Within this tut we are going to explore the Grid and Live Distribute features. The following information will help you create fast grids as well as explaining how to distribute frames quickly. Let’s begin!
Step 1
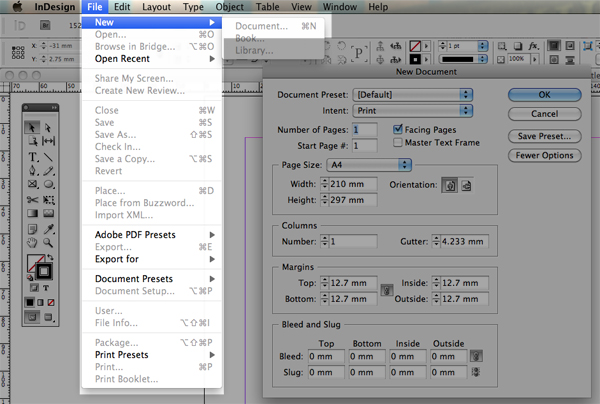
Create a new document by going to File > New > Document or use Shortcut Command + N and set up your document by entering the specific values for each section.
Step 2
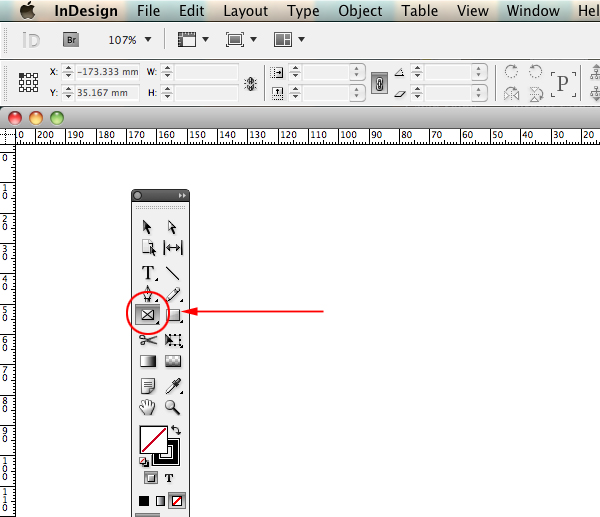
From the Tool Box select the Rectangle Frame Tool (F)
Step 3
Click within the document and drag out the cursor to create a large square or rectangle. Don’t release the click, instead press your right arrow key a couple of times. You will notice that the box divides itself into columns according to the amount of times the arrow key was pressed.

Still holding down the mouse, press the up arrow key to set the number of rows. Once you are happy with your grid release the mouse click. (Additionally all of the methods in step 3 will also work on text frames)
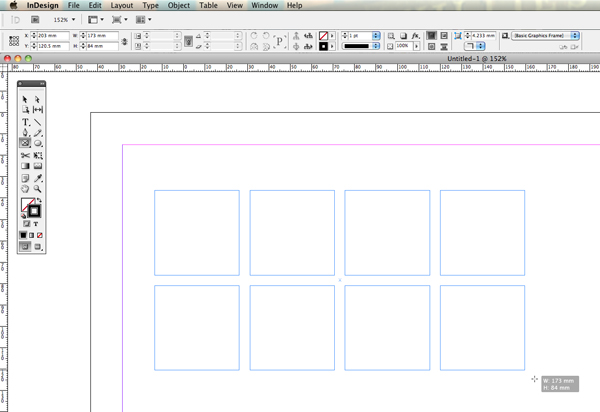
Note: While holding down your mouse click you can delete the amount of rows and columns by using the left/down arrow keys.
Step 4
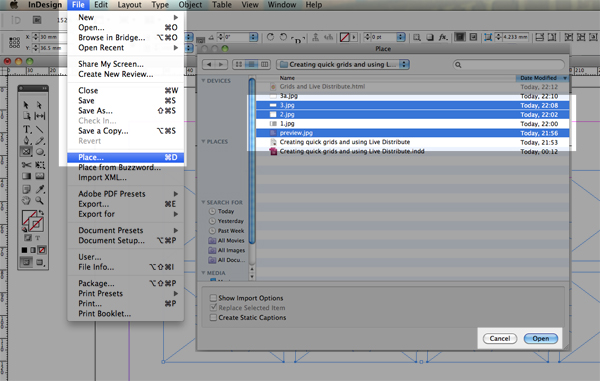
After releasing mouse click the frames should be still selected, so let’s import some images. Go to File > Place or use Command + D and navigate to where your images are saved. Hold down the Command button and select the images you want to use by clicking on them individually. Finally click Open.
Step 5
The cursor should now be fully loaded with the images ready to import. Add the images by clicking on the frames one by one.
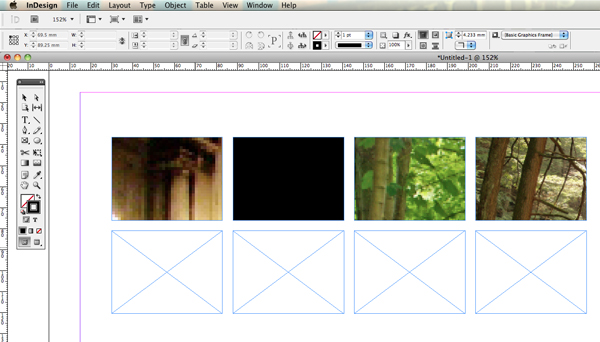
Note: The images in this tut are from www.morguefile.com
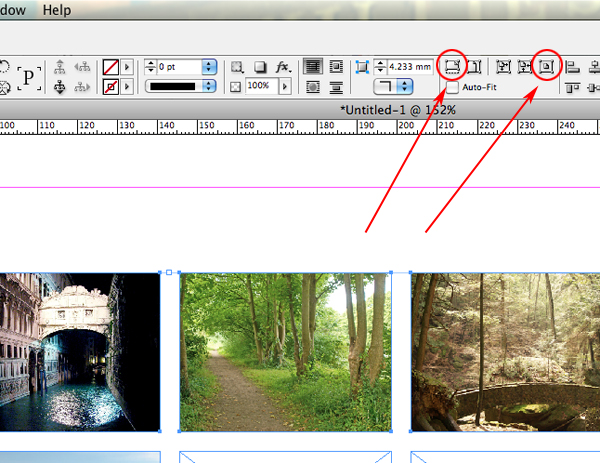
Step 6
Now fit the images proportionally and center them. Do this by selecting the frames and pressing the quick buttons on the Control Bar illustrated below.
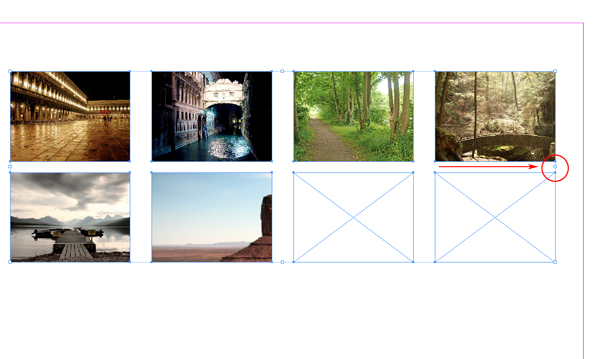
Step 7
The grid is now set up, so let’s take a look at the Live Distribute feature. Select the Selection Tool (V) from the Tool box. Select all the frames you want distribute and pull out the side handle on the right hand side of the collective frame and then hold down the space bar. Instantly you will notice that all the frames will be distributed equally and aligned.
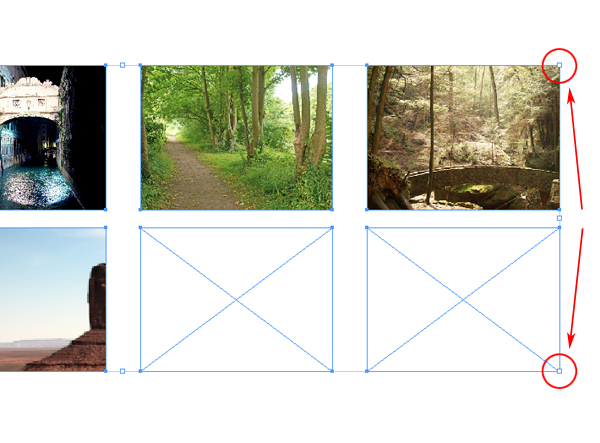
Step 8
This method can also be used on the corner handles too. Simply resize from the corner frame using the instructions detailed in step 7. To distribute from the center use the same methods described in steps 7 and 8, however this time hold down Alt after you have pressed the space bar. If you have a center frame the surrounding frames will rotate around it.
Conclusion
Use these brilliant Indesign CS5 features to enhance and quicken your operating skills. Live distribute works great when designing image heavy documents. I hope you’ve enjoyed this tut.
{excerpt}
Read More