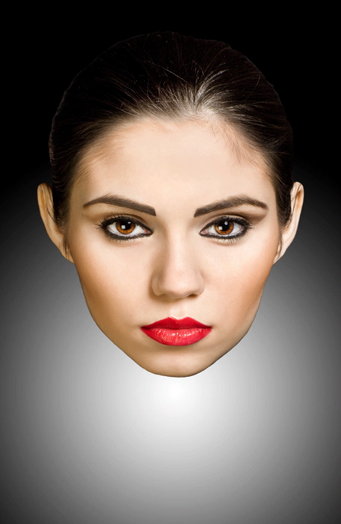
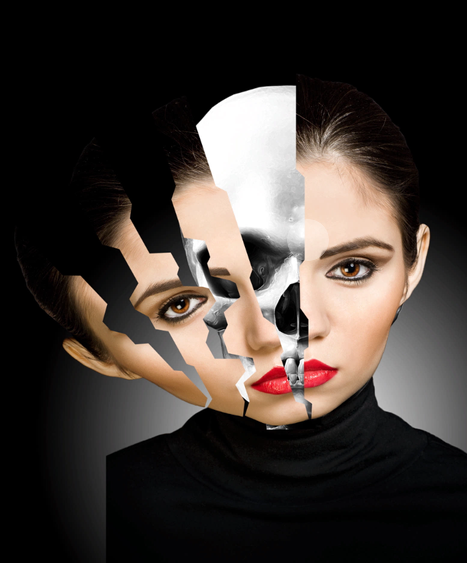
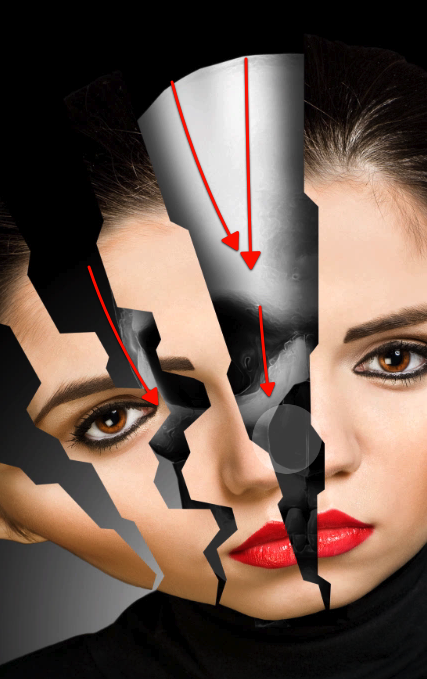
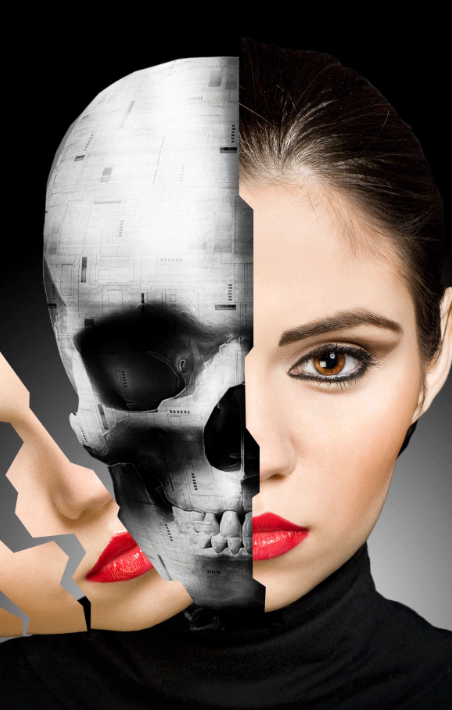
Photoshop can let us do some amazing things. In this long and detailed tutorial we will demonstrate how to create a cybernetic woman using a photo of a model and a few stock images. This content includes written and video content. Let’s get started!
Tutorial Assets
The following assets were used during the production of this tutorial.
Before We Begin
Special thanks to the model Ana Ilinca and Her husband Daniel Ilinca the photographer for providing the brilliant sharp image which we will use for this tutorial, pay them a visit, both are very talented and available for work.
Step 1- Setup the skull
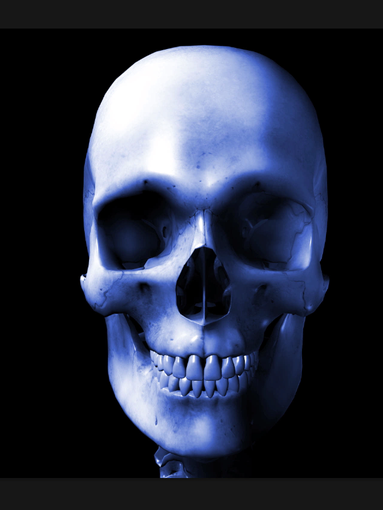
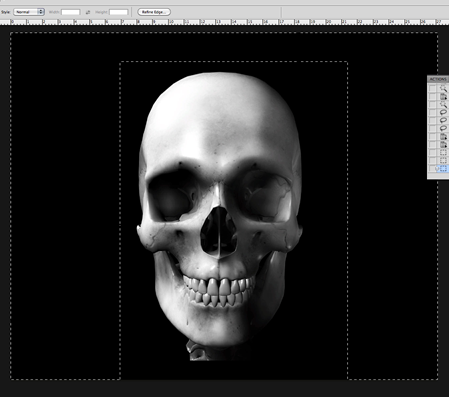
OK let’s get started, we will begin with this stock image from a skull that we will setup to fit the cybernetic mechanism we are trying to represent.
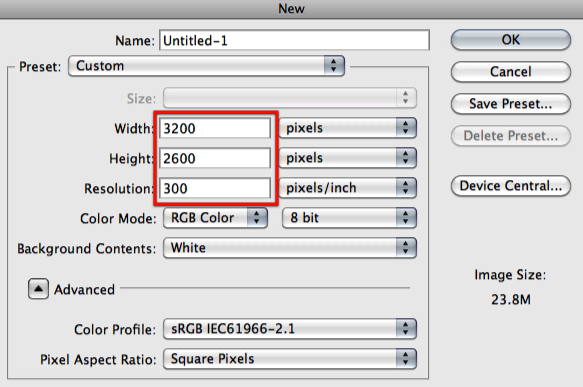
First off let’s create our document with these settings and size here.
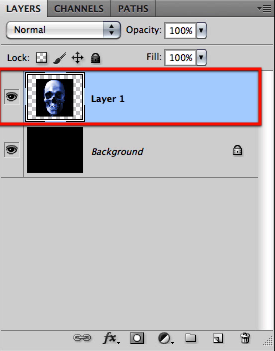
Fill in the background with a plain black.

Then copy and paste the image of the skull into a new layer.
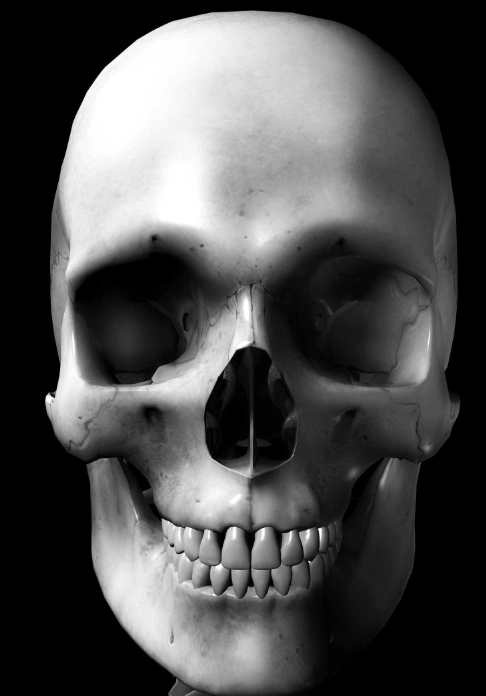
OK now that we have our skull let’s desaturate it to get rid of all the original color.

OK looking much better already, now we need to remove the black background from it.
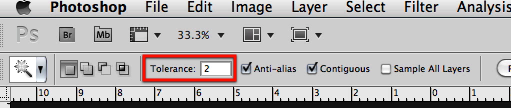
Since we have a great deal of contrast between the back and the skull we can use the magic wand tool to make a quick selection.

Set the tolerance to 2 and make a selection of the black around the skull; be sure that all around the skull is selected.

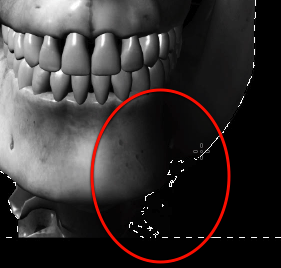
Now there will probably be some spill of the selection in the lower section of the skull so we will quickly use the lasso tool to fix this.

So just the lasso tool to remove this section from inside the skull area from the selection.

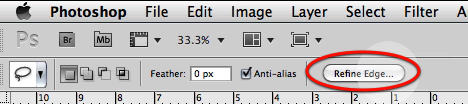
Once this is ready, inverse the selection and on the top bar click on refine edge.

On the dialog box let’s make all these adjustments to refine the selection a bit.
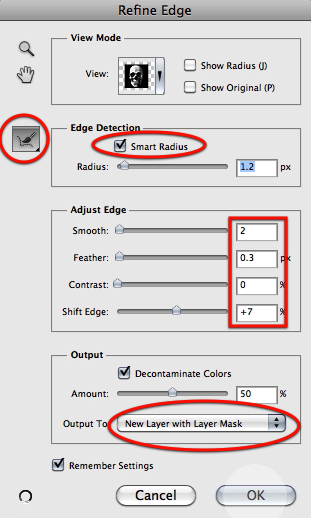
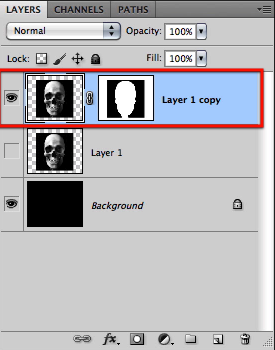
Once you click OK on the dialog box and the modifications are applied, just create a new layer mask.
Now let’s use the rectangular selection tool, so go ahead and select it.

Let’s make selections of what is left so we can complete the mask for our skull.
Now just fill in with black the rest of the mask.

You should end up with the skull shape clearly defined with white in the layer mask.
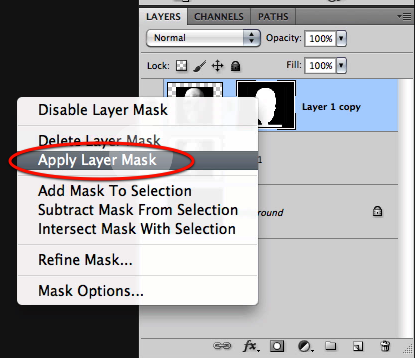
Then let’s apply the layer mask.
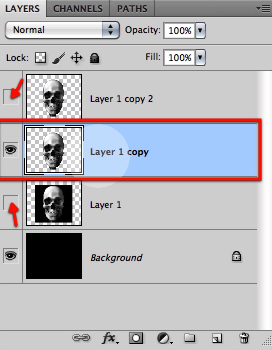
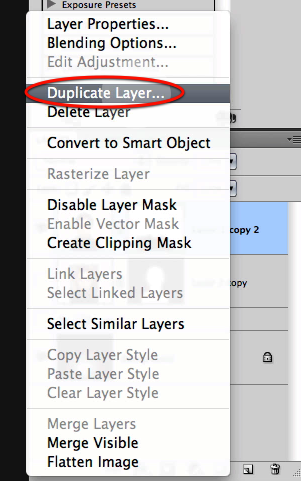
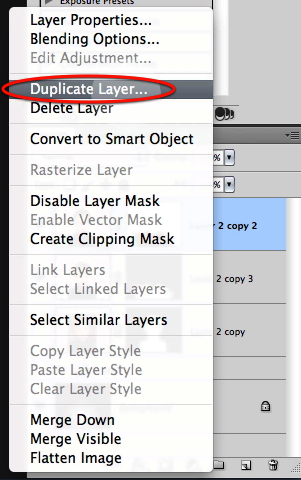
And let’s make a duplicate of it.
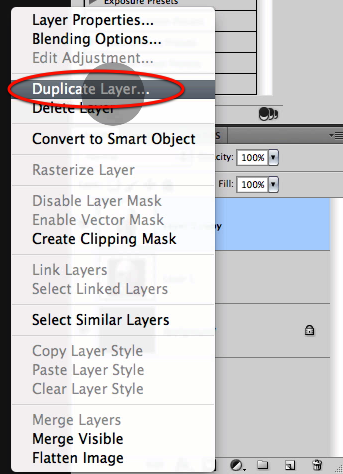
Now let’s hide these other two layers so we can work on the first copy.
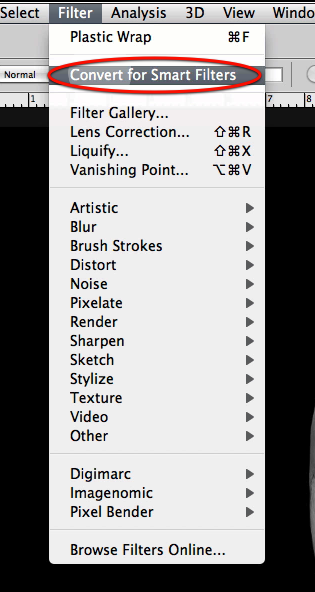
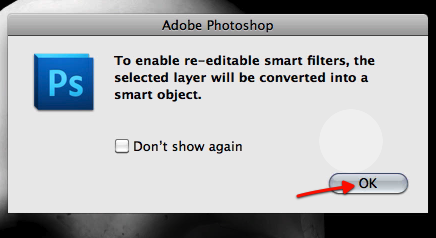
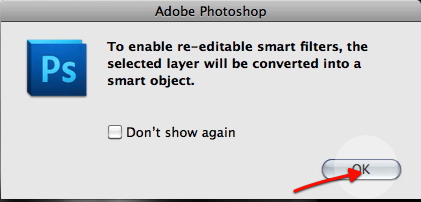
Now go to the filter menu and select "convert for smart filters"
You will get this warning box from Photoshop, so just hit OK.
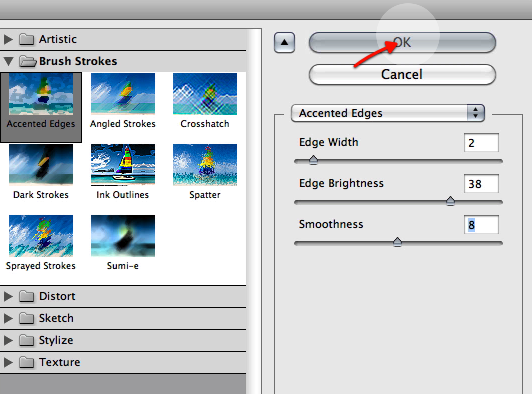
Now we can apply all the filters we want in a non destructive manner to this layer, and also disable them or adjust them at any time, just like adjustment layers. So let’s select the accented edges filter.
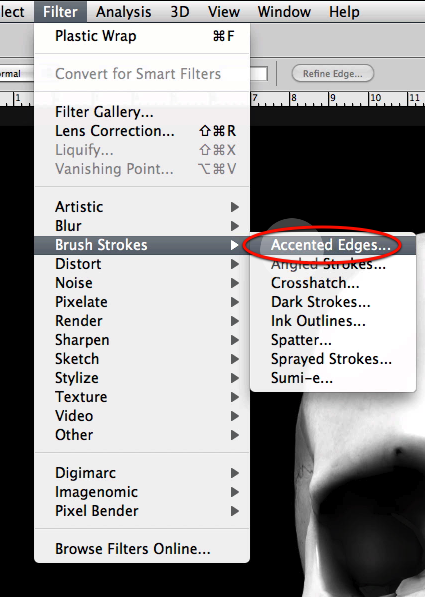
Adjust the settings for the filter as shown here.
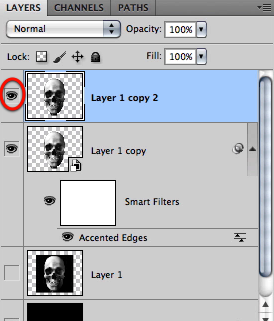
Once applied this is the stack you get that shows the edit able filter at the bottom and a mask you can use between the layer and the filter.

Let’s now go to the top layer so enable its viewing icon.
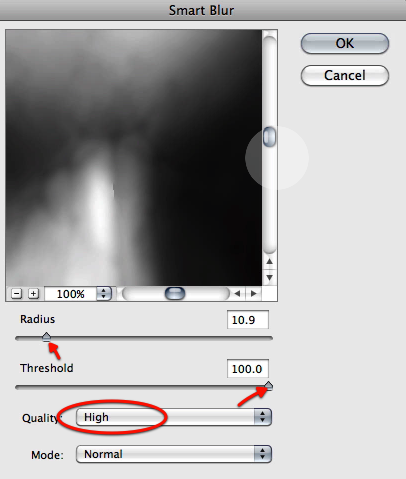
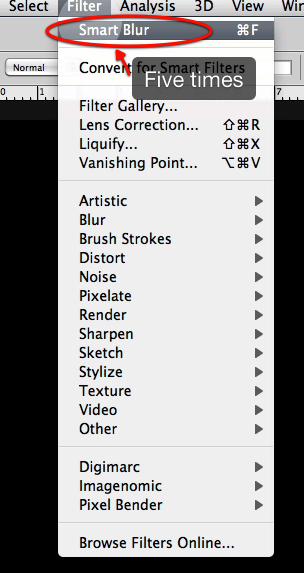
We will first apply a smart blur filter directly.
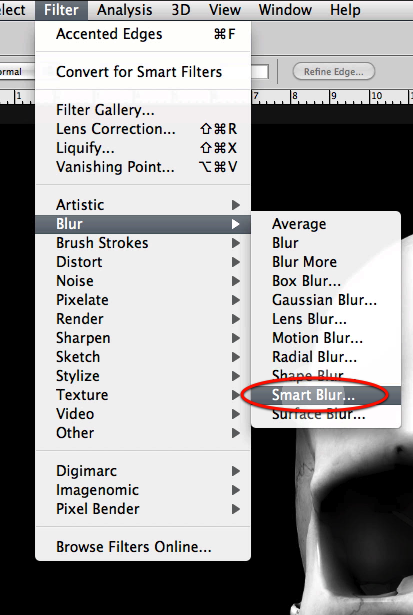
Adjust the settings as shown and re-apply the filter five times.
Now we can do the same as the other and convert the layer for smart filters
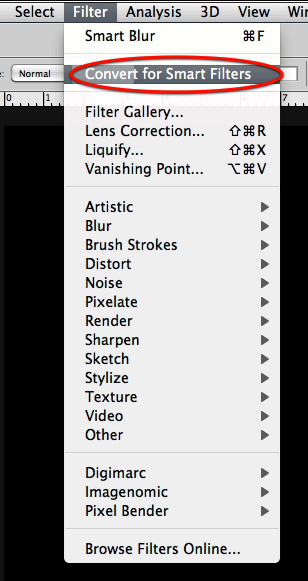
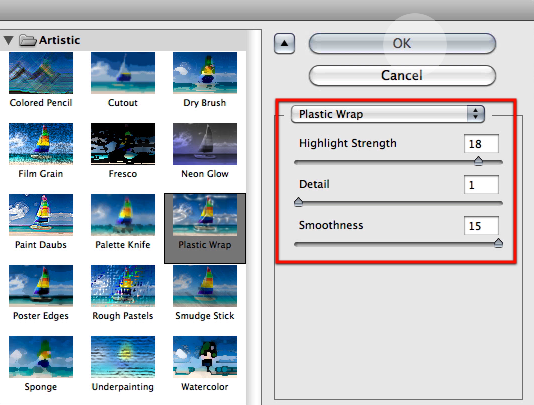
Hit OK on the dialog box and select plastic wrap from the filters.
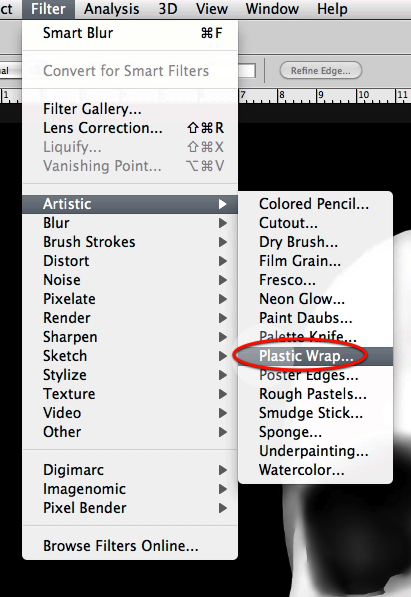
Adjust the settings as seen here.
Then set the layer mode to overlay.
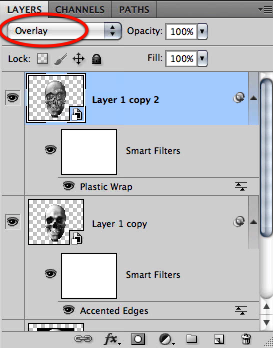
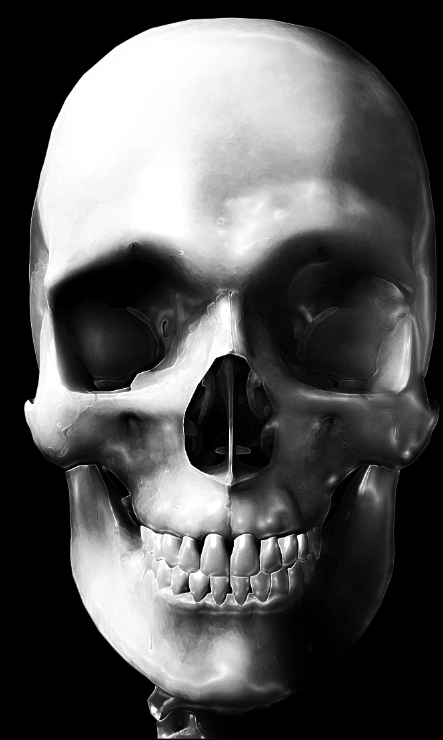
And this is what we have so far, a smoother skull with a metal appearance to it.
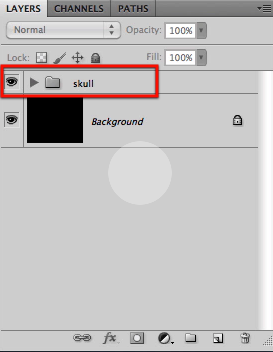
Now let’s grab all of our skull layers and group them together.

Then just to finalize this step name the group skull.
Step 2 – Mask the model
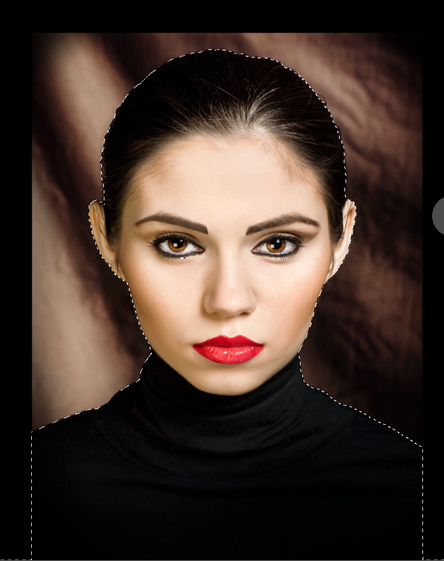
On this step we will be working with the main character image of the model and we will extract her from the backdrop, plus we will be separating her into just the face and the torso, so go ahead and open the image shown here.

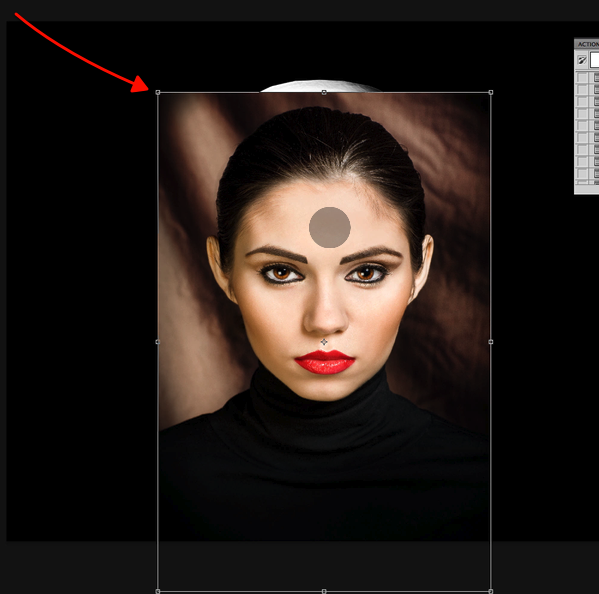
Copy and paste it on to a new layer and select the scale command so we can re size it.
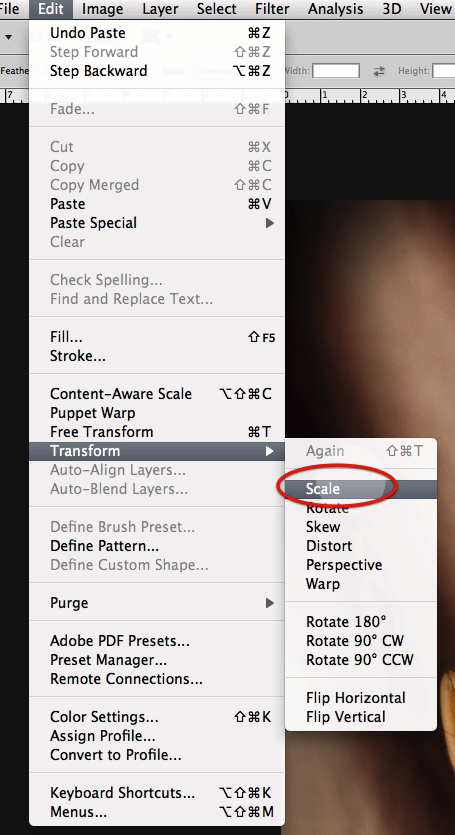
Scale down the image as seen here.
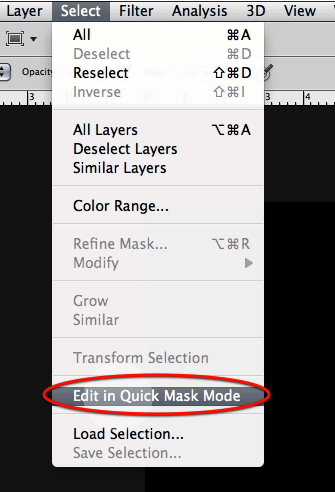
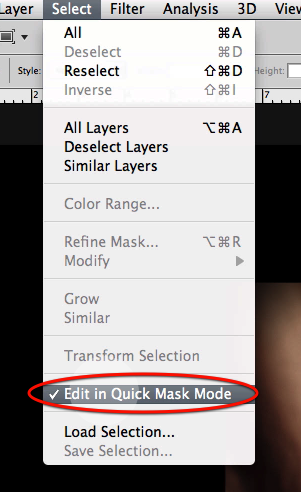
Then in the select menu access the quick mask mode.
Then select the paintbrush tool and choose this tip here.
Be sure that the brush is set to 100% opacity.

Now while you are in quick mask mode, everything you paint will appear in red if you haven’t altered the standard quick mask color preference. So start defining the border of the model.
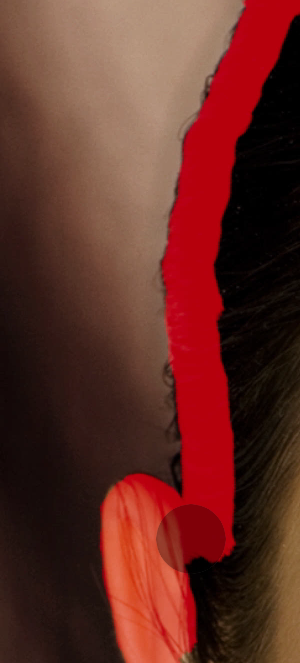
Just work around the edge detail until you have all of her covered in red, and of course change the brush size as needed.
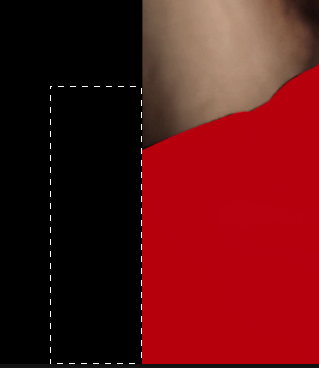
Now for the edges of the missing shoulders we will make those sharp using the rectangular selection tool.

Just drag a selection as shown here right at the border of the image.
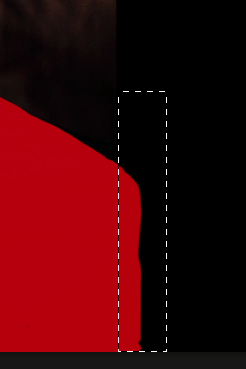
Then select the eraser tool

And erase the mask as shown here.
Now do the same for the other side of the image.
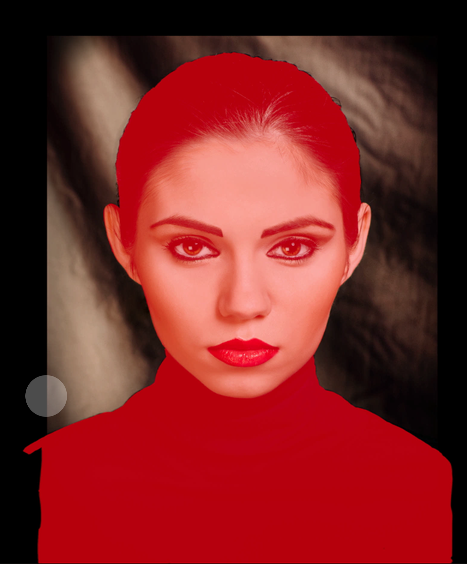
Then go again to the select menu and disable the quick mask mode.
As soon as you disable it, you will get a selection in place of the mask.
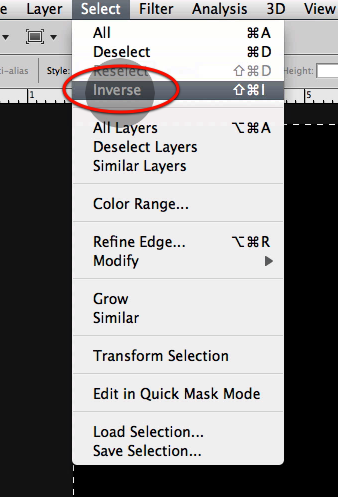
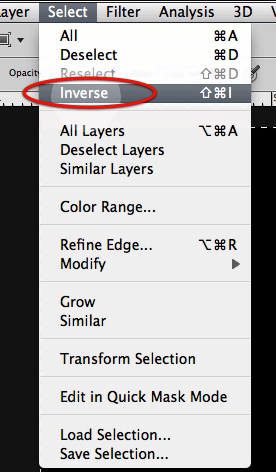
On the select menu inverse the selection
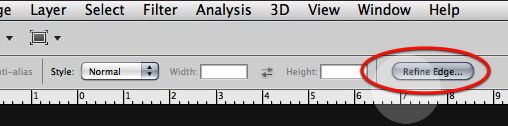
Once you have inverted the selection access the refine edge tool.
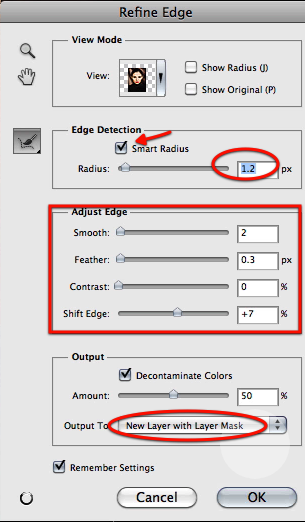
On the dialog box adjust the settings for it as shown here.
You will get a new layer with a layer mask already in place.
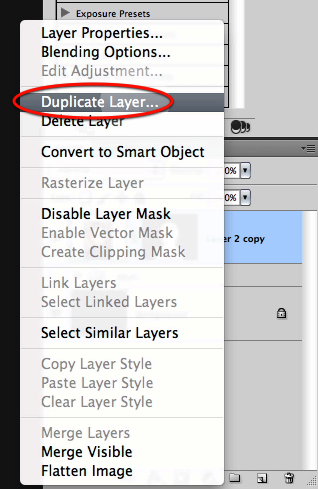
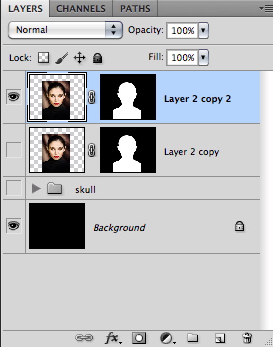
Right away let’s make a duplicate of the layer.
Now we have two layers, one for the face and one for the torso.
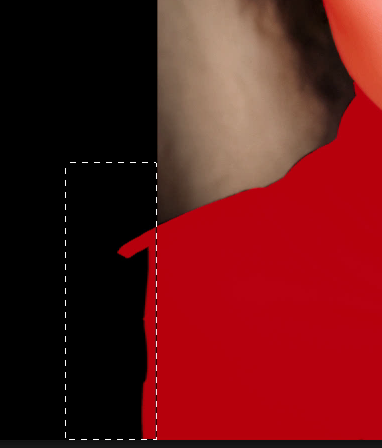
Before we continue working with the image let’s make a gradient for the back so its not all solid black.
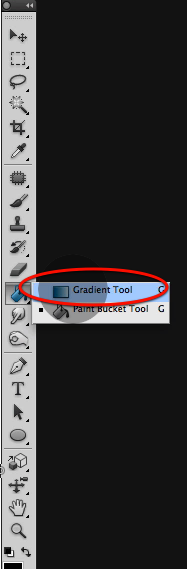
Select this simple black to white gradient.
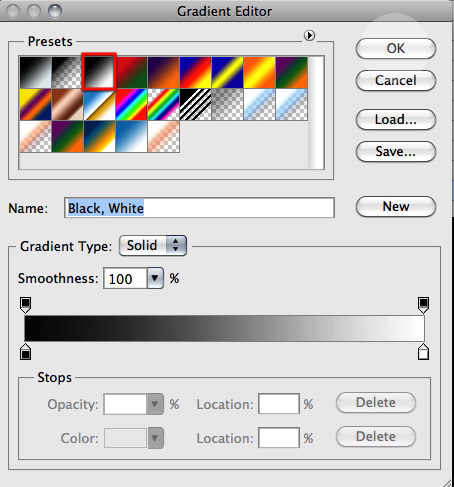
Make sure you have the circular gradient icon selected.

And while you have the background layer selected drag the big gradient as shown here.
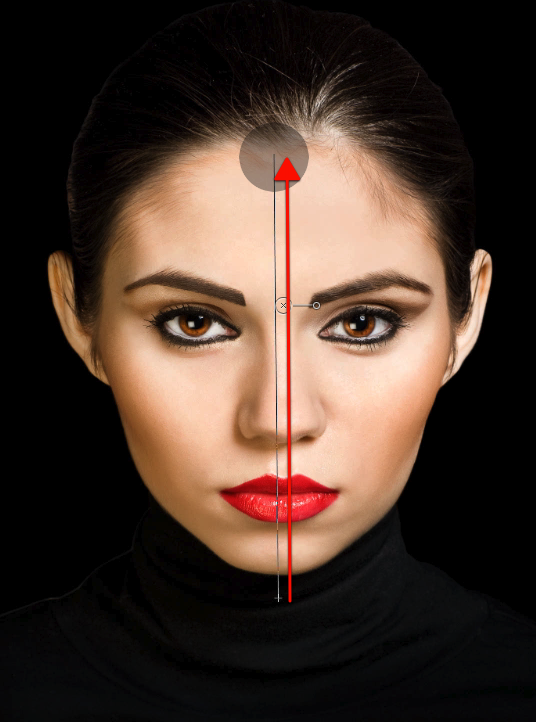
This is the result you should get where we can see a bit of the missing shoulder sections.
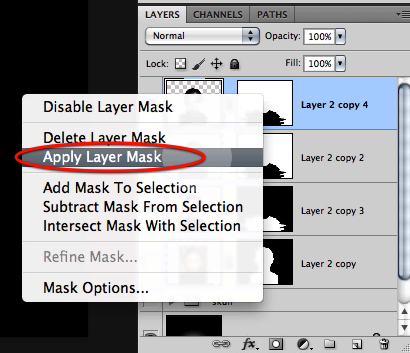
Then for the top layer go ahead and apply the layer mask.
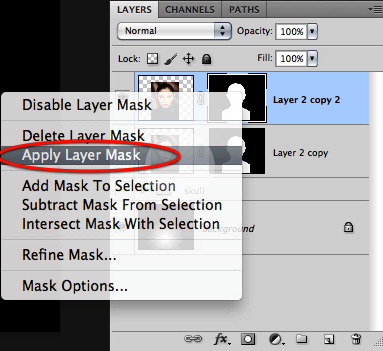
This gets rid of the mask and makes the cutout permanent, so be sure you have the mask perfect before applying this change.

Now to continue working we will create a new layer mask.
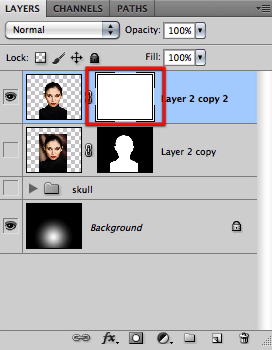
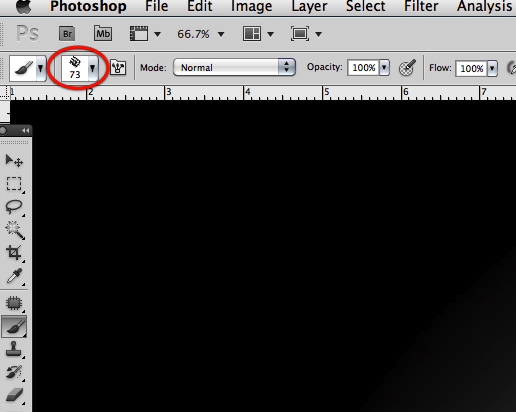
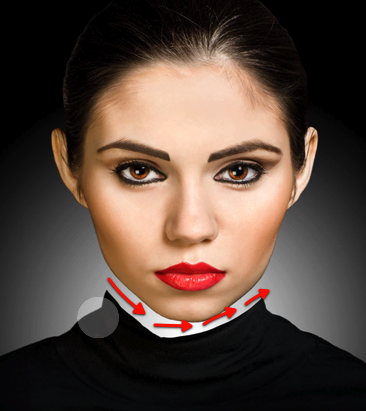
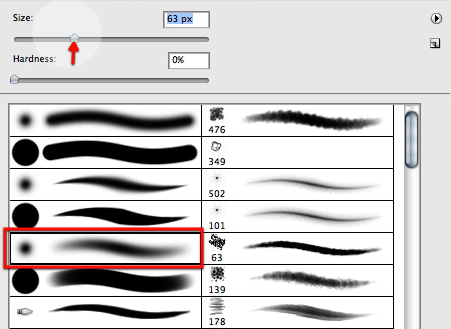
Then make the same black brush we have been using about 73 in size
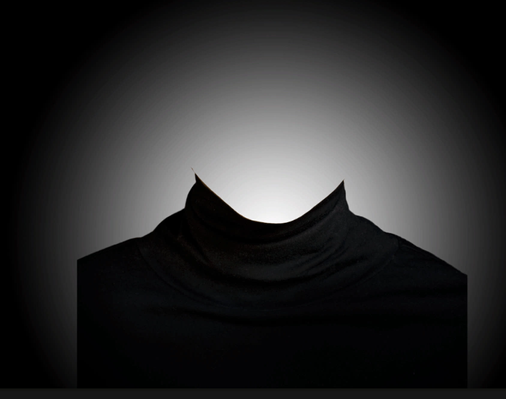
And start masking off all the black blouse as shown here.
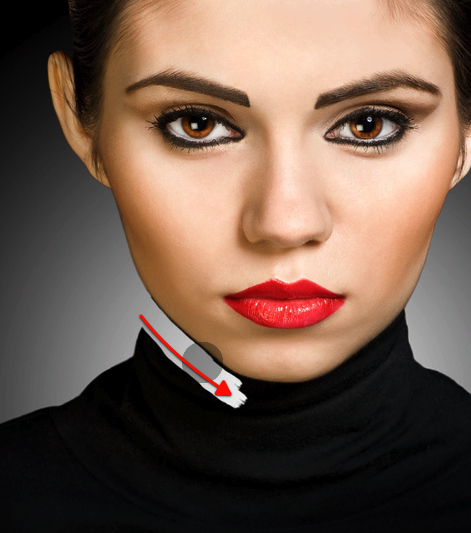
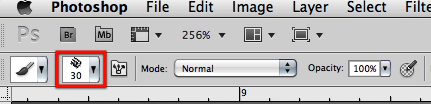
Then re size the brush to about 30 px
And detail the edge where the face starts.
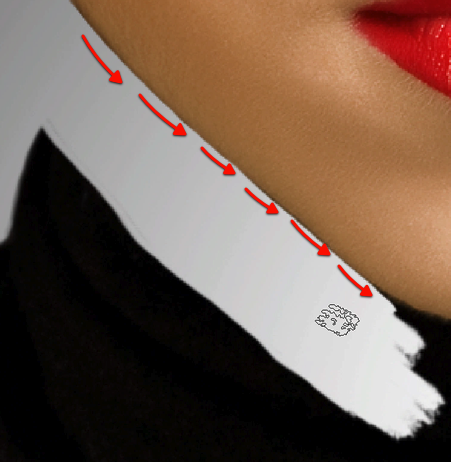
Continue with this process until you have masked all of the neck.
Then increase the size of the brush to 141 px
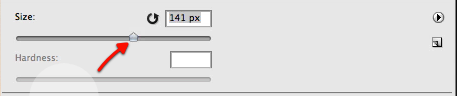
And mask off the rest of the black clothing.
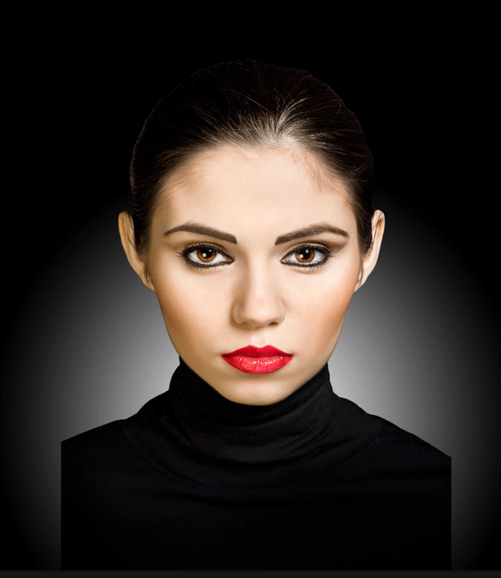
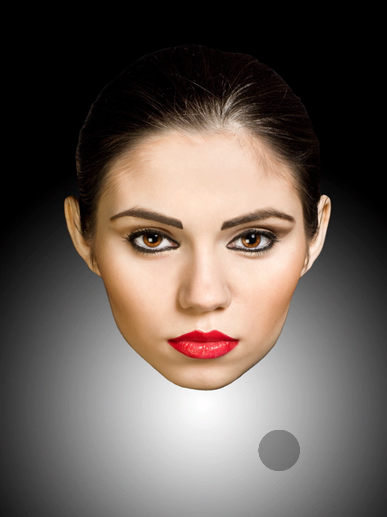
You should end up with just the head as shown here.
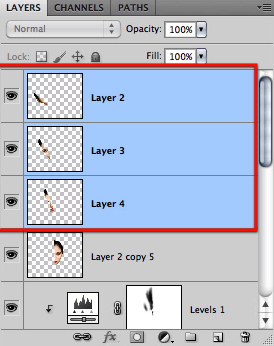
Then let’s duplicate this layer
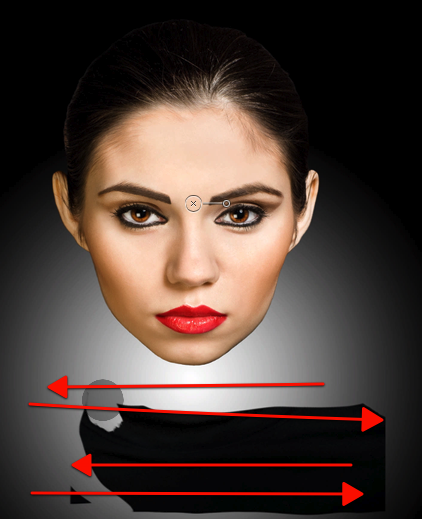
Let’s now make a quick selection of the mask.
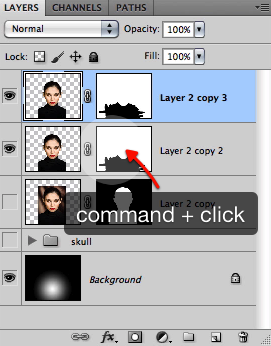
And then inverse the selection.
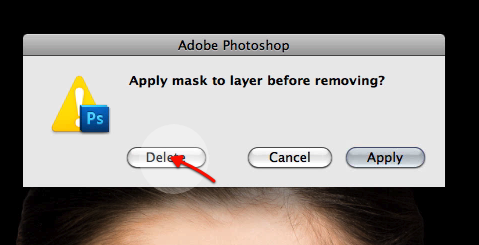
Without deselecting, go ahead and delete the layer mask as shown here.
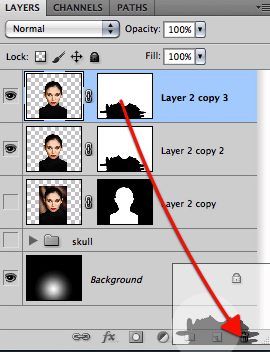
You will get this dialog box; just hit delete.
And now click on the new layer mask icon so we get a new mask but with the opposite effect as the previous layer.
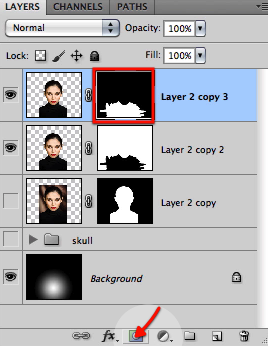
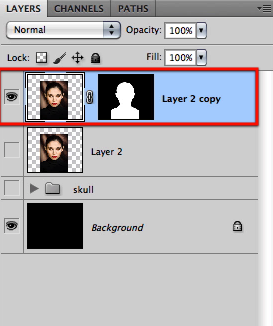
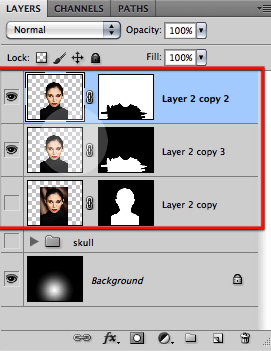
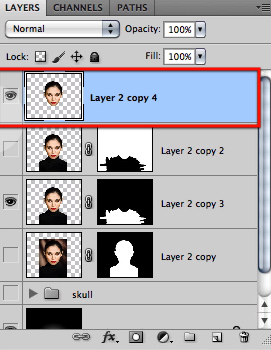
Now we have detailed sections for the torso and for the head in separate layers.
And we have finalized this step resulting in three layers that we will use for the rest of our work.
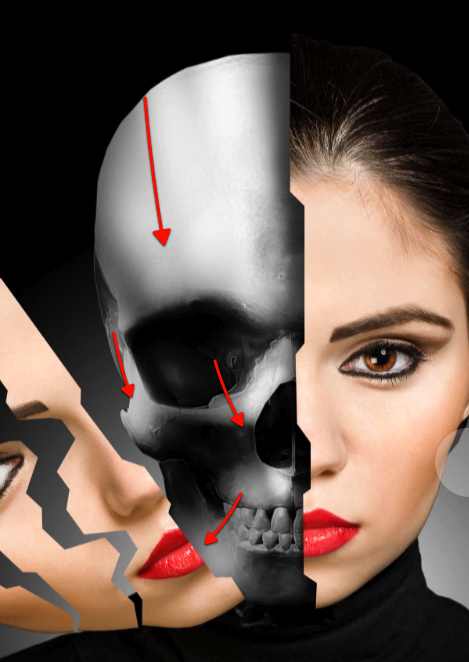
Step 3 – Section the face and adjust the skull
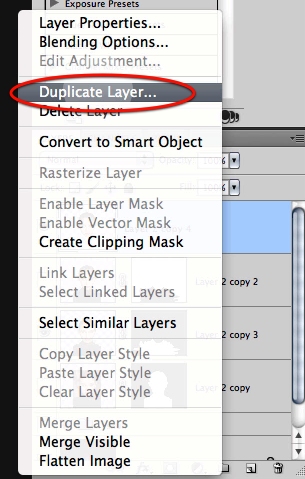
To start off let’s duplicate the face layer first.
Then apply the layer mask for this new duplicate.
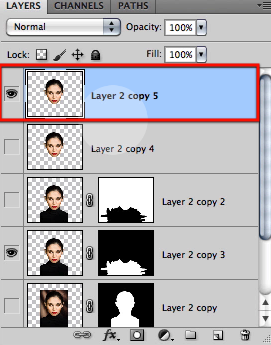
OK these leaves us with a layer of the head that we can work with to create the sections.
Let’s just now duplicate this last layer to keep safe in case we mess up.
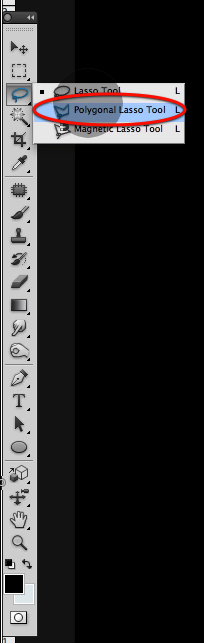
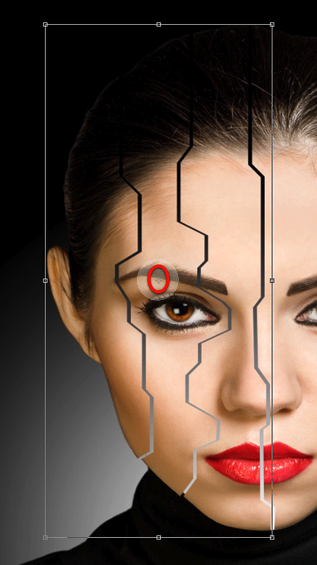
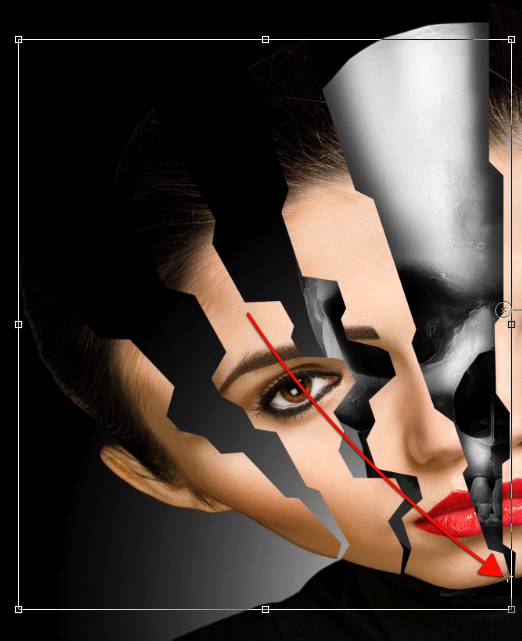
Now go ahead and select the polygonal lasso tool.
Then simple enough we start on the left side of the head and define a cut as you can clearly see here; and then just cut and paste the section on to a new layer.
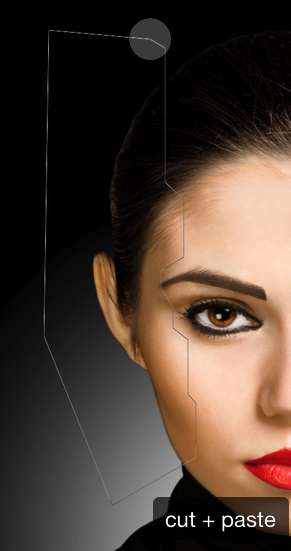
Once you have the section in a separate layer just reposition it a bit further out as seen here.
Now go back to the main face layer and define another cut section as shown here.
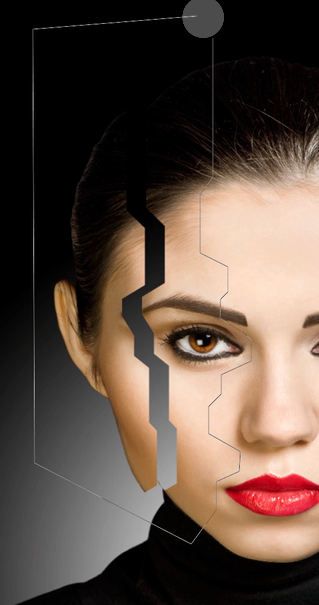
And repeat the same steps, cut and paste the section to a new layer and move it a bit to the left.
Let’s repeat this once more for one last final cut in the face section as shown here, right about the middle of the face.
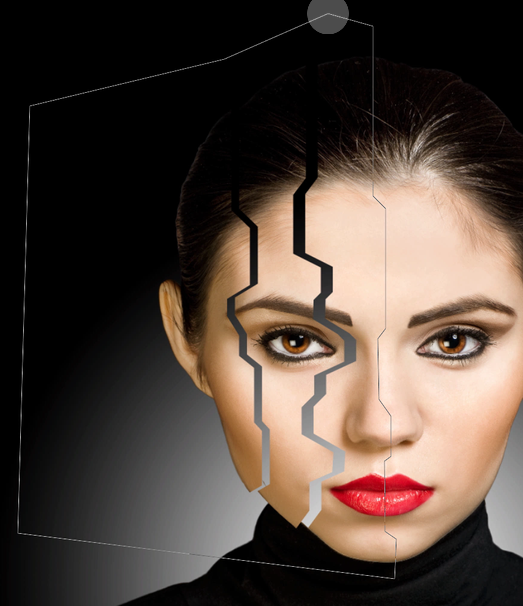
Then move this third piece a bit to the left so you have all pieces with just a small gap between them.
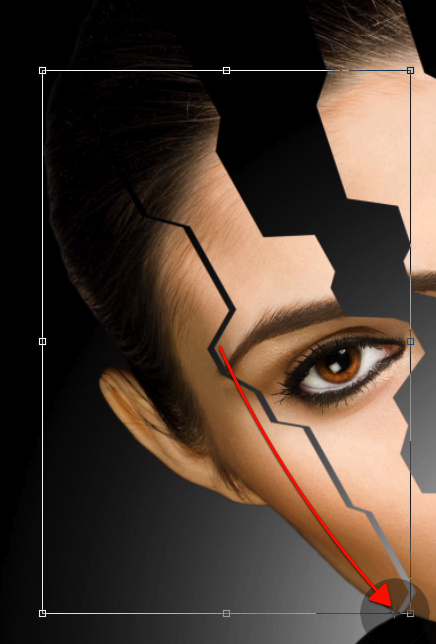
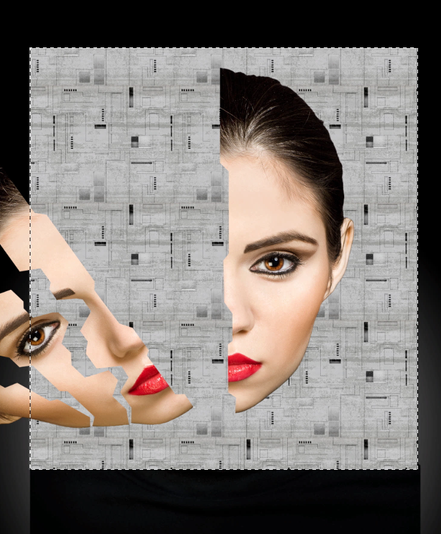
OK now you should have these four layers each containing a section of the face.
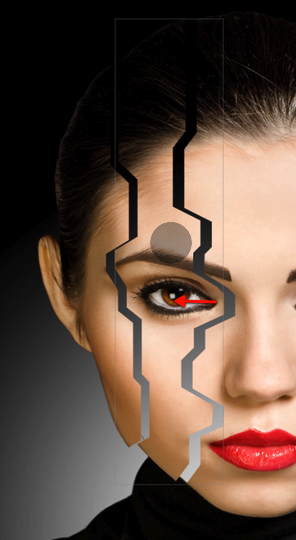
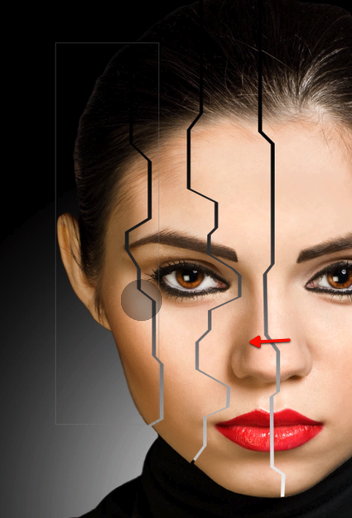
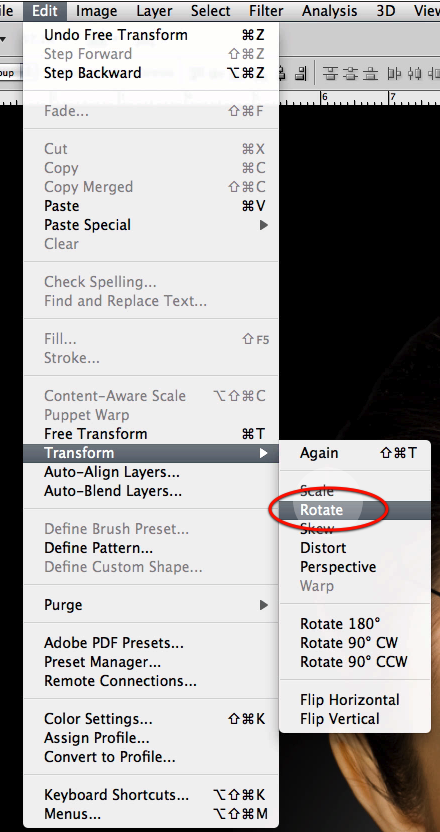
Let’s now select the three smaller sections only, leave out the big piece.
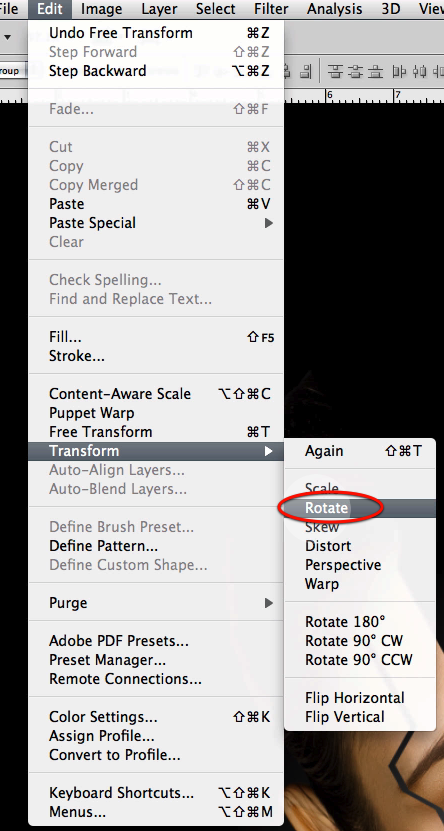
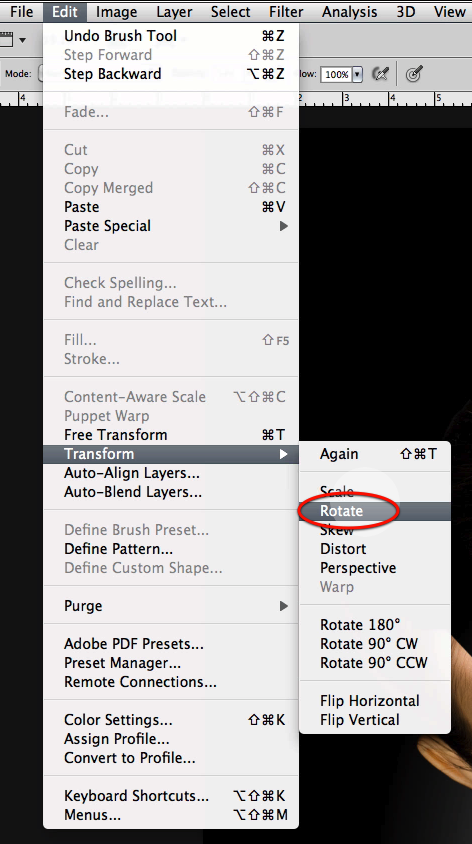
Select the rotate command.
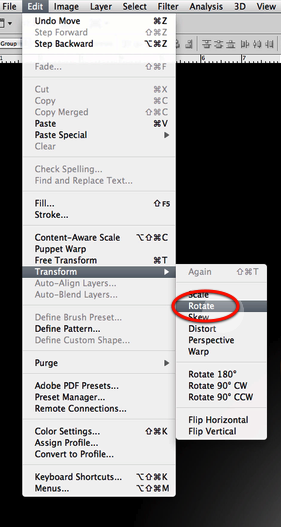
Now before we rotate, find the central anchor point of this selection.
And drag the anchor point all the way down to the lower right corner at the tip of the section.

Now you can rotate, and you will see how the lower right corner stays put while the rest rotates.
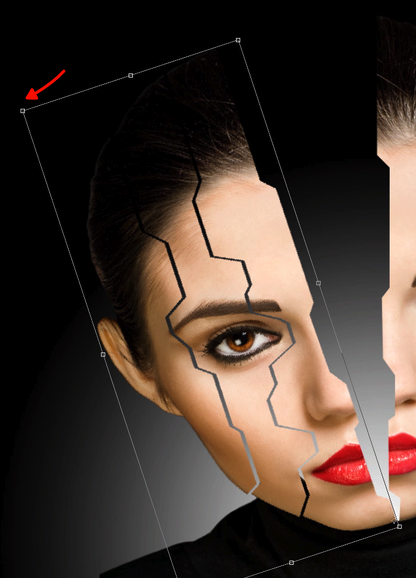
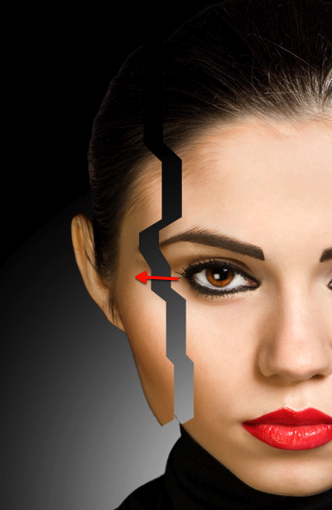
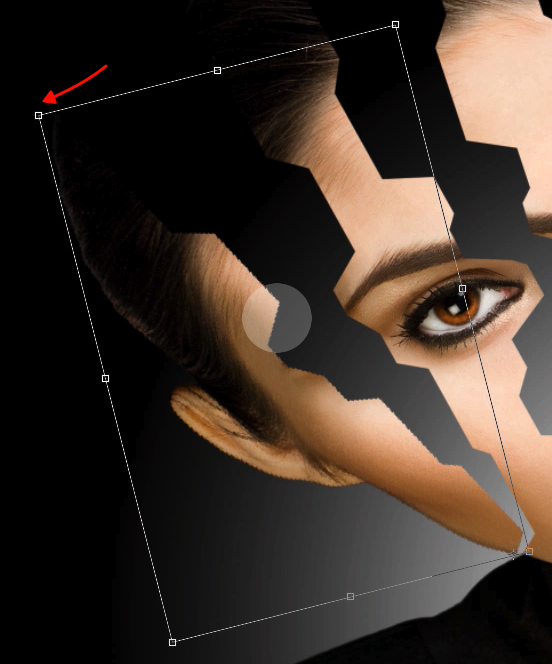
Now let’s just select these two pieces, drop the one closer to the rest of the face.
And again access the rotate command
Move the anchor way down right at the tip of the middle cut section as shown.
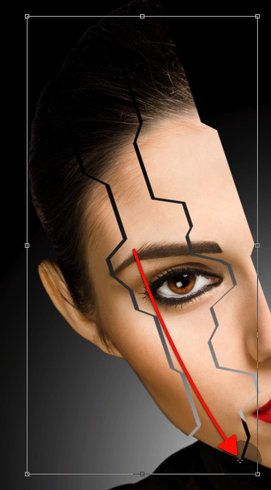
And now rotate these two pieces as shown here.
Now let’s just select the last piece further left (the one with the ear)
And once again access the rotate command.
Move the anchor point.
And rotate the last piece as shown here.
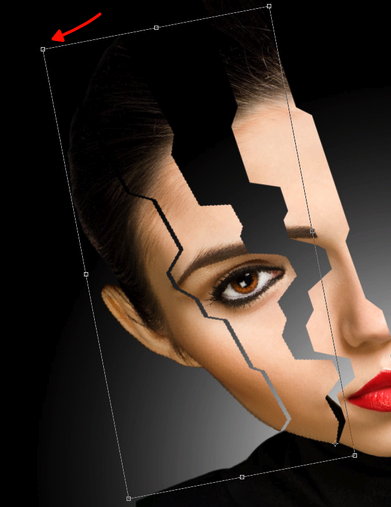
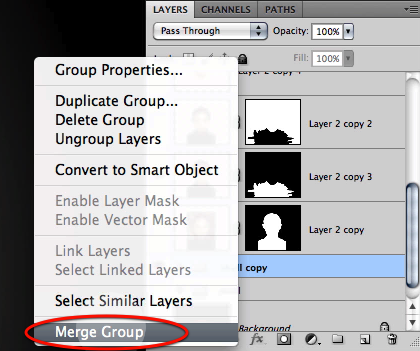
OK now we have our pieces spread nicely; let’s go back to the skull group, duplicate it and merge the duplicate.

Now go to the scale command

And scale the skull as needed so it fits evenly for the head proportions.
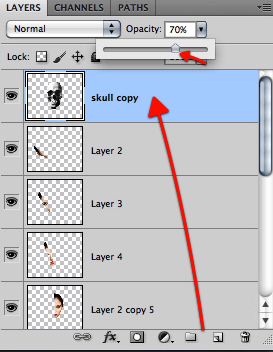
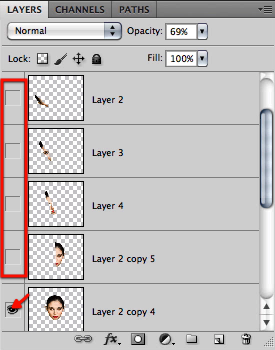
Now drag the skull merged group layer all the way to the top for now and reduce its opacity just a bit.
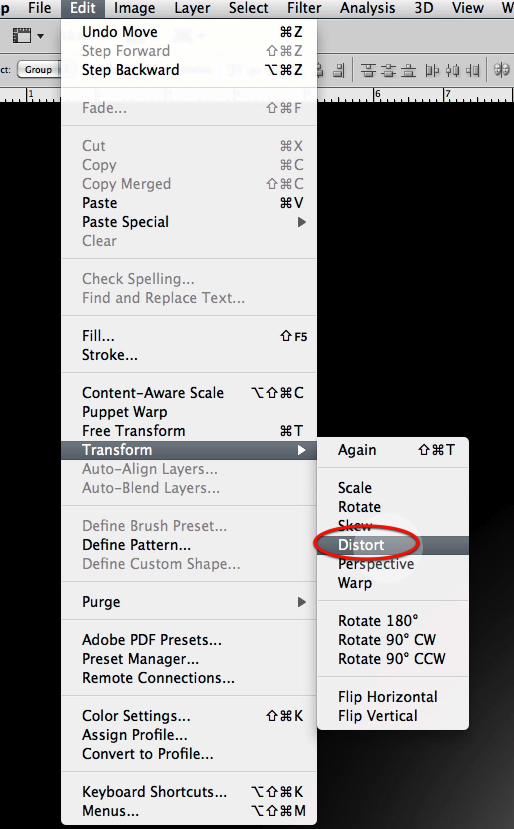
Go to the edit menu and select the distort command.

We need to make the skull fit our model so go ahead and distort evenly as shown here.
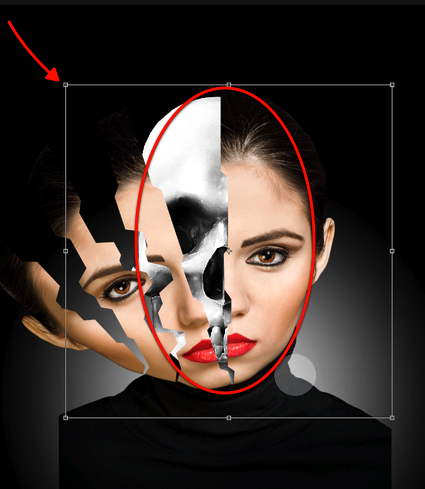
OK for now let’s hide all the pieces layers and enable the full face layer so we can clearly see the boundaries of it.
Let’s first center the skull in the face as indicated here.
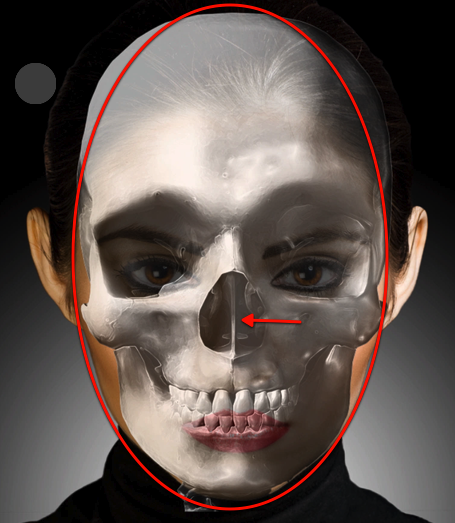
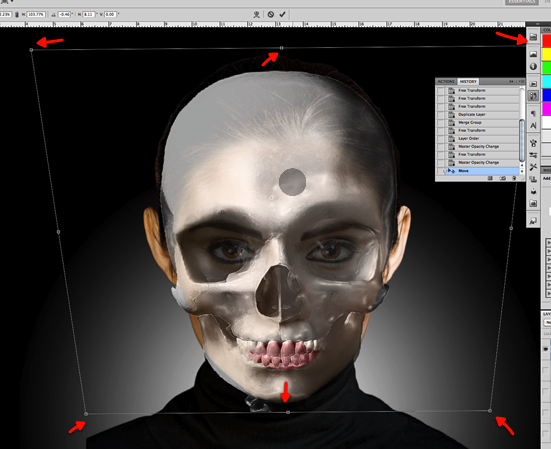
And once again access the distort command
Fine tune the skull shape to fit the face as needed.
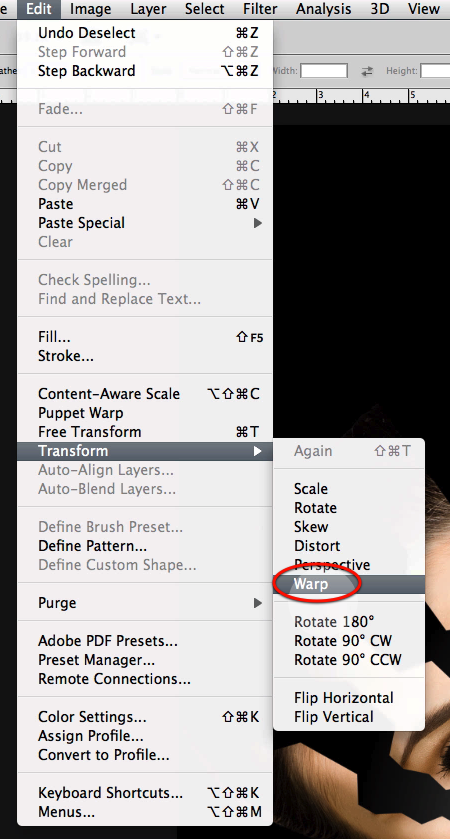
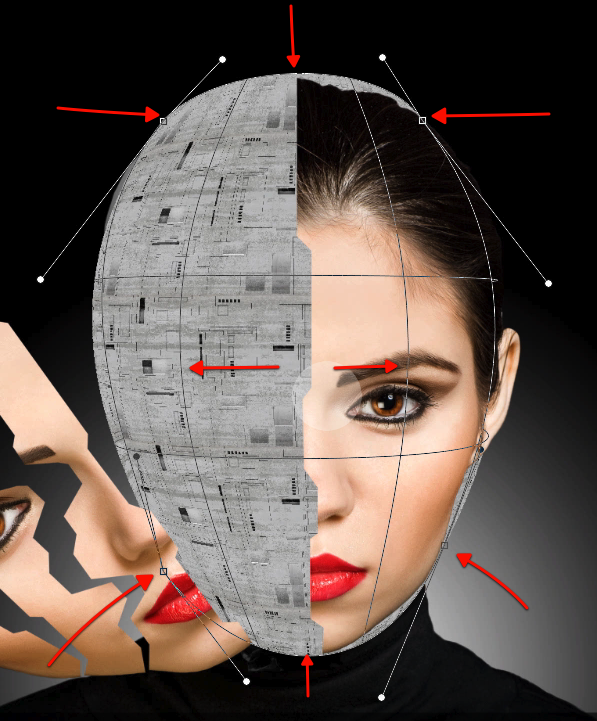
Now let’s use the warp command from the edit menu.
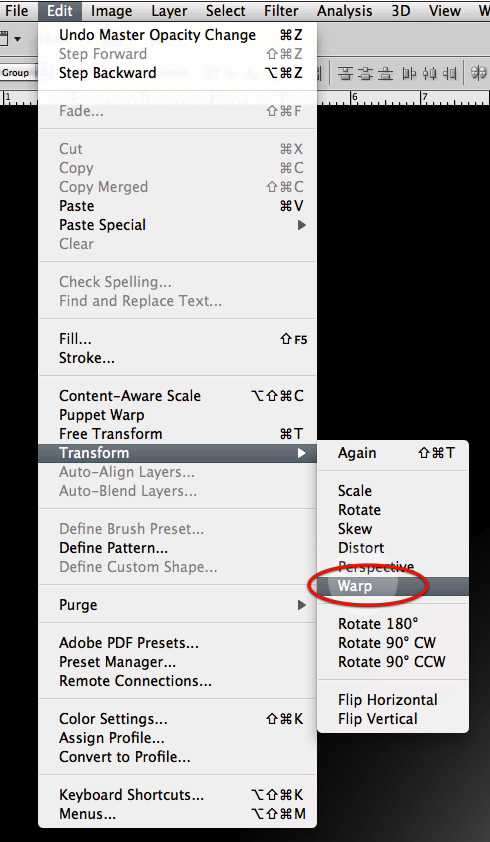
Use the lines to distort the skull a bit more so it fits inside the head boundaries and the eyes and nose align with the model.
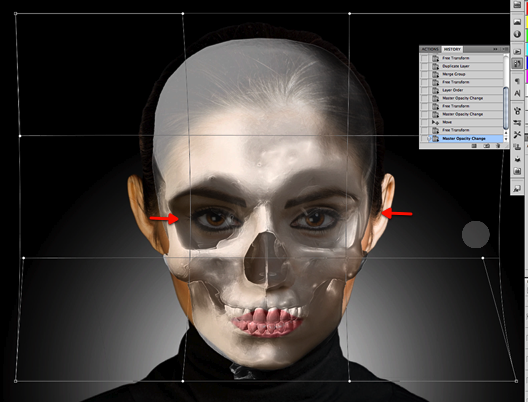
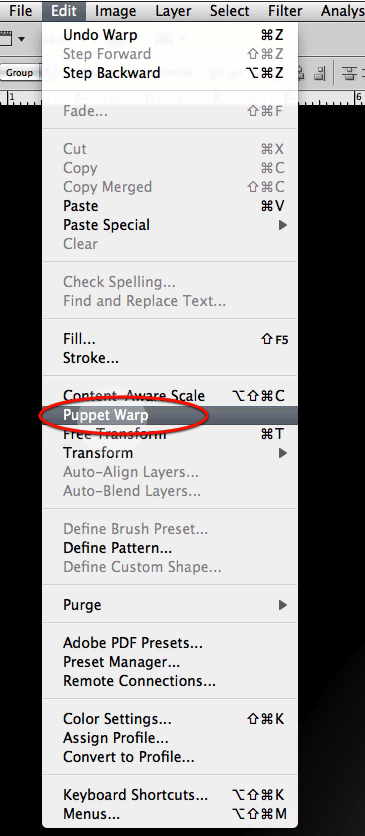
OK now to finalize we will access the puppet warp command from the edit menu.
Once you have enabled the puppet warp, you will get a grid that covers all the selected layer content; now each time you click over the image you get a yellow anchor handle; so go ahead and click until you get all these, and then reposition them as shown to alter the shape of the skull a bit.

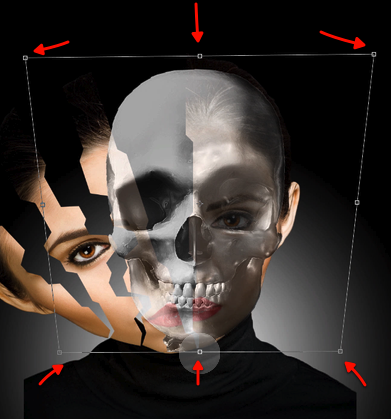
Now we can drag the layer down and restor its opacity to full.
Also enable the face sections above and hide the full face layer below.
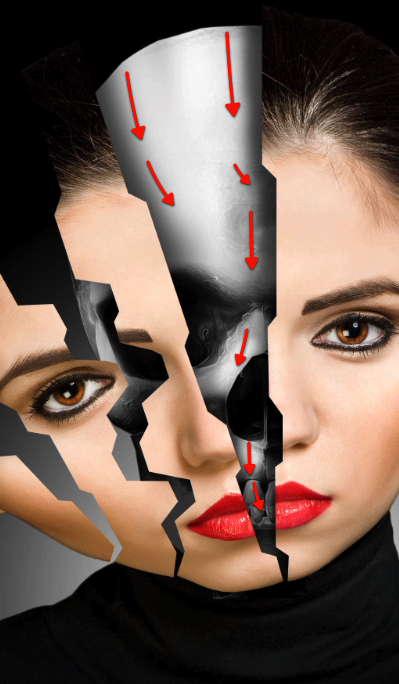
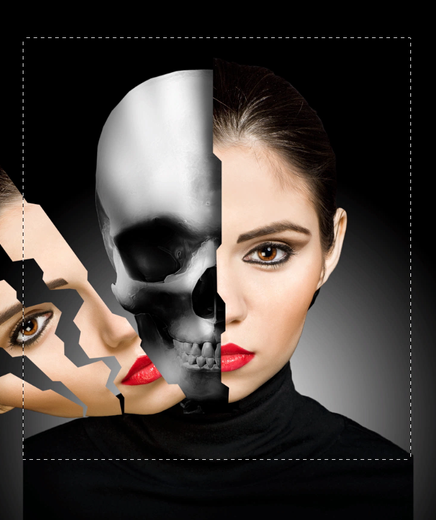
And here is what we have so far.
OK to continue we will ad a shadow layer for our skull; so go ahead and create one over the skull and make it a clipping mask.
Now adjust the layer as shown here and set its mode to multiply.
Let’s use a big soft brush and reduce its opacity a bit.
Now mask off the darkening effect of this layer where we would get light on to the skull in between the face pieces.
Now reduce the brush size a bit.
And refine the shading as indicated here.
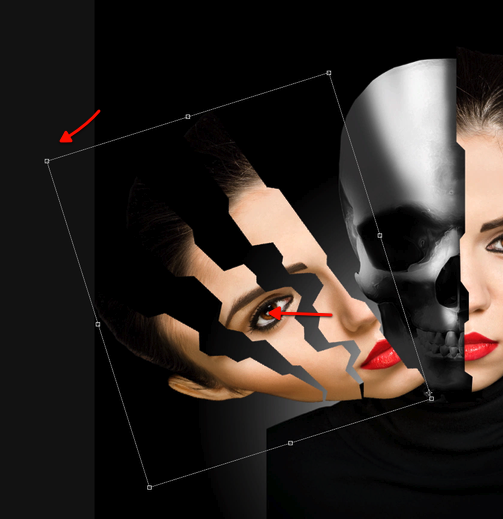
At this point I decided that the face sections are too much on top of the skull so let’s rotate them a bit more; so go ahead and select the three face piece layers.
Access the rotate command.
As we have done before readjust the central anchor point.
Then rotate a bit more so we can see almost all that half of the skull.
Let’s grab our soft brush again at about 300px
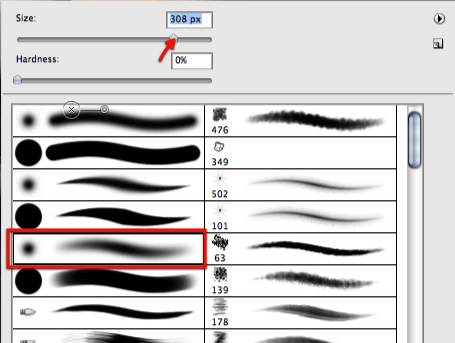
And let’s mask off the shading to adjust for the changes.
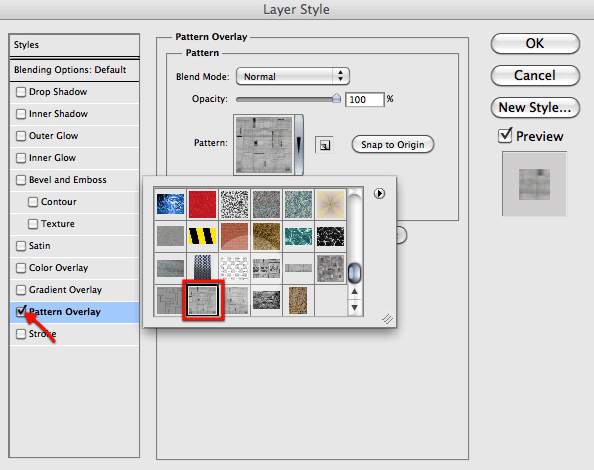
Now we will be adding some texture to the skull so create a new layer as shown here.

Let’s use the rectangular selection tool

Drag a square selection as seen here.
Fill the selection in the new layer with black.

Once you have it filled, access the layer style by double clicking on the layer; and then enable pattern overlay, and select this pattern from the pat. file.
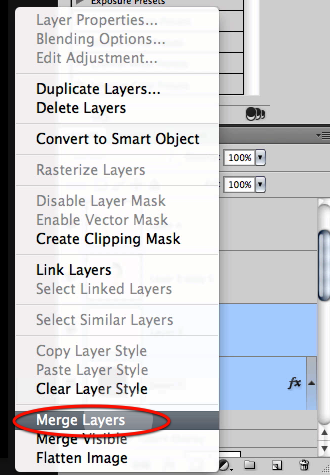
Then simply create a new layer and merge both so they are flattened.
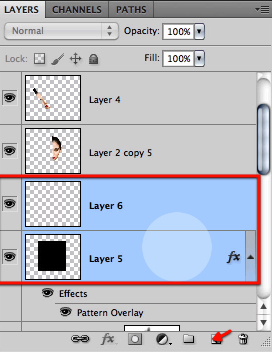
This gives us a layer that now we can manipulate to fit our skull.
Then go ahead and access the warp command again.
We will do extensive use of this tool as shown here so we can reshape the texture to the shape of the skull.
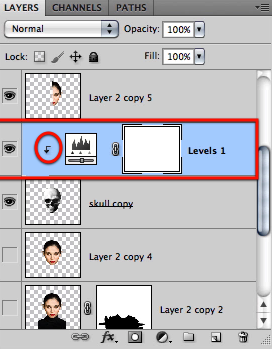
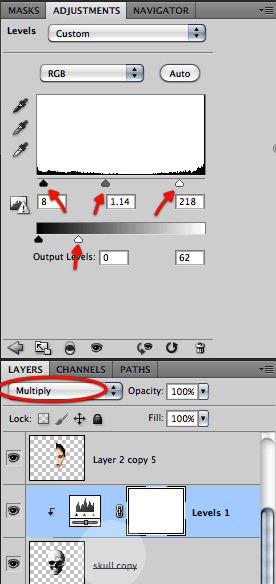
Then make the layer clipped to the skull layer, set its mode to overlay, and drag it on top the levels layer.
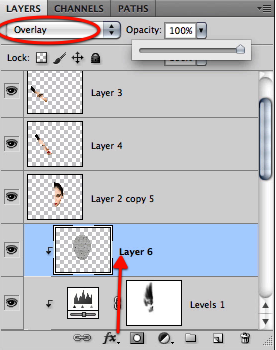
You can clearly see here the effect our texture provides.
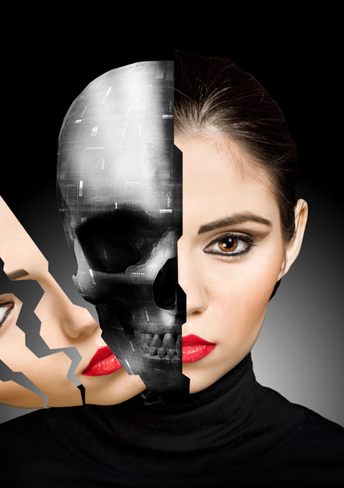
Finally just invert the layer.
And we have our pieces cutout and a nice looking texture for our skull.
{excerpt}
Read More