Follow this tutorial and you will learn how to play with the 3D options in Illustrator to create 3D letters and how to transform them into a sketch text using the Scribble effect and the Map Art option. You can create this effect using any color and because of its transparency you can place it on any background.
Step 1
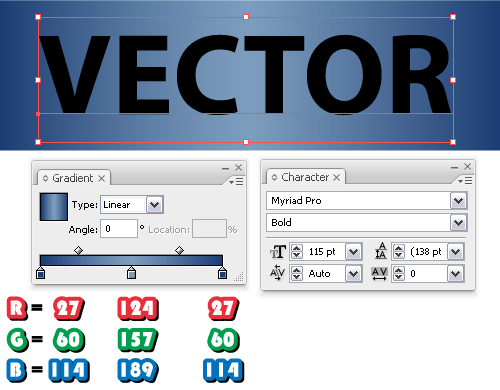
Start by drawing a 500 x 150 px rectangle using the Rectangle Tool (M) and fill it with the linear gradient shown in the image. Next take the Type Tool (T) and type "VECTOR". I used Myriad Pro Bold, 115 pt.
Step 2
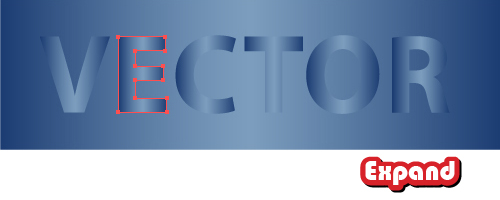
Go to the Object menu and Expand the text then fill it with the same gradient used above for the background. If you used another gradient for the background use the same to fill the letters.
Step 3
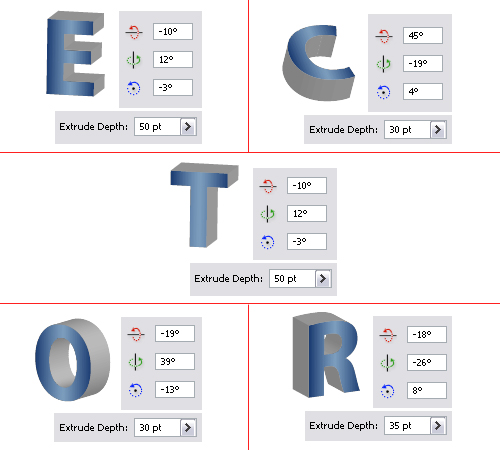
Now you need to create the 3D letters. Select the first one, go to Effect > 3D > Extrude&Bevel and make the changes like shown below.

Step 4
Here are the settings for the rest of the letters:
Step 5
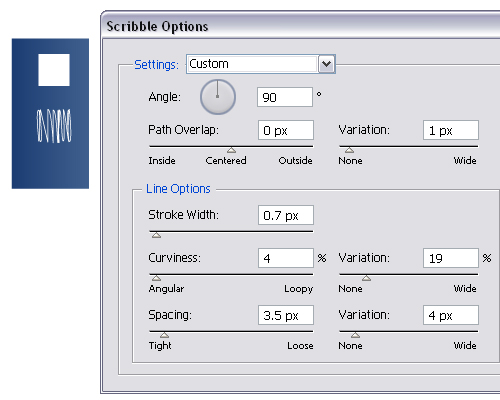
Let’s move on to the sketchy look. First draw a small white square then go to Effect > Stylize > Scribble and in the Options window change the values like in the image. From now on I will call this a sketch symbol because you will define it as a symbol at the next step.
Step 6
Depending on each letter you will need a smaller or a longer sketch symbol. For example, on top of the "V" legs a small symbol like the one made earlier works perfectly but for the sides it won’t because those are longer. For them and other similar surfaces you will need a medium size sketch symbol. The longest surface is the side of "O" and for it you will need to create an even longer sketch symbol.
To obtain all these sketch symbols simply multiply the first one made, the smaller one and drag one side with the Selection Tool (V) to make it longer. The Scribble settings remain the same you just need to stretch it. Once you have all the different sizes drag them into the Symbols Panel and choose Graphic. I made one small, two medium and one long like shown in the image.
Step 7
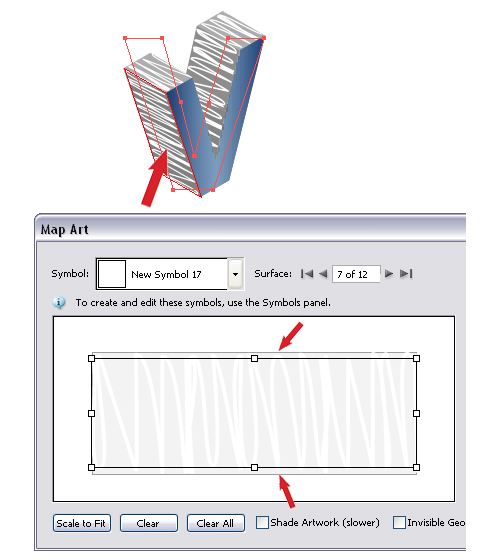
Now using the "V" letter I will explain how to apply the symbols. Double click in the Appearance Panel on the 3D Extrude&Bevel effect applied to open the Options window then click on the Map Art button. Select the side surface indicated, mine is 7 of 12 then also select a medium sketch symbol like the one shown at the previous step. Adjust the symbol if needed to cover the surface and drag the top and the bottom to make sure the wavy peaks don’t cross over the surface area.
Do the same for the side of the other leg.
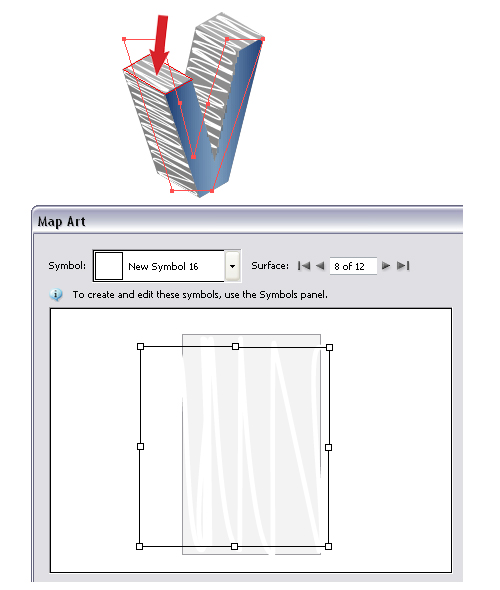
Use the arrows and move on to the next surface indicated, 8 of 12. For this one choose the smallest symbol made and again drag the top and the bottom sides if they cross over. Do the same for the other top surface on the other leg and you are done with the first letter. Continue with the rest of them and as long as you use the proper size symbol depending on how big or small each surface is your letters will look perfectly.
Note: The symbols can be modified at any time if they don’t fit. Just drag them from the Symbols Panel back into your working area and stretch them as needed but make sure you click on the Break Link to Symbol button first. This is why I never said to Expand Appearance after the Scribble effect was applied.
Step 8
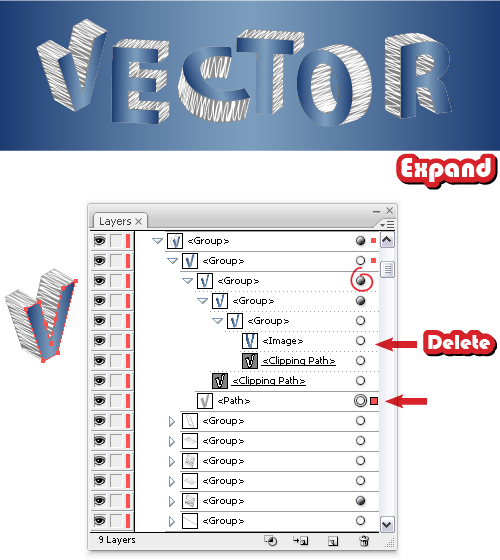
At this point the letters should look like in the image below. Now go to the Object menu and Expand Appearance for all of them. After that if you navigate into one of the letter groups you will find an image that you don’t need therefore delete it. It is there because at the beginning the letters were filled with a gradient and not with a solid color. Ever better delete the entire group in which the image is placed and use the indicated path below it to fill it back with the same gradient. Do the same for the rest of the letters to clean up your work.
Step 9
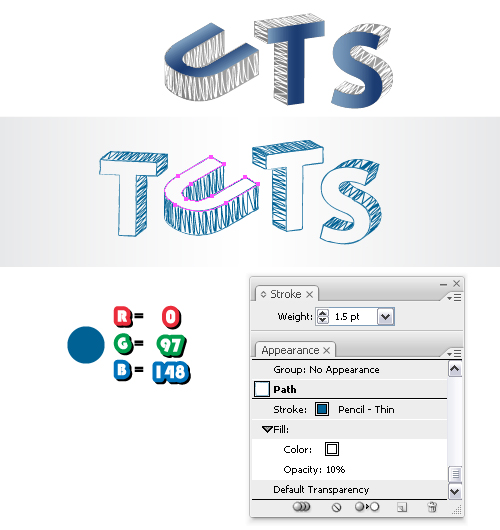
After expanding some of the surfaces might look like in the next image, composed of many smaller shapes. To fix that select the surface group that should be between the sketch group and the Clipping path, go to the Object menu and Ungroup then go to the Pathfinder Panel and click Add to shape area > Expand. Now that you obtained the whole shape, delete the gray fill and Stroke it using Pencil-Thin that you can find in the Brush Libraries menu under Artistic > Artistic_ChalkCharcoalPencil. This will improve the sketchy look. Also select a 1.5 pt Stroke Weight.
Do the same for the other surfaces where the symbols were applied for all the letters.

Step 10
Stroke using the same brush also the front shape of the letters and then reduce the Opacity to 10% but only for the fill gradient not for the stroke. This way the letters will be transparent.

Step 11
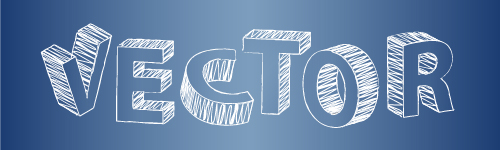
The letters now look like this:
Step 12
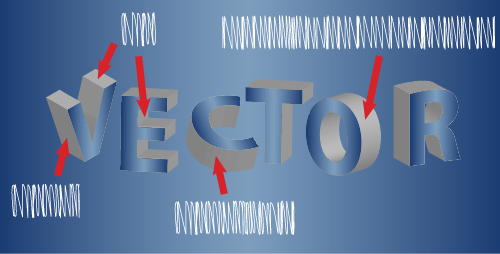
In the last step I will show another look that can be obtained in the same way. The first "T" is duplicated from above and the other three are created using the same symbols and the Map Art option like you did so far. The process is the same just after you expand them change the fill color for all the sketch groups to the blue color shown to make it look like pen sketching. Also use the same color for all the brush strokes. For the front surfaces change the fill gradient to white and keep the opacity reduced.
Place the letters on another 500 x 120 px rectangle filled this time with a linear gradient using light gray and white and you are done.
Conclusion
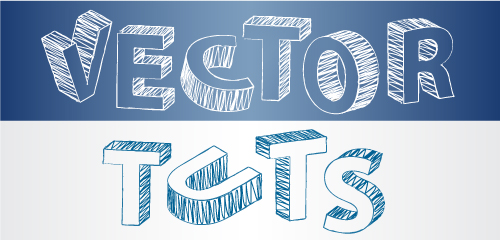
Here is the final image of the 3D sketchy text created.
Play with the 3D options in Illustrator to create the 3D letters, play with different colors to create this sketch effect and as long as you lower the opacity you can obtain transparent or semitransparent letters that can be placed on any background as you wish.