The ability to extract melodies from audio is bound to be welcomed by any producer. There are of course third party applications and plug-ins that are up to the task and the best are probably produced by Celemony. Luckily though, if you are a Cubase 6 user you can do this right within your project.
In this tutorial we’ll take a look at this relatively straightforward process from identifying the melody you want to extract, right through to using the new MIDI file with a software instrument. It really goes without saying but unfortunately the techniques demonstrated here do require the user to have Cubase 6.
Step 1: Your Original Audio
First up you’ll need to choose the audio you want to convert to MIDI data. In this case we are using a basic monophonic synth line. Whatever instrument you choose to process here it really should be simple and monophonic in nature. The pitch detection system in Cubase is good but doesn’t get on well with complex or harmonically rich content.
Here I had a synth loop that contained the perfect melody for the project I was working on but the sound itself was not right. I needed something a little more epic in nature. Having the MIDI for this melody line would be the perfect solution.
Once you have your audio file in place, perform all the usual checks you would with any other audio. So look for overs, clips, distortion, clicks and pops. It’s also worth mentioning that your audio should be dry and not over processed. Once you are happy we can move on to the next stage and start to detect the pitch in our melody.
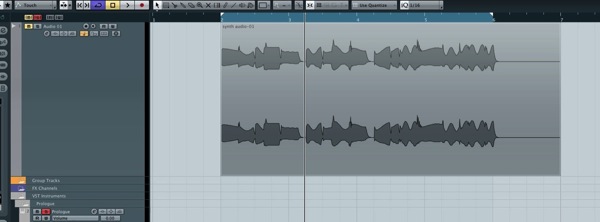
The original audio is in place.
The very plain, original synth melody in pure audio form.
Step 2: VariAudio Analysis
The next step is to analyse the pitch in our synth line and to do this we’ll need to utilise the VariAudio feature of Cubase 6. To access this system you simply need to double click on the audio part and you’ll be presented with a dedicated audio editor. It’s in this editor that we’ll do our pitch detection.
Once inside the editor window you’ll notice a number of options on the left hand side. One of these areas is labelled ‘VariAudio’ and this is the one your are after. With this clicked further menus will become available.
Now hit the first entry in the list, which is ‘Pitch and Warp’. Once activated this option will analyse your audio and generate a pitch signature for it. The pitch display is overlaid over that of the audio, with both note and pitch variation clearly visible.
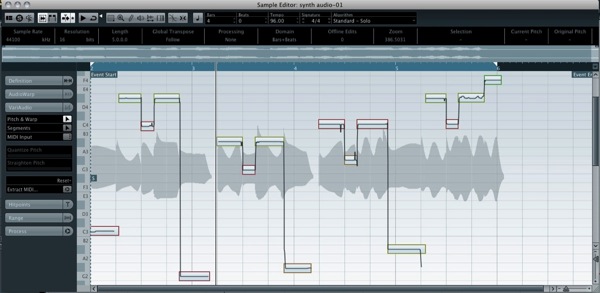
The pitch is detected and displayed.
We are now ready to generate our MIDI information.
Step 3: Extracting the MIDI
At the bottom of the list of options in the VariAudio window you should see a button labelled ‘Extract MIDI’. Hit this and a new window will pop up giving you… Yes you guessed it, more options!!
Here we can choose what data is included in our extracted MIDI file. You can opt for a few different flavours of pitch bend data to be thrown into the mix, this is especially useful if your audio has a lot bends in it. In this case everything is nice and static so I left this unchecked.

The static pitch bend option is used here.
You can also choose between a fixed and dynamic velocity. I went for the dynamic option to try and create a more realistic copy of the audio part. You can also specify the destination of the MIDI data.

The MIDI is brought into a temporary track for editing.
I instructed my new MIDI to go straight to the next available MIDI track and hooked it straight up to a simple synth patch in Cubase’s Prologue synth, so you could hear the playback. As you can hear from the clip below things were a little out and needed a quick tweak.
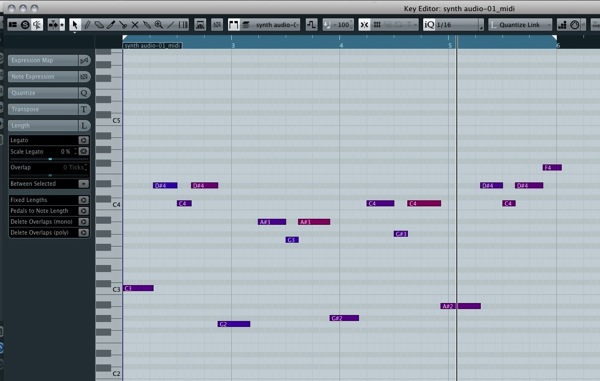
At this point the MIDI part is not on point and sounds a bit messy.
The new MIDI data’s timing is not exactly tight!
Step 4: Edit and Quantise
The easiest thing to do here is quantise the hell out of your new MIDI part. Of course this will only really work if the original pattern was heavily quantised and didn’t contain much of a groove.
I find that in most cases moving the parts manually will give you more success. In this case I just shuffled things about until they were the same as the original audio. You can flick back to the audio and even play it over your MIDI for a point of reference.
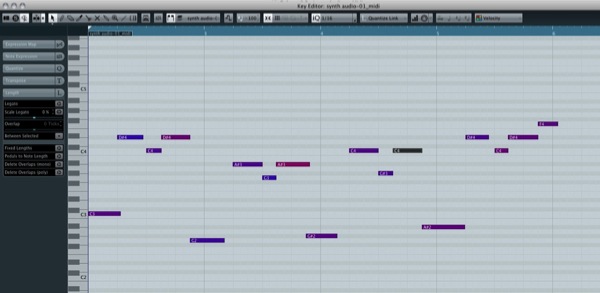
The pattern is tightened up using some manual editing.
The new tighter edited MIDI.
Step 5: Using Your MIDI with New Instruments
Finally I wanted to place my new MIDI into the project I originally had in mind. To do this the new MIDI was first exported from the basic working project. The target project was then loaded and a new MIDI track instantiated, before the MIDI file was re-imported.
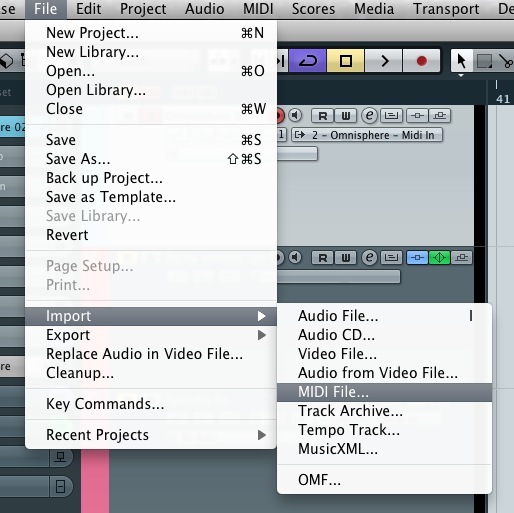
The MIDI is imported into our target project.
All of Cubase’s MIDI file Import and Export functions are in the file menu and the whole operation is very similar to importing an audio file.

The part in place in the new project.
The next move was to load up a new instrument and pick the patch I wanted our new melody to playback. I opted for an instance of Spectrasonics’ Omnisphere and picked a pretty epic synth patch. You can hear what this sounded like here.
The MIDI plays back using the Omnisphere patch.
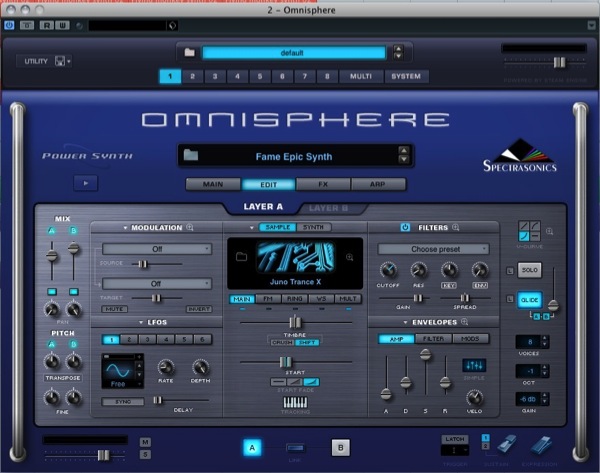
The Omnisphere patch used.
The sound is then mixed with the whole project. As you can hear the melody has taken on a whole new style and this would not of been possible without the Audio to MIDI function that Cubase 6 includes.
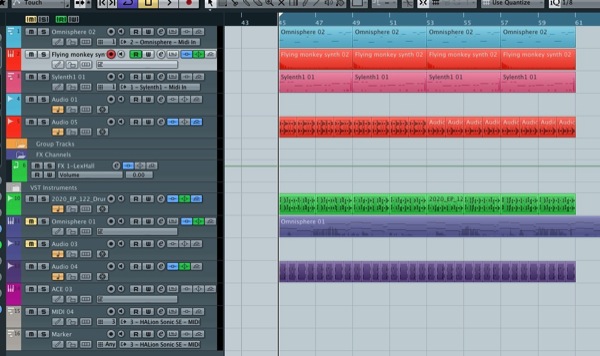
The project plays back with it’s new part.
The final result is mixed with our target project for a much more epic effect.