In the following tutorial you will learn to create a paste text effect. Using the Gradient, Pathfinder and Blur tools you will make a text effect that can be used to illustrate a piped frosting effect.
Step 1
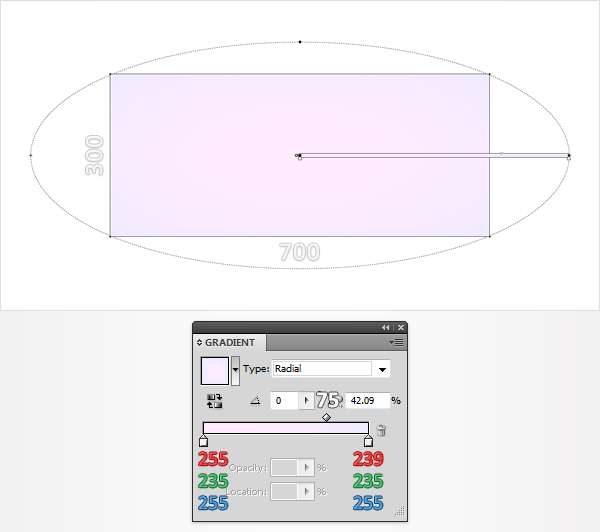
Create a 700px by 300px, RGB document. Pick the Rectangle Tool (M) and create a shape the size of your artboard. Fill it with the radial gradient shown below then lock it.
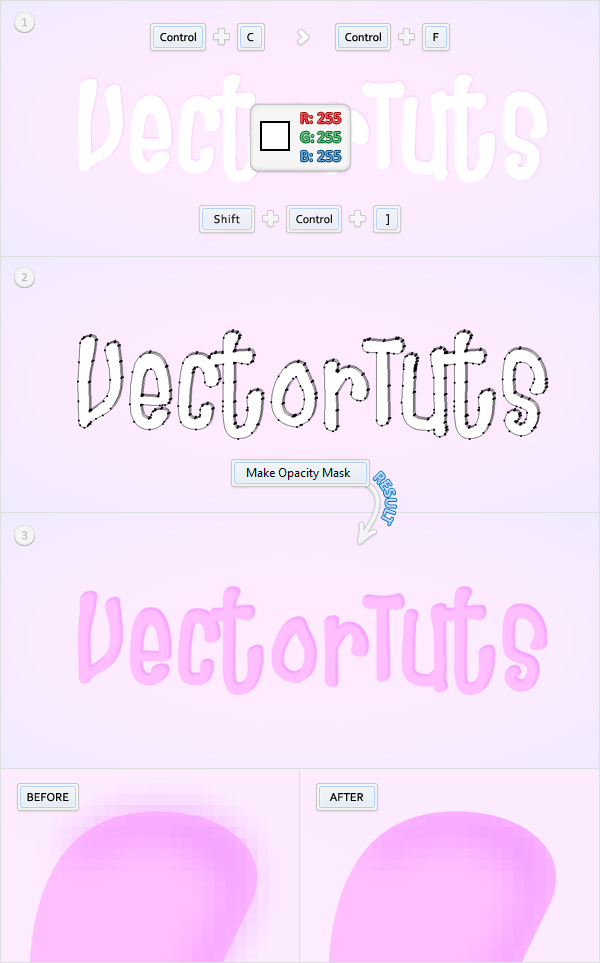
Step 2
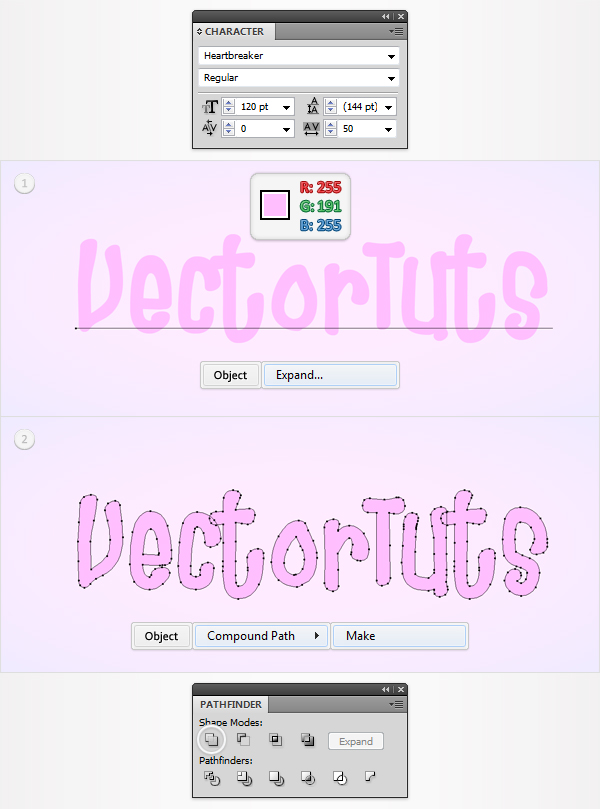
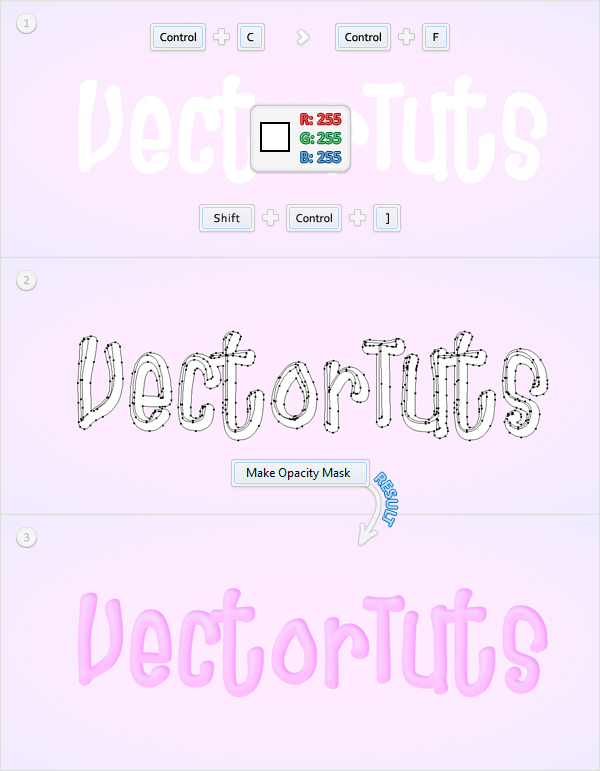
Pick the Type Tool (T), click on your artboard and add your text. Use the Heartbreaker font with a size of 120pt then set the color at R=255 G=191 B=255 and the tracking at 50. With this text selected go to Object > Expand. Select the resulting group, click on the Unite button from the Pathfinder panel then go to Object > Compound Path > Make. Double click on the resulting path (in the Layers panel) and name it Text.
Step 3
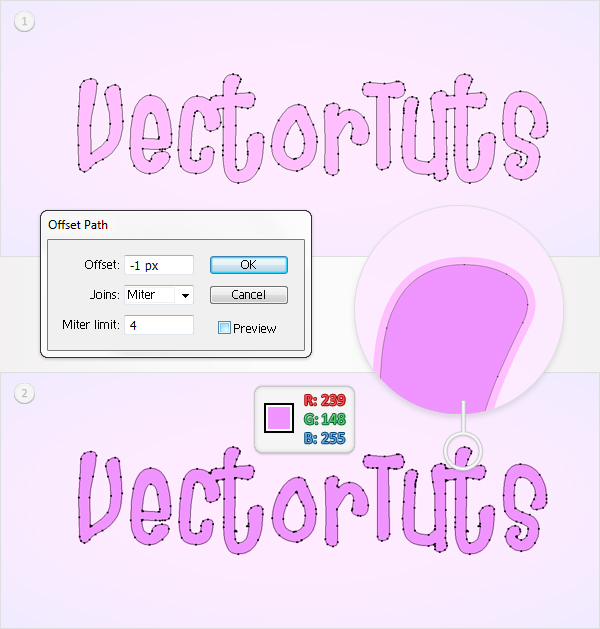
Select "Text" and go to Object > Path > Offset Path. Enter a -1px Offset and click OK. Fill the resulting path with R=239 G=148 B=255.
Step 4
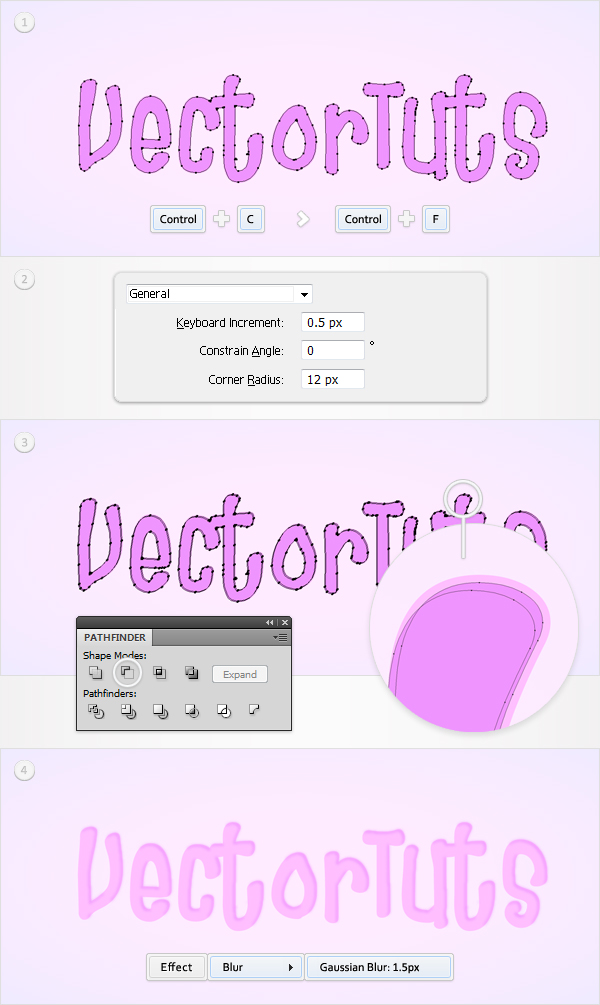
Duplicate the path made in the previous step (Command + C then Command + F). Go to Edit > Preferences > General and enter 0.5 in the Keyboard Increment box. Reselect the fresh copy then hit the down arrow and the left arrow twice. Now, select this copy along with the path made in the previous step and click on the Minus Front button from the Pathfinder panel. Fill the resulting group of shapes with R=G=B= then go to Effect > Blur > Gaussian Blur. Enter a 1.5px radius then click OK.
Step 5
Make a new copy of "Text" (Command + C then Command + F), Bring it to Front (Command + Shift + Right Square Bracket) and fill it with white. Select this new shape along with the group made in the previous step and go to the Transparency panel. Open the fly-out menu and click on Make Opacity Mask.
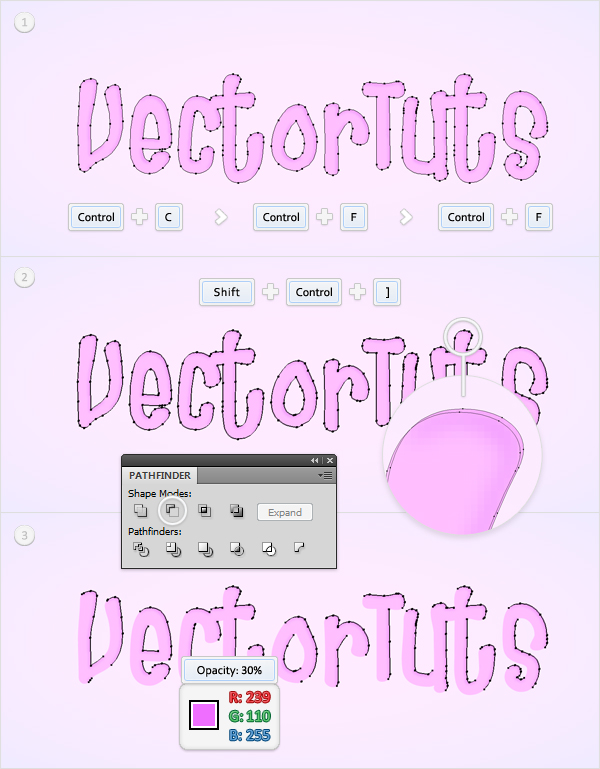
Step 6
Make two new copies of "Text" and Bring them to Front (Shift + Command + Right Square Bracket). Select the top copy then hit the left arrow and the down arrow once. Reselect both copies and click on the Minus Front button from the Pathfinder panel. Fill the resulting group of shapes with R=239 G=110 B=255 and lower its opacity to 30%.
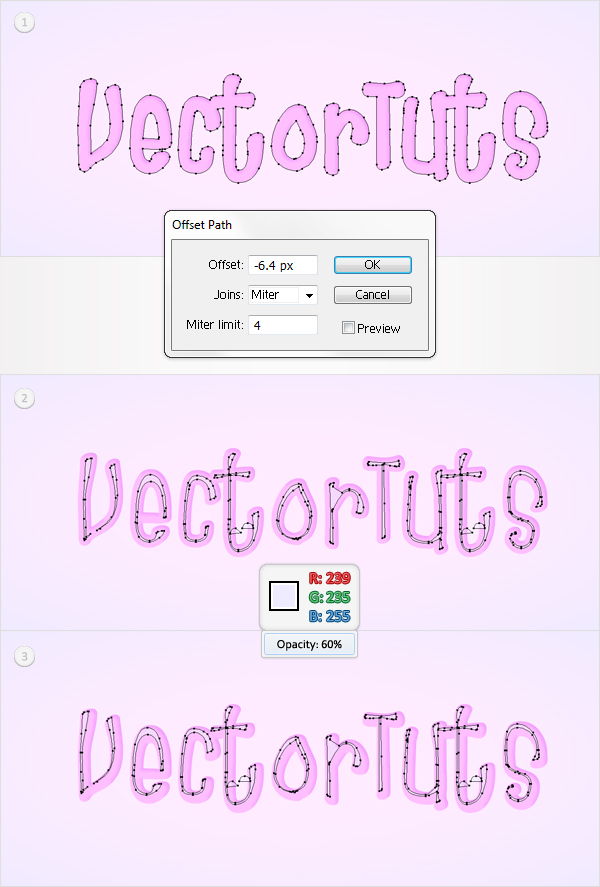
Step 7
Select "Text" and go to Object > Path > Offset Path. Enter a -6.4px Offset and click OK. Bring the resulting shape to Front (Shift + Command + Right Square Bracket) , fill it with R=239 G=235 B=255, lower its opacity to 60% then hit the left arrow and the up arrow seven times. Now, your shape should be placed as shown in the third image.
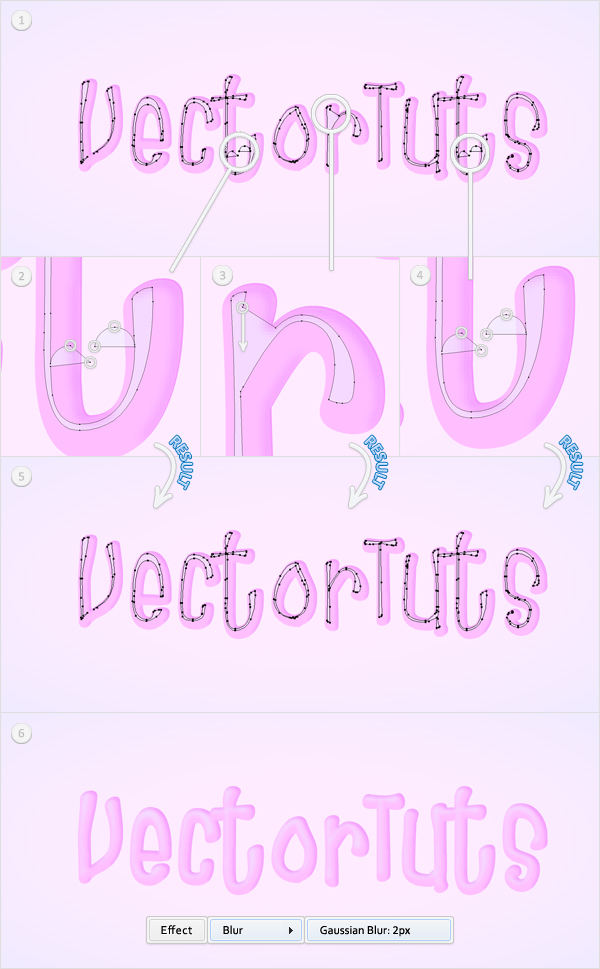
Step 8
Pick the Delete Anchor Point Tool (-), focus on the areas shown in image 2 and #4 then click on the highlighted anchor points to remove them. Grab the Direct Selection Tool (A), select the anchor point highlighted in the second image and drag it a few pixels down. Now, your shapes should look like in the fifth image. Select it and go to Effect > Blur > Gaussian Blur. Enter a 2px radius then click OK.
Step 9
Make a new copy of "Text" (Command + C then Command + F), Bring it to Front (Command + Shift + Right Square Bracket) and fill it with white. Select this new shape along with the path made in the previous step and go to the Transparency panel. Open the fly-out menu and click on Make Opacity Mask.
Step 10
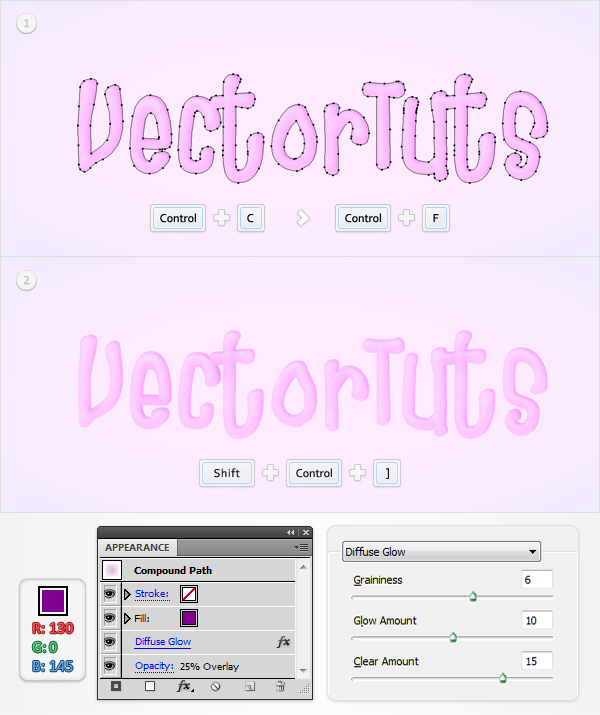
Make a new copy of "Text" (Command + C then Command + F) and Bring it to Front (Command + Shift + Right Square Bracket). Fill it with R=130 G=0 B=145, lower its opacity at 25%, change the blending mode to Overlay then go to Effect > Distort > Diffuse Glow. Enter the data shown in the final image then click OK.
Step 11
Make one final copy of "Text" (Command + C then Command + F), Bring it to Front (Command + Shift + Right Square Bracket) and fill it with white. Select this new shape along with the shape made in the previous step, go to the Transparency panel, open the fly-out menu and click on Make Opacity Mask.

Step 12
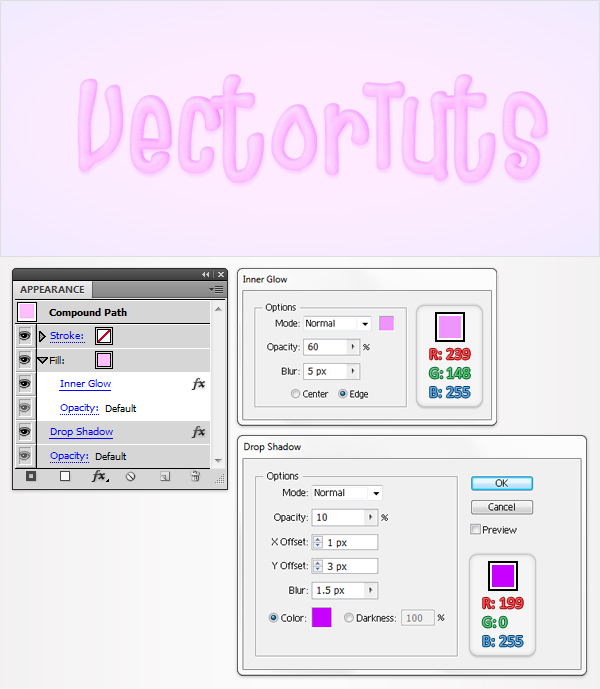
Reselect "Text" and go to Effect > Stylize > Inner Glow. Enter the data shown below, click OK then go to Effect > Stylize > Drop Shadow. Again, enter the data shown in the following image then click OK.
Step 13
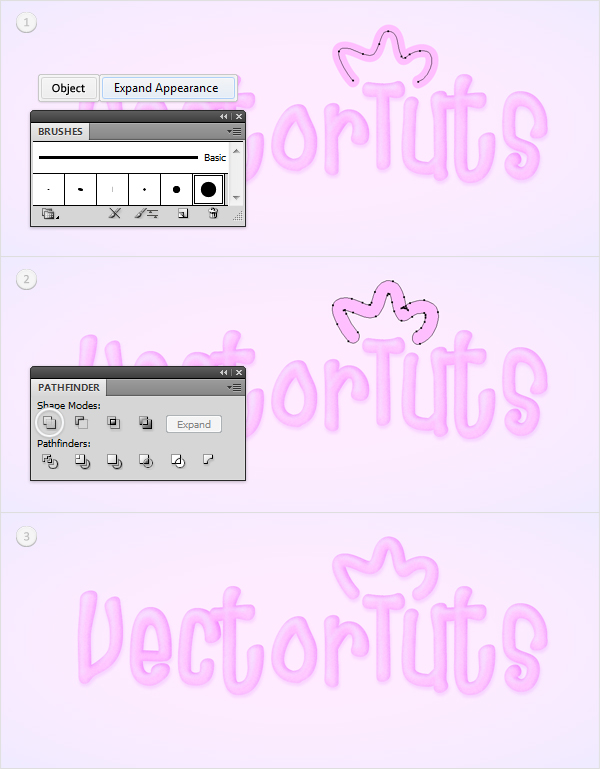
Finally, open the Brushes penal and pick the Brush Tool (B). Select the 15pt Round brush from the Brushes panel, add a smooth path as shown in the first image then go to Object > Expand Appearance. Make sure that the resulting shape is filled with R=255 G=191 B=255 then click on the Unite button from the Pathfinder panel. Now, repeat the techniques from the previous steps for this new shape. In the end your shape will look like in the third image.
Conclusion
There you have it, a nice looking paste effect. An idea how you could use this technique is to make piped frosting for cake illustrations. Have a play around with different shapes and colors and see what you can come up with. I hope you’ve enjoyed this tut.