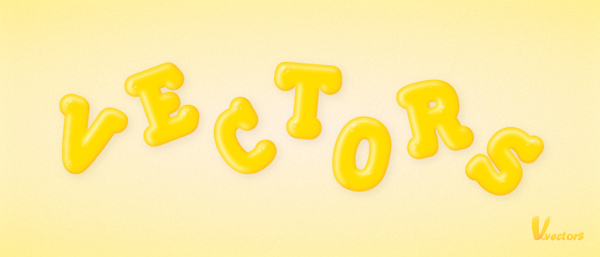
In the following tutorial you will learn to create a gummy text effect. Perfect for illustrative designs, you will create a cute and fun lettering effect using the Offset Path function and various other coloring techniques.
Step 1
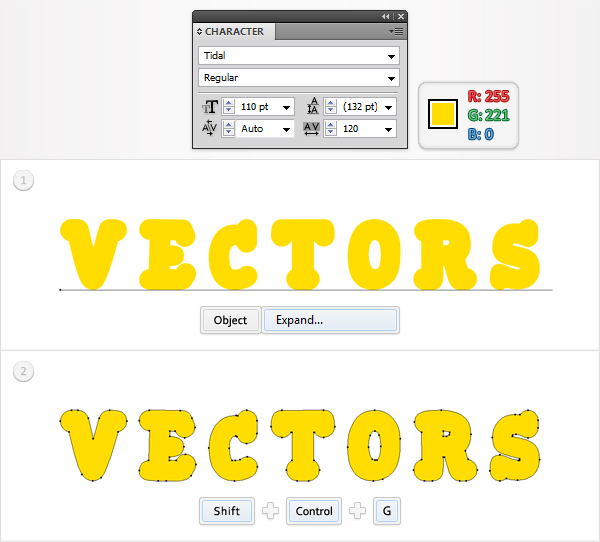
Create a 700px by 300px, RGB document. Select the Type Tool (T) and add your text using the Tidal font. Set the color at R=255 G=221 B=0 and the size at 110pt then go to Object > Expand. Select the resulting group and hit Shift + Control + G to ungroup it.
Step 2
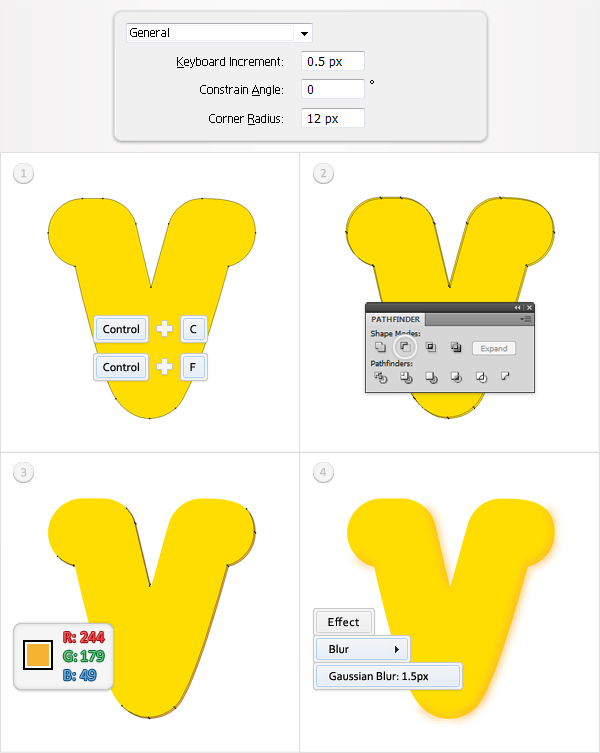
Let’s focus on the first letter shape. First, go to Edit > Preferences > General and enter 0.5 in the Keyboard Increment box. Now, select the "V" shape. Hit Control + C once then hit Control + F twice. This will add two copies of the selected shape. Select the top copy then hit the up arrow and the left arrow (to move it 0.5px up and to the left). Reselect both copies and click on the Minus Front button from the Pathfinder panel. Fill the resulting group of shapes with R=244 G=179 B=49 then go to Effect > Blur > Gaussian Blur. Enter a 1.5px radius then click OK.
Step 3
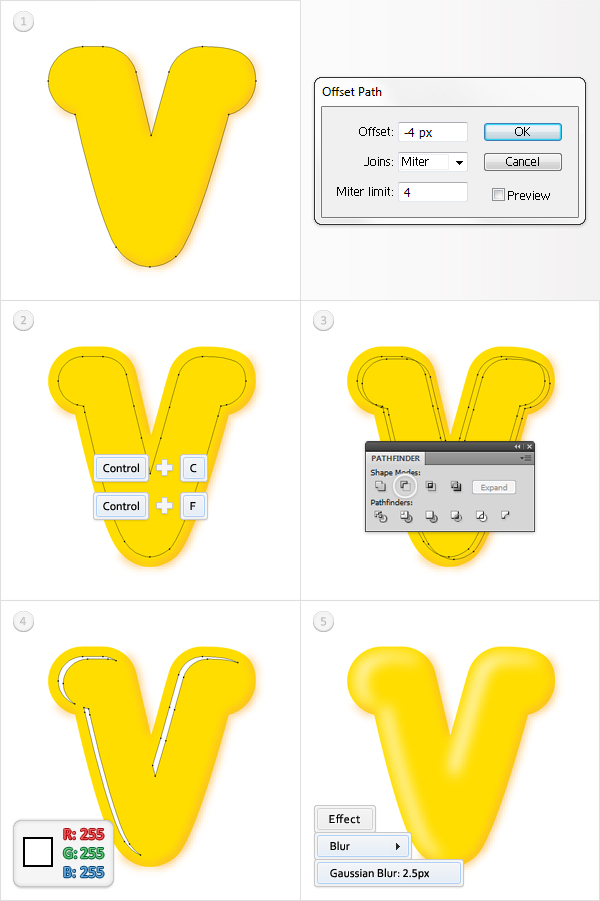
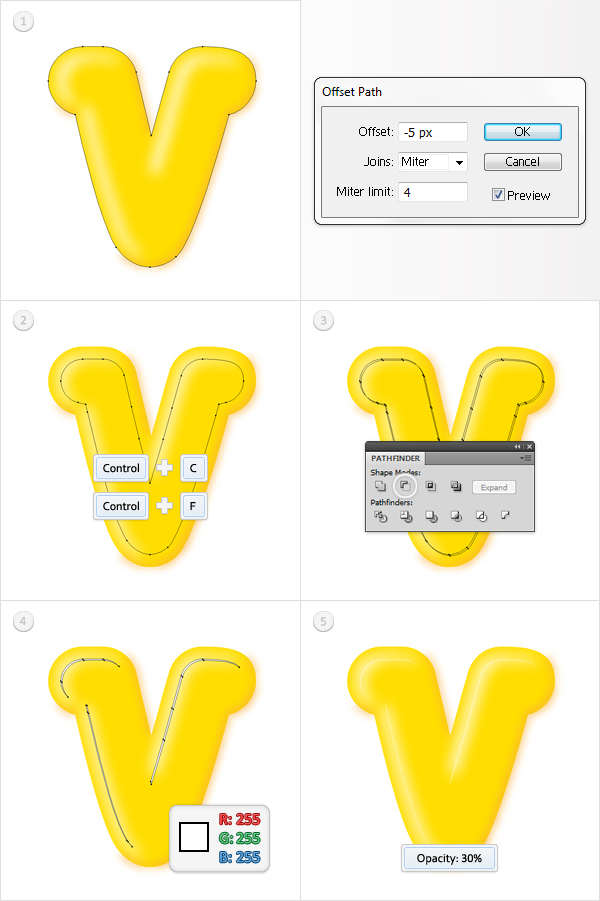
Reselect the "V" shape and go to Object > Path > Offset Path. Enter a -4px Offset then click OK. Duplicate the resulting shape (Control + C > Control + F). Select this fresh copy then hit the down arrow twice and the right arrow four times. Reselect the copy along with the original shape and click on the Minus Front button from the Pathfinder panel. Fill the resulting group of shapes with white then go to Effect > Blur > Gaussian Blur. Enter a 2.5px radius then click OK.
Step 4
Reselect the "V" shape and again, go to Object > Path > Offset Path. This time, enter a -5px Offset and click OK. Duplicate the resulting shape. Select this new copy then hit the down arrow and the right arrow once. Reselect the copy and the original shape then click on the Minus Front button from the Pathfinder panel. Fill the resulting group of shapes with white and lower its opacity to 30%.
Step 5
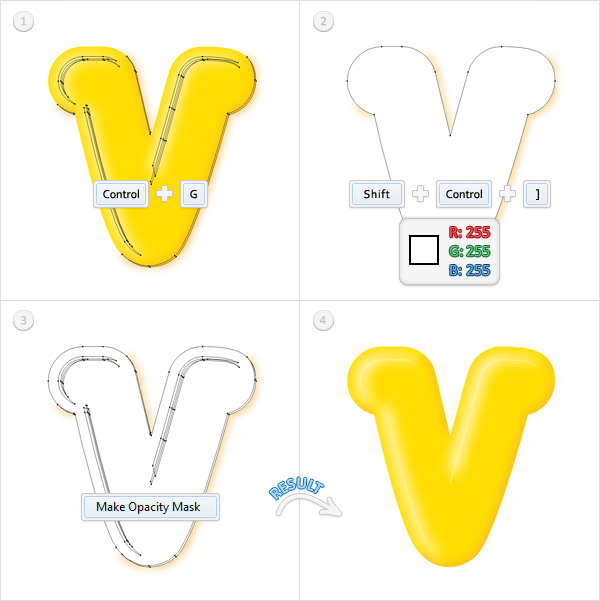
Select the groups made in the last three steps and hit Control +G to turn them into a single group. Make a new copy of the "V" shape, fill it white and Bring it to Front (Shift + Control + Right Square Bracket). Now, open the Transparency panel (Window > Transparency). Select the white shape along with the group, open the fly-out menu of the Transparency panel and click on Make Opacity Mask. The resulting shape should look like in the fourth image.
Step 6
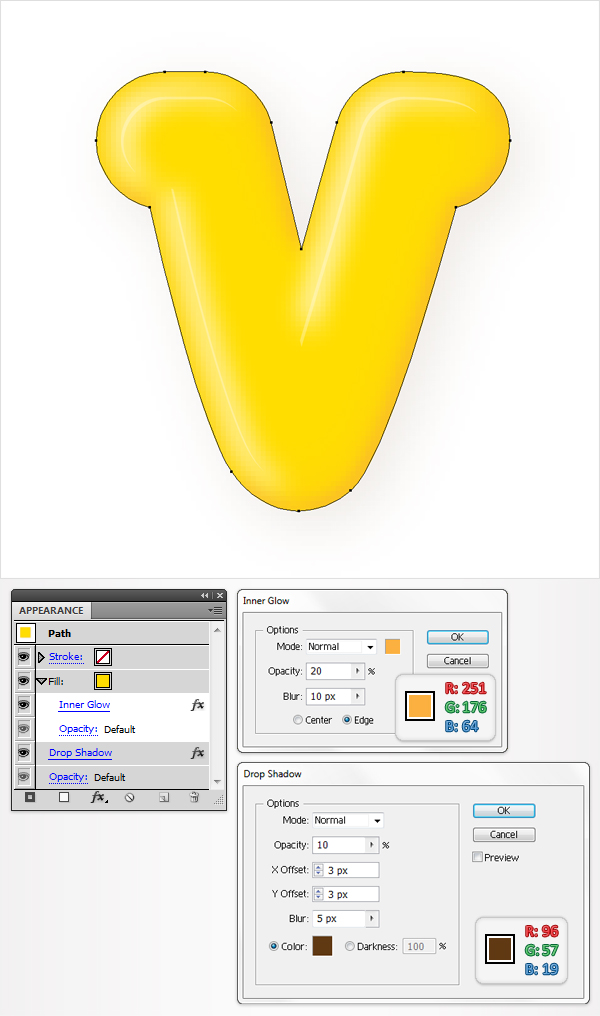
Reselect the "V" shape then select the fill from the Appearance panel and go to Effect > Stylize > Inner Glow. Enter the data shown below, click OK then reselect the entire path and go to Effect > Stylize > Drop Shadow. Again, enter the data shown in the following image then click OK.
Step 7
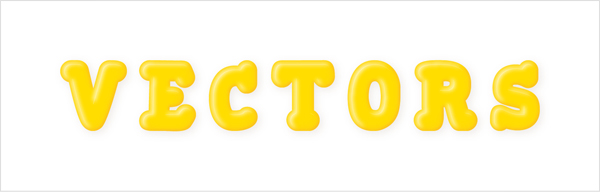
Repeat the techniques shown in the previous steps for the rest of the shapes.
Step 8
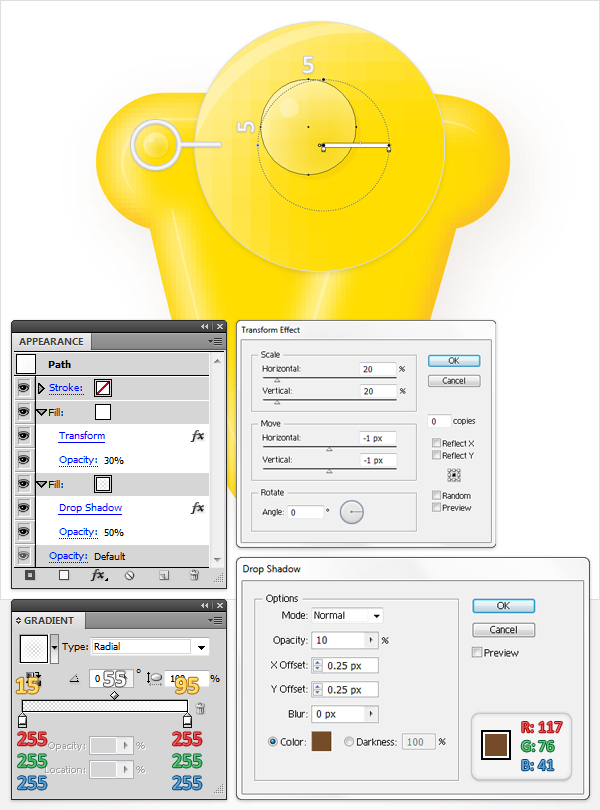
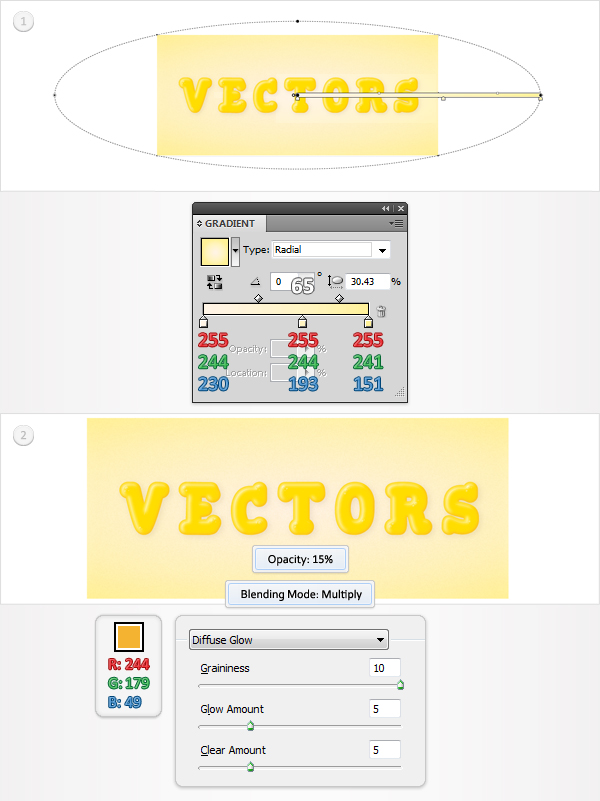
Now, let’s add some small details for these letters. Pick the Ellipse Tool (L), hold Shift and create a 5 by 5px shape. Fill it with the radial gradient shown below then select the fill from your Appearance panel. Lower its opacity to 50% then go to Effect > Stylize > Drop Shadow. Enter the data shown below, click OK then open the then fly-out menu of the Appearance panel and click on Add New Fill. This will add a second fill for your shape. Select it, make it white, lower its opacity to 30% then go to Effect > Distort & Transform > Transform. Follow the data shown in the following image then click OK. Take a closer look at the gradient image and you’ll notice some numbers above the gradients sliders. The white numbers stand for Location while the yellow numbers stand for Opacity.
Step 9
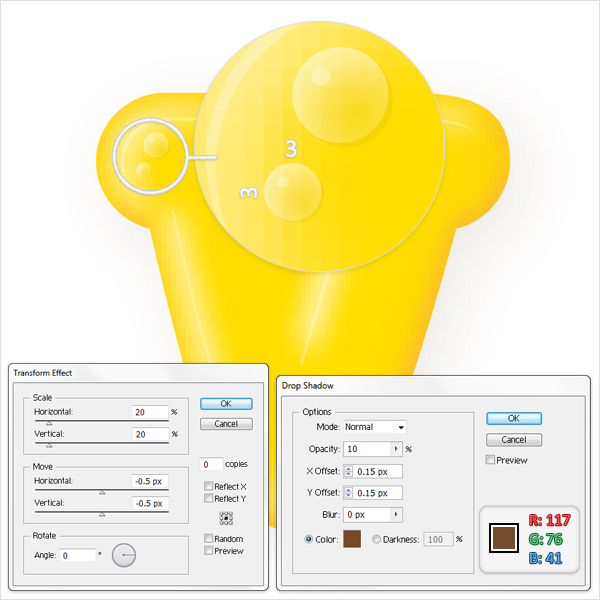
Duplicate the shape made in the previous step. Move this copy a few pixels down and to the left then resize it to 3 by 3px. Select it, go to the Appearance panel and edit the Transform and Drop Shadow effects as shown in the image below.
Step 10
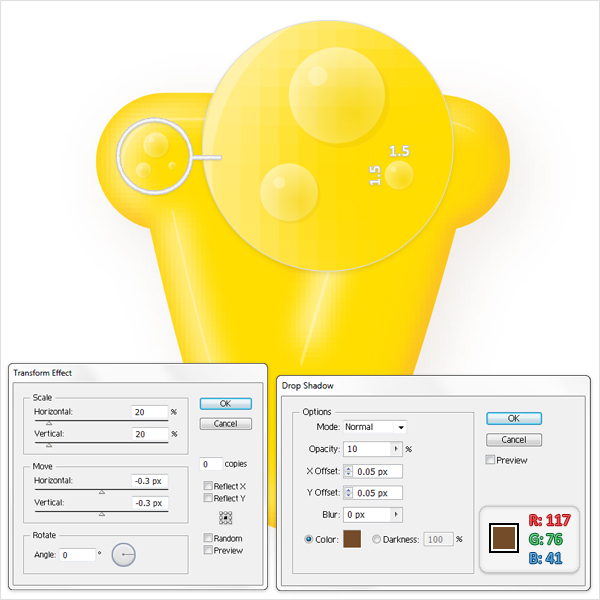
Again,duplicate the shape made in the previous step. Move it a few pixels up and to the left then resize it to 1.5 by 1.5px. Select it, go to the Appearance panel and edit the Transform and Drop Shadow effects as shown in the image below.
Step 11
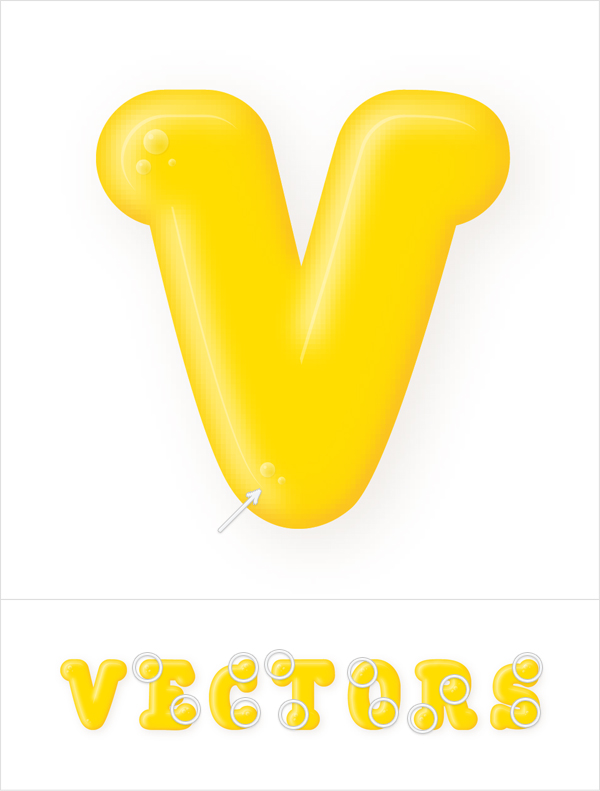
Make some copies for the shapes created in the last three steps and spread them above the text as shown in the following image. Try to place them in lighted areas.
Step 12
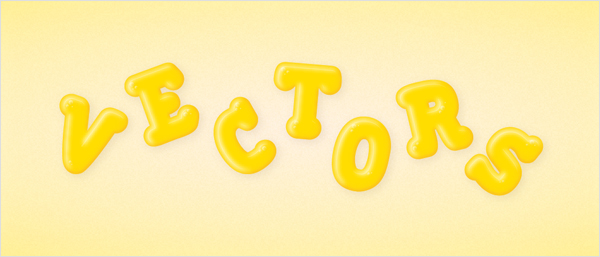
For the background, create a shape the size of your artboard using the Rectangle Tool (M). Fill it with the radial gradient shown below then add a second fill. Select this new fill (from the Appearance panel), set its color at R=244 G=179 B=49, lower its opacity to 15%, change the blending mode to Multiply then go to Effect > Distort > Diffuse Glow. Enter the data shown in the following image then click OK.
Step 13
Finally, make a group for each letter shape and its components. Now, rotate these groups as you want.
Conclusion
There you have it, a nice way to make gummy text. To take this further you can play around with different colors or even make a combination of colors. I hope you’ve enjoyed this tut.