In my experience, I needed to cut a Gradient Mesh. Looking for the solution on forums didn’t work out for me, so I thought it was impossible! The Knife and Scissors Tool are used for cutting vector objects but cannot be applied to the Gradient Mesh. So I thought that this problem would stay unsolved, but thankfully, that was not the case. As Pushkin, the great Russian poet, wrote: "And the case, the god of the inventor." Look how easily it can be done.
Step 1
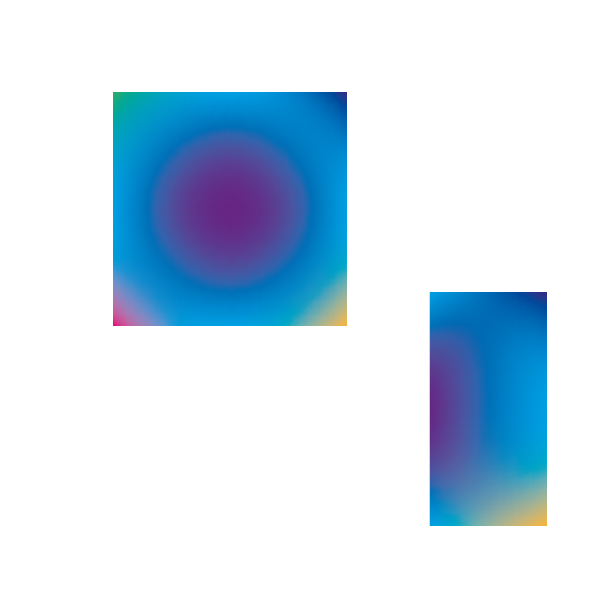
First, let us take a look at the technique on the example of a simple object. Create a rectangle using the Rectangle Tool (M).

Step 2
Take the Gradient Mesh Tool (U) and create a simple grid.
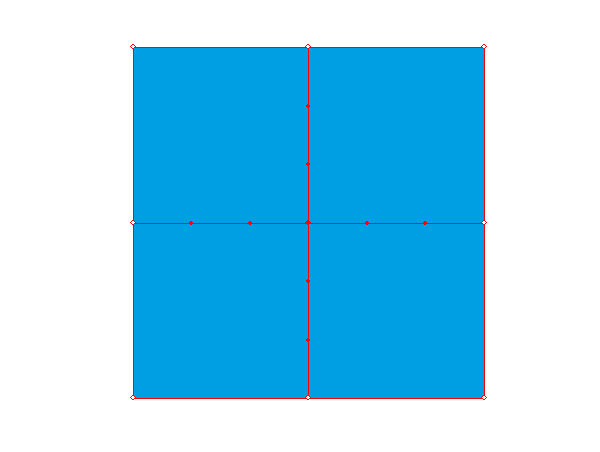
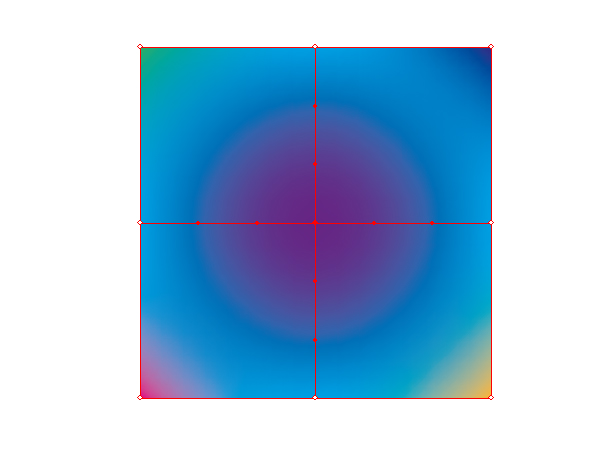
For display purposes, color the grid points in different colors.
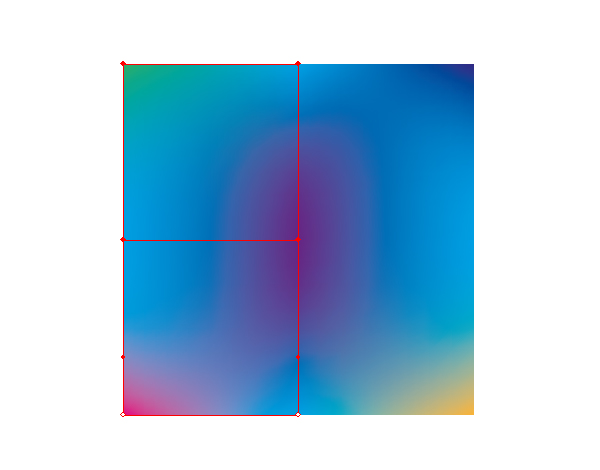
Step 3
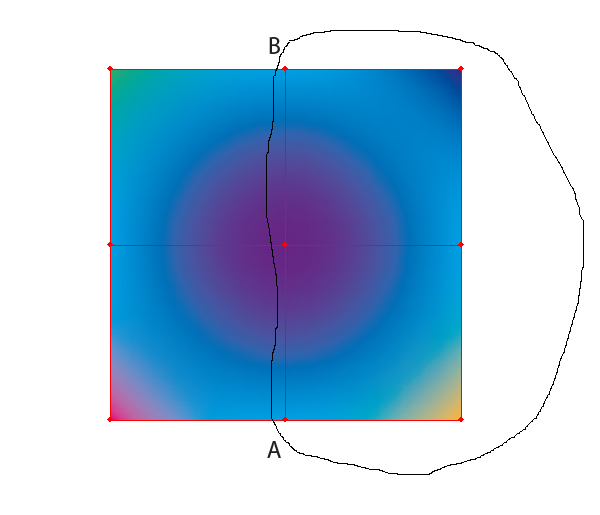
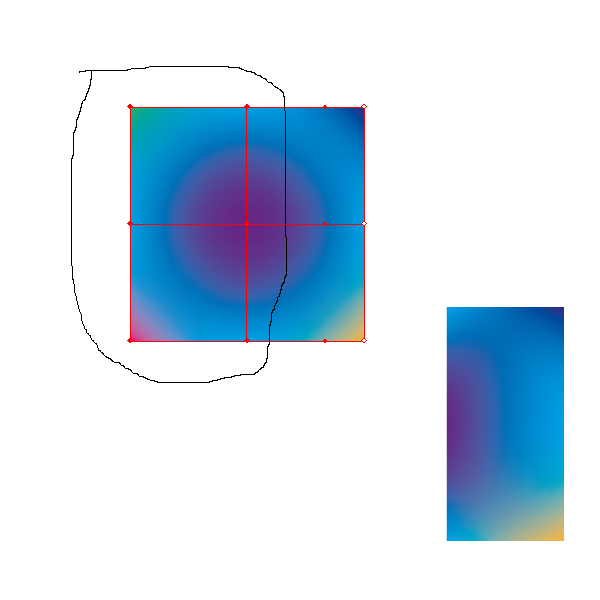
Assume that we need to cut an object along the AB line. Take the Lasso Tool (Q) and select the components of the gradient mesh of the half of the rectangle, as it is shown in the figure below.
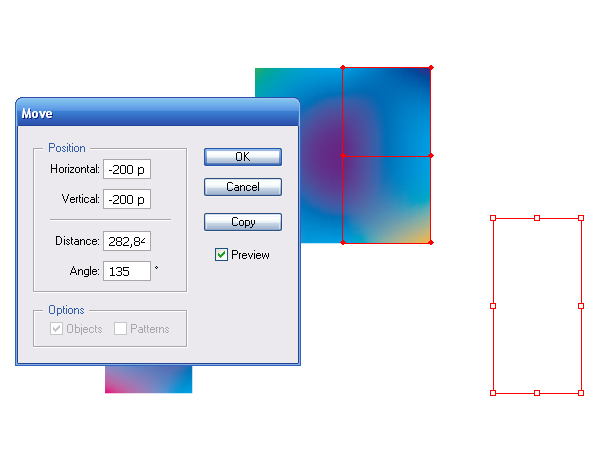
Step 4
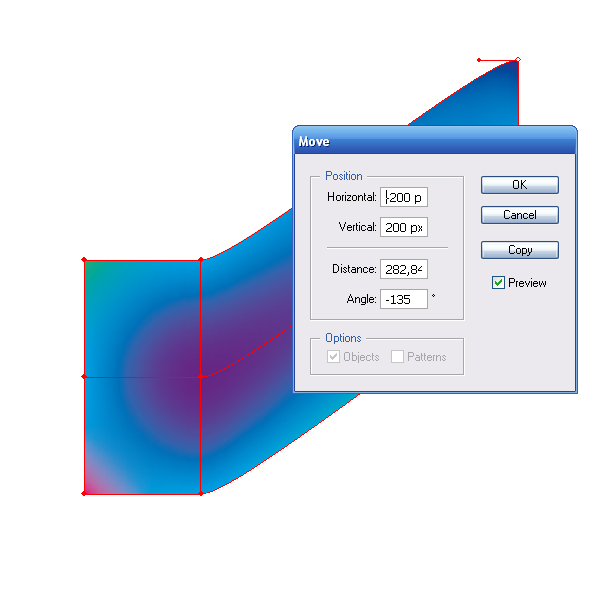
Keep the object selected, go to Object > Transform > Move, and key in some of the displacement values. Displacement should be commensurable to the size of the object. Memorize or write down these values, we will need them for our further work.
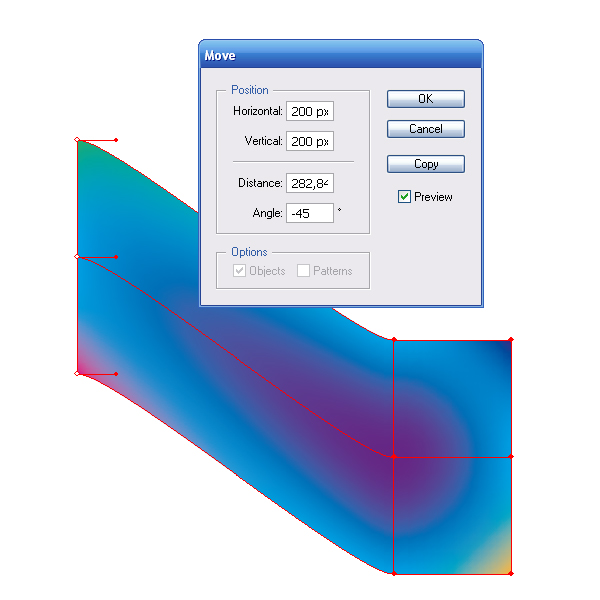
Now click on the Copy button in the dialog box. As a result, we have a copy of the selected part of the gradient mesh.
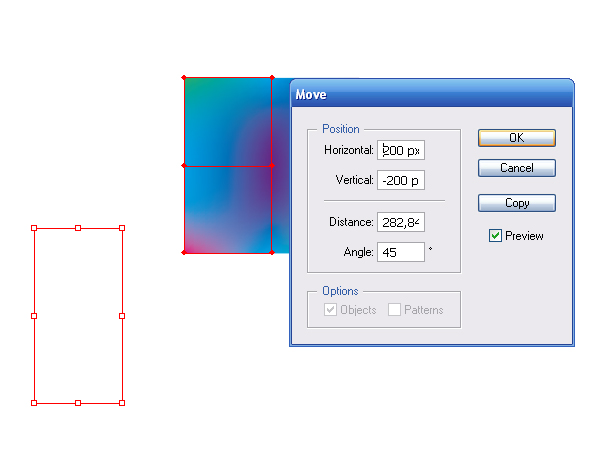
Step 5
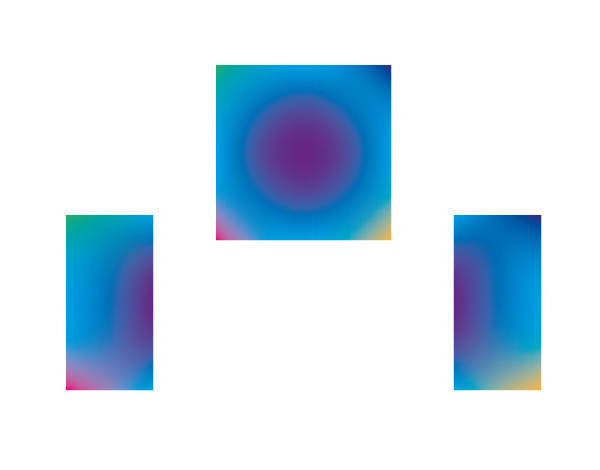
Do the same procedure with the second half of the rectangle. For display purposes, I have moved it on the other side.
Step 6
Now move both pieces of the gradient mesh to their positions. Set the offset value the same as in step 4 and 5 but with opposite sign. Preview option in the dialog box Move will prevent you from making mistakes. Press OK.
Do the same operation with the second part of the object.
Step 7
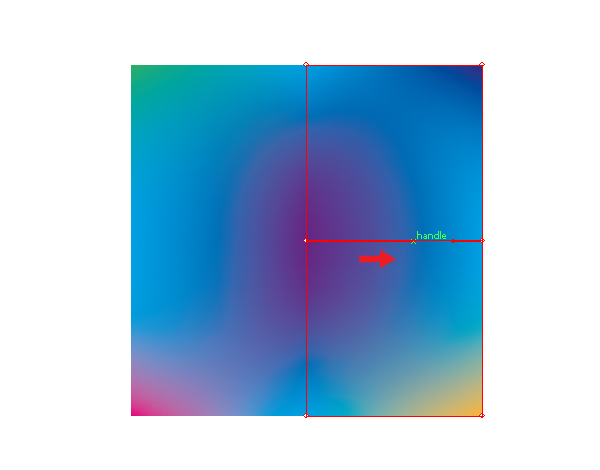
Now the original mesh object can be deleted. Perhaps, you might need to edit the color distribution after cutting. You can do that by moving the shoulders of the grid nodes at the cut.
To cut an object, you can simply copy the gradient mesh nodes and paste them in front (Command + C then Command + F), but I would recommend you to do it with the displacement method, so you can see which part of the object you duplicate.
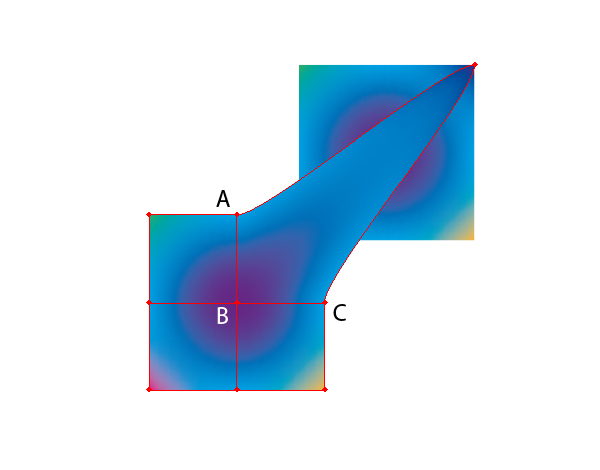
Step 8
You can split objects along the existing or newly established grid lines, but you cannot split along the polygonal path. The figure below shows an example of splitting along polygonal line A, B, C.
Step 9
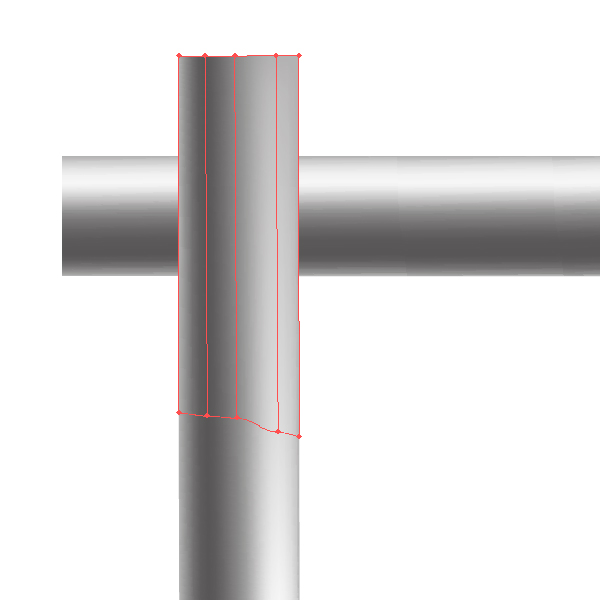
Let’s take a look at a more complex example. We need to cut the mesh object, I came up with it when I was overlapping it on itself.
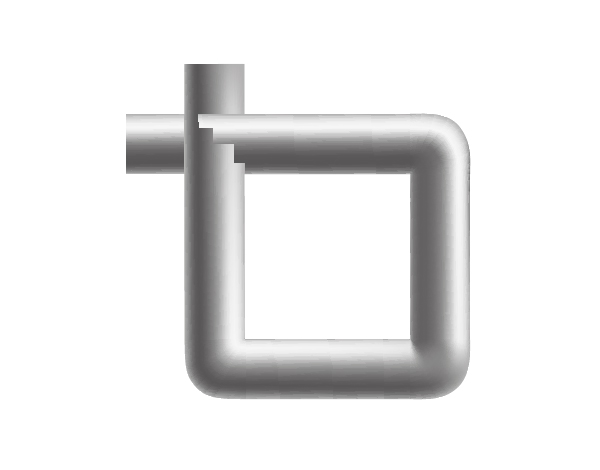
As it can be seen from the image, we have an artifact at the crossing point. This happens because the whole object lies in one plane that means in one underlayer. This object should be cut. Check the grid lines and look for a good spot for the cut.
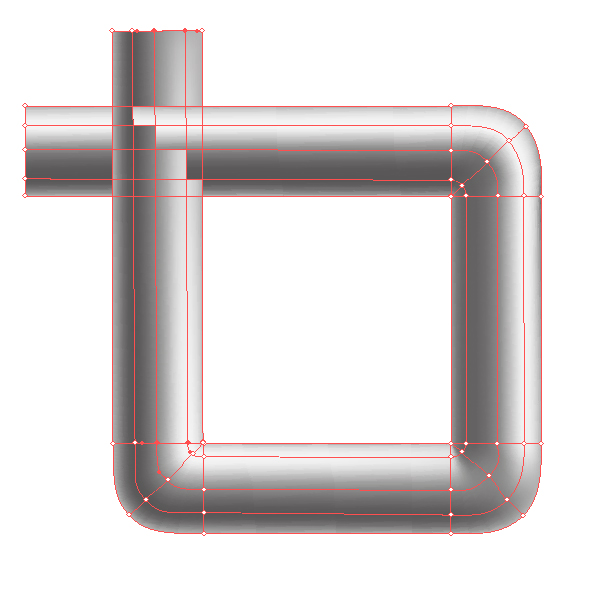
Step 10
Create a new line of the gradient mesh and cut the object along it.
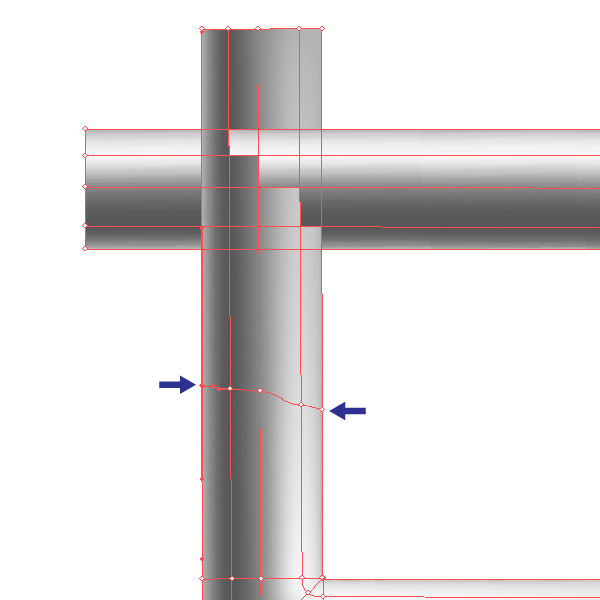
Select the gradient mesh nodes using the Direct Selection Tool (A), as shown in the figure below.
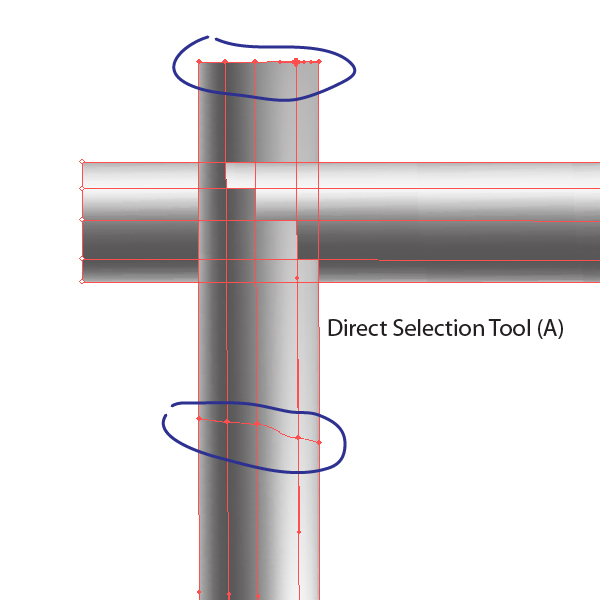
To select nodes of complex mesh objects, it is sometimes convenient to use both selection tools the Direct Selection Tool (A) and Lasso Tool (Q). Now press the key combination Command + C then Command + F or Command + C then Command + B, depending on the result you want to get. The problem is solved!
Conclusion
Using this method to separate the gradient mesh, you get a hundred percent correspondence between nodes and their colors. To learn how to sew two gradient meshes together, you can read my previous tutorial "How to Tame the Gradient Mesh"