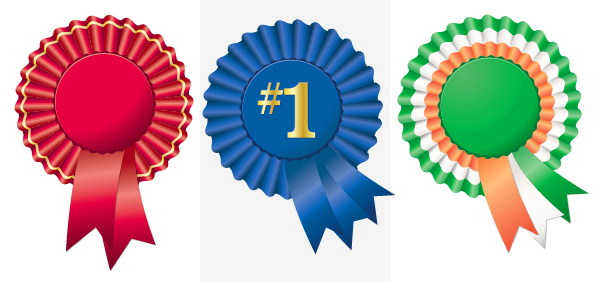
The key to this satiny ribbon is the careful placement of gradients on its component parts. And once you have the individual elements down, it’s a snap to create award ribbons, medals, or bunting. Let’s get started!
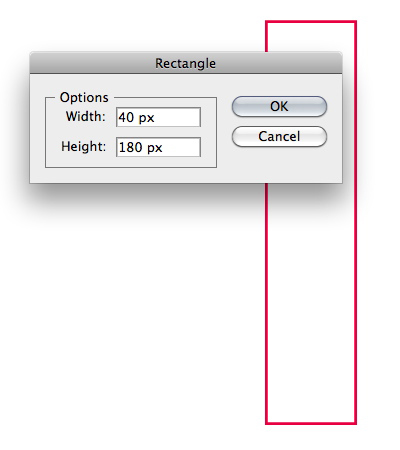
Step 1
Draw a rectangle that’s about four times as tall as it is wide. You can do this freehand, or click once on the artboard with the Rectangle Tool (M) and enter values in the Options box.
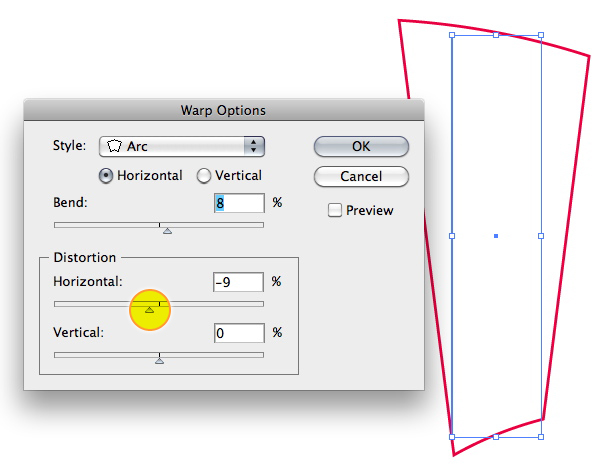
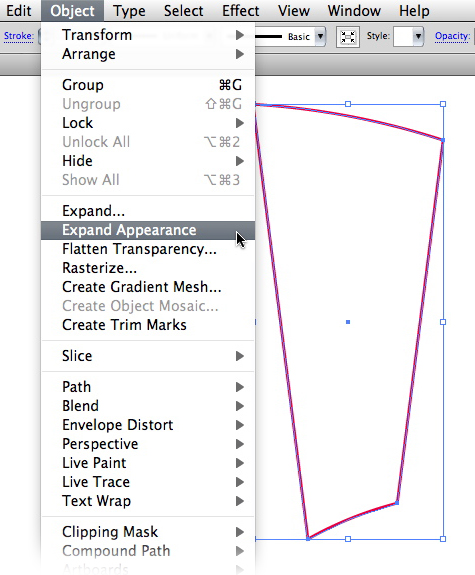
Step 2
Go to Effect > Warp > Arc and enter a slight horizontal bend, and a negative horizontal distortion. Once your warped rectangle looks like the one below, expand its appearance under the Object menu.
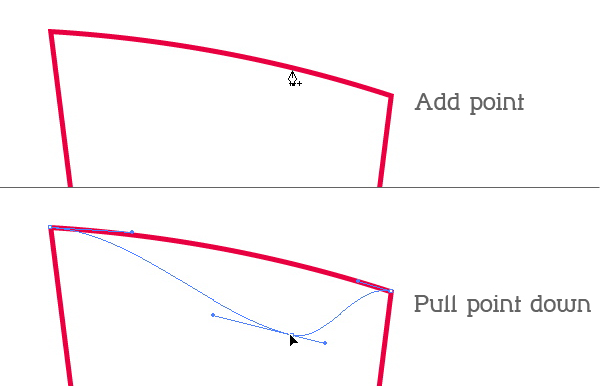
Step 3
Use the Add Anchor Point Tool (+) and add a point to the top segment of the shape. Then take the Direct Selection Tool (A) and pull down the new point as shown.
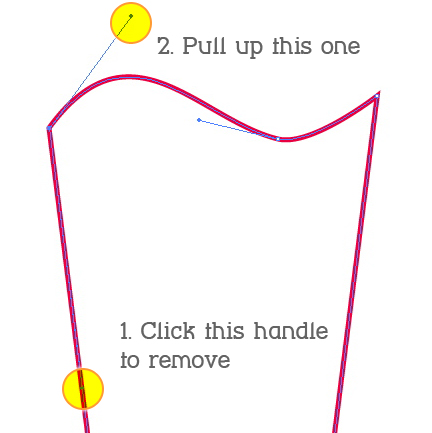
Step 4
Choose the Convert Anchor Tool (Shift + C) and click once on the left handle of the top right anchor point. This will remove that handle and make the corner sharper. Do the same with the point on the left. Now grab the remaining handle and drag it up so that the top of the shape is wavy. The resulting shape should look like the image below.

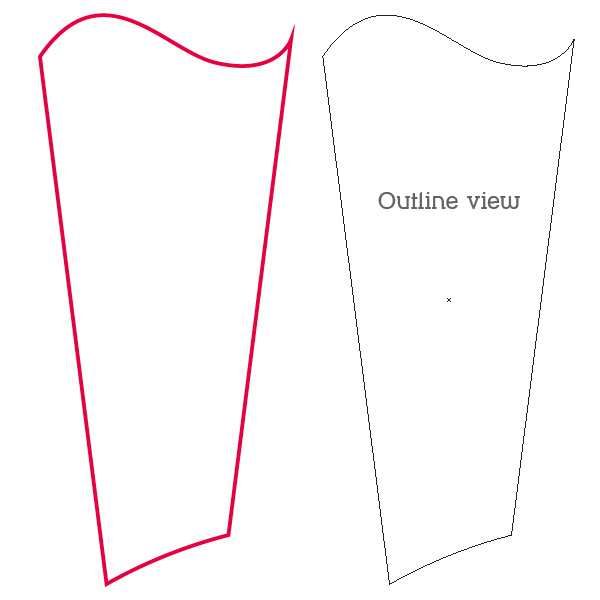
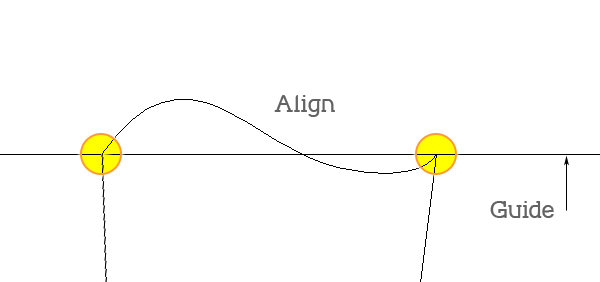
Step 5
Rotate the shape so that the left edge is at 90 degrees. It will help to drag a guideline out from the left ruler and line it up.
Make sure that the two top points are aligned. Again, it will help to draw out a guide. Adjust the points using the Direct Selection Tool if necessary. You now have the basic “fold” shape.
Step 6
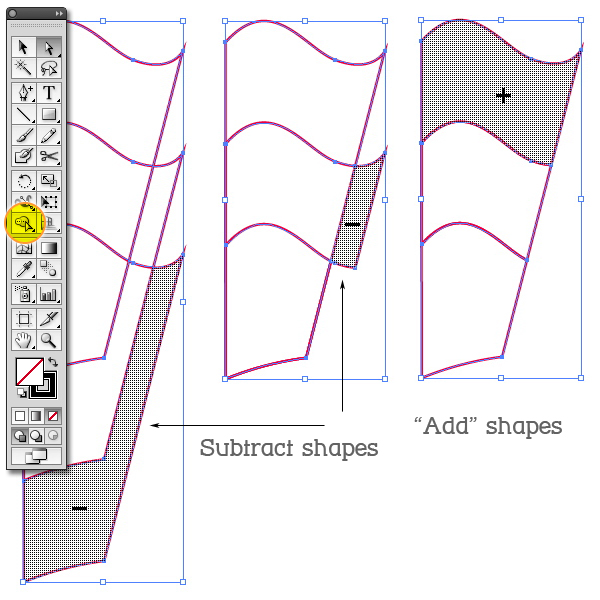
Select the fold shape and while holding down the Alt key, drag down about one third to make a copy. Press Command + D to make another copy. We will divide the fold into three sections.
Use the Shape Builder Tool (Shift + M), to subtract excess shapes. Holding down the Alt key will make the tool subtract. Then click on each of the remaining three sections so that they become individual shapes (note that this tool is only available in Illustrator CS5).
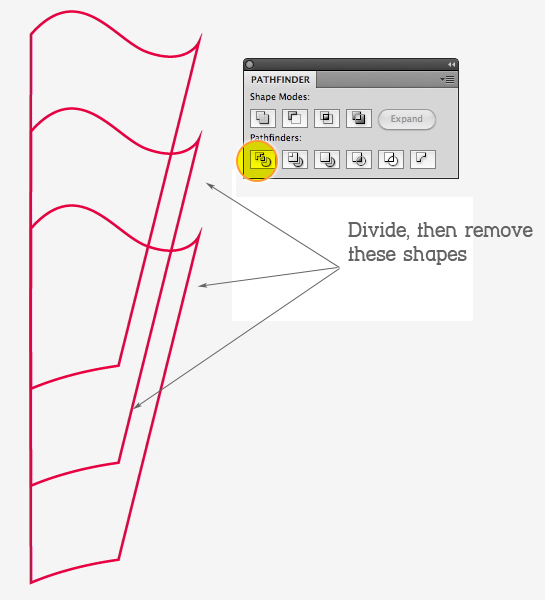
For CS4 and earlier versions, you may select the three shapes, then press the Divide function on the Pathfinder panel. Use the Direct Selection Tool to remove the unwanted shapes.
Step 7
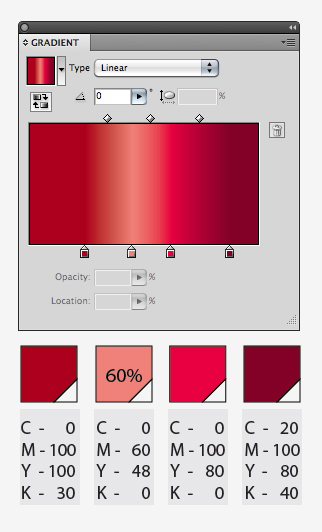
Create a four-stop gradient, as in the image below. I have used three global swatches — a bright red, medium red and dark red — plus a tint of one of them. Drag this gradient into your Swatches panel to save it.
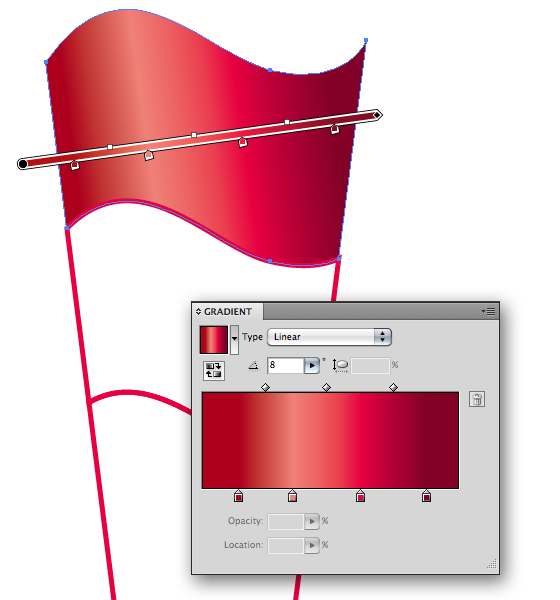
Step 8
Drag with the Gradient tool (G) across the top shape at a slight angle. Use the Gradient Annotator to position the gradient so that the highlights and shadow follow the curves of the shape, as in the image below.
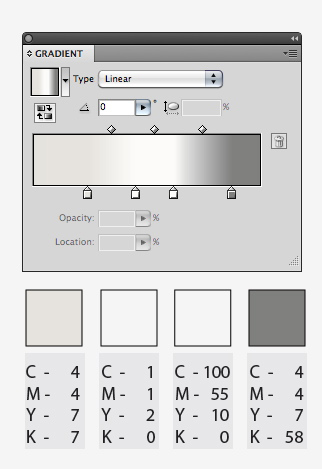
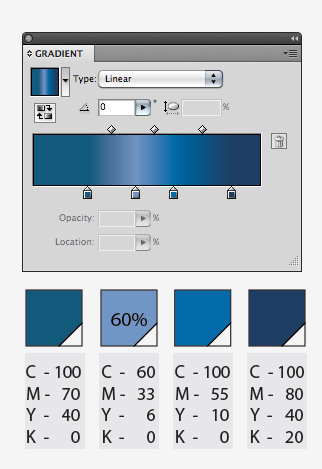
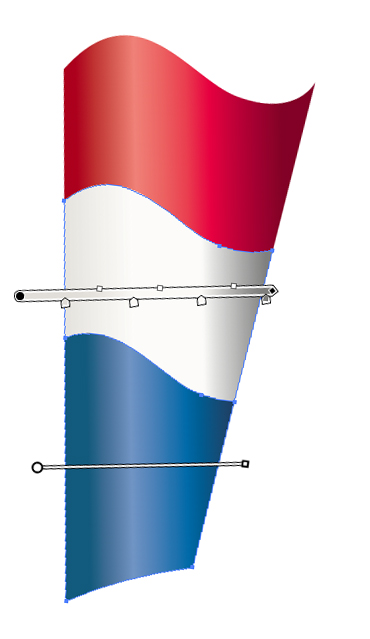
Step 9
Now make two more gradients based on the red one, in blue and white. Fill the remaining two sections with each gradient, and position them as before. The highlights and shadows on each section should line up, so that the combined shapes look like one piece of tri-colored fabric. Group the three sections.
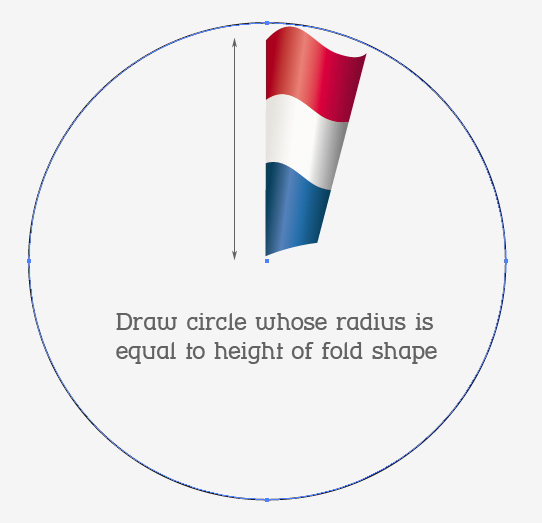
Step 10
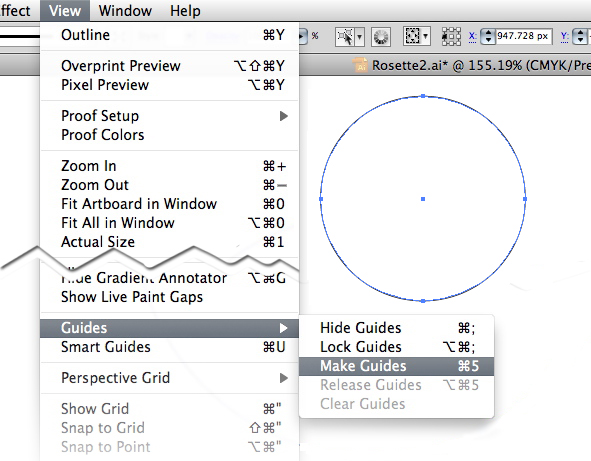
Draw a circle that’s about twice as tall as the fold shape. That is, the radius of the circle should be about equal to the height of the fold shape. Keep the circle selected and go to View > Guides > Make Guides. The keyboard shortcut is Command + 5. Draw out a vertical guide that bisects the circle guide.
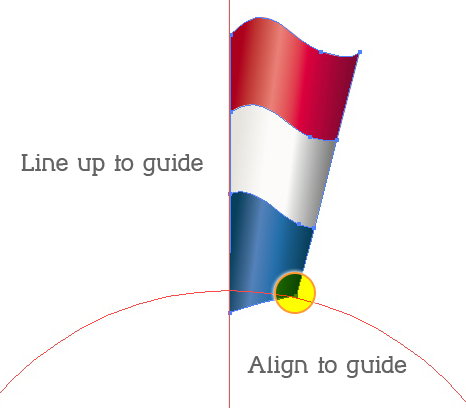
Step 11
Position the fold shape so that its left edge lines up with the vertical guide, and its lower right point aligns to the circle guide.
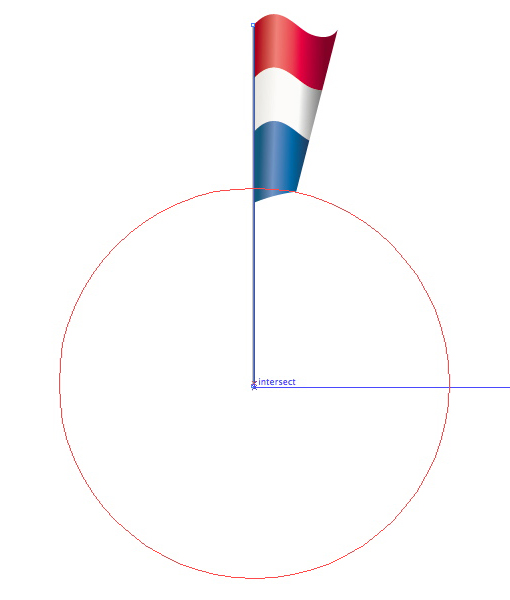
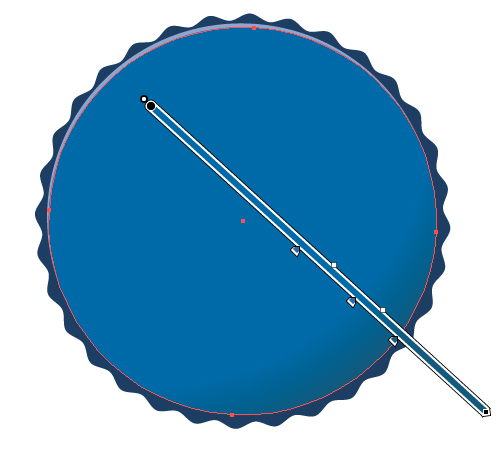
Step 12
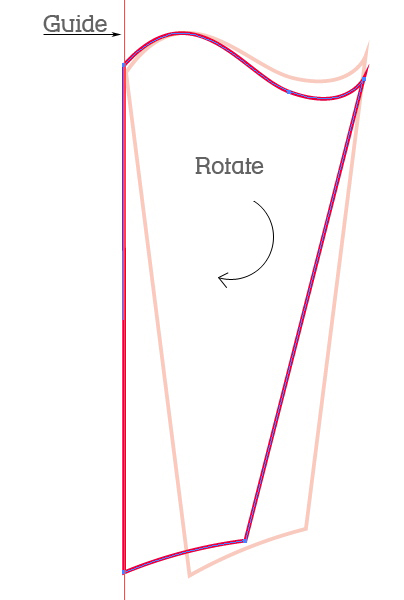
Draw a vertical line using the Line Segment Tool (\) or the Pen Tool (P) that aligns to the left edge of the fold shape. Extend it until it meets the center of the circle guide. Turn on Smart Guides (Command + U) to help position it. This path can have any color — it is just a “helper” and will be deleted later. Group the new path and the fold shape.
Step 13
Go to Effect > Distort & Transform > Transform. Check the Preview box. Click the lower left square on the 9-square grid proxy. This will be the reference point for the transform effect. Enter a positive value in the Rotate field, about 12 degrees. You’ll see the rotation preview on screen. Make sure that the rotated shape will overlap the original. Use the up or down arrow keys to change the rotate angle until it overlaps slightly, with no gaps.
Enter a number in the Copies field, so that there are enough copies to complete the circle. Again, add or subtract using the arrow keys to adjust.
Step 14
Go to Object > Expand Appearance. Now select the helper lines with the Direct Selection Tool (A) and press the Delete key twice to delete them.
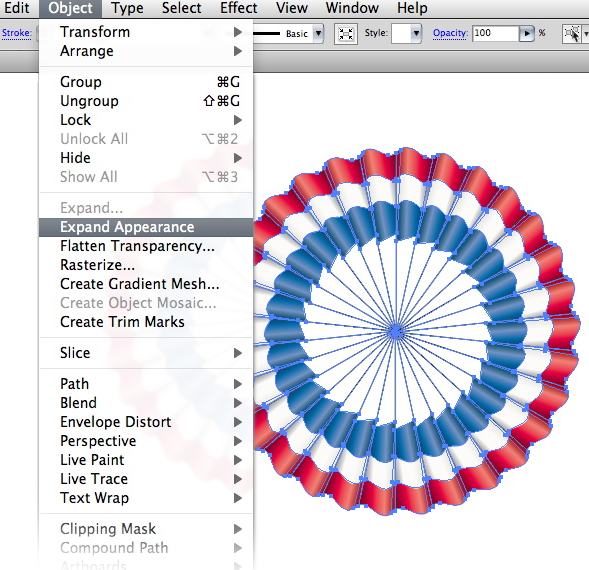
The last fold in the series will overlap the original one — don’t worry about it, we’ll cover it up later.
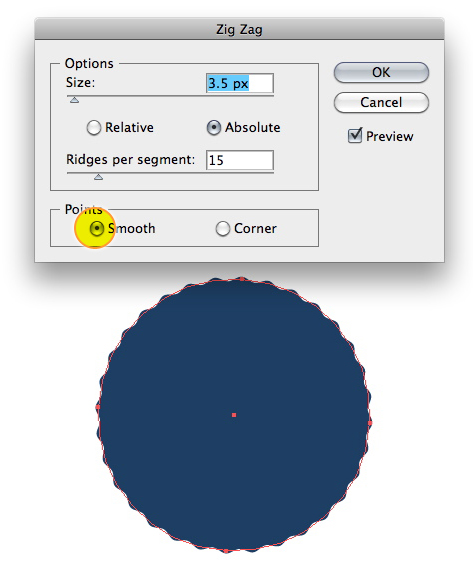
Step 15
Draw a circle for the center piece. Go to Effect > Distort & Transform > Zig Zag. Choose Smooth points and enter 15 in the Ridges per segment field. This should give you 32 ridges (I know, it doesn’t really make sense). Expand the appearance and place this shape in the center.
Step 16
Draw a circle and fill it with a radial gradient that is made up of 2 stops of the bright blue and one of the medium blue. Drag the gradient across the circle so that just a bit of the darker color is visible on the bottom right, to give the circle a little dimension.
Copy and paste this circle behind the original. Use the Paste in Back command (Command + B) from the Edit menu. Fill the copy with a tint of the light blue, and nudge it up and to the left one or two clicks, for a highlight.
Center these circles on top of the zig-zagged one.
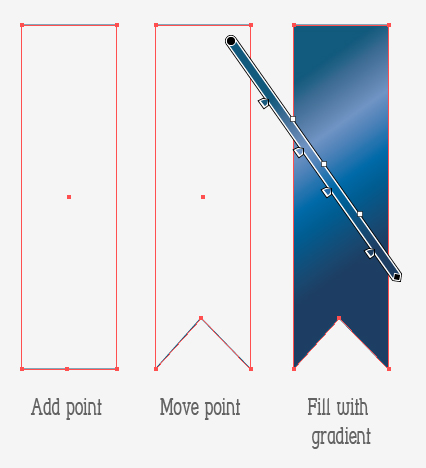
Step 17
For the ribbons, draw a thin rectangle, then add a point at the center of the bottom segment. Drag the point up to form the ribbon shape, then fill the shape with the blue gradient.
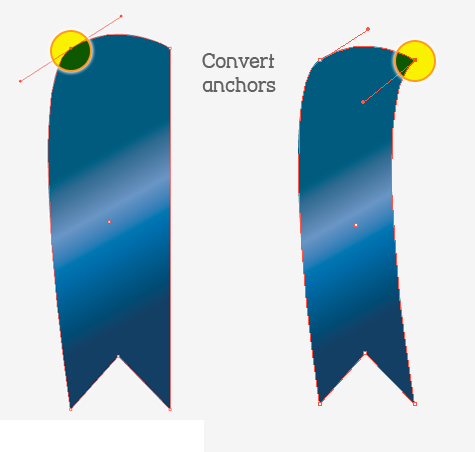
Step 18
Take the Convert Anchor Tool (Shift + C), and drag the upper left point so that the left side of the ribbon is curved. Do this with the upper right corner, then adjust the paths with the Direct Selection Tool. Make two copies, one each for the red and white gradients.
Step 19
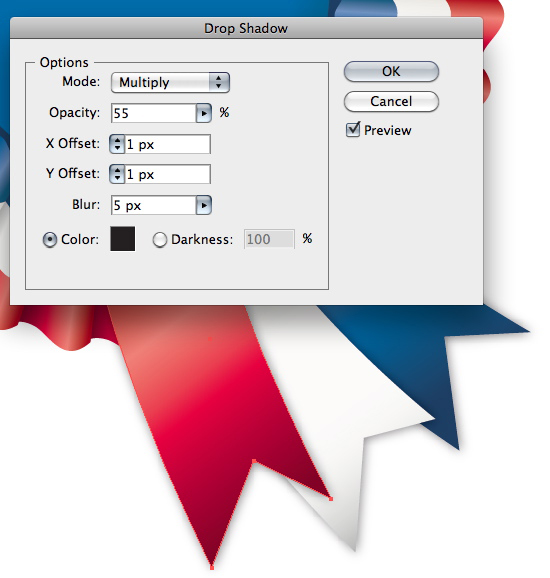
Position the ribbons underneath the center circles. Adjust the gradients if necessary, with the Gradient tool.

Now go to Effect > Stylize > Drop Shadow and add a slight shadow to each of them.
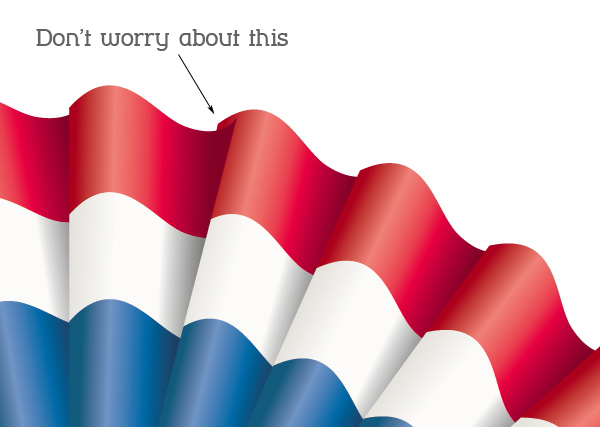
Remember the overlap in Step 14? Rotate the rosette so the overlapping part is hidden underneath the ribbons, and you’re done!
Conclusion
As with many vector illustrations the beauty of this one is its versatility. Spending the time up front to create the individual elements will make it super quick and easy to change colors for any occasion.