Sorry for the long delay in continuing this series. I just moved across the country which took a bit more time and effort than I had originally hoped. In getting back on track with this tutorial, we are going to begin to look at some interesting ways of setting up our mix routing to maximize our mix-down flexibility; allowing us to shape our sounds into something with a more personal and artistic feel. As with any artistic endeavor, many of the settings and choice of effects shown here are going to be largely subjective, but much of the routing and underlying principals will help give you a solid jumping off point in making your mixes and sounds more diverse, interesting and personal.
The first thing we are going to do is set up the routing of our most important elements (kick, bass, snare, hi-hat & vocal). I usually like to set up the kick, snare and sometimes the bass in much the same way so as to ‘de-correlate’ the sounds. De-correlation is basically the splitting up of a sound into different frequency ranges (low/high) or into it’s constituent parts (bass fundamental/twang; basically low/high again), applying different processing or plugins and then recombining them to form a new and cohesive sound.
Kick
For the kick, I have set up the mix routing so the original channel has no output and the original signal is sent to both a low and high pass filter on separate auxiliary channels via bus sends 1 & 2 on the original channel. The low and high passed channels are then recombined by routing both outputs to auxiliary channel 4. Additionally, I have initiated a bus send on both de-correlated channels to auxiliary 3 where I may place some type of special effect later (such as distortion).
I have routed to the effect channel in this way to allow flexibility in the amount of signal I send to the effect in regards to low vs. high. This optional special effects channel is in turn sent to auxiliary 4 which is my kick sub-mix channel. This channel acts as the ‘glue’ and will almost definitely undergo further processing in the form of EQ and compression to more effectively shape the separate inputs into a single sound. This channel is then sent to auxiliary 25 which will be my drum kit sub-mix channel (where all of my individual, final drum sounds will be sent), which in turn will undergo further processing to make the entire kit sound as one instrument.
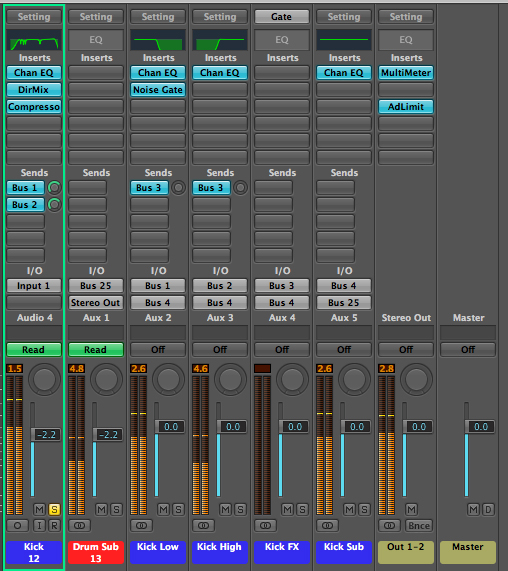
The kick flows from the ‘kick’ channel to the ‘kick low/high’ channels. From there it is recombined at ‘kick sub’ channel and then sent out through the ‘drum sub’. Additionally there is an optional kick FX channel being routed to the kick sub that is not presently in use.
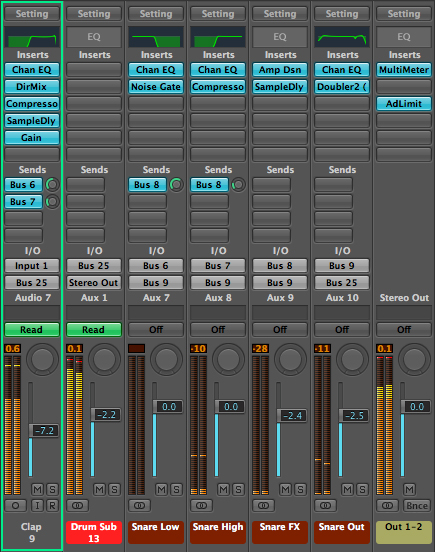
Snare
The snare has been set up in exactly the same way so as to de-correlate the sound. The only difference being the aux send numbers as those are going to be unique to the snare.
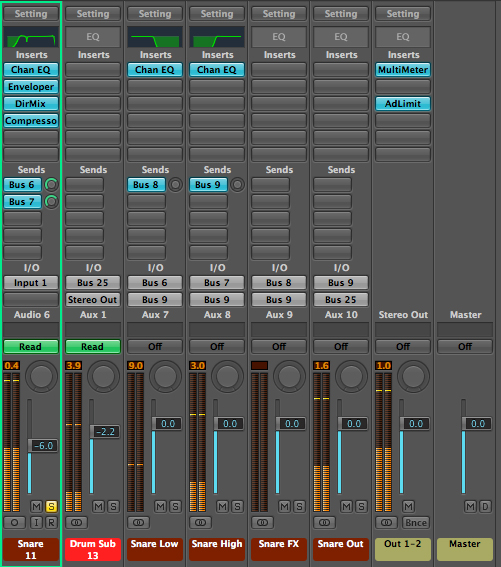
The snare follows the same routing principle as the kick, however it is sent to its own distinct aux channels for independent processing.
Bass
The initial bass setup is again very similar to the kick except for the addition of an extra effects channel (which may or may not be used, I just know I generally like to use a number of amp models on bass, so know to plan ahead). The bass sub-mix channel is also going directly to the stereo output rather than to a group sub-mix, as this is the only bass in this particular song. I have also added a noise gate to the low passed portion of the bass which will be set later to keep the low end tight and succinct.
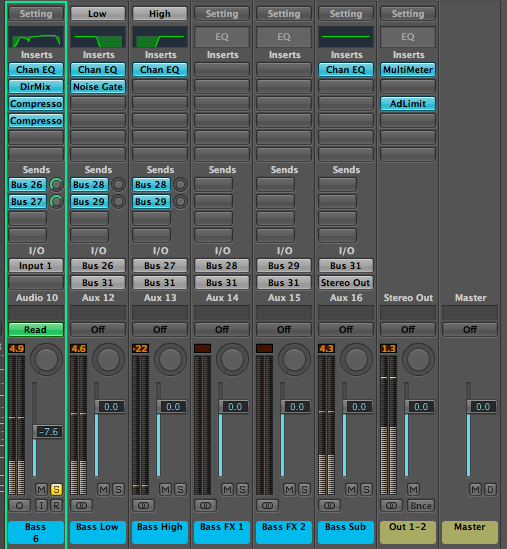
Once again, the bass follows the same basic principle as above, however this time there is an extra effects channel added.
Hi-Hat
I’ve basically just set up two effects channels for the hi-hat (one with an amp on it as I usually like to add some sparkle to the hats) and routed them with the original signal to a single sub-mix channel. This is then routed to the drum sub-mix where it will be recombined with the rest of the kit.
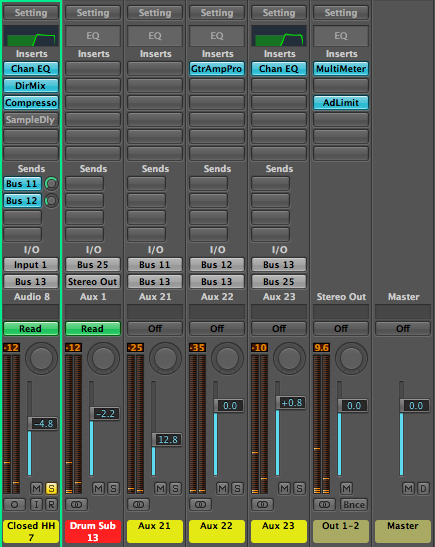
The routing principle of the hi-hat is a basic effects send set up which then goes to the drum submix channel.
Additional Percussion
In this particular song we have a few additional percussion elements; namely an open hi-hat, clap and rim. I will route the open hi-hat in the same way as the closed hat, as they would be mic-ed and routed the exact same in a ‘real’ recording set up. I will also route the clap the exact same as the snare as it serves primarily as an accented snare hit in this song (although processing it as its own distinct entity and recombining it with the kit down the road would not be a bad strategy either.
For sake of space and time, we’ll just treat it as described for now). For the rim, I will give myself a few more options and set it up with its own unique effects channel and sub channel as it is serving as its own distinct percussive element.
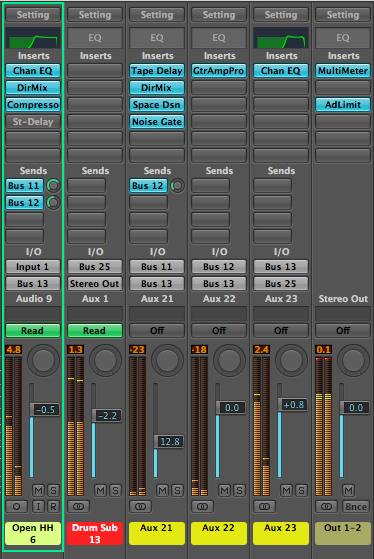

The three images above show the open hi-hat and clap being routed to related elements while the rim has its own distinct routing.
Keys and Synth
The keyboard and synth elements are pretty straight forward as well, so I’m really not going to do much more than send them to two effects sends and then recombine those sends at a keyboard/synth sub-mix respectively.

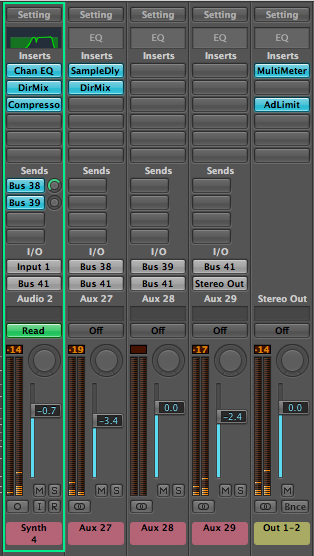
The keys and synth have basic, yet distinct routing paths.
Vocals
Vocals are generally pretty subjective, so really all of my decisions here are going to vary depending on the type of sound I am going for and how I want to creatively use FX. I first multi-tracked the vocal by copying the audio track twice (something you are usually always going to want to do). I then created a chorus/delay effect by pitch shifting one of the copies down slightly and also delaying it slightly. I then applied a slight pitch shift up to the remaining copy and delayed it by a different amount.
I gave it a larger width by creating a chorus effect track and widened it with the direction mixer. I also cut out much of the low end from the chorus track as you are usually going to want to place lower and main vocals toward the center and leave the higher chorus elements to inhabit the sides. I really just added the extra FX tracks (rotor & distortion) to add a bit more character to the sound and then worked back and forth a bit between the DeEsser and EQ on the vocal output to get rid of as much sibilance as possible. I then put a slight compression on it to help the vocal punch through he mix, while being careful to maintain as much original dynamic character as possible.
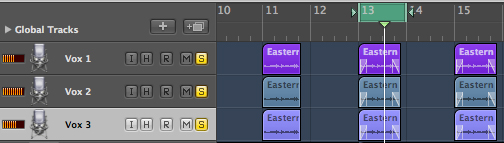
The multitracked vocals.
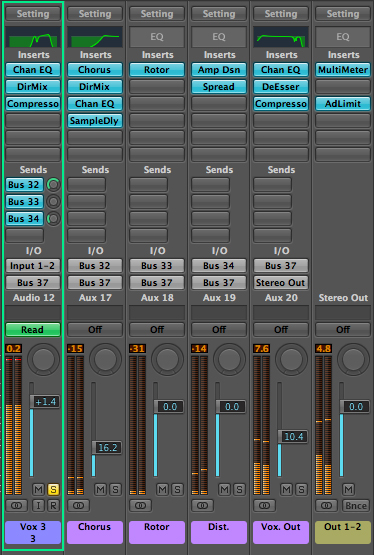
Although this image only shows the ‘Vox 3′ channel, all three vocal tracks are routed in the exact same way.
Drum Sub-Mix
For the drum sub-mix channel, I am simply going to put on an EQ and a compressor. I am putting the EQ on at this point and not really going to touch it until I am ready to go through my (more or less) final EQ pass. I am also going to mess around with the compressor, just slightly, in order to make sure the dynamics are controlled and that everything is peaking at more or less the same level with no major overs, but saving the final setting for a bit later.
At this point, things are sounding much better than when we started. we have everything acting in it’s own frequency and stereo space, so 2 of our three dimensions are pretty well covered. Next time, we will look at the depth aspect of our mix and accentuate that with careful placement of reverbs and delays before moving on to our final steps.
Download audio file (oldloop.mp3)
The initial loop.
Download audio file (newloop.mp3)
The loop as it sounds now.