Apple provides a control knows as the UIPickerView, with which a user can select an item from a list. In this tutorial you will learn how to create a simple picker view. Click on “Read more…” to continueIntroduction
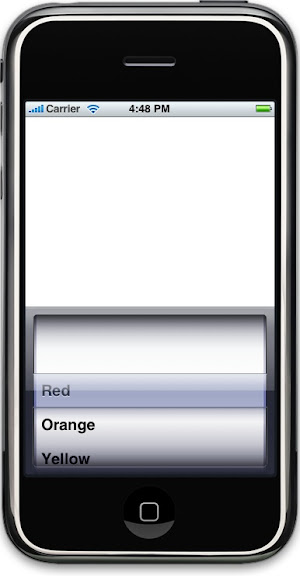
The picker view lets the user select an item from a list. In this tutorial, you will learn how easy it is to configure a picker view and respond to events. This is how the app will look like
Creating the project
Create a new project by selecting “Windows-Based Application”, I have named my project “PickerView”. I also added another view called “PickerView” and created a view controller for the view called “PickerViewController”. Add a UIPickerView to the view and create all the right connections. The “PickerViewController” implements two protocols and this is how the header file looks like
//RootViewController.h
#import <UIKit/UIKit.h>
@interface PickerViewController : UIViewController <UIPickerViewDataSource, UIPickerViewDelegate> {
IBOutlet UIPickerView *pickerView;
NSMutableArray *arrayColors;
}
@end
The connections of the picker view looks like this
 This is how the UIPickerView is added to the subview of the window.
//RootViewController.m
- (void)applicationDidFinishLaunching:(UIApplication *)application {
pvController = [[PickerViewController alloc] initWithNibName:@"PickerView" bundle:[NSBundle mainBundle]];
[window addSubview:pvController.view];
// Override point for customization after application launch
[window makeKeyAndVisible];
}
Creating the data source
Lets create a data source, with all the colors in a rainbow. The array is declared in the header file and released in the dealloc method. It is populated in viewDidLoad method and this is how the code looks like
//PickerViewController.m
- (void)viewDidLoad {
[super viewDidLoad];
arrayColors = [[NSMutableArray alloc] init];
[arrayColors addObject:@"Red"];
[arrayColors addObject:@"Orange"];
[arrayColors addObject:@"Yellow"];
[arrayColors addObject:@"Green"];
[arrayColors addObject:@"Blue"];
[arrayColors addObject:@"Indigo"];
[arrayColors addObject:@"Violet"];
}
The picker view can be divided into components, we need to specify how many components to display. This is done in numberOfComponentsInPickerView method. This is how the source code looks like
//PickerViewController.m
- (NSInteger)numberOfComponentsInPickerView:(UIPickerView *)thePickerView {
return 1;
}
Now that the picker view knows how many components it should expect, we need to specify how many rows it should display. This is done in pickerView:numberOfRowsInComponent. This is how the source code looks like
//PickerViewController.m
- (NSInteger)pickerView:(UIPickerView *)thePickerView numberOfRowsInComponent:(NSInteger)component {
return [arrayColors count];
}
The method pickerView:titleForRow:forComponent gets called n number of times, where n is the number returned in pickerView:numberOfRowsInComponent. This is how the source code looks like
//PickerViewController.m
- (NSString *)pickerView:(UIPickerView *)thePickerView titleForRow:(NSInteger)row forComponent:(NSInteger)component {
return [arrayColors objectAtIndex:row];
}
In the above code, we return the object at index using the row parameter. Here we ignored the component parameter, as we only have one component to display. If you have more then one component, then we return the row present in that given component. Run your application to see the values in the picker view.
Handling Events
The method pickerView:didSelectRow:inComponent is called when an item is selected in the picker view. In the example, I simply log the selected color and the row number. This is how the code looks like
//PickerViewController.m
- (void)pickerView:(UIPickerView *)thePickerView didSelectRow:(NSInteger)row inComponent:(NSInteger)component {
NSLog(@"Selected Color: %@. Index of selected color: %i", [arrayColors objectAtIndex:row], row);
}
Conclusion
Picker view is a perfect control to display a list of items, from which one single item can be selected. In this tutorial, we saw how easy it is to configure a picker view and respond to events. I hope this tutorial has helped you in some little way. Stay tuned for some more tutorials on the UIPickerView object.
Happy Programming,
iPhone SDK Articles
Attachments
Suggested Readings