Awesome Links #6: Simplicity, Blog Writing, Time Management

Zen Habits explores what it calls the “Clean Slate Method” to simplify your life by getting rid of things you don’t need.

7 Deadly Blog Writing Sins

A must-read for bloggers, this article talks about the common mistakes bloggers make that causes a decline in their readership.

How Google Works – Infographic

A detailed infographic on the steps Google’s spiders go through before returning you those accurate results for your search queries.

20 Quick Tips For Better Time Management

Use Stepcase Lifehack’s quick tips on time management to make more effective use of your time.

7 Social Marketing Strategy Mistakes That Cripple Your Reputation

And lastly, our sister site Freelance Switch asks you to avoid these social marketing mistakes while finding work online.

Cubicle Hell: Dealing with Distractions in an Open-Office Environment

Are you in a cube farm or other open-office environment? If so, you know that no amount of snack machines, sofas, or fancy Herman Miller furniture can make up for the constant noise and interruptions.

For many years I worked on a team of introverts sandwiched between two of my company’s most extroverted teams. Sitting out in the open with lots going on around me made it tough to be productive.

Here are some ways I coped with cubicle hell, and some new methods I’ve discovered since. Hopefully these will help you too.

1. Earplugs are your friend

I invested in some heavy-duty earplugs. They didn’t block noise completely but they definitely took the edge off. Tip: wear earplugs and headphones. The earplugs drown out surrounding chatter but you’ll still be able to hear the music. Try it! And remember, earplugs take a while to get used to, so definitely stick with them for a week or so.

2. Build a social wall with headphones

Besides the obvious benefit of listening to music, headphones say “I’m working don’t bother me”. Wear them even when you’re not listening to music. You’ll find people are less prone to interrupt you for no good reason. I found very visible headphones worked well as a social wall and were best at blocking external sounds.

3. Use calming noises to mask sound

Sometimes listening to music can be too distracting. Fans, desktop water fountains, and listening to flowing water sounds on your headphones are all great ways to take the edge off. Try Rainymood.com, a free website that plays the soothing sound of rain.

4. Cancel noise all together

I’ve never tried noise-cancelling headphones, but if I still worked in a cube, I definitely would. They can be very expensive though, so if you can, test them out before buying. Here are some great noise-cancelling headphone reviews from CNET.

5. Draw the line with neighbors

It’s important to be friendly and social in the office but draw the line with overly chatty neighbors. “I have to work right now”, “Talk to you later”, and “OK Bye” are all appropriate responses while you turn your back and get back to work. They may keep talking for a while, but if you don’t interact, they will eventually get the message.

6. Be strategic about seating

If you can control the location of your desk, be strategic. Don’t sit near benches or sofas where people can gather, outside the doors of meeting rooms or with your back to an aisle. All these locations make you a target for interruptions.

7. Work at non-peak times

Do your really crunchy work at the end of the day, early in the morning, or over lunch when people aren’t around. At non-peak times the office is quieter and you’ll naturally get more done. Once in a while I’d work late on a Thursday night so my Friday wouldn’t be so stressful. Then I’d leave early.

8. Work from home

This goes without saying. Try and strike a deal to work one day a week at home. Mid-week is best. Mondays and Fridays are already quiet because people like to take those days off.

9. Beware of the machines

Don’t sit near the coffee maker or the copy machine. The mechanically-challenged will continually ask for your help. If you’re forced to sit near the kitchen or a copier, my condolences. Besides self-medicating on toner fumes, use body language and headphones that say, “I’m working, don’t bug me.”

10. Work in a meeting room

Book out the time and the space in advance, so it’ll pop up on your calendar. Set up your laptop and put a bunch of papers across from you. You’ll have the meeting room to yourself and it’ll look like someone else is in there, so the odds of getting kicked out are reduced.

11. Talk to your boss

Don’t suffer in silence if your office is really noisy. Speak to your boss about it. Mine definitely understood the toll taken by noise and helped plan seating arrangements accordingly. In my case, things could have been much worse.

Have another tip? Feel free to leave them in the comments.

100+ Beautiful Examples of Bokeh Photography

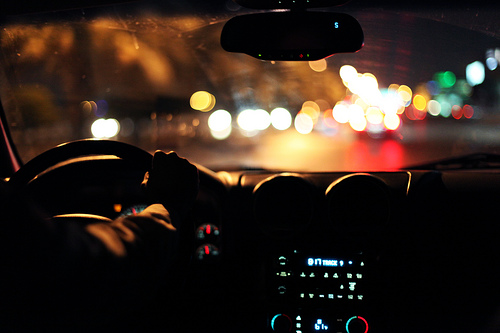
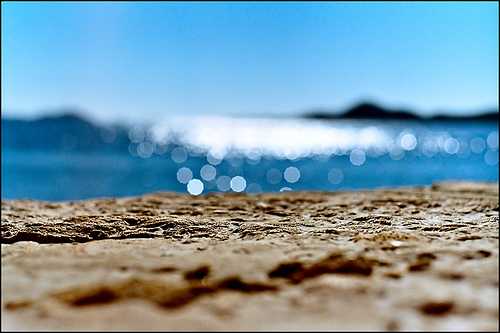
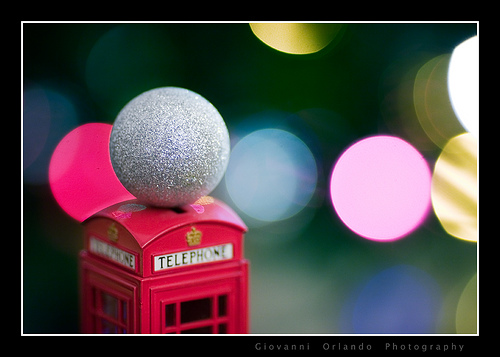
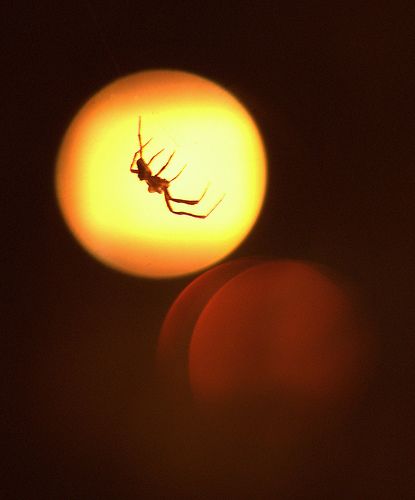
Today we’re going to be taking a look at the photographic effect known as bokeh. Although bokeh is simply “blur”, using it in an effective fashion can add real style and depth to your images. We’ll point you in the right direction to learn more about this technique, and showcase over a hundred stunning examples of bokeh photography.


Learning About Bokeh

In photography, bokeh is the blur, or the aesthetic quality of the blur, in out-of-focus areas of an image, or “the way the lens renders out-of-focus points of light” (source). It’s often most visible around lights in your image background, but blur actually occurs in any out-of-focus areas in your images.

Want to find out more about bokeh? We’ve published a few tutorials relating to what it means, and how you can easily re-create it in your own photography. Take a look at one of the following articles plenty of extra information:


100 Stunning Bokeh Photography Examples

Paul Hocksenar

Beautiful Bokeh Photography Examples

Nick Bradsworth

Beautiful Bokeh Photography Examples

Sara Kiesling

Beautiful Bokeh Photography Examples

Mario

Beautiful Bokeh Photography Examples

Lindsey

Beautiful Bokeh Photography Examples

Agnisoonu

Beautiful Bokeh Photography Examples

Mario

Beautiful Bokeh Photography Examples

Gege

Helen Sotiriadis

Zita

Jasmine

Beautiful Bokeh Photography Examples

Abby Lanes

Beautiful Bokeh Photography Examples

Jeni

Catarina

Beautiful Bokeh Photography Examples

Maureen

Siebe Warmoeskerken

Beautiful Bokeh Photography Examples

Ross Reyes

Beautiful Bokeh Photography Examples

Nawaf Hazeem

Mulia

Beautiful Bokeh Photography Examples

Les Lengyel

Beautiful Bokeh Photography Examples

Ryan O. Hicks

Michaela Rother

Beautiful Bokeh Photography Examples

Romain Ballez

Beautiful Bokeh Photography Examples

Diego Sevilla Ruiz

Beautiful Bokeh Photography Examples

Tori Steffen

Tracey Telik

Beautiful Bokeh Photography Examples

DerNetteAlex

Beautiful Bokeh Photography Examples

Anika Sablan

Beautiful Bokeh Photography Examples

Fabio Sabatini

Palakorn

Beautiful Bokeh Photography Examples

Joni Niemelä

Beautiful Bokeh Photography Examples

Jes

Beautiful Bokeh Photography Examples

Akhilesh Sharma

Beautiful Bokeh Photography Examples

Melissa

Beautiful Bokeh Photography Examples

Vjekoslav Bobi?

Beautiful Bokeh Photography Examples

John

Beautiful Bokeh Photography Examples

Gabriel Asper

Beautiful Bokeh Photography Examples

Anna Gay

Beautiful Bokeh Photography Examples

Ryan O. Hicks

Beautiful Bokeh Photography Examples

Agnisoonu

Kit Hung

Beautiful Bokeh Photography Examples

Stuart

Nicki Summerson

Beautiful Bokeh Photography Examples

Kevin Farris

Beautiful Bokeh Photography Examples

Crezalyn Nerona Uratsuji

Beautiful Bokeh Photography Examples

Weihao87

Beautiful Bokeh Photography Examples

Johnny Patience

Beautiful Bokeh Photography Examples

Nasos Zovoilis

Beautiful Bokeh Photography Examples

Natalia Campbell

Beautiful Bokeh Photography Examples

Fabio

Beautiful Bokeh Photography Examples

Adriana Giglio

Beautiful Bokeh Photography Examples

Thomas Lottermoser

Beautiful Bokeh Photography Examples

Erwin

Beautiful Bokeh Photography Examples

Sergei Chumakov

Beautiful Bokeh Photography Examples

Kelly

Beautiful Bokeh Photography Examples

Shaina

Beautiful Bokeh Photography Examples

Azzam Merchant

Beautiful Bokeh Photography Examples

Sarah Bernhard

Beautiful Bokeh Photography Examples

GlennWaters

Beautiful Bokeh Photography Examples

Van Yuen

Beautiful Bokeh Photography Examples

Lee

Beautiful Bokeh Photography Examples

Lotfi Dakhli

Beautiful Bokeh Photography Examples

Dennis William Gaylor

Beautiful Bokeh Photography Examples

eRiz

Beautiful Bokeh Photography Examples

Kimberly Clark

Beautiful Bokeh Photography Examples

Josh Libatique

Beautiful Bokeh Photography Examples

Yuji Shoda

Beautiful Bokeh Photography Examples

Ilias o

Beautiful Bokeh Photography Examples

David L

Beautiful Bokeh Photography Examples

Sara

Beautiful Bokeh Photography Examples

Kristine May

Beautiful Bokeh Photography Examples

Roger Lim

Beautiful Bokeh Photography Examples

Giovanni Orlando

Beautiful Bokeh Photography Examples

Nest

Beautiful Bokeh Photography Examples

Jordan Chark

Beautiful Bokeh Photography Examples

Adam Furgang

Beautiful Bokeh Photography Examples

Erik Forsberg

Beautiful Bokeh Photography Examples

Karin Eberhard

Beautiful Bokeh Photography Examples

Moogibang

Beautiful Bokeh Photography Examples

Emma

Beautiful Bokeh Photography Examples

Val Petras

Beautiful Bokeh Photography Examples

Neuza Teixeira

Beautiful Bokeh Photography Examples

Art Flow

Beautiful Bokeh Photography Examples

Florian Sprenger

Beautiful Bokeh Photography Examples

Joey Makalintal

Beautiful Bokeh Photography Examples

Martin Dorigny

Beautiful Bokeh Photography Examples

Jonathan Harris

Beautiful Bokeh Photography Examples

BrandonWarren

Beautiful Bokeh Photography Examples

Agnisoonu

Beautiful Bokeh Photography Examples

Harold Lloyd

Beautiful Bokeh Photography Examples

David Olkarny

Beautiful Bokeh Photography Examples

Ryan Connors

Beautiful Bokeh Photography Examples

Janna Pham

Beautiful Bokeh Photography Examples

Hoài Nam

Beautiful Bokeh Photography Examples

Jim Ward

Beautiful Bokeh Photography Examples

Milen

Beautiful Bokeh Photography Examples

David Lin

Beautiful Bokeh Photography Examples

Sylvia

Beautiful Bokeh Photography Examples

Roger Lim

Beautiful Bokeh Photography Examples

Faisal Al Ali

Beautiful Bokeh Photography Examples

Reni Li Wu

TMAB2003

Inma

Beautiful Bokeh Photography Examples

Michael Elford

Zuzana

Beautiful Bokeh Photography Examples

Tian Chew Lim

Beautiful Bokeh Photography Examples


Related Bokeh Resources

Here are a few resources that can help you acheive a similar effect.

How to Achieve Better Bokeh – 4 Simple Tips

50+ Lens Bokeh Comparison

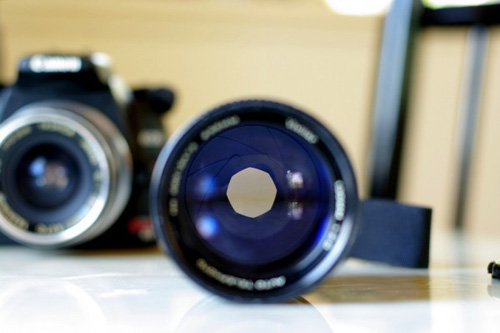
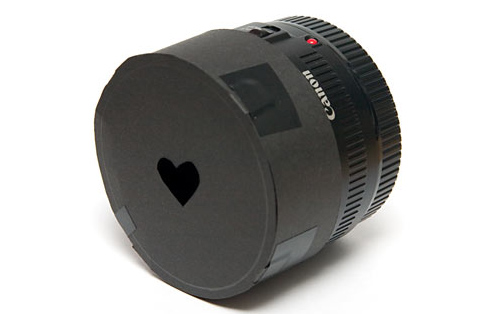
DIY – Creating Custom Shape Bokeh

Custom Bokeh With the Bokeh Masters Kit


Digital Bokeh

Though using digital bokeh wouldn’t do justice to your photographic skill, you can still try these tutorials and pre-made PS brushes. These are extremely useful if you are a Graphic Designer or plan to be one in future.

Shape Bokeh Photoshop Tutorial

Bokeh Effect Photoshop Tutorial

Digital Brush Presets


Share Your Images!

Do you have a few examples of bokeh photography you’d like to share? We would love to see them! Just paste a link to your image(s) below in the comments so everyone can take a look.

Best of luck with exploring this fascinating area of photography for yourself!

Easily Create Stunning Panoramic Images Without an Expensive Lens

Panoramic photography is the process of capturing an extremely wide field of view into a single photograph either by using specialized equipment, or specialized software. Today we’ll be looking at the latter of those two and examining how you can create your very own panoramic images with Adobe Photoshop, using almost any camera and lens.


Understanding Panoramic Photography

The word “panorama” was coined in the 1780′s by an Irish artist named Robert Barker. He used the word to describe a technique which had invented for painting a scene on the inside of a large cylinder, creating the illusion of a natural 360 degree view to anyone standing at the center.

There is no official divide between wide-angle photography and panoramic photography, but it’s a generally accepted rule that panoramic photographs take in approximately the field of view visible by the human eye, or slightly more. The purpose of panoramic photography is to capture an entire scene rather than just a single portion of it. For this reason it’s a popular technique amongst landscape photographers in particular.

Outside of the truly specialized panoramic lenses, you’ve probably already seen what the more common fisheye lens can do, pulling in the world around it and distorting it into a round shape. Often used in skateboarding and other extreme sports photography, fisheye lenses are the first step to getting the whole scene into the photograph while remaining close to the subject.

True panoramic photography, however, does not distort the entire image as much as fisheye lenses typically do. Where the fisheye expands the field of view both horizontally and vertically, generally speaking the focus of panoramic photography is only horizontal. Of course landscapes aren’t the only subject suited to this style of photography, all the birds flocked around the lake in the picture above are a perfect example of expanding the field of view for a good reason.


Creating Your Own Panoramic Image

If you come across a scene which you think would be perfectly suited to a very wide-angle panoramic image, then you can create one almost completely regardless of what camera or lens you have with you. The only real limitation is that the scene which you want to photograph has to be static. You’re going to need to take multiple photographs of the same location, which won’t work if there’s a lot of movement within the frame.

Step 1

The first thing you’re going to need to do is find a good location to take your shots from. What you’re going to do is stand in a single place, and then take photos starting at one side and working your way over to the other. Preferably you should us a tripod for this and rotate it around on the same spot, however it’s not essential. Either way, you need to be somewhere where you have ample space to turn around and your view isn’t obstructed in any direction.

I was in Spain recently on a bloggers press trip organized by the Land of Valencia and happened to find this rather nice spot at the top of a nearby mountain overlooking Benidorm, so this is where I stood.

Step 2

Now you need to take all the photos which are going to make up your panoramic photograph. The easiest thing to do here is to start at the left, and pick out a landmark on the right hand side of your frame. Take the shot, then move that landmark from the right hand side of the frame to left hand side.

Pick out a new landmark on the right, take the shot, and continue. This ensures that all the photos which you take will overlap properly without leaving any gaps between them.

Pay close attention to how you’re standing, try to keep the camera level and follow the horizon to make sure you don’t go up or down as you pan across.

Here are the photos which I took from the above location, which you’ll see have quite a large overlap. Realistically you don’t have to allow that much overlap, but it’s always better to waver on the side of caution. Too much overlap is better than not enough overlap – also known as gaps!

Step 3

The next step is to post process all the images in your series, but remember that you have to process them all in the same way or they won’t match up. If you add vibrancy and sharpening to one shot then you need to apply the same effects in the same amounts to all the other photos to stay consistent. A Photoshop actionmight help with this!

Step 4

Now we’re going to open up Adobe Photoshop (CS3 or higher). Make sure that you don’t have any files open in Photoshop, then select File > Automate > Photomerge. You can experiment with the different photo merging modes, however for most standard applications the Auto option will suffice.

Browse to the location where all the images to be blended are stored and add them to the dialog box.

Step 5

Hit the OK button, then give Photoshop a few minutes to work its magic. Some pretty hefty processing work is involved here, especially when working with large images from DSLR cameras. Once it’s finished you should end up with something like this:

Step 6

Choose the Crop tool (C) and then select the area inside the edges of the shape to find the composition of your final image. Once you’re happy with the selection, press enter, and you’re done!


The Final Image

There you have it, a full (and in this case, rather large) panoramic image created by stitching together multiple images. The best part is that each photo is still at full resolution, so if you wanted to print this then you could get it done at a seriously large size. Click here to see a bigger version of the final image.

This simple technique can come in handy for creating some really stunning panoramic images. Now that you know how to do it, make sure you’re always keeping an eye out for potential scenes which would be suited to this technique.

Finally, if you’ve taken any really great panoramic photographs yourself then we would absolutely love to see them so please do drop us a link in the comments below!

Photo credits, in order of appearance: Reinante El Pintor de Fuego, Stig Nygaard, Starka-Snap, JohnONolan.

Quick Tip: Try a Tripod Alternative

Continuing our look at interesting items to take on a shoot, this week we focus upon alternatives to the tripod. Tripods are necessary for many types of photography, but often are too bulky to take with us everywhere. In this article we took at a few uncommon alternatives to them.


What Does a Tripod Do?

If you do not know what a tripod does, you’re might be in the wrong trade (or a complete beginner, in which case our Basix series is a great place to start). A tripod simply holds your camera completely still, this allows for longer exposure times without any camera shake

Tripods come in many shapes and sizes but can be bulky, heavy and expensive. Often as photographers we end up without our tripod in the times we need it most. In this article we look at smaller, cheap and lightweight alternatives which are easy to take everywhere with us.

Image by unclefuz


The Gorillapod

You might have heard of the Gorillapod but never had the chance to use one. The Joby Gorillapod comes in many different sizes, for compact cameras, SLRs, and SLRs with telephoto lenses.

The main selling point about the Gorillapod is that it can be wrapped around almost any object – lampposts, table edges, you name it. You can get some really amazing angles which a standard tripod might not be able to offer. Joby also have released a magnetic Gorillapod which you attach to metal objects when out on a shoot.

Pricing starts at $24 for the compact camera (and lightweight SLR’s) and rises to around $60 for the stronger SLR pods able to hold heavy telephoto lenses. You can find unofficial imitations cheaper, but these might not have the same strength or quality as the official Joby pods. Check out the official website for more details.


The Pod

The pod is a very simple product. It acts as a glorified bean bag, supporting your camera on top of the soft cushion. It is a lot better than placing your precious camera on top of a hard rock wall when out and about.

The pod has a camera mount, which is the unique selling point. The green pod (SLR version) has the mount at the back so the lens is supported as well as the camera.

Disadvantages of the product include that it doesn’t have a firm grip on the surface, it can easily slip and ruin your photos, so is only really suitable on a flat base. It comes in fairly budget friendly at $12 for the compact camera and $20 for the SLR version. More details are available on the official website.


The Monsterpod

The Monsterpod is amazing, because the designers claim it can stick to over 1,000 surfaces. This means you can stick it on almost anything, without fear of it falling off. The claim is that it can hold a camera for at least a few minutes without slipping – This is perfect for most long exposure photography!

The main disadvantage is that it is only for compact cameras – a shame as almost all serious photographers use larger SLR’s. The price of the monsterpod is also a monster at $30, but if you want a small, lightweight and extremely stylish pod, this is the product for you.

</p


Other Products and Ideas

Here is a list of a few other ideas that might make your life easier:

  • Simply buy a plain bean bag – much cheaper and perfect for landscape photography.
  • Buy a cloth to stop scratching when you rest your camera on a surface.
  • A monopod is like a tripod, but with just one leg.

Or alternatively, you could always use your friends head! (courtesy of redsun81)


Thanks for Reading

Thanks for taking the time to read this Quick Tip. If you have any other suggestions, ideas, or recommended products to use as tripod replacements, be sure to let us know in the comments!

Deciphering Magic Methods in PHP


PHP provides a number of ‘magic’ methods that allow you to do some pretty neat tricks in object oriented programming. These methods, identified by a two underscore prefix (__), function as interceptors that are automatically called when certain conditions are met. Magic methods provide some extremely useful functionality, and this tutorial will demonstrate each method’s use.


Before We Begin

In order to fully understand magic methods, it’s helpful to see them in action. So let’s start with a base set of very simple classes. Here we define two classes: Device and Battery.

<?php
class Device {
    public $name;           // the name of the device
    public $battery;        // holds a Battery object
    public $data = array(); // stores misc. data in an array
    public $connection;     // holds some connection resource

    protected function connect() {
        // connect to some external network
        $this->connection = 'resource';
        echo $this->name . ' connected' . PHP_EOL;
    }

    protected function disconnect() {
        // safely disconnect from network
        $this->connection = null;
        echo $this->name . ' disconnected' . PHP_EOL;
    }
}

class Battery {
    private $charge = 0;

    public function setCharge($charge) {
        $charge = (int)$charge;
        if($charge < 0) {
            $charge = 0;
        }
        elseif($charge > 100) {
            $charge = 100;
        }
        $this->charge = $charge;
    }
}
?>

If words like “method” and “property” sound alien to you, you might want to read up on this first.

Device objects will hold a name, a Battery object, an array of data, and a handle to some external resource. They also have methods for connecting and disconnecting the external resource. Battery objects simply store a charge in a private property and have a method to set the charge.

This tutorial assumes you have a basic understanding of object oriented programming. If words like “method” and “property” sound alien to you, you might want to read up on that first.

These classes are pretty useless, but they make a good example for each of the magic methods. So now that we have our simple classes created, we can try out the magic methods.


Constructors & Destructors

Constructors and destructors are called when an object is created and destroyed, respectively. An object is “destroyed” when there are no more references to it, either because the variable holding it was unset/reassigned or the script ended execution.

__construct()

The __construct() method is by far the most commonly used magic method. This is where you do any initialization you need when an object is created. You can define any number of arguments here, which will be passed when creating objects. Any return value will be passed through the new keyword. Any exceptions thrown in the constructor will halt object creation.

class Device {
    //...
    public function  __construct(Battery $battery, $name) {
        // $battery can only be a valid Battery object
        $this->battery = $battery;
        $this->name = $name;
        // connect to the network
        $this->connect();
    }
    //...
}

Declaring the constructor method ‘private’ prevents external code from directly creating an object.

Here we have declared a constructor that accepts two arguments, a Battery and a name. The constructor assigns each of the properties that the objects requires to function and runs the connect() method. The constructor allows you to ensure that an object has all the required pieces before it can exist.

Tip: Declaring the constructor method ‘private’ prevents external code from directly creating an object. This is handy for creating singleton classes that restrict the number of objects that can exist.

With the above constructor in place, here is how you create a Device called ‘iMagic’:

$device = new Device(new Battery(), 'iMagic');
// iMagic connected
echo $device->name;
// iMagic

As you can see, arguments passed to the class are actually being passed to the constructor method. You can also tell that the connect method was called and the $name property was populated.

Let’s say we forget to pass a name. Here’s what happens:

$device = new Device(new Battery());
// Result: PHP Warning:  Missing argument 2 for Device::__construct()

__destruct()

As the name implies, the __destruct() method is called when the object is destroyed. It accepts no arguments and is commonly used to perform any cleanup operations such as closing a database connection. In our case, we’ll use it to disconnect from the network.

class Device {
    //...
    public function  __destruct() {
        // disconnect from the network
        $this->disconnect();
        echo $this->name . ' was destroyed' . PHP_EOL;
    }
    //...
}

With the above destructor in place, here is what happens when a Device object is destroyed:

$device = new Device(new Battery(), 'iMagic');
// iMagic connected
unset($device);
// iMagic disconnected
// iMagic was destroyed

Here, we’ve destroyed the object using unset(). Before it is destroyed, the destructor calls the disconnect() method and prints a message, which you can see in the comments.


Property Overloading

Note: PHP’s version of “overloading” is not quite the same as most other languages, though the same results can be reached.

This next set of magic methods are about dealing with property access, defining what happens when you try to access a property that does not exist (or is not accessible). They can be used to create pseudo properties. This is called overloading in PHP.

__get()

The __get() method is called when code attempts to access a property that is not accessible. It accepts one argument, which is the name of the property. It should return a value, which will be treated as the value of the property. Remember the $data property in our Device class? We’ll be storing these “pseudo properties” as elements in the data array, and we can let users of our class access them via __get(). Here’s what it looks like:

class Device {
    //...
    public function  __get($name) {
        // check if the named key exists in our array
        if(array_key_exists($name, $this->data)) {
            // then return the value from the array
            return $this->data[$name];
        }
        return null;
    }
    //...
}

A popular use of the __get() method is to extend the access control by creating “read-only” properties. Take our Battery class, for example, which has a private property. We can allow the private $charge property to be read from outside code, but not changed. The code would look like this:

class Battery {
    private $charge = 0;

    public function  __get($name) {
        if(isset($this->$name)) {
            return $this->$name;
        }
        return null;
    }
    //...
}

In this example, note the use of variable variables to dynamically access a property. Assuming the value ‘user’ for $name, $this->$name translates to $this->user.

__set()

The __set() method is called when code attempts to change the value a property that is not accessible. It accepts two arguments, which are the name of the property and the value. Here’s what that looks like for the “pseudo variables” array in our Device class:

class Device {
    //...
    public function  __set($name, $value) {
        // use the property name as the array key
        $this->data[$name] = $value;
    }
    //...
}

__isset()

The __isset() method is called when code calls isset() on a property that is not accessible. It accepts one argument, which is the name of the property. It should return a Boolean value representing the existence of a value. Again using our variable array, here’s what that looks like:

class Device {
    //...
    public function  __isset($name) {
        // you could also use isset() here
        return array_key_exists($name, $this->data);
    }
    //...
}

__unset()

The __unset() method is called when code attempts to unset() a property that is not accessible. It accepts one argument, which is the name of the property. Here’s what ours looks like:

class Device {
    //...
    public function  __unset($name) {
        // forward the unset() to our array element
        unset($this->data[$name]);
    }
    //...
}

Magic Properties in Action

Here are all of the property related magic methods we have declared:

class Device {
    //...
    public $data = array(); // stores misc. data in an array
    //...
    public function  __get($name) {
        // check if the named key exists in our array
        if(array_key_exists($name, $this->data)) {
            // then return the value from the array
            return $this->data[$name];
        }
        return null;
    }

    public function  __set($name, $value) {
        // use the property name as the array key
        $this->data[$name] = $value;
    }

    public function  __isset($name) {
        // you could also use isset() here
        return array_key_exists($name, $this->data);
    }

    public function  __unset($name) {
        // forward the unset() to our array element
        unset($this->data[$name]);
    }
    //...
}

With the above magic methods, here is what happens when we try to access a property called name. Remember that there isn’t really a $name property declared, though you’d never know that without seeing the internal class code.

$device->user = 'Steve';
echo $device->user;
// Steve

We have set and successfully retrieved the value of a nonexistent property. Well where is it stored then?

print_r($device->data);
/*
Array
(
    [user] => Steve
)
*/

As you can see, the $data property now contains a ‘name’ element with our value.

var_dump(isset($device->user));
// bool(true)

Above is the result of calling isset() on the fake property.

unset($device->user);
var_dump(isset($device->user));
// bool(false)

Above is the result of unsetting the fake property. Just to make sure, here is our empty data array:

print_r($device->data);
/*
Array
(
)
*/

Representing Objects As Text

Sometimes you might want to convert an object to a string representation. If you simply try to print an object we’ll get an error, such as the one below:

$device = new Device(new Battery(), 'iMagic');
echo $device;
// Result : PHP Catchable fatal error:  Object of class Device could not be converted to string

__toString()

The __toString() method is called when code attempts to treat an object like a string. It accepts no arguments and should return a string. This allows us to define how the object will be represented. In our example, we’ll create a simple summary:

class Device {
    ...
    public function  __toString() {
        // are we connected?
        $connected = (isset($this->connection)) ? 'connected' : 'disconnected';
        // how much data do we have?
        $count = count($this->data);
        // put it all together
        return $this->name . ' is ' . $connected . ' with ' . $count . ' items in memory' . PHP_EOL;
    }
    ...
}

With the above method defined, here is what happens when we try to print a Device object:

$device = new Device(new Battery(), 'iMagic');
echo $device;
// iMagic is connected with 0 items in memory

The Device object is now represented by a short summary containing the name, status, and number of stored items.


Cloning Objects

Objects, by default, are passed around by reference. So assigning other variables to an object will not actually copy the object, it will simply create a new reference to the same object. In order to truly copy an object, we must use the clone keyword.

This ‘pass by reference’ policy also applies to objects within objects. Even if we clone an object, any child objects it happens to contain will not be cloned. So we would end up with two objects that share the same child object. Here’s an example that illustrates that:

$device = new Device(new Battery(), 'iMagic');
$device2 = clone $device;

$device->battery->setCharge(65);
echo $device2->battery->charge;
// 65

Here, we have cloned a Device object. Remember that all Device objects contain a Battery object. To demonstrate that both clones of the Device share the same Battery, the change we made to $device’s Battery is reflected in $device2′s Battery.

__clone()

The __clone() method can be used to solve this problem. It is called on the copy of a cloned object after cloning takes place. This is where you can clone any child objects.

class Device {
    ...
    public function  __clone() {
        // copy our Battery object
        $this->battery = clone $this->battery;
    }
    ...
}

With this method declared, we can now be sure the cloned Devices each have their own Battery.

$device = new Device(new Battery(), 'iMagic');
$device2 = clone $device;

$device->battery->setCharge(65);
echo $device2->battery->charge;
// 0

Changes to one Device’s Battery do not affect the other.


Object Serialization

Serialization is the process that converts any data into a string format. This can be used to store entire objects into a file or database. When you unserialize the stored data, you’ll have the original object exactly as it was before. One problem with serialization, though, is that not everything can be serialized, such as database connections. Fortunately there are some magic methods that allow us to handle this problem.

__sleep()

The __sleep() method is called when the serialize() function is called on the object. It accepts no arguments and should return an array of all properties that should be serialized. You can also complete any pending tasks or cleanup that may be necessary in this method.

Tip: Avoid doing anything destructive in __sleep() since this will affect the live object, and you may not always be done with it.

In our Device example, the connection property represents an external resource that cannot be serialized. So our __sleep() method simply returns an array of all the properties except $connection.

class Device {
    public $name;           // the name of the device
    public $battery;        // holds a Battery object
    public $data = array(); // stores misc. data in an array
    public $connection;     // holds some connection resource
    //...
    public function  __sleep() {
        // list the properties to save
        return array('name', 'battery', 'data');
    }
    //...
}

Our __sleep() simply returns a list of the names of properties that should be preserved.

__wakeup()

The __wakeup() method is called when the unserialize() function is called on the stored object. It accepts no arguments and does not need to return anything. Use it to reestablish any database connection or resource that was lost in serialization.

In our Device example, we simply need to reestablish our connection by calling our connect() method.

class Device {
    //...
    public function  __wakeup() {
        // reconnect to the network
        $this->connect();
    }
    //...
}

Method Overloading

These last two methods are for dealing with methods. This is the same concept as the property overloading methods (__get(), __set(), etc), but applied to methods.

__call()

The __call() is called when code attempts to call inaccessible or nonexistent methods. It accepts two arguments: the name of the called method and an array of arguments. You can use this information to call the same method in a child object, for example.

In the examples, note the use of the call_user_func_array() function. This function allows us to dynamically call a named function (or method) with the arguments stored in an array. The first argument identifies the function to call. In the case of naming methods, the first argument is an array containing a class name or object instance and the name of the property. The second argument is always an indexed array of arguments to pass.

In our example, we’ll be passing the method call to our $connection property (which we assume is an object). We’ll return the result of that straight back to the calling code.

class Device {
    //...
    public function  __call($name, $arguments) {
        // make sure our child object has this method
        if(method_exists($this->connection, $name)) {
            // forward the call to our child object
            return call_user_func_array(array($this->connection, $name), $arguments);
        }
        return null;
    }
    //...
}

The above method would be called if we try to call the iDontExist() method:

$device = new Device(new Battery(), 'iMagic');
$device->iDontExist();
// __call() forwards this to $device->connection->iDontExist()

__callStatic() (PHP 5.3)

The __callStatic() (available as of PHP version 5.3) is identical to __call() except that it is called when code attempts to call inaccessible or nonexistent methods in a static context.

The only difference in our example is that we reference a class name instead of an object.

class Device {
    //...
    public function  __callStatic($name, $arguments) {
        // make sure our class has this method
        if(method_exists('Connection', $name)) {
            // forward the static call to our class
            return call_user_func_array(array('Connection', $name), $arguments);
        }
        return null;
    }
    //...
}

The above method would be called if we try to call the static iDontExist() method:

Device::iDontExist();
// __callStatic() forwards this to Connection::iDontExist()

Bonus: __autoload()

This is not a magic method, but it is still very useful. The __autoload() function is automatically called when a class that doesn’t exist is referenced. It is meant to give you one last chance to load the file containing the class declaration before your script fails. This is useful since you don’t always want to load every class just in case you need it.

The function accepts one argument: the name of the referenced class. Say you have each class in a file named ‘classname.class.php’ in the ‘inc’ directory. Here is what your autoload would look like:

function __autoload($class_name) {
    $class_name = strtolower($class_name);
    include_once './inc/' . $class_name . '.class.php';
}

Conclusion

Magic methods are extremely useful and provide powerful tools for developing flexible application frameworks. They bring PHP objects closer to those in other object oriented languages by allowing you to reproduce some of their more useful features. You can read the PHP manual pages on magic methods here. I hope this tutorial was helpful and clearly explained the concepts. If you have any questions, don’t hesitate to ask in the comments. Thanks for reading.

Writers Required, $3.50/500 words article by hotline69

I am currently in need of 1 writing team. Please apply, if you have good grammar and research capability. Articles are mainly science related, technical topics. Initial pay is $3.50 per 500 words. It is a long-term project… (Budget: $30-250, Jobs: Articles, Copywriting, Ghostwriting, Medical Writing, Technical Writing)


LONG TERM: Upload To Youtube, Then Post Vids In WordPress by voxelmm

Hey mate, we’re a cool team of people looking for someone like you, who can do this ongoing work 🙂 You will: 1. Receive video files from us in mp4 format, plus a special video tutorial showing you exactly how we want you to submit to YouTube and write the description… (Budget: $30-250, Jobs: Article Submission, Blog, Video Upload)


Logo Design by manokama

We are a KS based start-up providing a service to parents about the safety and cleanliness of their kids. We are looking for a free logo design. If selected you will get the paid opportunity to design our website and can use us in your portfolio… (Budget: $30-250, Jobs: Banner Design, Graphic Design, Logo Design, Photoshop, Photoshop Design)