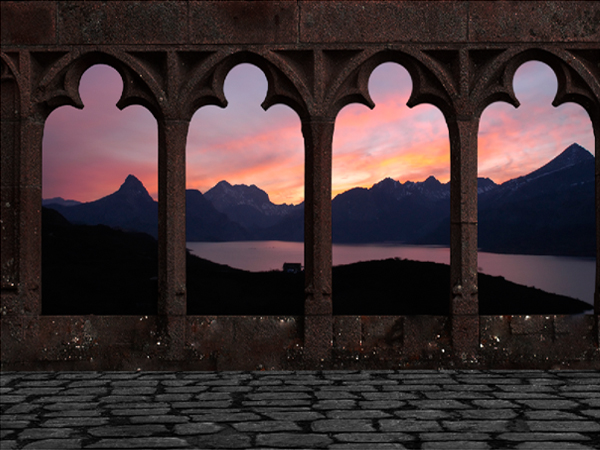
In today’s tutorial, we will combine stock photography and some basic digital painting techniques to create a scenic castle hallway in Photoshop. Let’s get started!
Tutorial Assets
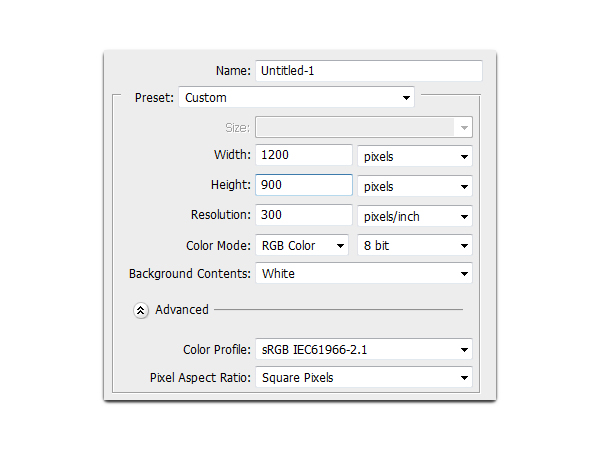
Step 1
First, start by creating a new file, 1200 x 900px with a resolution of 300ppi.
Step 2
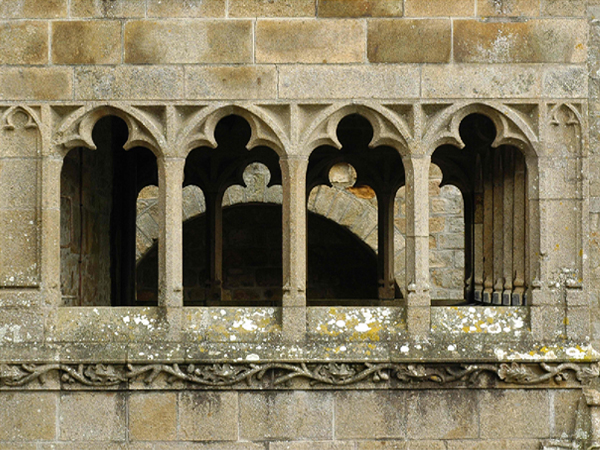
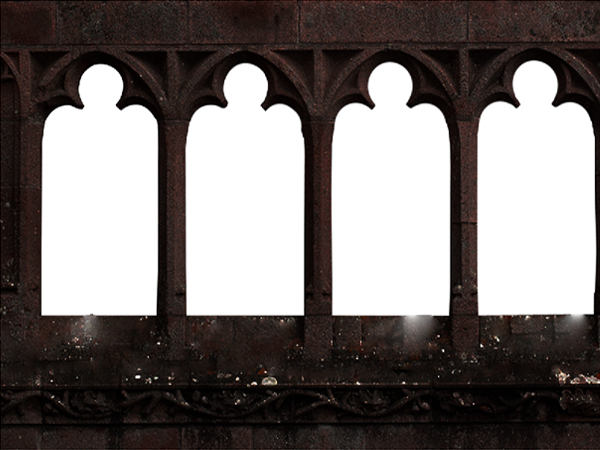
Next, open the Castle’s Window.jpg. Let’s rename this layer as "Pillars."
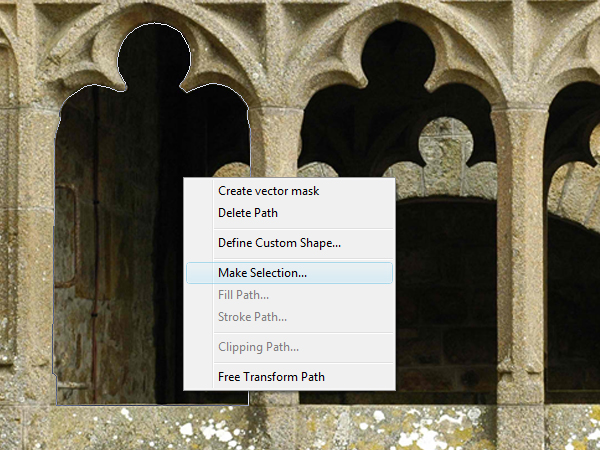
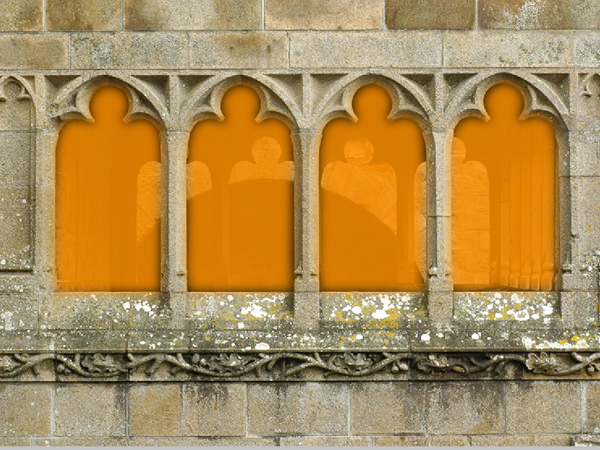
Then, by using the Pen tool (P), trace the outline of the main “arches” disregarding the interior parts like as shown below. Once the shape has been defined, press right-click then select Make Selection from the dropdown menu, then press delete.
Repeat the same process for the remaining three "windows."
Step 3
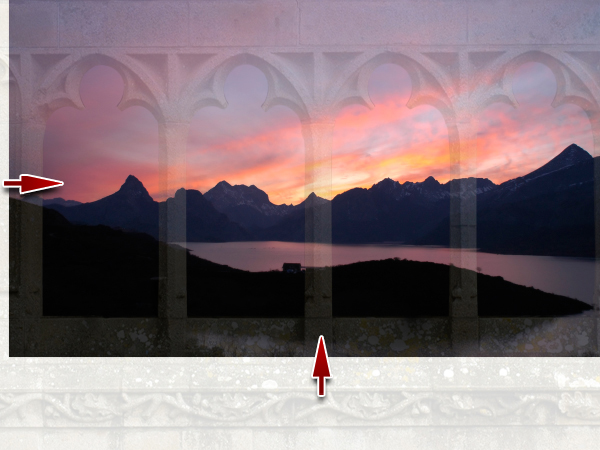
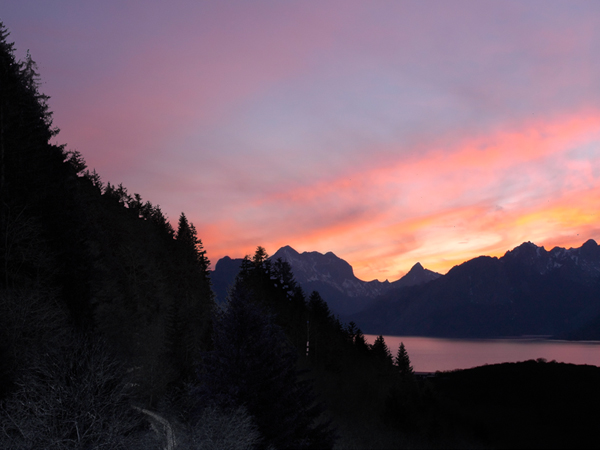
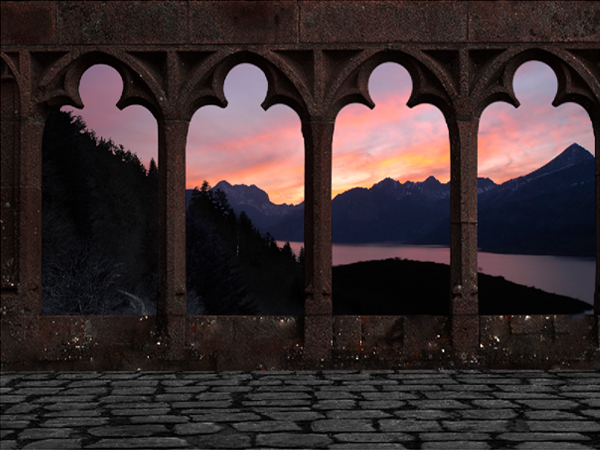
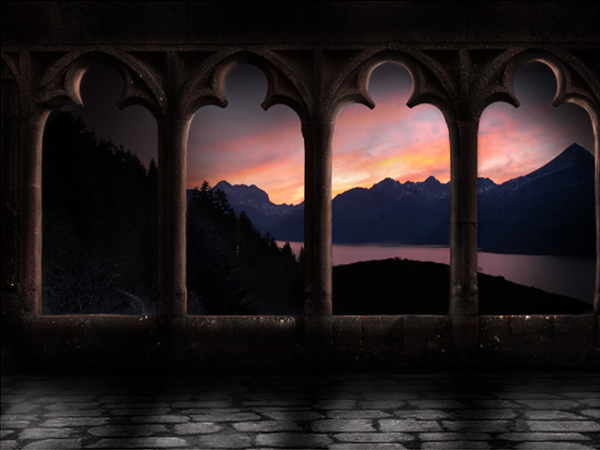
Next, open the Purple Mountains.jpg. For this step I decreased the "Pillar" layer’s opacity so I can see and estimate whether the size of the mountains is just right and the view of it is maximized.
Here you can see the final effect we want to achieve.
Step 4
We can see that the pillars’ color is off in comparison to our background, which has a dominant hue of purple. To correct this, apply different adjustments to both Hue/Saturation (Ctrl/Cmd + U) and Levels (Ctrl/Cmd + L) to match the colors. But, since the light source is coming from behind, it should have a darker shade of purple close to being black. The effect should look like the one below.
Step 5
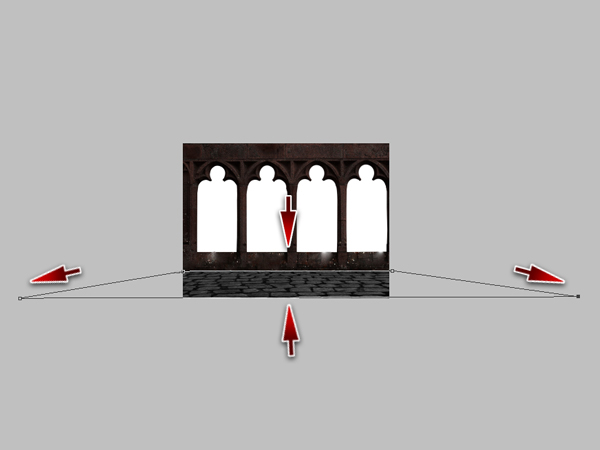
Next, is to add the floor. To do this open the Stonefloor.jpg then press Ctrl/Cmd + T to activate the resizing handles. Transform the selection just like as shown below. Just like what we did in the pillars, do some adjustments in the Hue/Saturation and Levels of the Stone floor just to blend it with the colors of its surroundings.
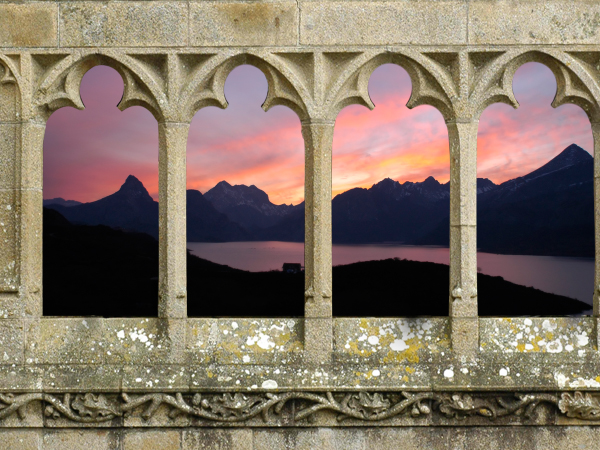
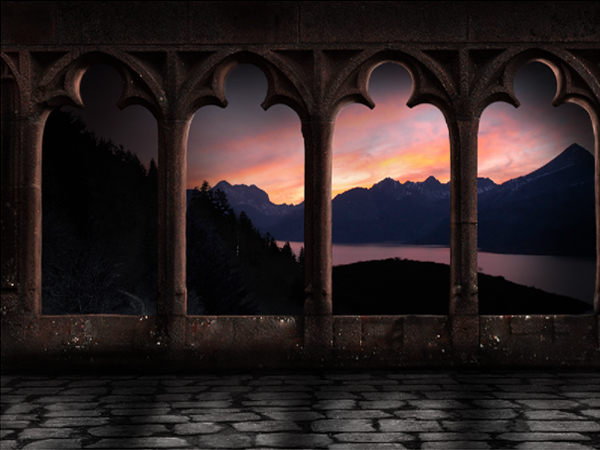
Here you can see the final effect of the steps we’ve done so far.
Step 6
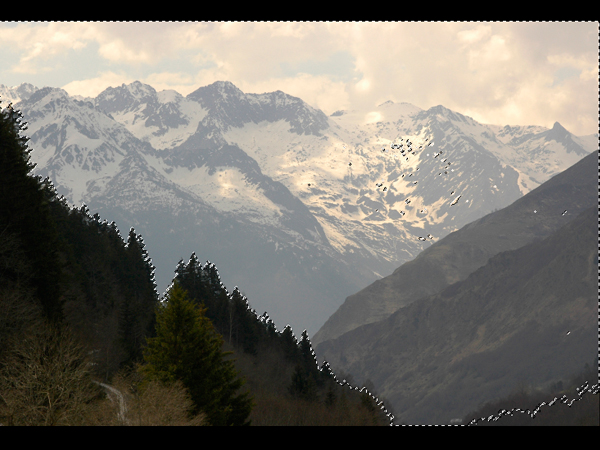
I want the effect that our castle’s hallway is extending from a mountainside. So to add this illusion, open the Mountainforest.jpg. Using the Magic Wand tool (W), select the areas indicated below. At first, use a higher tolerance for the Magic Wand then slowly decreasing it as you get closer to trees on the lower left side.
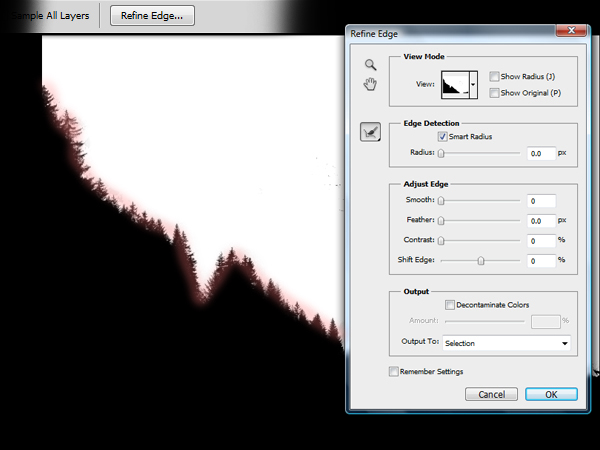
Once the areas needed to be removed have been defined, press the Refine Edge button to further refine the selection we just made. In Adobe Photoshop CS5 there is a tool called smart radius that intelligently selects the areas you want to retain and to remove just by following the outline of the area you want to retain, just like as shown below.
Just like from the previous steps, adjust the Hue/Saturation and Levels of the Mountain forest’s layer to blend with the background. In addition, I also use the Burn tool (O) to darken the light parts on the tips of the trees.
Next do some minor adjustments to complete the effect.
Step 7
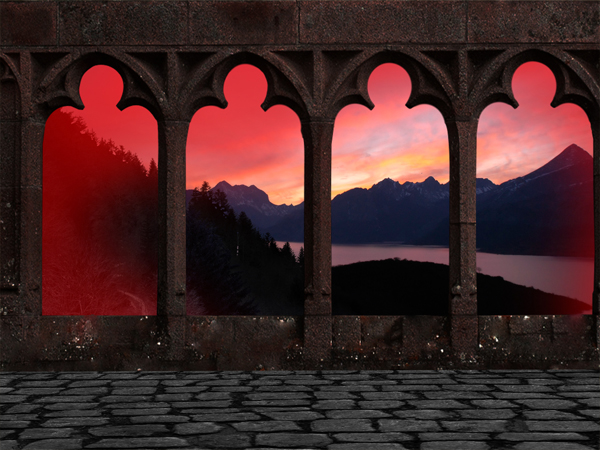
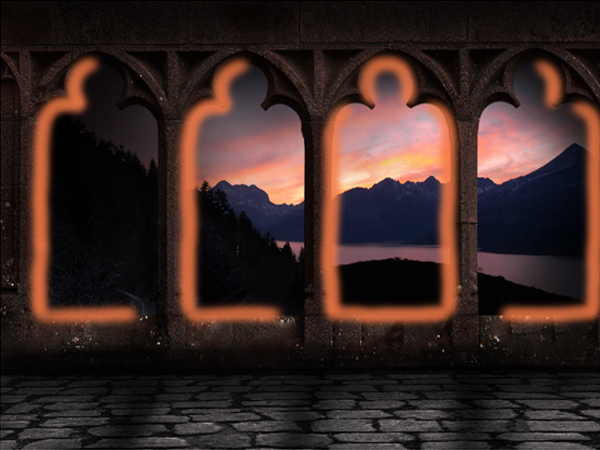
I want to add an effect that the night sky is slowly creeping towards the setting sun. To do this, add a new layer just below the Pillars layer, then by using a soft, large size brush with color #000000 or any dark color you want close to the color of purple and blue, brush the side areas of the image indicated in red below.
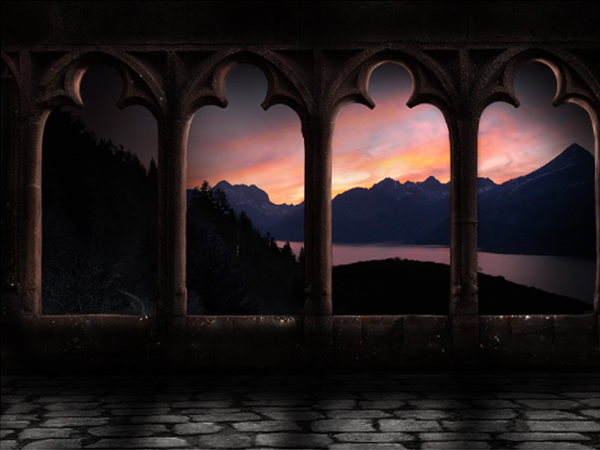
The effect should look like the one shown below.
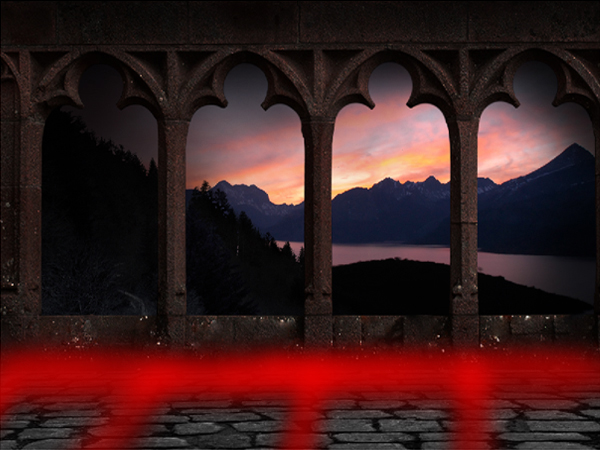
Step 8
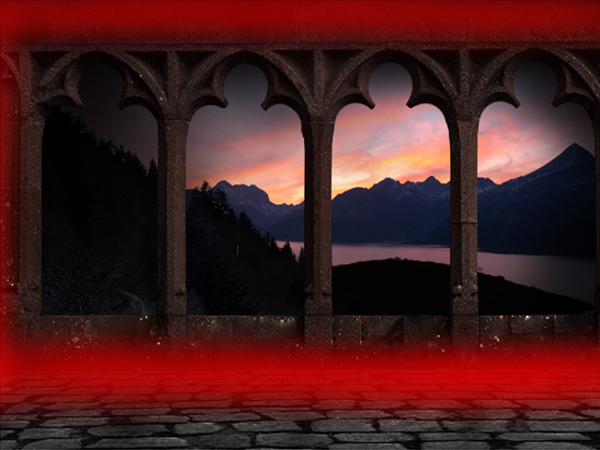
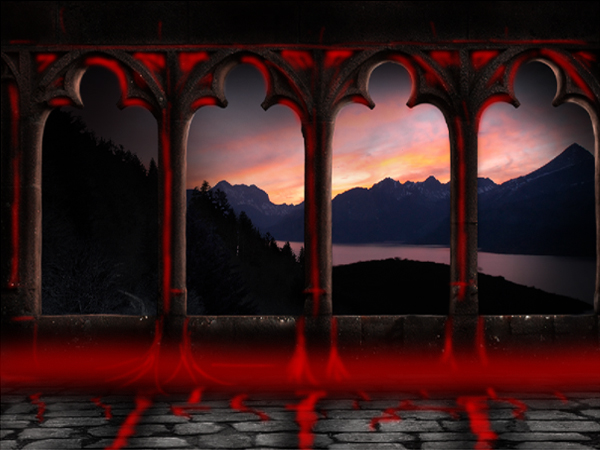
Next, add some shadows and shading. Using a soft, small brush with an opacity of about 50% and Flow of 40%, brush the areas indicated in red below.
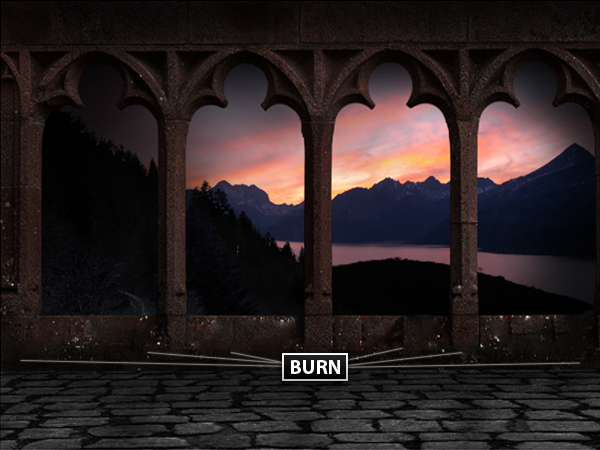
Step 9
Then using the Burn tool (O), burn the areas indicated below for both the Pillars layer and Stone floor layer enhancing the shadows we made in Step 8.
Step 10
Next, add a new layer and name it as "Pillars’ Shadows." Like what we did in Step 8, use a soft, small brush with opacity of 70% and flow of 30%, then brush the parts indicated in red with color #000000, followed by minor shadings using colors numbers close to the colors of the wall and the floor.
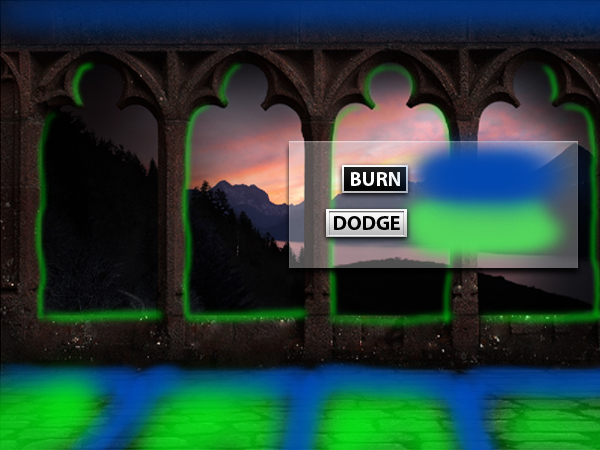
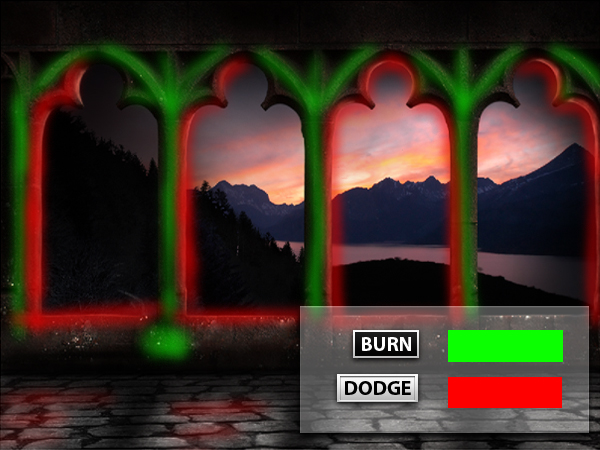
Step 11
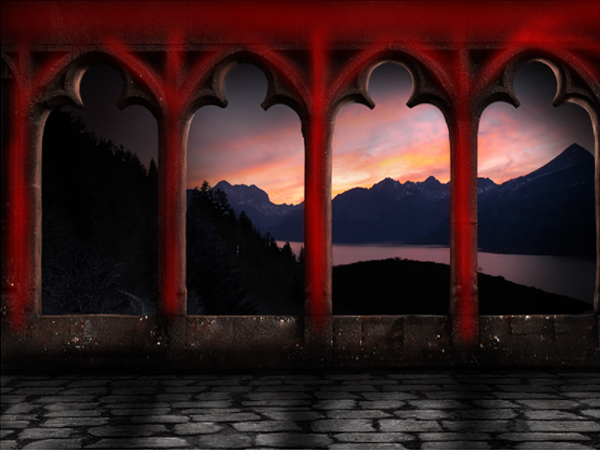
Burn and Dodge (O) the areas indicated below.
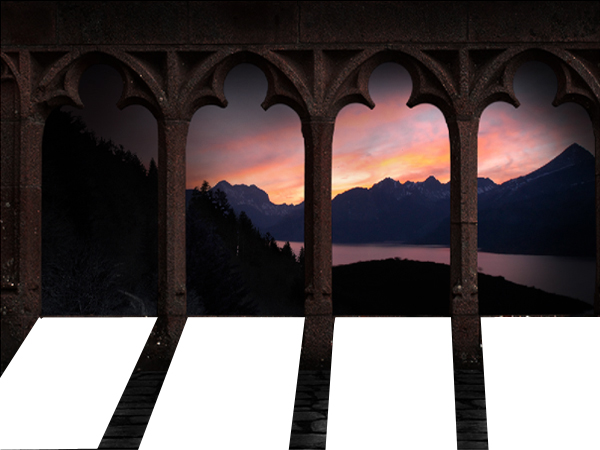
Step 12
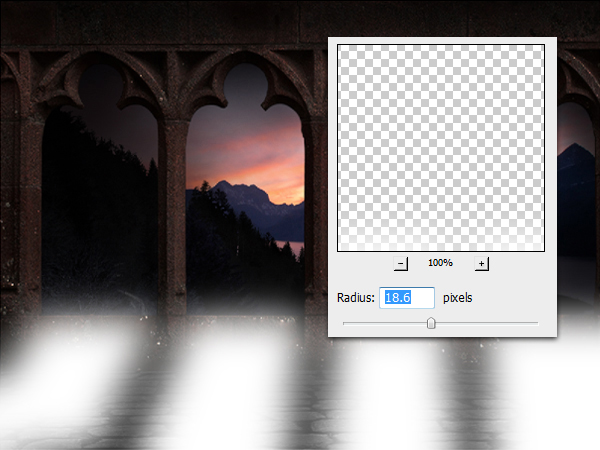
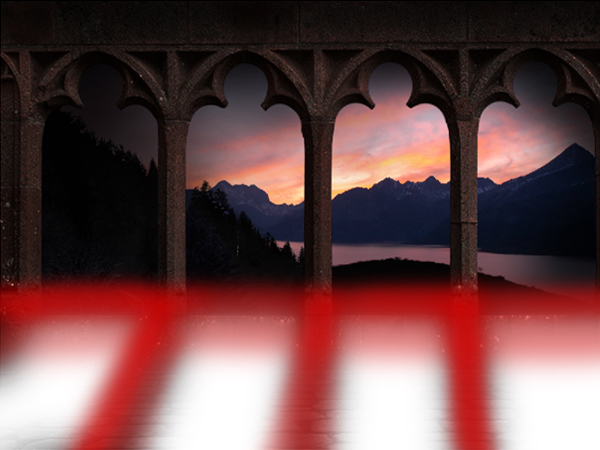
Next, add a new layer and name it as "Rays." Using the Polygonal Lasso tool (L) make slanted rectangular shapes then fill it with color #ffffff with the Paint Bucket tool (G) like as shown below
Next go to Filter > Blur > Gaussian Blur and apply the values indicated below.
Using the Eraser tool (E), erase the areas indicated in red as shown below.
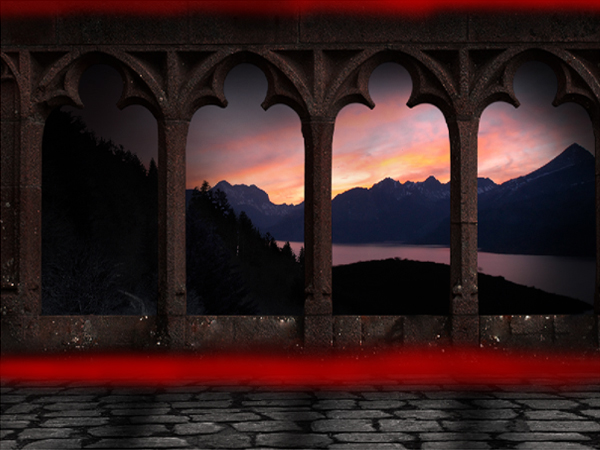
Next, duplicate the "Rays" layer. Decrease the Opacity level of the original layer to 5% then change the Blend mode of the duplicate layer to Overlay and increase its Opacity level to 30%.
Step 13
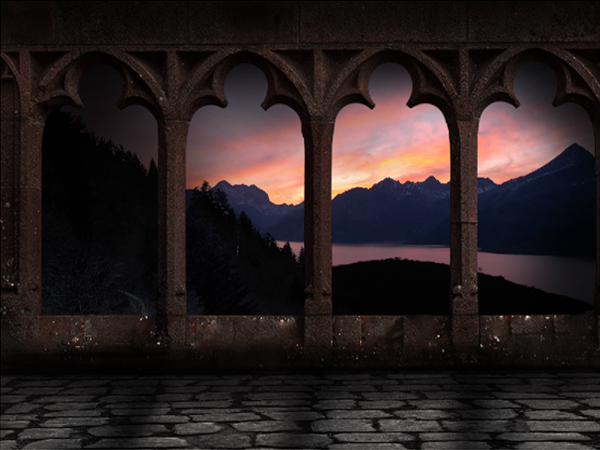
Next, using a small, 50% hard brush, brush the areas indicated in red with color #000000.
The final effect should look like the one shown below.
Step 14
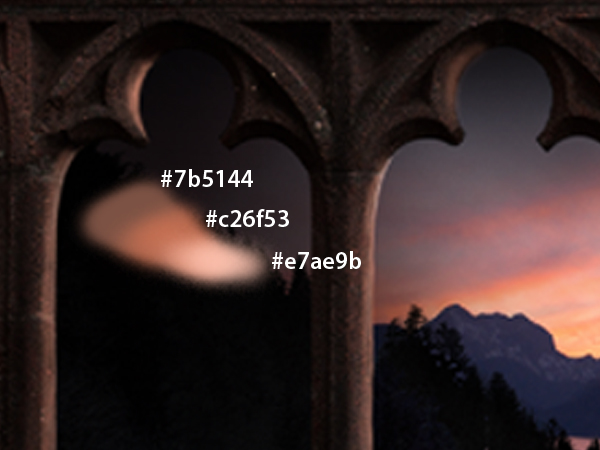
Next step is to digitally paint the highlights of the pillars. First change the settings of your brush to about 3-5px in diameter, 10% hardness, 70% opacity and 50% flow. Then using the color numbers indicated below, following the positioning of the colors, start painting the highlights.
As you may notice I picked a number of color shades that are close to the color of the light coming from the setting sun, the cloud and the pillar. Using those colors, paint the areas indicated below. Sometimes you have to change some of the brush settings in different areas, so try to experiment on different values and levels of the Brush tool (B). Once you have painted the indicated areas, you can use the Mixer Brush tool (B), which I think is only available in CS5 to mix the colors but if you’re using CS4 and lower you can use the Smudge tool and Liquify instead.
Step 15
Using the same technique in Step 14, paint the edges of the stone to add a light shiny effect just like as shown below.
The overall effect is shown below.
Step 16
Using a small diameter brush with a hardness of about 40-50% and color #000000, paint the areas indicated in red below.
Then Burn and Dodge (O) the “Pillar” and “Stonefloor” layer just like as shown below.
Step 17
Next step is to add the last shadow layer. Using a small size brush with hardness of 10-40%, brush the areas indicated below with color #000000. For this step, watch for areas that need to be highlighted and shaded.
The overall effect is shown below.
Step 18
Next, using a medium size brush with 5-10% hardness and color #ffffff, brush the indicated areas below to add a subtle glow effect.
The overall effect is shown below.
Step 19
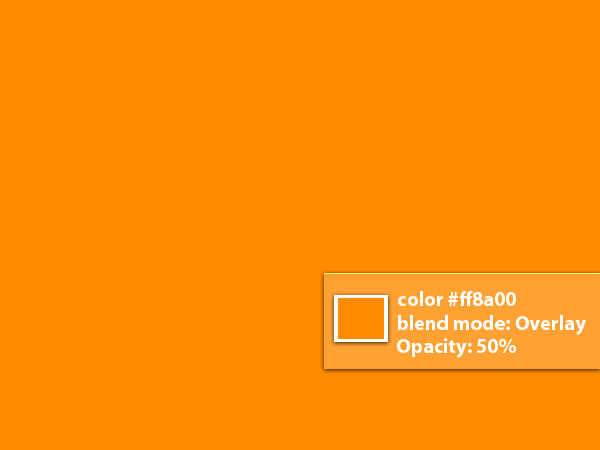
Next add a new layer then fill it using the Paint Bucket tool (G) using the indicated values and settings below.
We used this color because we want to add the feeling of warmth to the atmosphere of our design.
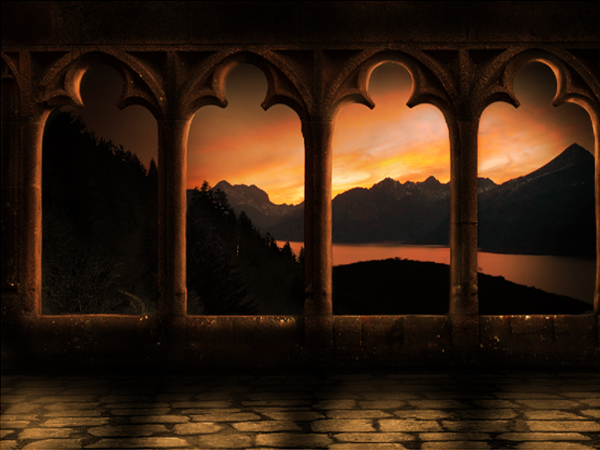
Step 20
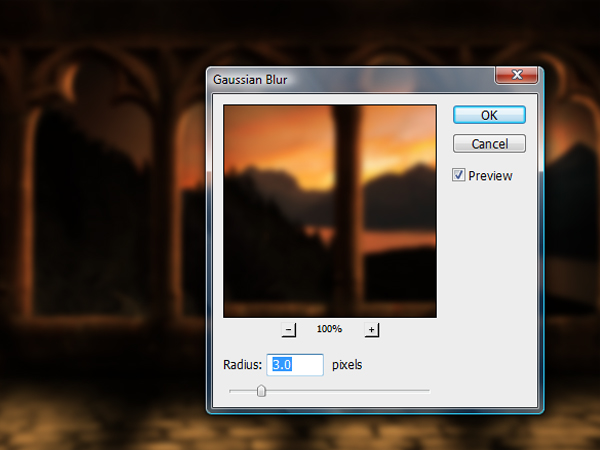
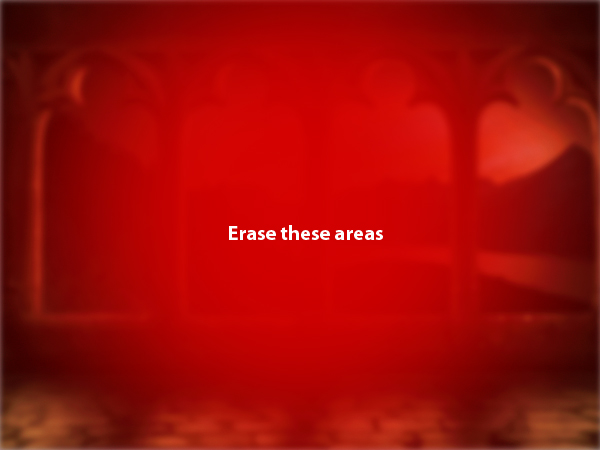
Next, save the entire file as JPEG then open it and place it on the top most position in the layers tab. Next go to Filter > Blur > Gaussian Blur and apply the indicated value below.
Lastly, using the Eraser tool (E), erase the areas indicated below.
Final Image