Black and White Grunge Textures – Psd Premium Texture Pack


Today, we have a new set of Premium Textures available for Psd Premium Members. This set was crafted by Caleb Kimbrough of Lost and Taken and includes 25 high resolution black and white grunge textures. If your next project calls for some grungy textures, than this set is perfect for you. Learn more at the jump!


New High Resolution Black and White Grunge Textures

This new Premium Psdpack Pack is available for Psd Premium Members today and includes 25 high resolution black and white grunge textures (3264px by 2448px). Members can Log in and Download! Otherwise, Join Now! You can view a preview of the textures below.

sample

This new Premium Psd Texture Pack was created by Caleb Kimbrough of Lost and Taken and is available for Psd Premium Members to download today. Caleb is a freelance blogger and the brains behind Lostandtaken.com, a blog solely focused on giving away free, high-res textures. We’re excited to partner up with him on this release.

pack

Psd Premium Membership

As you know, we run a Premium membership system that costs $9 a month (or $22 for 3 months!), which gives members access to the Source files for tutorials as well as periodic extra tutorials, and Premium Packs like this one! If you’re a Premium member you can log in and download the tutorial. If you’re not a member, you can of course join today!

HTML5 Apps: Positioning with Geolocation


“At the heart of every location-based application is positioning and geolocation. In this tutorial you will learn the geolocation capabilities of HTML5 and the basic principles needed to take advantage of them in your next HTML5 app!”

Nettuts+ sister site Mobiletuts+ has just posted a fantastic entry-level tutorial on using HTML5 for Geolocation with your mobile web app. If you’re interested in HTML5 and mobile development for mobile devices, make sure to check out the tutorial!

Quick Tip: Working with SharedObjects

In this Quick Tip, I’ll show you how to store and access SharedObjects (the Flash equivalent of cookies) so that you can save and load user data between sessions.


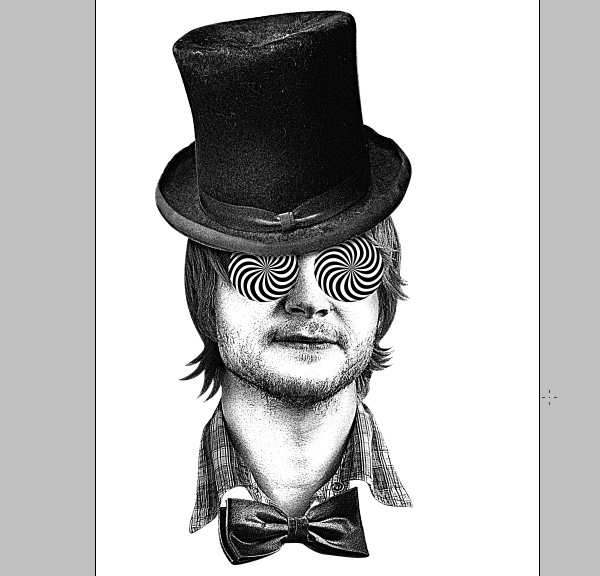
Final Result Preview

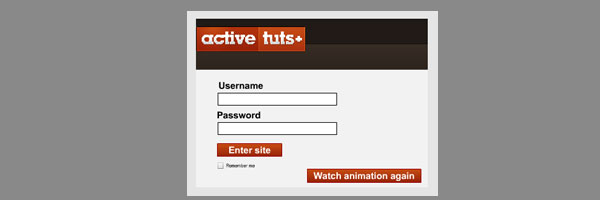
Let’s take a look at the final result we will be working towards:

Note that the intro animation doesn’t play if you’ve already seen it once. Try logging in (you can use any username/password combination) and then refresh the browser without logging out. Your details will automatically be entered.

To reset the data saved in the SharedObject, log in and then log out again.


Step 1: Setting up the Document

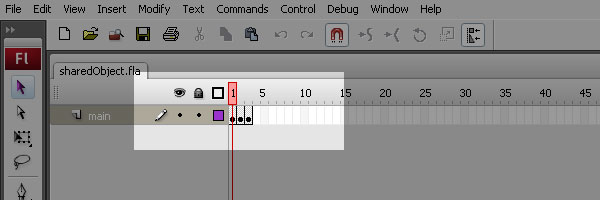
The first thing to do is download the source files for this tutorial. Since this tutorial is a quick tip, I will skip the layout steps. Once you have the files downloaded, open the ’sharedObject.fla’ file. When the file is loaded, you will notice that we have three keyframes on the timeline.

The first keyframe holds the intro animation. The animation is just a movieclip with some motion tweens and a ’stop’ action at the end.

The second keyframe is the login screen. Here a user can enter in their information. They can choose to save it or not. If the user clicks the ‘Watch animation again’ button, they will be taken back to the first keyframe. Also, the SharedObject that we are going to set will be deleted.

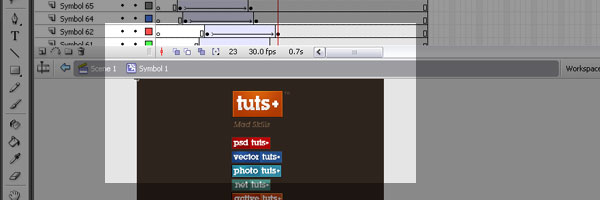
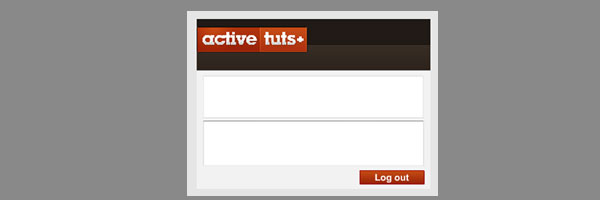
The last keyframe contains a simple RSS reader of the ActiveTuts+ feed. If the user clicks the ‘Log out’ button, they will be taken back to the second keyframe and the SharedObject will be cleared. This means that the user will view the intro animation the next time they visit the site.


Step 2: The Document Class

Create a new ‘ActionScript’ file and save it to the same folder as ’sharedObject.fla.’ Give the file a name of ’sharedObject.as.’ Next, link the Flash file and ActionScript file together in the Properties panel. For a more in-depth look at how to set up the Document class, visit this other Quick Tip.


Step 3: The Imports

Here are the import statements that we will be using for this file. Since we are using more than one frame of the timeline, we will need to extend it as a MovieClip.

package {

	import flash.display.MovieClip;
	import flash.display.SimpleButton;
	import flash.events.Event;
	import flash.events.MouseEvent;
	import flash.net.SharedObject;
	import flash.net.URLLoader;
	import flash.text.TextField;

	public class sharedObject extends MovieClip
	{

		public function sharedObject()
		{

		}
	}
}

Step 4: Starting With the SharedObject

Here is what the ActionScript 3.0 Language Reference says about SharedObjects:

The SharedObject class is used to read and store limited amounts of data on a user’s computer or on a server. Shared objects offer real-time data sharing between multiple client SWF files and objects that are persistent on the local computer or remote server. Local shared objects are similar to browser cookies and remote shared objects are similar to real-time data transfer devices. To use remote shared objects, you need Adobe Flash Media Server.

In this example, we will only be working with local shared objects. In order to get to started with SharedObjects, we create a variable called ’shared’ and cast it as a SharedObject. Next, we use the ‘getLocal’ method of the SharedObject class. I gave it a name of ‘example,’ but you can give it any name you like.

After we have initialized our SharedObject, we call the ‘init’ function. In the ‘init’ function, we stop the main timeline. We also check the SharedObject to see if the intro animation has been watched. If it has, we send the user to frame 2. If ‘watched’ property on the ‘data’ object of our SharedObject hasn’t been set, we play the animation and listen for it to finish using an ENTER_FRAME event.

package {
	import flash.display.MovieClip;
	import flash.display.SimpleButton;
	import flash.events.Event;
	import flash.events.MouseEvent;
	import flash.net.SharedObject;
	import flash.net.URLLoader;
	import flash.text.TextField;

	public class sharedObject extends MovieClip
	{
		private var shared:SharedObject;

		public function sharedObject()
		{
			shared = SharedObject.getLocal("example");
			init();
		}
		private function init():void
		{
			this.stop();
			if(shared.data.watched === true)
			{
				this.gotoAndStop(2);
				frame2handler();
			}
			else
			{
				this.addEventListener(Event.ENTER_FRAME, onEnter);
			}
		}
	}
}

Step 5: Handling the Intro Animation

In the ‘onEnter’ function, we listen to see if the animation has reached the end of its frames. Once it has, we remove the event listener, go to the second keyframe on the main timeline, and call the ‘frame2handler’ function. We also set the ‘watched’ property on the ‘data’ object of the SharedObject. Since ‘data’ is an object, we can assign any value to it. I just used ‘watched’ as an indicator for the intro animation.

Next, we call the ‘flush’ method of the SharedObject. This will save the SharedObject to the appropriate local file and be accessible for later use.

private function onEnter(event:Event):void
		{
			if(animation.currentFrame === animation.totalFrames)
			{
				this.removeEventListener(Event.ENTER_FRAME, onEnter);
				this.gotoAndStop(2);
				frame2handler();
				shared.data.watched = true;
				shared.flush();
			}
		}

Step 6: The Login Screen

In the ‘frame2handler’ function, you’ll notice that I’m calling the ‘addFrameScript’ method. Using this method, we can access different MovieClips in different parts of the timeline. ‘addFrameScript’ is zero based, so in order to access the MovieClips on frame 2, we pass it 1. Also, we pass it an inline function to handle any logic on frame 2. Inside that function, we are checking to see if the SharedObject has the ‘user,’ ‘password’ and ‘remember’ values set. If they are, we populate the text fields with the appropriate information.

private function frame2handler():void
{
	this.addFrameScript(1, function(){
		if(shared.data.user != null && shared.data.password != null)
		{
			user.text = shared.data.user;
			password.text = shared.data.password;
			remember.selected = shared.data.remember;
		}
		remember.label = "Remember me";
		enter.addEventListener(MouseEvent.CLICK, onClick);
		watcher.addEventListener(MouseEvent.CLICK, onClick);
	});
}

Step 7: Handling the Button Clicks

Since the app is small, we’re going to handle all the clicks with one function. Inside the ‘onClick’ function, we check the name of the target of the event. If the name is ‘enter,’ we then check to see if the user wanted their login info remembered. If they did, we simply add more values to the ‘data’ object. If not, we will delete those values from the ‘data’ object. After that, we send the user onto frame 3 and call the ‘frame3handler.’ If the user has clicked the ‘watcher’ button, we delete the value associated with the intro animation. The user then returns to the first frame, and we call the ‘init’ function using ‘addFrameScript.’ Finally, on the third frame, if the user clicks the ‘clearer’ button, we clear the ‘data’ object and all the values of the SharedObject are erased. The user is then sent back to frame 2 and none of their information is retained.

private function onClick(event:MouseEvent):void
{
	switch(event.target.name)
	{
		case "enter" :
			if(remember.selected)
			{
				shared.data.user = user.text;
				shared.data.password = password.text;
				shared.data.remember = remember.selected;
				shared.flush();
			}
			else
			{
				delete shared.data.user;
				delete shared.data.password;
			}
			this.gotoAndStop(3);
			frame3handler();
		break;
		case "watcher" :
			delete shared.data.watched;
			this.gotoAndStop(1);
			this.addFrameScript(0, function(){
				init();
			});
		break;
		case "clearer" :
			shared.clear();
			this.gotoAndStop(2);
		break;
	}
}

Step 8: Frame 3

In the ‘frame3handler’ function, we use ‘addFrameScript’ again to access the MovieClips on frame 3. Inside of the inline function, we load the RSS feed and use the List and TextArea components to display the information.

private function frame3handler():void
{
	this.addFrameScript(2, function(){
		clearer.addEventListener(MouseEvent.CLICK, onClick);
		var url:URLLoader = new URLLoader();
		url.addEventListener(Event.COMPLETE, function(){
			var xml:XML = new XML(url.data);
			var xmlList:XMLList = xml..item;
			for(var i:int = 0; i<xmlList.length(); i++)
			{
				list.addItem({label:xmlList[i].title.text(), data:xmlList[i].description.text()});
			}
			list.selectedIndex = 0;
			area.htmlText = list.selectedItem.data;
			list.addEventListener(Event.CHANGE, function(){
				area.htmlText = list.selectedItem.data;
			});
		});
		url.load(new URLRequest("http://feeds.feedburner.com/flashtuts"));
	});
}

Conclusion

There is a ton of applications for SharedObjects. Just check out any site like Pandora or game sites like on Adult Swim. However, the best way to learn is to experiment yourself and, of course, subscribe to Tuts+.

Thanks for following along!

5 Tips for Taming Email Overload

With press releases, Evites, news stories, coupon codes, client communications, and internal messages all arriving electronically, most of us get about a gazillion emails a day. For awhile, I managed several email boxes so I could keep newsletters and group discussions separate from my main inbox. Big mistake! Now I have over a thousand unread messages in one email account, and I’m tempted to declare email bankruptcy.

Since then, I’ve been focusing on one email account that I check consistently and keep organized. I’ve found that it’s more efficient for me personally to manage one inbox than it is to jump around checking multiple accounts. Here are several strategies for staying on top of email:

Create filters

Repeat after me: “filters are my friend.” This handy tool can help you stay organized and control the flow of email. I use filters to automatically mark certain emails as read if I want to keep them handy but don’t want to be bothered when they reach my inbox. For instance, I subscribe to emails that offer discounts on office supplies, but I only refer to them when I actually need to order something. I can click on that filter to easily locate the newest discount code and ignore the emails the rest of the time. You can also use filters to keep track of emails pertaining to certain projects or coming from certain people. Here’s how to set up filters (sometimes also called “rules) in Mac OS X mail, Gmail, Yahoo! mail, and Outlook.

Use the search function

Aside from filtering unimportant (or unwanted) emails, you don’t have to go too crazy with filters as long as your email program has a decent search function. As a Google product, Gmail is probably one of the most search-friendly email programs around. However, you don’t necessarily have to have a Gmail address to take advantage of its search capabilities. Here’s how to switch to Gmail without changing your email address (Gmail works for Outlook or your own domain-based email). If you must use Outlook, Xobni offers a free download that apparently makes it easier to search Outlook (full disclosure: I haven’t tried this product myself).

Disable notifications.

That little icon in Gmail or Outlook that announces a new email message may seem convenient, but it makes it more difficult for you to focus on other tasks and encourages a Pavlovian response to emails. Few messages are truly that urgent and in most cases, if someone needs an immediate response, they’ll know how to reach you by phone or other methods. Waiting until you’ve finished a task instead of constantly clicking back to your email program will allow you to get more done and feel less enslaved by your inbox. Here’s how to disable Outlook notifications.

Delete (or unsubscribe to) emails without mercy.

I used to read every single email that crossed my inbox. Then I got a Blackberry and discovered that it’s much easier to mass delete unimportant emails than it is to wait for them to load and squint at a tiny screen trying to figure out if I should respond or flag the email or what. How do I know if an email pertains to me? I scan the subject line and the sender’s name. Most press releases, mass emails, and email solicitations get deleted en masse unless there’s something special that catches my eye. And if it’s really off-topic, then I’ll unsubscribe to save myself the trouble of deleting them in the future.

Don’t use email for everything.

Not everything requires an email. Some discussions are better suited for a quick phone call to clear up confusion or confirm details. If a phone call isn’t practical or you’d prefer to have a paper trail of who said what when, then consider using a Google Wave. This tool is now open to everyone and allows users to track tasks, share video and photos, and archive discussions, making it ideal for collaboration.

What about you? Do you use one email account or several? How do you keep emails organized?

An Introduction to Texturing, Lighting and Rendering Architectural Exteriors – Day 3

In the field of Architectural Visualization, realism must always be the 1st goal that we strive to accomplish. In this 3 day tutorial series, you will gain a solid introduction to valuable lighting and texture mapping techniques that can be used to achieve realistic architectural renderings.

This tutorial is Day 3 in a series – Go to Day 1, or Day 2


Video 1

Download

Note: click the ‘Monitor’ icon to view tutorial in full-screen HD.

Video 2

Download

Note: click the ‘Monitor’ icon to view tutorial in full-screen HD.


This tutorial is Day 3 in a series – Go to Day 1, or Day 2


Don’t miss more CG tutorials and guides, published daily – subscribe to Cgtuts+ by RSS.

The Midweek Manifesto

You’ve just passed the middle of the week.  No time like the present to take a look at what you’ve done and what you have to get done.  Here’s a short note I like to call The Midweek Manifesto:

My mission is to reflect on the beginning of the week, see what I’ve not done and reboot it and see what I’ve done and celebrate it.  Looking forward I will take what’s left to be done and do them and with the rest of my plans I will stand firm.  I’ll add tasks as I need and make sure that I heed my own voice that tells me, “I must get to complete.”

It may sound a bit cheesy but it works for me.  I’m not suggesting you use this example, but just keep in mind your week is past the halfway mark.  Don’t let it get away from you.

CSS: Noob to Ninja – New Premium Video Series


This exclusive premium video series will take you from being an absolute CSS “noob,” all the way up to ninja-status, capable of wrangling even the most obnoxious of browsers into place. The series begins with the basics: the syntax, properties, etc. However, each new video expands upon the previous, as you work your up and improve your skills. This week, you’ll have access to Parts 1-4 in the series. The remaining six episodes will be available later this month!

If you’re switching over from a graphic design career, or are hoping to finally dig into CSS from scratch, this will be the series for you. And even if you have a modest level of experience and want to take your skills to the next level, learning the latest CSS3 techniques, the latter part of this series will surely quench that thirst! Become a Premium member!

Video Sample

Join Net Premium

NETTUTS+ Screencasts and Bonus Tutorials

For those unfamiliar, the family of TUTS sites runs a premium membership service. For $9 per month, you gain access to exclusive premium tutorials, screencasts, and freebies from Nettuts+, Psdtuts+, Aetuts+, Audiotuts+, and Vectortuts+! For the price of a pizza, you’ll learn from some of the best minds in the business. Become a Premium member!

Turn Out Something New By Rotating Boxes

In this tutorial I am going to show you how to create a very nice animation based in solids by using very simple effects and camera movements. All of this will be done totally inside After Effects and using nothing else than solids, rotations and camera postions. We will learn how to put a small box inside a bigger box to display you images or 3D elements in a cool way.


Preview

Want access to the full AE project files and assets for every tutorial on Aetuts+, including this one? Join Ae Premium for just $9/month. You can view the final effect preview video below.

Tutorial

Download Tutorial .flv

File size 327MB


Exclusive Freebie Pack – Cartoon Interiors


We have a new set of vector illustrations available exclusively from Vectortuts+ as freebie for anyone to download. This pack is created by Anastasiia Kucherenko. There are numerous cartoon interiors, which you could use to accompany your next character design. Learn more at the jump!

Continue reading “Exclusive Freebie Pack – Cartoon Interiors”

Quick Tip – Using Raster Effects to Stylize an Artwork


Adobe Illustrator contains a number of Raster Effects such as the Drop Shadow, Feather and Glow. Application of these effects greatly accelerates the creation of your artwork. However, sometimes the result is not what you’re expecting. The following quick tip will outline these raster effects, some of the issues to watch out for and how to use the them to your advantage.

Continue reading “Quick Tip – Using Raster Effects to Stylize an Artwork”

Arrangement Tips and Tricks Part 2: Automation

If any of you follow my tutorials then you’ll know I have started a few different series dealing with key subjects. In this series I’m taking a look at various aspects or arrangement using modern DAWs. You can see the first part of the series (looking at fills and transitions) here.

Although the previous tutorial did touch on using automation, we’ll take a closer look at editing, moving and creating automation and some situations it can be useful in. I’ll be using Logic Pro 9 here but the theory is pretty much the same in any DAW, so it should translate to your environment without issue.


Step 1: Reading and Writing

I’m sure the vast majority of you will have the basics of recording automation down, but for those of you who are less experienced lets take a very brief look at the concept of recording automation data.

Simply put automation is simply data that resides on its own dedicated ‘tracks’ and runs in the background of your mix. This data is capable of controlling just about any parameter in your DAW, be it simple tweaks to your mixer or more in depth edits involving multiple parameters within software instruments.

Automation data can be recorded in real time, drawn in using dedicated tools or placed point by point using ‘handles’ to create curves and fades. This data can then be moved with parts, copied, muted and deleted at will. If you haven’t spent much time working with automation then you should certainly start to familiarise yourself with it as it is an extremely important part of the modern production process.

When recording your own automation data it’s important to familiarise yourself with your DAWs read and write modes. Many DAWs feature a number of modes, usual suspects include ‘read’, ‘write’, ‘touch’ and ‘latch’. Think of write mode as a simple record button where any movement made will be recorded, the only downside here is that using this mode will also record over any previous movements made.

Logic’s automation write modes.

Touch and latch modes are often a much less destructive method of recording your movements. Latch will only record when it senses incoming data and will leave any previously recorded data untouched. Touch modes are often similar to latch in that they only record when a touch sensitive controller is used. This can be great for owners of these controllers as it allows very intuitive input of data.

As I said previously different DAWs feature different modes so it’s well worth checking your manuals for exactly how these different modes operate. Although they maybe named the same they may work in slightly different ways.

In the following steps I’ll show some basic ways of recording and manipulating automation data and demonstrate these techniques in a real world setting. This should help you when constructing your arrangements and give you ability to make your tracks that little bit more interesting.


Step 2: Basic Fades and Curves

The most basic form of automation editing is the creation of a simple fade. This can be achieved by adding two ‘handles’ and lowering or raising one of them. Of course the effect created will be very linear and perhaps a little inhuman for some uses but for a quick fade out in volume or frequency this can often be perfectly useable.

Try these simple fades on key instruments when moving between sections of your track or use them to raise or lower energy. If used over longer sections, fades like this can be great for subtly introducing an element over time and let’s face it they are quick to create. Of course you may want to make your fades sound a little more natural and this often requires a little extra leg work.

A couple of simple volume fades in Logic Pro.

Download audio file (2.mp3)

A drum loop and bass patch being faded out over time.


Step 3: Convex or Concave?

There are a few ways to make your automation curves sound a little more human and natural. One route is to edit your simple linear curves and create concave or convex curves. Some DAWs will require the entry of extra automation handles and the result may not be totally smooth. Other applications such as Logic Pro however features specialised automation tools to create these custom curves.

Logic’s automation curve tool.

Any curve with a non linear signature will give you a very different sound to a more uniform one. Convex curves come in very quickly but then ease off and become more gradual and obviously concave shapes produce the opposite with a slow attack and then speeding up towards it’s apex.

Strings faded in using a linear curve.

Download audio file (3b.mp3)

The linear curve in action.

Strings faded in using a concave curve.

Download audio file (3c.mp3)

The concave curve in action.

Strings faded in using a convex curve.

Download audio file (3d.mp3)

The convex curve in action.

If your DAW doesn’t feature automation curve tools you can try recording or drawing these shapes in live and perfecting them once completed. Although these DIY curves can often look rough and ready they can sound more natural and once your automation lanes are closed it can be very hard to tell the difference. Using your ears as opposed to your eyes here can be a good idea.


Step 4: Cross Fading

Although a lot of DAWs feature cross fade tools for blending audio files I often find that using automation for this task gives you more control. Crossfade tools often give you set curves to work with and although these can work very well, using automation can allow you to much more accurate.

By simply placing your two overlapping files in separate tracks simple volume fades can be placed at the start and end of the files, these fades can then be continuously tweaked to get the perfect blend. Another plus point here is that you can also automate other processors such as effects and eq to make the join even smoother.

An automation based crossfade.


Step 5: Automating Multiple Parameters

When using automation during the arrangement process one of the best tricks is to automate a number of parameters at once. This is the perfect technique for creating tension, building massive intensity and building impressive effects based fills. It can also be used for attention grabbing spot effects, which are especially effective when used on a top line or vocal.

There are pretty much endless possibilities here and it’s really a case of letting your imagination run free. The main thing is not to limit yourself to any one parameter, keep tweaking and recording your movements and don’t worry about moving between devices. Any new information will be recorded on a new track and can be tweaked or deleted at a later stage.

This technique of automation ‘performance’ works very well with soft synths and other virtual instruments and can make an ordinary baseline or synth sequence come to life. These movements will generally make your tracks more dynamic and keep the listener interested.

Multiple effects and instrument parameters automated to create a simple fill.

Download audio file (5.mp3)

The automated fill.


Step 6: Copying and Moving Automation Data

When you have got to grips with the way your chosen DAW handles the recording and editing of automation data it’s pretty likely that you’ll end up with a lot of recordings across your tracks. On occasion you’ll find that some of this works and some doesn’t.

The handy thing about automation data is that it can be selected, deleted and moved in blocks just like audio or midi regions. Most DAWs make this process very easy and supply tools for selecting large portions of data. With your chosen data selected you should now be able to move, copy, paste and duplicate it. This is really handy for replacing duff data or simply repeating a really successful section.

Selecting and copying automation data.


Quick Tip: Create a Wood Panel Texture in Photoshop – Screencast


In today’s screencast we will revisit a quick tip tutorial by Bree L. that demonstrates how to create your own wooden panel texture in Adobe Photoshop. This tutorial shows how to use the liquify tool and noise filters to create a realistic texture.

Here is a link to the written version of this tutorial Quick Tip: Create a Wood Panel Texture in Photoshop

Design Your Own Graphic Tee in Photoshop


This tutorial is the second installment of a 2 part series on designing graphic tees in Photoshop. If you have not already checked it out, please take a look at Part 1: An In-Depth Look Into the Graphic Tee. As printing technology and methodology improve, designers are given more freedom to push the canvas – in this case a t-shirt – to its limits. Don’t feel like you have to design in your favourite Vector package, Photoshop is a powerful creative tool that can be used to great effect. In today’s tutorial I will demonstrate how you can create a composite t-shirt design from photo assets and basic drawing techniques.


Resources

The following resources were used during the production of this tutorial:


Step 1

Open your start image and draw a path roughly around the face using the Pen Tool (set to Paths). Imagine you’re using scissors to cut the face out of the background and work loosely. This doesn’t mean you can’t create sharp corners though. Do this by drawing in an anchor point with a handle and then splitting the handle by holding Alt and drawing out from same point.

pack

Step 2

Create a selection from your path by opening the Paths palette and Cmd-Clicking the path thumbnail. Copy this to the clipboard. Create a new canvas set at 300dpi 300×400 mm for a nice, big, bold print. Paste your face into and the new document and rename the layer, I’ve gone with STEVE.

pack

Step 3

Use the Free Transform Tool (Edit > Free Transform) to resize STEVE so he’s massive.

pack

Step 4

Download the Top Hat images from Deviant Art, cut it out using the Pen Tool and paste it into your working document. Use the Free Transform Tool to resize the hat to fit STEVES head. I think the hat could be taller so stretch the height more than the width

pack

Step 5

Download the Bow Tie from sxc.hu and copy & paste it into your working document. Go to Edit > Transform > Flip Horizontal and use the bounding box to resize and rotate the Bow Tie to fit. You should also skew it – using the same bounding box – as the perspective is slightly off by holding the Cmd key whilst manipulating the top central point. I also shifted the top right point to adjust the perspective slightly.

pack

Step 6

Select the Ellipse Tool (set to Shape Layers) and draw a white circle. Hold down the Shift key to maintain a perfect circle. Then, with your new shape layer selected on the Layers Palette, go to Layer > Layer Style > Inner Shadow and set-up as in the screen grab.

pack

Step 7

Next we want to draw guides running through the Eyeball (circle layer you just drew) so go to View > Rulers and draw a vertical and horizontal guide by pulling them from the rulers. If you have the Eyeball layer selected, the guides will snap to the centre. Then, using the Pen Tool, draw in some black shapes on one quarter of the circle. Select Add shape layer so they’re all on one layer. Use the direct Selection Tool to clean up your shapes so they look exactly like the screen grab.

pack
pack

Step 8

Duplicate the SHAPES layer so you have four of them. Use the Free Transform Tool to rotate each one by 90, 180 and 270 degrees (holding down the SHIFT key whilst rotating will snap at 15 degree intervals making it easier to hit the required angles.

pack

Step 9

Select all four SHAPES layers and go to Layer > Merge Layers. Then go to Filter > Liquify, select the Twirl option on the right hand side. Then use the Tool Options to make a brush that completely covers your black shapes. Hover this brush over your shapes and click & hold until your shapes resemble the screen shot. Keep the brush stationary.

pack

Step 10

Create a selection from your Eyeballs by Cmd + clicking the Eyeball path thumbnail, then selecting the SHAPES layer and clicking Add Layer Mask (bottom of Layers Palette). Duplicate these two layers and position over the eyes

pack

Step 11

Desaturate (Image > Adjustments > Desaturate) the TOP HAT, BOW TIE and STEVE. Then select the Dodge Tool and set it to Highlights with an exposure of about 15% on the Options bar. Then select STEVE and use a soft-edge brush to dodge all of the mid grays in the skin. We want to keep the details only.

pack

Step 12

I want to make the Bow Tie darker so select the Bow Tie layer and go to Image > Adjustments > Levels and tweak the settings as shown in the screen grab.

pack

Step 13

Duplicate all your layers and Group the duplicates. Call the Group ORIGINALS. Select all of your loose layers and merge them into one. Then Go to Filters and apply a Noise, Gaussian Blur and Smart Sharpen in turn. Use the settings as in the screen grabs.

pack
pack
pack

Step 14

Use the Dodge Tool to further bleach out any grays within the skin. Then use the Burn Tool to strengthen detail such as the mouth and nostrils.

pack

Step 15

Once you’re satisfied, run one more Smart Sharpen to further boost the contrast and strengthen the details. It should begin to look a little like a detailed sketch.

pack

Step 16

If you want to add a little colour here try the following. Turn the merged image layer Blending Mode to Multiply. Then create a new layer directly beneath it. Make a selection using your ORIGINALS by Cmd + Clicking STEVE’s layer thumbnail. Then Cmd + Alt-click the TOP HAT, BOW TIE and EYEBALL layers to remove them from the section. Then select a new colour and fill the selection on your new layer. You could now flatten this and send it to a print shop for them to separate.

pack

Step 17

If you have your own screen printing set-up or just want to send the print shop a more finished plate you could try the following. Bear in mind that printers have different set-ups (meshes, inks etc), use different software (some very expensive) or employ different techniques. There is no definite rule that works for every design and I’m sure some people who use a different method will comment on this, but I’ve found that this technique has yielded pretty good results in the past. Either way, the artwork you have just created should print well in the hands of someone who knows what they are doing. Turn off all layers except your flattened and flatten the image.

pack

Step 18

Then go to Image > Mode > Grayscale. Then go to Image > Mode > Bitmap and set-up as on screen.

pack

Step 19

Click OK and input the settings as in the screen grab. In the past I’ve used a print shop that uses screens with a 220 mesh count. They recommended dividing this number by 3.5 to get your dot frequency – in this case is 63. The angle is more affected by the way the mesh interacts with the shirt weave. Trial and error is the only way to get this perfect as far as I know, but 52.5 or 45 degrees has never produced bad results for me. Apply this and zoom in to see your dots.

pack

Step 20

Here’s where it gets a bit homebrew but again, it has never failed for me. Select all and copy it to the clipboard. Open up your History Palette (Window > History) and go back to before you flattened the image. Then paste your half-toned image into the document.

pack

Step 21

Delete all layers except your Black plate (halftoned image) and your colour plate (Pink). Then use the Magic Wand Tool, turn Anti-aliasing off and uncheck the Contiguous box. Select any white space on your newly half-toned layer and delete. These are your two final plates.

pack

Final Image

That’s it! We’re finished! Thanks a lot and I hope you’ve learned something new.

pack

Just Released – Producteev Two

Producteev Two, a web-based task management solution hit the “virtual shelves” today and it is the latest addition to the many productivity tools that can be utilized by individuals or teams.  The aim of these types of applications is to get you out of managing your tasks from your email inbox and put them in a system that will enable you to manage them more efficiently and effectively.

I’ve had the opportunity to play around with the beta version of Producteev Two and will be posting a more comprehensive overview of the system tomorrow.  In the meantime, you can sign up here – it’s free for individuals to try (with some limitations – albeit none that really cripple the product) and put it through the paces yourself.

(You can also let them know what you think by send them a message on Twitter.)

Are Smartphones a Productivity Tool?

When I bought a BlackBerry Pearl two years ago, it was almost revelatory.

“You mean I can check my email or catch up on RSS feeds while waiting at the bus station or standing in line at the grocery store?! Yes, please!”

I quickly discovered that with a BlackBerry, it’s faster to axe a bunch of unimportant emails at once than it is to open them individually, so that reduced my daily email time. The ability to look up an address or live tweet from a conference or wherever is nice, too.

Smartphones are touted as a productivity tool, but are they really? All that 24/7 accessibility has its downsides, too. First, there’s the threat of burnout (you can’t be very productive if your brain is fried) and the constant distractions. All those apps, the endless email checking, and texting can keep you from real work, not to mention that they can keep you from staying in the moment and enjoying time-off.

Do you think smartphones help or hinder productivity? For those of you who own a smartphone, which one do you use? Are you an iPhone fanatic, an Android addict, or a CrackBerry connoisseur?  Let us know in the comments.