Quick Tip: Draw an Ink Painting in Photoshop


Sometimes all you need to create a quick graphic in Photoshop is a piece of paper, a pen, and a scanner. In today’s tutorial we will demonstrate how to convert a hand drawn sketch into an ink-style painting in Photoshop.


Step 1

First, create a simple drawing in pen or pencil and scan it into your computer. Open Photoshop and separate the drawing from the background by going to Select > Color Range and clicking on the part of the image in the preview that you want to select. You may want to experiment with the "Fuzziness" settings to see what looks best. Generally for hand drawn objects a setting between 90 and 170 works well. Then click "OK" and copy (Cmd/Ctrl + C) and paste (Cmd/Ctrl + V) the drawing onto a new layer. Make sure to name it appropriately so it does not get lost.


Step 2

Now choose a pastel (#ffddff) background for the image and start shading in the drawing. Create a new layer and call it "Shading". Then chose a hard round brush, set the Opacity to around 20% and press F5 for further refinement. In Shape Dynamics set Size Jitter to 50% and leave everything else in that section at 0%. In Scattering set Count Jitter to 100%, Count to 1 and Scatter to 75% (both Axes). In Other Dynamics set both Opacity and Flow Jitter to 20% (Pen Pressure). And most importantly put a check in the "Wet Edges" box.

The size of the brush you use depends greatly on the image that you are working on; sizes 15 and 10 were used on the image below. Use larger brushes first to make the light base. Then go back over the spots you think should be darker with a smaller brush, you may repeat the process decreasing the size of the brush you use for as long as it seems appropriate.


Step 3

After the shading is done it’s time to work on the highlights. Create another layer on top of "Shading", called "Highlights" and use a medium sized brush to draw in the highlights in white.


Final Step

Now come the final touches. In the image below, I’ve made the pavement with the pen tool and added shadows and highlights to it. I’ve also drawn a darker shadow under the umbrella, all using the same brushes and the same technique of layering as before. And finishing the picture I’ve added some falling petals in pink. This was done again with the same technique and brush though increasing the "Scattering" in the brush settings to 500%.

iOS 4: Please start your engines.

If you haven’t done so yet (not that we believe you didn’t), it’s a good time now to have a closer look at Apple’s new iOS 4, which was officially rolled out yesterday.

So we have known about it for two months and talked about it a couple times. In numbers, there are 100 new features and access to more than 1500 APIs, with details being provided by Apple on its SDK site.

There is a lot of focus on the new features (Ars Technica has the most thorough first look we have seen so far), but given Apple’s emphasis on iOS 4, the real news may not be so much new APIs or features, such as multitasking, per se. It’s the collective opportunity behind it.

Of course, there will be a race who will have the first apps out that use some of those new features, but it may the app that finds a way to take an intuitive approach to leverage iOS 4 features that will come out on top. It is a comprehensive update that can be overwhelming and clearly needs some thought. Perhaps that was the reason why Apple has given us more than two months to prepare for this release, if you think about it.

It is not particularly difficult to figure that Apple will push this release hard. There is some competition out there and we expect Apple to step up the marketing game even more, which should create new ways to ride in Apple’s tailwind to market your application. Make sure you are ready for this opportunity. It’s a growing market that quickly rewards your creativity and innovation.

We will spending quite a bit of time with iOS4 over the next few weeks, so make sure you check back frequently.

How Many iPads Can Apple Sell?

Predicting the potential customer base for your application is not that easy. It has become clear that especially the iPad has become a moving target that should be taken seriously. Latest sales numbers are proof that it is worth your while to make sure that you app runs well on both the iPhone and the iPad.

Apple said that 3 million iPads have been sold in 80 days. That works out to about 37,500 iPads every day. While this number is impressive, Apple’s numbers also suggest that iPad sales are climbing beyond the initial sales volume right after launch. As far as we know, it took Apple 28 days to sell the first million of iPads. It took about (we don’t know the exact count) 30 days to sell the second million and apparently about 22 days for the third million.

There was some speculation that overall sales could die down, but it seems that international demand is actually accelerating the demand. There have been some colorful comparisons, as Apple highlighted the “80 days” mark and mentioned that Apple will be making the iPad available to more people around the world. So Apple sold 3 million iPads in the same time Phileas Fogg traveled around the world in Jules Verne’s 1873 novel Around the World in Eighty Days. But in case you are wondering, of course, the iPads solds would not be able to make it “around the world.”  If placed end-to end, the line of iPads would stretch for about 452 miles. Apple will have to sell 165,067,381 iPads to make it once around the globe.

Not surprisingly, Apple’s new estimate has brought updated sales estimates from analysts, which have been somewhere between 5 and 7 million for this year, with the exception of Forrester, which was, as far as we know, the only research firm that indicated a slowdown of iPad sales, as they believe 3.5 million tablets (including the iPad) will be sold this year. Piper Jaffray’s Gene Munster now believes that Apple will sell 7.5 million iPads in 2010, up from a previous estimate of 6.2 million. By the end of 2011, Apple will have sold 16.5 million iPads, Munster said in a research note to his clients.

Given the fact that the sales estimates that most analysts covering the iPad have revised their estimates at least half a dozen times this year already, I wonder where we really will end up by the end of the year?

From a Logo to Business Card, How to Make a Self Promotion Set – Vector Premium Tutorial


We have another great Vector Premium tutorial available exclusively for Premium members today. If you want to learn how to make a quick and easy logo with basic illustrator tools, then use multiple artboards to make a collection of designs for self promotion and learn the details of each item you’ve designed, what file formats work best, and how to use them as the basis of your marketing, then we have an awesome tutorial for you.

Continue reading “From a Logo to Business Card, How to Make a Self Promotion Set – Vector Premium Tutorial”

Stereo Dynamic Drums in Reason

Static songs aren’t attractive to listen to. By adding dynamics to your mix, you’ll be able to hold the listener’s attention. This tutorial will show you two ways how to add stereo dynamics to your beats, using the Malström as a modulator.


Step 1

In this tutorial we start from scratch. Load up an empty rack (delete all the devices if there are any). Then create a Combinator, which will be the environment of this tutorial: nothing will happen outside this device. In the Combinator, first create a Line Mixer 6:2 followed by a Dr.Rex Loop Player.


Step 2

Load up a drum loop in the Dr.Rex player. For this tutorial the drum n bass loop FullCycle is used, which can be found in the Reason Factory Sound Bank -> Dr Rex Drum Loops -> Drum N Bass. The tempo of the loop is 165 bpm. In the Transport Panel, we’ll also adjust the tempo of the project to 165 bpm.

When clicking the ‘To Track’ button on the Dr.Rex, the loop is exported to a lane in the sequencer.

Download audio file (audioclip_1.mp3)


Step 3

Split the output signal of the Dr.Rex player into two signals, a left and right one. To do this, create a Spider Audio Merger & Splitter. Flip the rack and connect the Dr.Rex output to the input of the splitter. Then connect two outputs of the splitter to the first two channels of the Line Mixer 6:2. Flip the rack again and pan the first channel of the mixer all the way left and the second channel all the way right.


Step 4

Now, we can start with the dynamics. Create two ECF-42 Envelope Controlled Filter units while holding down the Shift key to bypass auto-routing. Name them respectively Left Filter and Right Filter. The frequency rotaries of the filter units should be all the way to the right, at a value of 127. Leave the rest as it is.

Flip the rack and connect the filter units with the outputs of the splitter. Now, connect the filter outputs back to the mixer: Left Filter to the first channel and Right Filter to the second.


Step 5

Now it’s time to add the first stereo dynamics to the drums. Create a Malström Graintable Synthesizer while holding Shift, so the Malström doesn’t get routed to the Line Mixer. Change the name of the device to Filter Control. The Malström will function as a modulator, so all we need of this device are Mod A and Mod B.

First we start with the routing, so flip to the back of the rack. Connect the Modulator A Control Output to the Res CV of the Left Filter and the Modulator B Control Output to Freq CV of the Right Filter. Change the value of the Freq CV to 100 and leave the rest as it is.

When we play the loop we already notice some changes in the stereo field.

Download audio file (audioclip_2.mp3)


Step 6

Time to add some more dynamic filtering. The modulators of the Filter Control Malström are now sine waves with default values. Sync the modulators and change their rate to 1/4, as shown in the following figure:

Now play the loop:

Download audio file (audioclip_3.mp3)


Step 7

Another way to add dynamics is to use Programmer of the Combinator. Hold the Shift button and create two Scream 4 Distortion units. Flip to the back of the rack and connect a Scream 4 to each filter output. Now, connect the outputs of the Scream 4′s back to the mixer: to the first and the second channel respectively. The Scream 4 connected to the first channel of the mixer should be named ‘Left Scream’. Name the other Scream 4 ‘Right Scream’.

Now make a ‘digitalizing’ effect both of the Scream4 devices:

  • If not already done, initialize the patch
  • Damage Control: 32
  • Damage Type: Digital
  • Parameter 2: 127
  • Turn on Cut
  • Master Level: 70

If you followed these instructions, both your Scream 4 units will look like this:

With the distortion patch we’ve just created, Parameter 2 will ‘digitalize’ the signal as we decrease its value. Furthermore we can cut off certain frequencies if we want to.


Step 8

To change the value of the Parameter 2 while playing the loop, the same thing as described with the filter units can be done. However, it’s not always possible to directly change parameters. Not all devices have CV inputs for all their features. With the Scream 4 units, for example, the Cut frequencies can’t be controlled directly using CV. But Reason always has a workaround, which will be shown here.

Create another Malström Graintable Synthesizer while holding Shift, so the auto-routing will be bypassed. Change the name to Scream Control. Flip the rack by pressing Tab and connect the Control Output of Mod A to Rotary 1 CV In of the Combinator. Do the same for Mod B: connect the Control Output of Mod B to Rotary 2 CV In of the Combinator. Change the Rotary CV In values of both to 80.


Step 9

To enhance the stereo dynamics, we fine tune the modulators of the second Malström. Our goal is to modulate the Left signal a bit different than the Right signal. By doing this, we’ll create a stereo effect that will catch the listener’s attention.

For this tutorial Mod A will have the default settings. Now change Curve of Modulator B to Curve 2, turn on the Sync button and change its rate to 2/4. It’s important to have a different rate then Modulator A if you want to achieve this stereo effect.


Step 10

Until now the Scream 4 Distortion units have been just static effects. Let’s change that. The second Malström, named Scream Control, is CV routed to two of the rotaries of the Combinator. Let’s program the Combinator to do something with these signals. Go to the Programmer of the Combinator by clicking the ‘Show Programmer’ button. We want to associate the Left Scream with the CV signal routed in the Rotary 1 CV In of the Combinator and the Right Scream with the second rotary. This can be done by making use of the Programmer. Select the Target and its values for the Left Scream as shown in the figure below:

Similar for the Right Scream, which will process the CV signals of Rotary 2.

Now take a look at the two Scream 4 devices and you’ll notice that some of the sliders and rotaries started moving. The Combinator is causing these movements and the CV signals going into the Combinator, together with the values assigned in the Programmer, determine the way the movements are made.


Step 11

Let’s compare the result with the original drum loop, which sounded like this:

Download audio file (audioclip_1.mp3)

With the stereo effects added in the previous steps, we’ve created a loop that is much more interesting to listen to:

Download audio file (audioclip_4.mp3)


Additional Notes

In this tutorial, we focused on a drum loop from a Dr.REX player. Of course, any instrument can be used. Also, the Filter units and the Scream 4 Distortion units can be chosen differently. Try to experiment with different instruments and effects. This tutorial shows you the tricks to modulate the effects to create a dynamic mix that will attract everyone’s attention.

Also, the effects in this tutorial are quite noticeable. Mostly, very small changes in the stereo field are already enough to make a song more interesting.


Workshop #86: Rap81 by David

At Audiotuts+ we irregularly put up a reader track for workshopping and critique (find out how to submit a track). This is how it works: you upload your song, and every week or so we’ll publish one here and step away from the podium. The floor is yours to talk about the track and how the artist can fix problems in and improve upon the mix and the song.

This track has been submitted for your friendly, constructive criticism. They have put their track (and their heart and soul) in your hands to learn and get useful feedback.

  • Do you enjoy the song or track itself? Does it have potential?
  • Can the arrangement be improved?
  • How did you find the mix? What would you do differently?
  • What do you enjoy about the rhythm track? What can be done to improve it?
  • Is the choice of instruments relevant and effective for the style/song?
  • Are the lyrics (if any) effective? Does the style, arrangement and genre of the song suit them?
  • Can you suggest any specific techniques that might improve the track?
  • Do you have any other constructive feedback?

Rap81 by David

Description of the track:

A beat I made on fruity loops 9. It was inspired by Adam Szabo’s ”One Day” Project file. I developed the beat from the piano sound.

Download audio file (rap81.mp3)

Terms of Use: No Copying.

Have a listen to the track and offer your constructive criticism for this Workshop in the comments section.


Submit Your Tracks for Workshopping

Need constructive criticism on your own tracks? Submit them using this form.


Create a Surreal Matte Painting in Photoshop – Psd Premium Tutorial


Today, we have another Psd Premium tutorial exclusively available to Premium members. If you want to take your matte painting skills to the next level, then we have an awesome tutorial for you. Learn more after the jump!


This Premium Tutorial is Filled with Creative Tips

In these days of digital special effects, Adobe Photoshop is a key ingredient to the creation of matte paintings. This tutorial will take you through the steps to make your own matte painting using photographic and painted elements. This image was originally created as a background for a Flash animation. Photoshop CS3 was used, but any Creative Suite version should work.


Professional and Detailed Instructions Inside

Premium members can Log in and Download! Otherwise, Join Now! Below are some sample images from this tutorial.


Psd Premium Membership

As you know, we run a premium membership system here that costs $9 a month (or $22 for 3 months!) which gives members access to the Source files for tutorials as well as periodic extra tutorials, like this one! You’ll also get access to Net Premium and Vector Premium, too. If you’re a Premium member, you can log in and download the tutorial. If you’re not a member, you can of course join today!

How to programatically remove WordPress dashboard widgets

Simply paste the following into your functions.php file. The code will remove all dashboard widgets, so you should comment lines related to wigets you’d like to keep.

function remove_dashboard_widgets() {
	global $wp_meta_boxes;

	unset($wp_meta_boxes['dashboard']['side']['core']['dashboard_quick_press']);
	unset($wp_meta_boxes['dashboard']['normal']['core']['dashboard_incoming_links']);
	unset($wp_meta_boxes['dashboard']['normal']['core']['dashboard_right_now']);
	unset($wp_meta_boxes['dashboard']['normal']['core']['dashboard_plugins']);
	unset($wp_meta_boxes['dashboard']['normal']['core']['dashboard_recent_drafts']);
	unset($wp_meta_boxes['dashboard']['normal']['core']['dashboard_recent_comments']);
	unset($wp_meta_boxes['dashboard']['side']['core']['dashboard_primary']);
	unset($wp_meta_boxes['dashboard']['side']['core']['dashboard_secondary']);

}

if (!current_user_can('manage_options')) {
	add_action('wp_dashboard_setup', 'remove_dashboard_widgets' );
}

Thanks to NoScope for this code!

By the way, did you had a look to my latest post on CatsWhoCode about WP 3.0 custom post types?

Looking for WordPress hosting? Try WP Web Host. Prices starts at $5/month and you can try it for free!

How to programatically remove WordPress dashboard widgets

How to create a side blog with WordPress 3.0

Getting ready

So, what are custom post types? That’s simple, custom post types are like a blog post or page, but of a custom defined type.
As an example, I decided to list some promo codes on my other blog CatsWhoBlog. I could have used a good old static page, but updating it and adding new promo codes would have been a pain.

So I created a custom post type, named coupon and a page template to list all coupons. It’s as simple as that, and now managing coupons & promo codes is extremely easy:

Creating the post type

Ok, let’s code. The first thing to do is to create a custom post type. To do so, pick up your theme functions.php file, and add the following:

function create_my_post_types() {
    register_post_type('coupons',
        array(
            'label' => __('Coupons'),
            'singular_label' => __('Coupon'),
            'public' => true,
            'supports' => array(
                'title',
                'excerpt',
                'comments',
                'custom-fields'
	    ),
	    'rewrite' => array(
	        'slug' => 'coupons',
	        'with_front' => false
	    ),
        )
    );
}
add_action( 'init', 'create_my_post_types' );

Once you saved functions.php, you should notice that a new tab appeared in your WordPress dashboard, as shown in the picture below:

So what does this code do?
First, I have created a function which registers a new post type, named coupons. I gave the following parameters to the register_post_type() function:

  • label: Nicename of your post type.
  • singular_label: Pretty self explanatory, the singular label of your post type.
  • public: Allows post type to be seen publicly.
  • supports: Array of data of what the post type supports (editor, excerpt, comments, custom fields, etc…)
  • rewrite: Parameters for url rewriting and general post type display.

The complete parameter list can be found on WordPress Codex.

Then, I “hooked” this function to WordPress init() function using add_action().

Adding data

Now that the post type has been created, you can add data by clicking on the “Add Coupon” (Or whatever you named it) link in WordPress dashboard menu.

You should see the following:

Creating a page template to list custom post types

Now that we have created a custom post type and added some custom posts, we still have to display it. To do so, I have used a page template. You can easily reuse the following code, or adapt it to display in your blog sidebar, for example.
If you want to see a demo of the page template, just click here.

<?php
/*
Template Name: Promo codes Page
*/
?>
<?php get_header() ?>

	<div id="container">
		<div id="content" class="coupons">
			<h1 class="entry-title"><?php the_title(); ?></h1>
			<?php the_content(); ?>

			<?php global $wp_query;
			$page_num = $paged;
			if($pagenum='') $pagenum=1;

			$wp_query = new WP_Query("showposts=20&post_type=coupons&post_status=publish&paged=".$page_num);

			while ($wp_query->have_posts()) : $wp_query->the_post(); ?>

				<div class="post" id="post-<?php the_ID(); ?>">
					<h2><?php the_title(); ?></h2>
					<div class="exerpt"><?php the_excerpt(); ?></div>
				</div><!-- .post -->

			<?php endwhile; ?>

			<div class="navigation"><p><?php posts_nav_link(); ?></p></div>

		</div><!-- #content -->
	</div><!-- #container -->

<?php get_sidebar() ?>
<?php get_footer() ?>

As you can see, the code I’ve used is definitely easy and self-explanatory. In order to fetch a specific post type, you have to specify the parameter post_type=coupons.

That’s all for today, hope you enjoyed this tutorial!

Like CatsWhoCode? If yes, don’t hesitate to check my other blog CatsWhoBlog: It’s all about blogging!

How to create a side blog with WordPress 3.0

Create a Dazzling Aurora Borealis – Screencast


It’s time to create some Northern Lights. Ryan from QuintalDesigns demonstrates how to light up the vector night sky in this video tutorial. Using gradients, blur effects and more you will learn how to create a vector Aurora Borealis in Adobe Illustrator.

Continue reading “Create a Dazzling Aurora Borealis – Screencast”

Icelandic Electronica: Interview with Redd Lights Productions

Iceland is not exactly known for their R’n’B. It’s a country more known for the more peculiar music of Sigur Ros and the electronic craziness of songstress Björk. However, in the past year or so a new team has been making all sorts of waves in the music industry in Iceland. They want to raise the bar in Icelandic pop music, taking the stagnant pop that’s been crowding the airwaves for the last decades and injecting it with a new type of vitriol. And what better way of saving pop music than converting it into Electronic R’n’B?

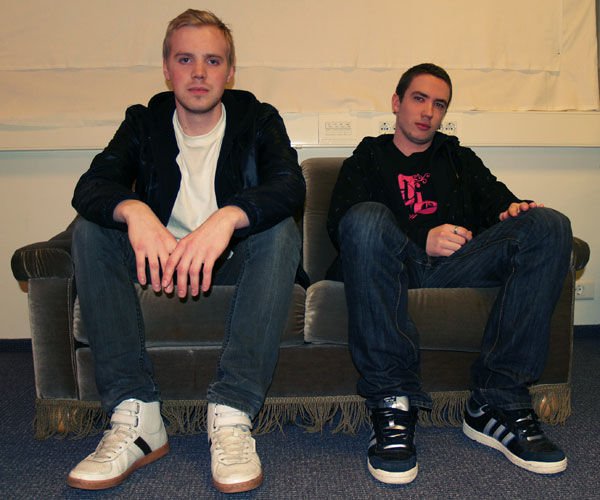
I met with Redd Lights, a production team that is behind the sound of Fridrik Dor, an Icelandic R’n’B/Pop artist that might be one of the most popular new artist in the Icelandic music scene. And since a relatively small country of 330 thousand is “missing themselves” (to translate a term) over this blend of Electronica and R’n’B, which is a microscopic niche market here in Iceland, I deducted that what they are offering must be good enough to warrant some further investigation. Therefore I met with them in their office space turned production studio where we discussed the nature of which they craft and produce their sound and their songs.

Download audio file (optimal.mp3)

Sometime – Optimal Ending Redd Lighs Remix

When you are producing and creating your songs. Where do you start?

We begin by finding a solid chordal structure to the song. A good base to produce the rest on. A solid chord progression that works, often times with a steady kick sound that we can then start building the drums around the direction we want to take the song.

For example, if we talk about Hlid vid Hlid (their biggest hit to date), it was originally an acoustic guitar track right?

Right. Frikki (Fridrik Dor’s nickname) just played an acoustic guitar loop, with the chords that were in the song. The original loop was actually much simpler than the one that made it to the final version. But over that acoustic chord progression he sang the whole song, in one take, which is actually the same vocal take that is on the single that’s playing on the radio. Then we just built and layered everything after that. Frikki wasn’t really here for most of the production process. We just took our time to create a completely different sound out of that guitar and vocal track.

Listen to Hlid vid hlid below:

Download audio file (Hlidvidhlid.mp3)

It’s a great example of when the artist just comes in and says, “All right, let’s do this,” does one perfect take and then leaves.

Exactly. He originally wrote it for another guy. We weren’t doing this to get it on the radio, but for a musical actually. He had written it for this guy who is a rapper, so he started out rapping it. But we had the idea of making him sing the whole song, not just the chorus, and that was the take that went through and got on the radio. Which is a great example of what a great artist he is.

The track itself was actually well thought out. We followed some pretty standard production ideas. You can hear the wind chimes and the violin outro (laughs) you know! It was a case of doing what works, and we just tried to do that really well.

It was also a challenge to create a different pro sound to Icelandic pop music, which we think is pretty boring. The idea is to push the envelope a little, create a new standard if you will. If you look at the modern music world maybe we aren’t really doing anything new, but compared to the Icelandic pop market this is a new sound. Pop music production here in Iceland has been pretty dry and tiring lately, and we want to change that.

What’s it like when you’re producing? How do you select the synth patches and drum samples?

Well, it really depends. We’ve got drums all over the place, and access to so many different sounds. Sometimes we use the Motif or Korg drums, but most of the time it’s really random. Actually, we usually start with an 808 kick and hi-hat, to begin with and then we work from there.

Do you have any templates that you like working from?

No, not really. We always start from scratch. But we usually load the 808 kick to start the beat off, but it depends if we continue using that specific sound or not.

Do you have any specific drum loops or synth sounds that you like more than others? Any favorites?

We never really use any pre-made drum loops. We create all our drum loops ourselves. But we have our favorite sounds. I don’t know if we should tell anybody about it, we’ve used it so often. But that’s off the Yamaha Motif, that’s a rack synth. But there are sounds that we favor more than others and we really try to not over use them. We use our go to sounds when we’re creating the basic structure, but that doesn’t mean those sounds make it to the final mix. Sometimes we try to see what would fit a specific situation, but then try to add some off the wall elements to stir things up beat-wise. Just so it doesn’t end up sounding generic and typical.

Do you create your sounds from scratch? Putting in a saw-tooth wave and then creating your synth sounds from the LFOs and envelopes, or do you work from the presets that are already installed on the synths?

Well, in the past yes, but now we don’t have the time for it. We just want hot sounds right now! (laughs)

But we do modify the sounds and edit them. Especially in the Korg M3 synth. We edit the sound to give it a different character but we rarely start synth sounds from scratch, we just don’t have the time.

You rather select a preset and then go from there, tweaking it until you get what you want?

Yeah, and sometimes it’s as simple as switching the sound from poly to mono, but it can get pretty complex as well. Changing all the envelope filters, the attack and release and such. The tone as well, or changing the original wave, from a saw to something else. Just changing the character of the sound really. Nothing incredible technical, but we’ve ended up with a lot of different custom made sounds we like to use.

But enough tweaking to create something new instead of using all the standard synth sounds?

Yeah, you can’t categorize our songs and say “that sound is from that synth patch”. Also, we use Karma a lot, which is an arpeggiator from the Korg M3, but it’s like twice as advanced. Our most creative synth sounds are done with Karma. We also process these synth sounds even further in the post-production or mixing process, adding on distortion or other crazy effects.

So you mix all your songs as well?

Yes. Everything happens in here really.

What about mastering. Do you master yourself as well?

No, we send all our mixes to a mastering studio in the UK to be mastered.

Do you record a lot acoustically, with microphones or do you focus mostly on using loops and samples inside the computer, recording MIDI and such?

Well, it’s mostly guitar and vocals. We’ve gotten away with nice sounding vocals by just recording it in the middle of the room. We usually just use our Line 6 POD which is a great all around guitar amp modeller to get our guitar tones, so the only acoustic recording that goes on is mostly just the vocal tracks.

Every once in a while we record some percussion in here as well, but we usually just use our samples and sample banks. Sometimes we record something and then try to process it so that it sounds completely different than the original recording.

For recording we’re just using a nice SE Electronics FET condenser, the sE2200a connected to an Edirol FA-66 Firewire interface, which just works really well for us. Sounds solid and simple to use.

So you adhere to the fix-it-in-the-mix mentality?

Well, we record scratch mixes to get the song going, but when we are working on the final product we make sure we get the best takes possible. If we do a bad job during recording but are able to salvage things and make them sound good, they are good. But we usually don’t try to fix recorded stuff like vocals in the mix. We’d rather get the best take with the best sound instead of trying to fix a badly recorded source sound. There is a lot of a/b going on between headphones and monitors if we’re trying to hear something specific, and then when we think the mix is finally done we go all over the place and listen to our mix in as many sound systems as we can.

You say you don’t use pre-made loops, but you obviously use samples. Do you just play everything in on the keyboard?

Yeah, it depends. When we’re searching for sounds and finding the rhythm we play everything on a MIDI keyboard. Then afterwards we edit the structure and the rhythm of the drums. We just know the beats we want in our heads and we edit them from sound memory really. It usually ends up being exactly like we wanted it to sound. We’ve used so many sample banks and drum samplers that we’ve gotten pretty good at understanding the beat and rhythm structure.

But aren’t you worried about your beats becoming sterile and uninteresting? Are you using automation and such to create excitement in the song?

We edit all the automation as well, the velocities of the MIDI samples and such to create a natural feel. Sometime we switch the hi-hat to a swing setting and then back to create a varying feel to our tracks. We don’t want the tracks to be too structured and machine-like so we try to draw in all the automation after the fact, in order to make it more organic.

It’s easiest to notice a sterile drum loop by the machine-like hi-hat sound…

Yeah, exactly, that’s why we try to vary the velocity setting to create a more natural feel. We layer the drums a lot too, taking varying samples to create the complete drum sound. Maybe we have an 808 kick drum sound as a base kick, but then we want to add something on top if we feel like we need more punch to the 808, which sometimes sounds a little too bassy.

The structure of our loops is also important to us. We rarely use the same two loops for 8 bars straight. We almost always vary each 4 bar beat with different loops and samples, just to create variety.

Is there any specific music that inspires you?

We just really try to deconstruct and understand the arrangements and structure of the music we listen to. It’s important to understand what you are listening to and why you are attracted to it. Although our influences change very rapidly. 80′s pop music, Stargate, Timbaland and Tricky Stewart to mention a few, but it almost changes every week.

What DAW are you using to produce your music?

We do everything from A to Z inside Cubase. We just recently upgraded to the newest version of Cubase and it’s just a great software that allows us to do everything. Plug-in wise we almost exclusively use Waves plug-ins. We could almost survive without anything else, the V-Series plug-in package, the SSL package and some vocal effects from Antares. We’ve also found some free plug-ins online that do simple effects like tape-stop and specific effects like that. It’s nice to be able to find plug-ins like that online for free.

Do you mix your music alongside the production process, or do you sit down and go, “Now we’re having a mixing session”?

We usually mix the beat and such before we record the final vocals. Then we mix the vocals to the rest of the beat and then mix the whole song together, when all the elements are in place. A song that’s published by us has been mixed around three times, the beat first, then the vocals on top and then we build, produce and mix everything together.

Like when we’re working with Fridrik Dor, we usually try to get him to sing over a minimalist outline of the song. Then we can build the production around the vocals, see what we can get away with. We try to get away with as few elements as possible, without it sounding empty. That way we don’t run the risk of overloading the song with different production elements and then trying to the fit the vocals on top. But if you can’t get away with leaving the mix sparse, then we layer all sorts of stuff on top if the song calls for it.

That’s a good method. So you have the vocals as a main lead element from the beginning?

Yeah, that’s usually the way we work with Fridrik. We try to put as many crazy sound ideas into the song as we can, but we usually don’t want to take away from the vocal.

How do you approach the engineering of the mixing process? Using compressors and EQ and such?

We usually start by setting up our favorite compressors, the V compressor and all that, and then we work from presets that we’ve created that we’ve found to work with specific artists. We put up our presets inside the compressor itself and then tweak the settings according to the track itself and what the song calls for.

Effect-wise we sometimes mix alongside the production process yes, say we have a synth line that doesn’t sound cool by itself, but during the pre-production process we’ve found that loads of delay works really well to enhance it, then we know how to work it.

The mixing process is a big part of the beat making process, in order for it to work out like we want it to, and we try not to change the synth sounds during the mixing process, but rather try to fit all the sounds together. When we have too much going on it’s become natural to try to fit everything together. If there’s too much going on we don’t have a problem with canceling a specific idea. It often works better to start from scratch sometimes, although it can be tedious to begin anew sometimes a better idea emerges.

Do you get inspired by anything else when you are creating your music?

Well, we don’t really think of ourselves as artsy types (laughs). But it’s funny how the process of creating this kind of music is mechanical. It’s almost like we’re solving a problem but the outcome sounds like it’s very emotional.

We try to achieve the same emotion that the artist is trying to portray with his song. Bringing all that forward and structure the production around what the artist is trying to say. Also, we try to achieve an ambience or a feeling that people can relate to. Like movies and such, we see a specific movie and we try to capture the same feeling from the film in one of our songs. It’s a visual process sometimes, everybody sees it differently but we try to create situations that we visualize in our heads into a specific soundscape you can listen to.

The team lets me listen to a few of their tracks that they are working on at the moment before I leave. It’s obvious that they take pride in their arrangements and choice of sounds, the occasional odd instrument choice creating an exciting edge to the already established pop R’n’B sound that’s so popular today.

I get to hear some of Fridrik Dor’s stuff as well as an orchestral rap song foundation inspired by cinematic film scores. Their creative intellect and desire to create the best music they can is what fuels their ambition, resulting in beats and tracks rivaling the biggest electronic and R’n’B artists out there.

To end I want to add Fridrik Dor’s latest single, Fyrir Hana (“For Her”) that has a more aggressive production to it than the more sparse Hlid vid Hlid.

Download audio file (Fyrirhana.mp3)

Check out more of their tracks at their website and follow them on Youtube for their latest work.


Quick Tip: Create an Extruded Glossy 3D Text Effect in Photoshop


People love 3D effects. They also love the look of shiny, glossy, graphics as well. Today, we will combine those two popular styles and create an extruded 3D glossy text effect in Photoshop. Let’s get started!


Step 1

Create a new document, make it 600px by 400px.


Step 2

Fill the background with #011923. Now, add some noise, go to Filter > Noise > Add Noise. 2% should be ok.


Step 3

Create a new layer and select the Elliptical Marquee Tool (M). Add a 150 px feather and drag out a shape as shown below.

Fill the selection with white and set the blending mode to Linear Dodge (Add) and bring the opacity down to 90%.


Step 4

Select a nice-looking bold font. I used Helvetica Neue LT Std 85 Heavy, but you can use anything you like. Set its size to about 160 px and fill it with white.

Duplicate the text, set the color to something darker. Send the darker text layer behind the original and adjust the width as shown below using the transform tool (T).


Step 5

Apply the following layer styles to the white text layer.


Step 6

Apply the following layer styles to the darker text layer.


Step 7

Grab the Brush Tool and select a big 200 px wide soft brush. This is what we will use to create some shiny reflections.

Paint the areas as shown and set the layer’s Blending Mode to Soft Light.


Step 8

Duplicate the text layer and rasterize it (Layer > Rasterize > Type). Select the Elliptical Marquee Tool (M) and create a wide shape as shown. Make sure to reset the feather value to 0px, we want this edge really sharp.

Now take the Eraser Tool (E) and start erasing the top part of it to get a nice and soft gradient.


Step 9

Use the Brush Tool again to create some soft spots and hit Cmd/Ctrl + T to bring up the Free Transform options. Scale down the width and rotate it 45 degrees by holding Shift while rotating. Duplicate it and rotate it again to get this x shaped sparkle.


Step 10

Create some copies of this sparkle and make them a little bit smaller, place them in the brighter areas. That’s it, you are done! Hope you enjoyed working on this tutorial!

Create a Cosmic Love Goddess With Photoshop CS5


Photoshop CS5 includes several new features to help improve your workflow. In today’s tutorial we will demonstrate how to create a cosmic love goddess using some of Photoshop CS5′s new tools including the Refine Edge Feature which really helps to streamline the process of masking and removing objects from their background.


Resources

The following resources were used during the production of this tutorial:


Step 1

Normally, I would ignore this step because it’s quite basic but Photoshop CS5′s new Refine Edge feature is extremely easy to use and can save you a lot of time.

Okay, let’s get started! Open your stock photo. Choose the Quick Selection Tool (W), it may be hidden under the Magic Wand Tool. Depending on your photo’s resolution, choose a suitable brush size, then paint over the parts you don’t need as shown below.

With selection still activated, click Refine Edge on the Option bar. When the Refine Edge dialog box comes appears, choose View: On Layer (Hotkey: L). Use the settings below:

  • Edge Detection: Check Radius, Radius: 6px
  • Smooth: 20
  • Constrast: 20%
  • Shift Edge: +20%
  • Check Decontaminate Colors: 70% for Amount.

Don’t click OK! With the Refine Edge dialog box still open, click "Refine Radius Tool (E) expand detection area" on the left side. Then draw over the cutting edges, do this a few times to get a desired result.

Save this as a PSD file or a PNG with a transparent background. We will need this later on.


Step 2

Open Sky 1. Go to Image > Adjustments > Curves:

Place Sky 2 into the document and scale it to fit. Position on top of the background layer and set blending mode to Overlay.

Now place the Wave photo. Go to Edit > Transform > Flip Vertical. Position "wave" layer between the two cloud layers. Change blending mode to Multiply.


Step 3

Now place the PSD/PNG model photo from Step 1 into your working document. Put her on the top layer (name it Model). Cmd + T to resize her and rotate as shown below.

Place the Wings photo into your working document. Resize, rotate, then Duplicate the "wings" layer. Put one below the Model layer and one above.

With the "Wings front" layer still activated, pick the Eraser Tool (E), with the brush’s hardness set to 100%. Remove the left wing to reveal model’s body. Don’t worry, we already have a backup wing underneath.


Step 4

Place the Helmet image into the working document, name it "Helmet" and put it on the top layer. Use the Lasso Tool (L) to cut it into 2 parts (back and front) and split it into 2 different layers.

Put the "Helmet back" layer underneath the Model layer and set "Helmet back’s opacity to 60%. Resize and Rotate them as shown below.

Pick the Dodge Tool (O) and use a small soft brush set to Range: Highlights, Exposure: 80%. Shade both helmet front & back until it looks shiny.


Step 5

Place the Necklace photo into your working document on the topmost layer. Resize, rotate, and Distort it until it fits on the model’s neck.


Step 6

Let’s add a bit more hair to the model using our Hair Brush set.

Use the technique we outlined in Step 3 to reveal the model’s arm.


Step 7

Now let’s make some ribbons with the Pen Tool (P). Create a new layer on top of everything, name it Ribbon 1, select the Pen Tool (P), then draw a path like the one shown below (remember to use the Direct Selection Tool to customize your path where needed).

Using the Direct Selection Tool, right click on the path, then choose "Fill path", fill it with any color, then click OK. We will fix it later. Apply a layer style as shown below with a Gradient Overlay.

Note : if your ribbon is not curvy enough, just go to Edit > Transform > Warp, with this tool you can freely create many styles of ribbons. As you can see I created two more ribbons with their Opacity set to 60%.


Step 8

Now let’s create some stars. Choose the Brush Tool (B), select a soft brush 15px, then open the Brush Palette.

Paint stars on the canvas as shown below. Use the scatter and size jitter feature to vary the size and placement of each star.

Set Star layer’s blending mode to Overlay, then select the Eraser Tool using a soft, large brush to erase stars you don’t want.


Step 9

Open the Rose photo, cut out one piece, crop it, then go to Edit > Define Brush > Name it Rose.

Now go back to your working document, select your Brush Tool (B), choose the rose brush that you just created, open the Brush Palette and use the settings below.

Create a new layer and bring it to the front. Choose red, orange as colors, draw pieces of rose that follow her body, after her hand.


Step 10

Go to Layer > New Adjustment Layer > Color Balance. Do this three times to make three Color Balance layers. Use the settings below.

Now click on the layer mask thumbnail of the Color Balance 2 layer, select the Eraser Tool using a soft, large brush with the Opacity set to 50% erase the center area of the picture, do the same thing with the Color Balance layer 3 and you are finished!


Final Image

Take a look at the final image below.

Tackling Rich Media for Tablets with Adobe CS5: Part 2

In the previous article I walked you through how one uses a variety of applications to create the assets for an interactive magazine and then the process of adding media, motion and interactivity to those assets in InDesign CS5. This article will focus on the end game – outputting the project for delivery through a web page or sending the project to Flash for more work and output to a SWF or even an AIR app.


Introduction

The reason I am using a magazine-style layout here is to demo a lot of the features in InDesign CS5. I will admit right off the bat, the page size might strike many of you as being a tad largish. Remember, you can use any page size you need and I suspect one of the more common sizes will be in the neighborhood of 800×600. Still, the choice is up to you.

Before we dig in, let’s deal with the inevitable “Why a SWF?” and “Why a Flash file?” questions. They are valid and the answer may surprise a few of you.

For far too many years Designers have been sort of forced to sit in the chairs along the wall at the Flash soireé. They would come up with some great ideas but their influence decreased at the same rate as their Developer counterparts rose. As we move into a digital communications realm where paper and screens are regarded as nothing more than display mediums, graphic design becomes increasingly important. Projects designed for print, as you have seen, can move off the static print page and interactivity, audio and video elements can be built built right into the design.

The SWF format, especially with the Flash Player 10.1 release, which puts a monster of a media player in the hands of everyone with access to a screen, allows you to create rapid prototypes for your clients. Just because we “get it” does not mean your clients will. Making the intellectual leap from paper to screen is going to be a new experience and putting a swf in their hands let’s them actually “see” what you are talking about.

The Flash format will absolutely thrill Developers. The project will be broken down and reassembled into Flash-friendly pieces which going to require the skills of an experienced Flash Developer to bring back to life. There is none of this: “Yep, just output to Flash and you are in the game.” which always seems to catch the attention of people who have never used Flash. As I am fond of saying, “Ain’t gonna happen.” You will see why I am saying that later on.

From there the normal Flash workflow takes hold as the developer pulls together the class files, code and media elements that build, and a many cases even improve, upon the efforts of the Graphic Designer. What will thrill the Designers is that Flash CS5 goes out of its way to accommodate the integrity of the design. Once this process is complete the project can then be output as anything from the final SWF for embedding in a Web page to an AIR 2.0 app.

Let’s get started:


Step 1: Export as a SWF

With the InDesign document open, select File>Export to open the Export dialog box. Select Flash Player (SWF) from the Format pop down menu and click Save.

Your choices are, for the most part, self-explanatory but there are a couple here that may catch your attention:

InDesign Markup (IDL): This format allows the document to be opened in InDesign CS4. This isn’t something that concerns us.

InDesign Snippet: This has absolutely nothing to do with the code snippet feature of Flash CS5. It allows you to save and reuse objects on the InDesign page.

XML: I’ll bet that one caught your attention. Don’t get too excited about this one because it requires a lot of extra work on the developers’s part. If you are intrigued with this option understand you can only export XML after you have:

  • Created and loaded the appropriate element tags.
  • Applied those tags to the elements on the pages.
  • Opened the Structure panel and adjusted the hierarchy if necessary.

Mind you, if this “floats your boat,” knock yourself out.


Step 2: General Preferences

When the Export SWF dialog box opens, determine your General preferences for the SWF.

Let’s go through your choices:

  • Export: You can choose to export a piece of a page, the entire document or a range of pages. The generate HTML File selection will create the HTML wrapper for the SWF and the last choice, View SWF after Exporting, will open the HTML page or SWF and allow you to take the project for a test ride.
  • Size (pixels): These options allow you choose the physical size of the final SWF. For example, the Fit To: pop down menu offers you a full range of common sizes or you can set your own. If you do change the physical size of the document, the integrity of the design will be maintained which sort of removes the “physical size” discussion from the table.
  • Background: If you choose transparent the background color of the HTML will be used.
  • Interactivity and Media: Select Appearance Only and all of the interactive elements and media become placeholders.
  • Page Transition: You can apply a range of cheesy effects from Blinds to Zoom Out. If you are into PowerPoint, you’re in heaven. Otherwise, just ignore this one.
  • Interactive Page Curl: This is a pretty cool option. Click and drag a turn page and the page turns. Still, this is not quite ready for prime time. I find this feature a bit difficult to use because, if you don’t do it just right, the page flips back. I found using a button for this navigation purpose to be more useful.

Step 3: Advanced Preferences

In the Export SWF dialog box click the Advanced tab to open the Advanced options.

This is where the Pros take over because this panel will determine how the SWF operates. Let’s go through your choices:

  • Frame Rate: The SWF frame rate is set here. Note that the default rate – 24 fps – is the one used by Flash.
  • Text: You get three choices here. Flash Classic text will output as searchable text and results in the smallest file size. Convert To Outlines is a good choice if you have only headlines. In this project this choice is the wrong one because there is a whack of body text. Convert to Pixels will flatten the text into a bitmap and all of the nastiness that entails.
  • Image Handling: These choices are quite familiar to anyone who has published a SWF.

Step 4: Click OK to publish the SWF

When you click OK the SWF is created and, as you can see in the screenshot, the project opens in a Web page.


Step 5: The SWF Folder

OK, minimize InDesign and open the SWF folder..

Just so we are all on the same page, so to speak, here are the files that get stuck in there:

  • Resources: This is the external media, including FLVPlayback skins, used in the document.
  • HTML: The HTML wrapper for the SWF.
  • SWF: The swf you just created.

If you are wondering about the images, buttons and text, they are all embedded into the SWF.


Step 6: Outputting to Flash CS5:

To a Flash Developer or Designer, going immediately to a SWF is “simply not done.” I couldn’t agree more. I find the video feature to be a bit “basic” and I am not a huge fan of putting a video skin over the video while it plays. Also using the various panels to “wire up” buttons and so on when I can do it more efficiently using ActionScript 3.0 sort of makes these “whizzy” features of InDesign feel more like “wind up” toys than anything else. Still they present an opportunity to test functionality, so they do have a use. Even so, if you want to create a lean, mean and fast-loading SWF then Flash is the next stop in the process.

Before I get you all excited about this you need to know that this technique, as you will soon learn, works best between Flash CS5 and InDesign CS5; in fact it is the only Flash format available to you. Also, Adobe has discontinued the XFL export option in InDesign. It was there simply to give InDesign CS4 the ability to move into Flash. Flash export replaces it.

Finally before exporting, make sure to create a new directory to hold the files.

Let’s get started.


Step 7: Export as FLA

Select File>Export> Flash CS5 Professional (FLA) and click the Save button to open the Export Flash CS5 Professional (FLA) dialog box.


Step 8: Choose Your Export Options

Many of the choices can be found in the general area of the SWF export dialog box. The new one being Text.

You get four choices. Three – Classic Text, Convert to Outlines and Convert to Pixels – have already been covered. The new one is Flash TLF text. This is the new way of managing text in Flash CS5. TLF stands for Text Layout Framework and it is the feature that brings typography to Flash. Any typographic changes you make in InDesign will transfer, intact, to Flash. This is great news for designers. The bad news is this feature only works with Flash CS5 and with Flash Player 10 or higher.

The Insert Discretionary Hyphenation Points selection “breaks” words when they bump up against the edge of a text box.

Before exporting to Flash you might want to do a “preflight” check to ensure you really do get WYSIWYG. Among the things to check:

  • Color: Don’t think you can take a CMYK layout and plop it into Flash. Flash uses the RGB color space and any spot colors – Pantone is a great example – will be shifted to the RGB space.
  • Transparency: Make sure, especially when exporting to the SWF format, that transparent objects don’t overlap any interactive elements. There is a risk that the interactivity may be lost.
  • 3D attributes: Any 3D effects used in InDesign – Text on a path – will not move to Flash or to the SWF.
  • Fonts: TLF only works with OpenType and TrueType fonts. Postscript fonts are not allowed.

Step 9: The Flash Folder

Minimize InDesign and open the Flash folder.

The only difference you should see between this folder’s contents and that of its SWF counterpart is the inclusion of a .fla file.


Step 10: Flash CS5

Take the .fla and open it in Flash CS5 (this is where is gets seriously cool).

First off, the movie only has three frames. The reason is each spread in InDesign, and there are three of them in this document, is wrapped into its own movieclip (named “Spread-xxx”) in the Library. All of the buttons used in the InDesign document are turned into button symbols in the Flash Library and each of the images used in the slideshow – a Multi-State object in InDesign – is converted to a movie clip and the images are added to the Flash library as bitmap symbols.

The bad news, and for many of you this isn’t really bad news, is all interactivity is lost. You will need to “rewire” the project using ActionScript 3.0.


Step 11: Animation

Let’s discuss opening a movieclip containing an animated object.

In this project there is an animated text block on Page 3 that starts with an Alpha value of 0 and uses the Fly In From Top effect in InDesign. These effects move, intact, into Flash, are added to Motion layers and the paths are fully editable in Flash.


Step 12: Select Text

Double-click a spread on the main timeline to open the movie clip and click on a text block.

As you can see, all of the text formatting, including flow between containers, applied in InDesign is reflected in the text container’s Text properties in Flash CS5. This is huge. The only thing missing is text wrap; it will not move between InDesign and Flash. What does move, though, are inline images. These are images or graphic elements added to text containers in InDesign as inline elements. Again, this is huge.


Step 13: Select the Video

Video and audio, typical external assets, don’t move into Flash. Any video is replaced with a bitmap placeholder of the video’s poster frame from InDesign CS5 and audio is, well, ignored. Again these two media types are best handled through ActionScript 3.0 so it is no a great loss. In fact, the video placeholder can be replaced with an FLVPlayback component or video object.

Conclusion:

In this tutorial I walked you through the steps necessary to get an InDesign CS5 document prepared for web playback as a SWF or .fla file. They are remarkably similar in how they are exported but the two formats are starkly different.

As I pointed out the SWF export is good for prototyping and a couple of other very specific uses. For many of you, it is the .fla kicked out of InDesign that is most important.

I showed you how motion, page assets, text and audio and video are moved into Flash. The most important aspect of this is all of the assets land in the Flash Library but it is going to require the attention of a Flash developer to “rewire” the project with ActionScript 3.0. This is a good thing; those who don’t have your skills and knowledge will think twice before exporting Indesign documents to Flash because they think that will solve their problems. Far from it. They are just starting.

Finally, once the project is “wired up” and functional it can then move to the web or be bundled up as an XFL document and handed over to the Flex team. This is a brand new workflow and I suspect many of you will see this as extra work. I honestly feel that once you get the “hang of it” InDesign is about to become another tool in our arsenal because a flood of tablets – Android and other OS’s – are just around the corner.