The Best of Tuts+ – June 2010


June was a stellar month for Tuts+. Mobiletuts+ had recently launched and started off with some great iPhone and Andriod development tutorials. Creative Sessions focused on Digital Illustration this month and started gearing up for July’s Interface Design session. During June a survey was run across all of Tuts+ to give our readers the opportunity to provide some feedback, over 7000 people participated and one was lucky enough to win a $250 Amazon Voucher. Here’s a small sample of the best from Tuts+ this month!

Activetuts+ – Flash, Flex and Actionscript Tutorials

  • Personal Portfolio Flash Template – Active Premium

    It’s time for some more Active Premium goodies, exclusively available to Premium members. This time, an XML-based Flash Personal Portfolio template is waiting for you to download; read on to check out the demo and find out more about subscribing to Active Premium!

    Continue Reading

  • Advanced Character Customization for Flash Games

    In this tutorial, we’ll delve into Flash game character customization. The result can be used to provide players with the ability to create a unique character, beyond the basic dress-up options of most games. We’ll learn how to let the user add custom colors to different parts of our character, how to add hand-drawn designs to the character’s clothing, and how to modify a basic walking animation that uses the player’s changes.

    Continue Reading

  • Interview with Chris Gross, Plus (Winner Announced) SourceMate License Giveaway!

    SourceMate is a new plugin for FlashBuilder which promises to add a lot of “missing” features some of us have taken for granted in other IDEs.Read on to hear SourceMate Architect Chris Gross answer some questions about the product, plus find out how you can win a free license!

    Continue Reading

Aetuts+ – Adobe After Effects Tutorials

  • Create A Growing Text Animation – Quick Tip

    This is a quick tutorial showing an animation idea if you ever need to animate lots of photos with tag lines. I’ll touch on “Beam” and “Auto-Trace” within After Effect and get you started on creating your own beautiful project!

    Continue Reading

  • Fluidic Designs Using Particular

    This tutorial is based on the Hyundai i45 tv commercial. The effect is rain falling in the shape of various designs, onto a vehichle. The tvc uses a real-world rain rig with a computer driven water delivery system, however we will be showing you how to create the same effect using only After Effects and Particular.

    Continue Reading

  • 41 MORE Killer Typography Works

    I know, I know, I am a day late, but I have quite a good reason… Thank you all for the well wishes, and since I love our readers so much, I was able to finish up this week’s article just for you guys. It’s another roundup of some amazing works of typographical art, that I really think that you are gonna like! You might see that I included one from the comments of last week, so if you have something that you think is worthy… stick it in the comments!

    Continue Reading

Audiotuts+ – Audio and Production Tutorials

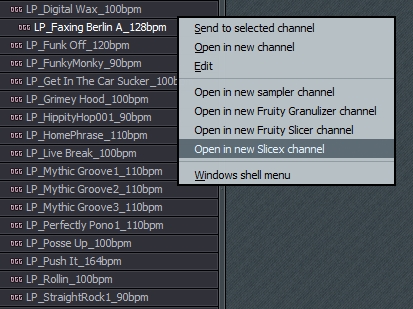
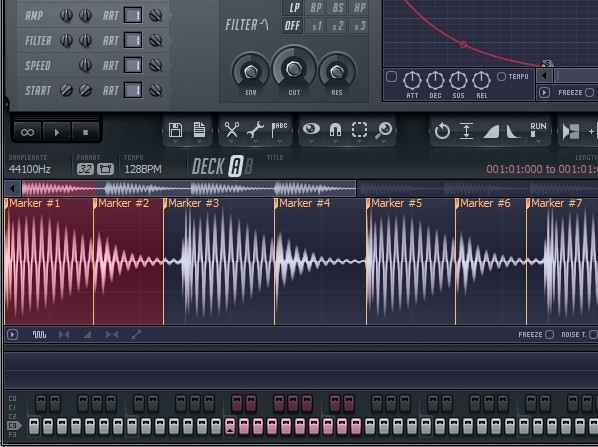
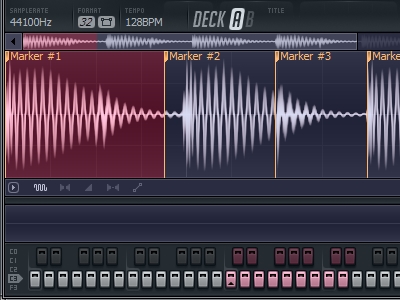
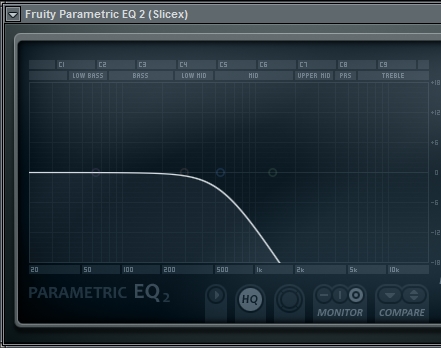
  • How to Make the Synth Sound from Lady Gaga’s “Just Dance”

    In this tutorial we are going to cover how to create Lady Gaga’s famous synth sound from “Just Dance”. Despite all the advancements in sound synthesis, sometimes the best sounds are the ones that are most simple. In fact the basis for the entire sound is one simple square wave!

    Continue Reading

  • Open Mic: Tell Us About the Tuts You’d Like to See on Audiotuts+

    What specific topics would you like to see covered in tutorials? Do you prefer written tuts, screencasts, or a mix? And what general areas would you like to see covered: DAW techniques, music theory, how to play an instrument, how to create specific sounds, how to make money with music, something different? Do you have any other suggestions? What can we do to keep you happy and make your day?

    Continue Reading

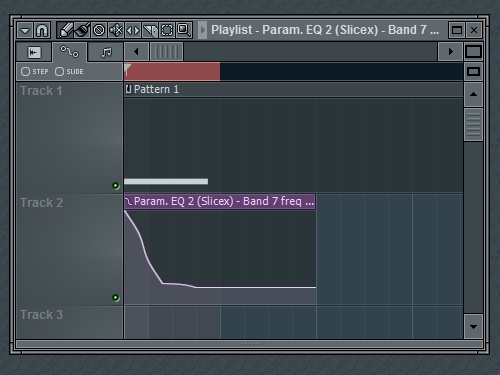
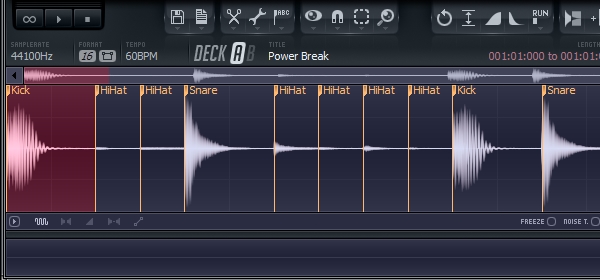
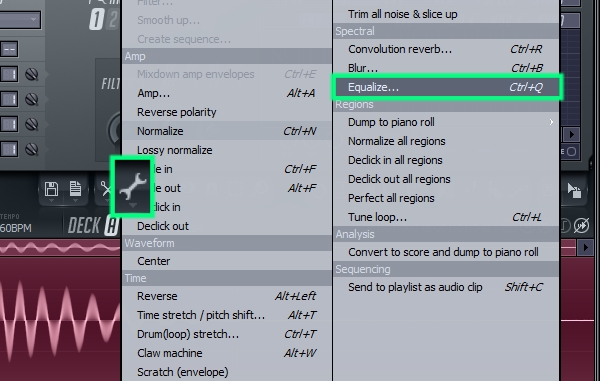
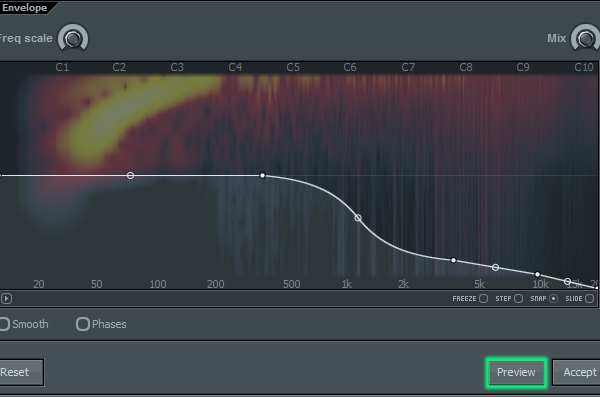
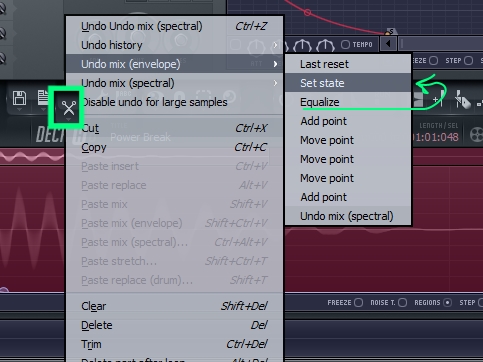
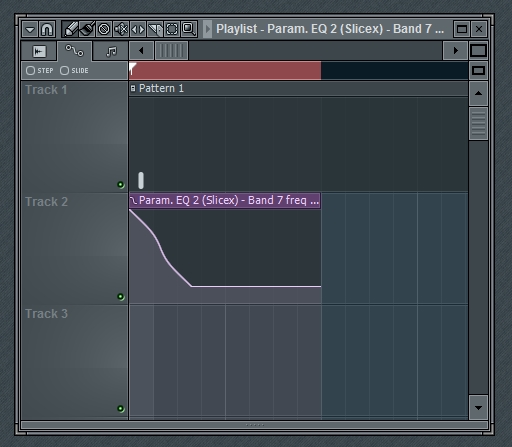
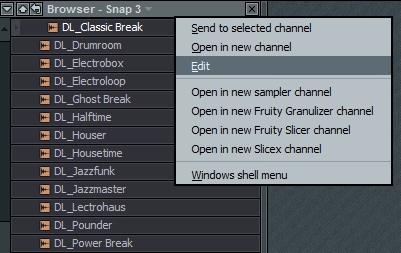
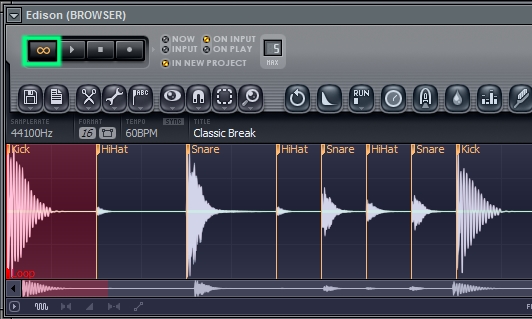
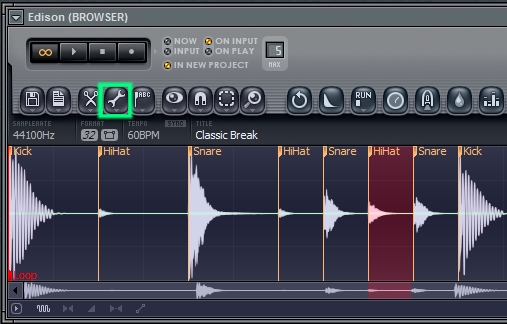
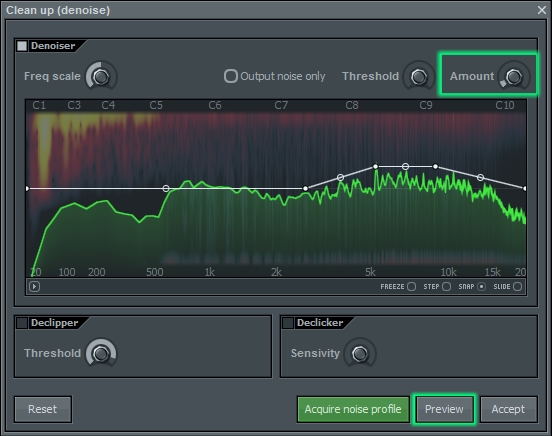
  • So You Think You’ve Finished Mixing? A Guide to Preparing Your Mix for Mastering

    You know what it feels like to finish a mix. Having spent hours, possibly days, perfecting your track to the nth degree, it feels great to finally have a song to be proud of after all the hard work and effort. But what if you took your mix just that little bit further. Before the crucial mastering stage, there are some very simple, and often overlooked, practices and techniques which can be applied to your mix in order to make sure your track stands out from the crowd and better yet, your final master is as good as it possibly can be.

    Continue Reading

Cgtuts+ – CG and 3D Tutorials

  • Model and Texture a Water Tower in 3ds Max – Day 1

    In the first part of this tutorial, the modeling and texturing process is covered in detail, starting with the creation of a proxy model inside of 3ds max. During this stage we will block out the tower structure using simple geometry and then go through the process of adding resolution and detail, creating an aged weathered look. We’ll make use of some simple poly modeling techniques as well as Max’s paint deformation tools to create the desired effect.

    Continue Reading

  • The Cgtuts+ E3 Games Roundup!

    Being in the CG realm of creativity, I know a lot of you are probably really into games, and probably even have worked on a few of them. I decided to make a nice list of a lot of the games mentioned or announced this past week at the E3 conference, so you can stay up to date, whether or not you followed it.

    Continue Reading

  • Composite a 3D object into video footage with Boujou, Maya and After Effects

    Matchmoving is a visual effects technique that allows the insertion of computer graphics into video footage. In this tutorial we’ll start by taking a look at how we can track our footage using Boujou. We’ll then jump into Maya and use that tracking information, along with a custom HDR image, to create and render a 3D object which we can insert into the scene. We’ll then use After Effects to composite the 3D object into the original video. The techniques used in this tutorial can be applied to almost almost all of your 3D integration shots.

    Continue Reading

Mobiletuts+ – iPhone, Android, Windows and Blackberry Mobile Development Tutorials

  • Introduction to iPhone SDK Development

    Mobiletuts+ will be covering all major mobile platforms – iPhone, Windows, Android and Blackberry. This tutorial looks at development with the iPhone SDK. You will learn information about the iPhone platform, how to setup and configure your development environment, and the steps necessary to create a simple fortune cookie application!

    Continue Reading

  • Introduction to Android Development

    Mobiletuts+ will be covering all major mobile platforms – iPhone, Windows, Android and Blackberry. Today we’ll be taking a look at Android development: explaining why people have choosen to work with Android and providing an overview of the Eclipse IDE and its Java, DDMS and debugging perspectives. Finally, you’ll learn how to get started making your first Android app!

    Continue Reading

  • HTML5 Apps: Positioning with Geolocation

    At the heart of every location-based application is positioning and geolocation. In this tutorial you will learn the geolocation capabilities of HTML5 and the basic principles needed to take advantage of them in your next HTML5 app!

    Continue Reading

Nettuts+ – Web Development Tutorials

  • The 10 HTML Tags Beginners Aren’t Using

    Let’s go back to the basics for this one. Everyone reading this at least knows what HTML is. I believe that, no matter what experience level someone has, reviewing the foundation can help increase knowledge. It also helps to hone skills, especially with the constantly evolving technologies that drives the Internet.

    Continue Reading

  • Inspiration: 40 Unique Footer Designs

    For this week’s stream of inspiration, we’ve collected forty fantastically creative and unique footer designs.

    Continue Reading

  • How to Authenticate Users With Facebook Connect

    Lately, there’s been quite a fuzz about lazy registration. It turns out that the less the user has to think, the higher the conversion rates are! What a thought! If everybody seems to have a Facebook profile, why not add a one-click user registration? I’ll show you how to do that today.

    Continue Reading

Phototuts+ – Photography and post-processing Tutorials

  • 7 Items You Never Thought to Bring to a Shoot

    Today, we’re taking a look at some of the less-obvious items that you may not consider bringing to a photo shoot. Some are tiny things, others are big – all of them will help to make any photography shoot go far smoother!

    Continue Reading

  • The Ultimate Beginner’s Introduction to Exposure

    Today we’ll be walking through the concept of exposure, right from the beginning. This article won’t befuddle you with complicated numbers and jargon, but it will help you feel more confident with your photography and understand a core concept that’s a vital piece of the photography jigsaw.

    Continue Reading

  • DIY: How To Make a Professional Softbox for Under $2

    Nowadays a softbox needn’t be all that expensive – you can get nice results for $100 or even less. But what if there’s a way of making it much cheaper, with the same results? That’s what we’ll be explaining in this DIY tutorial; how to make a softbox with professional results for less than $20.

    Continue Reading

Psdtuts+ – Adobe Photoshop Tutorials

  • Create a Cosmic Love Goddess With Photoshop CS5

    Photoshop CS5 includes several new features to help improve your workflow. In today’s tutorial we will demonstrate how to create a cosmic love goddess using some of Photoshop CS5?s new tools including the Refine Edge Feature which really helps to streamline the process of masking and removing objects from their background.

    Continue Reading

  • Design a Multimedia Website Layout in Photoshop

    First impressions do count! Stunning our viewers with a visually compelling portfolio is one of the most important things that a designer can do to court a new client. Today we will demonstrate how to use photos, brushes, and textures, and 3D objects to design a creative multimedia website layout in Photoshop. Let’s get started!

    Continue Reading

  • More Than 620 Bokeh Background Textures

    As I’m sure you already know, textures can come in very handy; whether you’re using them to subtly add interest to your work, or in full-blown, award-winning photo manipulations. Bokeh is the term used to explain the blur, or the aesthetic quality of the blur in photography, and is usually seen in good quality macro shots, in the areas that lay outside the depth of field.

    Continue Reading

Vectortuts+ – Adobe Illustrator and Vector Tutorials

  • Create a Detailed, Vector-based iPhone Illustration, Part 1

    In this tutorial you will learn how to create a photo-realistic iPhone illustration and every single icon you can find on the iPhone touch screen. That’s 18 icons! With so many fantastic tips and tricks we’ve broken the tutorial into two parts, in part two you will learn how to make the remainder of the icons and finish your illustration. Let’s get started!

    Continue Reading

  • Quick Tip: A Simple Way to Create Vector Fog

    In this tutorial, you will learn how to make a simple yet effective smoke-like illustration. Using this technique you can make smoke, fog and clouds in just a few easy steps. Let’s get started!

    Continue Reading

  • Inspiration: 35 Amazing Vector Landscapes

    Landscapes aren’t necessarily the first thing that come to mind when one thinks of vector artwork. After all, landscapes are often very nuanced and hold a wide variety of shapes, colors, and patterns that can be difficult to mimic in a vector image. But that doesn’t mean there aren’t some incredibly talented vector artists out there creating beautiful landscapes, some of which are almost photo-realistic (especially if viewed from a distance).

    Continue Reading

Creative Sessions

  • Realistic Vecyor Motorcycle Portaits

    Every semester, in my Illustrator classes, my students always want to know how I create the Motorcycle Portraits I am known for. I often give them a brief explanation, but I have never really sat down and described the process in detail…until now. My approach to getting a “realistic” look in my work is a bit tedious, but I think you will agree that the end results are well worth it. Enjoy!

    Continue Reading

  • The Making of Lost – Part 1

    A key to succeed in following this tutorial series is to experiment. I will be teaching the basic techniques but in order to create a strong composition and attractive shapes, you will need to alter the settings, change/redo splines and experiment with other effects. Patience and determination are mandatory skills for any artist. So let’s get started!

    Continue Reading

  • Scratching your Niche Market

    As opposed to discussing just the specific techniques used to target a precise niche market, I would like to start off with a few overarching thoughts. I will cover some basic, yet very useful principles to keep in mind for the bigger picture (Get it? ‘Bigger picture,’ like your career – hehe), and then supply a case study of how I have used them in my work.

    Continue Reading

FreelanceSwitch – Freelance Jobs & Freelancer Directory

  • 18 Smokin’ Hot Business Card Designs

    A good business card design is an essential tool in any freelancer’s arsenal. When you’re at a function networking, meeting new clients, or your work comes up in a conversation, your card is the anchor to make sure the discussion doesn’t come to nothing.

    Continue Reading

  • 5 Ways to Fire A Client

    There are just some clients who you no longer want to work with. It could be that the client in question is difficult to work with or it could be more a matter that you’ve moved on from the type of work you’ve been doing for that client. Whether you’ve only done a little work for the client or you’ve been together a long time, it’s never easy to fire a client. Not only do you have to get past the freelancer’s natural reluctance to give up money, but you’ve got to make the break in such a way that the client will still speak positively about you to other prospective clients.

    Continue Reading

  • 15 Inspiring Home Offices

    Is there such a thing as the perfect home office? From my personal opinion, I’d say that your own office is the perfect one. Then again, this all depends on what we have, what we use and if we’re pleased with it. I’m not even close to satisfied with my office yet, but I’m working on it.

    Continue Reading

Best of the Vector Web – June 2010


As you know, each month, we scour the Internet for the best vector content on the web and post it here for you all to enjoy. This month we found some excellent tutorials, freebies, and articles ranging from character design tutorials, free 3D vector iPhone designs, and inspirational articles; featuring all sorts of incredible vector art. Please help support the design community by visiting some of these awesome websites!

Continue reading “Best of the Vector Web – June 2010”

Workshop #89: Singularity by The Disconnect

At Audiotuts+ we irregularly put up a reader track for workshopping and critique (find out how to submit a track). This is how it works: you upload your song, and every week or so we’ll publish one here and step away from the podium. The floor is yours to talk about the track and how the artist can fix problems in and improve upon the mix and the song.

This track has been submitted for your friendly, constructive criticism. They have put their track (and their heart and soul) in your hands to learn and get useful feedback.

  • Do you enjoy the song or track itself? Does it have potential?
  • Can the arrangement be improved?
  • How did you find the mix? What would you do differently?
  • What do you enjoy about the rhythm track? What can be done to improve it?
  • Is the choice of instruments relevant and effective for the style/song?
  • Are the lyrics (if any) effective? Does the style, arrangement and genre of the song suit them?
  • Can you suggest any specific techniques that might improve the track?
  • Do you have any other constructive feedback?

Singularity by The Disconnect

Artist’s website: thedisconnect.bandcamp.com

Description of the track:

I’ve been writing a song a month since the beginning of the year and this is the first one that came out of it. I’m looking to remix it pretty shortly and would love some constructive criticism.

Download audio file (01Singularity.mp3)

Terms of Use: Users can stream the track for the purposes of giving feedback but cannot download or redistribute it. You can purchase the track from the artist’s website.

Have a listen to the track and offer your constructive criticism for this Workshop in the comments section.


Submit Your Tracks for Workshopping

Need constructive criticism on your own tracks? Submit them using this form.


Create a Still Life Candle in Photoshop


Still life compositions are like photographs in that they portray the details of objects as moments frozen in time. Still life images don’t tell a story, they simply depict the objects themselves. In today’s tutorial we will explore this style of art by creating a still life candle in Photoshop.


Resources Used

The following resources were used during the production of this tutorial:


Step 1

First, create a new file, 900×768 px and with a resolution of 300 ppi. Fill the background layer with a radial gradient as shown below.


Step 2

Now make a new layer and name it as "Candle top". Using the Elliptical marquee tool (M), create a perfect circle by holding down the Shift key while dragging.


Step 3

Fill the entire selection with the colors as indicated below using a Radial gradient.


Step 4

In the "Candle top" layer, select the small thumbnail on the left side of the layer’s name while holding the Cmd key to activate the selection marquee around the circle.


Step 5

Now go to Filter > Distort > Twirl and change the its value to an angle of 490 degrees.


Step 6

Press Cmd + T to activate the resizing handles, then do what is shown below.


Step 7

Create a new layer and name it as "Candle body". Using the Elliptical marquee tool (M), make a shape as shown in figure (a). Then using the Rectangle marquee tool (M) set in Subtract from selection mode, do what was done in figure (b) and the final product should look like (c).


Step 8

Using a Radial Gradient, fill the entire "Candle body" selection with the colors as indicated below.

Your image should look similar to the below image.

Note: Make sure that the "Candle body" layer is placed below the "Candle top" layer.


Step 9

Next add a new layer and name it "Highlights". Now, just as in Step 4, Cmd-click the "Candle body" layer to activate the selection around the shape.

Using the brush tool with a Master diameter of 168px and hardness of 0%, apply a subtle amount of color #985e11 to add a small glow below the body of the candle. This will give an illusion of light passing through the solid translucent body of the candle.


Step 10

Now make a new layer and name it "Highlights-2." Use the same technique as in Step 9 but use the color #ffffff for the brush with a Master diameter of 168px and hardness of 0%.


Step 11

Now add a new layer and name it "glass". Using the Elliptical marquee tool (M) make a shape as shown below.

Next use the Pen tool (P) to draw a shape as shown below. Make sure to select Subtract from selection mode from the pen tool panel before plotting the points. After completing the shape, right-click and choose Make Selection. From the Make selection window, configure the feather radius to 0px then click OK.

Apply a linear Gradient as shown from top to bottom.

Lastly, change its opacity to 7%.


Step 12

Now duplicate the "Glass" layer and rename it "Glass highlights" then change its opacity level back to 100%.

Using the Eraser tool (E), erase the areas as indicated below, leaving a small amount at the bottom.


Step 13

Next, add a new layer and name it "Glass face". Then, using the Elliptical marquee tool (M), make a shape as shown below.

Now using the Pen tool (P), set it to Subtract from selection in the Pen tool panel, then make a shape as shown below. After completing the shape right-click and choose Make selection from the drop down menu. From the Make selection window, adjust its Feather radius to 0px, then hit OK.

Next use the Pen tool (P) to make a shape as shown below, make sure that the Pen tool (P) is set to Subtract from selection mode from the Pen tool (P) panel. Press right-click and choose Make selection from the drop down menu. From the Make selection window, adjust its Feather radius to 0px, then hit OK.

Finally, fill the selection with #ffffff and set its opacity level to 30%.


Step 14

Now add a new layer and name it "Left glow". Then, using the Pen tool (P) draw a line as shown below. Now go to the Brush tool (B) then right-click anywhere in your image to show the brush panel. From the brush panel configure its values with a Master diameter of 20px and hardness of 0%. Then go back to the Pen tool (P), right-click and choose Stroke path from the drop-down menu. From the Stroke path window, define its stroke to use the Brush tool. Hit OK to accept the changes. Then go to Filter > Blur > Gaussian blur and from there, change its radius to 2px then press OK. Lastly, change its opacity level to 80%.


Step 15

Next add a new layer and name it "Right glow". Now use the Pen tool (P), make a shape as shown in figure (a). Then right-click and select Make selection from the drop-down menu. From the Make selection window, configure its feather radius to 0px then hit OK. The effect should look like figure (b). Fill the selection with #ffffff, as shown in figure (c).

Now from figure (c), go to Filter > Blur > Gaussian blur. From the Gaussian blur window, change its radius to 5px then press OK. Next, change its opacity level to 70%. The effect should look like figure (d). Next use the Pen tool (P) to define a shape as shown in figure (e). Next, right-click and choose Make selection from the drop-down menu. From the Make selection window, change its radius to 0px then hit OK. After that, Cmd + Shift + I to invert the selection then hit delete. The final product should look like figure (f). Lastly, change its opacity level to 70%.


Step 16

Add a new layer and name it "Rim highlights". Then, using the Pen tool (P), draw a line as in figure (a). Now go to the Brush tool (B) then press right-click anywhere in your image to show the brush panel. From the brush window, configure its values with a Master diameter of 2px and Hardness of 100%. Then go back to the Pen tool (P) then right-click and choose Stroke path from the drop-down menu as in figure (b). From the Stroke path window, define its stroke path to use the Brush tool as shown in figure (c.) Hit OK to accept the changes. Next, change its blend mode to overlay.


Step 17

Next, add a new layer and name it "Shadow shade". Using the Pen tool (P), make a shape as shown in figure (a). Next right-click and select Make selection from the drop-down menu. From the Make selection window, set the feather radius to 0px. Using the Paint bucket tool (G), fill the entire selection with #000000, as in figure (b). Erase it as shown in figure (c).


Step 18

Add a new layer and name it "Wick Shadow". Using the Brush tool (B), set the  Master diameter to 20px with a Hardness of 100%. Place a small dot in the center of the twirl on the top portion of the candle as in figure (a). Hit Cmd + T to activate the resizing handles, as in figure (b). Resize the circle vertically, then go to Filter > Blur > Gaussian blur and setting its radius to 32px. Change the layer’s opacity level to 66%.


Step 19

Next, add a new layer and name it "Wick". Using the Pen tool (P) make a shape as in figure (a). Right-click and choose Make selection from the drop-down menu. From there, adjust its feather radius to 0px. Using the Paint bucket tool (G) fill the entire selection with #000000, as shown in figure (b). Using the Brush tool (B), set the Master diameter to 17px with a Hardness of 0%, apply a small amount of #8b8b8b on top of the wick.


Step 20

Next is to put a gradient "glow" effect on the wick. Add a new layer and name it "Wick burn". Use the colors as indicated below with their corresponding brush size.


Step 21

Now we’ll be creating the flame for the candle. For this part instead of creating a new layer, we’ll be creating a new group, named "Fire group". To create the flame, follow the instructions below with its corresponding layer name, color and brush settings.

Note: Make sure that all of these layers are made inside the Fire group to prevent a cluttered layers palette.


Step 22

Now we’ll make the reflection for the candle. First, duplicate all of the candle layers. You can do this by Cmd-clicking the layers needed. After you’ve selected all the components drag them to the Create a new layer icon in the layers palette, (a). Next, merge all layers by right-clicking within the layers palette while the blue highlights for all the layers is still active. Next, select Merge Layers from the drop-down menu as in figure (b). Now name this layer "Reflection". Next hold Cmd+T to activate the resizing handles then right-click and select flip vertical from the drop-down menu.

Place the image as shown below.

Adjust its opacity level to 6% and erase areas as indicated below using the Eraser tool (E) with a Master Diameter of 257px and Hardness of 0%.


Step 23

Next, let’s add shadow to our candle. To do this, add a new layer and name it "Shadow 100". Next, using the Elliptical marquee tool (M), make an oval shape as shown below. Fill the entire selection with #000000. Go to Filter > Blur > Gaussian blur and set the radius to 7.2px.

Duplicate the "Shadow 100" layer then hit Cmd + T to activate the resizing handles. Scale the duplicated later as shown below, then lower its opacity to 90%.


Step 24

The next step is to add a subtle "Glow" coming from the candle’s flame. To do this, add a new layer and name it "Glow". Use the Brush tool (B) set to Master diameter of 473px and Hardness of 0% with color #ffffff. Follow the indicated position of the brush below.

Set the blending mode of this layer to overlay with an opacity of 50%.


Step 25

Next is to add the table where the candle will be sitting. Open the file named "Wood.jpg", then hit Cmd + T to activate the resizing handles. Right-click and select perspective from the drop-down menu, then change the Wood’s shape as shown below.

Next press Cmd + L to activate the Levels window, then set the values for the three handles as shown below.


Step 26

Next add a new layer and name it "Wood shade". Using the Rectangle marquee tool (M) select an area as indicated below.

Fill the entire selection with #000000.

Using the Eraser tool (E) set to Master Diameter 750px and Hardness of 0% erase the area as indicated below.


Step 27

Next add a new layer and name it "Circle light". Using the Elliptical marquee tool (M) make a shape as shown below. Fill the entire selection with #ffffff.

Go back to the Elliptical marquee tool (M) then right-click. Select Transform selection from the drop-down menu, and change the shape of the oval as shown below.

Hit delete.

Next, go to Filter > Blur > Gaussian blur and set its radius to 7.2px then change its opacity level to 4%.


Step 28

As for the last step, select all the layers and drag them to the Create a New layer icon as shown in figure (a). Next, merge all of them by right-clicking in the layers panel and selecting Merge layer from the drop-down menu as shown in figure (b). Lastly, go to Filter > Blur > Gaussian Blur and set its radius to 5px as shown in figure (c).

Erase the area as shown below using the indicated settings.


Conclusion

That’s it! Hope you had fun working on this project and learned many things that will help you in the future!

Google Docs Viewer, Mobile Edition

Google has just released a new version of its Doc Viewer, which enables iPhone users (and developers) to display various file formats right within the browser windows.

The viewer supports Microsoft’s DOC and DOCX formats, as well as DPS, TIFF and PPT. The viewer can be used online at http://docs.google.com/viewer.

However, Google also offers an embedded version. The viewer URLs uses the address path http://docs.google.com/viewer and supports two parameters: url points to the url of the document and embedded enables the embedded mode interface.

A direct link to a PDF file would look like this:

<a href=”http://docs.google.com/viewer?url=http%3A%2F%2Fwww.test.com%2F123.pdf”>Document Test</a>

The embedded version:

<iframe src=”http://docs.google.com/viewer?url=http%3A%2F%2Fwww.test.com%2F123.pdf&embedded=true” width=”600″ height=”780″ style=”border: none;”></iframe>

iPhone 4 x 1.7 million = $1,105,000,000

Earlier today, Apple sent out a note stating that it has sold 1.7 million iPhone 4s during the first three days of its availability. No other Apple launch has moved a similar number of units at launch. The original iPhone needed 74 days to hit 1 million, the 3G S sold 1 million units in 3 days and the iPad sold about 1 million units in a month.

The economics behind the launch are especially interesting. AT&T and other retailers are believed to pay nearly retail price to Apple for each iPhone, while the profit is mainly made via service contracts. At $600 for the cheaper version of the two iPhone variants, Apple’s iPhone 4 has already shifted more than $1 billion in sales in three days. Some estimates claim that Apple will be selling some 2.5 million iPhones until the end of July.

Market research firm iSuppli has already come up with some other numbers in its teardown report. Apparently it costs Apple about $188 to build and assemble each 16 GB iPhone. The most expensive component remains the screen, which is estimated at $28.50. That may be one of Apple’s best profit margins yet: Typically, the margin is somewhere in the 40-50% neighborhood. The iPhone 4 margin is at close to 70%, if the (unofficial) $599 price tag is correct.

If you order an iPhone 4 now, you will have to wait until the end of July, we hear. And those who don’t want to shell out $200 can get discounts or even free phones in a contest wave that is already flooding the Internet. The most creative idea may come from BlendTec, which said it will give one lucky winner an iPhone and prepay a 2-year service contract. In return, you are asked to surrender your old iPhone, which may end up in iSmoke and ascend to YouTube fame.

How to Extract Kicks Cleanly from Multi-track Loops in FL Studio

Have you ever wanted to cut a kick drum out of a loop but found it difficult to do so without bringing the other instruments with it? Even if you’re dealing with loops that are drums-only, the vast majority of the kicks in these loops have cymbals and hats playing at the same time. But there are ways to extract the kicks cleanly, without the hats and cymbals. This tutorial will demonstrate three surprisingly effective techniques, useful for three different situations ranging from simple to difficult.


Technique 1: EQ Automation

Some of the best kicks that come with FL Studio, and in sample packs, are in loops. They are buried under hat and crash sounds, but we can dig them out using the tools of EQ automation, Slicex’s undo envelope, and Edison’s denoiser.

To begin, we’ll start with the simplest method, EQ automation. If you’re following along in FL Studio, navigate to the royalty-free Packs > Loops > Drums folder in the Browser and load up the loop named LP_Faxing Berlin A_128. Right click on the sample’s name and select Open in new Slicex Channel.

Download audio file (01atcleaning.mp3)

Sampling this kick will be easier than in most situations, because for the most part we can hear the kick alone. I played the loop at a tempo slower than its original to show that the kick’s tail is interrupted by the hi-hat. You can also see it visually in Slicex.

Our goal is to extract this kick cleanly for use in other songs, and we have a few options. To avoid having the hat in the sound, we could just use the kick without the tail, but that would make it have an unpleasant, abrupt ending.

Download audio file (02atcleaning.mp3)

Or, we could use the whole sound. Then we’d have a kick with a hi-hat sound on the end of it, which is not very useful, but at least it would have a more natural ending. To see what this sounds like, go ahead and delete Marker 2 so that the first marker will also include the kick’s tail and hi-hat. This will bring us a step closer.

Download audio file (03atcleaning.mp3)

Now, we could try to filter out the hat with EQ, but then we’d lose the punchy, high attack of the kick.

Download audio file (04atcleaning.mp3)

This is brings us a step closer, but it puts us in a tough compromise. If we want more clarity in our kick sound, we’ll have to hear more of the hat, and if we eliminate the hat, we’ll be left with only the sub-bass of the kick. This is where automation comes in. We can automate the frequency of our low-pass EQ so that it stays up during the attack of the kick and then dives quickly at the end to eliminate the hat. This will enable to us to have the punchy attack and low release of the kick sound, with no hat.

Download audio file (05atcleaning.mp3)

Now you have a useful, fully intact kick drum sound that you can render for use in your own songs. You may want to save this project file because this set-up will come in handy more often than you might think.


Technique 2: Slicex Undo Envelope

Unlike the other techniques in this tutorial, this technique seems to work even in extreme situations, but it is the most technical. In order to demonstrate this, let’s try for something a little more challenging. Load the drum loop Power Break into a new Slicex plugin. (I recommend using FL’s Smart Find feature, CTRL+F.)

Download audio file (06atcleaning.mp3)

I want to save this kick, but it has a cymbal that plays at the same time throughout the whole sound.

Download audio file (07atcleaning.mp3)

This means that previous technique won’t work well, here is what it would sound like:

Download audio file (08atcleaning.mp3)

That actually could be a good sound in its own right, but it doesn’t achieve the goal of removing the kick as transparently as possible. To do this, we’ll combine Slicex’s internal EQ and the Undo Envelope feature to surgically remove the cymbal. So let’s delete everything except the first kick, and then select Equalize from Slicex’s Tools menu (wrench icon). You may also want to clone this instance of Slicex so that you’ll have a backup copy–we’ll be doing some heavy editing.

Next, try out equalization curves and use the preview button to hear how it affects the sound. It’s all about trying to find that difficult middle ground between the cymbal and the kick’s attack. Keep too much of the highs, and you keep the cymbal, but if you completely lose the highs, you lose the kick’s attack. In the next step we’ll reclaim the kick’s attack so you can remove more of the highs than you’re used to. Also, feel free to be creative and shape the EQ according to the sound you’re looking for.

Download audio file (09atcleaning.mp3)

Now let’s create an envelope to reclaim our kick’s attack. Click on the all purpose envelope icon and draw something like the picture below. You won’t hear an audible difference yet, but in the next step we’ll tell Slicex to undo the equalization in proportion to the envelope. Where the envelope is high, we’ll end up with the before EQ sound. Where the envelope is low, we’ll end up with the after EQ sound, and where the envelope is in the middle, we’ll have a mix of the before and after.

On Slicex’s GUI, select Edit (scissors icon) > Undo Mix (envelope) > and click not on Equalize, but on the step listed just above it. Now we have reclaimed our attack without introducing a sweeping filter sound.

Download audio file (10atcleaning.mp3)

If you listen closely, with headphones, to the tail of the kick, you can still hear some of the cymbal’s ring in the background, so I’m going to use Technique 1 to finish off that noise. To save time I’m going to route it to the mixer track I used in Technique 1, and I’ll make a slight adjustment to the automation timing. I made the filter take longer to move down, in order to retain the mid-range crunch of this kick.

Download audio file (11atcleaning.mp3)


Technique 3: Noise Profiles with Edison

This third technique is useful in situations when you are trying to cut a kick out of a loop that has a cymbal on it, but that cymbal also plays alone somewhere else in the loop. What we’ll do is tell Edison that the cymbal is noise and then we’ll have Edison denoise the kick.

Load the drum loop Classic Break. As a shortcut, right-click on the file name and select edit. This will open the file in an instance of Edison, on the Browser Mixer Track.

Download audio file (12atcleaning.mp3)

Press the loop button and use the right and left arrow keys to switch between playing the different slices in the loop. The kick has a hi-hat on it, and we’re looking to see if a similar hi-hat plays on its own anywhere else in the loop.

It appears that the third solo hi-hat may be the closest. At first listen, it sounds like the third hi-hat is higher than the hat that plays with the kick, but we need to listen more closely. By A-B’ing the sounds and trying to filter out the kick (for comparing purposes) as we listen, we can hear that they are similar, perhaps the same.

Download audio file (13atcleaning.mp3)

If it sounds close, it’s close enough. Select the third solo hat and go to Tools > acquire noise profile, or use the keyboard shortcut ALT + U.

Next, select the first kick, and go to Tools > Clean up (denoise), or use keyboard shortcut CTRL + U. I wanted Edison to pay more attention the highs so I boosted them a little, which resulted in more metallic sizzle being removed.

You may want to adjust the amount knob differently than I. With more amount, more frequencies from the hat get removed, but there are many frequencies that the hat and the kick have in common. So we find ourselves with same old question, “how much of the kick are you willing to give up in order to get rid of the hat?” Use the preview button to find your answer, and then hit the accept button once you’re satisfied with the results. The audio file below plays my settings for a bar, then plays the “before” for a bar, then plays the “after” again.

Download audio file (14atcleaning.mp3)

There we go! We removed the nasty metallic sound. As with the previous examples, we could remove some of the ultra-highs before saving the sound, but I find that in most cases, it’s better to wait until I’m working on a song to bring out the static EQ. This way, I can tailor the EQ to each song project and reuse the kick without having it sound exactly the same in each track. This is also why I’m choosing not to compress this kick for now.

That demonstrates our last method for this tutorial. In summary, we rescued three kicks from a variety of situations. We used EQ automation to get the Faxing Berlin kick, Slicex’s undo envelope to get the Power Break kick, and Edison’s denoiser to get the Classic Break kick. There are many other kicks out there, perhaps sitting in your loops folder, waiting to be extracted, and now you have a way to do it! I encourage you to explore the possibilities inside of FL Studio’s powerful, high-fidelity tools.


Final Tips

  • Mix and match techiques. Each method colors the sound a certain way. If you want to prevent the coloring and preserve the original kick sound, it’s better to use a few techniques gently rather than try to use one technique dramatically.
  • In Technique 2, I suggested cloning the Slicex plugin. I recommend doing this so that you can try out different EQ shapes and undo envelopes and compare them. It takes awhile to get a hang of it, and comparison will help show you the effects of different settings.
  • Sometimes, dirty is better. Sometimes the noise, cymbals, and hats work as a part of the drum sound and it’s better to leave it. But, if you are able to extract a solid kick cleanly, you can reuse that kick many times, maybe by adding your own custom dirt to it in each track.


Quick Tip: Some Basic Equalization Tips

What is equalization? Equalization (or EQ) doesn’t change the frequency in any way really – it’s just a frequency volume control.

There are two different types of equalizers used.

Graphic EQ:

Parametric EQ:

The difference is that graphic equalizers are usually used for “Corrective EQ” – turning problem frequencies up or down, for example finding and turning down feedback at a live event. (Problem frequencies tend to be 250 Hz and 1 kHz.) They also have fixed frequency settings so you can’t pick and choose what frequency to boost or cut, you alter what you’re given.

On the other hand, parametric equalizers are mainly used for “Creative EQ”, altering a frequency level until you get something that excites us, but can also be used for corrective EQ. There are no fixed frequencies on a parametric equalizer – you can boost and cut the frequencies that you want.


Basic Controls

There are three basic controls on a parametric EQ. You will sometimes come across Gates etc.
Especially on Graphic Equalizers but I’m just going to talk about the main 3 on parametric.

1. Gain

Gain is of course the volume control, up and down for each frequency you select, they don’t usually go above +15dB of gain.

2. Q or B/W (Bandwidth)

Q is the width of the of the frequency you are changing here is an example:

1 and 2 have a very narrow Q. 3 and 4 have a very wide Q. Wide Qs effect a wide range of frequencies, while a narrow Q effects only a narrow band.

3. Frequency

Frequency just allows you to scan up and down the frequency spectrum to find frequencies you do and don’t like in your track.


3 Tips on EQ

Tip 1: Cut First, Boost Later

Cut the frequencies you don’t want. For example, if you want the low end of your bass to stand out more, don’t just boost the lows or you’ll add extra gain and noise. You must first cut out some of the high/mid frequencies that you don’t want. Don’t just take it all out or you’ll be left with a very horrible, thin instrument that’s missing a lot of the fundamental frequencies.

By cutting Frequencies you don’t like, you’re also letting other instruments in the overall mix to filter through. This is important if your mix gets a little overcrowded.

This doesn’t mean boosting is a bad thing, but do it moderately and subtly. Just make sure you cut out what you don’t want first.

Tip 2: Narrow vs Wide Bandwidth

Too often people use an extremely narrow bandwidth to boost frequencies. There is nothing wrong with this really, but a narrow bandwidth will not changing many frequencies at once, and this will eventually cause your instrument to sound very unnatural. Cutting narrow is usually fine for taking out things like feedback and mud for example but for boosting I’d recommend a wider bandwidth.

Tip 3: Bleed/Spill

Bleed can be considered both good and bad in a recording session, but when it comes to EQ and effects it can be quite bad. This is why most people like to record in separate rooms, but trying to record completely dry can lead to very unnatural sounding recordings.

If a snare sound bleeds into your guitar track, when you EQ your guitar you are also going to be changing the sound of the snare. There are ways to fix this but not always perfectly. Gates for example.

The guitar amp is much closer to the microphone than the snare, so the guitar will be louder on that track. Set a gate at a threshold so the track is only in use when the guitar is playing. To battle with this you could try putting an EQ filter or just cut out certain frequencies to try and clean up some of the bleed.


How to create a built-in contact form for your WordPress theme

Getting Ready

You can see the working form on my site PHP Snippets. It is a site of mine, so don’t hesitate to grab the RSS feed and follow it on Twitter if you want.

Step 1: Creating the page template

The first step is to create a page template. To do so, copy the page.php code into a new file named page-contact.php.

We have to add a comment at the beginning of the contact.php file to make sure WordPress will treat the file as a page template. Here’s the code:

<?php
/*
Template Name: Contact
*/
?>

Your contact.php file should look like this:

<?php
/*
Template Name: Contact
*/
?>

<?php get_header() ?>

	<div id="container">
		<div id="content">
			<?php the_post() ?>
			<div id="post-<?php the_ID() ?>" class="post">
				<div class="entry-content">
				</div><!-- .entry-content ->
			</div><!-- .post-->
		</div><!-- #content -->
	</div><!-- #container -->

<?php get_sidebar() ?>
<?php get_footer() ?>

Step 2: Building the form

Now, we have to create a simple contact form. Simply paste the following code within the entry-content div.

<form action="<?php the_permalink(); ?>" id="contactForm" method="post">
	<ul>
		<li>
			<label for="contactName">Name:</label>
			<input type="text" name="contactName" id="contactName" value="" />
		</li>
		<li>
			<label for="email">Email</label>
			<input type="text" name="email" id="email" value="" />
		</li>
		<li>
			<label for="commentsText">Message:</label>
			<textarea name="comments" id="commentsText" rows="20" cols="30"></textarea>
		</li>
		<li>
			<button type="submit">Send email</button>
		</li>
	</ul>
	<input type="hidden" name="submitted" id="submitted" value="true" />
</form>

Nothing hard with this pretty self-explanatory html code for our form. Note the input type=”hidden” I added on line 19: It will be used later to check if the form has been submitted.

Step 3: data processing and error handling

Our form looks pretty good, but right it is very useless because it does not send any email. What we have to do is to verify if the form has been submitted then verify if fields have been filled correctly.

If fields are correctly filled, we’ll get the blog admin email and send them the email. Otherwise, no email will be sent and errors will be displayed to the user.

Paste the following code between the Page Template declaration and the get_header() function:

<?php
if(isset($_POST['submitted'])) {
	if(trim($_POST['contactName']) === '') {
		$nameError = 'Please enter your name.';
		$hasError = true;
	} else {
		$name = trim($_POST['contactName']);
	}

	if(trim($_POST['email']) === '')  {
		$emailError = 'Please enter your email address.';
		$hasError = true;
	} else if (!eregi("^[A-Z0-9._%-]+@[A-Z0-9._%-]+\.[A-Z]{2,4}$", trim($_POST['email']))) {
		$emailError = 'You entered an invalid email address.';
		$hasError = true;
	} else {
		$email = trim($_POST['email']);
	}

	if(trim($_POST['comments']) === '') {
		$commentError = 'Please enter a message.';
		$hasError = true;
	} else {
		if(function_exists('stripslashes')) {
			$comments = stripslashes(trim($_POST['comments']));
		} else {
			$comments = trim($_POST['comments']);
		}
	}

	if(!isset($hasError)) {
		$emailTo = get_option('tz_email');
		if (!isset($emailTo) || ($emailTo == '') ){
			$emailTo = get_option('admin_email');
		}
		$subject = '[PHP Snippets] From '.$name;
		$body = "Name: $name \n\nEmail: $email \n\nComments: $comments";
		$headers = 'From: '.$name.' <'.$emailTo.'>' . "\r\n" . 'Reply-To: ' . $email;

		mail($emailTo, $subject, $body, $headers);
		$emailSent = true;
	}

} ?>

What I’ve done here was simply to make sure that the form has been submitted and filled correctly. If an error, such as an empty field or incorrect email address occurred, a message is returned and the form isn’t submitted.

Now we have to display error messages below the related field, for example “Please enter your name”. Below you’ll find the complete form page template that you can use “as it”.

<?php
/*
Template Name: Contact
*/
?>

<?php
if(isset($_POST['submitted'])) {
	if(trim($_POST['contactName']) === '') {
		$nameError = 'Please enter your name.';
		$hasError = true;
	} else {
		$name = trim($_POST['contactName']);
	}

	if(trim($_POST['email']) === '')  {
		$emailError = 'Please enter your email address.';
		$hasError = true;
	} else if (!eregi("^[A-Z0-9._%-]+@[A-Z0-9._%-]+\.[A-Z]{2,4}$", trim($_POST['email']))) {
		$emailError = 'You entered an invalid email address.';
		$hasError = true;
	} else {
		$email = trim($_POST['email']);
	}

	if(trim($_POST['comments']) === '') {
		$commentError = 'Please enter a message.';
		$hasError = true;
	} else {
		if(function_exists('stripslashes')) {
			$comments = stripslashes(trim($_POST['comments']));
		} else {
			$comments = trim($_POST['comments']);
		}
	}

	if(!isset($hasError)) {
		$emailTo = get_option('tz_email');
		if (!isset($emailTo) || ($emailTo == '') ){
			$emailTo = get_option('admin_email');
		}
		$subject = '[PHP Snippets] From '.$name;
		$body = "Name: $name \n\nEmail: $email \n\nComments: $comments";
		$headers = 'From: '.$name.' <'.$emailTo.'>' . "\r\n" . 'Reply-To: ' . $email;

		mail($emailTo, $subject, $body, $headers);
		$emailSent = true;
	}

} ?>
<?php get_header(); ?>
	<div id="container">
		<div id="content">

			<?php if (have_posts()) : while (have_posts()) : the_post(); ?>
			<div <?php post_class() ?> id="post-<?php the_ID(); ?>">
				<h1 class="entry-title"><?php the_title(); ?></h1>
					<div class="entry-content">
						<?php if(isset($emailSent) && $emailSent == true) { ?>
							<div class="thanks">
								<p>Thanks, your email was sent successfully.</p>
							</div>
						<?php } else { ?>
							<?php the_content(); ?>
							<?php if(isset($hasError) || isset($captchaError)) { ?>
								<p class="error">Sorry, an error occured.<p>
							<?php } ?>

						<form action="<?php the_permalink(); ?>" id="contactForm" method="post">
							<ul class="contactform">
							<li>
								<label for="contactName">Name:</label>
								<input type="text" name="contactName" id="contactName" value="<?php if(isset($_POST['contactName'])) echo $_POST['contactName'];?>" class="required requiredField" />
								<?php if($nameError != '') { ?>
									<span class="error"><?=$nameError;?></span>
								<?php } ?>
							</li>

							<li>
								<label for="email">Email</label>
								<input type="text" name="email" id="email" value="<?php if(isset($_POST['email']))  echo $_POST['email'];?>" class="required requiredField email" />
								<?php if($emailError != '') { ?>
									<span class="error"><?=$emailError;?></span>
								<?php } ?>
							</li>

							<li><label for="commentsText">Message:</label>
								<textarea name="comments" id="commentsText" rows="20" cols="30" class="required requiredField"><?php if(isset($_POST['comments'])) { if(function_exists('stripslashes')) { echo stripslashes($_POST['comments']); } else { echo $_POST['comments']; } } ?></textarea>
								<?php if($commentError != '') { ?>
									<span class="error"><?=$commentError;?></span>
								<?php } ?>
							</li>

							<li>
								<input type="submit">Send email</input>
							</li>
						</ul>
						<input type="hidden" name="submitted" id="submitted" value="true" />
					</form>
				<?php } ?>
				</div><!-- .entry-content -->
			</div><!-- .post -->

				<?php endwhile; endif; ?>
		</div><!-- #content -->
	</div><!-- #container -->

<?php get_sidebar(); ?>
<?php get_footer(); ?>

Step 4: Adding jQuery verification

Our form is now working perfectly. But we can enhance it by adding a client side verification. To do so, I’m going to use jQuery and the validate jQuery plugin. This plugin is great because it allows you to verify that a form has been filled correctly, quickly and easily.

The first thing to do is to download the validate plugin and upload it into your theme file (under a /js directory). Once done, paste the following into a new file:

$(document).ready(function(){
	$("#contactForm").validate();
});

Save it as verif.js in your /js directory.

Now we have to link the javascript files to our theme. Open your header.php file and paste the following within the <head> and </head> tags:

<?php if( is_page('contact') ){ ?>
	<script type="text/javascript" src="<?php bloginfo('template_directory'); ?>/js/jquery.validate.min.js"></script>
	<script type="text/javascript" src="<?php bloginfo('template_directory'); ?>/js/verif.js"></script>
<?php }?>

Once done, your form will be validated on the client side by the jQuery validate plugin. How does it work? It simply picks form element which have the css class required and verifies if they’re filled correctly. If not, a message is displayed.
The plugin is powerful and you can do lots of things with it, however this isn’t the purpose of this article. Hope you enjoy your new WordPress form!

Like CatsWhoCode? If yes, don’t hesitate to check my other blog CatsWhoBlog: It’s all about blogging!

How to create a built-in contact form for your WordPress theme

Fluidic Designs Using Particular

This tutorial is based on the Hyundai i45 tv commercial. The effect is rain falling in the shape of various designs, onto a vehichle. The tvc uses a real-world rain rig with a computer driven water delivery system, however we will be showing you how to create the same effect using only After Effects and Particular.


Tutorial

Download Tutorial .flv

File size 288MB


Inspiration: 40 Typographic Posters


Typography is the designers’ and illustrators’ most multifaceted weapon. It is seen everywhere. On our screens, in our books and magazines, on our breakfast packaging. We’re always being inspired by the typography around us, even if you don’t know it yet. With it being just about everywhere we look, it inspires us to break the rules, which a lot of the typographic-based posters below do, and do incredibly well, too. We have a lovely, eye-catching and mind-blowing collection of 40 typographic posters below, all designed by some of the best and most-talented typographic designers and illustrators this side of the millennium. We’d love to know your favorite poster below, why it’s your favorite, and if we missed any of your favorite typography posters. Enjoy!

Continue reading “Inspiration: 40 Typographic Posters”

Workshop #88: Two Heads by Vestis

At Audiotuts+ we irregularly put up a reader track for workshopping and critique (find out how to submit a track). This is how it works: you upload your song, and every week or so we’ll publish one here and step away from the podium. The floor is yours to talk about the track and how the artist can fix problems in and improve upon the mix and the song.

This track has been submitted for your friendly, constructive criticism. They have put their track (and their heart and soul) in your hands to learn and get useful feedback.

  • Do you enjoy the song or track itself? Does it have potential?
  • Can the arrangement be improved?
  • How did you find the mix? What would you do differently?
  • What do you enjoy about the rhythm track? What can be done to improve it?
  • Is the choice of instruments relevant and effective for the style/song?
  • Are the lyrics (if any) effective? Does the style, arrangement and genre of the song suit them?
  • Can you suggest any specific techniques that might improve the track?
  • Do you have any other constructive feedback?

Two Heads by Vestis

Description of the track:

I have recently begun the process of building my own recording studio in my apartment. After some time we have finally gotten pretty serious about it and this is our first project. I am interested in feedback on how to make it better!

Download audio file (01TwoHeads.mp3)

Terms of Use: Users can stream the track for the purposes of giving feedback but cannot download or redistribute it.

Have a listen to the track and offer your constructive criticism for this Workshop in the comments section.


Submit Your Tracks for Workshopping

Need constructive criticism on your own tracks? Submit them using this form.