Quick Tip: How Create an Abstract Desktop Wallpaper


Looking for an abstract wallpaper but can’t find a color or shape that your like? In this tutorial you will learn how to create desktop wallpapers using simple geometric figures, the Blending Mode, and Gaussian Blur. Let’s get started!

Continue reading “Quick Tip: How Create an Abstract Desktop Wallpaper”

Create CS5 Width Profile Brushes in any Version of Adobe Illustrator CS!


Adobe Illustrator CS5 has a new option within the Stroke window known as "Width Profile". This tutorial shows how you can create brushes and use them in any version of Adobe Illustrator CS. You will also learn how to create, save and use your new brushes!

Continue reading “Create CS5 Width Profile Brushes in any Version of Adobe Illustrator CS!”

How to Create & Use Custom Groove Templates in Logic

Groove templates can be very useful when making music, and Logic makes it quite easy for you to make your own and use them in your projects. However a little homework is required and there are a few tricks to doing it right. That’s what this tutorial is all about.

I would like to mention that I am not going to provide the project file for this tutorial. If you do it right, this has to be done only once. So if I do include the project files, it would make the tutorial redundant.

For the uninitiated, a groove template is made using a MIDI pattern that has been quantized with a certain groove. Therefore a prerequisite to this tutorial is that you have some other source for a “groove” at hand. For example a drum machine or a sequencer other that Logic (like Ableton Live). This may seem strange but there small differences in the groove quantization.

I will be using Ableton Live to create the source MIDI files which we will later use in Logic. Again, you can use any sequencer or plugin that can add groove to MIDI sequences. (a plugin that can do this is GURU by fxpansion)

Let’s get started.


Step 1

Open Ableton Live and create an Instrument Track. Now drop a “Simpler” instrument on the track and drop the “Click Attack” sample provided on Simpler (this is only for monitoring purposes). Double click in any cell of the instrument channel to create a MIDI region.


Step 2

At the bottom left corner, right click/crtl click on the “1/16″ and select 1/8 in the popup menu to change the grid.

You could use 1/16 notes too, but I’m sticking to 1/8 notes for the purpose of the tutorial. Once you learn how it’s done, you can create MIDI sequences with different grooves based on both, 1/8th and 1/16th notes.


Step 3

Now double click after the first grid line to create a MIDI note. In this case it makes no difference which note you are using since this has nothing to do with tone or pitch.

Do this for all 8 divisions of the grid, or simply use the shortcut “Command-D” seven times (Ctrl-D in case of windows).

Play the MIDI clip to hear how it sounds without any groove applied. This way it will be easier to hear the difference once you apply a groove to the sequence.


Step 4

Once the notes are drawn, locate the “Clip” section towards the bottom left of the screen. (It’s right beside the “Status Bar”.) Here you will find the Groove drop-down menu and right next to the word “Groove” a small round “Hot Swap” button. Click the Hot Swap Button to reveal the Groove Library.

Now you can see all the grooves from various sources that you can apply to your MIDI patterns within Live. Ironically there is also a folder of Logic grooves you can use in Live. For the purpose of this tutorial, we will chose the MPC folder which uses grooves generated using the legendary AKAI MPC sampler. (I suggest experimenting with the others later.)


Step 5

Now double click on any of the MPC 8 Swing grooves to hear how they sound with the pattern you created earlier. Experiment to hear what they sound like and make notes since you can make templates out of all the grooves that work well with your music.

In the case of this tutorial, we will use the “MPC 8 Swing-60”. To apply the selected groove to the MIDI clip, click on “Commit” right below the Groove drop-down menu in the Clip section. The quantization will visually change on the right side to show the applied change. You should also be able to hear the difference.


Step 6

We now need to export this MIDI data so that it can be used by Logic. To do this, simply right click / ctrl click on the MIDI clip and select “Export MIDI Clip” in the menu. Save the file in an easily accessible location since it will be needed soon. I also suggest naming it depending on the groove used, for example: mpc8-60.mid. This will avoid confusion when using the files later.

This process can be repeated for all the chosen grooves and also using the 1/16 grid. By the end of this you should have your own pool of usable MIDI grooves that can now be converted to Groove Templates in Logic.


Step 7

Once this is done it’s time to open Logic and start a new project. If you use a “Project Template” or “Autoload” in your workflow, I suggest incorporating the next part into the Template and saving it. If you do not use a template, now would be a good time to start. The reason for this is that Logic will not remember your groove templates across projects or even within the same project if it is not being used.


Step 8

Import or drag and drop all the MIDI files that you created using Live and organize them in the arrange window. Rename the tracks to exactly how you want them to appear in the Quantize menu before saving them as Groove Templates. Once the tracks have been renamed select all the MIDI regions that were imported containing groove information , right click / ctrl click on the selection, scroll down to “Name & Color” and chose “Name Regions by Tracks” in the sub-menu.


Step 9

Finally we get to creating the actual groove template in Logic. This is a really simple step. Just select a track which has a MIDI region with groove information and in the “Inspector”, found at the top left of the page, click on the arrows next to “Quantize”.

The menu that appears will have all the default logic quantization values and at the bottom of the list an option to “Make Groove Template”. Clicking one that adds the groove template to the list and it is ready for use. Using the templates is easy. Just click on any other midi track to which you want to apply the groove and go back to the quantization menu and select a groove from the list. The groove templates will also be available in the Piano Roll editor.


Step 10

Now that we are done with the creation of Groove Templates, it’s time to clean up and organize. First of all, remove all the virtual instruments that were created on the instrument tracks when the MIDI files were imported. This is very important! You could also choose to not send them to the stereo output (by assigning them to “No Output”), but this is not essential.


Step 11

Select all the MIDI regions you used as groove templates and right click / ctrl click on the selection, scroll down to the last option in the drop-down menu and select “Pack Folder” from the resultant sub-menu. You may want to rename the folder at this time following the same steps as renaming a MIDI region.


Step 12

On top of the Arrange window, immediately to the left of the “Edit” button is a button with the letter “H” on it. Clicking on this button turns it green and reveals a smaller “H” button on all the tracks in the Arrange window. Click on the small “H” corresponding to the folder track containing the MIDI grooves. This will also turn green once activated. Now simply click on the larger “H” next to the “Edit” button and the track will be hidden from view in the arrange window. The button will also turn orange to indicate that the project has hidden tracks.


Step 13

All that remains now is to save all this work. As mentioned earlier, those that started this exercise within their Autoload or Default Template should save it as a part of the template. For those that haven’t been using templates, save this project as a Template.

By doing this, the Custom Groove Templates that were added to the Quantize list will appear on every new project.

Have fun creating your own pool of Groove Templates for Logic.


Workshop #97: Blue Sky by MichaelBrown

At Audiotuts+ we irregularly put up a reader track for workshopping and critique (find out how to submit a track). This is how it works: you upload your song, and every week or so we’ll publish one here and step away from the podium. The floor is yours to talk about the track and how the artist can fix problems in and improve upon the mix and the song.

This track has been submitted for your friendly, constructive criticism. They have put their track (and their heart and soul) in your hands to learn and get useful feedback.

  • Do you enjoy the song or track itself? Does it have potential?
  • Can the arrangement be improved?
  • How did you find the mix? What would you do differently?
  • What do you enjoy about the rhythm track? What can be done to improve it?
  • Is the choice of instruments relevant and effective for the style/song?
  • Are the lyrics (if any) effective? Does the style, arrangement and genre of the song suit them?
  • Can you suggest any specific techniques that might improve the track?
  • Do you have any other constructive feedback?

Blue Sky by MichaelBrown

Description of the track:

This is an instrumental I recorded recently. Kind of a Pink Floyd/David Gilmour thing. I used Sonar 7 Studio, a Ramsa DA7 digital console (still the best bang for the buck for out of the box tracking and mixing), a Behringer V amp pro for guitars, a Martin D15 acoustic miked with an AT 2020 ( great all-purpose mic for the price). Drums are programed, with a touch of blue egg shaker to humanize it a bit. Let me know what ya think!

Download audio file (BLUESKY.mp3)

Terms of Use: Have at it! Share with your facebook friends if you think they will dig it.

Have a listen to the track and offer your constructive criticism for this Workshop in the comments section.


Submit Your Tracks for Workshopping

Need constructive criticism on your own tracks? Submit them using this form.


Interface Design – Creative Session Wrap


It’s a wrap. This session has covered a mix of interface design topics. We’ve looked at quite a bit of inspirational icon and graphic user interface design articles, after reviewing theory on topics like creating user friendly interfaces. We’ve reviewed both in depth detailed tutorials and case studies. This session posted across numerous Tuts+ sites: Nettuts+, Psdtuts+, and Mobiletuts+. We’ll continue to expand each session as we cover new topics and integrate your feedback. Let us know what you think of this session’s material.


Interface Design – CS Content

  • Getting Started with Interface Design

    In this article we look at five fields that you should aim to learn more about in order to rock at interface design. These fields include Experience Design, Interaction Design, Information Architecture, User-Centered Design, and Graphic User Interface (GUI) Design.

    Visit Article

  • Three Steps to Fostering a User-Centered Design Culture

    As responsible designers we must educate clients on the importance – both the validity as well as the viability – of the user-centered design process, one that gives due consideration to the needs of potential users. With the three steps that follow, we’ll go over techniques that you can use to get your team thinking about what’s really important with regards to the design of their websites you’ll help them create.

    Visit Article

  • Roughly Speaking: Working within Mobile UI Design Limitations

    Visit Article

  • Showcase of Macintosh Dashboard Widget UI Designs

    This inspirational compilation post showcases a collection of 32 creative, unique and easy to use Apple Macintosh Dashboard Widgets, including a selection of default widgets that ship with your Apple Mac, and a good handful or two of third party widgets.

    Visit Article

  • Designing Realistic Interfaces – Part 1

    You have to be great in many areas of Photoshop to be good at interface design. So along with the actual steps needed to create this particular interface, in this series I will also provide as many references to other tutorials, resources and concepts as possible. That way, you can have access to some of the tools that will allow you to create completely original interfaces utilizing the same methods I teach in collaboration with your own creativity. Let’s get started with Part 1 of this two part series.

    Visit Tutorial

  • Designing Realistic Interfaces – Part 2

    You have to be great in many areas of Photoshop to be good at interface design. So along with the actual steps needed to create this particular interface, in this series I will also provide as many references to other tutorials, resources and concepts as possible. That way, you can have access to some of the tools that will allow you to create completely original interfaces utilizing the same methods I teach in collaboration with your own creativity. Let’s move on with Part 2 of this two part series.

    Visit Tutorial

  • Know Your Icons Part 1 – A Brief History of Computer Icons

    As with great works of art, you must look into the past to appreciate the future. With roots as far back as the 1970?s, the humble icon has come a long way. Following is a collection of icons though history. Although there have been many other operating systems in the time between 1981 – 2010, I’ve hand picked the ones of the most significance to modern icon design. These designs show just a small fraction of the icons in the many and varied User Interfaces throughout the years.

    Visit Article

  • Know Your Icons Part 2 – Modern Icon Design

    In the last installment you learned about the history of icon design and how it has evolved from black and white representations of office items into full colored, glassy, hyper-rendered, isometric representations of… office items. In this installment I will be delving further into the world of icons and exploring what icons mean to us today.

    Visit Article

  • Exploring Graphic User Interface Styles – from Minimal to Futuristic

    A user interface (UI) can come in many styles ranging graphically from very simple, all the way to extremely complex. In this article we are going to explore a range of styles demonstrating that there isn’t just one recipe for creating a good looking, and ultimately successful user interface. Of course, not every style is represented in this article; we will be exploring several high-quality examples, representing a wide range of graphical styles from simple to complex. Enjoy!

    Visit Article

  • iPad Magazine Interface Design

    A great magazine is more than just a collection of articles around a theme or idea, it’s a curated editorial experience. Through layout design and copy it can take you to different places and teach you new things. The release of the iPad has kicked off the latest chapter in the history of magazine design. I’ve been working with a startup, Sideways.com, to create our own magazine publishing platform and here is what we’ve done.

    Visit Article


Your Thoughts on this Digital Illustration Session

We’d love to here your feedback and suggestions on how to improve Creative Sessions. We’re actively working to improve this project, by consistently adding more high quality material, and new intensive two week sessions releasing each month. We look forward to your comments.

Create Photoshop Stencil Art – Psd Premium Tutorial


Today, we have another Psd Premium tutorial exclusively available to Premium members. If you want to take your design skills to the next level, then we have an awesome tutorial for you. Learn more after the jump!


This Premium Tutorial is Filled with Creative Tips

Urban art has fast become the de-facto graphic style for practically all things associated with youth culture. Extreme sports, clothing, and music have all been heavily influenced by its gritty, low-brow appeal. Today’s premium tutorial by author Mark Mayers will show you how to re-create a popular style of stencil graffiti art without getting your hands messy or winding up in jail!

Mark is a talented designer and illustrator from the UK. He has worked as a designer and creative director for several design/advertising agencies and specializes in print, branding, packaging, and exhibition graphics. Mark began his career when the tools of the trade were markers, layout pads, and most importantly, the ability to draw, but he embraced the digital revolution in the early 90′s and swapped his drawing board for a Mac. Today, Mark freelances from his studio in Cornwall for such clients as American Express, BMW, Future Publishing, IDG Communications and Imagine Publishing. Log in or Join Now to get started!


Professional and Detailed Instructions Inside

Premium members can Log in and Download! Otherwise, Join Now! Below are some sample images from this tutorial.


Psd Premium Membership

As you know, we run a premium membership system here that costs $9 a month (or $22 for 3 months!) which gives members access to the Source files for tutorials as well as periodic extra tutorials, like this one! You’ll also get access to Net Premium and Vector Premium, too. If you’re a Premium member, you can log in and download the tutorial. If you’re not a member, you can of course join today!

iPad: Ground Zero For Enhanced EBooks?

So we know that the iPad is often criticized as a device that tries to be everything to everyone, but does not excel at any particular discipline. Amazon’s Kindle comes up as an example very often, in which the Kindle is described as the better specialized ebook reader as it has the better screen for reading and better battery life. However, we are also seeing first signs of a new development in ebooks where ebooks turn into multimedia apps that simply can’t run on a Kindle.

Michael Wolf has recently written a great article on this topic for GigaOm Pro (subscription required), and sheds light on what he calls enhanced ebooks. Wolf believes that enhanced ebooks are just developing with all the disadvantages that come along with such a trend – such as inconsistent apps for different platforms, but it is easy to see that, if he is right, that the iPad may be much better positioned for media-rich ebooks than the Amazon Kindle.

That trend has lots of implications for developers, which may suddenly be able to go into a business that was previously reserved for printing services, but offer new types of applications that, for example, create ebook platforms and allow content creators to easily publish media rich magazines, newsletters or ebooks. The market opportunity is substantial, as Amazon announced this week that it is now selling more ebooks than hardcover versions.

Wolf believes that enhanced ebooks may result “in a whole new digital book industry, much like has been seen in the digital video and music industries.” He sees the iPad as a key platform as this trend and consumer perception will evolve. “The media-consumption friendliness of the iPad is a natural choice for authors looking to create a multimedia-laden e-book,” he wrote.

iPad Sales Estimate Jumps 81%

Apple will begin selling the iPad in 9 more countries on Friday. Austria, Belgium, Hong Kong, Ireland, Luxembourg, Mexico, Netherlands, New Zealand and Singapore will be added to the existing base, as Apple has been able to ramp its production to support new geographies.

However, “support” is somewhat relative as market researchers and analysts believe that Apple can still not meet actual demand and that iPad sales are limited by production capacity and not demand. iSuppli today raised its unit forecast by 81% to 12.9 million units for 2010. Next year, Apple may sell 36.5 million iPads and in 2012 50.6 million. If iSuppli is correct than Apple may sell 100 million iPads in less than three years, which makes it an interesting app platform, perhaps even more interesting than the iPhone for some.

“The iPad is shaping up to be the ‘Tickle Me Elmo’ of the 2010 holiday season, with product demand expected to vastly exceed available supply,” said Rhoda Alexander, director of monitor research for iSuppli.

For 2010, Apple is estimated to hold an 84% market share in tablet PCs and continue to dominate the segment at least until 2012. Competition may be insignificant until 2011 when other players, including HP, will have some products to show. iSuppli believes that Apple cannot sit back and just enjoy the success, but actually think about product improvements for next year. Likely additional changes will embrace an internal camera and expansion of the product line, potentially including additional screen sizes, the company said.

Apple rivals, on the other side, will have to focus less on the hardware but relate more to the suite of applications that can be paired with the hardware.

I may be speculating here, but I feel that this was not the last adjusted iPad forecast for the year.

Antenna Confusion Not Deterring New Users

With all the hoopla surrounding the iPhone antenna issues, it’s easy to imagine that Apple may be losing some buyers to Android. There is enough confusion out there to suggest that a different smartphone may be a better smartphone right now.

However, the antenna issue has not really big impact on prospective buyers that are new to Apple, but it may have an impact on iPhone upgrades, which should make you think twice about iOS 4. IDC has published brief results of a survey that asked people whether they are still interested in buying an iPhone 4. 74% of those who wanted to buy an iPhone before have not changed their mind. However, 66% of those who own an iPhone already said they are delaying an upgrade to the iPhone 4. IDC did not break out numbers of those iPhone owners and which iPhones they own.

Of course, those numbers are to be taken with a grain of salt as purchase intentions do not really relate to actual behavior and intentions can change in an instant. However, the numbers may reflect the current mood in the market, which we would describe as cautious. IDC noted that the actual impact of the antenna issues and the effect of Apple’s response to give out free bumpers will only reveal itself over the next few months. That said, Steve Jobs said that more than 3 million iPhones have been sold already.

Behind The Scenes of The Apple-AT&T Relationship

Wired will be running an article in its upcoming August issue that will shed some light on the rather difficult relationship between Apple and AT&T. While it is always difficult to determine how accurate such reports are, the article promises to provide background information why AT&T seems to be falling of what the iPhone really would need.

Apparently, Apple is not as happy with AT&T as it is publicly stated by the company. According to the article Jobs considered dropping AT&T “more than a dozen times”. It isn’t difficult to figure out what the differences between the two companies really are – it comes down to data capability and affordability. For example, Apple wanted tethering to be included in the data plan, AT&T wanted extra money – which makes sense, as AT&T’s cellular network has been brought down to its knees due heavy data usage and extra charges would create a barrier for additional data use (and deliver extra revenue, of course.)

We can only imagine how much the two are arguing over Facetime and its availability on the 3G network.

There is also some information on the never ending rumors of a Verizon iPhone. The article states that Apple considered switching to Verizon several times, but concluded that the different chip sizes and the tight iPhone design would require Apple to create a CDMA iPhone from the ground up. The article isn’t out yet, but it is worth the read when published.

Program A Fallout 3 “Pipboy” Touch Screen – Day 1

In Day 1 we’ll go over how to set up the shot to add a CG screen on a cell phone, GPS, or anything with a screen. It really looks cool when you do it on something portable though. We’re making a pipboy so we’ll go over how to mimick the pipboy look as far as style, color, and feel. So get ready to build build build!


Tutorial

Part 1

Download Tutorial .flv

File size 161MB

Part 2

Download Tutorial .flv

File size 217MB


Core Art Skills: Part 4, Working in Traditional 3D


By now you should be feeling supercharged with creativity and ready to unleash your ideas on a new project. In the fourth installment of Core Art Skills, Ben Mounsey will be showing you the benefits of getting your hands messy and developing a feel for 3D! You will learn how working in 3 dimensions can be used as an outlet for creative exploration and how it can help you better understand your two dimensional work. Let’s get started!

Continue reading “Core Art Skills: Part 4, Working in Traditional 3D”

Using Guitar Amp Simulators 101, Part 1

Kicking off a new series of expanded, in-depth Basix tutorials, this is the first in a series of articles designed to guide you step-by-step through the process of setting up and using guitar amp simulation in your recordings. Beginning with the fundaments, we’ll work through some simple scenarios and work our way up to advanced tweaks and tricks. While there will be plenty of guidance and ideas you can take away and use in your own productions, the real aim is to equip you with the skills to develop your own creative solutions.


Introduction

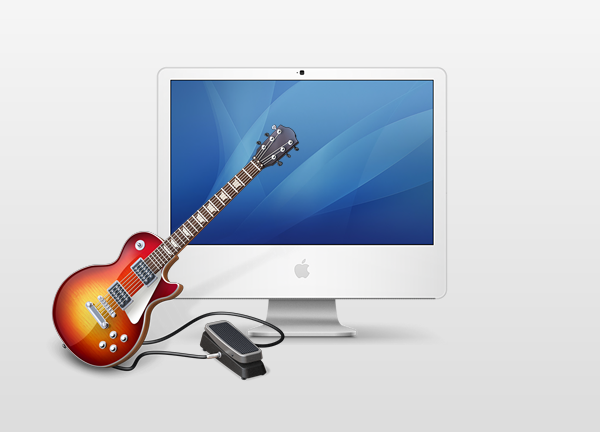
For many of us, and for reasons ranging from cost to living arrangements, it’s just not practical to record a real guitar amplifier in a real room with real microphones. Fortunately, the rapidly growing range and improving performance of digital guitar amplifier modelling technology has brought great recorded guitar tones within easy reach of the hobbyist.

Many hardware digital amps feature direct outputs with built-in speaker emulation and even, in some cases, sophisticated microphone emulation, allowing you to run your regular amp signal direct to your Digital Audio Workstation (DAW). Of the countless benefits of such a set-up, the real beauty of it is consistency: you can feed precisely the same tone into the mixing desk when playing live as you do when recording rehearsal room demos or cutting an album in the studio.

However, for those of us who aren’t quite ready to give up on the warm glow of vacuum tubes and commit to a fully digital rig, software amp simulation products like Native Instruments’ Guitar Rig, IK’s AmpliTube and Waves’ GTR provide an excellent compromise, acting as a standalone computer based amp for quiet practice sessions or jamming along with your favourite tracks in iTunes, as well as providing a means of getting great recorded guitar tones without the trouble and expense of traditional recording methods.

Though it’s true that, for many guitarists, even the best digital modelling isn’t quite ready to render the tube amp obsolete, it is nonetheless possible to achieve very impressive, professional results, and even rock royalty like Angus Young – practically synonymous with a good old fashioned Marshall half-stack – used Native Instruments’ Guitar Rig 3 to record some tracks on AC/DC’s album Black Ice.

So whether you’re a complete beginner looking to take your first steps in home recording, or you’re a seasoned pro with a few hundred million albums on your resumé, chances are that amp modelling software can provide you with the tones you want.


Choosing an Amp Simulator

While some DAWs, like Apple’s Logic and Garageband, come with guitar amp simulation built in, most don’t and, great though these bundled plugins are, many people will find that most of the dedicated 3rd party options offer a good deal more flexibility and better sounds. The important thing is to make use of trial versions; as with “real” amps, all amp sims are not equal, and only you can decide which one will provide the kind of sounds you want. Some well known and not so well known options are:

There are also some very good free options, too:


Setting Up

Depending on your computer, it’s likely that all you need to get your guitar signal into your computer is a 1/4” to 1/8” adaptor. These come in various forms, typically either a simple jack adaptor or a cable with a mini-connector on one end. There are also USB connectors, usually with a small signal amplifier built in.

As with most things, the options vary from the simple and inexpensive variety to fancier, brand name affairs. My advice is to try the simplest and cheapest first and, if in doubt, ask around for advice.

If you’re going with the simple adaptor – not a dedicated guitar interface – you’ll need to convert your guitar’s signal from high to low impedance. Guitars with passive pickups produce a high impedance signal which, perhaps counter-intuitively, means it’s quite weak and needs to be driven a little harder before it can go through, say, an amplifier circuit or into your computer’s sound card.

The good news is that any powered effect pedal or rack processor, as long as it isn’t a “true bypass” circuit, will do that job for you, so you probably don’t need to buy any extra gear. Something like a noise suppressor or an EQ is ideal, since you then get the added benefit of the pedal’s effect (less noise, or pre-amplification EQ) as well as the impedance conversion.

Of course, if you want to be able to record multiple, simultaneous tracks, you’ll need some kind of multi-input audio interface. This also applies if you’re having latency issues; that is, a small delay between you playing a note and hearing the amplified signal from your computer. However I’ve found that most modern PC and Mac sound cards are sufficiently powerful to keep latency sufficiently low.


Getting Started

So, you’ve chosen an amp simulator and you’ve got your guitar signal into your computer. How to get the best from it?

Paradoxically, the plug and play simplicity of most modelling software means that many players expect great results far more quickly than with a “real” amplifier. Given a decent tube amp, most people will spend days and weeks constantly homing in on that elusive, perfect tone; with the vastly greater range of possibilities modelling software offers, it should be no surprise that the digital alternative requires at least the same investment.

It’s also often the case that the preset sounds in any given plugin sound impressive at first but, as soon as you try to get them to sound effective in a mix with other instruments, they begin to fall short.

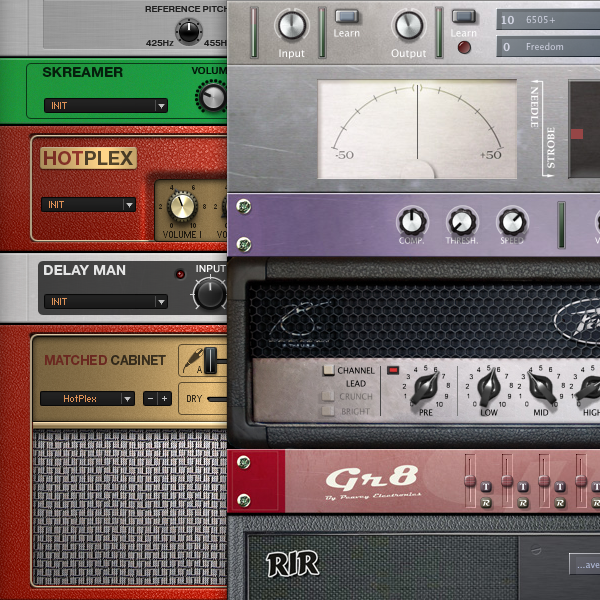
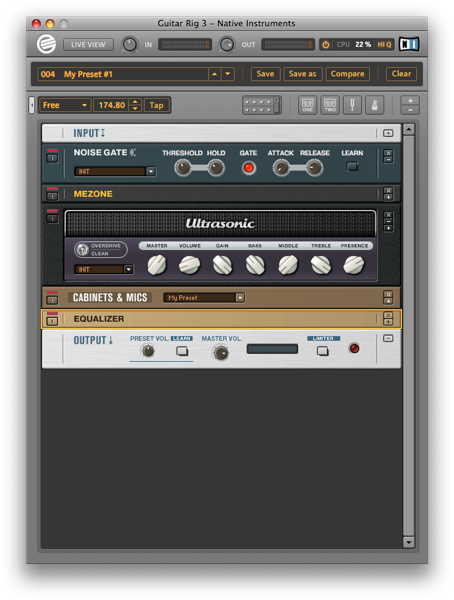
For the rest of this tutorial, I’m going to be working with Guitar Rig 3, since that’s the plugin I use and am most familiar with. However, the topics we’ll cover are applicable to most, if not all, of the amp simulators currently on the market.


Keep the Noise Down!

Unwanted noise can be a problem with any guitar recording scenario – real amps or software – and especially when higher gain settings are involved. Unfortunately, while the hiss and hum of a real half-stack has a certain portentous charm, the hiss and crackle of digital modelling software is rather less appealing.

If noise is a problem for you, try the following steps:

  • Make sure your audio cables are in good order. If you can, unscrew the plugs and check for loose wires and repair or replace them if necessary
  • Turn off any unnecessary electrical devices like TVs, fluorescent strip lights and energy saving lights, which are all sources of unwanted signal interference. Even if they’re nowhere near you, they can still cause unwanted noise
  • Screen your guitar. You can buy self-adhesive foil and even a special type of paint which, when applied to the internal surfaces of your guitar, will help to eliminate unwanted electrical interference
  • Use humbucking pickups if you have the option and their sound is suitable

At this point, you might be wondering why I haven’t mentioned noise suppressors; don’t worry, I’m coming around to that in a moment! The above steps are important because they will all help to keep unwanted noise from getting into your signal in the first place. The benefit of that is a nice, clean signal while you’re playing: a noise suppressor or gate, no matter how good it is, is only effective when the gate is closed, i.e., when you’re not playing, so it’s imperative to make sure you’re working with the best possible signal. Remember: garbage in, garbage out!


Close The Gate

A noise suppressor or gate is the thing that’s going to give you glorious, undisrupted silence during breaks and rests in the music, but setting it correctly is of paramount importance in preserving the dynamics of your playing. Get it wrong, and it’ll be too slow to react to your playing, causing notes to cut off or fail to sound altogether.

So what’s the difference between a noise suppressor and a noise gate? Not much, really, at least in terms of their main function. Typically, a noise suppressor is a simpler tool which is designed to filter out hiss and hum and is usually set with a single threshold control. Noise gates, in contrast, tend to be more sophisticated, typically featuring controls for threshold, attack, release and, occasionally, hold.

  • Threshold determines the level at which the gate effect starts to work. A higher setting will be needed for noisier signals
  • Hold sets a minimum time that the gate will remain open, and can be used to ensure that the natural decay of your guitar – even the very rapid decay of staccato notes and chords – isn’t interrupted
  • Attack and Release, respectively, deal with the speed at which the gate engages and disengages; longer settings mean slower response, while short settings are more abrupt

It’s worth noting that, in a recording scenario, you may need to use different noise gate settings for different parts of the song, especially where there are dramatic differences in the dynamics of your playing.

For example, for a heavy rock or metal track, the rhythm guitar parts are likely to be performed with quite an abrupt, heavy staccato and lots of distortion, in which case the gate will need to respond quite aggressively in order to preserve a “tight” sound. When you come to the solo, or maybe a more fluid, rolling chorus part, that aggressive noise gate setting will probably be too harsh, cutting off decaying notes and blocking softer pick attack.

The input section of Guitar Rig, and most of its competitors, has noise reduction built in, and this can usually be turned on or off and its threshold adjusted manually or via the “Learn” function, through which the software will try to determine the appropriate setting as you play. For anything more than very slightly overdriven tones, though, this probably isn’t going to be sufficient, so you’ll need to add a gate or suppressor to the signal chain.

In the SideKick panel of Guitar Rig (F2, to show and hide), there are two options: Noise Gate and Noise Reduction.

Noise Reduction is my favourite for general use, since it’s so easy to use and is generally very good at filtering out the hiss without affecting the attack and decay of my playing. The key thing to do, though, is to click the maximise button on the right side of the module to open the “expert” parameters. This reveals a pair of fairly intuitively named controls: Release and De-Hiss. The former determines how quickly the noise filter will engage when the input signal stops (i.e, when you stop playing), and the latter will help to filter out high frequency hiss (although this can be detrimental to your overall tone, so proceed carefully).

Noise Gate, on the other hand, is more akin to the rack and stomp-box noise reduction units you might already be familiar with, and is better suited to specific applications, like that heavy rock rhythm track I mentioned earlier.


Up the Quality

It’s easy to miss, but at the very top right of the Guitar Rig window, next to the bypass switch and CPU meter, is a Hi Q control. Other modellers have similar functions, often in the overall program settings, and usually a choice between 32 and 64 bit processing.

Engaging Hi Q mode, or otherwise increasing the software’s processing rate, produces a much higher quality sound. The drawback is that this places a greater strain on your computer’s CPU and, depending on how powerful your computer is, may introduce unmanageable latency.

Most modern computers should be able to cope with this, but bear in mind that as you introduce your host DAW, various plugins and perhaps multiple instances of plugins, the load on the CPU increases, so watch out for the CPU meter tipping into the red. If necessary, save the high quality mode for the final mixdown.


Ditch Those Presets!

Most of the preset tones in amplifier modelling software are designed to show the product off to its best advantage as a standalone device. Typically, that means lots of gain, lots of bass, and jaw dropping delays and modulation. All great fun, but perhaps not well suited to real world applications in a full band mix.

The only way to get tones that work well in your mixes and with your music is to build signal chains from the ground up. Of course, the presets are a good way to get an idea of which amp and effect models are going to get you into the ballpark and, since all of the amp simulator manufacturers use quite well established amps as the basis for their models, very often your existing real-world knowledge of amps is going to stand you in good stead.

Nonetheless, the dizzying array of options can be daunting, so how do you get to grips with learning to coax the sounds you want from your software? My advice is to try to mimic some of your favourite guitar tones. If you’re a big fan of, say, Jimmy Page, you probably already have a pretty good idea of what kind of equipment he used and what his tone should sound like. Using that knowledge as a starting point, you can turn the learning process into a fun afternoon of tone-matching, trying different amp and speaker models, different overdrive boxes, and so on. In the process, you should start to get a good idea of how the different elements affect the sound and, just as importantly, how closely the software matches the amps and effects it seeks to emulate.


Response and Feel

Another important thing to consider is that feel is as important as sound. Ever plug into an amp that you just love? Part of that will of course be the tonal properties of the amp’s sound, but it will also be how the amp responds to your playing style and, in turn, how that makes you play. This matters with software amps, too: even if the tone sounds right, you might find that, somehow, you’re not feeling an interaction between your playing and the amp.

We’re dealing with an issue that’s hard to quantify here but, later in this series of tutorials, I’ll take you through some of the factors that can help get the right feel, as well as the right sound.


End of Part One!

So, that’s a very general introduction to using software amp simulation. In the next part, we’ll work through some detailed examples of the processes involved in getting specific sounds and fine tuning them to perfection, before moving on to more advanced configurations, including 3rd party cabinet simulations and blending multiple amps for fuller tones.


Draw an LCD Television in Photoshop


In today’s tutorial, we will create an LCD TV from scratch using simple shapes and layer styles. We will also learn how to create a seamless pattern to create the speakers and also how to create some nice indicator lights. Let’s get started!


Step 1: Create the Screen

Start by creating a new file, size 2600×1700 px. In Photoshop, it’s easier to start with a big size to help us focus on the details. Using a rounded rectangle with 5 px radius, create a shape and use the following layer styles.

create complex pattern using smart object and nudging

Step 2

Create a smaller rounded rectangle inside previous shape to create the screen. Add the following layer styles.

create complex pattern using smart object and nudging

Step 3

Using the rounded rectangle tool, create another shape behind the screen. Click with pen tool to add new anchor points as indicated below. Select new point with direct selection tool and move it down. Add layer styles as shown below.

create complex pattern using smart object and nudging

Step 4: Draw the Base

Create another rounded rectangle. This time under the TV. Add a point in the middle of lower side and move it down. Select points in the top corner, press Cmd/Ctrl + T and move them closer. Finally, move the points as indicated below. Add layer styles.

create complex pattern using smart object and nudging

Step 5

Draw a rounded rectangle connecting the base and the screen. Hit Cmd/Ctrl + T, right click and choose Perspective. Change its size, see picture below for reference. Double click layer to open Layer Style options. Activate Layer Mask Hides Effects and add the following layer styles.

create complex pattern using smart object and nudging

Step 6

Add layer mask. Paint lower part of the shape with black until it blends into the base.

create complex pattern using smart object and nudging

Step 7: Create Reflections

Now, we can start creating reflections. Create a shape as shown below. Add the following layer styles. Use a black to white gradient with blending mode set to Screen. Change layer’s blend mode to Screen to remove the black and leave only the lighter pixels.

create complex pattern using smart object and nudging

Step 8

Draw another shape as shown below. Add Gradient Overlay with blending mode set to Screen. Change layer’s blending mode to Screen.

create complex pattern using smart object and nudging

Step 9

Create another shape for reflection. Add the following layer styles.

create complex pattern using smart object and nudging

Step 10

Repeat previous step to create another reflection on the other side. Add the following layer styles but this time use the opposite direction for the angle.

create complex pattern using smart object and nudging

Step 11

Create a shape as shown below. Add the following layer styles. Change blending mode to Screen.

create complex pattern using smart object and nudging

Step 12

Duplicate the reflection and place on the other side.

create complex pattern using smart object and nudging

Step 13

Create a shape under the base. This is the part that touches the floor. Add the following layer styles.

create complex pattern using smart object and nudging

Step 14: Add Shadow

Let’s add a shadow on the floor. Create a new layer underneath the TV, create a rectangular selection. Add Gaussian Blur to soften it and change its opacity to 5%.

create complex pattern using smart object and nudging

Step 15: Add Texture

This TV is too clean and it looks unrealistic. We need to add some textures. Hold Cmd/Ctrl + Shift then click the TV and base layer’s to create a selection based on its shape. Create a new layer on top of all the other layers and fill it with black. Click Filter > Noise > Add Noise. Change layer’s blend mode to Screen.

create complex pattern using smart object and nudging

Step 16: Add Speakers

To create speakers, we need to create its pattern first. Create a new file 50 x 50 px. Activate ellipse tool. From the option bar set to Fixed Size 20 x 20 px. This setting will automatically create a 20×20 px circle shape.

create complex pattern using smart object and nudging

Step 17

Hit Cmd/Ctrl + R to activate Ruler. Drag ruler to the center of the image to create a vertical and horizontal guide in the center. Draw a circle in the middle.

create complex pattern using smart object and nudging

Step 18

Draw another circle and place it in the middle of each corner.

create complex pattern using smart object and nudging

Step 19

Click Edit > Define Pattern to save it as a pattern.

create complex pattern using smart object and nudging

Step 20

Create new file, size 3000 x 3000 px. Open Channels panel and create a new channel.

create complex pattern using smart object and nudging

Step 21

Click Edit > Fill. Use pattern we created earlier.

create complex pattern using smart object and nudging

Step 22

Cmd/Ctrl-click channel to load it as a selection. Create new layer, fill it with black. Select all and copy (Cmd/Ctrl + C).

create complex pattern using smart object and nudging

Step 23

Return to your TV file. Create a rectangular selection on the right side of the screen.

create complex pattern using smart object and nudging

Step 24

Click Edit > Paste Into. The pattern will automatically be placed inside the selection. Hit Cmd/Ctrl + T and resize it. Add the following layer styles.

create complex pattern using smart object and nudging

Step 25

Create a rounded rectangle covering the speaker. Change its fill to 0% and add these layer styles.

create complex pattern using smart object and nudging

Step 26

Duplicate the speaker and place on the other side.

create complex pattern using smart object and nudging

Step 27: Add Brand

Add the TV’s brand and apply the following layer styles to give it a metallic look.

create complex pattern using smart object and nudging

Step 28: Create Lamp Indicator

Create a small rounded rectangle shape. Make sure its Opacity is set to 100% with its Fill set to 0%. Apply the following layer styles.

create complex pattern using smart object and nudging

Step 29

Duplicate the shape and resize it as shown.

create complex pattern using smart object and nudging

Step 30

Create another rounded rectangle. Use the same layer styles.

create complex pattern using smart object and nudging

Step 31

Activate the line tool. From the option bar, set Arrowheads to End. Use previous layer’s styles and add Color Overlay.

create complex pattern using smart object and nudging

Step 32

Create plus and minus sign using rectangle tool for volume indicator.

create complex pattern using smart object and nudging

Step 33

Let’s add an up and down indicator for channel. Draw a rectangle shape. Click its middle with pen tool to add new anchor points. Select and move them up. Use previous layer styles, Outer Glow, Color Overlay, and Stroke. To create a down indicator you just need to duplicate the shape and flip it vertical.

create complex pattern using smart object and nudging

Step 34

To create the power indicator we need to combine a few shapes. Start by creating a circle shape. Duplicate circle path and resize it, from option bar select Subtract. Create a rectangular path and select Add.

create complex pattern using smart object and nudging

Step 35: Create Background and Floor

Activate the Background layer. Create a radial gradient from light gray to darker gray.

create complex pattern using smart object and nudging

Step 36

Duplicate layer and resize it. This is going to be the floor

create complex pattern using smart object and nudging

Step 37

We still need to distinguish the floor from its background. Click Lock Transparency icon in Layers panel. Paint upper part of the floor. First, click on one side then Shift-click on the other side to paint a straight line.

create complex pattern using smart object and nudging

Final Image

That’s it! We’re done. You can view the final image below.

Add categories or tags to post programatically

The first thing to do is to create an array of categories id. Once done, you simply have to use the wp_set_object() function, which take 3 parameters: The post id, an array of categories to add to the post, and the taxonomy type (category in this example).

$category_ids = array(4, 5, 6);
wp_set_object_terms( $post_id, $category_ids, 'category');

Adding tags to a post is extremely easy as well. The only difference with the code to add categories is the taxonomy “post_tag” instead of “category”.

$tag_ids = array(7, 8, 9);
wp_set_object_terms( $post_id, $tag_ids, 'post_tag');

Thanks to WPProgrammer for this very cool snippet.

Looking for WordPress hosting? Try WP Web Host. Prices starts at $5/month and you can try it for free!

Add categories or tags to post programatically