A lightweight version of the paragraph styles you would find in Adobe InDesign, Adobe Illustrator’s Paragraph Styles help you set your type in many different ways. Learn more about how to save time styling your type in this Video Quick Tip.
Blancer.com Tutorials and projects
Freelance Projects, Design and Programming Tutorials
Tutorials,freelance,projects,joomla,php,mysql,wordpress,blancer.com
A lightweight version of the paragraph styles you would find in Adobe InDesign, Adobe Illustrator’s Paragraph Styles help you set your type in many different ways. Learn more about how to save time styling your type in this Video Quick Tip.
At Audiotuts+ we irregularly put up a reader track for workshopping and critique (find out how to submit a track). This is how it works: you upload your song, and every week or so we’ll publish one here and step away from the podium. The floor is yours to talk about the track and how the artist can fix problems in and improve upon the mix and the song.
This track has been submitted for your friendly, constructive criticism. They have put their track (and their heart and soul) in your hands to learn and get useful feedback.
Artist’s website: soundcloud.com/tysonwillert
Description of the track:
The aim of this game is just to see if anyone is feeling it…
Tyson Willert ft Erin Ragland – Rollover Juicy by TysonWillert
Terms of Use: Download, play it out, show everyone you know and let them know.
Have a listen to the track and offer your constructive criticism for this Workshop in the comments section.
Need constructive criticism on your own tracks? Submit them using this form.
This is a subject I touched on briefly in a previous tutorial on gating and people were pretty interested in the technique. This tutorial aims to show the various ways of creating the effect in more detail.
I’ve used Logic but this can be achieved in pretty much any DAW that supports native side chaining and has a gate plug-in.
If you plan to use the techniques outlined in this tutorial you’ll have to ensure your DAW has a gate plug-in that supports native side chaining. To be honest most of the major players include this as a standard feature now, so it should be pretty easy to translate the methods I’ve used to your favourite app.
Routing audio to our various gate plug-ins is really not the challenging part of this technique, it relies more on what you feed your gate with and the settings used. To get an idea of what I’m talking about let’s get stuck in.
At this point you want to think about the sound you want to gate. I find this works very well with sustained sounds, such as strings, pads and vocal effects. In this case I have opted for a synth/string sample.
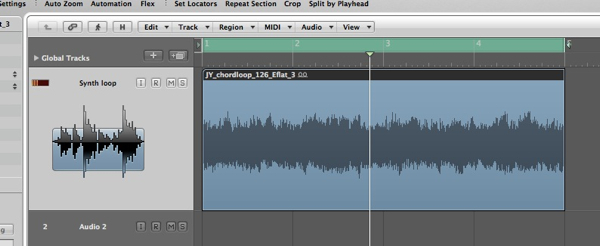
The synth sample we’ll be treating.
The untreated synth loop.
The whole aim of the game here is to create a rhythmical, groove based effect so a good starting point is to use a percussion (or drum loop) as our trigger or source. I have chosen a well defined, simple loop to get things going.
Anything with sharp transients will work here, try and avoid anything too busy though as the gate will find it difficult to clamp down on the individual sounds.
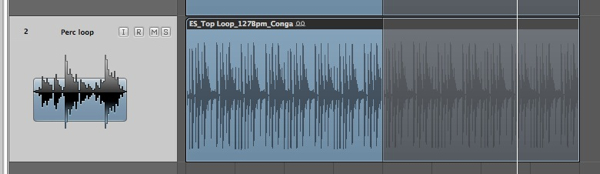
The percussion loop we’ll use to trigger the gate.
The raw percussion loop.
The two raw sounds mixed.
Now we can route the percussion loop into the gate via the side chain input. In Logic this is simply a case of using the drop down menu in the top right hand corner of the plug-in. You should now see the available source and amongst them the percussion loop.

Using the gates side chain function.
With all the signal flowing in the right direction it’s time to setup the gate. Move the threshold up until you hear the peaks of the loop effecting your treated sound. You should hear the sound ‘flashing’ on and off in time with your trigger sound.
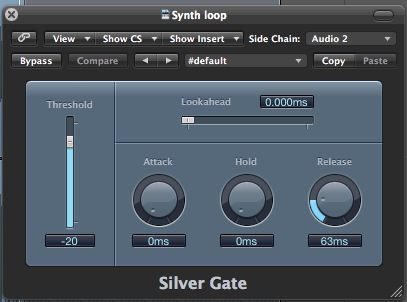
The gates parameters are set.
The gate effect comes to life.
With the threshold set you can now adjust the attack and release settings. You’ll find that you can get away with a pretty fast attack time but the release might take a little more time to tweak. Try and time the recovery of the gate with the tempo of your project, this way things shouldn’t sound too choppy.
The gated string in isolation.
Using a loop to trigger your gate is a great way to dial in a quick pattern but if you want something a little more ‘custom’ you could try slicing your audio and creating a new groove.
One of the easiest ways to do this is cut your existing loop into small sections and rearrange them. This gives you much more control over the gated pattern and can allow you to match the rest of your projects groove with ease.
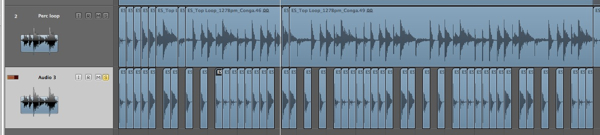
The loop gets chopped to create a new groove.
The loop slices in isolation.
The sliced loop and the new gated string.
… and finally the new gated string in isolation.
If you have success with creating grooves using audio parts but crave even more control over your gate patterns you might want to try using a MIDI triggered sound. Using a soft sampler or drum machine can give you ultimate control and you can even experiment with release times and various different samples.
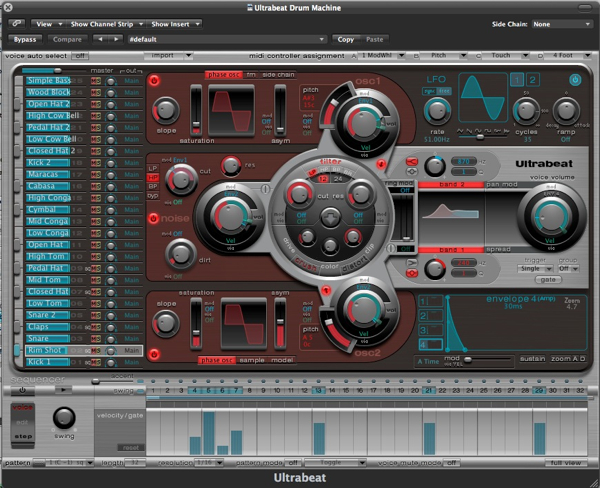
An Ultrabeat is used to playback percussion samples.
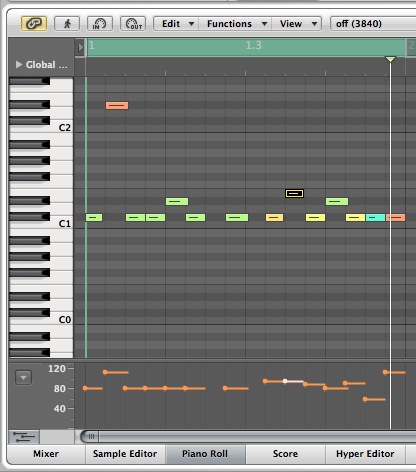
A simple drum pattern is programmed to trigger the gate.
The MIDI part and gated effect.
… and the gated effect in isolation.
Photoshop’s wide variety of tools enable you to perform complex photo manipulations with relative ease. Today, we will demonstrate how to combine Photoshop’s tools with photo manipulation techniques to create a medieval fantasy castle gate. Let’s get started!
The following resources were used during the production of this tutorial. Each item is freely available to you on CG Textures; just sign up!
First, create a new file with a size of 800 x 800 px and a resolution of 300 ppi.

Next, open the files: SoilSand.jpg and Grass.jpg then resize it (Cmd/Ctrl + T) as shown below.

Next change the Hue/Saturation (Cmd/Ctrl + U) levels of the SoilSand.jpg with the values below.

Next open WoodPlank.jpg then resize it and place it as shown.

Using the Pen tool (P), draw the shape shown below. After defining the shape, right-click and select Make Selection from the drop-down menu. Inverse the selection by pressing Cmd/Ctrl + Shift + I, then hit delete.

Now press Cmd/Ctrl + L to adjust the Levels of WoodPlank.jpg and change its values as indicated below.

Next we’ll make a set of stones to form an arch. To do this, open Concrete.jpg, then rename it "Stone." Then press Cmd/Ctrl + T to resize it as shown. Use the Eraser tool (E) to erase the edges of the "stone". Then, use the Burn tool (O) to burn the indicated areas shown in figure (c). After that, apply a layer style to the “Stone” layer and apply a small Drop Shadow as shown in figure (d). Now, create a new layer and place it below the "Stone" layer and Cmd/Ctrl + click the thumbnail of "Stone" layer to activate its selection as shown in figure (e). Using the Paint Bucket tool (G), fill the entire selection with #000000 as shown in figure (f). Finally, go to Filter > Blur > Gaussian Blur, and apply a radius of 5.0px.

After merging the "Stone" layer and the blurred selection from Step 7, duplicate (Cmd/Ctrl + J) the layer until you’ve reached the other side of the arch.

Using the Burn tool (O), burn the areas as indicated below in the "SoilSand" layer and in the "Grass" layer.

Next, use the Eraser tool (E) to erase the areas as indicated below in the "SoilSand" layer.


Now, let’s create the gap between the doors. To do this, use the Pen tool (P), then create a line as shown in figure (a). Then, right-click and select Stroke Path from the drop-down menu. Make sure to set the Brush tool (B) as indicated in figure (b) prior to using the Pen tool. Lastly, go to Filter > Blur > Gaussian Blur and enter a 2.5 px radius as shown in figure (c).


Repeat the same process to create the gap below the door as well.

Using the Pen tool (P), make a line as shown below. Next, right-click and select Stroke Path from the drop-down menu. Make sure to set the Brush tool (B) to a Master Diameter of 20px and Hardness of 100% prior to using the Pen tool. Next, go to Filter > Blur > Gaussian Blur and set it to 8.0px. After that, decrease its opacity to about 50%.

Now, let’s add the door hinges. To do this, open the file "Ornament." Then, using the Magic Wand tool (W), select the background of the image.

Next select the Refine Edge tool (Cmd/Ctrl + Alt + R) and check the box for Smart Radius. Then using the brush for Smart Radius, follow the outline of the hinge. After that, check the box for Decontaminate Colors and hit OK.

After hitting OK, add a Drop Shadow in the Layer Style window by double-clicking the "Ornament" layer.

Duplicate this layer three times and position them as shown below.

Using the Pen tool (P), make a shape as shown below. Right-click and select Stroke Path from the drop-down menu. Make sure to set the Brush tool (B) to a Master Diameter of 45px, Hardness of 0% with color #000000 prior to using the Pen tool. Finally, set its Blend mode to Soft Light.


Open the file "OrnamentHead.jpg." Using the Magic Wand tool (W), select the background of the image. Next select the Refine Edge tool (Cmd/Ctrl + Alt + R) and check the box for the Smart Radius. Then, using the brush for the Smart Radius, follow the outline of the Ornament Head. After that, check the box for Decontaminate Colors and hit OK.


Add a drop shadow to "OrnamentHead."

Duplicate the "Ornament" layer and place them as shown.

Next we’ll add some Sunrays. Using the Pen tool (P) make a line as shown below, after that right-click and select Stroke Path from the drop-down menu. Make sure to set the Brush tool (B) to a Master Diameter of 95px, Hardness of 0% with color #ffffff prior to using the Pen tool.

Add some more using the same technique. After that, merge them and name them "Lights."

Next, go to Filter > Blur > Gaussian Blur with a 25 px radius

Finally, decrease its opacity to 50%.

Next we’ll add some sparkes. Using the Paint Brush tool (P) set to Hardness 0% and color #000000, apply varying sizes of “dots.”

Next go to Filter > Blur > Gaussian Blur and apply a radius size of 5px. Decrease its Opacity to 40%.

Next step is to add highlights for the stones of the arch. To do this, use the Brush tool (B) set to a Master Diameter of 7px and a Hardness of 0%. Add the highlights according to the source of light, like as shown below.

Then go to Filter > Blur > Gaussian Blur and apply a radius of 3px.


Next we’ll add a brownish tint for the image. First, add a new layer and fill it, using the Paint Bucket tool (G), with #714200. Next, change its Blend mode to Color Dodge and decrease its Opacity to 60%.


For the last step, we’ll add subtle shading to complete the effect. To do this, first add a new layer, then fill it with the #000000 and name it "Shade."

Using the Polygonal Lasso tool (L), make a shape as shown below, then hit delete.

Lastly, go to Filter > Blur > Gaussian Blur and change its radius to 22px then decrease its Opacity level to 60%.

That’s it! The final product is shown below. Hope you had fun working on this project! Thanks for reading.

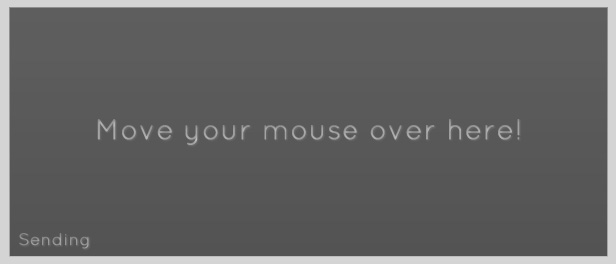
In this tutorial we will use the AS3 LocalConnection class to send and receive data between two different SWF files. Today we will use this to detect mouse movement in one SWF and mirror it in another.
Let’s take a look at the final result we will be working towards. Below are two completely different files.
This tutorial is split into two sections. The first will concentrate on the sending SWF and the second will involve building the receiving SWF. I will also be using the document class throughout this tutorial.
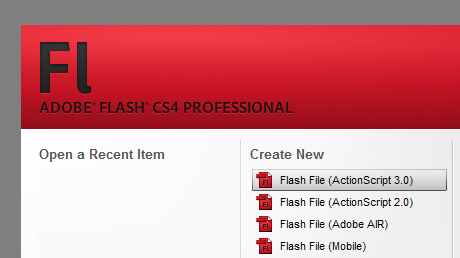
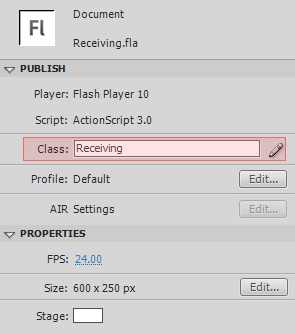
Firstly, create a new ActionScript 3.0 file.
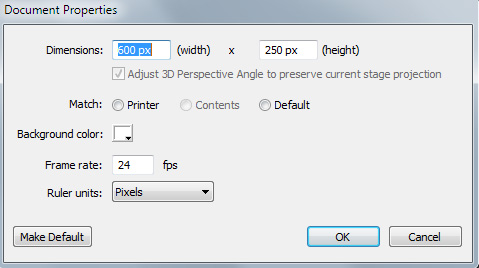
Then, resize the file to 600px × 250px.
This step is not necessary for functionality, but more for aesthetics. Add your image to the stage and then lock its layer.
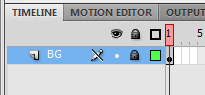
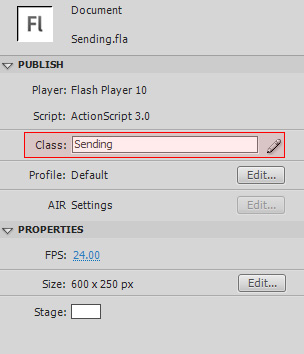
Save your FLA as Sending.fla and then create a blank AS file. Save this file in the same folder as your FLA and name it Sending.as.

Then go back and link the document class to the FLA.
Add a blank package, class and constructor function to your AS file.
package {

	public class Sending extends MovieClip {

		public function Sending() {
		}

	}

}
The first thing we need to do in our document class is to import all the classes which we will need in the future.
package {

	import flash.display.MovieClip;
	import flash.events.Event;
	import flash.events.StatusEvent;
	import flash.events.MouseEvent;
	import flash.net.LocalConnection;

	public class Sending extends MovieClip {

		public function Sending() {
		}

	}

}
Before we start sending information with a Local Connection, it is best that we learn exactly how to use it. This is really simple and consists of only two parts:
Declaring an instance of the Local Connection class is easy:
private var localConnection:LocalConnection = new LocalConnection();
Next we need to use the .send method. This method connects to the other SWF and then triggers a function in the receiving file which handles any variables which are sent across. Let’s see an example:
localConnection.send("_connectionName","methodName",variable1,variable2);
Both the connection name and the method name should be enclosed in quotation marks (as they are strings). In addition, it is best to start the connection name with an underscore ( _ ). The method name is simply the name of the function which you want to be triggered in the receiving SWF. The function, in the receiving SWF, will be provided with the variables as arguments. Now, let’s use what we’ve just learnt!
Here are all the variables we need to declare:
private var localConnection:LocalConnection = new LocalConnection();

private var mX:Number;
private var mY:Number;
After declaring an instance of our local connection, we create two variables. mX will hold the mouse’s ‘x’ value and mY will hold the mouse’s ‘y’ value. This code needs to be placed before the constructor function, but inside the class.
Next is the constructor function. This function contains just one line: adding an event listener for the Event.ENTER_FRAME event. We will cover the function it calls in the next step. Here is the finished constructor function:
public function Sending() {
    stage.addEventListener(Event.ENTER_FRAME,mainLoop,false,0,true);
}
In the previous step, we created an event listener which calls this function once every frame. This function will be doing two things. The first is to set the variables mX and mY equal to the mouse’s ‘x’ and ‘y’ position respectively. The second is to send these two variables, through the Local Connection, to the other SWF file.
Here is the finished function:
private function mainLoop(e:Event):void {
    mX = mouseX;
    mY = mouseY;

    localConnection.send("_mouseConnection","processData",mX,mY);
}
When sending the data, we use “_mouseConnection” as the connection name and “processData” as the method name. This means it will try to call processData(mX, mY).
We are very nearly finished. All that remains to be done is to handle the status event. The LocalConnection object dispatches status events; in this project we will not be using the events; however, if we do not listen out for them, we will receive errors such as this: ‘Error #2044: Unhandled StatusEvent:. level=error,code=’
We have already imported the event in Step 5, so first we will add an event listener for a status event in the constructor function:
public function Sending() {
    stage.addEventListener(Event.ENTER_FRAME,mainLoop,false,0,true);
    localConnection.addEventListener(StatusEvent.STATUS, onStatus);
}
Now we need to create a blank function to respond to the event. The function is called ‘onStatus’.
private function onStatus(e:StatusEvent):void {};
In Section 1, we have learnt how to use the LocalConnection class to send information, via a connection, to another flash file. Here is our finished AS file for Section 1:
package {

	import flash.display.MovieClip;
	import flash.events.Event;
	import flash.events.StatusEvent;
	import flash.events.MouseEvent;
	import flash.net.LocalConnection;

	public class Sending extends MovieClip {

		private var localConnection:LocalConnection = new LocalConnection();

		private var mX:Number;
		private var mY:Number;

		public function Sending() {
			stage.addEventListener(Event.ENTER_FRAME,mainLoop,false,0,true);
			localConnection.addEventListener(StatusEvent.STATUS, onStatus);
		}

		private function mainLoop(e:Event):void {
			mX = mouseX;
			mY = mouseY;

			localConnection.send("_mouseConnection","processData",mX,mY);
		}

		private function onStatus(e:StatusEvent):void {};

	}

}
Firstly, create a new ActionScript 3.0 file.
Then, resize the file to 600px × 250px.
As before, this step is not necessary for functionality, but more for aesthetics. Add your image to the stage and then lock its layer.

We now need to create an object to mirror the mouse pointer. It will be given the same X and Y values as the mouse pointer in the other file via ActionScript.
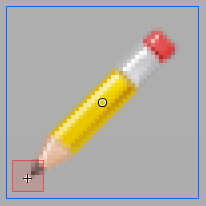
In this example I am using an icon of a pencil (courtesy of WeFunction). Import the icon to the stage, in its own layer, and then convert it to a MovieClip and give it an instance name of cursor_mc.

By default, the registration point (the cross, not the circle) is in the top left corner. This means that when we complete the project, the pencil will be slightly off from the location of the mouse. To fix, double click on the pencil, and realign it so that the end of the pencil is on the registration point.
As in the first part, save your FLA as Receiving.fla and then create a blank AS file. Save this file in the same folder as your FLA and name it Receiving.as.
Then go back and link the document class to the FLA.
Add a blank package, class and constructor function to your AS file.
package {

	public class Receiving extends MovieClip {

		public function Receiving() {
		}

	}

}
Just like before, import all the classes we will need.
package {

	import flash.display.MovieClip;
	import flash.events.Event;
	import flash.events.StatusEvent;
	import flash.net.LocalConnection;

	public class Receiving extends MovieClip {

		public function Receiving() {

		}

	}

}
We are now ready to start writing the code to receive the information from the local connection. Here is what we need to do:
Declaring an instance of the Local Connection class is the same as before:
private var localConnection:LocalConnection = new LocalConnection();
Next we need to connect to the connection which we created when we sent the data from the other file.
localConnection.connect("_connectionName");
Now we set the client. The client indicates the object on which the functions are called. It is normally set to this.
localConnection.client = this;
Finally, we need to create a blank function which will receive the data through its arguments.
public function methodName(variable1:type,variable2:type...):void {};
Now that we know how to receive information with a local connection, we can begin writing the script. First declare a new LocalConnection instance. Place this before the constructor function in the class.
private var localConnection:LocalConnection = new LocalConnection();
Then, in the constructor function, connect to the local connection and set its client:
public function Receiving() {
    localConnection.connect("_mouseConnection");
    localConnection.client = this;
}
(Notice that we are connecting to a local connection with the same ID as we used in the Sending file.)
When information was sent from the sending file, a receiving function or method was named. In this project, I used the function processData(). The following function receives the X and Y coordinates as arguments and then uses them to set the pencil’s position.
public function processData(mX:Number,mY:Number) {
    cursor_mc.x = mX;
    cursor_mc.y = mY;
}
This function needs to be a public function so that it can be accessed through the local connection.
As with Section 1, because we are using a local connection, we will need to handle status events. The event has already been imported in Step 16, so we now need to add an event listener for the events. Let’s add a line to the constructor function:
public function Receiving() {
    localConnection.connect("_mouseConnection");
    localConnection.client = this;
    localConnection.addEventListener(StatusEvent.STATUS, onStatus);
}
Then we create a blank function to respond to the event listener:
private function onStatus(e:StatusEvent):void {};
In this second part we have successfully received information from a local connection and processed it. Here is our finished AS file:
package {

	import flash.display.MovieClip;
	import flash.events.Event;
	import flash.events.StatusEvent;
	import flash.net.LocalConnection;

	public class Receiving extends MovieClip {

		private var localConnection:LocalConnection = new LocalConnection();

		public function Receiving() {
			localConnection.connect("_mouseConnection");
			localConnection.client = this;
			localConnection.addEventListener(StatusEvent.STATUS, onStatus);
		}

		public function processData(mX:Number,mY:Number) {
			cursor_mc.x = mX;
			cursor_mc.y = mY;
		}

		private function onStatus(e:StatusEvent):void {};

	}

}
In this tutorial we have learnt how to use the LocalConnection class. You have seen how to send information, receive information and also how to handle status events. This method is often used in web advertising when an advertiser wishes to synchronise an advert between two different ad positions on a single webpage. This same principle can easily be developed to include two-way communications between two files.
Thank you for reading this tutorial; I hope you enjoyed it!
In this tutorial you will learn how to use SWFObject script to set up automatic redirection from a Flash website to a non-Flash backup website when it’s viewed on an iPad.
Here’s a very simple mock-up of a Flash website we’ll be using in this tutorial. If you try to access that page using iPad you won’t be able to see any content.
And here’s the final result we’ll be working toward. if you access it with iPad you’ll be able to see the animated page.
When the wind of change blows, some people build walls, others build windmills.
– Ancient Chinese proverb
I think iPad is a great device, even though I can understand why the introduction of the Flashless tablet made quite a few people mad. I admit it did make me mad at first: just before iPad appeared in my local Apple store I finished a Flash website I considered my personal masterpiece, and I was taken aback when, trying to open it with iPad, instead of my ultra-cool Flash animation I was redirected to the backup non-Flash site I set up “just in case”. I confess it took me some time to adapt my mind to iPad, but gradually I’ve learned to believe that, like all pioneering works, it had to break out of the comfort zone, and I guess I’m cool with that.
Of course what helped me to arrive at that philosophical attitude was the number of people who hired me to set up similar redirections for their existing Flash websites. They either couldn’t afford to, or didn’t want to replace their fancy, well-designed Flash sites with simpler but more iPad-friendly ones, so the option of setting up automatic iPad redirection to a simpler, pure HTML site appealed to them.
(One may argue that, even not being able to play Flash animations, iPad is more open toward JavaScript, but unfortunately that’s not the case. The majority of JavaScript-animated sites don’t play well on iPad. Test any of these ten JavaScript animated websites on your computer and then on iPad to see what I mean.
We’ll have to wait until HTML5 is fully implemented to see the new Internet where third party plugins like Flash Player gradually lose its importance. In the meantime, the release of the iPad tablet has created a new temporary niche in web development: iPad-proofing existing Flash websites. There are thousands of excellent Flash websites out there that could benefit from such service; it’s a great work opportunity for guys like you and me.
There can be many different ways to iPad-proof a Flash website, some better than others. This tutorial offers just one possible simple solution. So let’s get down to business.
It could be a complete non-Flash website containing the HTML version of all the content copied from the Flash site, or just a single web page with only basic information and a message to the visitor, something along the lines of “you are viewing our website on a device that doesn’t allow Flash content to be displayed. To access all the features, please open our website using a computer with the latest version of the Flash player installed.”
For this tutorial, I prepared a simple JavaScript-animated web page to serve as backup. iPad is capable of playing the animation moderately well. Creating iPad-friendly JavaScript animations is beyond the scope of this tutorial, but you can find some useful information about it on the home page of the $FX() JavaScript animation library (and you are also welcome to explore the source code of the JavaScript-animated page we’ll be using as our backup).
Note: to allow the JavaScript-animated page to play when uploaded on your server you will also need to upload the fx.js file located in the Scripts folder among the downloadable files for this tutorial.
We need to find out what code was used to embed the SWF file of the original Flash website into its HTML page. We can do this by opening the page in the browser and selecting the View Source option. Alternatively, we can open the page in any text editor or specialized HTML editor.
The snippet of code that embeds a SWF file in the HTML page is easy to recognize within the source code. Activate the Find function and search the page for “swf”. Doing so will reveal the name of the swf file embedded in the html page. The code surrounding the name of the swf file is the code that embeds it in the html page.
SWF files can be embedded in an HTML page in a number of different ways. Describing them all would make this tutorial endless, so if you’re curious you can just Google it. I’ll only mention some of the most popular ones.
Basic HTML tag-based code for embedding a SWF file may look like this:
<object classid="clsid:D27CDB6E-AE6D-11cf-96B8-444553540000" codebase="http://download.macromedia.com/pub/shockwave/cabs/flash/swflash.cab#version=6,0,0,0" width="800" height="580" id="FlashWebsite" align="">
<param name=movie value="FlashWebsite.swf">
<param name=quality value=high>
<param name=bgcolor value=#FFFFFF>
<embed src="FlashWebsite.swf" quality=high bgcolor=#FFFFFF width="800" height="580" name="FlashWebsite" align="" type="application/x-shockwave-flash" pluginpage="http://www.macromedia.com/go/getflashplayer"></embed> </object>
Chances are, that Flash site was made a while back: from the codebase attribute of the object tag we can see that the SWF is to be played by the 6th version of the Flash player.
The code is mostly self-explanatory, it’s very clear what parameter does what. One thing to mention is that as you can see, for some seemingly mysterious reason most of the parameters are indicated in the code twice. This is easy to explain: the code targets two different Internet browsers separately.
The <object> tag with all its attributes and parameters targets Internet Explorer. The <embed> tag targets the currently deprecated Netscape Navigator (that browser ignored the object tag). Hence, the repetition of the same information.
I should also mention that classid attribute of the <object> tag tells Internet Explorer that it should load the ActiveX plugin if it’s not installed; pluginpage attribute of the <embed> tag tells Netscape Navigator to display the link to the plugin page.
AC_RunActiveContent.js is a JavaScript file that was still widely used only a few years ago. Some programmers still working with Flash CS3 Professional may still use it even now.
The code embedding the swf file using AC_RunActiveContent.js may look like this:
<script type="text/javascript" >
AC_FL_RunContent('codebase','http://download.macromedia.com/pub/shockwave/cabs/flash/swflash.cab#version=8,0,0,0','width','800','height','580','align','middle','src','FlashWebsite','quality','high','bgcolor','#ffffff','name','FlashWebsite','allowscriptaccess','sameDomain','pluginspage','http://www.macromedia.com/go/getflashplayer','movie','FlashWebsite' );
</script>
There’s also a line of code within the tag of the page that may look like this:
<script src="Scripts/AC_RunActiveContent.js" type="text/javascript"></script>
The purpose of the inclusion of the AC_RunActiveContent.js file was the change made by Microsoft Corporation to Internet Explorer browser in 2006. As a result of that change (brought about by certain legal matters known as “Eolas patent problem” and not directly related to technical aspects of web programming), the visitors who opened Flash websites using Internet Explorer had to click the embedded content before being able to see or interact with it.
AC_RunActiveContent.js file was a workaround that allowed users to skip that bothersome click and display the active content right away, by the means of generating the html tags within the JavaScript file. That file is typically located in the Scripts folder in the same directory as the HTML page where the swf file was embedded. Not to go into too much detail, the AC_RunActiveContent.js file is called via the AC_FL_RunContent function, and the attributes and values are passed to the file in pairs: ‘width’, ’800′, ‘height’, ’500′ and so on. You do not need to include file extensions with the names of swf files, the JavaScript file does that automatically.
UFO (an acronym that stands for Unobtrusive Flash Objects) is a JavaScript file used since 2006 for detecting versions of Flash Player and embedding swf files into HTMl pages. It was created by Bobby van der Sluis.
The code for embedding a SWF file into an HTML page with ufo.js may look like this:
<script type="text/javascript">
		var FO = { movie:"FlashWebsite.swf", width:"800", height:"580", majorversion:"8", build:"0" };
		UFO.create(FO, "container");
		</script>
The reference to the JavaScript file within the <head> tag may look like this:
<script type="text/javascript" src="Scripts/ufo.js"></script>
The arguments of the ufo.js are self-explanatory. The file was very popular, but is currently deprecated.
FlashReplace.js is a lightweight (2.1 kb) JavaScript file created by Robert Nyman.
The code for embedding a SWF file in an HTML page using FlashReplace.js may look like this:
<script type="text/javascript">
    FlashReplace.replace("container", "FlashWebsite.swf", "Flash Website", 800, 580);
</script>
Obviously, as is the case with AC_RunActiveContent.js and ufo.js files, you will also find the reference to the JavaScript file within the <head> tag. It may look like this:
<script type="text/javascript" src="Scripts/FlashReplace.js"></script>
As you can see, FlashReplace.js is really easy. The first argument is the name of the HTML tag whose content is to be replaced with the swf file; the second argument is the name of the swf file, the third argument is the arbitrary id you can assign to the object you’re embedding, and the last two arguments are the width and height of the SWF file.
swfbject.js was created by Geoff Stearns, Toby Boudreaux and Bobby van der Sluis. It is currently (2010) the most popular and widely used JavaScript library for detecting versions of Flash player and embedding swf files into HTML pages.
The code for embedding a SWF file in an HTML page using SWFObject.js may look like this:
<script type="text/javascript"><!--
			var so = new SWFObject("FlashWebsite.swf", "FlashWebsite", "800px", "580px", "9", "#FFFFFF", "high");
			so.write("container");
// --></script>
The snippet of code you just read is a very basic example of how the swfobject.js may be implemented. The code may be much more complex. For more information, check out this swfbject.js tutorial and consult the developers documentation.
The reference to the JavaScript file within the <head> tag may look like this:
<script type="text/javascript" src="swfobject.js"></script>
If the existing Flash website is using SWFObject.js to embed swf file, you’re in luck: we are going to use SWFObject.js type of embedding to set up redirection to the non-Flash web page. If any other kind of embedding scenario is used, we’ll have to erase the old code from the HTML page and replace it with the SWFObject embedding. We are going to use SWFObject to redirect iPad visitors to the backup non-Flash website.
For the purposes of this tutorial, we are going to use a training page that has the SWF file embedded using the AC_RunActiveContent.js file. If we open the FlashWebsite.html page in a browser, we’ll see the familiar SWF file embedded in the page.
Let’s open the page called FlashWebsite.html in any text editor or any specialized HTML editor.
We should remember or write down the important information about our SWF file, such as its name (FlashWebsite.swf in our example), width (800), height (580) and background color (#FFFFFF).
Now let’s replace the line that references the AC_RunActiveContent.js file in the tag:
<script src="Scripts/AC_RunActiveContent.js" type="text/javascript"></script>
with this line:
<script type="text/javascript" src="Scripts/swfobject.js"></script>
We have now created the reference to the SWFObject library.
Let’s locate a code that looks like this:
<script type="text/javascript" >
AC_FL_RunContent('codebase','http://download.macromedia.com/pub/shockwave/cabs/flash/swflash.cab#version=8,0,0,0','width','800','height','580','align','middle','src','FlashWebsite','quality','high','bgcolor','#ffffff','name','FlashWebsite','allowscriptaccess','sameDomain','pluginspage','http://www.macromedia.com/go/getflashplayer','movie','FlashWebsite' );
</script>
We’ll select that bit of code and erase it. What we have now is the empty <div> tag:
<div id="container">
</div>
Below that tag, let’s paste the following:
<script type="text/javascript"><!--
			var so = new SWFObject("FlashWebsite.swf", "FlashWebsite", "800px", "580px", "9", "#FFFFFF", "high");
			so.write("container");
// --></script>
Note that the argument in parentheses for the single added parameter (so.write("container")) matches the name of the empty <div> tag: “container”. That argument tells the browser where to place the Flash content. The swf file will be embedded inside the empty <div> tag marked with the id “container”.
Note: the fifth argument in the parentheses of the SWFObject function, “9″, refers to the major version of the Flash player. When it’s of no particular importance, I prefer to give browsers some slack and to not demand the laterst version of the Flash player, so I set it here to 9, even though the current version today (2010) is 10.
Let’s save the HTML page and open it in a browser. It should look like this.
So far, nothing seems to have changed. The Flash animation played when embedded using the AC_RunActiveContent.js file, and it plays in quite the same way now, being embedded with swfobject.js file. If we tried to open that page with iPad we still wouldn’t see any content.
Let’s add two more arguments at the end of the series of arguments within the parentheses of the main function call. The first argument should be empty, just the quotation marks: “”, and the second argument should be the path to the backup non-Flash web page we want to redirect the iPad visitors to: “./JavaScriptWebsite.html”
The complete bit of code with the two new arguments added should look like this:
<script type="text/javascript"><!--
			var so = new SWFObject("FlashWebsite.swf", "FlashWebsite", "800px", "580px", "9", "#FFFFFF", "high", "", "./JavaScriptWebsite.html");
			so.write("container");
// --></script>
The first, empty argument we’ve just added is called xiRedirectUrl, and it’s used by SWFObject script to redirect users who complete the ExpressInstall upgrade. We are not using the ExpressInstall here, so we leave the argument empty. The second argument, called redirectUrl, is used by SWFObject to automatically redirect the users who do not have the required version of a Flash player installed – which is exactly the function that we needed all along. iPad tablet doesn’t have ANY version of Flash player installed, so it qualifies!
Note: “./JavaScriptWebsite.html” is the local path to the JavaScript-animated backup page we use in this tutorial. That path will allow us to test the redirection locally as well as on the server. Working with your own projects, you can set the absolute path to your backup html page instead of the local path, or a local path to any directory or subdomain where you may choose to host the backup page.
Before uploading the files to the server, we should test redirection locally. To be able to do that, we’ll simulate the iPad by setting the version attribute of the SWFObject to a non-existing version of the Flash player. Let’s go wild and set it to a 1000 (that version of the Flash player should be available sometime around 3000 A.D. if things go well at Adobe).
The code should look like this:
<script type="text/javascript"><!--
			var so = new SWFObject("FlashWebsite.swf", "FlashWebsite", "800px", "580px", "1000", "#FFFFFF", "high", "", "./JavaScriptWebsite.html");
			so.write("container");
// --></script>
Don’t forget to save the file.
Now let’s open the FlashWebsite.html in a browser and take a look at the title bar of the web page. Instead of saying “Flash Website”, it should say “JavaScript-Animated Website”, and the last part of the URL should be JavaScriptWebsite.html instead of FlashWebsite.html. Congratulations, our redirection is working: the ultra-advanced animation you see in your viewport is done not with Flash but with JavaScript. It should look and behave like this.
Let’s reset the version value back to “9″. The code in the FlashWebsite.html should again look like this:
<script type="text/javascript"><!--
			var so = new SWFObject("FlashWebsite.swf", "FlashWebsite", "800px", "580px", "9", "#FFFFFF", "high", "", "./JavaScriptWebsite.html");
			so.write("container");
// --></script>
Make sure to save the file again.
Using any FTP client software, let’s upload the following files to a selected directory on your server:
Upload the Scripts folder containing swfobject.js and fx.js files to the same directory on the server (to remind you, swfobject.js is the file that enables swf embedding as well as redirection, and fx.js file is the one that allows you to create and play JavaScript animation used in the backup web page which is suitable for being played on iPad).
You do not have to upload the AC_RunActiveContent.js also located in the Scripts folder to your server, even though if you’ve accidentally done so, that file would in no way interfere with the performance of all the other files you’ve uploaded.
Here it comes, the moment of truth! Fire up your iPad tablet and access the FlashWebsite.html page uploaded to your server. Voilà! You should see the JavaScript-Animated mockup page instead of the Flash page. We’ve just iPad-proofed a Flash website.
You’ve just learned one of possible ways to iPad-proof an existing Flash website. There are many ways in which that goal can be achieved, and not all of them involve automatic redirection. I’d like to ask you all to share your ideas about the subject of iPad-proofing Flash website in the comments to this tutorial. Thank you for reading!
Keeping your scenes organised can be a somewhat tedious task, so any tools that can be used to speed up and simplify the process can be very useful! In this tutorial, Benoit Staumont takes us through how to write a much-needed custom Material Renamer script, using Maxscript in 3Ds Max. The result is an incredibly useful script that you can use easily on any future projects.
Download
Note: click the ‘Monitor’ icon to view tutorial in full-screen HD.
Don’t miss more CG tutorials and guides, published daily – subscribe to Cgtuts+ by RSS.
In today’s tutorial, David Kwasnik takes us through the process of creating an amazing Cgtuts+ ident, using the Xplode plugin for C4D. This plugin allows you to very easily and quickly cut any object up into many different pieces, and in the following video David shows us how to art-direct the size of these pieces to get the required result. This process, combined with MoDynamics and Mograph 2.0, is used to create an impressive shattering effect. It’s then over to AE for some optional compositing work!
Download
Note: click the ‘Monitor’ icon to view tutorial in full-screen HD.
Download
Note: click the ‘Monitor’ icon to view tutorial in full-screen HD.
Don’t miss more CG tutorials and guides, published daily – subscribe to Cgtuts+ by RSS.
To celebrate the release of Marmoset Toolbag V1.01, the real-time model presentation tool, we’ve teamed up with 8monkeylabs to give away 3 full licenses in our fantastic July competition! Read on to find out how you can enter…
Marmoset Toolbag is a fully-featured, real-time material editor and presentation tool. You can easily import your models, add texture maps and custom environments as well as tweak material settings, all in real-time. Once you have your model looking exactly as you want, Toolbag gives you the ability to render out single images or setup full turntable animations which can then be captured using software such as Fraps or the open-source CamStudio. The video below shows a portion of just what is possible :
You can visit the 8monkeylabs site to read more about the application : http://www.8monkeylabs.com
The three winners of the competition, jointly chosen by 8monkeylabs and Cgtuts+ will each be awarded one full, node-locked license for the newly released Marmoset Toolbag V1.01.
Please be aware that Toolbag is currently a Windows-only application, although it does run smoothly on OSX Bootcamp!
Using the many different features in the evaluation version of Marmoset Toolbag, we want you to come up the coolest image or animation you possibly can, and then post a link to it in the comments below. Don’t have a model you can use for your entry? No problem; Toolbag comes bundled with several simple models you are free to use. And remember, we’re not looking for the most complex model, just the coolest looking final result!
To get started, you’ll need to head over to the 8monkeylabs site and download an evaluation copy of the software. To do this, click this link and then at the bottom of the Toolbag page, click the top Add To Cart button on the Evaluation Download line. In the window that pops-up, click the Checkout button and then add in your information and click OK to be provided with your download link.
The evaluation version is fully-featured, allowing you to sample all of the available tools, and it lasts for 20 days. Once downloaded and installed be sure to take a look at the User Manual to quickly get up to speed on the application itself.
8monkeylabs have kindly offered to keep a close eye on the comments, so if you have any problems with the install, the workflow or any of the features, just leave a comment with as much detail as you can and they’ll do their best to get back to you quickly! Alternatively, you can email [email protected].
Once you have your final image or animation, we want you to upload it to one of the many free file hosting sites (MegaUpload, YouShare, Flickr, Youtube and Vimeo to name just a few) and then post a link in the comments below, making sure that you add the word ENTRY in capital letters to the start of your comment.
This competition is open worldwide, and runs for 14 days, so make sure to get your comment in before midnight on August 3rd, 2010, Pacific Standard Time.
Other than that, have fun, enjoy the software and good luck! I can’t wait to see what you all come up with!
Don’t miss more CG tutorials and guides, published daily – subscribe to Cgtuts+ by RSS.
A colleague suggested several business coaching candidates, so I contacted a smaller subset of that group and discussed my needs over the phone. The first coach seemed friendly, yet professional, and we clicked almost immediately. As our conversation concluded, she agreed to send me a proposal of what our coaching relationship would look like.
The second coach seemed equally friendly and professional, but after we chatted for awhile, she did something that few self-employed professionals do: discouraged me from becoming a client. “It sounds like you have solid strategies in place, and the few issues you’ve had were unusual circumstances,” she said. “I hate to turn away business, but I’m just not sure you need this right now.” I told her appreciated her honesty and that I’d get in touch if I really did need her in the future. When the first coach got back to me with her proposal, I responded similarly. I’d also been thinking about hiring a personal assistant and that seemed like a better use of resources anyway.
Though I didn’t end up using a business coach, there are others who went the other way.
Have you hired a business coach or a life coach? What did you look for? How did they help you?
I work from home. My friends think I am the luckiest. I have all the time in the world. I don’t need to commute everyday. My work’s easy. I can go out whenever I want. Great life, right?
I wish all of that was true.
Despite the benefits of working from home, it is no less challenging than an office job. In fact, I’d argue that working from home is more difficult because it’s not always easy to alienate your family from your work. Also, since there’s no boss screaming all the time, you could easily fall into the procrastination trap. Haven’t you experienced that? I bet, you have. Being productive while getting things done from home isn’t as easy as it looks. In this article, I explore 16 ways that could help you work smartly if you are one of us. Most of the tips come from my personal experience of working from home for over two years. Hope you find them useful.
1. Routine is a must. Getting into a state of mind that you could work whenever you want and you don’t need a routine is the first step towards procrastination. Whether you are working from home or an office, a routine is a must. Of course, there are days when exceptions need to be made, but for most of the time, you have to follow a fixed schedule. That’s the best way to get things done productively, from home.
2. Know your best times. The good thing about working from home is that you can make your routine. It doesn’t necessarily have to be 9 to 5. It could any fixed time-frame in the 24 hour span. Hence, check what are your best working times, and make your routine accordingly.
3. Plan the day before. Making a tentative work schedule for the next day before you go to sleep is usually a fruitful exercise. The next day, when you begin work, you will have an idea about the things you need to accomplish (unless some urgent tasks need to be attended). For more on this, check what my fellow WorkAwesome contributor Andre has to say on beginning your work day at the end of it.
4. To-do lists. To-do lists give you a clear picture of the tasks ahead. And as you complete them one by one, checking them off the list is kinda satisfying too. Learn how to create effective to-do lists. Also, there are some nice online to-do list tools you could make use of.
5. What distracts you? Some people need pin-drop silence to work. Some work best when they’ve got music on. Some cannot work with people around. Some need people around to work. Hence, a distraction for one could be a good work environment for the other. So, what distracts you? You can handle them only once you know them.
6. Make your friends and family aware. Often you will find that friends and family fail to realize the seriousness of your work just because you are not going to an office. Your friends would stop by when they are free (doesn’t matter you are free or not), your family members would disturb often, and so on. You need to make them aware about your work schedule, and the fact that working from home doesn’t mean you are always free. The onus is on you.
7. Switch off, disconnect. You may need the internet to work, but being connected all the time might not be wise since there are so many tempting distractions (read Twitter and Facebook). If possible, disconnect from the internet when you are doing creative stuff like writing or designing. Also switch off your phones (or put them in silent mode) if that’s an issue.
8. Take breaks. It is very important to take regular breaks and take your eyes off the computer. Working for long hours in the same position isn’t good for your health. You could take small 5 minute breaks after each 20-25 minute stretch, or may be a 15 minute break after a 1 or 1 and a half hour stretch. But do take them frequently.
9. Are you measuring quality or quantity? It is important to monitor if you are actually producing a productive output while working from home. What are you focusing on? the quantity of work done or the quality? Are you able to follow your routine effectively? Is life happier or stressful?
10. Get a work buddy. If self-discipline or procrastination is an issue, may be a work buddy could help you out. Someone who would track your progress and give you feedback. Working from home doesn’t mean you stop collaborating with people. Talk to people online, make friends and ask them for suggestions.
11. Use RescueTime. We’ve previously talked about RescueTime here. RescueTime is web based time tracking software lets you know how you spend your time on your computer everyday. Once you know which sites you are addicted too, you could take steps to visit them less often.
12. Time your tasks. Whether you are writing an article, or browsing through your feeds, use a timer to time the tasks. For more on this, check how to time your tasks. Also, take a look at my previous list of web based time tracking tools for effective time tracking.
13. Set up daily milestones. Setting up daily milestones gives you an idea of the actual work you could get done contrary to what you think you can get done. Also, it lets you track if you are getting things more efficiently after you’ve implemented the productivity-enhancing steps discussed above.
14. Exercise. This is a no-brainer, but, worth repeating in every productivity related article. Why? Because people just don’t understand how important it is to stay fit and productive. Understand that you don’t need to visit the gym everyday. Half an hour of yoga, or a short run in the morning is enough. But do it consistently, everyday.
15. Spend time with family and friends. If you are being productive in your work, you should be able to take out time for family and friends on weekends. That’s the goal, isn’t it? Work-life balance has to be maintained. Dedicate a day each week for your loved ones. Set aside time. Try to get your work done in 5 or 6 days of the week. Take a day off.
16. Do things that make you happy. All productive work and no play would make you unproductive in the long run. Spending time with yourself is as important as spending time with your loved ones. Play guitar, draw sketches, go for a long drive. Take time out, free up your mind and indulge yourself. Be happy!
For some, a quick walk around the block is all it takes. Other people get energized by checking out their favorite blogs or listening to music. A steaming cup of coffee or a lively chat by the water cooler are other standbys.
So what’s your favorite pick-me-up? How do you get a quick jolt of positive energy?
In some cultures it is acceptable to be late, meaning arriving after the agreed upon time. This makes the definition of “being on time” subjective as some take it as meaning being 5 minutes before the agreed upon time, for others 15 minutes after.
I’ve asked this of many people and some swear there’s no such thing as cultural differences when it comes to being on time. Others argued that everyone knows that everyone else will be 15 minutes late so, in fact, everyone is on time. In today’s increasingly diverse workplaces these differences can create some tension – and make some team members feel they’re being taken advantage of.
Do you deal with this cultural difference in your workplace? What approach do you take?
I’m writing this on a desktop computer. I also use a laptop – when I’m away from home or working from the patio. In addition, there are two mobile devices in my messenger bag that can access the Internet. Oh, and I used to work for an employer who provided yet another desktop computer.
That means five different Web browsers with different sets of bookmarks. So if I save a site to my bookmarks at work, how do I remember it when I’m at home or working from my favorite coffee shop?
Thankfully. there are plenty of ways to sync bookmarks. Basically they store your URLs on their servers and sync them with your computer – or allow access via the Web. I prefer the tools that integrate smoothly with my Firefox browsers and keep bookmarks private.
If you don’t have anything to hide when you’re surfing and saving URLs, maybe a social bookmarking service is for you. There several that let you easily share and categorize the pages you think are worth saving. Plus these sites have privacy features that let you keep URLs hidden.
The beauty of social bookmarking sites is that they are great places to look for other sites you may be interested in seeing.
These services and tools also serve as backup for my bookmarks. If something goes wrong, I don’t lose the important addresses I need.
What bookmarking tools work well for you?
No matter your field, there are several advantages to establishing a presence online. You can connect with colleagues and customers, learn new things and help others learn, as well. But as you establish your online identity, it’s important to think about your personal branding.
Just like Pepsi and Starbucks, we each have a brand. It represents how people perceive us—who we are, what we stand for, what we do and how and why we do it. On the web, it can be distributed across a range of platforms, such as Twitter, Facebook and maybe our own website or blog. This puts the burden on you to make sure your online personal branding is up-to-date, accurate and presented to your satisfaction.
Here are a few ways you can manage and monitor your personal brand on the web:
Before diving in and setting up a bunch of accounts, think through what you want to achieve on the web. Who do you want to communicate to or engage with? Are you looking to learn about a topic of interest? Do you want to gain customers or make business connections?
Then, consider how each platform could help you achieve your goals. Not every platform will necessarily apply, so don’t be dazzled by the array at your disposal. Only commit to developing as much of a presence as you can commit to maintaining. Sitting down and mapping out your strategy for managing your brand online may not take very long, but it will provide a helpful road map going forward.
One of the most basic and most essential things you can do is to regularly Google your name (including variations, such as nicknames or potential misspellings) to see where you are being mentioned on the web and in what context. You can also set up Google Alerts for any variation of your name so you can see where it’s popping up. There are several tools available to cast a wider monitoring net.
Mhairi Petrovic of Out-Smarts made the good point in this Slideshare presentation that it is important to see yourself as others see you. To that end, log out of your services and view your profiles as others see them. Do they look how you expect them to look, both visually and in terms of messaging?
As you conceive your personal digital strategy, the next step is to think through your personal privacy policy. What information do you want to protect? Some things to consider:
As you manage your digital outposts, it is important to be aware of how these services interact. Many of these services allow you to send updates to the others, but by doing so, you may unintentionally create a lot of noise and redundancy. Check your settings and adjust appropriately. Some examples of this are:
You may do an excellent job managing your presence on Flickr, YouTube, Twitter and LinkedIn, but two facts remain:
For these reasons, it is important to own your own digital brand with a website. Your website is your online hub, where all of your digital outposts should point to and come home to roost. It is the one space on the web that you can completely control. If you decide to get a website, consider your domain name very carefully. It is also advisable to reserve – even if you don’t have a plan to use them – your desired names across a range of social networks via a tool like namechk.com.
The challenge of having our brand distributed across a range of services and platforms is that there is no way to update all of them at once. Since in all likelihood you will set up one platform to link to all or most of your others, it is important to have your information and presentation be up-to-date and consistent across the board. This includes details about your current employer, contact information and goals. This can also extend to your professional portrait, and even your color scheme.
In addition, any non-digital material you have – memorable business cards, a portfolio, even a downloadable PDF on your website – should also remain up to date and aligned with your digital collateral. Make a checklist of online and offline materials to review whenever you have a change in your professional life.
A successful brand is one that is useful and relevant. Search engine optimization (SEO) is the practice of tailoring your website content to rank highly in search engines. One way of elevating your personal brand is to elevate your content, whether it’s your blog posts or static pages on your website. If people find your information useful, your personal brand gets a boost. For a good introduction to SEO, visit SEOMoz.
This is both the simplest bit of advice and perhaps the most critical. Sure, it’s the web and it’s fun, but if you are using it toward professional ends, be mindful of what you say and who you associate with – just as you would in the real working world.
What have you done to manage your personal brand online?