SeaShore: An Open Source Image Editor

Photoshop is the undisputed king of image editing, but it also has a huge price tag and an even bigger learning curve. If you don’t make a living as a designer, the time and money necessary for professional photo editing software is hard to justify. Further, some free options like GIMP are much more than many users will ever need.

So what should a Mac owner use for casual graphics editing? One option is Seashore, a free image editor that’s easy and fun to use. Below I’ll walk you through the basic functionality and tell you what I thought of the application.

Meet Seashore

Seashore is a simple but effective image editing application. The basic interface is quite similar to Google SketchUp with a bar of large buttons running across the top representing your tool set and a main image area below that.

screenshot

The Seashore Interface

Rather than messing with a million palettes as in Photoshop, Seashore integrates nearly all of its functionality into a single window. The one floating palette you have to deal with regularly is the color palette, shown above at left.

The layers are shown on the left, the context-sensitive tool options are shown under the toolbar, the foreground and background colors are at the top right and the zoom options are on the bottom.

Working with Layers

Layers work pretty much how you’d expect. You can add, delete and rearrange them using controls on the left side of the interface. Clicking the info button on a layer will pop up a menu that allows you to name the layer and set various options such as opacity and size.

screenshot

Layer options

I was pleasantly surprised to find blending modes in here. You can use many of the popular options from Photoshop, including multiply, overlay, screen, and more.

screenshot

Blending Modes

Tools

The tool set here is pretty standard. You have some basic selection options, including rectangular marquee, elliptical marquee, lasso, polygonal, and magic wand.

Next up is the art section. Here you have a pencil, brush, text tool, eraser, paint bucket and gradient tool. You have a number of options for customizing your brushes including several presets, spacing options, textures, fade out and pressure sensitivity.

screenshot

Brush Options

Your toolbar also has an eyedropper, crop tool, magnifying glass and move tool. The most fun set of tools though is the set in between those we’ve already looked at.

Here you have a smudge tool, a standard clone tool, and then this crazy effects tool that lets you do all sorts of fun stuff. When you grab this tool you can choose between a number of blurs, distortions and transforms and then click on specific places on your canvas to apply them in different ways.

screenshot

Effect Brush

I found the motion blur above to be especially nice as it produced much different results than the same tool in Photoshop.

Effects

Located under the selection menu is a number of effects that are similar to filters in Photoshop. These are broken up into Blur, Color Adjust, Color Effect, Enhance, Generate, Halftone and Stylize.

screenshot

More Effects

Each effect comes with a unique set of controls (usually simple sliders) for varying the application. As you experiment with different settings the controls fade out so you can have a decent view of the entire image.

Using effects you can easily create noise, make a photo black and white or sepia tone, or posterize an image.

How Is It?

As a graphic designer, it’s hard to give Seashore a proper analysis. Since I live in Photoshop, I definitely found Seashore to be very limited and even frustrating at times. For instance, the type tool is abysmal and works in a very indirect fashion and the document color options are limited to grayscale and “full color” whatever that means. Also, there are a few big feature holes such as layer masking capabilities or layer effects like drop shadow, outer glow, etc.

However, that being said, I was surprised by how much fun I had with the app. Seashore has a lot of tricks up its sleeve and even does a few things better than Photoshop. As an example, the halftone effects are much closer to something you could actually use in a design.

Bottom line, it’s not a professional graphics application. It neither claims to be nor tries to be. If you want to be a professional, learn Photoshop and maybe even Pixelmator. if you can’t afford these, use GIMP (Seashore is based on GIMP but is simpler). Everyone else, download Seashore.

Conclusion

Seashore is free, lightweight, has a low learning curve and is perfect for a much larger audience than more powerful and expensive alternatives. It’s definitely not for professionals but it does have some impressive functionality.

If you’re not an avid Photoshopper, go grab the free download and let us know what you think. Are there any features you’d like to see added or tweaked? How easy was it for you to pick up and use? Leave a comment below.


The Missing Manual: Time Saving Tips Nobody Wrote Down – AE Basix

One of the keys to mastering After Effects transcends the addictive process of adding your spark, the glamour, and making everything sexy. As fun as that is, the reality is that we often have the clock ticking against us, whether it’s our client nervously watching the hours rack up, or that family time we’re neglecting yet again. Everyone seems to agree there aren’t enough hours in the day, so why not earn a few easy ones back?


Tutorial

I’d like to think that most of these tips are obvious and that much of the professional world already applies them. However, I never found these in any of my instruction, so I’d like to share this workflow of mine that consistently helps me make better videos and cut my hours in half—by eliminating my most major mistakes.

Quick Summary:

  • Start with the audio
  • Plan it all on paper
  • Start your video as basic as possible so you can address major storytelling issues while it’s still easy.

Simple. For some reason it took me forever to “get” this, and why the seemingly boring process is so vital.

1) Audio first

Unless you’re in a market like digital signage, your video needs a soundtrack. And there are plenty of important reasons to start here before anything else.

  • Inspiration: the soundtrack of a song conveys many obvious and subtle emotions. Choosing the right soundtrack drives your viewer’s emotions and validates the video in a way nothing else can. Listen to your soundtrack with your eyes closed and you’ll see possibilities for your video that are uniquely yours and fit it far better than just following tutorials.
  • Essential: You want your major transitions to line up with set changes in the song. Because all music conforms to very consistent patterns: 4 beats per measure, 4 measures per set, we are very restricted about how much we can edit it later. Time your effects around beats in the song, not the other way around.
  • Practical: If you have a duration limit (like 15 or 30 seconds), you may need to do a little editing so the track has a decent start, middle, and finish. You want to do this before you have dozens of effects timed to the old music edit.

The bottom line is that video effects are very easy to move around. Audio is far more difficult to ‘nudge’.

Example

Here is an energetic music track where the main instruments suddenly stop and a guitar slides down.
I felt like I was being dropped from mid-air here, so in my video I use a falling transition to
emphasize it. It‘s my favorite part of the video.

2) Storyboard: use a pad of paper!

Even if you’re a terrible drawer like me, you’ll still benefit a lot by doing your test run on paper first. Your brain has better things to do than remember every little detail you’ve conjured up, and the process just takes me three or four minutes (and often saves me hours).

  • Inspiration: Seeing your idea on paper gives you perspective, because you can find problems in symmetry, balance, or there not really being enough room for all that text, etc. Layout often makes sense in my head but just doesn’t work in a 16×9 frame. Staring at it lets you think outside the box, and frees up your brain to think of new approaches.
  • Essential: You can double-check timing. If you have a duration limit, will this all really fit in time? “Watch” your slides while listening to the audio track to see that you can comfortably read all of the text, and process all of the information at a good pace. Do this 2 or 3 times and you should have a good sense as to whether it will work like you think.
  • Practical: You’ll greatly accelerate your editing. With the big picture in place, you can more structurally lay out your compositions so they make sense. And rather than de-railing to remember what you planned next, you can glance at your storyboard to stay right on track and in your zone. This’ll save you more time than you probably expect.

I once spent 4 or 5 hours finishing the details on a great 30-second ad. But I didn’t storyboard, and when I hit the 24 second mark, I had only shown half the client’s talking points and hadn’t even gotten to their logo yet. Oops! Most of it had to be thrown out.

3) Make a “Mock Video”

Again in the spirit of ensuring that your timing will work, now create the entire video as basic as you can. Get any important elements in place but avoid adding anything that will tax your CPU or clutter your timeline for now.

First handle: Optionally add: Not yet:
Text Basic backgrounds Effects
Photos Basic transitions Blending modes
Layout Camera motion Color correction
Timing down to a ‘T’ Basic movement Anything not vital to your story

Here are two mock-ups I made for my videos. They are really dull, yes, and that’s good, for reasons I’ll explain in a minute.

Example: a very basic mockup


A more complex example: showing a mockup with 3D movement

For now you’re trying to avoid any details that aren’t critical to the storytelling. If you work on little details like glows and pretty effects early in, several bad things happen:

You make it very difficult to edit major things later
  • Layout: It’s very hard to click and drag a specific layer in a complicated scene. Instead you highlight a color correction adjustment or a big foreground layer by mistake. Gah…
  • Efficiency: lots of effects will seriously tax your CPU, making it a real chore to make any broad layout changes later
  • Timing: Imagine: some text flies in and you have a puff of smoke emanating from its landing place. That’s several layers of smoke, all keyframed to start in sequence just after the text lands. What happens if you need that text to land a half-second sooner? Instead of one key-frame to move, you could have a dozen. What if you need to move it back some? You’ve got to grab all those keyframes again. What if you forget a keyframe? Or several? You’ve got to track them down. What about all the layers that come after it, do they need to shift too? Gah…!
Waste

And the most dreadful: you could spend time working on scenes you might decide to cut completely. It’s happened to me a lot.

Watch your “mock” video again and again. Be sure you love it. Because this is the time when you can most easily play with and perfect it.

4) Have fun!

Your hard work pays off and the fun begins. Go through your video and add smoke effects, gradients, blending modes, textures, and everything else you’ve been eager to add. You’ll find yourself zooming through this faster than usual too, since you can fully focus on aesthetics and not question your storytelling again and again. Good luck!


How to Make a Flesh Ripping Zombie Type Treatment


When Horror Site Freddy in Space recently ran "Romero Week" they asked Nik Holmes to provide a type treatment to tie the articles together. Could you possibly think of a better Vector Artist for the job? Among one of the best illustrators of this genre, Nik will take you though the process he used to create the character and type treatment for this blood-curdling illustration.

Continue reading “How to Make a Flesh Ripping Zombie Type Treatment”

Workshop #114: APEX by OceanFactory

At Audiotuts+ we regularly put up a reader track for workshopping and critique (find out how to submit a track). This is how it works: you upload your song, and every week or so we’ll publish one here and step away from the podium. The floor is yours to talk about the track and how the artist can fix problems in and improve upon the mix and the song.

This track has been submitted for your friendly, constructive criticism. They have put their track (and their heart and soul) in your hands to learn and get useful feedback.

  • Do you enjoy the song or track itself? Does it have potential?
  • Can the arrangement be improved?
  • How did you find the mix? What would you do differently?
  • What do you enjoy about the rhythm track? What can be done to improve it?
  • Is the choice of instruments relevant and effective for the style/song?
  • Are the lyrics (if any) effective? Does the style, arrangement and genre of the song suit them?
  • Can you suggest any specific techniques that might improve the track?
  • Do you have any other constructive feedback?

APEX by OceanFactory

Artist’s website: http://soundcloud.com/oceanfactory

Description of the track:

Ambient progressive house club track.

Download audio file (APEX5byOceanFactory.mp3)

Terms of Use: Users can stream the track for the purposes of giving feedback but cannot download or redistribute it.

Have a listen to the track and offer your constructive criticism for this Workshop in the comments section.


Submit Your Tracks for Workshopping

Need constructive criticism on your own tracks? Submit them using this form.


Quick Tip: Use a Practice Schedule

Practicing is the most important skill that every musician should spend some time developing. Knowing how to practice will give you the quickest and easiest route to achieving your goals.

Here are some tips to help you ?gure out how to create your own effective practice schedule.


Quick Tip 1: Set Some Goals

Setting goals enables you to know what you want/need to practice. Goals give you something to achieve and makes sure you don?t spend your practice time noodling over the same material.


Quick Tip 2: Break Down Your Goals

Breaking down your goals into smaller, more manageable chunks is an incredibly effective way to absorb anything your trying to learn. By making things smaller, your actively making what your trying to learn much easier for yourself.

For example, don?t try and learn all ?ve major scale patterns in one sitting. Take one, learn it, save the other for other practice sessions.


Quick Tip 3: Prioritize

Prioritizing is important in making sure you get what you need to get done fast. If you want to become a speed demon shredder, get your techniques exercises practiced ?rst before moving onto writing riffs or jamming.


Quick Tip 4: Use A Timer

Using a timer is another effective tool to have in your practice toolbox. By giving yourself a time limit to learn something during a session, you mind focuses itself much more effectively than if you were just casually noodling over your scales for 15 minutes.

Also, practicing for a limited time is good for your brain. It?ll save you from burning out, and losing focus. It?ll also tell you when it?s time for a break. Taking breaks is incredibly important because giving your brain a rest is out you absorb information.

Ideally, you should take a 15 minute break to drink water, walk around and stretch after ever hour of practice.


Quick Tip 5: Keep A Journal

Keeping a journal is a huge help for musicians. It tells you what you?ve been practicing, how long you?ve been practicing certain things for, and it gives you great motivation when you start seeing how far you?ve progressed over a couple of months.

You can write down little notes in your journal during a practice session as reminders for the next sessions, such as “Lick 1A – relax more, release tension,” or “Watch shoulder tension.” Small notes like these are what make a huge difference in the long run.


Quick Tip 6: Plan Your Session and Allocate Time to Each Topic

Before sitting down for that hour of practice, consider what you want to improve. If you want to improve technique, then plan out a session with that goal in mind. If you want to write some better songs, plan out a session where you can achieve that goal, or at least some of it.


Key Points

  • It?s much better to practice with focus for thirty minutes than to practice loosely for an hour.
  • Don?t take on too much at once. Start small and slow. You don?t want to overwhelm yourself because you?ll end up back at square one and wonder why your practice plan didn?t work. See your whole development as a musician as a journey.
  • Be realistic.

I hope you consider these points next time you sit down to practice. They are very effective, and can result in improvement in a short amount of time.


How to Work With Groove-based Samples

This four-part screencast continues to answer questions I have recently received by email or that I’ve been asked by my one to one students. This episode concentrates on how to rip samples from existing productions and sync them to your current projects tempo.

There are plenty of ways to do this and some methods are DAW specific. I’ve tried to concentrate on techniques that can be used with any DAW or at least are common to a few different titles. I you have any questions about the methods used here or suggestions for future tuts just let me know!


Part 1

The sample is converted from MP3, trimmed and saved.
View a high-resolution version here.

Part 2

The sample is then loaded into Recycle, edited and saved as a .REX file.
View a high-resolution version here.

Part 3

Our .REX file is loaded in Logic and we look at how to perform basic time stretching.
View a high-resolution version here.

Part 4

An alternative method for creating synced, sliced loops is looked at.
View a high-resolution version here.


Create an Electrical Outlet Icon in Photoshop


In today’s tutorial, we will be making use of vector masks and layer styles in Photoshop to create a high quality electrical outlet icon. Let’s get started!


Before You Begin

When creating icons from real-life objects it is best to first take a look at those objects and see how they look. When you are done, go ahead and start to sketch out how you want your icon to look.


Step 1

Create a 400 x 400 pixel canvas at 72 dpi.

outlet04

Step 2

The first thing that we’re going to do is create the outlet shape. For that, choose the round rectangle tool and draw a simple rectangle.

outlet05

You can see your newly created path in the path palette next to the layers palette. Now, use the Free Transform Path Tool, which you can found in the Edit menu or by selecting Cmd/Ctrl + T and change its size as shown below.

outlet06
outlet07

Step 3

Pick the path selection tool (black arrow) and click on the rectangle either on the canvas or in the path palette. Go to Layer > New Fill layer > Solid Color.

NewOutlet01

Choose any color.

outlet08

Step 4

Click on the "Add Layer Style" button at the bottom of the layer palette.

outlet09

We will apply three layer styles to this element. Let’s begin with "Bevel and Emboss."

outlet10

Now apply the following settings: Style: Inner Bevel, Technique: Smooth, Depth: 100%, Direction: Up, Size: 10 px, Soften: 0 px.

outlet11

Next, we need to apply a Gradient Overlay style to give our outlet a little bit of lighting. In this case, apply the following layer styles: Opacity: 60%, Style: Linear, Angle: 70, Scale: 100%.

outlet12

Now apply a Satin layer style using the following settings: Blend Mode: Multiply, Opacity: 20%, Angle: 0, Distance: 11 px, Size: 14 px.

outlet13
outlet14

Step 5

We’re now going to create a shine effect on one of the outlet corners. Select the pen tool and draw a shape as shown.

outlet15 
outlet16

Step 6

Go to Layer > New Fill Layer > Solid Color and pick a pure white color.

NewOutlet02
NewOutlet03

Then select your active layer to confirm by clicking on it, and go to Layer > Layer mask > Reveal all. A white box will appear in between your path and the Solid Color Fill.

outlet17

The layer mask will give us control over the gradient so we can place it exactly where we want it to be. Pick the Gradient tool in the tool bar, and choose Black to white linear Gradient from the tool options bar.

outlet18
NewOutlet04

Apply a down to top gradient over the shine shape we drew earlier.

outlet19

Then, apply a Gradient Overlay Layer style effect. Use the following settings: Opacity: 100%, Angle: -141, and Scale: 100%.

NewOutlet05

Step 7

To create the screw that holds our outlet to the wall, we only need to make a couple of layers In one layer, use the rectangle tool to create the center of the object. Then create a new fill layer (Layer > New Fill layer > Solid Color) and choose the color you consider the most appropriate. Now add a layer style, in this case, select "Inner Shadow", and enter the following values: Blend Mode: Multiply, Opacity: 33%, Angle: 120, Distance: 3 px, Choke: 0, Size: 3 px.

outlet20

After that, use the circle tool to generate the screw’s basic shape, as we did before, go to menu Layer > New Fill layer > Solid Color and choose the best one.

NewOutlet01

Now we need to add some layer styles. First, add "Bevel and Emboss" and enter the values Style: Inner Bevel, Technique: Smooth, Depth: 100%, Direction: Up, Size: 9 px, Angle: 90, Altitude: 30, Opacity: 75%.

NewOutlet06

Now, apply a "Gradient Overlay" and enter the following settings: Opacity: 60%, Style: Linear, Angle: 70, Scale: 70%.

NewOutlet07

Finally, add a "Satin" layer style with the following settings: Blend Mode: Multiply, Opacity: 30%, Distance: 11 px, Size: 14 px.

NewOutlet08
outlet21

Step 8

Choose the pen tool and draw the shape of the plug, go to menu Layer > New Fill layer > Solid Color and choose and appropriate one.

NewOutlet01

This is one of the shapes that require more than three layer styles. First, add the "Drop Shadow" style and adjust the parameters to Blend Mode: Multiply, Opacity: 75 %, Angle: 77, Distance: 3 px, Spread: 0 %, Size: 5 px.

outlet22

Next, select "Bevel and Emboss" and the parameters will be the following: Style: Pillow Emboss, Technique: Smooth, Depth: 381%, Direction: Up, Size: 10 px, Soften: 0 px, Angle: 90, Altitude: 30, Opacity: 75%.

outlet23

Now select "Gradient Overlay" and give it this values: Opacity: 60%, Style: Linear, Angle: 70, Scale: 100%.

outlet24

Finally, click on "Satin" and customize the parameters to Opacity: 20%, Angle: 0, Distance: 11 px, Size: 14 px.

outlet25
outlet26

Step 9

As you know, electric outlets have three holes, two for the energy and one for grounding. We need three layers to do this. We can start with any of the three, it doesn’t matter. For the electric ports, use the rectangle tool, and for the grounding, use the pen tool. Once you’ve drawn your shapes go to Layer > New Fill layer > Solid Color and choose an appropriate one.

NewOutlet02
outlet27

Use the following layer styles.

outlet29
outlet30
outlet31
outlet32
outlet28

Step 10

Using the pen tool, draw the shadow shape.

outlet15 

outlet33

Go to menu Layer > New Fill layer > Solid Color and choose a plain black. After that is very important to lower the opacity to 50%, remember, this is a shadow.

NewOutlet09
NewOutlet10

Add a Gradient Overlay Style with the following parameters: Blend Mode: Normal, Opacity: 100%, Gradient: Reverse, Style: Linear, Angle: 90, Scale: 100%.

NewOutlet11
outlet34

Now, create a new layer and using the Pen Tool, draw the same figure that we’ve made around the three connectors, this is to make the cable fit as if it were connected. Go to menu Layer > New Fill layer > Solid Color and choose a plain black.

outlet15 

NewOutlet09

Now, go to the layer styles button and select "Drop Shadow", although at the end, we decided to hide it, is your choice. Enter the parameters Blend Mode: Multiply, Opacity: 75%, Angle: 86, Distance: 16 px, Spread: 0% and Size: 16 px.

NewOutlet12

Now add an "Outer Glow" and enter the following values: Opacity: 75%, Noise: 0%, Spread: 0%, Size: 5 px, Range: 50% and Jilter: 0%.

NewOutlet13

Add an "Inner Glow" using the following settings: Opacity: 75%, Noise: 0%, Source: Edge, Choke: 0%, Size: 7 px, Range: 50% and Jilter: 0%.

NewOutlet14

Now add "Bevel and Emboss" and the values Depth: 100%, Size: 43 px, Soften: 0 px, Angle: 90, Altitude: 30 and Opacity: 75%.

NewOutlet15

Add a "Stroke" with the following parameters: Size: 1 px, Position: Outside and Opacity: 100%.

NewOutlet16
outlet35

It’s time to start making the cable 3D. First we must add the left and right side. It is very important to keep in mind your references, so we can make a good use of the perspective. Using the Pen Tool, draw the left side of the cable’s head.

outlet15 

outlet36

Now add some layer styles. Add "Drop Shadow" (once again we decided at the end to hide it) and enter the values Opacity: 75%, Distance: 16 px, Spread: 0%, Size: 16 px and Noise: 0%.

NewOutlet17

Add "Bevel and Emboss" with the values Depth: 100%, Direction: Up, Size: 43 px, Soften: 0 px, Angle: 90, Altitude: 30 and Opacity: 75%.

NewOutlet18

Add the "Stroke" layer style and assign it the following parameters: Size: 1 px, Position: Outside and Opacity: 100%

NewOutlet19
outlet37

To make the right side, we need to do exactly the same, so start drawing it with the Pen Tool and then go to menu Layer > New Fill layer > Solid Color, then choose a plain black.

outlet15 

NewOutlet01
outlet38

Now add some layer styles. First add "Drop Shadow" (this one we also decided to hide it at the end) and enter the values Opacity: 75%, Distance: 16 px, Spread: 0%, Size: 16 px and Noise: 0%.

NewOutlet20

Add "Bevel and Emboss" with the values Depth: 100%, Direction: Up, Size: 43 px, Soften: 0 px, Angle: 49, Altitude: 42 and Opacity: 75%.

NewOutlet21

Add the "Stroke" layer style and assign it the following parameters: Size: 1 px, Position: Outside and Opacity: 100%.

NewOutlet22
outlet39

Take your pen tool and decide how the side must look, then draw it.

outlet15 

outlet40

Go to Layer > New Fill layer > Solid Color and choose a black.

NewOutlet09

First, "Inner Glow", enter the following values: Opacity: 33%, Noise: 0%, Source: Edge, Choke: 0%, Size: 5 px, Range: 50%, Jilter: 0%.

NewOutlet23

Add "Bevel and Emboss" with the values Depth: 100%, Direction: Up, Size: 5 px, Soften: 0 px, Angle: 90, Altitude: 30 and Opacity: 75%.

NewOutlet24

Now add the "Stroke" layer style and assign it the following parameters: Size: 2 px, Position: Outside and Opacity: 73%.

NewOutlet25
outlet41

Select the pen tool and draw a standard cable, then go to menu Layer > New Fill layer > Solid Color and choose a black so we can continue with the layer styles

outlet15 

NewOutlet01
NewOutlet02
NewOutlet09 

outlet42

Let’s start with "Inner Glow", enter the following parameters: Opacity: 50%, Noise: 0%, Source: Edge, Choke: 0%, Size: 5 px, Range: 50%, Jilter: 0%.

NewOutlet26

Select "Bevel and Emboss" and assign it the values Depth: 100%, Direction: Up, Size: 21 px, Soften: 0 px, Angle: 90, Altitude: 30 and Opacity: 75%.

NewOutlet27

Now the "Stroke" layer style, give it the following parameters: Size: 1 px, Position: Outside and Opacity: 100%.

NewOutlet28
outlet43

Step 11

Now our outlet is almost ready, and the only thing left to do is to add some details and a shadow. Take the pen tool and draw a shape on the upper right side of the cable’s head, then go to the menu Layer > New Fill Layer > Solid Color and pick a pure white color.

outlet15 

NewOutlet03

Now select your active layer to confirm by clicking on it, and go to Layer > Layer mask > Reveal all. A white box will appear in between your path and the Solid Color Fill.

NewOutlet29
outlet44

Pick the Gradient tool in the tool bar, and choose a Black to white linear Gradient from the tool bar options.

outlet18
NewOutlet04 

Apply a down to top gradient over the shine shape we drew earlier. Finally, select the "Gradient Overlay" style and enter the values Opacity: 100%, Angle: -141 and Scale: 100%.

NewOutlet30
outlet45

At this phase, we could consider this project complete but because we always want the best, let’s add a shadow to provide some depth to our icon. The shadow is easy. Just add a new layer below all the rest layers and draw with the rectangle tool on the base of the outlet. Then go to Layer > New Fill layer > Solid Color and choose black. Change the opacity to 75% and finally, select the layer and go to Filter > Blur > Gaussian Blur and give it a value around 5.0.

NewOutlet31
NewOutlet09 

NewOutlet32
NewOutlet33
NewOutlet34 


Final Image

outlet46

Flash CS5 for Designers: TLF and ActionScript + Win 1 of 3 Signed Copies!

A lot has changed between how text was handled in Flash CS4 and Flash CS5. We think now is a good time to pull up a stool, sit down, and review, in very broad terms, what one needs to know about TLF before “wiring up” an exercise or project using ActionScript.

The following is an exercise from Foundation Flash CS5 For Designers by Tom Green & Tiago Dias.
 
If you’re feeling lucky, enter the Activetuts+ competition to win one of 3 signed copies! (Of course, you can always purchase a copy..)

Introduction

With the new TextLayoutFramework (TLF), text is found in these things called containers. They either can be physically drawn on the stage using the Text tool and given an instance name or, as is more common, can be created at runtime. You also know that the text can be formatted and manipulated using the Properties panel. The neat thing here is the word properties. If there is a property in the panel, its counterpart is found in ActionScript. The bad news is, ActionScript is stone, cold stupid. It doesn’t have a clue, for example, what a container is until you tell it to create one. It won’t format text until you tell it what to do. It won’t even put the text on the stage until it is told to do so.

Most projects will start with you telling Flash to create a Configuration() object, which is used to tell Flash there is a container on the stage and how to manage the Text Layout Framework for the stuff in the container. The actual appearance is handled by the TextFlow() class, which takes its orders, so to speak, from the Configuration() object.

Naturally, being stupid, the Configuration() object needs to be told exactly how to manage the text in the container. The default format is set through a property of the Configuration class called textFlowInitialFormat. To change it, you simply use the TextlayoutFormat () class to set the fonts, colors, alignment, and so on, and then tell the boss—Configuration ()—that its textFlowInitialFormathas changed to the ones you set using TextLayoutFormat().The boss will get that, but he isn’t terribly bright, so you next need to tell him to hand the actual work to another member of the management team, the TextFlow() class. This class has overall responsibility for any words in a container. Being just as dim as the boss, TextFlow() needs to be told what a paragraph is (ParagraphElement), how wide the paragraph is (SpanElement), whether any graphics are embedded in the paragraph (InLineGraphicElement), whether any of the text contains links (Link Element), and so on. Not only that, but it needs to be told what text is being added to the container so it can handle the line length and to add any children (addChild) that contain that formatting so the user can actually see it.

The TextFlow() class, again not being too terribly bright, will then hand the job over to another member of the management team, the IFlowComposer() class, whose only job is to manage the layout and display of the text flow within or among the containers. The flow composer finishes the process by deciding how much text goes into a container and then adds the lines of text to the sprite. This is accomplished through the use of the addController() method, which creates a ContainerController() object whose parameters identify the container and its properties.

The usual last step is to tell the FlowComposer to update the controllers and put the text on the stage according to how the other members of the team have told the Configuration() object how their piece of the project is to be managed.

With this information in hand, let’s move on to working with TLF in ActionScript. We’re going to create a column of text with ActionScript.


Step 1: New Document

Open a new Flash ActionScript 3.0 document, rename Layer 1 to actions, select the first frame of the actions layer, and open the Actions panel.


Step 2: ActionScript

Click once in the Script pane, and enter the following:

var myDummyText:String = "The introduction of the Adobe CS5 product line puts some powerful typographic tools in your hands—notably, a new API (Application Programming Interface) called Type Layout Framework (TLF)—and with as more tools in the Adobe line up nudge closer to a confluence point with Flash, the field of typographic motion graphics on the Web is about to move into territory that has yet to be explored. To start that exploration, you need understand what type is in Flash and, just as importantly, what you can do with it to honor the communication messengers of your content.";

You need some text to add to the stage. This string is the third paragraph of this chapter. Now that you have the text to go into the container, you need to load the class that will manage it.


Step 3: Configuration()

Press the Enter (Windows) or Return (Mac) key, and add the following line of code:

var config:Configuration = new Configuration();

As you may have noticed, as soon as you created the Configuration() object, Flash imported the class—flashx.textLayout.elements.Configuration —whose primary task is to control how TLF behaves. The next code block tells TLF how the text will appear on the stage.


Step 4: TextLayoutFormat Class

Press the Enter (Windows) or Return (Mac) key twice, and enter the following:

var charFormat:TextLayoutFormat = new TextLayoutFormat();
   charFormat.fontFamily = "Arial, Helvetica, _sans";
   charFormat.fontSize = 14;
   charFormat.color = 0x000000;
   charFormat.textAlign = TextAlign.LEFT;
   charFormat.paddingLeft =100;
 charFormat.paddingTop = 100;

The TextLayoutFormat class, as we said earlier, is how the text in a container is formatted. The properties in this class affect the format and style of the text in a container, a paragraph, or even a single line of text. In this case, we are telling Flash which fonts to use, the size, the color, how it is to be aligned (note the uppercase used for the alignment), and the padding that moves it off the edges of the container.

Before you move on, you need you to do something. There is a coding issue. Scroll up to the import statements. If you see this line—import flashx.textLayout.elements.TextAlign;—proceed to the next code block. If you don’t, delete this line in the code block just entered: charFormat.textAlign = TextAlign.LEFT;. Reenter charFormat.textAlign =. Type in the first two letters of the class (Te), press Ctrl+spacebar, and the code hint should appear. Find TextAlign, and double-click it. This should add the missing import statement. To preserve your sanity, we will be providing a list of the import statements that should appear at the end of each exercise. We strongly suggest that you compare your list of import statements against the list presented and, if you are missing any, add them into your code.

Now that you know how the text will be formatted, you need to tell the Configuration() object to use the formatting. If you don’t, it will apply whatever default setting it chooses.


Step 5: textFlowInitialFormat

Press the Enter (Windows) or Return (Mac) key twice, and enter the following:

config.textFlowInitialFormat = charFormat;

Step 6: TextFlow ()

Press the Enter (Windows) or Return (Mac) key, and enter the following code block:

var textFlow:TextFlow = new TextFlow( config );
   var p:ParagraphElement = new ParagraphElement();
   var span:SpanElement = new SpanElement();
   span.text = myDummyText;
   p.addChild( span );
 textFlow.addChild( p );
 

The TextFlow () object needs to be here because its job is to manage all the text in the container. The constructor—TextFlow (config)—lets TLF know that it is to use the config object created earlier so it now knows how to format the contents of the container and even the container itself.
The next constructor—ParagraphElement()—essentially tells Flash how a paragraph is to be handled. There is only one here, so it really doesn’t need a parameter.

The final step is to get all the formatting and layout into the container on the stage.


Step 7: ContainerController

Press the Enter (Windows) or Return (Mac) key, and add these final two lines:

textFlow.flowComposer.addController( new ContainerController( this, 500, 350 ) );
 textFlow.flowComposer.updateAllControllers();

The first line adds the ContainerController and tells Flash the container being managed is the current DisplayObject (this), which currently is the stage, and to set its dimensions to 500 pixels wide by 350 pixels high.


Step 8: Test

Save the project, and test the movie. The text, as shown below, appears using the formatting instructions you set.

Import Statements for this Exercise

These are the import statements for this exercise:

   import flashx.textLayout.elements.Configuration;
   import flashx.textLayout.formats.TextLayoutFormat;
   import flashx.textLayout.formats.TextAlign;
   import flashx.textLayout.elements.TextFlow;
   import flashx.textLayout.elements.ParagraphElement;
   import flashx.textLayout.elements.SpanElement;
   import flashx.textLayout.container.ContainerController;

Using ActionScript to create and format the container and its text

Though this coding task may, at first, appear to be a rather convoluted process, we can assure it isn’t; it will become almost second nature as you start using ActionScript to play with text in the containers.

With the introduction of the Text Layout Format, your ability to create text, format text, put it in columns, and generally manipulate it using ActionScript has greatly expanded your creative possibilities. Before you get all excited about this, you need to know that the word Framework is there for a reason.

Any TLF text objects you create will rely on a specific TLF ActionScript library, also called a runtime shared library (RSL). When you work on the stage in the Flash interface, Flash provides the library. This is not the case when you publish the SWF and place it in a web page. It needs to be available, much like Flash Player, on the user’s machine. When the SWF loads, it is going to hunt for the Library in three places:

  • The local computer: Flash Player looks for a copy of the library on the local machine it is playing on. If it is not there, it heads for Adobe.com.
  • Adobe.com: If no local copy is available, Flash Player will query Adobe’s servers for a copy of the library. The library, like the Flash Player plug-in, has to download only once per computer. After that, all subsequent SWF files that play on the same computer will use the previously downloaded copy of the library. If, for some reason, it can’t grab it there, it will look in the folder containing the SWF.
  • In the folder containing the SWF: If Adobe’s servers are not available for some reason, Flash Player looks for the library in the web server directory where the SWF file resides. To provide this extra level of backup, manually upload the library file to the web server along with your SWF file. We provide more information around how to do this in Chapter 15.

    When you publish a SWF file that uses TLF text, Flash creates an additional file named textLayout_X.X.X.XXX.swz (where the Xs are replaced by the version number) next to your SWF file. You can optionally choose to upload this file to your web server along with your SWF file. This allows for the rare case where Adobe’s servers are not available for some reason. If you open the file where you saved this exercise, you will see both the SWF and, as shown in Figure 6-25, the SWZ file.

The .swz file contains the Text Layout Framework.


The Giveaway!

We’re running this giveaway a little differently since Adam from Aetuts+ pushed Wildfire my way.. Wildfire is a brilliant promotion builder and makes entering competitions a piece of cake! If you’d like to be in with a chance of winning one of three signed copies of “Foundation Flash CS5 for Designers”, just enter!

How do I Enter?

  1. Send a tweet from the entry page. For every Twitter follower that enters through your link you get an extra entry.
  2. Fill in your details once you’ve done so. That’s it!

The three winners will be announced on Monday 6th September. Good luck!

Presenting a Brand Using 3Ds Max – Day 2

When designing an identity and brand materials for a client, good presentation is crucial! In the second and final part of his 3Ds Max tutorial, Hussain Almossawi takes us through how to light, apply materials to and render the models we previously created in Day 1, before completing post-production within Photoshop. So let’s get started!


This tutorial is Day 2 in a series – Visit Day 1.


Step 1

Welcome back to the second part of the tutorial. In this part we’ll cover adding materials, setting up the lighting and the rendering, and finally take a look at some post-production work. So open up your file and load the scene from Part 1.


Step 2

Create a Vray Plane and place it anywhere in the scene. (Geometry Menu > VRay > VRayPlane)


Step 3

Create a Vray light with the following parameters, Half-length: 13.5″, Half-width: 20.8″


Step 4

Rotate the light from your top view-port 15 degrees to the left on the z axis.


Step 5

Rotate it 20 degrees to the right on the y axis. Now your light should be slanted sideways and aiming slightly upwards.


Step 6

Set the light color to the following shade of yellow: (240, 242, 215, 45, 28, 242).


Step 7

Apply the following settings to your light:


Step 8

Place the light to the left of your scene, leave some distance so the light can look natural.


Step 9

Select your light and choose the “Mirror” tool. Use the following settings:


Step 10

Place the light to the right of your scene, make sure the spacing is proportional with the light on the left.


Step 11

Change the Intensity of the light on the right to 8.


Step 12

Select the first light on the left, and under Parameters choose “Exclude”. Move the “Calendar” and “Folder” models to the Exclude box.


Step 13

Now our scene has the right amount of lighting, Let’s move on to applying material. Start by opening a new file in Adobe Illustrator


Step 14

To avoid going into much detail into the Illustrator part, basically, we will be creating designs for each of the stationary materials we created, with the same size, in order to fit them into our scene later on. The reason I’m using Illustrator, is that in the professional world, collateral’s and such designs are made in Illustrator which makes it easier for printing purposes. Although, feel free to use any program you like or are used to. We will start by creating our letter head, make a new box, with the following size, width: 8.5″, height: 11″.


Step 15

Apply your design to the letterhead.


Step 16

Copy your letterhead design and open up Photoshop, Create a new Document.


Step 17

Change the resolution to 300.


Step 18

Paste your design into the new document as “Pixels”.


Step 19

Make sure your design fills the document, and press enter.


Step 20

Go to Layer > Flatten Image.


Step 21

Save your file as .TIF format (File > Save As).


Step 22

Now go back to Illustrator, and repeat the steps for the other stationary materials. This is an example of what I have.


Step 23

Let’s go back to 3D Max, and start applying the materials. Let’s start with the Letter Head, Select the Letter Head.


Step 24

Open the Material Editor, and click “Standard”. Set your material as VRayMt.


Step 25

Click the small box next to Diffuse, and double click Bitmap.


Step 26

Choose the file we just saved in Photoshop, Letter Head.tif


Step 27

“Assign Material to Selection”, and “Show Standard Map in Viewport”.


Step 28

Our Material is applied now, but it’s facing the wrong way, set the angle “W” to -90.


Step 29

Repeat steps 14 to 28 to the rest of the stationary materials, making sure everything is facing the right way, you should end up with something like this:


Step 30

Open the Material Editor, Create a new material and call it “Scene”, set the Diffuse Color to 226 (light gray).


Step 31

Apply the material to the VRayPlane.


g”

Step 32

Moving on to the Render Settings, open up the Render Setup, starting with the global switches, use the following settings.


Step 33

VRay Image Sampler, set the Image Sampler type to “Adaptive Subdivision”, and the Antialiasing filter to “Catmull-Rom” to allow a sharp result.


Step 34

Set the following for the Adaptive Subdivision image sampler settings, Min Rate: -1, Max rate: 3, Clr thresh: 0.1, and check Randomize Samples.


Step 35

Set the GI Environment to 4.


Step 36

We will now create a map for our environment, which will allow a smoother outcome when rendering. Open up the Material Editor, and select a new material. Click on the small box next to Diffuse.


Step 37

Select Gradient Ramp.


Step 38

Set the Angle for the W to -90, this will make the gradient vertical.


Step 39

Go to the Gradient Ramp Parameters, double click the middle marker and set the color to 5.


Step 40

Create a new marker right next to it by clicking, and set the color of the new marker to the following (164, 146, 164, 213, 28, 164).


Step 41

Select the marker to the right, the one in the white area, and set the color to (206, 212, 239 162, 35, 239).


Step 42

Select the Gradient Ramp title at the top, and drag into the Map box for Environment in Render Setup. Make it copy as Instance.


Step 43

Moving on to the Color Mapping, choose Exponential as Type, and apply the following settings, Dark Multiplier: 1.2, Bright Multiplier: 2.7, Gamma: 1.0


Step 44

Move on to the Indirect Illumination, and apply the settings as follows:


Step 45

Set your camera/view to however you like best, keep in mind that you might need to have it from somewhat of a upper to lower angle, to avoid showing the horizon line.


Step 46

Render your scene and you should end up with something like this. Save it as “Stationary.jpg”


Step 47

Open the rendered image in Photoshop. Go to Image > Adjustments > Curves.


Step 48

Click in the middle of the curve, and raise it somewhat to the top, use your judgment to make sure the lighting on the scene looks natural.


Step 49

Notice the background isn’t very smooth, duplicate your layer (ctrl+J / cmd+J).


Step 50

Apply Gaussian Blur with a radius of 4 (Filter > Blur > Gaussian Blur).


Step 51

Using the eraser tool, erase the parts that have the stationary materials.


Step 52

Now you’re all set! Save your image at high quality and impress some clients with your work!


This tutorial is Day 2 in a series – Visit Day 1.


Don’t miss more CG tutorials and guides, published daily – subscribe to Cgtuts+ by RSS.

How to Use Mind Maps for Managing Ideas

I’ve recently started using mind mapping software for managing ideas.

Mind maps are graphical representations of outlines. The advantage over a traditional outline is that you can connect related topics. It’s also easier for some visually oriented people to review.

Like I said, I use it plan ideas. I start with the idea name as the center node (topics are called nodes) and create nodes for tasks and concepts that will guide the project. The resulting mind map helps me figure out where to start work.

It’s also handy for brainstorming. The mind map becomes a record of ideas and questions. Later when I’m ready to develop the idea, it’s a clear representation of what I was thinking. To me, it’s clearer than traditional notes.

Here are some options that stand out:

  • Think: This is a free Web app. Obviously the big benefit is that it’s free. Since it’s in the clouds you can access your maps (which are called thoughts here) from any computer and share them with other users. Which opens the possibilities of mind maps as a collaboration tool. Note that Think seems to work best with Safari and Chrome.
  • MindManager: This is a desktop app that comes at a hefty price ($349 for Windows version and $249 for Mac version). It bills itself as a project management tool with collaboration and sharing features. It does offer a Web-based version called Catalyst ($11/month subscription).
  • MindView:  This is another expensive desktop app with Mac and Windows versions. It can work with your Microsoft Office apps. You can adjust the styles that change how your maps look. The result can be slick charts that will impress your clients.
  • MindNode: This is my choice. There is a limited free version but MindNode Pro costs $24.95. There are only Mac and iPhone versions. It’s simple to use but doesn’t have the slick look of the expensive competitors. I can link to other mind maps, documents and web sites. It works well for me.
  • Deadtree: Sorry, I made that up. But you can map just about everything you think with a sketch pad and collection of colored markers. I recommend fine point Sharpies. The paper versions of your mind map are very collaboration friendly and portable.

There are more mind map tools out there. Your mileage may vary with each. So take advantage of free and trial versions to see what works best for you.

Do you use mind maps in your business?

How to Hire an Intern

Hiring an intern for your business should not be a task that is taken lightly—as anyone who has had the intern from hell will tell you. The reason small businesses, like the one I work for, hires interns is to improve our profitability. Interns are free labor.

Besides being cheap, interns are also eager to work and learn and bring a young, vibrant vibe into your office. That is, if you know how to hire an intern correctly. The effort you put in to hiring an intern directly corresponds to your return on investment. Who knows? Perhaps your new intern will end up becoming your next full-time hire.

If you are lucky enough to have interns banging down your door, then your job is easy. If you have to reach out to the local community to find interns, here are some ideas on where to start:

Starting Points

Local university career center

Career centers are specifically designed to help students locate internships and jobs and for employers to find the right candidate for their open positions. These career centers will often hold a job fair or internship fair to help pair students and companies looking to hire. Some of the bigger schools have career centers at each of their specific schools. Team up with a career center at your local college or university and let them help you—it’s their job!

Contact specific professors

If you want to take a more proactive approach to finding local college kids for internships, contact the university department that represents your field. The head of the department will be able to put the word out to their colleagues that you are looking for an intern with a desired set of skills. The professors can put the word out and pass along your contact information. The department may even have their own job/internship listing on their website. This is how I found my internships in grad school with PRWeek and Inc. Magazine.

Advertise on the Internet

Websites like Craigslist are also a way to find potential interns, depending on where you are located. I have found that postings in larger cities get much more attention than in rural areas. Also, more people know about Craigslist in Chicago than in, say, rural Idaho.  While these postings are free or cheap, there is no telling the caliber of candidates you will attract. Still, I say it’s worth a shot.

What’s Next?

So, you’ve received some responses from interested candidates and you’re ready to start the interview process. The hard part has just begun.

Make note of what each candidate wears to the interview. Is your office strictly shirt and tie and the candidate shows up in jeans? Maybe not a good fit.

The questions you might ask when interviewing a full-time employee might not be as effective when interviewing an intern. I tend to focus on educational experiences and goals rather than their professional experiences. Here is a list of questions that I ask intern candidates:

  1. How do you think this internship will help you prepare for your career?
  2. What are your plans after graduation?
  3. Are you involved in any campus organizations?
  4. Why did you choose your major?
  5. Why do you think you will be successful in your chosen field?
  6. What have you learned from part-time or student jobs?
  7. What do you hope to learn in this internship?
  8. What skills and expertise do you bring to this internship?

I listen for answers that indicate that the student has done some research on the company I work for and has a sense of what we do. I also listen to see if the student has thoughtfully considered their career path and what they would like to do after graduation. I want to make sure they are genuinely interested in the internship and the tasks they will be performing. I find that students who have had a part-time job or are involved in a campus organization tend to manage their time better.

Conclusion

Internships give students the opportunity to learn about their chosen career field while gaining valuable work experience. But it’s up to you to hire the candidate who will be the best fit for your work environment.  Remember, you’re stuck with them for the next four months or so—do your part to make sure it’s a productive and satisfying experience for the both of you.

Shooting at Night: 4 Photography Scenarios Explained

Shooting outside at night is no easy task if you don’t enjoy the unprofessional and merciless glare of a built-in flash. Today we’ll shed some light on the subject and discuss how you should approach venturing into the darkness with your camera loaded and ready to take on the world. We’ll focus on four different styles that you can use as a springboard for your creativity!


Hunting Light in the Dark

In a sense, photography is the art of capturing light. Your camera is not only a digital image creation tool but more importantly an advanced light collection device. If you think of photography in this way, shooting at night sounds down right crazy.

To shoot photos at night means to wander out into the dark to capture light. Obviously, the task will not be an easy one. Human eyes are extremely advanced optical equipment that automatically adjust to different lighting conditions. A DSLR, though quite advanced, is simply no match for this natural brand of technology. What this means on a practical level is that capturing what you see can be very difficult, especially at night.

What it takes to pull off great night shoots is the right equipment, a lot of know how, some patience, a bit of trial and error and even a little luck. Below we’ll take a look at a few distinct kinds of photographs taken at night and discuss how to capture them.


The Landscape Shot

The first type of shot we’ll discuss is one of the easiest. Landscapes at night can be incredibly beautiful and are used to convey a number of different moods and personalities. A oceanside beach horizon feels exotic and inviting, a desert shoot feels desolate and lonely and the mountains feel peaceful and majestic.

To capture a shot like the one above you don’t need much in the way of special equipment. Just pack your tripod, a camera and some warm clothes and you’re ready to go.

There aren’t a lot of city lights to get blown out (just the tent light), there aren’t any people or animals to get all blurry, there’s just the steadfast Earth and a brief peek at the sky. The task here then becomes to simply set your camera up and let it go about its business of collecting photons while you freeze your fingers off pacing back and forth as the snow crunches quietly under your feet. You see the fog of your breath, the faint glow of distant stars and the patches of green rebelliously poking through the snowy canopy. Your silent and ever gazing cyclops companion sees only light.

The photographer above set his aperture to f/3.4 and his exposure to a whopping 30 seconds. If you’ve never taken a photo for thirty seconds, that’s a really long time. Count down thirty seconds in your head and imagine your shutter was open that entire time. This is what it takes to shoot a land that’s far removed from the harsh lights of developed civilization.

Notice that the clouds did indeed move during this time, as floating objects are wont to do. The result however isn’t anything distracting or ugly, but a nice subtle motion blur that makes the heavens seem that much more vast.

You’ll find that the longer exposure makes you feel like more work was put into these shots. When you finally hit your stride and start taking great night landscape shots, expect a surge of pride upon viewing the results.


The City Shot

A close cousin to the deserted landscape shot, the city shot requires a bit more cunning and methodology. The blessing and the curse here is the availability of light.

On one hand, the more light that is available, the easier time your camera will have of gathering everything it needs to make a decent image. However, the light is often deceptive as it may seem quite bright to your eyes but will still result in a pure black image without a sufficient exposure.

You really have to be on guard though as you crank that exposure because there will be a great disparity between the points of light and the rest of the photo. It’s far too easy to blow out certain portions while others remain dark, or simply cause the entire image to be engulfed in a massive flare.

The image above was shot at f/22 with a 15 second exposure and an ISO of 320. Notice how much narrower the aperture is here than in the previous shot. This photographer is letting in less light all around and yet still comes up with a remarkably bright image. To be an effective evening photographer, you’ll definitely have to learn to evaluate your surroundings and translate the available lighting conditions into appropriate camera settings.

When shooting images like the one above, take your time and experiment with as many different exposure settings as it takes to start getting the result you want. If possible, dedicate an hour or more to the task and don’t be surprised if it takes you that long to get something noteworthy.


The Dark Alley Shot

The dark alley shot utilizes a beautiful shallow depth of field (a wide aperture), a fairly immobile subject and a much quicker shutter speed that what we saw above (though still fairly slow compared to shooting during the day).

The feeling here is one of loneliness and isolation. The city is vast and alive, but also harsh and difficult to survive. It lures you in with its pretty lights but ultimately spits you out cold and hungry.

The key for this style of shot is to utilize only the available light (or at least appear to) without the excessive use of any professional lighting equipment or flashes. The natural contrast of the light and dark areas plays into the concept of the shot and should be embraced and experimented with extensively.

The image above was shot at f/2.8 at 0.25 sec with a 400 ISO. The f/2.8 gives us that excellent blur and helps pull in as much light as possible to prevent the need for a flash. A shutter speed of 0.25 sec is a great way to give a lot of ugly blur to your subject but the person in the photo above fortunately managed to keep fairly still.

There’s definitely quite a bit of light on the subject and we’re uncertain as to where it’s coming from just by looking at the image. The effect, uneven and show producing, is that of a streetlight similar to those you see in the distance. As I mentioned above, this plays perfectly into the personality of the image and allows the photographer to use a shutter speed of less than a second.

One important step here, and in fact throughout all these shots, is to keep a close eye on your camera’s histogram. You’re likely to have significant clipping on both ends from the dark shadows and bright lights. Do your best to eliminate or at least minimize this so that you have plenty of pixels to pull out of the image if necessary during the post-processing steps. Never trust your camera’s on-screen preview! Instead, always let the histogram tell you what’s there and what isn’t.


The Glamour Shot

This is the high quality professional portrait photograph. It makes the subject look undeniably cool and attractive. Anyone viewing the photo doesn’t pity the subject’s loneliness as with the image above but instead envies their lifestyle and savoir faire.

This can be the hardest to capture as it often requires significant professional equipment and an impressive knowledge of flash photography techniques and lighting setups.

Below is the photographer’s description of the settings and equipment used:

“Taken with Canon 70-200mm f/4.0 L USM. Canon Speedlite 430EX II @ 1/4 + 1/2 CTO gel thru white umbrella camera left. Studio flash @ 1/2 into reflective umbrella camera right. Trigged with PT04 wireless system”

The surprising part is that the shot was taken with a Canon 100D. That means the lens on the camera cost considerably more than the camera itself (not too uncommon), not to mention the professional flashes, umbrellas, wireless rigs, etc. This just goes to show you that even if all you own is a cheap digital Rebel, you can without a doubt capture professional quality images as long as you’re willing to invest in some decent supporting equipment.

The key for this style of image is to light the subject throughly, but softly. The umbrellas serve to diffuse the incoming light and spread it out out so that the coverage is better and less harsh than the horrid quality produced by a standard unfiltered on-camera flash.

Also notice how the subject is placed on the right half of the frame and looks into the image rather than out of it. This directs your eyes to look around the photo and keeps your attention better than an image where the subject looks out. Psychologically, he seems a bit more content as well this way. If he were looking right towards the edge closest to him, he might seem uneasy and convey the impression that he wanted to be somewhere else.

You can definitely fake this setup with some DIY ingenuity, but it’s not going to be easy to reproduce the excellently lit subject on a beautifully rich bokeh background with cheap equipment. For starters, find an affordable lens with a wide aperture. Then place your subject far in front of some nice bright lights of as many different colors as you can find. Finally, use a streetlight, your car’s headlights, and anything else you can find to manipulate the lighting conditions until they’re just right.

The problem you’re going to run into is of course how harsh the light will seem. Use a flash diffuser and/or something reflective to filter and bounce light off of rather than lighting the subject directly.


Show Us Your Night Shots!

Thanks for reading my lengthy spiel on shooting outside in the dark. I hope it’s been educational and that you’re encouraged to go out and try to replicate some of the image styles shown above in your own unique way.

As always, we want to see your work. Leave a comment below with a link to some of the evening shots you’re most proud of taking. Be sure to share any insight or techniques you’ve discovered along the way!

Building a Sleek AJAX Email Signup Form


In this tutorial, we’ll learn how to create a slick email signup form. This form will harness the full power of AJAX, meaning that we will submit data to the server, validate it, and receive a response – all without a single page refresh! Along the way, you should pick up some useful tips related to PHP and JavaScript, as well as general programming best practices.


Step 1: The Plan

So, we want to create an email signup form, but not just any signup form: we want to create a super-responsive, AJAX-powered email signup form. This means no pesky page refreshes, giving the end user real-time status updates, and all the juicy goodness of server side data validation. Here is a flow chart of exactly how we want this to work:

Flow Chart Of Events

To accomplish all this hocus pocus, we’ll need to use some pretty cool web technologies. These include JavaScript (with a little lot of help from jQuery), AJAX, PHP, MySQL and JSON. Heres a rundown of what we will be using each technology for:

  • JavaScript – Submit data to the server and parse messages received from the server. We will be using jQuery to handle our AJAX calls and parse our JSON.
  • PHP – Process the data sent to the server. This will include validating the data (making sure it’s OK to put in the database) and handling the response to send back to the browser.
  • MySQL – Store the signup data.
  • JSON – Glue all of the above together. I will explain more about JSON later in this tutorial.

So we know how we want it to work, and we know what technologies we want to use: it’s time to get started!


Step 2: Setting Up the MySQL Database

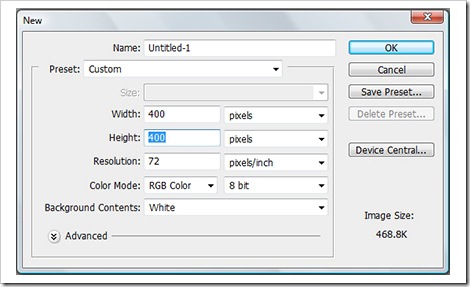
Ok, first things first: we need to set up our database. At the moment the only data we want to record is the user’s email address, and the date and time he or she signed up. Open up PHPMyAdmin (or whatever program you use to manage your MySQL database) and create a new table in your database using the following statement:

CREATE TABLE `signups` (
  `signups_id` int(10) NOT NULL AUTO_INCREMENT,
  `signup_email_address` varchar(250) DEFAULT NULL,
  `signup_date` date DEFAULT NULL,
  `signup_time` time DEFAULT NULL,
  PRIMARY KEY (`signups_id`)
) ENGINE=MyISAM AUTO_INCREMENT=1 DEFAULT CHARSET=utf8;

The above should be sufficient for what we need. signups_id is an auto incrementing field to assign a unique id to each record, signup_email_address is a varchar field and will be the email address the user uses to sign up with, and signup_date and signup_time are date and time fields which will record when the user signed up. Next, we need to set up the HTML.


Step 3: Setting up the HTML

<form id="newsletter-signup" action="?action=signup" method="post">
    <fieldset>
        <label for="signup-email">Sign up for email offers, news & events:</label>
        <input type="text" name="signup-email" id="signup-email" />
        <input type="submit" id="signup-button" value="Sign Me Up!" />
        <p id="signup-response"></p>
    </fieldset>
</form>

This should be the bare minimum HTML that we need to get this working (I have not included the body tags or header stuff in this snippet just to save space. Do note that you will need to have jQuery loaded on your page). All we need is a text input, a submit button, and a message placeholder. Obviously, you need a label for the input, and I have used a fieldset as I am working with an XHTML strict doctype. The placeholder is where our status message to the user is going to be shown. At the moment it should just be empty.

Unstyled Form

So here’s our form in all its glory. Looks pretty plain, doesn’t it? I’m going to do some CSS for our form to make it look a little less windows95-ish.

* {
    padding:0;
    margin:0;
}

body {
    font-size:12px;
    font-family:Arial, Helvetica, sans-serif;
}

fieldset {
    border:none;
}

form {
    width:930px;
    margin:20% auto;
    padding:15px;
    border:solid 6px #9FCBFF;
    -moz-border-radius:6px;
    -webkit-border-radius:6px;
    border-radius:6px;
}

input {
    border:none;
    background-color:none;
}

#signup-email {
    border:1px solid #999999;
    color:#9E9E9E;
    padding:5px;
    margin-left:10px;
    margin-right:4px;
}

#signup-email:focus {
    border-color:#9FCBFF;
    background-color:#DFEEFF;
    background-image:none;
    color:#000;
}

#signup-button {
    background-color:#9FCBFF;
    color:#FFF;
    -moz-border-radius:10px;
    -webkit-border-radius:10px;
    border-radius:10px;
    padding:5px;
    text-shadow: 1px 1px 1px #5FA8FF;
}

#signup-button:hover {
    cursor:pointer;
    background-color:#7FB9FF;
}

#signup-response {
    display:inline;
    margin-left:4px;
    padding-left:20px;
}

.response-waiting {
    background:url("loading.gif") no-repeat;
}

.response-success {
   background:url("tick.png") no-repeat;
}

.response-error {
   background:url("cross.png") no-repeat;
}
Styled Form

That’s better. Although our response message is not yet visible (as there in no response yet) it will appear next to the “sign me up” button like so:

Form With Message


Step 4: The Glue

Now that the database access and mark-up have been completed, we need to know how we are going to link the two together.

How is the JavaScript going to be able to send and receive messages from a completely different programming language (PHP)? We are going to use something called JSON.

What is JSON?

JSON (JavaScript Object Notation) is a lightweight, text-based open standard designed for human-readable data interchange (similar to XML in intent). JSON is often used for serializing and transmitting structured data over a network connection. It is primarily used to transmit data between a server and web application, serving as an alternative to XML. JSON is derived from the JavaScript programming language for representing simple data structures and associative arrays, called objects. Despite its relationship to JavaScript, it is language-independent, with parsers available for virtually every programming language. Yep, that includes PHP. Here is a snippet of JSON:

{"hey I'm a key":"and I'm its value!"}

As you can see it’s super-simple. We have encapsulated a key-value pair in some curly braces. The key-value pair relationship is indicated using a colon. The curly braces indicate that this is an object, and everything inside of them is part of that object. You can have multiple key-value pairs in an object:

{"hey I'm a key":"and I'm its value!",
 "hey I'm another key":"and I'm its value!",
 "you guessed it, I'm a key":"and I'm its value!"}

All we have done is split the key-value pairs using a comma. The key-value pairs are actually referred to as members of the object (the JSON object). You can get even more fancy and have an array as a value of a key which holds more objects

{"key1": {
  "key2": "value2",
  "key3": "value3",
  "key4": {
    "value4": [
      {"newobject_1_key_1": "newobject_1_value_1", "newobject_1_key_2": "newobject_1_value_2"},
      {"newobject_2_key_1": "newobject_2_value_1", "newobject_2_key_2": "newobject_2_value_2"},
      {"newobject_3_key_1": "newobject_3_value_1", "newobject_3_key_2": "newobject_3_value_2"}
     ]
  }
}}

Let’s go through this:

  • Key1′s value is an object.
  • Inside that object there are key-value pairs for key2 and key3.
  • Key4 has an object for its value.
  • Value 4 is an array of 3 more objects, which contain 2 key-value pairs each.

But that’s getting too complicated for our needs.

All we are going to need to do is get the server to send us a JSON response containing two members (key-value pairs): one for the status and one for the message. This will look like so:

{"status":"success","message":"Wahey! You've been signed up!"}

status will indicate whether the signup process was successful or not. message will be the message related to the status. If the status is ‘success’ we want to tell the user they are signed up. If the status is ‘error’, then we want to tell the user what went wrong. So if we’re telling the user what has happened via the message member, why do we need the status member? Well, there are two reasons. The first is that we want to apply a class to the response message holder, so that we display a green tick for success and a red cross for an error. The second reason is there can be only one success message that can be sent back (indicating the user has been signed up), but there are up to four error messages that could be sent back. Error messages will occur in the following cases:

  • The user did not enter an email address.
  • The user entered an invalid email address.
  • The email address the user entered has already been used.
  • There is some kind of technical error and the user can not be validated or added to the database.

This means that we also need to know the exact text responses of each message, in order to assign the correct class to the message holder. This equals one massive headache. What if we wanted to change the message sent back? We would then need to revise the code used to assign the class to the message holder as well. It is so much easier to send back the status.

Don’t worry if you do not understand this JSON malarkey yet; as we work

Premium Members: Download this Video ( Must be logged in)

through the rest of the tutorial, it should start to piece together.


Step 5: Preparing It All

Normally, when you submit a form, the browser is redirected to the action of the form. We don’t want this to happen, as we want to submit data in the form using AJAX. The first thing we need to do is stop the form from redirecting us when the submit button is clicked.

$(document).ready(function(){
   $('#newsletter-signup').submit(function(){

        //do our ajax stuff here

        //prevent form from submitting
        return false;
    })
})

Here, we are saying, “when document is ready and the submit event is triggered for any element with an id of newsletter-signup (which just happens to be our form), execute the code inside the function.” This is where we will be inserting the AJAX call, the JSON response handler, and anything else needed to make our form function the way we wish. The only code in this function at the moment is return false. This will stop the form from submitting, which in turn stops it from redirecting us. The next thing we need to do is set up the variables that we are going to be using.

var form = $(this),
    formData = form.serialize(),
    formUrl = form.attr('action'),
    formMethod = form.attr('method'),
    responseMsg = $('#signup-response')

Here we are declaring multiple variables all at once. It just saves writing the var keyword five times. Good times. Anyhow, here is what each variable is for:

  • form – We use the this keyword wrapped in the jQuery object. this refers to the actual form element. We want to wrap it in the jQuery object so we can use other jQuery DOM functions.
  • formdata – We are using the jQuery serialize() function to get all the form data. In its simplest form serialize() gets all the form fields and all their values and puts them in key-value pairs inside a string. We will then send this string of data to the server.
  • formUrl – This is the URL we want to send our data to.
  • formMethod – This is the method we want to use to send our data.
  • responseMsg – This is the element that we are going to use to display our message to the user.

We get the form URL and form method this way so we don’t have to change the JavaScript if we decide to change where and how we send the data to the server in the HTML. We store the response message element in a variable so we only have to search the DOM for it once. To continuously query the DOM for an element is wasteful.

As we are going to be using AJAX to submit the form, we should provide the end user an indication that we are doing some work behind the scenes, so to speak. To do so, we will set the response message holders text to ‘Please Wait…’ and give it a class of ‘response-waiting’. This will give it a cool loading gif :) .

//show response message - waiting
responseMsg.hide()
           .addClass('response-waiting')
           .text('Please Wait...')
           .fadeIn(200);

We hide the response message holder first so that when we set the text, it does not show straight away. Next, we add the class ‘response-waiting’. After that, we set the text to ‘Please Wait…’ and finally fade it in. All we are doing here is chaining together jQuery functions. The responseMsg code could be wrote on one line; I’ve just split it up to make it easier to read.

responseMsg.hide().addClass('response-waiting').text('Please Wait...').fadeIn(200);


Step 6: Submitting To The Server

Okay, it’s time to get to the juicy bit. Now that we have our data, and have provided some visual feedback to the visitor, we’ll use a jQuery function to submit the data to the server.

$(document).ready(function(){
    $('#newsletter-signup').submit(function(){

        //setup variables
        var form = $(this),
        formData = form.serialize(),
        formUrl = form.attr('action'),
        formMethod = form.attr('method'),
        responseMsg = $('#signup-response')

        //show response message - waiting
        responseMsg.hide()
                   .addClass('response-waiting')
                   .text('Please Wait...')
                   .fadeIn(200);

        //send data to server
        $.ajax({
            url: formUrl,
            type: formMethod,
            data: formData,
            success:function(data){
                //do something when ajax call is complete
            }
        })

        //prevent form from submitting
        return false;
    })
})

The magic happens here:

$.ajax({
    url: formUrl,
    type: formMethod,
    data: formData,
    success:function(data){
        //do something we ajax call is complete
    }
})

We are using the jQuery function $.ajax() to submit the data to the server. This function handles all the complicated cross browser XML HTTP Request stuff that we’re not really interested in. Notice something here? Looks a lot like a JSON object…

We need to pass some information to the $.ajax() function so it knows what to do and how to do it. You can pass multiple parameters to the $.ajax() function, but for the sake of this tutorial, we only need to pass it the url, type, data and success parameters.

  • url – This is the url we want to send our data to. We saved this in a variable called formURL earlier.
  • type – This is the method we want use to send our data to the server. We saved this in a variable called formMethod earlier.
  • data – This is the data we want to send to the server. We saved this in a variable called code>formDataearlier
  • success – This is a callback function. It is called if the AJAX call is successful. In this function we will process the JSON response we get from the server.


Step 7: The Success Function

Once we have submitted the data to the server, it will send us a response message back. The message will be a well formatted JSON string. Luckily for us, jQuery has a neat function to parse JSON.

success:function(data){

    //setup variables
    var responseData = jQuery.parseJSON(data),
        klass = '';
}

The argument data that is passed to the success function is our JSON response returned from the server. Within this function, the first thing we want to do is setup two variables:

  • responseData – This will hold the parsed JSON response. The $.parseJSON() function will turn our JSON response into a JavaScript object.
  • klass – This will be a variable that we will set later. It will contain the name of the class we want to apply to the response message holder, based on the response we receive from the server. If you are wondering why we are calling the class variable klass, it is because the word ‘class’ is a reserved word in JavaScript and can not be used as a variable name.

The next thing must do is determine which CSS class we should apply to the response message holder. The class will be based on what status the server returns. If the status is ‘success,’ we want to give it a class of ‘response-success,’ and if the status is ‘error,’ we’ll give it a class of ‘response-error’

//response conditional
switch(responseData.status){
    case 'error':
        klass = 'response-error';
    break;
    case 'success':
        klass = 'response-success';
    break;
}

The CSS classes that will be applied to the status messages will look like:

Response Classes

The first one is the loading message (.response-loading), the second is the success message (.response-success) and the third is the error message (.response-error).

We are using a switch statement to determine which class to use based on the status. I could have used if statements, but this is a better way of doing it. The condition we want to compare against is responseData.status. responseData is an object and status is a property of that object. This object was created by the $.parseJSON() function and is based on our JSON response. This response will return two members: status and message. These will be converted into properties of the responseData object. In this switch, we have two cases to compare responseData.status against. If responseData.status is equal to the string ‘error’, then the klass variable will be set to ‘response-error’. If responseData.status is equal to the string ‘success’ , then the klass variable will be set to ‘response-success’. Now all that is left to do is actually show the message to the user.

//show reponse message
responseMsg.fadeOut(200,function(){
    $(this).removeClass('response-waiting')
           .addClass(klass)
           .text(responseData.message)
           .fadeIn(200,function(){
               //set timeout to hide response message
               setTimeout(function(){
                   responseMsg.fadeOut(200,function(){
                       $(this).removeClass(klass);
                   });
               },3000)
            })
})

The first task we do is fade out the response message holder, as it is currently set to ‘Please Wait…’. Once this has been completed, we remove the class ‘response-waiting’, add either the ‘error’ or ‘success’ class, set the text to be the message sent back from the server, and then finally fade it back in. All of this is done from the callback of the fadeOut() function. Once the message has faded in, we don’t want it to stick around forever so we set a timeout to fade the message out again after three seconds. This is all done from the callback of the fadeIn() function.

As you can see, we are making good use of jQuery’s callback functions. These ensure that everything is executed in the correct order, at the correct time. If we did not use the callback functions, we would end up in a situation where we fade the message in and immediately tell it the fade out even though it has not finished fading in. Finally, when the response message holder has faded out we want to remove any classes we assigned to it. That’s it for the success function!

And that’s it for the JavaScript, too. We have set up our variables, set our status message, submitted the data via AJAX, got a JSON response, parsed the JSON, and returned the status of the submission back to the user. Your completed JavaScript code should look like so:

$(document).ready(function(){
    $('#newsletter-signup').submit(function(){

        //setup variables
        var form = $(this),
        formData = form.serialize(),
        formUrl = form.attr('action'),
        formMethod = form.attr('method'),
        responseMsg = $('#signup-response');

        //show response message - waiting
        responseMsg.hide()
                   .addClass('response-waiting')
                   .text('Please Wait...')
                   .fadeIn(200);

        //send data to server for validation
        $.ajax({
            url: formUrl,
            type: formMethod,
            data: formData,
            success:function(data){

                //setup variables
                var responseData = jQuery.parseJSON(data),
                    klass = '';

                //response conditional
                switch(responseData.status){
                    case 'error':
                        klass = 'response-error';
                    break;
                    case 'success':
                        klass = 'response-success';
                    break;
                }

                //show reponse message
                responseMsg.fadeOut(200,function(){
                    $(this).removeClass('response-waiting')
                           .addClass(klass)
                           .text(responseData.message)
                           .fadeIn(200,function(){
                               //set timeout to hide response message
                               setTimeout(function(){
                                   responseMsg.fadeOut(200,function(){
                                       $(this).removeClass(klass);
                                   });
                               },3000);
                            });
                 });
              }
        });

        //prevent form from submitting
        return false;
    });
});


Step 8: Server Side Validation

Now that we have the HTML prepared, and the JavaScript ready to send and receive data, we need to write our server side code to process the data it’s given, and send a JSON response back to the JavaScript. For this tutorial, PHP will be our server-side language of choice.

if($_GET['action'] == 'signup'){
    mysql_connect('localhost','YOUR DB USERNAME','YOUR DB PASSWORD');
    mysql_select_db('YOUR DATABASE THAT CONTAINS THE SIGNUPS TABLE');
    $email = mysql_real_escape_string($_POST['signup-email']);

    //do some stuff

    exit;
}

Here we are saying that if, in the querystring, (as we are using the $_GET array) the parameter action is equal to ‘signup,’ then execute this code. This is a good way to encapsulate our AJAX call. Firstly we define our MySQL connection using PHP’s built in mysql_connect() function. To get this connected to our database we need to give it the host, the database user username, and the database user password. We don’t have to do any error checking here, as we are going to do that later in the script. Next, we select the database we want to access using mysql_select_db().

Now that we have got our database access code set up, we can use the mysql_real_escape_string() function to sanitize the data we are sending to the server. This makes the data safe for inserting into the database by escaping certain characters that are classed as unsafe. Because we are posting the data to the server, we use the $_POST array to access our email address. $_POST[‘signup-email’] will get our email address and we will store it in a variable called $email. The last line of code is the exit statement. This will stop the rest of the script from executing. This is useful if we had lots of code in here, as we only want to run the bit we need and ignore the rest. This is important to keep our AJAX calls nice and speedy. The next thing we are going to need to do is validate the data to make sure that we are not inserting any old junk into the database.

//validate email address - check if input was empty
if(empty($email)){
    $status = 'error';
    $message = 'You did not enter an email address!';
}
else if(!preg_match($emailRegex, $email)){ //validate email address - check if is a valid email address
    $status = 'error';
    $message = 'You have entered an invalid email address!';
}
else {
    $existingSignup = mysql_query("SELECT * FROM signups WHERE signup_email_address='$email'");
    if(mysql_num_rows($existingSignup) < 1){

        //database insert code

    }
    else {
        $status = 'error';
        $message = 'This email address has already been registered!';
    }
}

We only need to do three checks on our data:

  1. Make sure the user actually submitted an email address
  2. Make sure the email address submitted is a valid email address
  3. Make sure the email address submitted has not already been used to sign up

We are using a series of if statements to achieve this. The first if uses the PHP function empty() to check if the $email variable actually contains anything. If the variable is equal to an empty string, 0, ‘0’, false or null, it will return true (meaning that we have an empty variable). If we have an empty variable, we set a variable called $status to ‘error’ and a variable called $message to ‘You did not enter an email address!’. If our variable is not empty we can proceed to check that it is a valid email address. To do so, we use a PHP function called preg_match(). We give this function a regular expression (the long string full of weird characters) and our email address. If the email address matches the regular expression, the function returns 1 (which equates to true). If it does not match, it returns 0 (which equates to false). In our case if preg_match() returns false, we know the email address is invalid; so we set our $status variable to equal ‘error’ and our $message variable to equal ‘You have entered an invalid email address!’. Otherwise if preg_match() returns true, we can move on to the next check which requires us querying the database to see if our email address has already been signed up. We can use the PHP function mysql_query(), which accepts a SQL query, queries the database, and returns a resource. We do not need to know anything about the data that mysql_query() returns; we only need to know how many records is returned. If it returns more than 0, this email address has been used to sign up before so we set our $status and $message variables accordingly. If no records are returned, we are good to insert our data into the database.

We use the PHP function mysql_num_rows() to find out how many records the query returned. All we need to do is pass it the resource which we saved in a variable called $existingSignup and it will return a number. We then use an if statement to check that the number is less than 1.


Step 9: Insert Into Database

We have verified our data is OK to be put in the database, so we are going to use the following code to so:

$date = date('Y-m-d');
$time = date('H:i:s');

$insertSignup = mysql_query("INSERT INTO signups (signup_email_address, signup_date, signup_time) VALUES ('$email','$date','$time')");
if($insertSignup){
    $status = 'success';
    $message = 'you have been signed up!';
}
else {
    $status = 'error';
    $message = 'Oops, there's been a technical error! You have not been signed up.';
}

The date and time variables are PHP functions that return the date and time in a specified format. Because we set the signup_date field in the database to be a date field and the signup_time field to be a time field, I am formatting my date and time to suit them. The next thing to do is insert the data into the database. This, again, is done by using the mysql_query() function and passing it an SQL statement. Because this is an INSERT SQL statement, the function will return true on success and false on failure. It will not return a resource as there is no resource to return because we were just executing a statement. We then check if the query was successful or not. If it was, we set our $status variable to ‘success’ and our $message variable to ‘you have been signed up!’. Otherwise, if the query failed, we set $status to ‘error’ and $message to ‘Oops, There’s been a technical error! You have not been signed up.’ We don’t need to tell the user what the error was, just that there’s been a problem and they have not been signed up. This will also catch any error caused by the initial connection code (like could not connect to database or could not find table, etc).


Step 10: Send The Response Back

The previous step defined two variables: $status and $message. This is the data we want to encode as JSON to send back to the user. We are going to put these two variables into an associative array, so we can provide meaningful names to the keys of the JSON members.

$data = array(
    'status' => $status,
    'message' => $message
);

You don’t have to write your associative array like this; though I personally find it easier to read. All we need to do now is pass this array to a PHP function called json_encode(). This turns our associative array into a well formatted JSON string. Once it has been encoded as JSON, we need to return it back to the clients browser. We do this with a simple echo statement.

echo json_encode($data);

And that’s it. That’s all the server side code needed. You should have ended up with this:

if($_GET['action'] == 'signup'){
    mysql_connect('localhost','YOUR DB USERNAME','YOUR DB PASSWORD');
    mysql_select_db('YOUR DATABASE THAT CONTAINS THE SIGNUPS TABLE');

    //sanitize data
    $email = mysql_real_escape_string($_POST['signup-email']);

    //validate email address - check if input was empty
    if(empty($email)){
        $status = "error";
        $message = "You did not enter an email address!";
    }
    else if(!preg_match('/^[^\W][a-zA-Z0-9_]+(\.[a-zA-Z0-9_]+)*\@[a-zA-Z0-9_]+(\.[a-zA-Z0-9_]+)*\.[a-zA-Z]{2,4}$/', $email)){ //validate email address - check if is a valid email address
        $status = "error";
        $message = "You have entered an invalid email address!";
    }
    else {
       $existingSignup = mysql_query("SELECT * FROM signups WHERE signup_email_address='$email'");
       if(mysql_num_rows($existingSignup) < 1){

           $date = date('Y-m-d');
           $time = date('H:i:s');

           $insertSignup = mysql_query("INSERT INTO signups (signup_email_address, signup_date, signup_time) VALUES ('$email','$date','$time')");
           if($insertSignup){
               $status = "success";
               $message = "You have been signed up!";
           }
           else {
               $status = "error";
               $message = "Ooops, Theres been a technical error!";
           }
        }
        else {
            $status = "error";
            $message = "This email address has already been registered!";
        }
    }

    //return json response
    $data = array(
        'status' => $status,
        'message' => $message
    );

    echo json_encode($data);

    exit;
}

That is all the code we need for the email signup form to work. Hopefully, if you followed this tutorial step by step you, should be recording email signups now. Although our code works and our form does what it should, there is one last thing that will improve the form.

If the user clicks the submit button more than once before the AJAX call has finished, we are going to get some pretty weird results. The message results holder will fade in and fade out again, but the timeout won’t reset. This will look daft, as well as causing unnecessary calls to the server. Really, we should stop the user from submitting the form whilst a submission is currently in progress.


Step 11: Stopping Multiple Form Submissions

Stopping multiple form submissions is actually pretty easy to accomplish. All we need to do is check what the form’s status is when it is submitted. If it is currently submitting, we don’t want to re-submit the form until it has finished. To do this, we’ll store the status of the form, on the form, using jQuery’s data() function. This function lets us store and retrieve arbitrary data associated with the matched element in key value format. We will use a key called ‘formstatus’ and its value will either be ‘submitting’ or ‘idle’. If ‘formstatus’ equals ‘submitting,’ the form will not be submitted. If it equals ‘idle’, it will submit. Once the form is submitted, we will need to set ‘formstatus’ to ‘submitting’. And, when ithas finished submitting, we set ‘formstatus’ to ‘idle’. Here’s our final JavaScript.

$(document).ready(function(){
    $('#newsletter-signup').submit(function(){

    //check the form is not currently submitting
    if($(this).data('formstatus') !== 'submitting'){

         //setup variables
         var form = $(this),
         formData = form.serialize(),
         formUrl = form.attr('action'),
         formMethod = form.attr('method'),
         responseMsg = $('#signup-response');

         //add status data to form
         form.data('formstatus','submitting');

         //show response message - waiting
         responseMsg.hide()
                    .addClass('response-waiting')
                    .text('Please Wait...')
                    .fadeIn(200);

         //send data to server for validation
         $.ajax({
             url: formUrl,
             type: formMethod,
             data: formData,
             success:function(data){

                //setup variables
                var responseData = jQuery.parseJSON(data),
                    klass = '';

                //response conditional
                switch(responseData.status){
                    case 'error':
                        klass = 'response-error';
                    break;
                    case 'success':
                        klass = 'response-success';
                    break;
                }

                //show reponse message
                responseMsg.fadeOut(200,function(){
                   $(this).removeClass('response-waiting')
                          .addClass(klass)
                          .text(responseData.message)
                          .fadeIn(200,function(){
                              //set timeout to hide response message
                              setTimeout(function(){
                                  responseMsg.fadeOut(200,function(){
                                      $(this).removeClass(klass);
                                      form.data('formstatus','idle');
                                  });
                               },3000)
                           });
                });
           }
      });
    }

    //prevent form from submitting
    return false;

    });
})


Conclusion

Hopefully, you can apply the techniques you’ve learned in this tutorial to create more complex projects in the future. Thanks for reading, and, if you have any questions or comments, don’t hesitate to leave a comment below.

Styled Form

In Brief: Woz’ Big Bang Theory episode airs September 30th

I’m looking forward to the Big Bang Theory episode with Steve Wozniak, both because I’m a fan of the show, and because who doesn’t love the Woz? A post on the CBS forums says that the episode with the Apple co-founder is coming up on September 30th, just the second episode of the show’s new season.

There’s no information yet on why Woz will appear with the nerds on the show, but the plot of the episode apparently has wacky physicist Sheldon Cooper trying to put his brain into the body of a robot in an effort to stay immortal. As you can see in the picture to the right, he either succeeds or (more likely) has a sitcom fantasy about succeeding, so maybe Woz will appear in a dream sequence.

At any rate, it should be fun — The Big Bang Theory pretty successfully walks the line of friendly sitcom mixed in with some well-done geek cultural references. I’ll be setting my Tivo for September 30th.

TUAWIn Brief: Woz’ Big Bang Theory episode airs September 30th originally appeared on The Unofficial Apple Weblog (TUAW) on Mon, 30 Aug 2010 17:30:00 EST. Please see our terms for use of feeds.

Read | Permalink | Email this | Comments

Marketcircle releases Billings Pro

After some teasing and a closed beta, Marketcircle has finally released Billings Pro 1.0. As the big brother to Billings, the pro version offers multi-user support for small businesses.

I’ve used Billings and Billings Touch for years, and love them dearly. Of course, I’m a “business of one,” so I don’t need multi-user support. Many do, however, and Marketcircle intends to bring the great Billings experience to them. Additionally, they’re going for ubiquitous access from the Mac, iPhone and the web.

Billings Pro is a multi-user time tracking and invoicing application. Time tracking is super easy. All you must do is click aspect of the project you’re working on, start the timer and you’re off. When you’re done working, simply stop the timer. All data is synchronized automatically.

This release offers new tools for the manager, like what they’re calling “Timecard,” which lets users track mileage, project expenses and time spent working via a modern web browser, including Mobile Safari.

There are several payment options. First, users can purchase Billings Pro for a one-time fee of US$199.95 per user. Once that’s done, you own it. There are no monthly or annual fees. Additionally, users can upgrade from Billings 3 to Billings Pro for $174.95 per user. Those with more modest needs can take advantage of a monthly, per user “pay as you go” option for $24.95.

Marketcircle is also offering a Billings Pro Starter Bundle which comes preloaded with Billings Pro, Billings Pro Touch, Timecard, Switchboard and a full year of Premium Support, starting at $1,429.50 for up to 5 users.

Of course, that’s only the surface of Billings Pro. We’re working on a full review and will have that out for you soon. Good luck to the folks at Marketcircle.

TUAWMarketcircle releases Billings Pro originally appeared on The Unofficial Apple Weblog (TUAW) on Mon, 30 Aug 2010 16:00:00 EST. Please see our terms for use of feeds.

Read | Permalink | Email this | Comments