Open Mike: Brackets

Allman or K&R? This is Open Mike, a series of discussion posts to throw the cat amongst the pigeons. These posts are all about you — we want to hear your opinions, ideas, and thoughts. To kick things off, let’s talk about brackets.


1: Do you Cuddle?

“Cuddling” braces means writing them like this:

function showCuddlingExample():void {
	if (example) {
		//do something
	} else {
		//do something else
	}
}

Alternatively, there’s Allman style:

function showAllmanExample():void
{
	if (example)
	{
		//do something
	}
	else
	{
		//do something else
	}
}

This Wikipedia entry lists other common styles. Which do you use?

I like Allman because you can do this:

//if (someCondition)
{
	doSomething();
}

I can easily turn the conditional check off by simply commenting out the ‘if’ statement. If I was cuddling braces, I’d have to either write a new brace to replace the ‘if’, or comment out the corresponding closing brace.


2: Do You Pad Your Parentheses?

Compare all of these:

//tight
function exampleFunction(arg1:int, arg2:String):void
//space before parentheses
function exampleFunction (arg1:int, arg2:String):void
//space between variable and type
function exampleFunction(arg1 : int, arg2 : String) : void
//padded parentheses
function exampleFunction( arg1:int, arg2:String ):void

I’ve seen all of these, in various combinations. I used to use ‘padded parentheses’, as it seemed easier to see the arguments and their types, but now I prefer ‘tight’. What about you?


3: Do You Nest Parentheses in Conditions?

To me, it feels “correct” to write:

if ( (condition1) || (condition2) )

…rather than:

if (condition1 || condition2)

…even though the first takes up a lot more space. The parentheses make it clear where the separation lies. But is that small distinction worth it?

One last thing: thanks to Sergio from www.artua.com for the awesome microphone icon!

Layout for Silverlight User Interfaces

Silverlight lays out user interface elements in Panels with various capabilities ranging from fixed, pixel-based layout through to flexible, fluid designs. You can make use of the existing layout mechanisms or build your own Panels to supplement what’s available. Let’s take a look at what’s involved..

In this video, we’ll examine the Panels available and the various properties around alignment and sizing that come into play when you’re laying out elements for Silverlight UI.


What’s Covered?

Here’s a quick look at some of the subjects covered in this screencast:

  • Element properties
  • Panel types
  • Dragging and dropping
  • Fixed and fluid layouts

View Screencast

Don’t like ads? Download the screencast, or subscribe to Activetuts+ screencasts via iTunes!


Useful Links

Mike Taulty Microsoft (UK): http://mtaulty.com: [email protected]: twitter.com/mtaulty

Franci’s FITC San Francisco Diary: Day Two

By day two at FITC it had become obvious to me that I had underestimated Flash as a tool for deploying all sorts of interactive digital experiences on the desktop as well as in public. It seems you have to see and hear first hand the different logic and technologies that go into creating these experiences to actually realize that you might be able to pull it off yourself..

I’m talking about most of us who have experience with Flash and AS3 and a bit of extra creativity in store. FITC has given me a fresh set of ideas and opened up a new playground I can experiment in.

fitc


Harnessing the Abundance
Mike Creighton

Don’t like ads? Download the screencast, or subscribe to Activetuts+ screencasts via iTunes!

Flow is the mental state of operation in which a person in an activity is fully immersed in a feeling of energized focus, full involvement, and success in the process of the activity.

The goal of Mike Creighton was to capture the “data” that an artist produces in this Flow state through tracking the motion of analogue painting or drawing, and use that data to create derivative digital work. Flow is the result. It’s a open source project that provides a set of tools for capturing motion data.

It is one of the examples of how Flash has evolved from humble beginnings into a tool which, if properly used and combined with other technologies, allows you to express yourself in ways that were out of the scope of creatives until lately.

The key to being able to create and approach problem solving when working with multiple technologies is defining your goals and setting your parameters, else the abundance can really start working against you. The problem being, that with so many options and interesting steps and results in the process of developing and creating one can be easily distracted from the initial goal. So if you’re not just experimenting or playing around, define your goals and parameters, then stick to them. This was one emphasis of Mike’s presentation.


Space Invading
Seb Lee-Delisle

Don’t like ads? Download the screencast, or subscribe to Activetuts+ screencasts via iTunes!

“Space Invading” was all about bringing the playful, creative experience that Flash can deliver, to the people. Seb is a master of presentations; he connects with his audience with the use of interactive technology and has everyone jumping around in no time. You don’t see that every day, although I do think I need to start going to more of these Flash events.

He had a little presentation of the great work of his studio Plugin-Media along with some of his personal experiments in the beginning. He then went on to demonstrate his live audio/video mixer. The idea is that you can sample sounds and capture video at the same time, map them to different keys on the keyboard and then play them back by pressing those keys. The result is impressive. It’s probably useless for any kind serious recording, but has a lot of other possible creative applications and it’s just plain fun.


The Apparat
Joa Ebert

This presentation was more technical and honestly mostly beyond my comprehension. That doesn’t mean that I won’t be able to use the tools presented to optimize my projects.

Apparat is a set of tools that you can use to further compress your SWF, SWC and ABC files. Particularly if you use the [Embed] method to embed large PNGs and use the Reducer which is one of the Apparat tools, you’ll see a big improvement in your SWF file sizes since it will compress the otherwise uncompressed raw PNG files. This will give you a great reduction in file size reaching over 50% of the original file size, depending on the size and number of embedded PNGs as well as the compression level set by the Reducer. You should check this one out , it will definitely help you streamline your files and reduce bandwidth usage, loading times etc., which can only be a good thing.


Eyes Can Hear, 5 Ways
Jared Ficklin

There may or may not be smoke, fire, lasers & non-newtonian fluids

Don’t like ads? Download the screencast, or subscribe to Activetuts+ screencasts via iTunes!

Don’t like ads? Download the screencast, or subscribe to Activetuts+ screencasts via iTunes!

Don’t like ads? Download the screencast, or subscribe to Activetuts+ screencasts via iTunes!

Everyone probably knows to some degree what sound visualization is, but we don’t really recognize the simple elegance behind it. Seeing Jared do “analog” sound visualizations with smoke, fire and corn starch (yes…corn starch) and then jumping to sound visualization on the screen and in public, you start appreciating the link between the two.

For me it’s easier to understand the workings of a drum shooting smoke rings by sound pressure waves than frequencies, ranges, cutoffs etc.. But mostly it gives me a tangible real world representation of what we’re trying to achieve with sound visualization on the screen and it makes it that more interesting and understandable.

Full video of this presentation available at the FITC web site!


Pulsatile Crackle
André Michelle

If you’re into audio, you should really check out Audiotool. It’s an online Flash application that lets you create and mix music without any installing or registering. Besides it being a great free tool, it’s also testament to Flash’s capabilities as an online runtime environment. It has also been greatly optimized by using the previously mentioned Apparat framework.

There are a lot of interesting creative uses with mixing sound and interactive experience. Using audio in combination with other innovations in Flash like 3D and physics is something that everyone should consider exploring to add that extra edge to their projects.


High Performance Mobile Content with Flash
Mike Chambers

Flash is slowly but surely reaching most of our mobile devices. There is a lot of debate about performance of the Flash player on mobile and even though I’m pretty sure most of us were surprised by how well it performs in general, there are some pretty simple practices that can help you increase performance of your applications without compromising looks or functionality. The following tips apply to both AIR and Flash on mobile devices.

Flash CS5 for Designers: TLF and ActionScript + Win 1 of 3 Signed Copies!

A lot has changed between how text was handled in Flash CS4 and Flash CS5. We think now is a good time to pull up a stool, sit down, and review, in very broad terms, what one needs to know about TLF before “wiring up” an exercise or project using ActionScript.

The following is an exercise from Foundation Flash CS5 For Designers by Tom Green & Tiago Dias.
 
If you’re feeling lucky, enter the Activetuts+ competition to win one of 3 signed copies! (Of course, you can always purchase a copy..)

Introduction

With the new TextLayoutFramework (TLF), text is found in these things called containers. They either can be physically drawn on the stage using the Text tool and given an instance name or, as is more common, can be created at runtime. You also know that the text can be formatted and manipulated using the Properties panel. The neat thing here is the word properties. If there is a property in the panel, its counterpart is found in ActionScript. The bad news is, ActionScript is stone, cold stupid. It doesn’t have a clue, for example, what a container is until you tell it to create one. It won’t format text until you tell it what to do. It won’t even put the text on the stage until it is told to do so.

Most projects will start with you telling Flash to create a Configuration() object, which is used to tell Flash there is a container on the stage and how to manage the Text Layout Framework for the stuff in the container. The actual appearance is handled by the TextFlow() class, which takes its orders, so to speak, from the Configuration() object.

Naturally, being stupid, the Configuration() object needs to be told exactly how to manage the text in the container. The default format is set through a property of the Configuration class called textFlowInitialFormat. To change it, you simply use the TextlayoutFormat () class to set the fonts, colors, alignment, and so on, and then tell the boss—Configuration ()—that its textFlowInitialFormathas changed to the ones you set using TextLayoutFormat().The boss will get that, but he isn’t terribly bright, so you next need to tell him to hand the actual work to another member of the management team, the TextFlow() class. This class has overall responsibility for any words in a container. Being just as dim as the boss, TextFlow() needs to be told what a paragraph is (ParagraphElement), how wide the paragraph is (SpanElement), whether any graphics are embedded in the paragraph (InLineGraphicElement), whether any of the text contains links (Link Element), and so on. Not only that, but it needs to be told what text is being added to the container so it can handle the line length and to add any children (addChild) that contain that formatting so the user can actually see it.

The TextFlow() class, again not being too terribly bright, will then hand the job over to another member of the management team, the IFlowComposer() class, whose only job is to manage the layout and display of the text flow within or among the containers. The flow composer finishes the process by deciding how much text goes into a container and then adds the lines of text to the sprite. This is accomplished through the use of the addController() method, which creates a ContainerController() object whose parameters identify the container and its properties.

The usual last step is to tell the FlowComposer to update the controllers and put the text on the stage according to how the other members of the team have told the Configuration() object how their piece of the project is to be managed.

With this information in hand, let’s move on to working with TLF in ActionScript. We’re going to create a column of text with ActionScript.


Step 1: New Document

Open a new Flash ActionScript 3.0 document, rename Layer 1 to actions, select the first frame of the actions layer, and open the Actions panel.


Step 2: ActionScript

Click once in the Script pane, and enter the following:

var myDummyText:String = "The introduction of the Adobe CS5 product line puts some powerful typographic tools in your hands—notably, a new API (Application Programming Interface) called Type Layout Framework (TLF)—and with as more tools in the Adobe line up nudge closer to a confluence point with Flash, the field of typographic motion graphics on the Web is about to move into territory that has yet to be explored. To start that exploration, you need understand what type is in Flash and, just as importantly, what you can do with it to honor the communication messengers of your content.";

You need some text to add to the stage. This string is the third paragraph of this chapter. Now that you have the text to go into the container, you need to load the class that will manage it.


Step 3: Configuration()

Press the Enter (Windows) or Return (Mac) key, and add the following line of code:

var config:Configuration = new Configuration();

As you may have noticed, as soon as you created the Configuration() object, Flash imported the class—flashx.textLayout.elements.Configuration —whose primary task is to control how TLF behaves. The next code block tells TLF how the text will appear on the stage.


Step 4: TextLayoutFormat Class

Press the Enter (Windows) or Return (Mac) key twice, and enter the following:

var charFormat:TextLayoutFormat = new TextLayoutFormat();
   charFormat.fontFamily = "Arial, Helvetica, _sans";
   charFormat.fontSize = 14;
   charFormat.color = 0x000000;
   charFormat.textAlign = TextAlign.LEFT;
   charFormat.paddingLeft =100;
 charFormat.paddingTop = 100;

The TextLayoutFormat class, as we said earlier, is how the text in a container is formatted. The properties in this class affect the format and style of the text in a container, a paragraph, or even a single line of text. In this case, we are telling Flash which fonts to use, the size, the color, how it is to be aligned (note the uppercase used for the alignment), and the padding that moves it off the edges of the container.

Before you move on, you need you to do something. There is a coding issue. Scroll up to the import statements. If you see this line—import flashx.textLayout.elements.TextAlign;—proceed to the next code block. If you don’t, delete this line in the code block just entered: charFormat.textAlign = TextAlign.LEFT;. Reenter charFormat.textAlign =. Type in the first two letters of the class (Te), press Ctrl+spacebar, and the code hint should appear. Find TextAlign, and double-click it. This should add the missing import statement. To preserve your sanity, we will be providing a list of the import statements that should appear at the end of each exercise. We strongly suggest that you compare your list of import statements against the list presented and, if you are missing any, add them into your code.

Now that you know how the text will be formatted, you need to tell the Configuration() object to use the formatting. If you don’t, it will apply whatever default setting it chooses.


Step 5: textFlowInitialFormat

Press the Enter (Windows) or Return (Mac) key twice, and enter the following:

config.textFlowInitialFormat = charFormat;

Step 6: TextFlow ()

Press the Enter (Windows) or Return (Mac) key, and enter the following code block:

var textFlow:TextFlow = new TextFlow( config );
   var p:ParagraphElement = new ParagraphElement();
   var span:SpanElement = new SpanElement();
   span.text = myDummyText;
   p.addChild( span );
 textFlow.addChild( p );
 

The TextFlow () object needs to be here because its job is to manage all the text in the container. The constructor—TextFlow (config)—lets TLF know that it is to use the config object created earlier so it now knows how to format the contents of the container and even the container itself.
The next constructor—ParagraphElement()—essentially tells Flash how a paragraph is to be handled. There is only one here, so it really doesn’t need a parameter.

The final step is to get all the formatting and layout into the container on the stage.


Step 7: ContainerController

Press the Enter (Windows) or Return (Mac) key, and add these final two lines:

textFlow.flowComposer.addController( new ContainerController( this, 500, 350 ) );
 textFlow.flowComposer.updateAllControllers();

The first line adds the ContainerController and tells Flash the container being managed is the current DisplayObject (this), which currently is the stage, and to set its dimensions to 500 pixels wide by 350 pixels high.


Step 8: Test

Save the project, and test the movie. The text, as shown below, appears using the formatting instructions you set.

Import Statements for this Exercise

These are the import statements for this exercise:

   import flashx.textLayout.elements.Configuration;
   import flashx.textLayout.formats.TextLayoutFormat;
   import flashx.textLayout.formats.TextAlign;
   import flashx.textLayout.elements.TextFlow;
   import flashx.textLayout.elements.ParagraphElement;
   import flashx.textLayout.elements.SpanElement;
   import flashx.textLayout.container.ContainerController;

Using ActionScript to create and format the container and its text

Though this coding task may, at first, appear to be a rather convoluted process, we can assure it isn’t; it will become almost second nature as you start using ActionScript to play with text in the containers.

With the introduction of the Text Layout Format, your ability to create text, format text, put it in columns, and generally manipulate it using ActionScript has greatly expanded your creative possibilities. Before you get all excited about this, you need to know that the word Framework is there for a reason.

Any TLF text objects you create will rely on a specific TLF ActionScript library, also called a runtime shared library (RSL). When you work on the stage in the Flash interface, Flash provides the library. This is not the case when you publish the SWF and place it in a web page. It needs to be available, much like Flash Player, on the user’s machine. When the SWF loads, it is going to hunt for the Library in three places:

  • The local computer: Flash Player looks for a copy of the library on the local machine it is playing on. If it is not there, it heads for Adobe.com.
  • Adobe.com: If no local copy is available, Flash Player will query Adobe’s servers for a copy of the library. The library, like the Flash Player plug-in, has to download only once per computer. After that, all subsequent SWF files that play on the same computer will use the previously downloaded copy of the library. If, for some reason, it can’t grab it there, it will look in the folder containing the SWF.
  • In the folder containing the SWF: If Adobe’s servers are not available for some reason, Flash Player looks for the library in the web server directory where the SWF file resides. To provide this extra level of backup, manually upload the library file to the web server along with your SWF file. We provide more information around how to do this in Chapter 15.

    When you publish a SWF file that uses TLF text, Flash creates an additional file named textLayout_X.X.X.XXX.swz (where the Xs are replaced by the version number) next to your SWF file. You can optionally choose to upload this file to your web server along with your SWF file. This allows for the rare case where Adobe’s servers are not available for some reason. If you open the file where you saved this exercise, you will see both the SWF and, as shown in Figure 6-25, the SWZ file.

The .swz file contains the Text Layout Framework.


The Giveaway!

We’re running this giveaway a little differently since Adam from Aetuts+ pushed Wildfire my way.. Wildfire is a brilliant promotion builder and makes entering competitions a piece of cake! If you’d like to be in with a chance of winning one of three signed copies of “Foundation Flash CS5 for Designers”, just enter!

How do I Enter?

  1. Send a tweet from the entry page. For every Twitter follower that enters through your link you get an extra entry.
  2. Fill in your details once you’ve done so. That’s it!

The three winners will be announced on Monday 6th September. Good luck!

Introducing the Tuts+ Marketplace – Making Premium Accessible to Everyone

We’ve just launched the Tuts+ Marketplace, where Premium quality tutorials – both from our Tuts+ Premium program and from unaffiliated authors – are available to purchase individually. Our Tuts+ Premium program will still stay exactly the same – you’ll get all the same things, for the same price. But now, non-members will be able to purchase selected Premium tutorials on a one-off basis, without a Premium membership.


Hey! Look for this link!

So far we’ve added nearly half our Premium tutorials to the Tuts+ Marketplace, and will be adding more over time. To find out if a Premium tutorial is available for sale on the Tuts+ Marketplace, look for this link:

Item Link

Q + A More Information

Here are answers to some of your likely questions about the Tuts+ Marketplace. Please read through these, and if you have any more questions they may be answered in the special edition podcast Introducing the Tuts+ Marketplace (with me and Sean Hodge as a special guests :) hehe). If not, leave a comment!


QWhat does this mean for Premium members?

That it’s a lot easier to see the value you’re getting as part of Premium. With files on the marketplace priced between $3 and $7, your Premium subscription gives you access to thousands of dollars worth of files for $9 a month. Premium will still work exactly the same and cost the same – so you’ve got nothing to worry about! The marketplace is more for people who aren’t Premium members, and for those who want access to user-submitted tutorials that aren’t available as part of Premium – or anywhere else.


QWhat will be sold on the Tuts+ Marketplace?

We’ve seeded the site with our Tuts+ Premium tutorials, but anyone can submit a tutorial for sale on the Tuts+ Marketplace. If it’s ‘Premium’ quality, it will be accepted. Eventually, the marketplace will be filled with tutorials you can’t find anywhere else.


QWho benefits from the Tuts+ Marketplace?

If you only have time to go through 1 or 2 Premium tutorials a month, or only want to pay for the Premium tutorials you need, the Tuts+ Marketplace is perfect for you. You can purchase tutorials on a one off basis, and files are priced between $3 – $7.

As the marketplace grows, authors will come in from elsewhere to sell their tutorials. There will be high-quality tutorials on the Tuts+ Marketplace that you can’t get anywhere else, so if you love learning from great tutorials, you should keep tabs on the Tuts+ Marketplace.

If you go through lots of Premium tutorials, the Tuts+ Premium subscription is better value for you. The option that’s right for you will depend on your needs.


QWhat categories does the marketplace cover?

We currently host the following categories, and will be expanding our selection over time:


Forums Have your say!

Because the Tuts+ Marketplace is built on our Envato Marketplaces app, we have dedicated Forums. Head on over, sign up for the marketplaces, and tell us what you think of the Tuts+ Marketplace.

Modelling and Rendering a Dumbbells Scene in C4D – Day 1

In this fantastic new 2-part tutorial series, Moises Perez walks us through how to model, texture and render a dumbbells scene in Cinema 4D. Today’s part covers the dumbbell modelling and the overall scene layout, and is an awesome way to brush up on your C4D modelling skills! Get started after the jump…


Video 1

Download

Note: click the ‘Monitor’ icon to view tutorial in full-screen HD.


Video 2

Download

Note: click the ‘Monitor’ icon to view tutorial in full-screen HD.


Don’t miss more CG tutorials and guides, published daily – subscribe to Cgtuts+ by RSS.

Practice Networking, Not Nepotism

Good business networking is about discovering symbiotic relationships between businesses. The question that good networkers often ask each other is:

“How can I help you?”

Bad business networking is classic nepotism; favoritism granted to friends or relatives regardless of merit. Instead of striving to be the best match for a fellow firm’s needs, parasitic networkers search for the decision-maker of a company and become “friends” with a shallow, tenuous personal connection. Then, they offer a one-sided business relationship with a firm handshake, a few personal perks and a winning smile.

They wander business networking events and offer the same one-size-fits-all routine to everyone, fishing the whole room and hoping for a few bites. If they were truly looking for carefully-chosen, mutually-beneficial business relationships, wouldn’t they be fishing with the precision of a spear instead of a huge, clumsy dragnet?

Poorly-chosen partnerships may not affect your individual productivity right away, but less-than-ideal matchups between businesses will eventually trickle down the food chain, leaving you spinning your wheels with partners that are more interested in using you as a stepping stone than a long-term ally. It can be a productivity killer and a deep frustration, especially if your firm’s decision-maker is happy with the business relationship for the wrong reasons.

The best networked relationships benefit businesses, not individuals. If two networkers earn each other credit at their respective workplaces, the relationship will prove to be far more valuable than a few personal perks exchanged among individuals.

Perhaps to avoid the dark side of networking, the best question to be asking is not “how can I help you?” but rather “how can my business help yours?” That way, we could put fabricated friendships, extravagant lunches, event tickets and other forms of persuasion aside and get learn how to network with people as equals.

Using Multiple Twitter Accounts

If you use one Twitter account for both personal and professional reasons listen up. There is no reason, with the technology we have at our fingertips, to have just one account. In fact, it can be downright inappropriate.

Let me give you an example: I follow a woman who works in economic development. She is an acquaintance of mine and I follow her because of who she is professionally because it pertains to my job as the editor of a regional magazine. While she tweets about the goings-on in her city in a professional manner, she also tweets about her professional life. And nothing bothers me more.

While I am happy to learn about new businesses moving to the area and community initiatives, I am not interested in hearing about her children, the party she is going to this weekend, or how much she hates it when her friends call her on her cell phone in the middle of the day while she’s at work. These personal tweets are taking away from her professional ones and, honestly, causing me to tune out and “unfollow”.

If she would just have two separate accounts—one to use as a PR tool for the city she works for and one to rant and rave about her personal life—this love/hate relationship I have with her online persona would disappear.

You might think that having more than one Twitter account is annoying—having to always sign in and out of Twitter each time you want to switch. It’s time consuming and annoying. Yeah, I did that for a while too, but then I found something better, something marvelous. That thing is called Seesmic.

Seesmic is one of those applications that helps you manage multiple accounts at once and saves you time doing it.

I manage three different Twitter accounts for the three different magazines my business creates. Becoming overwhelmed with the process of managing them all I sought a way to become more productive. There’s a great article on Mashable published about a year ago citing 25 Twitter apps to manage multiple accounts.  I tried out a couple and ended up using Seesmic.

Why Seesmic? Well, it has the cutest little raccoon icon—but that’s not the most important reason. I found it to be the easiest to download and figure out how to use. There’s nothing worse than an application that boasts that it’s going to save you time that takes a manual to figure out how to use. The easier the better for someone as busy as I am.

Here are some others that you might like better:

TweetDeck

TweetDeck works for Windows and Mac users. It connects you across many social media sits like Facebook, MySpace, Foursquare, and LinkedIn to name a few.

Nambu

This is for you Mac users out there who want the same look and feel as OSX. It’s also good if you are interested in Twitter trends, filters, and groups. It looks to me to have a lot of bells and whistles that some people find fascinating.

Tweetie

Another Mac app that has a nice look that wont hurt your eyes. It has a single column view and keyboard shortcuts. And if you’re one of those people who have conversations via Twitter there is a feature called direct message threading. It looks like an instant messaging window with the photo and talk bubbles.

Conclusion

Choosing an application to manage your Twitter accounts really comes down to your preference—what you find appealing. Also, if you have a smartphone (like the iPhone) or an iPad, you’ll want to find an app that works across all the platforms you intend to use it on.

But I beg you—no matter what you use, be sure to use it. The combination of professional and personal posts not only turn your followers off, it’s hurting the brand you are trying to create. There’s nothing wrong with separate – but equal – when it comes to your tweets.

Introducing the Wonderful World of 50mm Prime Lenses

What do Henri Cartier-Bresson and Ralph Gibson have in common? They’re both famous photographers – yes. But something else – they both used a 50mm prime lens for much of their photography.

Why is this interesting? Well, if you’re like most contemporary photographers your first SLR came with a kit zoom lens in the range of around 18-55mm. These are useful lenses, but most photographers find as their experience grows that they soon outgrow the kit zoom lens and need something else. This brings us to a question that every photographer faces at some point – what second (or third or fourth…) lens would be most useful to me?


The Benefits of a 50mm Lens

This is tricky – everybody’s needs are different. If you’re interested in sports or nature photography, for example, you’ll need a long telephoto lens. But what if you just want a lens that will help you take better photos? Is this possible? Yes it is – and that’s where the 50mm prime lens comes in (used to take all the photos in this article).

Most likely you already own a zoom lens that covers the 50mm focal length. So why would you buy a 50mm prime lens? Kit zooms are a great introductory lens to photography. But there are some crucial differences that mean a 50mm prime lens is very different from the 50mm focal length setting on a kit zoom.

Aperture

Kit zooms have their limitations. Some of these limitations are physical. One is the maximum aperture, around f4 to f5.6 depending on the lens and the focal length you use it at. This slow maximum aperture makes it difficult to take photos in low light. It means you have to resort to using a tripod, flash or a high ISO setting to give you a fast enough shutter speed to hand hold the camera properly.

50mm prime lenses, on the other hand, have a maximum aperture of somewhere between f1.2 and f2, letting you hand hold photos in much lower light levels (they also give you a much brighter viewfinder, making it easier to see the subject in low light).

For example, this landscape was taken with a 50mm prime lens by the light of the setting sun. The light was very low and I wouldn’t have been able to hand-hold the camera if the maximum aperture was limited to f4 or f5.6.

Optical Quality

Another limitation of the standard zoom is the optical quality. They’re normally not bad – but they’re not great either. Compare the quality of your standard zoom to a professional quality optic and you’ll see a dramatic difference. The images from pro lenses are sharp and crisp, with far less flare and almost no chromatic aberrations.

But pro lenses are expensive, you say. And you’re right. Wouldn’t it be great if there was an pro quality lens that retailed for £100 pounds or so (or dollars or euro, depending on where you live). Well, there is – you’ve probably guessed it already – the 50mm prime lens. 50mm lenses have been around for decades and the optical design is pretty simple (they’re neither a telephoto nor a wide angle lens, which have more complex optical designs). They’re cheap to make and the optical quality is superb.

Depth of Field

The wide maximum aperture has another advantage – depth of field, or lack of it. At f2 (or f1.8 or f1.4 and so on) you’ll be amazed at how little depth of field there is. You can use this creatively to blur the backgrounds in your photos. It works beautifully with portraits, giving a creamy background blur. This portrait was taken at f1.8, as was the introductory portrait to this article:

And this the beautiful thing about 50mm prime lenses – they enhance your creativity. You can hand hold the camera in low light, taking advantage of the wonderful evening light for longer, without resorting to flash. Learning to use natural light increases your creativity and photographic skills.

You can use the narrow depth of field for all sorts of creative focusing effects. Again, you’re learning to see and think creatively. Keep doing this and one day you’ll find that you’re using the lens to ‘see’ – that is to take photos that represent your artistic and creative vision. This is a great moment for all photographers.

Lack of Zoom

The biggest disadvantage of zoom lenses is that they zoom. This isn’t a contradiction – zooming encourages photographers to be lazy. Not close enough to your subject? Then just zoom in. Too close? Zoom out. It’s convenient, but it doesn’t teach you anything about focal lengths.

With a 50mm prime lens, you can’t zoom. You have to physically get closer (or further away) from your subject. The perspective doesn’t change. You become intimately acquainted with the physical characteristics of your lens.

This portrait is a good example, I had to position myself in the right place to make this composition:

Lightweight Construction

Another advantage of 50mm prime lenses is that they are very light. This makes a big difference if you’re walking around all day with your camera gear. I’ve made the mistake of taking too many lenses at one time and then being too tired at the end of the day to enjoy taking photos.

When I used film cameras I was perfectly happy to use just two lightweight bodies – one with a 24mm prime lens and the other with a 50mm prime lens. I carried these around all day and never got too tired to take photos. It was a great combination and I never felt the need for more lenses. This photo was taken with a 50mm prime lens on a trip to Argentina:

50mm prime lenses also have a very pleasing perspective that matches the field-of-view of the human eye. They take photos that don’t have the sweeping lines or distorted perspective of images taken with wide angle lenses, or the compressed perspective created by telephoto lenses. This street photo is a good example:

Inexpensive

Did I mention that 50mm prime lenses are inexpensive? They certainly can be. The Canon ‘nifty fifty’ – its 50mm f1.8 lens – is a great example. It retails for less than a hundred pounds (or dollars or euros) and has superb optical quality. In fact, I recently took a photo with this lens and an EOS 5D Mark II (Canon’s 21.1 megapixel semi-professional full frame camera) and I was amazed at the quality when I enlarged it to one hundred percent.

There are trade-offs; the auto-focus isn’t as good as more expensive lenses and it has a plastic, not a metal mount. But you can’t argue with the price, or the quality, and the important thing is that it brings the experience of high quality optics within just about anyone’s reach.

This is the photo taken with the nifty fifty:

And this is a 100 per cent enlargement. You won’t get this quality with a kit zoom lens!

For more information about buying your own 50mm prime, be sure to read our article on The Benefits of Wide Aperture (And Choosing a Lens for Under $500).


50mm Prime Lenses and Digital SLRs

A lot of articles about 50mm prime lenses refer to them as standard lenses. I’ve avoided doing that because it’s no longer always the case. A standard lens is a lens that roughly matches the field-of-view of the human eye. It’s neither wide angle nor telephoto. If you have a 35mm film camera, a lens with a focal length of 50mm is a standard lens. 35mm film cameras were the norm for many decades, so 50mm prime lenses became known as standard lenses.

However, now the game has changed. If you’re lucky enough to own a full frame digital camera, then a 50mm prime lens is still a standard lens. But full frame digital cameras are expensive, and most photographers own cameras with smaller sensors.

A 50mm lens on one of these cameras is a short telephoto lens. Should you worry about this? Not at all. It’s still the same 50mm prime lens, it’s just that you get to use it as a short telephoto rather than a normal lens. For some photographers this is an advantage, because this focal length is ideal for portraits. Portrait and fashion photographers love this focal length. You can photograph someone’s face, throwing the background out of focus – wonderful!

This photo was taken on an EOS 40D with a 50mm prime lens. The lens is a short telephoto on this camera and, combined with a wide aperture, makes it easy to throw the background out of focus:

And if you’d like a normal lens for your cropped sensor camera, not a short telephoto lens, they’re still available. It just means that you should buy a 28mm or a 35mm prime lens, not a 50mm prime lens.


50mm Prime Lenses on Flickr

These are some of my favourite photographers on Flickr that use 50mm prime lenses in their work. Their work is inspirational and will give you an idea of the potential of 50mm prime lenses:

Chrissy White

December Sun

Idle a While

Milki.C

Tommy Oshima

Moaan

Carf

Thomas Shahan


50mm Prime Lens Flickr Groups

Find out more about the world of 50mm prime lens photography by exploring these Flickr groups for 50mm prime lens users:

50mm Journal

A group for photographers who use 50mm prime lenses to record the everyday details of their lives.

Canon EF 50mm f1.8 II

Photos taken exclusively with the Canon EF 50mm f/1.8 II lens – the ‘nifty-fifty’.

Nikkor 50mm 1.8

This group is for photos taken with any of Nikon’s Nikkor 50mm 1.8 lenses.

50mm f1.4 Shooters

This is a group for photographers using 50mm f/1.4 lenses, regardless of make.

Canon 50mm f0.95 “Dream Lens”

A group for photos taken with the extraordinary Canon 50mm f/0.95 lens – one of the fastest 50mm primes ever made.

50 for 50 (50mm for 50 days)

An unusual but imaginative project that caught my eye, the photographers in this group took photos for 50 days with their 50mm lenses between September and October 2009.

The Original 50mm Group

Pictures taken with 50mm prime lenses of any brand.

Sigma DP2s Review: Back to Basics, But Has It Gone Too Far?

The Sigma DP2s is the latest version of Sigma’s ground-breaking DP-series compact cameras, which first reached the market in Spring 2008 with the launch of the DP1. Today we’ll be asking whether Sigma’s big-sensor compact can hold its own against the latest hybrid cameras, and whether it’s “back to basics” approach gives you enough power in today’s age of feature-packed cameras.


Background

The DP1 was a revelation. Here was a camera which had a big, SLR-sized sensor in a compact camera sized body. Not only that, it was aimed squarely at serious photographers who wanted straightforward manual controls and no gimmicks. It didn’t even have a zoom, just a 28mm equivalent fixed focal length lens.

The DP1′s other claim to fame was its Foveon sensor. This has three layers, capturing red, green and blue colour information for each pixel in the image. By contrast, conventional single-layer sensors have a mosaic of red, green and blue photosites and full colour information for each pixel has to be interpolated from neighbouring photosites.

The bottom line is that the Sigma produces images of a much lower resolution than we’re used to, at just 4.7 megapixels.

However, because there’s no need for interpolation or, in fact, the low-pass (blur) filters needed on other sensors to combat moire effects, the Foveon sensor’s fine detail is dramatically cleaner and crisper.

The Sigma’s images may be small, but they can be blown up far more than ordinary digital images and, in the end, the outright resolving power of the Foveon sensor and that of a regular 10-12 megapixel APS-C sized sensor isn’t that different.

Since the launch of the DP1, the DP series has changed very little. The DP2 model comes with a 24.2mm (41mm equivalent) lens rather than the 28mm equivalent lens on the DP1, but it was always intended as an alternative rather than a replacement.

The ‘s’ suffix on the latest models doesn’t indicate a major change. The autofocus algorithms have been improved, the buttons on the rear have gone through a modest redesign and there’s a new Power Save mode which can extend the battery life.


Key Specifications

The DP2s is such a straightforward camera that there’s really not much to say about its specifications which hasn’t been covered already.

Sigma describes the Foveon sensor as having 14.1 million effective pixels, and they’ve got a point. If other makers can say their single layer sensors have 14 megapixels, when each one only records light of one colour, why can’t they? The images the Sigma produces, though, are 4.7 megapixels, and that’s the figure most users will consider to be the ‘true’ resolution.

The sensor measures 20.7 x 13.8mm, so in fact it’s slightly smaller than an APS-C sized sensor. It’s not a particularly big difference, though, so it makes sense to describe it broadly as the same thing.

The DP2s can shoot both JPEGs and RAW files. If you want to use the camera’s maximum ISO of 3200, you have to shoot RAW files – JPEG files stop at ISO 800. You can process RAW files in the Sigma Photo Pro 4 software that comes with the camera, or in a third-party program like Adobe Camera RAW (there aren’t too many others which support the Sigma RAW format).

Exposure modes are confined to program AE, aperture-priority, shutter-priority and manual. There are no scene modes here, and it’s good to see Sigma picking its target market so clearly. This simplicity of function is one of the DP2′s most appealing characteristics.

There is a movie mode, but the resolution is just 320 x 240 pixels, so it is, frankly, quite hard to see why Sigma bothered at all. But then the original DP1 was conceived way back in 2006, when low-res movie modes were the norm and even 640 x 480 movies were a rarity.

This is a clue to the speed of Sigma’s development process. ‘Glacial’ might be the best word to describe it.

Autofocus is handled by a 9-point contrast-detection AF system, but you can also focus manually. The lens itself doesn’t have a distance scale, but there’s a distance dial on the top plate overhanging the back of the camera, and when the DP2s is in manual focus mode, you turn this dial to adjust the distance.

There’s a pop-up flash with a guide number of 6. It has a reassuringly solid action – you just have to make sure you move your fingers out of the way first. It’s not particularly powerful, but you can also attach an external flash to the camera’s accessory shoe if you need more light.

Sigma quotes a battery life of 250 shots, which is a bit below par for a camera in this class, which is presumably why the Power Save mode was introduced. You get to the battery via a sprung cover on the base of the camera, and this is where you insert memory cards too. The DP2s takes standard SD/SDHC cards.


Handling, Controls, and Menus

Compared to most digital compacts and hybrids, the DP2s has a very plain, square design, but it many ways that’s a big selling point for those who hanker after old-fashioned manual cameras. After all, once you understand the basics of photography, what you most want is efficient, hands-on manual control, and that’s exactly what the Sigma provides.

One of the differences between the DP2s and the old DP2 is the design of the controls on the back, where key buttons (trash, zoom, playback) have been picked out in red. The layout and labelling of the old camera seemed clear enough, but the Sigma’s designers must have thought it was worth improving on.

It’s a shame the LCD isn’t bigger, though. A 2.5-inch display is pretty low-rent by today’s standards, and the 230,000-pixel resolution isn’t that special either.

The DP2′s external controls are refreshingly clear and straightforward, but its menu navigation system is a bit odd. It’s logical enough when you get used to it, but it doesn’t behave like any other.

For a start, the menu highlighting doesn’t scroll up and down the list. Instead, it stays where it is near the top of the menu, and the menu itself scrolls up and down. When you select an item, the screen changes to show the settings, as you’d expect, but when you’ve chosen the one you want, it doesn’t go back to the menu but stays on that screen… and it’s still there when you next open the menus.

In fact, to get back to the menu, you have to press the screen display mode button on the back of the camera. This really ought to be labelled ‘back’ or something similar, because until you work this out, the DP2′s menu system seems almost unfathomable.

Fortunately, you don’t need the menus that often because the DP2s has a Quick Set menu for accessing common settings. When you press it once, the Sigma displays the Qs1 screen where you can press the ‘up’ directional button to change the ISO, press ‘right’ to change the metering pattern, press ‘down’ to change the white balance and ‘left’ to change the flash mode. To cycle through the available options, you just keep pressing the appropriate button.

If you press the QS button again you get a Qs2 screen where you can set the aspect ratio, drive mode, picture style (Vivid, Sepia and so on) and image quality. This Quick Set menu system actually works very well.

You get the strong feeling that the DP2s has been designed without reference to any other camera. Sigma’s designers have done it their way, and the result is a camera with a slightly uneasy mixture of clever and odd design ideas.


Shooting

It doesn’t feel as responsive as the latest compacts and hybrid cameras, either. It takes a couple of seconds to start up, accompanied by some fairly loud whirring as the lens extends.

This is quite odd in itself. Why would a fixed focal length lens like this need to extend? This is a mirrorless camera body, so it surely doesn’t need any kind of complex and bulky retro-focus design? There’s presumably a very good reason why the Sigma’s lens needs to move out quite as far as it does, but it’s still a shame that the DP2s doesn’t have the equivalent of the pancake lenses on the Olympus Micro Four Thirds cameras or Panasonic’s GF1.

The autofocus feels quite primitive, too. The Sigma takes somewhere between half a second and a second to lock on to the subject, and it’s accompanied by some coarse-sounding mechanical whirring you can feel through the camera body.

And there are some issues with the processing speed. The DP2s can take 3-4 shots in quick succession (depending on whether you’re shooting JPEGs or RAW files), but then it takes several seconds to clear its buffer before it’s ready to take any more. This can really trip you up if you’re grabbing shots of a fast-changing situation because the camera can be tied up with its image processing right when you need it. The only solution is to plan a bit more carefully or shoot a bit more slowly, which restricts the Sigma’s appeal for quick-response candid or street photography.

This is a camera you have to use with a certain amount of care and deliberation. In some ways this is a good thing. Largely manual controls and a fixed focal length lens are exactly what you want if you’re trying to get back to a more considered, deliberate kind of photography. But the Sigma’s sluggish responses and slow processing slow you down in a less desirable way. You want a camera that makes you think, for sure, but not one that slows you down unnecessarily.


Viewing and Focusing

The Sigma’s straightforward, traditional design makes it feel like a camera from the past, and this will suit photo traditionalists down to the ground. Unfortunately, some of the technology seems to be from the past too, notably the 2.5-inch LCD display. By any standards, even budget compacts, that’s pretty small. Look at Sony’s NEX-3 and NEX-5, for example. They have tilting 3-inch screens with 920,000 pixels – three times the resolution of the Sigma’s.

Sigma’s rate of development seems much slower than everybody else’s. It’s not difficult to accept that the Foveon X3 sensor is largely unchanged since this is cutting-edge technology which is still in its early stages, but that 2.5-inch, 230,000 pixel LCD does seem dated.

The lack of size and resolution does affect the manual focus mode, which is otherwise one of the Sigma’s strong points. To judge the focus accurately, you need to press the OK button to magnify the image (it doesn’t zoom automatically like other camera’s in MF mode).

In the end, you might prefer to estimate the focus using the distance scale on the manual focus dial. This is a great way to rediscover the lost art of ‘zone focusing’, which is one of the advantages of a fixed focal length lens – the depth of field and different focus distances and lens apertures can be worked out pretty accurately.

It makes shots like this much easier, especially if you can get hold of a depth of field calculator (there are some good ones online, too). You just switch to aperture-priority mode, set the lens aperture, set the focus distance and shoot away. This boat is sharp from front to back, as were lots of other subjects shot at the same time, and there was no need to fiddle about with the focus.

It would be nice if the focus dial could be locked in some way, though. It’s a bit too easy to turn accidentally, so if you do use manual focus extensively, you do need to keep checking the distance before you shoot.

It’s going to sound from these comments as if the Sigma DP2′s handling and controls are bad, but they’re not. They take a little getting used to, and there are some annoying characteristics, but it’s a very straightforward camera to use. It’s just that it could be a lot better.


Sigma Photo Pro

The Sigma Photo Pro software that comes with this camera is very interesting. You can leave images exactly as they are and convert them directly into JPEGs, you can adjust the image manually using a good range of tone, colour and other controls, or you can choose the Auto setting and let the software optimise your photos automatically.

This doesn’t always work out too well. If the picture has a normal brightness range, it’s fine. The software adds a subtle ‘fill lighting’ which lightens darker tones and produces a pleasing overall balance. In high-contrast scenes, though, it can try a little too hard and produce the kind of ‘glow’ effect around objects that you sometimes see in HDR effects.

The software can also recover a certain amount of highlight detail that you don’t get in the JPEGs – this is one good reason for shooting RAW files in general. Unfortunately, recovered highlights can take on an unpleasant green tinge, and some of the tonal transitions can be very abrupt.

Here, the software’s succeeded in recovering some extreme highlight detail in the sky, but it’s taken on an unpleasant cyan-green colour cast.

In fact, Adobe Camera RAW is a little better at recovering highlights ‘gracefully’ from the Sigma’s RAW files, though there are still issues with colour shifts. It’s not quite as good at generating good quality results at high ISOs, though, which is where you really do need the Sigma software.


Picture Quality

Until you’ve looked at the results from a Foveon sensor closely, it’s hard to imagine how the fine detail could be so much sharper than that from a regular sensor. You get so used to the slight blur at a pixel level from ordinary cameras that you stop noticing it. This is why the razor-edged clarity of the DP2′s pixels is such a revelation. 4.7 megapixels wouldn’t get you very far with a regular sensor because there just wouldn’t be enough definition to justify big enlargements. With the DP2s, there is.

Here’s an example, with a section blown up to 100% magnification. There’s been no additional sharpening or any other kind of processing. This is the detail you get straight from the camera.

The DP2′s exposure metering is very good, and for most purposes the standard multi-pattern metering system is all you need.

This shot shows the DP2s at its best. It’s capture every minute detail, all the tonal subtlety and all the rich detail in this stained glass window.

The colour rendition can be a bit flaky, though, and this is partly due to the sometimes unpredictable Auto corrections in the Sigma Photo Pro software, and partly the camera’s own auto white balance system.

These two pictures were taken just seconds apart, and no adjustments were made to the camera, yet the white balance has shifted drastically.

Using the white balance presets gives the most predictable results, and it’s a good idea to get the exposure right when you shoot rather than relying on any kind of highlight recovery when shooting RAW files because of the unwanted colour shifts.

The use of a fixed focal length lens pays off in a number of ways. When you’re shooting, it encourages you to walk up to and around your subject, and experiment more with angles and compositions. Zooms can make you lazy. Depth of field estimates become much easier too, because you’re working at a single focal length (depth of field changes with different zoom settings, even if the lens aperture remains the same). Given that, though, it’s a shame Sigma couldn’t have incorporated some kind of depth of field indicators.

The fixed focal length lens also provides very good image quality, with great edge-to-edge definition and minimal distortion and chromatic aberration.


How It Compares to Hybrids

There’s a lot to be said in the DP2′s favour. It’s simple, solid, and delivers pictures with a unique and very different quality to any other digital camera. The rate of development at Sigma is slow compared to everyone else’s, but this also gives the DP-series of cameras an element of long-term stability, which is a refreshing change in itself. The DP2s is a plain, straightfoward camera in an age when its rivals are laden with gadgets, innovations and sales gimmicks.

But there’s a lot wrong with it too. The main issues are its sluggish and noisy autofocus, its slow image processing and the low-quality LCD display. And these are all too obvious when you set the DP2s against the latest generation of compact hybrids. These cameras weren’t around when the DP1 was first launched, but now they’re storming the market.

There’s the Olympus Pen series, for example. They take interchangeable lenses, which the Sigma doesn’t, and if you prefer the Sigma’s single-lens simplicity, you can fit Olympus’s 17mm pancake lens.

Or there’s the Panasonic GF1. Again, it takes interchangeable lenses, but there’s an excellent 20mm pancake lens if you want to keep things simple.

Sony’s NEX-3 and NEX-5 are slightly different in that they cater for novices and snappers rather than enthusiasts (the plodding interface sees to that), but the quality of the displays, the responsiveness of the AF system and the processing speed (they can both shoot at 7fps) does show just how far behind Sigma has fallen.


Verdict

The DP2s is a unique camera, partly because of its back-to-basics design and partly because of its Foveon sensor. But while it does have many important qualities, it’s now up against competition that’s faster, better and more versatile. For a while, the DP-series cameras were blazing new trails, but it could be that their time has now passed.


Pros

  • Extraordinary pixel-level detail
  • Refreshingly straightforward design
  • Manual focus dial
  • Good lens quality

Cons

  • Non-interchangeable lens
  • Slow autofocus and image processing
  • Low-quality LCD display
  • Uncertain colour reproduction, especially from the Sigma Photo Pro software

Understanding and Applying Polymorphism in PHP


In object oriented programming, polymorphism is a powerful and fundamental tool. It can be used to create a more organic flow in your application. This tutorial will describe the general concept of polymorphism, and how it can easily be deployed in PHP.


What is Polymorphism?

Polymorphism is a long word for a very simple concept.

Polymorphism describes a pattern in object oriented programming in which classes have different functionality while sharing a common interface.

The beauty of polymorphism is that the code working with the different classes does not need to know which class it is using since they’re all used the same way.

A real world analogy for polymorphism is a button. Everyone knows how to use a button: you simply apply pressure to it. What a button “does,” however, depends on what it is connected to and the context in which it is used — but the result does not affect how it is used. If your boss tells you to press a button, you already have all the information needed to perform the task.

In the programming world, polymorphism is used to make applications more modular and extensible. Instead of messy conditional statements describing different courses of action, you create interchangeable objects that you select based on your needs. That is the basic goal of polymorphism.


Interfaces

An integral part of polymorphism is the common interface. There are two ways to define an interface in PHP: interfaces and abstract classes. Both have their uses, and you can mix and match them as you see fit in your class hierarchy.

Using an Interface

An interface is similar to a class, except that it cannot contain code. It can define method names and arguments, but not the contents of the methods. Any classes implementing an interface must implement all methods defined by the interface. A class can implement multiple interfaces.

An interface is declared using the ‘interface‘ keyword:

interface MyInterface {
    // methods
}

and is attached to a class using the ‘implements‘ keyword:

class MyClass implements MyInterface {
    // methods
}

Methods can be defined in the interface just like in a class, except without the body (the part between the braces):

interface MyInterface {
    public function doThis();
    private function doThat();
    public function setName($name);
}

All methods defined here will need to be included in any implementing classes exactly as described. (Note the code comments below.)

// VALID
class MyClass implements MyInterface {
    protected $name;
    public function doThis() {
        // code that does this
    }
    private function doThat() {
        // code that does that
    }
    public function setName($name) {
        $this->name = $name;
    }
}

// INVALID
class MyClass implements MyInterface {
    // missing doThis()!
    public function doThat() {
        // this should be private!
    }
    public function setName() {
        // missing the name argument!
    }
}

Using an Abstract Class

An abstract class is a mix between an interface and a class. It can define functionality as well as interface (in the form of abstract methods). Classes extending an abstract class must implement all of the abstract methods defined in the abstract class.

An abstract class is declared the same way as classes with the addition of the ‘abstract‘ keyword:

abstract class MyAbstract {
    // methods
}

and is attached to a class using the ‘extends‘ keyword:

class MyClass extends MyAbstract {
    // class methods
}

Regular methods can be defined in an abstract class just like in a regular class, as well as any abstract methods (using the ‘abstract‘ keyword). Abstract methods behave just like methods defined in an interface, and must be implemented exactly as defined by extending classes.

abstract class MyAbstract {
    protected $name;
    public function doThis() {
        // do this
    }
    abstract private function doThat();
    abstract public function setName($name);
}

Step 1: Identify The Problem

Let’s imagine that you have an Article class that is responsible for managing articles on your website. It contains information about an article, including the title, author, date, and category. Here’s what it looks like:

class poly_base_Article {
    public $title;
    public $author;
    public $date;
    public $category;

    public function  __construct($title, $author, $date, $category = 0) {
        $this->title = $title;
        $this->author = $author;
        $this->date = $date;
        $this->category = $category;
    }
}

Note: The example classes in this tutorial use the naming convention of “package_component_Class.” This is a common way to separate classes into virtual namespaces to avoid name collisions.

Now you want to add a method to output the information into different formats, such as XML and JSON. You might be tempted to do something like this:

class poly_base_Article {
    //...
    public function write($type) {
        $ret = '';
        switch($type) {
            case 'XML':
                $ret = '<article>';
                $ret .= '<title>' . $obj->title . '</title>';
                $ret .= '<author>' . $obj->author . '</author>';
                $ret .= '<date>' . $obj->date . '</date>';
                $ret .= '<category>' . $obj->category . '</category>';
                $ret .= '</article>';
                break;
            case 'JSON':
                $array = array('article' => $obj);
                $ret = json_encode($array);
                break;
        }
        return $ret;
    }
}

This is kind of an ugly solution, but it works — for now. Ask yourself what happens in the future, though, when we want to add more formats? You can keep editing the class, adding more and more cases, but now you’re only diluting your class.

One important principle of OOP is that a class should do one thing, and it should do it well.

With this in mind, conditional statements should be a red flag indicating that your class is trying to do too many different things. This is where polymorphism comes in.

In our example, it is clear that there are two tasks presented: managing articles and formatting their data. In this tutorial, we will refactor our formatting code into a new set of classes and discover how easy it is use polymorphism.


Step 2: Define Your Interface

The first thing we should do is define the interface. It is important to think hard about your interface, because any changes to it may require changes to calling code. In our example, we’ll be using a simple interface to define our one method:

interface poly_writer_Writer {
    public function write(poly_base_Article $obj);
}

It’s that simple; we have defined a public write() method that accepts an Article object as an argument. Any classes implementing the Writer interface will be sure to have this method.

Tip: If you want to restrict the type of arguments that can be passed to your functions and methods, you can use type hints, as we’ve done in the write() method; it only accepts objects of type poly_base_Article. Unfortunately, return type hinting is not supported in current versions of PHP, so it is up to you to take care of return values.


Step 3: Create Your Implementation

With your interface defined, it is time to create the classes that actually do stuff. In our example, we have two formats that we want to output. Thus we have two Writer classes: XMLWriter and JSONWriter. It’s up to these to extract the data from the passed Article object and format the information.

Here’s what XMLWriter looks like:

class poly_writer_XMLWriter implements poly_writer_Writer {
    public function write(poly_base_Article $obj) {
        $ret = '<article>';
        $ret .= '<title>' . $obj->title . '</title>';
        $ret .= '<author>' . $obj->author . '</author>';
        $ret .= '<date>' . $obj->date . '</date>';
        $ret .= '<category>' . $obj->category . '</category>';
        $ret .= '</article>';
        return $ret;
    }
}

As you can see from the class declaration, we use the implements keyword to implement our interface. The write() method contains functionality specific to formatting XML.

Now here’s our JSONWriter class:

class poly_writer_JSONWriter implements poly_writer_Writer {
    public function write(poly_base_Article $obj) {
        $array = array('article' => $obj);
        return json_encode($array);
    }
}

All of our code specific to each format is now contained within individual classes. These classes each have the sole responsibility of handling a specific format, and nothing else. No other part of your application needs to care about how these work in order to use it, thanks to our interface.


Step 4: Use Your Implementation

With our new classes defined, it’s time to revisit our Article class. All the code that lived in the original write() method has been factored out into our new set of classes. All our method has to do now is to use the new classes, like this:

class poly_base_Article {
    //...
    public function write(poly_writer_Writer $writer) {
        return $writer->write($this);
    }
}

All this method does now is accept an object of the Writer class (that is any class implementing the Writer interface), call its write() method, passing itself ($this) as the argument, then forward its return value straight to the client code. It no longer needs to worry about the details of formatting data, and it can focus on its main task.

Obtaining A Writer

You may be wondering where you get a Writer object to begin with, since you need to pass one to this method. That’s up to you, and there are many strategies. For example, you might use a factory class to grab request data and create an object:

class poly_base_Factory {
    public static function getWriter() {
        // grab request variable
        $format = $_REQUEST['format'];
        // construct our class name and check its existence
        $class = 'poly_writer_' . $format . 'Writer';
        if(class_exists($class)) {
            // return a new Writer object
            return new $class();
        }
        // otherwise we fail
        throw new Exception('Unsupported format');
    }
}

Like I said, there are many other strategies to use depending on your requirements. In this example, a request variable chooses which format to use. It constructs a class name from the request variable, checks if it exists, then returns a new Writer object. If none exists under that name, an exception is thrown to let client code figure out what to do.


Step 5: Put It All Together

With everything in place, here is how our client code would put it all together:

$article = new poly_base_Article('Polymorphism', 'Steve', time(), 0);

try {
    $writer = poly_base_Factory::getWriter();
}
catch (Exception $e) {
    $writer = new poly_writer_XMLWriter();
}

echo $article->write($writer);

First we created an example Article object to work with. Then we try to get a Writer object from the Factory, falling back to a default (XMLWriter) if an exception is thrown. Finally, we pass the Writer object to our Article’s write() method, printing the result.


Conclusion

In this tutorial, I’ve provided you with an introduction to polymorphism and an explanation of interfaces in PHP. I hope you realize that I’ve only shown you one potential use case for polymorphism. There are many, many more applications. Polymorphism is an elegant way to escape from ugly conditional statements in your OOP code. It follows the principle of keeping your components separate, and is an integral part of many design patterns. If you have any questions, don’t hesitate to ask in the comments!

Theme Tumblr Like a Pro: Upcoming Rockable Book


I’m pleased to announce the upcoming release of the book I’ve been sporadically referencing on Twitter for the last month or so: “Theme Tumblr Like a Pro.” There’s a reason why Tumblr’s popularity has sky-rocketed in the last few years: it’s amazingly intuitive, and allows you to rapidly build dynamic websites in a matter of hours.

As with my previous book, I’ve included companion screencasts with each chapter. This means that, whether you prefer the written word or screencasts, we have you covered.

Theme Tumblr Like a Pro: Upcoming Rockable Book

What’s in it for you?

Focusing on the fundamentals, this book takes you from front to back. You’ll learn about:

  • The fundamentals: template tags, basic structure
  • Blocks
  • The various post types and variables
  • Build a theme
  • Working with the Tumblr API
  • Passing Tumblr-specific values to your JavaScript
  • Adding enhanced functionality with JavaScript and the API
  • A plethora of miscellaneous recipes
  • Working with custom meta types to create an options panel, which then provides maximum flexibility for the user of the theme
  • And plenty more…
Promo

Save $9 and get a Free Book

The book won’t be out for one more week, however, as always, those who are on the Rockin’ List (takes five seconds to sign up) will receive a voucher for $9 dollars off the cost of the book.

“The Rockin’ List is our irregular mailout about new books and products, discounts and offers and Rockable news. Signing up to the mailing list will get you a free copy of the Rockstar Personal Branding minibook by Skellie.”


I’ll obnoxiously keep everyone posted on when the book officially comes out. Strangely, there simply aren’t many Tumblr resources and screencasts available around the web for those looking to switch over from a framework, like WordPress. Hopefully, this will help! Bye!

CodeIgniter from Scratch: Displaying & Sorting Tabular Data


In today’s video tutorial, we are going to use CodeIgniter to pull information from a database and display it in a sortable table structure. This is a quite common task, especially inside admin areas, for displaying database records. We’ll be utilizing a few different utilities, such as the active records library and pagination.


Catch Up


Day 16: Displaying & Sorting Tabular Data

Day 16: Displaying & Sorting Tabular Data

Thanks for watching! Any questions/thoughts?

10 Terminal Commands That Will Boost Your Productivity


Back in May, Nettuts+ ran a great article entitled ”7 Simple and Useful Command-Line Tips”; this was a great article for getting started with using the command line. But there’s a lot more you can learn about using a shell, and I’ll take you to the next level in this tutorial!


Getting Started

If you’re running Mac OS X, or your favourite flavour Linux, you’re all set. Just fire up the terminal, and keep going. If you’re on Windows, well, the default command set isn’t quite what a bash shell is. If you want some power, check out Microsoft PowerShell; however, the commands below won’t necessarily work there. You can get a bash shell on Windows, though:

  • Install Cygwim, a Linux-like environment for Windows.
  • Install msysgit; depending on the options you choose when installing, you’ll get a Git Bash that should work will all these commands.
  • Try Windows’ subsystem for Unix-based applications. Although I haven’t tried it myself, I understand you can get a Unix shell with it.

All right, let’s hop in!


1. Touch

touch

As a developer, one of your most common tasks is creating files. If you’re working from the command line, most of the time you’ll just pass the name of the file you want to create to your editor:

$ mate index.html
$ mvim default.css

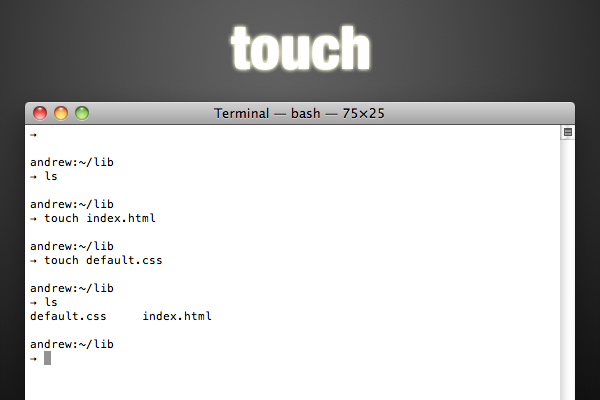
However, occasionally you’ll just want to create one or more files, without editing it. In this case, you’ll use the touch command:

$ touch index.html
$ touch one.txt two.txt three.txt

It’s that easy. Actually, the touch command is for updating the access / modified date of a file; it’s just a nice side-effect that if the file doesn’t exist, it will create it.


2. Cat and Less

cat and less

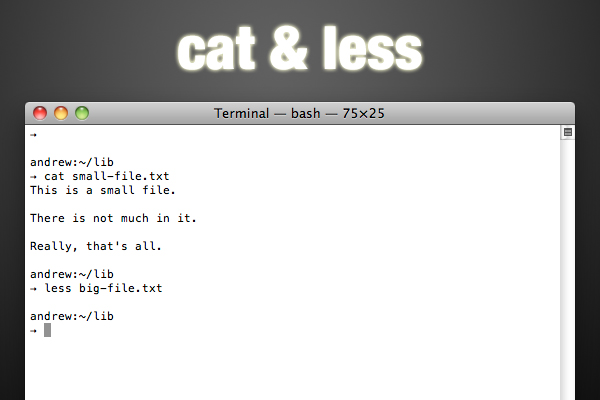
Well, since it’s all about files, there’s a good change you’ll want to see the contents of a file from the terminal sooner or later. There’s a few commands that will do this for you. First is cat; cat is short for “concatenate”, and this command does more than output file contents; however, that’s what we’ll look at here. It’s as simple as passing the command a file:

$ cat shoppingList.txt

However, if the file is large, the contents will all scroll past you and you’ll be left at the bottom. Granted, you can scroll back up, but that’s lame. How about using less?

$ less shoppingList.txt

Less is a much better way to inspect large files on the command line. You’ll get a screen-full of text at a time, but no more. You can move a line up or a line down with the k and j respectively, and move a window up or down with b and f. You can search for a pattern by typing /pattern. When you’re done, hit q to exit the less viewer.


3. Curl

curl

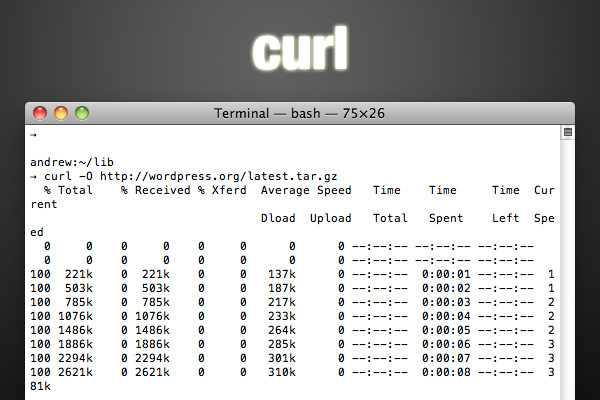
Since you probably work with your fair share of frameworks libraries, you’ll often find yourself downloading these files as you work. Oh, I know: you can just download it from the web, navigate to the folder, uncompress it, and copy the pieces to your project, but doesn’t that sound like so much work? It’s much simpler to use the command line. To download files, you can use curl; proceed as follows:

$ curl -O http://www.domain.com/path/to/download.tar.gz

The -O flag tells curl to write the downloaded content to a file with the same name as the remote file. If you don’t supply this parameter, curl will probably just display the file in the commmand line (assuming it’s text).

Curl is a pretty extensive tool, so check out the man page (see below) if you think you’ll be using it a lot. Here’s a neat tip that uses the shell’s bracket expansion:

$ curl -0 http://www.domain.com/{one,two,three}.txt

Yeah, it’s that easy to download multiple files from one place at once. (Note that this isn’t curl functionality; it’s part of the shell, so you can use this notation in other commands; check this link out for more)


4. Tar and Gzip

tar and gzip

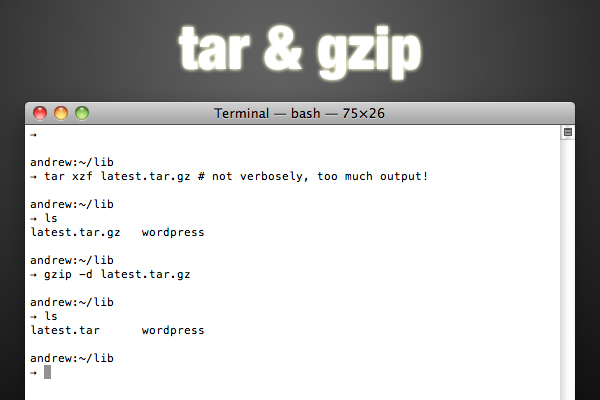
So, now you’re rocking command line downloads; however, there’s a really good chance that most of the things you download will be archived and gzipped, having an extension of .tar.gz (or, alternately, .tgz). So, what do you do with that? Let’s take a step back for a second and understand what exactly “archived and gzipped” means. You’re probably familiar with archives. You’ve seen .zip files; they’re one incarnation of archives. Basically, an archive is just a single file that wraps more than one file together. Often archives compress the files, so that the final file is smaller than the original ones together. However, you can still get a bit smaller by compressing the archive … and that’s where gzipping comes in. Gzipping is a form of compression.

So, back to that download. It’s been tarred (archived) and gzipped. You could unzip it and then un-tar it, but we’re all about fewer keystrokes here, right? Here’s what you’d do:

$ tar xvzf download.tar.gz

Wait, what? Here’s the breakdown: tar is the command we’re running; xvzf are the flags we’re using (usually, you’d have a dash in front, but that’s optional here). The flags are as follows:

  • x let’s tar know we’re extracting, not archiving.
  • v let’s tar know we want it to be verbose (give us some output about the action it’s performing).
  • z let’s tar know that the file we’re working with has been gzipped (so it unzips the file).
  • f let’s tar know we’re going to pass it the name of the archive file.

If you want to create one of these gzipped archives, it’s as simple as replacing the x flag with a c (to create an archive). The v and z flags are options: do you want output? how about gzipping? Of course, leave f; you’ll have to give the file name for the new archive (otherwise, it will all be output to the command line). After that, you’ll pass the command all the files you want to put in the archive:

$ tar cvzf archive.tar.gz index.html css js auth.php
$ tar cvzf archive.tar.gx *.txt

Just for completeness, I’ll mention that you can gzip archives (or other files) individually; when you do so, gzip replaces the original file with the gzipped version. To un-gzip, add the -d flag (think decompress.

$ gzip something.txt
$ gzip -d something.txt.gz

5. Chmod

chmod

Another thing you’ll do often as a web developer is change file permissions. There are three permissions you can set, and there are three classes that can receive those permissions. The permissions are read, write, and execute; the classes are user, group, and others. The user usually the owner of the file, the user that created the file. It’s possible to have groups of users, and the group class determines the permissions for the users in the group that can access the file. Predictably, the others class includes everyone else. Only the user (owner of the file) and the super user can change file permissions. Oh, and everything you’ve just read goes for directories as well.

So, how can we set these permissions? The command here chmod (change mode). There are two ways to do it. First, you can do it with octal notation; this is a bit cryptic, but once you figure it out, it’s faster. Basically, execute gets 1 ‘point’, write gets 2, and read gets 4. You can add these up to give multiple permissions: read+write = 6, read+write+execute = 7, etc. So for each class, you’ll get this number, and line them up to get a three digit number for User, Group, and Others. For example, 764 will give user all permissions, give group read and write ability, and give others permission to read. For a better explanation, check out the Wikipedia article.

If you have a hard time remembering the octal notation, you might find symbolic notation easier (although it takes a few more keystrokes). In this case, you’ll use the initial ‘u’, ‘g’, and ‘o’ for user, group, and others respectively (and ‘a’ for all classes). Then, you’ll use ‘r’, ‘w’, and ‘x’ for read, write, and execute. Finally, you’ll use the operators ’+’, ‘-‘, and ’=’ to add, subtract, and absolutely set permissions. Here’s how you’ll use these symbols: class, operator, permissions. For example, u+rwx adds all permissions to the user class; go-x removes executable permission from group and others; a=rw sets all classes to read and write only.

To use all this theory on the command line, you’ll start with the command (chmod), followed by the permissions, followed by the files or directories:

$ chmod 760 someScript.sh
$ chmod u=rwx g+r o-x dataFolder

6. Diff and Patch

diff and patch

If you’ve used version control like Git or Subversion, you know how helpful such a system is when you want to share a project with other developers, or just keep track of versions. But what if you want to send a friend some updates to a single file? Or what if another developer has emailed you the new version of a file that you’ve edited since you received the last copy? Sometimes, full-blown version control is too much, but you still need something small. Well, the command line has you covered. You’ll want to use the diff command. Before you make changes to a file, copy the file so you have the original. After you update, run diff; if you don’t send the output to a file, it will just be output to the command line, so include a > with the name for your patch file:

$ cp originalFile newFile
$ vim newFile #edit newFile
$ diff originalFile newFile
1c1
< This is a sentence.
---
> This is a short sentence.
$ diff originalFile newFile > changes.patch

As you can see, the diff is just a simple text file that uses a syntax the diff and patch command will understand. Patch? Well, that’s the command that goes hand in hand with diff. If you’ve received a patch file, you’ll update the original as follows:

patch originalFile2 changes.patch

And now you’re all updated.


7. Sudo

sudo

Sudo isn’t really a command like the others, but it’s one you’ll find a need for as you venture deeper into the command line world. Here’s the scenario: there are some things that regular users just shouldn’t be able to do on the command line; it’s not hard to do irrevocable damage. The only user who has the right to do anything he or she wants is the super user, or root user. However, it’s not really safe to be logged in as the super user, because of all that power. Instead, you can use the sudo (super user do) command to give you root permissions for a single command. You’ll be asked for you user account password, and when you’re provided that, the system will execute the command.

For example, installing a ruby gem requires super user permissions:

$ gem install heroku
ERROR:  While executing gem ... (Errno::EACCES)
    Permission denied - /Users/andrew/.gem/ruby/1.9.1/cache/heroku-1.9.13.gem
$ sudo gem install heroku
Password:
Successfully installed heroku-1.9.13

8. Man

man

Most of the commands you’ll use in a bash shell are pretty flexible, and have a lot of hidden talents. If you suspect a command might do what you want, or you just want to see some general instruction on using a command, it’s time to hit the manuals, or man pages, as they’re called. Just type man followed by the command you’re curious about.

$ man ln

You’ll notice that the man pages are opened in less.


9. Shutdown

shutdown

When you’re done for the day, you can even turn your computer off from the command line. The command in the spotlight is shutdown, and you’ll need to use sudo to execute it. You’ll have to give the command a flag or two; the most common ones are -h to halt the system (shut it down), -r to reboot, and -s to put it to sleep. Next, you’ll pass the time it should happen, either as now, +numberOfminutes, or yymmddhhmm. Finally, you can pass a message to be shown to users when the deed is about to be done. If I wanted to put my computer to sleep in half-an-hour, I’d run this:

$ sudo shutdown -s +30

10. History, !!, and !$

history

Since the command line is all about efficiency, it’s supposed to be easy to repeat commands. There are a few ways to do this. First, you can use the history command to get a numbered list of many of your recent commands. Then, to execute one of them, just type an exclamation mark and the history number.

$ history
...
563  chmod 777 one.txt
564  ls -l
565  ls
566  cat one.txt
...
$ !565

Granted, this is a terrible example, because I’m typing more characters to use the history than it would take to re-type the command. But once you’re combining commands to create long strings, this will be faster.

It’s even quicker to access the last command and last argument you used. For the latest command, use !!; the usual use case given for this is adding sudo to the front of a command. For the latest argument, use !$; with this, moving into a new folder is probably the common example. In both these cases, the shell will print out the full command so you can see what you’re really executing.

$ gem install datamapper
ERROR:  While executing gem ... (Errno::EACCES)
    Permission denied - /Users/andrew/.gem/ruby/1.9.1/cache/datamapper-1.0.0.gem
$ sudo !!
sudo gem install datamapper
Password:
Successfully installed datamapper-1.0.0

$ mkdir lib
$ cd !$
cd lib

Conclusion

If you’re as passionate about productivity as I am, the idea of using the command line as much as possible should resonate with you. What I’ve shown you here is just a sampling of the built in commands … then, there are many more than you can install yourself (look at something like the homebrew package manager, for example). But maybe you’re already proficient on the command line; if so, can you share another great command with the rest of us? Hit the comments!

Build a Custom HTML5 Video Player: Free Premium Tutorial


Much like the other various Envato marketplaces, our newly launched Tuts+ marketplace will offer a free file each month. For September, that free file/tutorial just so happens to mine! I’ll show you how to build a custom HTML5 video player with Flash fallback support.

Be sure to grab this one for free for the entire month of September. Next month, it’ll return to its original price.

Build a Custom HTML5 Video Player

Though the idea of a video-specific HTML element was suggested well over a decade ago, we’re only just beginning to see this come to fruition! Forget all of that “HTML5 2012” mumbo-jumbo; the truth is that you can use the video element in your projects right now! The only problem is that the video players are inconsistent from browser to browser, and full-screen support is, at the time of this writing, only available in certain browsers, via a right-click. Further, what if we want to brand our video player? Unfortunately, there isn’t an easy way to do so by default. The solution is to create a custom player that remedies all of these issues.

While we’re using a great deal of our Premium catalog to populate the new marketplace, it will quickly become dominated by unique tutorials, screencasts, and eBooks! Be sure to check it out if you haven’t already.