Dealing with the Twitter Oauth-Apocalypse

As many of you may have seen in recent weeks, Twitter changed its access policies and now requires OAuth from all third party applications that access Twitter user accounts. This is a large change from how many iPhone developers having been incorporating Twitter into their applications. What is OAuth exactly? How can iPhone developers get their apps up to date so they don’t break their Twitter incorporation? Well we have all the info you need to know about the OAuth-Apocalypse.

What is Oauth?

Twitter has a brief explanation of the difference between Basic Authentication and OAuth. They use the example of a letter and how it is addressed as their metaphor, and I think this gets the idea across clearly. You can see their entire explanation along with pros and cons here.

TL;DR With Basic Auth you would make every request and would include a username and password with each. This method is very insecure because it allows applications to actively hold user’s credentials and does not have any accountability for which application is performing what action on who’s account. If you imagine your Twitter account as a room, this is like having access to the room be granted based on a single key that many people have copies of. OAuth makes access to your room be granted by a key pad. And everyone that has access to the room has a different code they input into the keypad. You can see who came in and when and revoke anyone’s code at any time.

Twitter is evolving and now requiring that applications register. As a result, user’s gain more control over what services have access to their account. Additionally, Twitter can be more effective at targeting malicious applications, and developers can get more accurate feedback on the frequency of their app’s use throughout Twitter. With all this said, OAuth is tough to implement from scratch. So today we are going to go through the installation and use of a collection of classes that takes care of the dirty work for us, and let developers update the Twitter functionality of their application easily.

Required Classes

Today we are going to be building off a collection of classes that were created by several different people. The main portion of the class is the MGTwitterEngine which was created by Matt Legend Gemmell who’s website can be found here. From here, Ben Gottlieb took the classes and added his own drop in view controller to them. With all this together we have a simple view controller that will perform login and OAuth, and from there an engine that will perform any type of Twitter request we are looking to do. You can get a zip file of the root folder that contains all of these files here.

Installation

We are going to start out with a blank, view based iPhone project called iCodeOAuth. Once the project has come up, take the folder you downloaded called “Twitter+OAuth” and drag it into the “Other Sources” folder within Xcode. Make sure you check the box to copy the sources into the project folder. If we do a build now, you will get a ton of errors. That is because these classes require that libXML be a target of the project build as well. This can be accomplished by clicking the arrow next to Targets in the left column of the Xcode project. Here there will be an application called iCodeOAuth. If we right click on this and select Get Info we will see the info about our target. From here we click the build tab and search for the field “Header Search Paths”. You need to add the following into the Header Search Paths:

$(SDKROOT)/usr/include/libxml2

If you build again, you should see no errors and we can move forward with using this awesome set of classes.

Getting your Creds from Twitter

Now that we have these classes properly installed, it is time to take care of some registration requirements for OAuth. In order to use OAuth you must identify your app to Twitter. Once you do so, Twitter will provide you with an OAuthConsumerKey and an OAuthConsumerSecretKey. These are going to need to be provided to the classes we have just added into our project in order to talk with Twitter’s OAuth system. To register your application and get these creds go to http://dev.twitter.com/apps/new. I have created a application called the iCodeBlog OAuth Demo, whose credentials are included in the sample app which I have provided. For your own personal app you will need to go create your own Twitter Application and get your own keys.

Using SA_OAuthTwitter Engine

Ben Gottlieb used a great design pattern to create a very easy to use access point for the more complex MGTwitterEngine which lies underneath. In order to use these classes we will go into out view controller and add the following code to the header:

#import "SA_OAuthTwitterEngine.h"
#import "SA_OAuthTwitterController.h"
 
@interface iCodeOauthViewController : UIViewController  {
 
	IBOutlet UITableView *tableView;
	IBOutlet UITextField *textfield;
 
	SA_OAuthTwitterEngine *_engine;
	NSMutableArray *tweets;
}
 
@property (nonatomic, retain) IBOutlet UITableView *tableView;
@property (nonatomic, retain) IBOutlet UITextField *textfield;
 
-(IBAction)updateStream:(id)sender;
-(IBAction)tweet:(id)sender;
 
@end

And add the following into the Main

- (void)viewDidAppear:(BOOL)animated {
 
	if(_engine) return;
 
	_engine = [[SA_OAuthTwitterEngine alloc] initOAuthWithDelegate:self];
	_engine.consumerKey = @"PzkZj9g57ah2bcB58mD4Q";
	_engine.consumerSecret = @"OvogWpara8xybjMUDGcLklOeZSF12xnYHLE37rel2g";
 
	UIViewController *controller = [SA_OAuthTwitterController controllerToEnterCredentialsWithTwitterEngine: _engine delegate: self];
 
	if (controller)
		[self presentModalViewController: controller animated: YES];
	else {
		tweets = [[NSMutableArray alloc] init];
		[self updateStream:nil];
	}
}

This will instantiate our engine with the appropriate consumer and consumer secret keys. With this done we will create a controller. If you run the app now you will see a modal web view come up and lead to a sign in page for Twitter. This is a web view, but the great classes written by Ben are set up to programmatically handle the progression of these web views as the user signs in.

Scrolling to the bottom of this page there will be a username and password field to fill out. Don’t put in your Twitter credentials yet. We need to fill out a few delegate methods to handle the callback from SA_OAuthTwitterEngine.

Handling Login Callbacks

Insert the following into your main class.

#pragma mark IBActions
 
-(IBAction)updateStream:(id)sender {
 
}
 
-(IBAction)tweet:(id)sender {
 
}
 
#pragma mark SA_OAuthTwitterEngineDelegate
 
- (void) storeCachedTwitterOAuthData: (NSString *) data forUsername: (NSString *) username {
 
	NSUserDefaults	*defaults = [NSUserDefaults standardUserDefaults];
 
	[defaults setObject: data forKey: @"authData"];
	[defaults synchronize];
}
 
- (NSString *) cachedTwitterOAuthDataForUsername: (NSString *) username {
 
	return [[NSUserDefaults standardUserDefaults] objectForKey: @"authData"];
}
 
#pragma mark SA_OAuthTwitterController Delegate
 
- (void) OAuthTwitterController: (SA_OAuthTwitterController *) controller authenticatedWithUsername: (NSString *) username {
 
	NSLog(@"Authenticated with user %@", username);
 
	tweets = [[NSMutableArray alloc] init];
	[self updateStream:nil];
}
 
- (void) OAuthTwitterControllerFailed: (SA_OAuthTwitterController *) controller {
 
	NSLog(@"Authentication Failure");
}
 
- (void) OAuthTwitterControllerCanceled: (SA_OAuthTwitterController *) controller {
 
	NSLog(@"Authentication Canceled");
}

We just implemented the SA_OAuthTwitterControllerDelegate and the SA_OAuthTwitterEngineDelegate. The SA_OAuthTwitterEngineDelegate methods take care of storing the OAuth data string in a plist so that when the app is launched again the user will not have to sign in. SA_OAuthTwitterControllerDelegate methods are callbacks depending on what happens upon sign in. In this case when sign in is successful another method in our class called updateTweets will fire. For now we have those methods defined but we don’t have them filled in. We will get to that in a few steps. If you run the application and login using some Twitter credentials, you should see a successful authentication message appear in your debug screen. With this done, let’s add some interface elements to our view controller XIB so that we can start interacting with Twitter. Our final product is going to look like this:

Building the Interface

To Build the interface open up the XIB for your view controller. We are going to be putting in 2 buttons, a UITextField and a UITableView. Lay the elements out like so.

Make sure to connect the delegate and data source of the table view to the file owner. Also connect the “Tweet This” button to the tweet method and the Update Tweets method to the updateStream method. Finally, make sure the IBOutlets for the UITextField and the UITableView are set. With these in place we can fill in the final methods to take advantage of our Twitter engine.

Filling in our IBActions

Put the following code in for the IBActions which we defied before.

#pragma mark IBActions
 
-(IBAction)updateStream:(id)sender {
 
	[_engine getFollowedTimelineSinceID:1 startingAtPage:1 count:100];
}
 
-(IBAction)tweet:(id)sender {
 
	[textfield resignFirstResponder];
	[_engine sendUpdate:[textfield text]];
	[self updateStream:nil];
}

The update stream method will ask our engine to get the Twitter timeline of the people you follow. It will retrieve the first page of the first 100 tweets. There is a delegate method that fires off on this request completing that we will fill out in a moment. The tweet method dismisses the keyboard and then uses our engine to send an update. Once the update is send we update the tweet view below.

Making a really simple Tweet Object

To help us with displaying tweets we are going to make a very quick Tweet object. This will be a simple NSObject subclass. Use this code for the header:

@interface Tweet : NSObject {
 
	NSDictionary *contents;
}
 
-(NSString*)tweet;
-(NSString*)author;
 
@end

And this code for the main

@implementation Tweet
 
-(id)initWithTweetDictionary:(NSDictionary*)_contents {
 
	if(self = [super init]) {
 
		contents = _contents;
		[contents retain];
	}
 
	return self;
}
 
-(NSString*)tweet {
 
	return [contents objectForKey:@"text"];
}
 
-(NSString*)author {
 
	return [[contents objectForKey:@"user"] objectForKey:@"screen_name"];
}
@end

Finally make sure to import the class within the main of your view controller class. These will simply give easy methods to get the info we want out of each tweet dictionary that the MGTwitterEngine will return to us.

Filling in our MGTwitterEngineDelegate Methods

The MGTwitterEngine is doing most of the heavy lifting here when it comes to interacting with Twitter. The methods we are using to get tweets and to send tweets are all defined within the MGTwitterEngine. There is also a defined MGTwtterEngineDelegate which defines the callback methods that fire upon these requests finishing. For the sake of completeness, I have filled out all the methods, although only a few of them will be called in the case of our application working properly. Insert the following code into your main.

#pragma mark MGTwitterEngineDelegate Methods
 
- (void)requestSucceeded:(NSString *)connectionIdentifier {
 
	NSLog(@"Request Suceeded: %@", connectionIdentifier);
}
 
- (void)statusesReceived:(NSArray *)statuses forRequest:(NSString *)connectionIdentifier {
 
	tweets = [[NSMutableArray alloc] init];
 
	for(NSDictionary *d in statuses) {
 
		NSLog(@"See dictionary: %@", d);
 
		Tweet *tweet = [[Tweet alloc] initWithTweetDictionary:d];
		[tweets addObject:tweet];
		[tweet release];
	}
 
	[self.tableView reloadData];
}
 
- (void)receivedObject:(NSDictionary *)dictionary forRequest:(NSString *)connectionIdentifier {
 
	NSLog(@"Recieved Object: %@", dictionary);
}
 
- (void)directMessagesReceived:(NSArray *)messages forRequest:(NSString *)connectionIdentifier {
 
	NSLog(@"Direct Messages Received: %@", messages);
}
 
- (void)userInfoReceived:(NSArray *)userInfo forRequest:(NSString *)connectionIdentifier {
 
	NSLog(@"User Info Received: %@", userInfo);
}
 
- (void)miscInfoReceived:(NSArray *)miscInfo forRequest:(NSString *)connectionIdentifier {
 
	NSLog(@"Misc Info Received: %@", miscInfo);
}

These methods are all very straightforward in their naming. The only one we fill out significantly is the statusesReceived:forRequest method. Here is where tweets will be returned to us, each as a separate dictionary when we request the timeline for a user. We will clear the tweets array that we have defined for our class and create a Tweet object for each of the dictionaries we have representing a tweet. From there we will ask our table view to reload. The only task we have left to perform is to fill in our table view data source methods to show all the tweets.

Table View Data Source and Delegate Methods

Now we have everything in place. We just need to create a UITableViewCell for every tweet we have. We will also do some tweaking of the size of each cell and the number of lines of each UITextField within each table view cell. These methods are very common so I wont go into much detail on them. Here are the necessary Data Source and Delegate Methods.

#pragma mark UITableViewDataSource Methods 
 
- (NSInteger)tableView:(UITableView *)tableView numberOfRowsInSection:(NSInteger)section {
 
	return [tweets count];
}
 
- (UITableViewCell *)tableView:(UITableView *)tableView cellForRowAtIndexPath:(NSIndexPath *)indexPath {
 
	NSString *identifier = @"cell";
	UITableViewCell *cell = [tableView dequeueReusableCellWithIdentifier:identifier];
 
	if(!cell) {
 
		cell = [[UITableViewCell alloc] initWithStyle:UITableViewStyleGrouped reuseIdentifier:identifier];
		//[cell setBackgroundColor:[UIColor clearColor]];
	}
 
	[cell.textLabel setNumberOfLines:7];
	[cell.textLabel setText:[(Tweet*)[tweets objectAtIndex:indexPath.row] tweet]];
 
	return cell;
}
 
- (CGFloat)tableView:(UITableView *)tableView heightForRowAtIndexPath:(NSIndexPath *)indexPath {
 
	return 150;
}

With this in place you will have an OAuth twitter client that is capable of doing any type of interaction with Twitter. You can find the source for the project here. Please post any questions you have and happy coding!

Follow me on Twitter at @cruffenach

Tool Review: Link-Building with Postrunner

Working as a freelance writer and in SEO over the past few years, one thing became clear to me very quickly: link-building was going to be a big part of the job. One of the easiest ways to build links is by writing articles that contain anchor text (keywords that contain a hyperlink), and then submitting the articles to websites for publication. Building website links is very easy to do with article writing, but I have always been faced with two big problems.

The first problem is that writing articles for link-building purposes and then submitting them to websites is a time-consuming process and the second issue is that the writer does not often have control over where the content is going to be published. There are generally three main ways to submit articles to websites to build links:

  • Submit the articles to article directory websites such as Ezine Articles and Articlesbase.
  • Submit articles to blogs that accept guest posts.
  • Use an article marketing software or service.

Article directories

Article directories are a good place to start building links, but link diversity is also important. Several links all coming from article directories are not going to be as valued in regards to SEO as incoming links from several different websites that are relevant to your website and that are ranked well with the search engines. Getting articles approved in the article directories can also be a time-consuming process and there are restrictions on where anchor text and links can be placed within the articles.

Guest posting

Guest posting is a wonderful option if a writer can find blogs that allow guest posting, but the search for blogs that allow guest posting is a time-consuming process itself and there is no guarantee that a blog will accept a writer’s articles. Guest posting cannot usually be done on an everyday basis and blog owners will often have the final say over any links.

Article marketing software

Using an article marketing software program or service is good for mass article writing and sending the content out to several different blogs at once, but this solution often results in a lot of duplicate content. Some article marketing services offer writers the use of an article spinner program as well, but search engines have a knack for recognizing spun content. Many article spinners are also very flaky and I found that I was spinning articles by hand more often than I was using the actual spinning program. This was a waste of time and I also did not have control over where content was being published, which often resulted in a lot of low quality websites using my articles.

What I wanted

What I wanted was a program that allowed me to write articles that contained at least a link or two that also allowed me to have complete control over where my articles were being used. I did not want to use a program that resulted in duplicate content and I wanted this application to be in an easy-to-use interface.

After a couple years of extreme frustration, I accidently landed on the Keyword Academy’s website and found some information about their Postrunner tool. The Keyword Academy is run by Court Tuttle and Mark Butler, who through videos, webinars, and articles, teach people how to make money online. As with any make-money-online website, I was a little hesitant, but I really needed to find a good link-building tool and the Keyword Academy made claims about Postrunner that prompted me to try it and I am glad I did.
What is Postrunner?

Postrunner’s interface is very easy to use and is built on the WordPress platform. You sign in with your chosen username and password that you receive when you sign up with the Keyword Academy’s PRO membership. Once in your Postrunner dashboard, you simply write an article in the standard WYSIWYG editor that is at least 300 words in length.

You can include up to two links within each article using anchor text and after the article is written, you then choose a blog that you want to submit your content to. There are blogs on just about any topic in the Postrunner system, ranging from finance to marketing and technology. You are provided with blog links so that you can visit each blog before you decide where you want to publish your content.
Blogs that you submit your articles to range from PR 0 to at least 5 (the highest I have found) and you can submit up to 500 articles per period, which is plenty and you shouldn’t need more than that.

Postrunner takes originality very seriously and does not allow content to be pasted into their system from outside articles. Article spinning is not permitted. Blogs that publish your content are also not allowed to change the links included, but they are allowed to make minor changes to the article and they are not required to publish the content under your name. Most blogs post the content as “guest poster.”

Blog owners can choose to reject articles, but if they choose to reject, they are encouraged to send you a reason why your content was refused. If a blog does not accept an article within 7 days after it was submitted, the article is returned to you and you can then choose another blog to submit it to.

Cost

To access Postrunner, you have to be a Keyword Academy PRO member, which costs $33.00 per month. Postrunner cannot be purchased without a TKA PRO membership, but with that membership, you get access to the forums, webinars, training videos, and articles on The Keyword Academy’s website.

Room for improvement

The search engine ranking of the blogs that you can submit to in Postrunner could be a little higher, but there is a good variety of blogs and their rankings are pretty decent for the price you pay to use Postrunner. However, as more blogs sign up to receive content from Postrunner, it would seem likely that this will improve. It would also be nice if a person could purchase Postrunner separate from the TKA PRO membership or be able to purchase yearly use of Postrunner at a discount, rather than paying by month.

Summary

  • Postrunner is an easy-to-use link-building tool that gives you a good deal of control
  • You don’t need to have a technical background to use the interface and submit articles
  • Knowing exactly where content is going to be posted on the Internet gives you peace of mind; you do not have to worry about your articles showing up on low caliber websites that do not add any value
  • If you want to learn how to make money online, you can easily do so using your TKA PRO membership to the fullest advantage
  • Postrunner gives helps you get your content out on the web quickly and easily
  • If a blog has certain requirements for their articles, they clearly state their requirements when a Postrunner user is selecting where they want their content to be published

Postrunner: http://postrunner.com

Getting Started with HTML5: What’s new?

HTML5 is not in its final version yet but more and more sites have started using it. HTML5 attempts to meet the requirements of the new Web and to make it easier to publish Web 2.0 content. When HTML4 was in the works, Web 2.0 wasn’t even dreamed of, so you can’t expect HTML4 to be Web 2.0-friendly.

Now with HTML5, this is expected to change. Though, by the time HTML5 is in its final version, we may have witnessed Web 3.0, 4.0, or more, so it will again be outdated but for now HTML5 is more or less an adequate answer to the needs of web developers today.

HTML5 isn’t very different from HTML4 but still there are some important differences to know and keep in mind. Here are some of the differences of general interest to a wider audience:

Simplified Syntax

One of the most notable differences between HTML4 and HTML5 is that now the syntax is simplified – web developers will certainly love this! The syntax in HTML5 is compatible with HTML4, but still there are many improvements. The doctype declaration is much shorter and is just <!doctype html>. Transitional and loose variations of the doctypes are not supported anymore – you need to stick to XHTML syntax or HTML in strict mode.

New Elements

The new elements in HTML5 are the most notable introduction. These new elements are intended to better meet the requirements of Web 2.0 sites and to simplify development. It is not possible to list all the new elements and attributes because the list is very long and if you are interested in the complete list, check the page at the W3 Consortium. Here I will present only some of the new elements and attributes, which in my opinion are the most important:

  • <article> – This attribute is used to separate articles, blog posts, and other text content. With so many blogs and article sites, this element is extremely useful.
  • <header> and <footer> – These new elements are used for the header and footer of the page and they can replace the <div> elements we use today to identify many elements, including headers and footers. Since headers and footers are present on almost any page, it is good that now they have an element of their own.
  • <nav> – Similar to <header> and <footer>, <nav> is a dedicated element for the navigational items that we presently put in <div>.
  • <audio> and <video> – Audio and video content is so common and so Web.20-like that it is really great that they made it easier to use audios and videos on a page. The <audio> and <video> elements make it easier to embed audios and videos, respectively.

In addition to the new elements in HTML 5, many new attributes to existing elements are introduced, but their list is even longer than the list of elements. In any case, before you start coding in HTML5, take a look at the list of new attributes for the elements you most frequently use to see if there are changes.

Modified Elements and Attributes

Some of the fundamental attributes in HTML, such as <a>, <b>, or <i> have been modified. It might take you some time and a lot of effort to learn the new meanings. Here are some noteworthy changes:

  • <a> – When the <a> element is used without an <href> attribute, this is a placeholder for a link.
  • <b> – The new function of the <b> element is rather vague. It is not bold but it is still a way to mark a chunk of text as different from the rest. You can use it for keywords, product names, etc.
  • <hr> – The <hr> element is now a type of break (a paragraph-level thematic break, to be more precise).
  • <i> – The <i> element also marks a chunk of text as different from the rest but its usage is very diverse. You can use it for names, idioms, technical terms, etc. Pretty vague again – I guess if you continue to use <b> and <i> the way you are used to, this will be a mistake. If you want to have bold and italicized text, you should put them in the stylesheet instead. I wouldn’t call this change convenient for sure but since it is there, we need to follow it. Maybe for SEO these tags are now more useful because they are a way to mark a chunk of text as important without making the text as bold and italicized, but until we get used to the new meanings of the elements, there will be problems. The <mark> and <em> elements can be used as well to mark and emphasize special parts of the text.

There are many other changes to existing attributes and elements but they are more evolutionary than revolutionary and will hardly cause so much turmoil in the community.

Deleted Elements and Attributes

In addition to the elements and attributes that changed from HTML4 to HTML5, there are some elements and attributes that are no longer with us. Some of them will hardly be missed because they haven’t been used much and were just cluttering the language, while others could have stayed. Here are some of the elements and attributes that didn’t make it into HTML5:

  • Elements better handled via CSS. The first group of deleted elements includes some very popular elements, such as <font>, <center>, <big>, and <u>. These elements are no longer supported in HTML5 because their place is in the style sheet. This change could cause a bit of a turmoil when you really want to use these elements in your html rather than in your style sheet.
  • No more frames. The <frame>, <frameset>, and <noframes> elements were so 1990-ish that it is great we got rid of them. Frames were cool 10 year ago, but since they caused so much trouble and were a SEO and useability penalty, many designers avoided them, even though these elements were not excluded from the HTML specification. This is good riddance for sure and these elements will hardly be missed.
  • Elements rarely used. There are many elements that were present in the old specification but were not commonly used, so they have been removed completely. They include <acronym>, <applet>, <isindex>, and <dir>.

As you can see, there are some differences between HTML4 and HTML5 but they are not that fundamental – that is, you won’t have to re-learn HTML from scratch. Still, it might take some time and effort to get used to the changes, especially the modified elements and attributes. The good news is that HTML5 eases many aspects of HTML development and this alone is enough to justify the update.

Quick Look: Bazinga 4 Mac

Quick Look posts are paid submissions offering only a brief overview of an app. Vote in the polls below if you think this app is worth an in-depth AppStorm review!

In this Quick Look, we’re highlighting Bazinga 4 Mac. The developer describes Bazinga 4 Mac as an app which can turn any web site, web page or web app into a native mac application. This allows you to access your favorite web sites quickly and easily without relying on your web browser.

Read on for more information and screenshots!

Update: We messed up with the price on this one! We’d like to make it clear that Bazinga is completely free, not $49.99 as originally stated. Sorry for the confusion!

Screenshots

Bazinga for Mac

Bazinga for Mac

About the App

Here are the top five features you can expect to see in the latest version:

  • Easy to create mac apps, just create a copy of the bazinga app and rename it to the site you want to create a mac app for i.e. mac.appstorm.net
  • Create as many mac apps as you like
  • Change the icons of your mac apps
  • Share your mac apps on the internet
  • Bazinga 4 Mac is FREE

Requirements: Mac OS X or later

Price: Free

Developer: Regedanzter

Vote for a Review

Would you like to see us write a full review of Bazinga 4 Mac? Have your say in our poll:

Would you like to see Bazinga 4 Mac reviewed in-depth on AppStorm?online surveys

Quick Look posts are paid submissions offering only a brief overview of an app. Vote in the poll if you think this app is worth an in-depth AppStorm review! If you’re a developer and would like to have your app profiled, you can submit it here.


Win a Copy of TrackRecord!

We recently published a Quick Look at TrackRecord, and I’m pleased to let you know that we have five licenses available to give away today!

TrackRecord is a new time monitoring application for Mac OS X that integrates with 37Signal’s Basecamp. TrackRecord lets you track and manage the time you’re spending, filter your Basecamp account to see as much or as little as you like, and even edit and delete the time you’ve already posted to Basecamp.

It usually costs $20, but you have the chance to bag one of five copies for free! Entering is really easy. All you need to do is:

  1. Post a link to this competition – either on your website, or via Twitter
  2. Leave a comment, letting me know where you posted the link

The competition will run for one week, and I’ll pick five winning comments at random on Friday 24th September. Best of luck!


10 Tips for Getting the Most Out of TweetDeck

In recent years, countless Mac Twitter applications have sprung up seemingly in an instant and died just as quickly. One app that has stayed strong ever since the beginning of the Twitter application revolution is TweetDeck. Its powerful feature set and intense multi-column format, though hated by some, is still a favorite among many power users.

Today we’ll go over ten simple tips that will help new and advanced users alike get the most out of using TweetDeck as the ultimate social media application.

Meet TweetDeck

In case you’ve never heard of TweetDeck, it’s a Twitter-centric social media hub that utilizes a series of user-defined columns to separate content.

Though it’s certainly not for everyone, TweetDeck is one of the most advanced and fully-featured Twitter applications of its kind, especially in the free category. Be warned, if you’re a recovering Twitter addict, seeing all those columns for the first time might send you back into a downward spiral from which you will not easily recover.

tweetdeck screenshot

TweetDeck

More Than Twitter

Despite it’s Twitter-centric name, TweetDeck is a whole lot more than a simple Twitter client. In fact, you can add up to six different types of accounts to your TweetDeck columns.

Twitter, Facebook, LinkedIn, Foursquare, Buzz and MySpace are all supported in TweetDeck. Under Preferences, go to the Accounts tab and you should see a range of buttons for adding your various accounts.

tweetdeck screenshot

TweetDeck Social Accounts

Simply click a button to add the corresponding account. Then from the main interface, hit the little plus button at the top left to add a new column. You should be given various options for adding a column for any one of your connected networks.

For instance, let’s say I wanted to create a column that shows all the pictures my friends are uploading to Facebook. I simply click the “Add Column” button, navigate to the Facebook tab, then select “Photos” and hit the “Everyone” button.

tweetdeck screenshot

Adding a Facebook Column

Alternatively, if you don’t want to see everyone’s photos, you can create a select group of friends from which TweetDeck will pull for updates.

TweetShrink

Have you ever had one of those tweets that you just can’t seem to squish down to 140 characters? With TweetDeck you can relax about that character limit and let it help you trim that pesky text until it fits.

tweetdeck screenshot

Before shrinking (top) and after (bottom)

Sometimes this service is helpful and sometimes it turns your tweet into a mess of jargon that only a text-messaging-addicted teenager could decipher. Either way, it’s fun to play with and can be useful at times.

Notable changes include changing words like “to” and for to their number equivalents (2,4), inserting ampersands, and ditching vowels when possible.

User Profiles

One of the first things I check on any Twitter app is whether or not I can view user profiles and timelines within the app (as opposed to simply linking to the browser). Many apps support only profiles or only timelines, others support neither. Since user profiles and timelines play a huge role in who I decide to follow and are therefore a key part of my Twitter experience, I simply refuse to use the otherwise solid Twitter apps that don’t support this functionality.

TweetDeck has impressively full support for profiles. You can view the user’s profile pic, real name, screen name, bio, location, website, number of followers, number of people they’re following, the number of lists the user is in and his/her timeline.

tweetdeck screenshot

User Profile

There are two primary ways to bring up a user profile in TweetDeck. The first is to hover over the user’s avatar in your timeline and click the “Other Actions button.” Then follow the “User” submenu to the “View Profile” option.

The second way to view a user profile is to hit the little compass button at the top of the interface. This seems like it would have something to do with location services but it is in fact a quick way to search for a list or user. Simply type the username you’re looking for into the box that pops up and you’ll be taken to the appropriate profile.

tweetdeck screenshot

Accessing User Profiles

If you don’t like eating up your API calls with user profiles, there is an option in TweetDeck Preferences to force user profiles to open in your browser.

Translate That Tweet

It seems that several of the people I follow are intent on making me feel dumb due to the fact I can only tweet in one language (unless Ubbi Dubbi counts). Admit it, when you see a tweet go by in a language that you’re not fluent in, you can’t help but be curious about what it says.

Fortunately, with TweetDeck you can skip the language classes. Instead hover over the user’s avatar in your timeline and click the “Other Actions button.” Then follow the “Tweet” submenu to the “Translate” option.

tweetdeck screenshot

Translating a Tweet (before)

Voila! Clicking that magical button will automatically turn you into a multi-lingual professional tweeter. Well, not really, but it will at least attempt to translate the tweet for you. I really like that I don’t even have to input a “to” and “from” language here. TweetDeck is smart enough to figure the details out on its own.

tweetdeck screenshot

Translating a Tweet (after)

Track Your New Followers

When you’re creating a new Twitter column, TweetDeck gives you all kinds of great options. This includes the standard features such as mentions and DMs, as well as some third party services like StockTwits and TwitScoop.

One of my favorite options here is the “New Followers” column. As you’ve no doubt guessed, selecting this option will create a column that features users who have recently started following you.

tweetdeck screenshot

Adding a New Followers Column

As you can see in the screenshot below, the New Followers column shows each user’s profile pic along with their bio. Notice in the bottom right you have a couple of handy options for quickly following or blocking a user. This is a super quick way to add interesting followers to your list while ignoring obvious spam and other uninteresting accounts.

tweetdeck screenshot

New Followers Column

Sync Your Columns! Sometimes…

Once you’ve finally reached the ideal column setup in TweetDeck, wouldn’t it be great to have them automatically carried over to your iPhone and other TweetDeck locations?

It turns out all you need to do to accomplish this is set up a TweetDeck account. Then when you log in on any device you should see an option to bring over your columns.

tweetdeck screenshot

Click the Sync Tab

To get your account setup, go to the sync tab in Preferences. Now do the same thing on the iPhone application and you should be ready to go!

Unfortunately, how syncing works in theory and how it works in practice are two very different things. Though many users experience zero issues with syncing, the rest of us see the screen below (no columns found) far too often despite the fact that we have in fact created new columns that we want to carry over.

tweetdeck screenshot

iOS Syncing (Almost)

Some days syncing works for me; today is not one of those days. If you figure out a way to bypass this issue, be sure to leave a comment below!

Simple View

Sometimes seeing all those columns at once can be a bit overwhelming. When you’re experience TweetDeck overload, try switching to the single column view via the first button on the strip at the top right.

tweetdeck screenshot

Single Column View

This view is a lot less busy and is much more like you find in other apps. To switch between columns you can still use the little icons at the very bottom. Hover over a column icon to see what it is and click on it to bring it up.

Note that the single column view works best if you don’t have the “narrow columns” option activated.

Keyboard Navigation

If you’re a fan of keyboard shortcuts you’ll be happier to know that you can perform quite a few TweetDeck actions without touching the mouse.

To get started, used the arrows keys to move around and select a message. Strangely enough, the H, J, K and L keys can also be used to navigate messages. Also, hitting the “C” key will bring up the compose window if it isn’t already activated.

To bring up the menu below, select a message and hit the space bar.

tweetdeck screenshot

Keyboard Shortcut HUD (space bar to reveal)

From here you can hit “A” to reply, “S” to ReTweet, “D” to DM, and “F” to favorite the message. Further, if you select a message and hit the period key, you can access the “Tweet” and “User” submenus.

Finally, hitting the “\” key will bring up the New Column window with a Twitter Search.

What’s Popular?

TweetDeck provides a quick and easy way to see what your friends are talking about via the little cloud button on the bottom of each column.

Pressing this will pop up a list of frequently appearing hashtags and links from all the users in that column. Clicking on any one of these items will quickly add a filter to the column so you can see who is tweeting that content.

tweetdeck screenshot

Popular Content

Block Annoying Content

Don’t you just hate it when something “big” happens in the world like Justin Bieber getting a haircut or Lady Gaga accidentally going out in public dressed like a normal human being? Or even worse, when those crazy people that watch normal television start tweeting about the finale of your favorite show while you wait for it to hit Hulu?

Suddenly, your entire Twitter stream is filled with stuff that you simply don’t want to see. To stop the madness, check out TweetDeck’s global filter.

tweetdeck screenshot

Global Filter

From here you can choose specific people, trends, words and sources to temporarily filter out of your columns. So the next time a famous diva shaves her head, you can tweet in peace!

Conclusion

Leave a comment below and let us if you found these tips to be helpful. Also let us know about your favorite commands or features that we might have left out.

If you’re a TweetDeck fan, be sure to take a look at the recently launched Seesmic Desktop 2, a very similar app with a shinier interface and a few tricks of its own.


Premium Vector Pack – Retro Women


We have a new set of vector illustrations available exclusively for Vector Premium members. Crafted by the group over at Designious, you will find a great selection vector illustrations in this set depicting beautiful retro women. You can use them in your next project where a touch of elegance and class is needed. Learn more at the jump!

Continue reading “Premium Vector Pack – Retro Women”

Reason and Record Routing Tips: Channel Strip

In this series of screencasts I’m going to try and give you as many Reason and Record routing tips as possible. It’s a pretty big subject so I’ve started simple. This first video covers the basics of the rack based channel strip device.

Over the course of the video I take a look at side chaining, direct outputs and insert points. This is really aimed at beginners and newcomers to Record. I’ll be covering more advanced topics as we go, so if you have anything specific you’d like me to get into please leave a comment.


2011 Vector Calendars – Vector Freebie


We have four different 2011 calendar designs, as a freebie for anyone to download. These files are created by Stock Graphic Designs and are perfect to use as a base for your own calendar designs. They take the hard work out of writing up all the days and months and can be scaled and re-colored in any way you like, it’s all 100% vector.

Continue reading “2011 Vector Calendars – Vector Freebie”

Quick Tip: How to Create Templates EastWest PLAY

When you have to work hard and fast on a project that has its deadline, templates are a valuable tool for the composer. You know what you have to do and you simply start doing it, without searching for the correct samples, because you’ve selected them before. In this quick tip I’ll try to explain how to create templates with PLAY, developed by East West.

Templates – are they good or are they bad? To be really honest, I seldom use templates. Even when I’m working on a deadline (I was told once or twice to make 50-60 minutes of music in one week) I prefer to sweep through my samples and VST instruments and to get the most suitable sound for the music.


Still, sometimes the instruments in PLAY are just not that good alone and they surely would need some layering. I’ll explain the trick by building up a drum template.


Why Build a Drum Template?

Well, first of all – I’m a drum maniac. I want all my drum sounds to sound correct and please my ear. For example most of the drum instruments in Goliath (a virtual instrument by Quantum Leap) have great sounds, but still there is always something that is not right.

I load the “Metal Kit” because I very much like that tight kick sound and the snare sound but I don’t like the hats and the cymbals. Therefore I’ll use another instrument bank’s cymbals and hats. Let’s see how to do that.


Step 1: Load Different Instrument Banks

In order to create the ultimate drum sound, we’ll have to take the best out of each instrument bank. So, after some listening and thinking, I’ve selected:

  • Metal Kit for the kick sound
  • Funk Kit 1 for the snare sound
  • Jazz Kit (sticks) for the hats
  • Stage Kit for the toms
  • Studio Kit for the cymbals


Step 2: Optimize the Memory

This step is very important, because is:

  1. removes the unwanted samples and therefore speeds up our machine, and
  2. allows us to combine everything in one MIDI channel.

How do we remove the samples? It’s very easy. In the bottom right corner of the PLAY Player interface (just above the keyboard) you’ll see the articulations panel. I typed “Player” interface, because as you probably know PLAY has two main interfaces – Player and Browser. In the Player window we can alter the sounds, add effects and etc.

So we’ve found the articulations panel. Now each unnecessary sample should be removed. This means that we must deactivate snare, hats, toms and cymbals from the Metal Kit, then we must deactivate kick, hats, toms and cymbals from the Funk Kit and so on.

You should press both buttons – Activated and Loaded – to properly deactivate it and to unload it from your system’s memory.


Step 3: Assign MIDI Channels and Outputs

This is the most important part. First of all, we’ll need to use all of the above samples on a single MIDI track for our own convenience. And secondly, we must send each sample to its own FX channel. How to do that?

In the browser panel you’ll see all five kits together in the top left corner. You’ll see three buttons bellow them → MIDI Ch., Outputs and Delete.

Assign each sample to MIDI Channel 1. This means that when you play MIDI channel 1, it will combine all five samples together.

As for outputs, set a unique output for each sample. In our case – Metal Kit should be 1/2, Funk Kit – 3/4, Jazz Kit – 5/6, Stage Kit – 7/8, Studio Kit – 9/10. This will send each sample to its own mixer FX track.

Now just one clarification – to properly use the multiple outputs, you should have set that in your browser. For example in FL Studio you should enable multiple outputs and set the instrument settings. In Samplitude you’ll have to load the VST with the Multi-Channel setting.


Step 4: SAVE, SAVE, SAVE

Now we have our ultimate drum kit and we will like to save it. This can be done very easily – click on the huge button, labeled “Main menu”, after that click “Save As” and then use a unique name for the template!

The default name would be the name of the first loaded instrument (in our case – Metal Kit). Don’t overwrite the instrument packs, because you’ll surely need to use them again.

Well, that’s it for now. In the next tutorials I’ll explain how to create unique instrument sets by using templates and combining different samples.

Good luck!


Quick Tip: Apply a Burned Effect to Different Textures

The Burn Tool is a very powerful feature in Photoshop’s toolbox. In today’s tutorial we will demonstrate how to quickly burn an object into two different textures. Let’s get started!


Resources Used


Step 1 – Textile

We’ll start with a textile fabric; you can find the texture here. The size of the document doesn’t matter, so you can work directly with the size of the texture, If you want to print it, work with CMYK, if not, work with RGB; we are going to experiment, so you can work with anything you like, such as 1 color logos, type, or vectors. In my case, I used the Psdtuts logo.


Step 2 – Textile

We need to prepare the logo to blend into the texture by creating a Displacement Map, this will alter the silhouette of the object, making it irregular and leaving it ready to work within the texture. Duplicate the texture layer and desaturate (Cmd/Ctrl + Shift + U); then select the desaturated layer (Cmd/Ctrl + A), copy the layer (Cmd/Ctrl + C), make a new document (Cmd/Ctrl + N) and paste it inside (Cmd/Ctrl + V), save it as displace.psd and close it.


Step 3 – Textile

Now, let’s apply the displacement map to the logo, select the object you are working with and go to filter. Go to Filter > Distort > Displace, then in the Displace Window type 3 on horizontal and vertical scale, make sure the options Stretch to Fit and Repeat Edge Pixel are selected too, and select ok; then you will select the displacement map you made for this texture (displace.psd) and select open; after doing this step, take a look at the result, if it’s too distorted, perhaps you will have to try one value down, if it’s not much of a change, then, you need to go up on the values.


Step 4 – Textile

Now we are ready to start making the burn effect. Keep in mind that this effect involves a little bit of practice with the burn tool, this is because the Burn Tool reacts differently with each texture, this also depends of the Range and Exposure of the brush you are using, so it’s not certain to get the result you expect. Before you start, remember that you will be burning the texture, this means that you can’t go back, modify or move the burn, so I suggest you duplicate the texture and give it a try with the Burn Tool, once you got the feel of it, duplicate a clean texture and layout all the things you are about to burn in the place you want them.

I recommend to use soft brushes and do a few passes playing with the Range (Highlights, Midtones and Shadows) as well with the Exposure and size of the brush. This effect needs practice and detail to really make it look really good.

Let’s make a selection of the object, in this case the logo and then move to the texture layer, select the Burn Tool and start exploring how it behaves.


Step 5 – Textile

After you’ve got the result you are looking for with the Burn Tool it should look similar to this result that blends with the texture; this can work by itself, but we can still make it better by adding some lights and shadows. Duplicate the texture and move it above all layers and name it Overlay, then Desaturate (Cmd/Ctrl + Shift + U), change Layer Blend Mode to Overlay at 40% Opacity. Make a new layer above the Overlay layer, select a soft white brush and make it a size that can fit all the object, brush blend mode set to Normal and 100% Opacity; then set the Layer Blend Mode to Overlay at 40%. We are now finished with the textile texture.


Step 6 – Paper

Let’s move on to a paper texture, the process will be exactly the same as it was with the textile texture, just remember to explore how the Burn Tool will react with the paper texture; to make it more interesting, we will blend some paper textures and play around with the Hue and Saturation as well with the Burn Tool to make an interesting texture to work with.

You can find some interesting textures here (old paper) and here (texture paper); make a new document and put them together, we’ll use shape of the texture paper (make them the same size no matter if you stretch them to fit), make a selection of the texture paper silhouette, select the old paper and Inverse the selection (Cmd/Ctrl + Shift + I) and erase, you will end up with this.


Step 7 – Paper

Remember that this is a new texture, so you have to test how the burn will work on it, so duplicate this layer just in case. The old paper texture looks very pale, go ahead and play with the Hue and Saturation (Cmd/Ctrl + U), then with the Burn Tool go work on the edges to burn and some parts of the center too.

Move the texture paper above and set the Layer Blend Mode to Linear Burn at 90% Opacity, duplicate the layer (same blending mode) at 90% Opacity, it will look something like this.


Step 8 – Paper

To save some time and steps, let’s use the same object you used in the earlier exercise, it will already have the displace filter applied to it to make it blend with the texture.

Remember to duplicate the old paper texture to practice, then make a selection of the object and start burning, pay attention how the burn tool reacts with this new texture, when you are done, it should look something similar to this.


Step 9 – Paper

Now we have a good burn on paper that can work, but let’s add some more details for a better result. Duplicate the texture paper and move it above all layers and name it Overlay, then Desaturate (Cmd/Ctrl + Shift + U), change Layer Blend Mode to Overlay at 40% Opacity. Make a new layer above the Overlay layer, select a soft white brush and make it a size that can fit all the object, brush blend mode set to Normal and 100% Opacity; then set the Layer Blend Mode to Overlay at 40%.


Final Image

Now that you know the power of this tool, keep exploring it; check out the results you can achieve with this tool, here are some examples I made. This is a very basic and easy effect, just need some experimentation in order to get the feel of the Burn Tool, it has a lot of potential if you know how to use it and how to combine it to get awesome results. I encourage you to give it a try on new textures, see how it works, keep trying and practicing; sometimes basic things are the ones that take the final piece to another level; if you want to keep trying out this tool with other textures I recommend you check out CG Textures.

Psdtuts+ Welcomes New Editor, Grant Friedman

If you follow us on Twitter or Facebook, you may already be aware that Psdtuts has a new editor. In fact, this is kind of old news. Grant actually began his editing duties for Psdtuts on August 1 and has been quietly editing the site ever since. Before that time, Grant worked as the Associate Editor for this site under Sean Hodge; who is now heading up the new Tuts+ Marketplace, as well as Vectortuts.

You may already be familiar with Grant. For the last few years he has maintained Colorburned, another popular design blog. He is a very active member of the design community, is an active Twitterer and brings loads of blogging experience to the table. Psdtuts is in good hands with Grant and we are very excited to have him at the helm.

Since taking on the Lead Editor role, Grant has taken on a more active role on both our Twitter and Facebook pages. Please feel free to connect with us on both networks to learn more about what’s happening on Psdtuts.


Some Interesting Facts About Grant

  • He loves peanut butter and jelly sandwiches.
  • He is a Kentucky Colonel (just like Colonel Sanders).
  • Works on a Mac.
  • Does not own an iPhone.

New Author Recruitment

We are always looking for new writers here at Psdtuts. We work with a fantastic team of regular authors but we love working with new people as well. So if you’ve been on the fence about writing an article or tutorial, now is a great time to give it a try. To learn more about writing for Psdtuts, visit our Write for Us page or just Submit an Idea.


Envato Remote Staff Meetup

We also thought that we would let you know about another exciting event here at Envato. Last week we held our first ever remote staff meetup in Chicago. This was the first time that the remote staff got to meet each other in person. We had Envato staff travel all the way from Australia, Europe, and Canada and it really was a fantastic experience. Now that everyone has had a chance to meet in person, we hope to do much more collaboration with the other tuts sites as well as the marketplaces. Hopefully, there will be more meetups in the near future. Until then, you can view photos of the event here.

Anyhow, that’s all for now. Thank you all so very much for the loyal readership. It means so much to us.


Don’t Forget to Like Us

Please don’t forget to like us on Facebook!

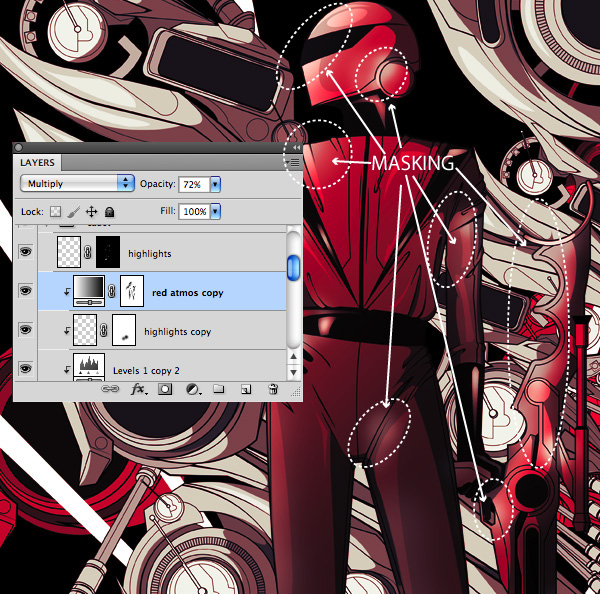
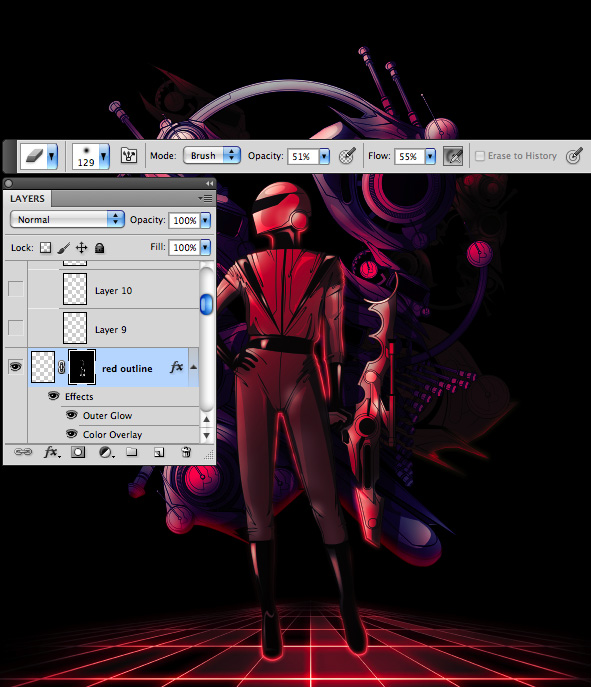
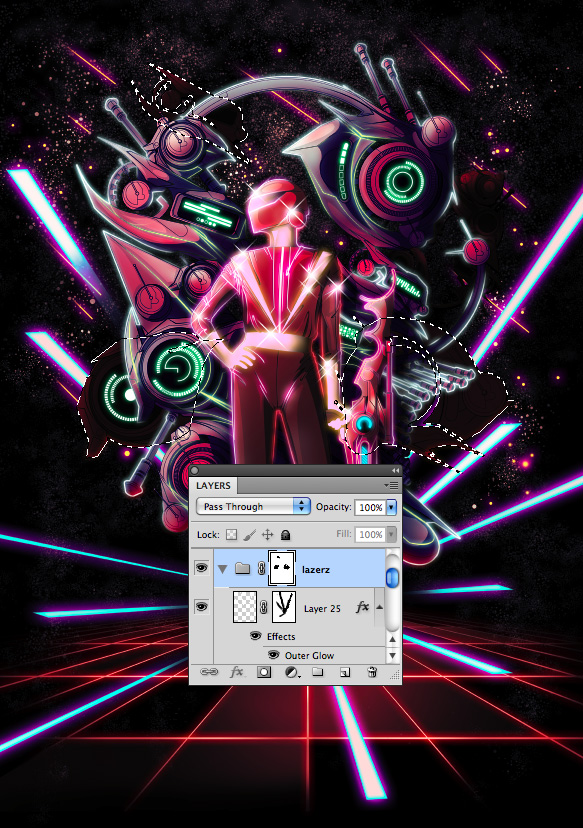
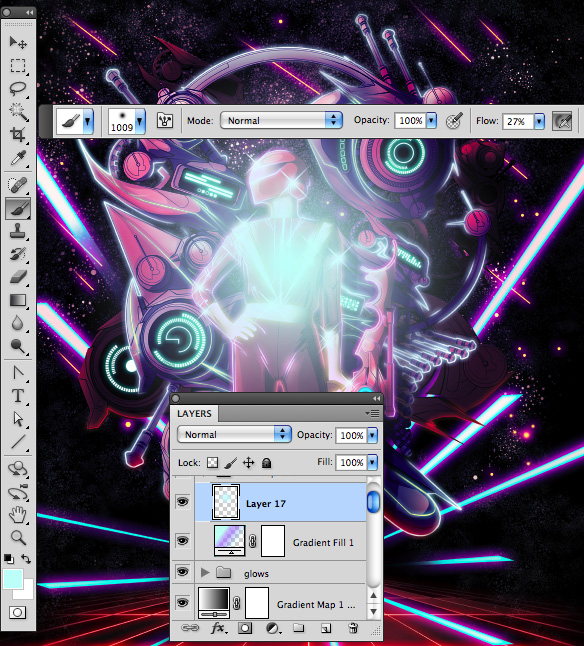
Render a Stunning Space Cadet Illustration in Photoshop – Psd Premium Tutorial

Today, we have another Psd Premium tutorial exclusively available to Premium members. If you want to take your illustration skills to the next level, then we have an awesome tutorial for you. Learn more after the jump!


This Premium Tutorial is Filled with Creative Tips

Today’s tutorial will focus on the capabilities of Photoshop as a rendering tool to bring your vector illustrations to life utilizing raster effects. With just a few coloring techniques, namely adjustment layers, layer masks, and layer styles; you’ll notice that the process can become quite repetitive thus making it a fairly intuitive and efficient workflow.

This tutorial was written by Kervin Brisseaux who is a digital Illustrator from New York. He is a senior member of The Depthcore Collective and is currently pursuing a Masters Degree in Architecture at Syracuse University. Lately, he has been involved in various freelance projects for clients such as Nike, Axe Bodyspray, and Aquafresh. For more examples of Kervin’s  work, check out his portfolio at Brisseaux.com.


Professional and Detailed Instructions Inside

Premium members can Log in and Download! Otherwise, Join Now! Below are some sample images from this tutorial.


Psd Premium Membership

As you know, we run a premium membership system here that costs $9 a month (or $22 for 3 months!) which gives members access to the Source files for tutorials as well as periodic extra tutorials, like this one! You’ll also get access to Net Premium and Vector Premium, too. If you’re a Premium member, you can log in and download the tutorial. If you’re not a member, you can of course join today!

18 Excellent Design Schools From Around the World

If you are a designer who is looking to transition from a hobby to a career, choosing the right design school may be an important decision. Today, we have gathered a list of some excellent design schools from around the world. Each school listed has some amazing programs in several design disciplines. If you have been toying with the idea of going to a design school, than this article is definitely for you.


North America

Art Center College of Design, Pasadena CA

The Art Center College of Design is located in sunny California and has been cranking out amazing designers for over 80 years. In the schools statistics report it notes that 88% of the students who graduated from the basic undergrad program have landed jobs, so that is definitely a positive. This College specializes in Advertising, Graphic Design, and Illustration programs. Some notable alumni that have graduated from the college are Dustin Edward Arnold & Sandeep Menon.

Parsons School of Design, New York NY

Next we will travel to New York and show you the Parsons School of Design. Their curriculum trains students to be able to solve complex problems as well as creating new innovative approaches. This school pretty much covers every facet of design from Fashion to Art history. Parsons has produced big names such as Marc Jacobs & Norman Rockwell, this is definitely the art school to attend if you can get into the prestigious institution.

Pacific Design Academy, British Columbia Victoria Canada

Only about 19 years old, this Canadian institution has made a name for itself by providing some of the best design education in Canada. This school focuses on Graphic design as well as architecture and fashion, and its classes are lead by some of the best designers in the area. So if you live in Canada and are thinking about attending a design school then you might want to consider this one.

International Academy of Design and Technology, Toronto Canada

This is another Canadian institution providing some of the best art education out there. This school focuses how to prepare students to apply their design skills in real life situations. The curriculum focuses on all the basic types of design as well as video game creation and fashion marketing. This is another solid school to consider if you are living in the area.

Pratt Institute, Brooklyn NY

Pratt Institute located in New York has a huge selection of design associated programs. From the common Graphic Design to Digital Arts, and Interior design, it is all covered at Pratt. The institute has a long list of distinguished alumni that you can view here.

Rhode Island School Of Design, Providence RI

The Rhode Island School of Design is another well-known college that focuses on Graphic Designing. If you choose to enroll you will be engulfed in the fine arts learning about everything from Typography, to Design Theory. You can earn your Bachelors of Graphic Design in 5 years at the school, which will mean you are proficient in the arts. This school also has a very long list of noteworthy alumni which you can check out here.


Europe

Central St. Martins College of Art & Design, London UK

Now that we wrapped up North America we can move onto Europe, and Central St. Martins is a great art and design college in the UK. This is one of the more prominent design schools in Europe having ties to many creative industries around the world. This school offers many different design programs that you can choose from if you decide to go. The notable alumni’s that have graduated from this college can be viewed here.

University of Art & Design, Helsinki Finland

The University is over 138 years old and is dedicated to many different forms of design like media art, and motion graphics. You will definitely get a well-rounded education in this school because of its renowned curriculum.

Umea Institute of Design, Sweden

This Swedish institute has a multitude of interesting design orientated classes and is renowned as the best art school in all of Sweden. The institute was even featured as one of the best design schools in the world 2 years running by BusinessWeek. Only about 14 students are accepted annually to their bachelors program so this is definitely a hard school to get into, but you won’t regret it if you do.

Eindhoven University of Technology, Netherlands

With their school mantra being “Mind over Matter” we can already tell this school is dedicated to learning. Although it is not known for its graphic design program, the school is recognized for architecture and industrial design.

Florence Design Academy, Florence Italy

This design academy in Italy is focusing on the future of design, it has amazing international programs accepting many students from other countries to come and study in Italy. The school has some impressive galleries of past students work in fields like Graphic and Industrial design. Classes are equipped with the latest models of all your favorite programs, so look into this school if you are in the area.

Créapôle Ecole de Creation Manqagement, Paris France

This academy located in the heart of Paris trains designers to think ahead and focus on the future of their fields. All the basics are covered in this school and then some other alternative majors as well. This is a great school for those who want to or already do live in France, so make sure to check it out if you are interested.


Asia

National Institute of Design, India

Our first Institute in Asia was recently rated one of the top 25 Schools on the continent. The NID focuses in providing its students with the very best design programs. They even offer some postgraduate work in 14 different design fields. The school only consists of about 300+ students, so it is a difficult one to get accepted into.

The Hong Kong Polytechnic University, Hong Kong China

The core values of this institute are centered around what they call Humanistic Designs. The university preps its 1200 students to become strategic thinkers in regards to their art. This school has taught many now prominent designers which you can view here.

Tongji University, Shanghai China

Even though this university is in China it offers a broad range of international programs. While its main art focus is in architecture it still offers classes for advertising, graphic design, and animation.

MIT’s Institute of Design, Maharashtra India

This 25-acre campus features one of the best design schools in India. The university explains what it means to be a designer and then teaches the students how to be a good artist, as well as a thinker. The school features all the major design fields and also focuses on making their students as well rounded as possible.


Australia

Australian Academy of Design, Melbourne Australia

The Australian Academy of Design will give you a wide selection of majors to choose from in the art field. Each discipline has its own bachelors program and a strong curriculum surrounding it, this school immerses the student in a great environment. The school also supports international students, so it is a plus for anyone who wants to study in Australia.

Curtin University of Technology, Perth Australia

This massive school holds a whopping 44,000 students but it is considered to be one of the best design schools in Australia. This university also offers an international program for overseas students, and its current courses focus on Photography, Graphic Design, and even Jewelry. This is another great choice if you are in the area and want to go to a design school.


More Information

If you are interested in checking out more design universities in your area please use this great directory created by Core77.