In this guide you’ll learn how to downgrade iOS 4.2 to iOS 4.1 / 4.0.1 on iPhone 4, 3GS, 3G and iPod Touch 4G, 3G, 2G. Follow the steps below to downgrade iOS 4.2 to 4.0.1/4.0 firmware on iPhone and iPod Touch.
iOS 4.2 is not jailbreakable ATM. So, if you want to jailbreak iPhone 4, 3GS, 3G or iPod Touch 4G 3G, 2G then you MUST downgrade to iOS 4.1 or 4.0.1 first. iOS 4.1 jailbreak is expected soon via GreenPois0n.
In this guide we’ll discuss following two methods to downgrade iOS 4.2 iPhone / iPod Touch firmware:
- Using TinyUmbrella (Recommended)
- By Editing Hosts file
IMPORTANT: iPhone 4, iPhone 3GS, 3G, iPod Touch 4G, iPod Touch 3G, 2G users MUST have SHSH blobs saved for 4.0.1/4.0 firmware in order to downgrade from iOS 4.2.
How to: Save SHSH blobs for iPhone, iPod Touch
How to Downgrade iOS 4.2 to iOS 4.1, iOS 4.0.1
Download your desired firmware for which you’ve SHSH blobs saved and want to downgrade to:
Method 1: Using TinyUmbrella
Download TinyUmbrella from the link below:
If you’ve SHSH blobs saved on Saurik’s server via Cydia, download them into your computer first. To do that:
- Connect your device, Fire up the TinyUmbrella and Check mark the Advanced Options.
- Select your device, firmware (the one for which you’ve SHSH saved at Cydia; 4.1, 4.0.1 or older) and Cydia as Location.
- Hit the save My SHSH button. that’s it.
Step 1 – DFU Mode
Put your iPhone into DFU Mode (How to: enter DFU Mode)
Step 2 – Start TSS Server
- Run the TinyUmbrella
- Hit the Display SHSH button to confirm that downloaded SHSH blobs has been cached by TinyUmbrella for 4.1, 4.0.1 or older. (If you already have them in your PC, drag and drop the SHSH blobs in the TinyUmbrella window then hit the display SHSH blobs button to confirm).
- Then hit the Start TSS Server button.
Step 3 – Restoring the Firmware
- Now Open the iTunes.
- Hold down the Shift (Windows)/Alt (Mac) key and hit the Restore button.
- Select the downloaded firmware (iOS 4.1, iOS 4.0.1 or older) and let the restore process complete.
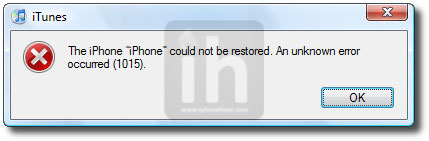
iTunes will bring up error 1015, 1013 or 1011 message. Don’t worry, it’s normal. You’ve successfully downgraded your iPhone/iPod Touch firmware.
Step 4 – Getting Out of Recovery
Now in order to get out of recovery mode, hit the “Kick Device Out of Recovery” button on TinyUmbrella right below the Start TSS Server button or you can also use RecBoot. That’s it!
__________________________________________________________________________________
Method 2: Edit Hosts File
**We assume that you’ve SHSH blobs saved via Saurik’s server.
Download your desired firmware for which you’ve SHSH blobs saved and want to downgrade:
Step 1 – DFU Mode
Put your iPhone into DFU Mode (How to: enter DFU Mode)
Note: Apple is currently signing iOS 4.1. If you’re downgrading to iOS 4.1 then you can skip Step 2 and continue from Step 3. Once Apple stops signing iOS 4.1, Step 2 will become compulsory for iOS 4.1 as well. If downgrading to iOS 4.0.2, 4.0.1 or 4.0, you MUST follow Step 2.
Step 2 – Editing Hosts File
Now we are going to redirect iTunes from Apple Servers to Saurik’s server.
———————————-
Windows:
Go to C:\Windows\System32\drivers\etc\ and locate hosts file.
Open the hosts file in Notepad.
NOTE: Win 7 and Vista users MUST run Notepad with admin privileges. Right click on Notepad app and select Run as Administrator.
Mac OS X:
Go to \etc\ directory and locate hosts file. Copy it on your desktop
Open the hosts file in TextEdit.
———————————-
Add the following line at the end of the hosts file and then save and close the file:
74.208.105.171 gs.apple.com
Mac OS X users needs to copy the edited hosts file from desktop back to /etc/ directory and replace the older one.
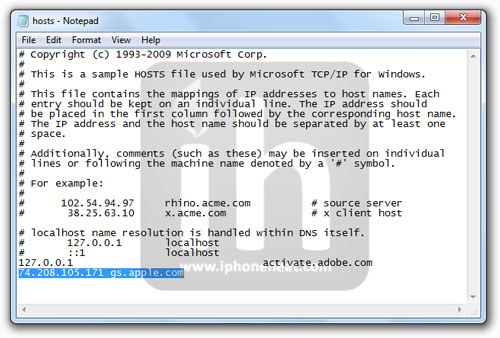
(Click to enlarge)
Step 3 – Restoring the Firmware
- Now Open the iTunes.
- Hold down the Shift (Windows)/Alt (Mac) key and hit the Restore button.
- Select the downloaded firmware (iOS 4.1, iOS 4.0.1 or older) and let the restore process complete.
iTunes will bring up error 1015, 1013 or 1011 message. Don’t worry, it’s normal. You’ve successfully downgraded your iPhone/iPod Touch firmware.
Step 4 – Getting Out of Recovery
Now in order to get out of recovery mode, hit the “Kick Device Out of Recovery” button on TinyUmbrella right below the Start TSS Server button or you can also use RecBoot. That’s it!
You must now remove 74.208.105.171 gs.apple.com line from the host file and save it. Doing this will let iTunes to prompt you about future updates from Apple.
Jailbreak iOS 4.0.1
How to: Jailbreak iPhone 4 iOS 4.0.1
How to: Jailbreak iPhone 3GS, 3G iOS 4.0.1
How to: Jailbreak iPod Touch 3G, 2G (MC, non-MC) iOS 4.0.1
You can follow us on Twitter, Join us at Facebook, and also Subscribed to RSS Feed to receive latest updates.


 Tonight is the first-ever
 Personally, I consider Apple’s Bluetooth