28 Best Brush Fonts (Script, Paint, and More!)

Find the best brush fonts handcrafted by pro designers. Check out this list for great inspiration.

28 Best Brush Fonts (Script, Paint, and More!)

You can achieve wonders with a spectacular brush font. They make the perfect addition to any wedding invitation or a compelling header for your website.

Handcrafted with expertise, these fonts are stunning and original. So grab the tools you need from Envato Market and Envato Elements.

Use these incredible fonts on posters, websites, and more. Get exceptional handcrafted typefaces that are ready to go for your projects.

Want to try these fonts? Sub one out in this fun Hand-Lettered Card tutorial by Elizaveta Akimova.

Taksim Brush Font

Let’s start with this awesome brush script font, Taksim. Pair it with a stunning golden sheen like the image below. This cool handwritten font is professional and memorable. It includes two font alternatives and an authentic dry brush style. Visit the preview link to test it out!

Taksim Brush Font

Supreme Spirit Brush Font

This next brush font will put you in a creative spirit. Created by designer Cruzine, this super pretty font pack includes regular and color fonts, along with PSD and vector files. Add it to your collection for just under $15.

Supreme Spirit Brush Font

Nervous Brush Stroke Font

Feeling nervous about your marketing? Make an impact with an enigmatic type. The Nervous brush font can fit many creative brands. A handwritten typeface, this font works perfectly on both Mac and PC. Get four font files along with plenty of swash extras.

Nervous Brush Font

Chrei SVG Brush Font

Enjoy authentic calligraphy styles with the Chrei brush font. Especially made for logos, quotes, and typography projects, this font can certainly help your graphics stand out. Use it for magazine covers, website headers, and so much more.

Chrei SVG Brush Font

Holden Brush Font

This next awesome font duo is bold and firm. The Holden Brush has authentic dry brush textures and a very bouncy baseline. Level up your packaging design or stationery with its energetic vibe and imperfect textures. Try it out today!

Holden Brush Font

Flohart SVG Brush Lettering Font

Or test drive this next brush lettering font to see how it fits your style. Flohart looks as if it was just handwritten with a large marker or pen. Customize the look with any color or additional effects like shadows and more.

Flohart Svg Brush Font

Hysteria Brush Font

Need a cursive brush font like Hysteria? Featuring basic Latin characters, numbers, and symbols, this handwritten brush pack includes a web font and international language support. Create beautiful cursive quotes and titles in less time.

Hysteria Brush Font

Belvana Paint Brush Font

Belvana is a paintbrush font with OpenType features. It includes uppercase and lowercase letters with lots of personality and unique characters. Use it on posters, websites, or print designs for a bold new look. Check it out!

Belvana Brush Font

Rapstar Brush & SVG Font

Somehow designers can capture realistic brush textures like the ones in this stunning Rapstar font. This SVG color font works well on grunge and artistic projects. Instantly add a little grit and edge to any video title or brand name. Test it out with different words to see if it fits.

Rapstar Brush  SVG Font

Boomshell Brush Stroke Font

Make bombshell graphics with this illustrious brush font. Get three incredible versions, including a cleaner example with the textures removed. Handwritten and carefree, this font lets you mix and match the styles for a wonderful result.

Boomshell Brush Font

Never Brush Font

Or get messy with the super-realistic Never brush font. A strong, dry brush font with realistic textures, this type includes thick, all caps characters. The playful lettering can go with creative urban themes, apparel design, or rebellious projects. Add it to your collection.

Never Brush Font

Rallifornia Brush Calligraphy Font

Brush calligraphy fonts like the Rallifornia typeface are simply essentials. Created by designer MissinkLabStudio, this signature font makes any important title shine. Use it for your official blog logo or for brand new marketing material. Check it out!

Rallifornia Brush Calligraphy Font

Starshy Street Paint Brush Font

Not many brush fonts include realistic drips, so you should definitely make sure you grab up this Starshy street brush. Great for advertisements, social media posts, and more, this font pack includes tons of glyphs, ligatures, and web fonts.

Starshy Street Paint Brush Font

Mustang Brush Font

Easily install the Mustang handwritten brush font with OpenType features. Two regular styles are included, as well as an alternative web font for easier implementation. Create masterful calligraphic text with this unique brush script.

Mustang Brush Font

Black Ball Brush Stroke Font

This playful hand-lettering script resembles natural dry brush textures you would get from markers or ink pens. Use it for nearly any design project that could use a commanding font. Enjoy this all caps typeface with letters, numbers, and punctuation.

Black Ball Brush Stroke Font

Okami – Brush Font

Japanese brush fonts have inspired designers for ages, and the Okami font is no different. Let it help you create magical designs using its rough, bold letter style. Enjoy international language support and additional alternate styles.

Okami - Brush Font

Rodagila Brush Font

Make a powerful headline with the Rodagila brush font. Easy to install, this rough typeface was made completely by hand. It’s been made with a slightly contemporary feel, so you’ll be able to apply it to many modern projects. Get it for just $15.

Rodagila Brush Font

Harmony King – Brush Font

Fonts work together in harmony. The Harmony King brush font is pretty key for new designers. It creates elegant, loopy characters with a bouncy baseline we’re sure you’ll love. Add a calligraphy touch to your work with this exceptional font.

Harmony King - Brush Font

SREGALE Brush Font

This next textured font is reliable and professional. You can easily add it to your magazine designs or update your portfolios with a new logo. Get basic A-Z Latin characters as well as standard numbers and punctuation.

SREGALE Brush Font

Mombay Dry Brush Font

Transform any brand with a new font. The Mombay dry brush font might just be the perfect fit. Created by designer maulanacreative, this download includes two font files along with an additional web font. Use it on cards, invites, and more.

Mombay Dry Brush Font

Tucker Dry Brush Font

Get a fresh new take on typography. The Tucker Dry Brush font is a calligraphy typeface made by designer Khurasan. It offers multi-lingual support as well as a set pack of letters, numbers, and symbols. How will you use it for your projects?

Tucker Dry Brush Font

Mustache Brush Script

This next funny typeface almost resembles a funky mustache. A beautiful brush script, this font pack includes three font types for smooth and rounded text qualities. Use it on merchandise, social media, or more imaginative projects.

Mustahe Brush Script

Bubarz Brush Font

The Bubarz brush font packs a punch. It includes both light and bold line options as well as a unique handwritten style that looks like the real thing. Easily adapt it to your work using Photoshop, Illustrator, and more. Add it to your design arsenal today!

Bubarz Brush Font

Cyber Brush – Dry Brush Font

Need a great dry brush font for your album cover? Try the awesome Cyber Brush font. It’s the perfect match for powerful projects that could use a little edginess in their style. No special software is required, so just right-click the font files to install. Check it out!

Cyber Brush - Dry Brush Font

Dinamic Blow Brush Font

Want a dynamic brush font? This modern calligraphy typeface has spectacular textures and flow. It includes standard OpenType features along with letters, numbers, and additional ligatures. Grab it today!

Dinamic Blow Brush Font

Brush Attack Font

Or make an impact with the Brush Attack font. Especially made for compelling headlines and bold brands, this handwritten typeface looks wonderful on clothing, signs, and print design. Customize it with any color or gradient for a beautiful result.

Brush Attack Font

Ragtime – Brush Font

Get two awesome brush fonts that support multiple languages! Ragtime is an epic brush font duo that’s perfect for art and creative projects. It includes script and sans serif versions along with an additional web font. And it’s only $12!

Ragtime - Brush Font

Artsy Brush Font

The final paint brush font on this list is the wonderful Artsy brush typeface. Made by designer fopifopi, this authentic handwritten brush is stylish and impressive. Make amazing titles, websites, and stationery with very little software knowledge.

Artsy Brush Font

More Font Inspiration Templates

Handwritten brushes will always dazzle us with their authentic handmade aesthetics. Bookmark this list and remember to check out our text effect tutorials to create more amazing graphics with brushes like these.

Looking for more inspiration? Check out these articles:

Tried any of these assets? Let us know! Tell us your favorites in the comments.

{excerpt}
Read More

15 Best Royalty-Free Ambient Music Tracks of 2019

Bring a calm and atmospheric sound to your next multimedia project with the most popular ambient tracks of this year. The tracks offer a mix of soothing melodies, ethereal pads, and delicate drum beats. 

Ambient music tracks help bring a laid-back and feel-good vibe to your next audiovisual project. The ambient genre works well for lifestyle, travel, fashion, and advertisement videos.

In this article, I’ve compiled a list of the 15 best royalty-free ambient music tracks of 2019 that you will find on AudioJungle.

1. Inspiring Ambient

‘Inspiring Ambient’ is a royalty-free ambient track featuring a piano, synths, and percussion. Use this track in films, television, YouTube videos, and corporate videos.

2. Background Ambient

This beautiful ambient track is a moving and emotional piece for projects that need to convey motivation. A simple but elegant piano melody gives this royalty-free ambient track its main theme. 

3. Ambient Corporate Motivation Background

‘Ambient Corporate Motivation Background’ is an inspiring atmospheric track that is composed of gentle pianos and warm pads. Use this track in your next multimedia project and it won’t disappoint your audience.

4. Ambient Background Corporate

This royalty-free music track mixes in perfectly the different elements that an ambient song should have. Guitars, pianos, soft beats, and a feel-good atmosphere. Use this song in your next corporate project and any project that needs to set a pleasant tone. 

5. Serenity

‘Serenity Beautiful Lounge’ gives off a calm and relaxed atmosphere. In the track, you will find a lounge-style piano and subtle orchestral instruments that feed into a trip-hop drum groove. Give this unique royalty-free ambient song a listen. 

6. Chilling Mood

‘Chilling Mood’ contains an electric piano, synthesizers, and acoustic guitars that blend together seamlessly. This song is perfect for YouTube videos, corporate projects, and anything that needs a sense of sophistication and comfort. 

7. Warm Lounge

 ‘Warm Lounge’ is a royalty-free ambient track that is has a heavy house lounge influence. Create a warm atmosphere in your next multimedia project with the classic sound of a Rhodes piano, mysterious bells, and a house beat. 

8. Acoustic Guitar Solo

This track is played by a band consisting of an acoustic guitar, electric guitar, bass, and drums. This royalty-free ambient track can find its way into any multimedia project that needs to convey compassion. 

9. Waiting For The Light

Electronic drums, sweet guitar melodies, and ethereal pads make up this royalty-free ambient music track. This will work perfectly in your next corporate multimedia project.

10. Inspiring Piano Ambient

‘Inspiring Piano Ambient’ is a very uplifting, inspiring song with a steady drum groove that will complement innovative multimedia projects.

11. Corporate Minimal Technology Inspiring Ambient Uplifting Abstract

Start your next audiovisual project off with a bang. This royalty-free ambient track delivers a positive tone and keeps it going through the entire tack. Guitars, pianos, drums, and synths are the instruments found in this song. 

12. Documentary

‘Documentary’ is an inspiring track with a beautiful piano, industrial-like beats, and cinematic strings. This song will make for excellent background music, intro, or outro track for any project. 

13. Floating In Bliss

‘Floating In Bliss’ uses synthesizers and electronic drums to create a unique calm energy that is catchy. This royalty-free ambient music track is sure to catch your audience’s attention.

14. Pulse 

‘Pulse’  is an atmospheric ambient and electronica track that works as a non-intrusive background track for any YouTube video, travel video, and vlogs. 

15. Piano Technology

Last up on the list is an inspiring glitchy ambient electronic track that features a scintillating piano, atmospheric strings, spacey synths, and chunky drums. Add this royalty-free ambient music track to a project to draw in and keep an audience’s attention. 

Conclusion 

These 15 royalty-free ambient music tracks are just a small selection of the thousands of ambient songs available at AudioJungle, 

If you did not consider any of these music tracks for your audiovisual project, then there are plenty of other options from you to choose from on AudioJungle.

If you are looking to improve your own music production skills, then check out all the in-depth music and audio tutorials on Envato Tuts.

{excerpt}
Read More

CSS Transitions – Tutorial and Examples

Since the release of the CSS3 specification, transitions are allowing web designers and front-end web developers to create stunning CSS animations in pure CSS, without using JavaScript. This quick CSS reference guide explains how to use transitions properties and provides stunning, ready-to-use examples of what you can do with CSS3 transitions. If you need a …

CSS Transitions – Tutorial and Examples Read More »

How to Make Your Own T-Shirt Design in 5 Easy Steps

Final product image
What You’ll Be Creating

Always wanted to make a DIY T-shirt design, but lacked the courage since you didn’t actually have the required tools or skills to design your T-shirt?

Well, all of that changes today, since I’m going to show you how to design your own T-shirt using Placeit’s online T-Shirt Design Maker.

From finding a T-shirt design to learning how to make your own T-shirt design, the entire process is as simple as it can get, as we will see in the following moments.

So, if you want to learn how to make T-shirt designs so that you can design your own tee shirt line, this video was meant for you.

Follow along with us over on our Envato Tuts+ YouTube Channel:

1. What Is Placeit?

Before we begin, I wanted to take a couple of moments and quickly talk about what Placeit is and how it can do all the hard work for you.

If you aren’t a designer yourself, most of the time that means that you won’t have access to the tools and resources that designers usually use, such as Adobe Illustrator, Adobe Photoshop, Affinity Designer, Sketch, etc.

But what if sometimes you actually need to create something yourself, but don’t feel like spending a lot of money on a graphics suite that you probably won’t use all that often?

Well, when this happens, Placeit can prove to be the perfect fit, since it comes with a set of dedicated online tools that help you create professional banners, mockups, logos, etc. using just a couple of clicks.

Let’s see how easy it is to design your own tee shirt using Placeit’s custom T-Shirt Design Maker.

design own t shirt

2. How to Access the T-Shirt Design Maker

Before we can begin working on the actual design, we first have to navigate to the correct section of the website in order to be able to access the T-Shirt Design Maker.

To do so, we’re going to be using the horizontal navigation menu by heading over to Designs, which will bring up a submenu as we hover over it.

Here, we’ll want to look for T-Shirt Design Templates, which should be the first option that we’ll see.

design your own tee shirt

When we click on the link, the website will redirect us to a new page, on the left side of which we’ll find the Tags menu. This will allow us to filter the available designs using the provided categories.

diy t shirt design

3. How to Use the T-Shirt Design Maker to Create a Custom Tee Design

So now we’ve seen how easy it is to find the tool, let’s take a look at the actual process of using it.

The first step that we need to take is to decide what design we’re going to be using for the actual T-shirt. As you’ve probably seen, there are quite a large number of really good-looking designs that we can choose from, depending on what we’re aiming for. Here are some that I really liked.

Mother’s Day T-Shirt Design

how to make t shirt design
Mother’s Day Tee Design

Illinois T-Shirt Design

make your own t shirt design
Illinois T-shirt Design

Illustrated Fox T-Shirt Design

how to design your own t shirt
Illustrated Fox T-Shirt Design

Business Cat T-shirt Design

design your own tee shirt
Business Cat T-Shirt Design

Valentine’s Day T-Shirt Design

design your t shirt
Valentine’s Day T-Shirt Design

For this example, I decided to go with this retro-looking design, which has a lot of potential, as we will see in the following moments.

retro sports t-shirt design
Basketball T-Shirt Design

Once we’ve decided which design template we’re going to be using, it’s time to go through the process of customizing it.

Quick tip: no matter what template you end up using, the layout will mostly be the same. On the left side you’ll have all your text-related options, while on the right one you’ll find all your background- and shape-related ones.

Step 1

We’re going to quickly overwrite the default provided text using the two input fields, and then adjust their fonts and colors using the dropdown boxes.

Since I’m going for a “funky” vibe, I went with Lakki-Reddy for the font and white for both colors.

As you can see, we can also add another text line using the Add Text button, but for this example, we’re going to keep to the default number.

example of adjusting the text

Step 2

Once we’re done working on the text part of our design, we can move over to the right side of the page, where we will adjust the Background by removing it completely so that our design can be used on any colored fabric (any except pure white ones).

By doing so, the tool will save the final design as a PNG file with transparency enabled, which will make it more versatile when used on non-white T-shirts.

example of setting a transparent background

Step 3

Next, we’re going to customize our Main Graphic by replacing the basketball with a hippy heart, and then setting its color a slightly lighter orange.

adjusting the main graphic

Step 4

Finally we have our last option, called Flag, which allows us to pick a different theme for the horizontal stripes, or even remove them completely using the No Image button.

Personally, I really like the default flag, so I’m going to stick with that version for the current example.

example of available flag options

Step 5

Since the template supports interactive editing, we can easily adjust the position and size of some of the text and shapes. Just select them, which will bring up their bounding box, and then click and drag them to another location, or drag the bounding box’s squares outwards or inwards, depending on what you’re trying to achieve.

For the current example, I’m going to enlarge the main graphic just a little bit, so that it will draw more attention to itself.

If for some reason you’re not happy with your changes, you can easily undo them using the Reset Layout button.

example of resizing the main graphic

4. How to Export the Final Design

Once we’re happy with the final banner design, we can easily download it by clicking on the Download button, which will charge us a small fee each time we use the banner template generator, or we can choose to go with a monthly subscription plan, which will get us full access to all the templates.

example of downloading the final design

Now that you’ve downloaded the custom created design, you might be curious to see how it would look like on an actual T-shirt.

Well, if you scroll down to the bottom of the page, you’ll quickly see that Placeit gives you the ability to do so using its custom clothing mockups, which will give you a quick preview of your current design.

quick mockup example

If you want to explore the entire range of available T-shirt mockups, you can head over to the T-Shirt Mockup Generator page, where you can upload your design and get a quick preview of how it would look when applied to all the different mockups.

example of using the t-shirt mockup generator

Once you’ve found a design that you like, you can click on it to further customize it, and then go through the same process of acquiring it.

example of using a custom t-shirt mockup

Since I really liked how this one looked, I ended up using it for the final design presentation, which as you can see really makes the design pop.

design applied on mockup

Great Job!

As always, I hope you had fun working on this little project, and most importantly managed to learn something new and useful during the process.

If you have any questions, feel free to post them within the comments section and I’ll get back to you as soon as I can!

Expand Your Creative Skills!

Just finished going through this quick tutorial, and feel like learning more of what it takes to become a visual creative? Well, if that’s the case, then you’re in luck since I’ve put together a little list which should get you up and going in no time!

{excerpt}
Read More

Add Dramatic Rain to a Photo in Photoshop

Final product image
What You’ll Be Creating

In this tutorial, I’ll demonstrate how to add a dramatic rain effect to a photo in Photoshop. While rain effects are not new to Photoshop, I will go a step further and show you how to make the image more photo-realistic by adding reflections and small puddles. Let’s get started!

Get inspired! Create realistic rain fast with Photoshop Actions from Envato Market.


Tutorial Assets

The following assets were used during the production of this tutorial. Please download them before you begin or find alternatives if they are not available.


1. How to Set Up the Base

Step 1

Open the Walk on pier image in Photoshop. Double-click the layer to unlock it and name it “Base.”

The first step to add realistic rain is to have convincing clouds. Go to File > Place… and place Cloudy Scotland at the top of your canvas. You will need to stretch the image a bit so that the clouds fully cover the sky. To do so, hit Command/Control-T to enter Free Transform mode and input 120% for the height. Hit Enter to confirm, name the layer “Sky”, and place it below your “Base” layer.

resize image horizontally
rearrange layers

Step 2

Using your favourite tool, create a selection of the sky (I used the Quick Selection Tool). Select your “Base” layer, hit Command/Control-G to group it, and create a mask from the selection in order to hide the sky.

select sky
add layer mask to remove sky

I suggest you take the time to refine your mask. This will help achieve a photo-realistic result in the end. To do so, select your group’s mask and use a black or white Brush (B) to paint in and out the parts you desire.

clean selection

Since the sky still has a little bit of color, create a Black & White adjustment layer to make sure it fits your base layer.

convert image to black and white

Step 3

When it rains, the air gets really humid, resulting in fog that hides faraway elements. To create this effect, use a soft large Brush with a gray color (#C3C3C3 in this case) and draw a straight line on the horizon (hold Shift when painting to draw in a straight line). Set the layer Opacity to 50%. You can then duplicate the layer (Command/Control-J) and stretch it vertically to soften the fog even more. Name both layers “Fog” and place them below the group.

add fog
add softer fog
fog layers

Finally, create a Curves adjustment layer to darken the image. Place it above everything else.

add curves adjustment
darken the sky
make sky darker photoshop

2. How to Generate the Rain

Step 1

The usual method to generate rain is to combine the Add Noise and the Motion Blur filter. Start by creating a new layer (Command/Control-Shift-N) and filling it with black (D, then Alt-Backspace), and then go to Filter > Noise > Add Noise. Scale the noise up to 400%.

add noise
resize noise

Then go to Filter > Blur > Motion Blur and give the noise a slanted motion blur. Hit Command/Control-M to bring up the Curves adjustment panel and add contrast to your layer. Finally, switch your layer to Screen and name it “Rain.”

add motion blur
darken the blur
create rain effect
change blend mode to screen
add rain to photo

Now the key to get a more realistic and more interesting is randomness. You see, rain doesn’t usually fall in a perfectly straight line because of the wind. To get this randomness, we will have to repeat the process a few times with a varying size of grain and angle of motion blur. In this case, I did the process with noise scaled to 250% and with a 79° blur.

add more rain

And once again, this time with a 600% scale and 60° blur.

change rain direction

Finally, I simply generated noise and darkened it a lot. Name this layer “Noise.”

change contrast
add dark noise

Step 2

Set all your “Rain” layers to Screen, and unhide them.

set layers to screen mode

Now this is a bit too much. To fix this, give each of the rain layers a mask, select it, and go to Filter > Render > Clouds. This will reduce the effect and give the rain a bit more randomness. Also, set the “Noise” layer to 20% Opacity.

lower opacity
add grain

3. How to Create Water Puddles and Reflections

Step 1

We managed to create the falling rain. However, our image doesn’t look realistic yet. Why is that? Well, when you look at rain photos, you realise that the raindrops are usually barely visible. What is visible, however, is the darker, soaked and reflective ground, which is the most important and the hardest part of the process.

The first step is to isolate our image’s floor. Using your favorite tool, create and fill the floor with a thick color on a new layer.

select floor

Once you are satisfied with your work, Command/Control-Click on the layer thumbnail to retrieve its selection, create a new empty group, and create a mask out of the selection. Name the group “Floor Mask.”

add layer mask to floor

Step 2

Duplicate your “Base” layer and place it in your “Floor Mask” folder. Go to Filter > Filter Gallery and select Bas Relief. Give it the values indicated in the example below and press Enter. Give it a Curves adjustment to darken it a little bit (you can clip it by holding Alt and clicking between the two layers). Set the layer to Color Dodge.

add bass relief effect
change contrast
add water to floor

Once again, we’ll give the layer a cloudy mask in order to add randomness. Let’s start by creating a new layer filled with clouds. Hit Command/Control-T and scale it down below the horizon.

Still in Free Transform mode, right-click and select Perspective. Move the bottom corner handles to roughly match the perspective of the planks. Hit Command/Control-A to select everything, and Command/Control-X to cut it. Give the layer you created in the last step a mask, select the mask in the Channels panel, and paste the clouds in.

change perspective of texture
add texture in perspective
add texture to mask
add mask to layer
add puddles of water

Step 3

Since our floor is soaked, it should reflect the things above it, including the sky. To achieve this, duplicate your “Sky” layer and place it inside the “Floor Mask” folder. Flip it vertically (Command/Control-T, right-click, and select Flip-Vertical) and set it to 15% Opacity. Notice that in this step I brought back the previous Black & White filter above the “Pier” group.

add reflection of sky
copy sky layer

Step 4

Now we’ll need to retrieve the selection from the area between the sky and the floor. To do so, retrieve the selection from the “Floor Mask” group’s mask (Command/Control-Click). Then, invert the mask (Select > Inverse), and Command/Control-Alt-Click on the “Pier” group’s mask. With the selection active, duplicate (Command/Control-J) your base layer in order to get a copy of this particular area. Name the new layer “Reflection.”

select sky
select people
copy people

Now the next step is a little bit tricky. In order to help yourself, you should hide all effects. You can also create a new layer below “Reflection”, fill it with red (Edit > Fill), and set it to 50% Opacity.

add red mask

Flip your layer vertically and place it so the feet of the couple on the left match. Using the Rectangular Marquee Tool (M), create a selection of the wall to the left and bring it up. With the selection still active, use the Skew transformation mode (Command/Control-T, right-click > Skew) to make the reflection mirror the wall’s perspective.

reflect people vertically
skew reflection
change perspective of reflection

Repeat the process for the following wall.

create realistoc reflection

Using the Lasso Tool (L), create a selection of the man and the child. Move them down so the feet match.

add reflection in water

Keep going until you get the following result.

make floor reflective

Step 5

You can now delete the red layer and place the “Reflection” layer inside “Floor Mask”, above the “Sky” layer, and set it to Multiply.

Now you will notice there are a few places we need to work on a bit more.

create photoshop reflection

Using the Smudge Tool (located under the Blur Tool), you can smudge back the parts of the reflections that are missing. For the area between the legs of the couple on the left, you can simply paint with a gray brush.

fix the mistakes

In this case, I also gave the layer a mask and softly painted out parts of the reflection. When you are done, you can bring back the effects and lower the layer Opacity to 35%.

add layer mask to reflection
final reflection

Step 6

We can enhance the floor a bit more. Select every layer below the “Black & White” layer, duplicate, and merge them. Apply the Reticulation Filter (from the Filter Gallery) and give it the values as shown in the example. Hit Command/Control-M to bring up the Curves panel and increase the layer’s contrast a bit. Finally, place the layer inside the “Floor Mask” group and name it “Reticulation.”

copy merged
add reticulation filter
darken the ffect
add dark grain
change blend mode

Voilà! We’re done! In case you missed anything, here is what your final layer setup should look like.

layers list

You can also compare the final image with the base template and appreciate the formidable work you’ve done!

rain effect comparison

Conclusion

In this tutorial, we showed you how to quickly add a dramatic rain effect to your photos. In addition, we also showed you how to add reflections and puddles to make the effect more realistic.

how to add rain to photo photoshop

Premium Actions From Envato Market

Love photo effects? Explore our massive collection of premium Photoshop Actions on Envato Market and Envato Elements to create rain, light flares, and so much more! Check out some of our favorites below!

Gif Animated Rain Photoshop Action

Create a cinematic experience with this wicked animated rain Photoshop action. This action not only generates realistic rain, but applies a free flowing animation to your photos. Use it to create trendy cinemagraphs in only a fraction of the time!

Gif Animated Rain Photoshop Action

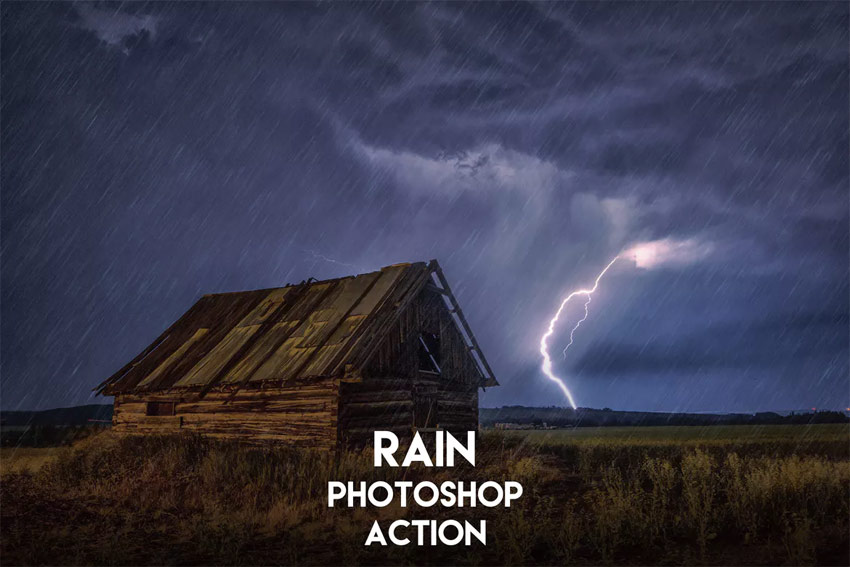
Rain Photoshop Action

Make a realistic rain effect in just a few minutes! Great time-saver when
you need to get a client’s work done or make a gift for a friend—or just for personal use and fun!

Rain Photoshop Action

Realistic Rain Photoshop Action

This is an effect that creates realistic rain on your photos. The action includes drops of rain, splashing and dripping on your object.
The composition is complemented by the background, with beautiful clouds that
are generated randomly, so each time you will have a unique background.
This effect includes three directions of rain.

Realistic Rain Photoshop Action

Rain Effect Photoshop Action

Create rain effects in just a few seconds! Every time you run this action, you will get a different result.

Rain Effect Photoshop Action

Rainstorm Photoshop Action CS3+

Just brush the area over your object and play the action! You will get a rainy effect in a few minutes and clicks.

Rainstorm Photoshop Action CS3

{excerpt}
Read More

Tutorial: Create an editable table with jQuery and Pure CSS

Using open-source components makes it really easy and quick to build powerful front-end elements for websites or apps. In this tutorial, you’ll learn how to easily create an editable table using PureCSS and jQuery. There’s a demo available for this tutorial, click here to see. Getting Started The very first thing to do, indeed, is …

Tutorial: Create an editable table with jQuery and Pure CSS Read More »