Category: Tutorials
Tutorials,freelance,projects,joomla,php,mysql,wordpress,blancer.com
How to Safely Store Digital Photos With the 3-2-1 Method for Lightroom
{excerpt}
Read More
How to Create an Animated Text Effect Photoshop Action
In this tutorial, we will create a VHS-style 3D Photoshop effect for text layers using smart filters, gradient fills, and video overlays.
You can find plenty of Photoshop text actions on GraphicRiver, and if you want to create this 3D text effect in just a few simple clicks, then check my Animated VHS Text Effect Action created the same way.

Tutorial Assets
- Bebas Neue Font or any other similar font you want to use for this effect
- VHS Video Overlay
1. How to Prepare the Document
Step 1
Press Control-N to create a new document and use the following settings:
- 1920 x 1080 px
- 300 dpi

Step 2
Create a new layer using Shift-Control-N and name it “placeholder”.

Step 3
Right-Click on the layer and select Convert to Smart Object.

Step 4
After that, Right-Click > Edit Contents on the “placeholder” layer.

Step 5
Click T to open the Horizontal Type Tool and create any text using the Bebas Neue font with a size of 84 pt. After that, close and save the placeholder.

Step 6
Right-Click on the smart object, select Duplicate, and create two duplicates of the layer.

Step 7
Rename the layer to “text” and “glow” and make the first smart object Invisible.

Step 8
Select the background layer and Fill it with #141414 color using Shift-F5.

2. How to Create VHS Text Effects
Step 1
Now let’s start to create our text effects. Select the “Text” layer and then go to Filter > Blur > Gaussian Blur and set the Radius to 2 px.

Step 2
After that, go to Filter > Blur > Motion Blur and use the following settings:
- Angle: 90°
- Distance: 60 px

Step 3
Go to Filter > Distortion > Wave and use the following settings:
- Number of Generators: 1
- Wavelength: 1 and 298
- Amplitude: 1 and 6
- Type: Sine

Step 4
Now we need to create layer style effects. Double Click on the Layer and then go to Gradient Overlay.

Step 5
Use the following settings for your gradient:
- Blend Mode: Normal
- Opacity: 100%
- Angle: -180°
Set the following colors for your gradient: #fc3d4f ; #fd7335 ; #f57c21.

Step 6
After that, you need to add Gaussian Blur and Wave Effect with the same parameters to the “glow” layer.

Step 7
Double-Click on the layer and add an Outer Glow effect with the same gradient as we use before and the following settings:
- Blend Mode: Screen
- Opacity: 100%
- Spread: 4%
- Size: 12 px

Step 8
Change the Fill setting of the layer to 0%.

Step 9
Select your smart objects while holding Shift, and then hit the Create a New Group icon and name it “Main Text”.

Step 10
Create two duplicates of the group and name them “Color Shift 01” and “Color Shift 02”.

Step 11
Double-Click on the “Color Shift 01” layer and Uncheck the Green and Blue color channels.

Step 12
Double-Click on the “Color Shift 02” layer and Uncheck the Red and Green color channels.

Step 13
Move the “Color Shift 01” group of layers 4 px to the left while holding Shift.

Step 14
Move the “Color Shift 02” group of layers 8 px to the right while holding Shift.

3. How to Create Overlaying Elements
Step 1
Now we need to create “TV Lines” overlay textures. Create a new layer using Shift-Control-N and Fill it with #282828 color.

Step 2
Go to Filter > Filter Gallery > Sketch and select Halftone Pattern. Use the following settings:
- Size: 2
- Contrast: 50

Step 3
Create a duplicate of the layer and then move it 1080 px up while holding Shift.

Step 4
After that, you need to select both of the layers and move them 1080 px up again.

Step 5
Create another duplicate of the “layer 1” and then move it 1080 px down.

Step 6
Select all three layers and Right Click > Merge Layers. Name it “TV Lines”.

Step 7
Change the Blending Mode of the layer to Overlay and the Opacity to 25%.

Step 8
Go to File > Place and then select the MP4 file from the attachment of this tutorial. Resize and rotate it to the borders of the document.

Step 9
Change the Blending Mode of the layer to Screen.

Step 10
Select your overlay layers while holding Shift, and then hit the Create a New Group icon and name it “Video Overlays”.

Step 11
Now we need to create gradient overlays for our video. Go to Layer > New Fill Layer > Gradient and create two gradients. Name them “Light Leaks 01” and “Light Leaks 02”.

Step 12
Double-Click on the first gradient fill in the Layers panel and use the following settings:
- Style: Linear
- Angle: -35°
- Scale: 232%

Step 13
After that, Left-Click on the Gradient in the same panel and create a new gradient with the following settings:
-
Color:
#ff7511, Location: 0%; Opacity: 100% - Location: 35%; Opacity: 82%
- Location: 51%; Opacity: 0%
-
Color:
#e90f43, Location: 61%; - Location: 67%; Opacity: 82%
-
Color:
#f3005e, Location: 100%; Opacity: 100%

Step 14
Double-Click on the second gradient fill in the layer panel and use the following settings:
- Style: Linear
- Angle: -171°
- Scale: 232%

Step 15
After that, Left-Click on the Gradient in the same panel and create a new gradient with the following settings:
-
Color:
#315934, Location: 0%; Opacity: 100% -
Color:
#ac9102, Location: 100%; Opacity: 100%

Step 16
Change the Blending Modes of both gradients to Color Dodge.

Step 17
Select your overlay layers while holding Shift, and then hit the Create a New Group icon and name it “Light Leaks”.

4. How to Create the Animation of the Layers
Step 1
Now we are ready to start creating our animation. Go to Window > Timeline and click on the Create Video Timeline icon.

Step 2
Reduce the duration of the timeline to 05:00 by moving the icon shown below.

Step 3
Now you need to create the first keyframe. Select the “Text” layer and click on the Timer icon near Transform to create the first Keyframe.

Step 4
Move the Time Indicator to 0:00:00:10 and then move the layer 15 px up while holding Shift.

Step 5
Move the Time Indicator to 0:00:00:20 and then move the layer 15 px down while holding Shift.

Step 6
Select the keyframes we just created while holding Shift and then Right-Click > Copy.

Step 7
Move the Time Indicator to 0:00:01:00 and then hit the Keyframe icon.

Step 8
After that, Right-Click > Paste on the last keyframe to duplicate the keyframes we created before.

Step 9
Create duplicates of the keyframes until you fill the whole timeline.

Step 10
Select all the keyframes of the “text” layer and paste them for the “glow” layer.

Step 11
Select the “TV Lines” layer and click on the Timer icon near Position to create the first Keyframe.

Step 12
Move the Time Indicator to 0:00:05:00 and move the layer 2160 px down while holding Shift.

Step 13
Select the “Light Leaks 01” layer in the timeline panel and reduce the size of the clip to Start: 02:00 and Duration: 02:00.

Step 14
Select the “Light Leaks 02” layer in the timeline panel and reduce the size of the clip to Start: 03:00 and Duration: 02:00.

Step 15
Click on the Transitions icon and select Fade.

Step 16
Drag and drop the Fade transition to the start and the end of the “light leak 01”.

Step 17
Right-Click and change the duration of both Fade transitions to 0.97 s.

Step 18
After that, you need to apply the same transition with the same duration to the second “light leaks” layer.

Step 19
Create a new layer using Shift-Control-N, and then fill it with black color and name it “Fade In/Out”.

Step 20
Change the Fill of the layer to 0%.

Step 21
And finally, Drag and drop the Fade With Black transition to the start and the end of the “Fade In/Out” layer.

5. How to Render the Animation as a Video
Step 1
Our animation is now ready for rendering. Click on the icon in the upper right corner and select Render Video.

Step 2
Set the following settings in the Render Video panel:
- Format: H.264
- Size: Document Size
- Range: All Frames

Awesome Work, You’re Now Done!
Your video is ready! In this manner, we can create an animated VHS text effect in Adobe Photoshop using the smart objects, gradient fills, filters and video overlays.
I hope you enjoyed this tutorial, and if you want to create this effect using Photoshop actions, you can check my Animated VHS Text Effect Action on GraphicRiver, which will help you to create this text effect in a few simple clicks.
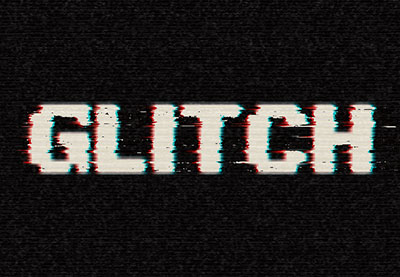
 GlitchHow to Create an Editable Animated RGB Glitch Effect in Adobe PhotoshopMohammad Jeprie
 Text EffectsHow to Create an Easy Digital Glitch Text Effect in Adobe PhotoshopRose
 AnimationHow to Create a Glitch Animated Gif Action in Adobe PhotoshopIvan Gromov
 GlitchHow to Create a Set of Glitches in Adobe PhotoshopLaura Keung

{excerpt}
Read More
Top 7 iOS 13 Features for iPhone
Apple has already released iOS 13 with new features, major improvements and security changes for iPhone and iPod Touch. Check what are Top iOS 13 features for iPhone. Another day, another fresh…
[[ This is a content summary only. Visit my website for full links, other content, and more! ]]
iOS 13 Is available, Install it now on your iPhone
As expected Apple released the final version of the iOS 13 with amazing new stuff for you to play with. iOS 13 has a list of new features like Dark Mode, Silent unknown callers, revamped photos app,…
[[ This is a content summary only. Visit my website for full links, other content, and more! ]]
Top 7 iOS 13 Features for iPhone
Apple has already released iOS 13 with new features, major improvements and security changes for iPhone and iPod Touch. Check what are Top iOS 13 features for iPhone. Another day, another fresh…
[[ This is a content summary only. Visit my website for full links, other content, and more! ]]
iOS 13 Is available, Install it now on your iPhone
As expected Apple released the final version of the iOS 13 with amazing new stuff for you to play with. iOS 13 has a list of new features like Dark Mode, Silent unknown callers, revamped photos app,…
[[ This is a content summary only. Visit my website for full links, other content, and more! ]]
18 Top Business Video Intro (Opener) Templates for After Effects
{excerpt}
Read More
21 Top Corporate After Effects Video Templates for Business
{excerpt}
Read More
49 Epic Tattoo Fonts
Whether you’re looking to get a tattoo for the first time or you’re a total tattoo snob, choosing the right font for your designs takes patience. So today we present you with 49 insanely epic tattoo fonts we’re sure you’ll love.
49 Insanely Epic Tattoo Fonts
With a selection of fonts curated from GraphicRiver and Envato Elements, this collection features 49 awesome tattoo fonts you’ll definitely want to incorporate into your next ink.
Want that extra personalized touch? Enlist the help of the professional designers at Envato Studio to create a custom tattoo design just for you!
Old English Fonts
Do you love tattoo design? We sure do! From wild decorative fonts to stunning handwritten scripts, we’ve got a font to cover all of your tattoo needs.
Enjoy this eclectic collection below and let us know your favorites in the comments!
The Razor Blade Font
This razor blade font is a design inspired by elegant handwriting. This Old English calligraphy font captures the unique style of the past while adding a new modern twist. Enjoy uppercase and lowercase styles you can use in any design program.

BloodOnMyBlade Font
Tattoo
lovers, beware. This font will turn you into a badass in no time.
Inspired by the west coast style of tattoos, this font type features an
aggressive, gothic design. Included in this set is a complete package of
letters, numbers, and punctuation.

Afterkilly Black Letter
This new blackletter font was made with creative designers in mind. Use it as the official typeface for your next book, or to kick off a new brand. Included in this download is a full suite of letters and numbers as well as punctuation.

Ancient Sword Font
Wield your words like an ancient sword. This next magnificent font is sharp and alluring. It combines several vintage typographic styles together and includes unique details and additions to each letter. Just visit the link to try it out!

Black Vision Font
Do
you have a vision of black for your next tattoo? Well, try this Black
Vision font on for style. This set includes an elegant vintage feel, and
features a full set of letters, numbers, and punctuation to complete
your designs.

Sirunian Typeface
Evolve with the right typeface. The Sirunian font is bold and strong. It captures the look of vintage architecture and works great for headlines, websites and more. Grab it today for just $15. Try it out!

Victory Typeface
Enjoy a wonderful victory with next brilliant font. Victory is an ornamental typeface inspired by vintage Victorian writing. It comes with standard upper and lowercase letters as well as additional numbers and symbols. Add it to your collection!

Tattoo Script Font
What better way to start off this collection than with an amazing tattoo font? This awesome script font was inspired by the swirls of traditional tattoos and a unique hand lettering style. Find packaged into this typeface a complete set of uppercase and lowercase letters, numbers, and even a bonus set of borders for your convenience.

Aseina Typeface
If you’re looking for a unique font with that traditional vintage flair, then try the Aseina typeface for your designs. This font features a beautiful elegant feel, with the perfect mix of letters, numbers, and glyphs for that one-of-a-kind vintage style.

Conchita Typeface
Inspired by tattoo lettering, this all caps font features a bold style that is sure to stand out. Download this set to get access to a complete collection of uppercase letters, numbers, and punctuation.

Gothic Fonts
Love Gothic fonts? This next selection includes amazing Gothic fonts that are perfectly suited for posters, print design and typographical projects. Check out our favorites.
Zenzero Sans Font
If
you’re looking for a bold design, considering using this Zenzero Sans
font for your tattoo art. An industrial-based font created with regular
and round styles, this unique font type gives you endless possibilities.

Haext Regular Font
Explore
the rustic Neo-Gothic elements of this Haext font for impressive tattoo
designs. Part rune craft, part sacred goddess, this font is sure to put
a spell on you with its spellbinding features.

Sadis Typeface
If
you’re feeling a little crazy, throw this Sadis font into the tattoo
mix. A black letter font inspired by that epic Gothic look, this font
features a complete set of letters, numbers, and punctuation we’re sure
you’ll love.

Sacred Geometry Font
Enjoy
the sacred geometric shapes of this unique and inspiring font type.
Inspired by sacred symbols, this font features letters, numbers, and
basic punctuation. Incorporate it into your tattoo designs for that
sacred personalized touch.

Captain Cook Tattoo Font
Named after the famous Captain James Cook who stumbled across
the wonders of tattooed people in the South Pacific, this font features a
cool decorative style perfect for a sailor or pirate. Its recommended
size is at 36 pt or higher for a great design ideal for your next tattoo
project.

Typewriter Font
Want
a tattoo that is unique yet simple? Give this awesome Typewriter font a
try. Inspired by the cool mechanical look of classic typewriter
lettering, this font features 187 unique glyphs and all the letters and
numbers you need for your next project.

Petit Jardin Font
Delicate
with organic curly serifs, this Petit Jardin font is divinely lovable.
Designed for that sweet, dainty look, this font package includes
letters, symbols, numbers, and more! Use it for your tattoo designs for
that gorgeous Art Nouveau look.

Alitide Typeface
Inspired by old western design, this typeface features a modern twist for creative tattoo lovers. Included in this set are several font files with a helpful video for using the alternative glyph characters.

Victoriandeco Font
A
classic Victorian serif font that is simple and easy to use,
Victoriandeco is a font you’ll definitely want to incorporate into an
awesome tattoo design. Inspired by the Victorian era of British history,
this font features all your essential characters with bonus ornamental
elements for additional decoration.

Victorian Parlor Font
Designed with a traditional Victorian aesthetic in mind, this typeface incorporates that clean vintage look with unique swirls and glyphs. Included in this package is a full set of letters, multi-language support, and access to 350 glyphs.

Sekatoan Typeface
With
three unique styles—clean, inline, and inline-shadow—this energetic
typeface features an ornamental design that is sure to make you stand
out. Be the envy of all your tattooed friends with this awesome vintage
style.

Black Heat Font
Black
Heat is a modern typeface inspired by the Victorian era of design.
Download this package to gain access to a full set of numbers, letters,
and additional support for international symbols.

Bekelakar Typeface
If you’re a fan of horror, metal, or gothic design, you’ll
definitely love this Bekelakar typeface. Available in regular and an
all-caps style, this font features a full set of letters, numbers, and
basic punctuation.

Dramaga Typeface
Create drama with this insane Dramaga typeface.
Inspired by the design behind the Posthardcore Band, this font features
an intense Gothic vibe with unique angular accents. Download this font
to feature this awesome style for your next tattoo.

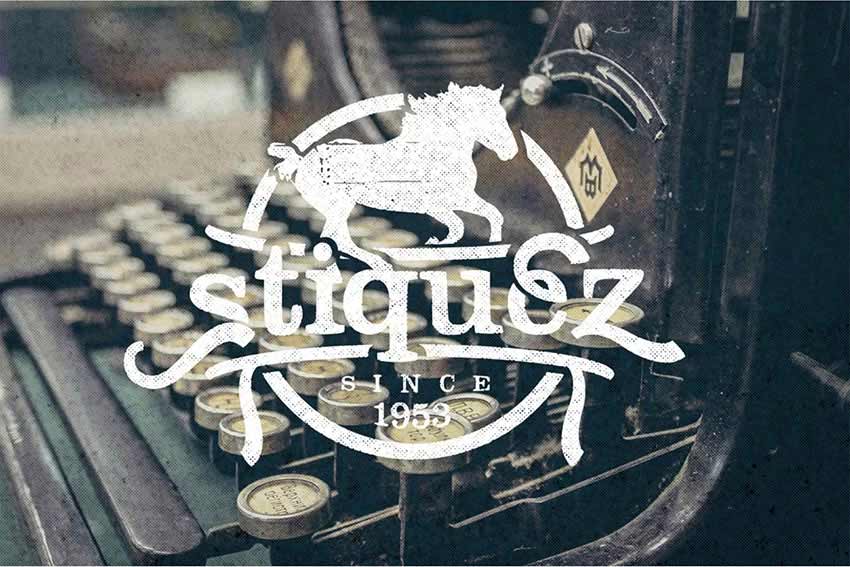
Stiquez Font
Although
this typeface is perfect for logos, you can also mix it into an awesome
tattoo design. This unique serif typeface features a cool retro design
that works perfectly in a variety of programs for further customization.
Annabel Font
This
cool vintage font is perfect for your next ink design. Featuring a
grungy design with interesting loops and curves, this package comes
complete with four font files and so much more!

Food Craft Font
Get
crafty with this unique Food Craft font. Designed with an unusual
ribbon aesthetic in mind, this font would be the perfect addition to a
standalone tattoo design. Included in this package is a full range of
letters and more to fulfill your tattoo needs.

Stay Alive Font
Stay
alive with this edgy font type. Inspired by the Victorian era and the
posters of the 1800s, this font type features a full set of characters,
numbers, and basic symbols. Use it for print work or that special ink
you’ve been dying to get!

Script Fonts
Our final selection is a collection of modern script fonts that are inspired by creative vintage trends. See our favorites below!
Bodega Script Font
A
decorative copperplate script with a modern twist, this Bodega Script
font is a stunning typeface with an elegant style. It’s perfect for
print work, tattoos, and so much more, so highlight your favorite
passages with this unique typeface.

November Script Font
Sail
across the seas with this November Script font. Hand-crafted and then
digitized for a beautiful calligraphic design, this font features a full
set of letters, numbers, and some nice ligatures for tricky letter
combinations.

Brushgyo Typeface
Suitable for print designs and creative tattoo art, this
typeface features a modern script design that was handcrafted for that
handwritten look. Included in this package is a full set of letters,
numbers, and even multi-language support.

Stay High Typeface
Inspired by handwritten letters and the cool side of street life, this modern typeface features a wild curvy design with all the characters you could ask for. This font is perfect for graffiti lovers, and you can incorporate it into your next ink for a cool, edgy style.

Marchy Script Font
March into an awesome tattoo design with this gorgeous script typeface. Marchy was designed to illustrate a unique calligraphic style with stunning loops and clean lines. Featured in this download is access to a full range of letters and numbers with over 430 glyphs to incorporate into your designs.

Einstein Font
Bring out your inner genius with this awesome Einstein font. A sophisticated script with a playful baseline, this font features a full set of letters, numbers, and basic punctuation. Download this package to gain access to a bonus swash set!

Twenty Nine Font
Twenty Nine is a playful marker typeface featuring a simple curvy style. With a bouncy baseline and a few sweet bonuses included, you’ll be happy you downloaded this set. An additional set of handcrafted ornaments is also included for that extra awesome touch!

Jimmy Font Duo
Script fonts are super popular in tattoo designs nowadays. And this Jimmy font family includes a handcrafted script font designed to reflect the modern vintage trend sweeping the nation. Incorporate it into your next ink designs for that magical retro look.

SokaQola Font
A modern typeface handcrafted with brushes, the SokaQola font features an elegant design suitable for print work, tattoo art, and so much more. Included in this set is a full range of characters with additional stylistic ligatures for more design options.

Amorie Modella Font Family
Get dainty with this sweet Amorie Modella font family. Featuring a skinny, hand-drawn style, this font would work perfectly for a simple quote or even a unique name. Mix it up with flowers for an additional pretty element or keep it simple for a classic handmade design.

Rude Cookie Font
Get rude with this delicious typeface. A hand-drawn font designed with unique character, this file includes two serif fonts along with two script fonts. These fonts are created to work perfectly together, so you can mix them for interesting tattoo designs.

Hello Lary Font
You’ll be saying “Hello Lary” with this lovely handmade font type. A modern typeface created with brushes, this font features a full set of letters, numbers, and basic punctuation for all your tattoo needs.

Reckless Font Trio
Get reckless with this awesome font trio. Reckless is a handwritten brush font made with elegant curves and a unique style. Download this set to gain access to three handwritten fonts with all the characters you need for the ultimate design of elegance.

Balham to Brooklyn Font
Balham to Brooklyn is a modern monoline script font that emulates hand-drawn letterforms. It’s inspired by American pop culture and features a stunning cursive design that works perfectly for simple tattoo designs and so much more.

Roadhouse Blues Font
Start singing the blues with this handmade Roadhouse Blues font. Inspired by an early American style, its decorative swashes give it a friendly retro vibe. Download this package for a full set of letters, numbers, and basic punctuation.

Glamour Font
Get glamorous with this gorgeous font. A freestyle handmade signature type, this Glamour font is perfect for that awesome handwritten element. Included in this package are all the characters you need as well as 100 total freebies for more design experimentation.

Adorabelle Font
Enjoy the adorable qualities of this stunning, elegant font. A modern script with a looping calligraphic style, this font is perfect for a meaningful personal quote or a name-based tattoo design.

Beautylove Script Font
Enjoy the beauty of this classically designed typeface. Combining elements of copperplate and contemporary design, this font is perfect for a stunning yet simple tattoo. Included in this set are 300 glyphs and 118 alternate characters to complement your work.

Growler Script Font
A mono-weight script font, this type is heavily based on the modern era of traditional logo design. Make your tattoos stand out with this impressive font complete with letters, numbers, and so much more!

Honeycomb Font
Enjoy the fancy yet flirty elements of this delicious Honeycomb font. Designed with fat-to-thin brush strokes and an imperfect baseline, this font would work gorgeously for a simple tattoo design. Download this package to gain access to a complete set of characters and stunning bonus extras.

Mochafloat Script Font
To finish this collection of amazing tattoo fonts, I present you with this beautiful Mochafloat typeface. Created to emulate a modern calligraphic style, this package features 300 glyphs and 200 alternative characters.

10 Amazing Tattoo Tutorials from Envato Tuts+
Inspired by this wonderful collection? Put your skills to the test with these awesome tattoo-based tutorials from Envato Tuts+.
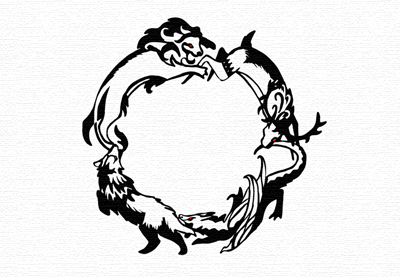 Tattoo DesignHow to Design a Tattoo With a Game of Thrones ThemeMonika Zagrobelna
 Tattoo DesignHow to Draw a Group of Swallows in a Retro Tattoo StyleLucy Pryor
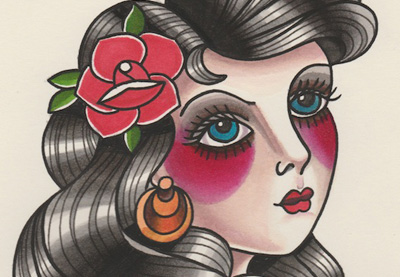 Tattoo DesignHow to Draw a Vintage Pin-Up Portrait Tattoo IllustrationLucy Pryor
 DrawingHow to Draw a Tattoo-Style Tiger With Colored PencilsHellobaby
 IllustrationCreate a Tattoo Style, Grunge, Day of Dead Girl Poster in IllustratorSergey Kandakov
 TypographyArr Matey! Create a Nautical Themed Tattoo Alphabet in SketchChris Carey
 IllustrationCreate a Punk Queen of Hearts With a Sleeve Tattoo in IllustratorYulia Sokolova
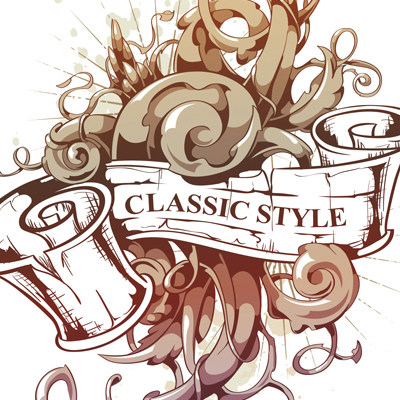 IllustrationVector Ink Anyone? Create an Abstract Tattoo Design in Adobe IllustratorSergey Kandakov
 IllustrationCreate a Nautical Tattoo Style Design for a Craft ProjectChris Carey
 Photo EffectsAdding a Realistic Tattoo the Easy Way with PhotoshopDennis Dunbar
Conclusion
This list is jam-packed with exciting resources for the avid designer
familiar with OpenType and more. If you need additional
help creating a personal tattoo design, enlist the skills of a talented
professional by choosing one of the amazing designers from Envato Studio.
And with hundreds of glorious handwritten and script fonts to choose from, chances are we’ve missed a few to add to your personal collection. Be sure to browse Envato Market and Envato Elements for more resources, and let us know your favorites in the comments below!

{excerpt}
Read More
How to Create a Science Brochure Template in Adobe InDesign

In this tutorial you’ll learn how to create a science brochure template with a colorful, on-trend style. You’ll pick up pro tips on how to make a brochure in InDesign, customising the design with your own content and preparing it for printing.
This six-page, easy-to-create brochure design has a clean and modern style which can be adapted for scientific companies, medical businesses, beauty enterprises, or research laboratories.

Ready to create your brochure design? Awesome, let’s dive in.
Looking for more editable brochure templates? These InDesign brochure templates on GraphicRiver and Envato Elements come in a huge range of customizable styles.
-

How to Make a Travel Brochure Template in InDesign
Learn how to make a travel brochure template in Adobe InDesign. This stylish brochure is the perfect promotional tool for travel agents. Or why not adapt it… -
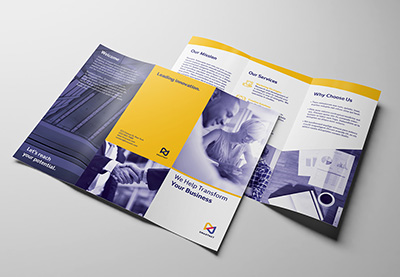
How to Make a Trifold Brochure Pamphlet Template
Trifold brochures can be an excellent tool for getting information to people in an easy-to-use, eye-catching way. In this tutorial, I will show you how to…
What You’ll Need
As well as access to Adobe InDesign and Adobe Illustrator (or an alternative vector program), you’ll also need to download and install the following font and icon sets from Envato Elements to use in your brochure:
You can choose to use the photos used in the template as pictured or replace these with your own choice of images. The photos used in the template, as pictured here, are:
Once you’ve installed the font files on your computer and have your images to hand, you’re ready to start creating your brochure template.
1. How to Set Up the Brochure Template in InDesign
Step 1
Open InDesign and go to File > New > Document.
Select Print from the Intent options at the top of the window, and choose Letter for the page size.
Increase the number of Pages to 6 and make sure Facing Pages is checked.
Set the Top and Outside Margins to 0.75 in, the Inside to 0.875 in, and the Bottom to 1 in.
Add a Bleed of 0.25 in to all edges except the Inside edge, which you can keep to 0 in. Then click Create.

Step 2
Go to the Layers panel (Window > Layers) and double-click on Layer 1, renaming it Photos.
Create three more new layers—Color, Graphics, and Type.

Then lock all the layers except the Color layer.

Step 3
Expand the Swatches panel (Window > Color > Swatches) and choose New Color Swatch from the panel’s drop-down menu.
Set the levels to C=56 M=0 Y=0 K=0, and click Add and Done.
Create three more CMYK swatches:
- C=14 M=34 Y=99 K=0
- C=60 M=100 Y=1 K=0
- C=2 M=85 Y=79 K=0

2. How to Add Color to Your Brochure Template
Step 1
Working on the Color layer, switch to the Rectangle Tool (M) and drag to create a shape across the first page of your document, extending the edge up to the bleed and left page trim.
From the Swatches panel, set the Fill of the shape to red, C=2 M=85 Y=79 K=0.

Step 2
Scroll down to the first two-page spread of your document, and create a colored rectangle over the left-hand page, setting the Fill to purple, C=60 M=100 Y=1 K=0.

Edit > Copy, Edit > Paste the rectangle, and move it over to the right-hand page.
With this second shape selected, go to Object > Effects > Transparency. Set the Mode to Hard Light and bring the Opacity down to 75%.

Step 3
Select and Copy both purple rectangles, and scroll down to the next spread of the document.
Edit > Paste them, switching the opaque shape to the right side and the transparent one to the left side.

Step 4
Create a final colored shape across the final page and back cover of the brochure, setting the Fill to red to match the front cover.

3. How to Create a Striking Design for Your Front Cover
Step 1
Scroll back up to the first page of the document, and lock the Color layer. Unlock the top layer, Type.
Use the Type Tool (T) to create a large text frame across the top quarter of the page, typing in the title and setting the Font to Chronograph and a purple Font Color.

Step 2
Copy and Paste the text frame a couple of times, arranging the copies in a row below the first, filling up the second quarter of the page.
Be playful with the Font Color, applying a different color from your palette to one of the text frames.

Step 3
Build up more text frames across the cover, creating four complete rows and varying the Font Color throughout.

Step 4
Open the pack of laboratory icons in a vector program like Adobe Illustrator.
Select one of the icons and Edit > Copy it.

Return to InDesign and lock the Type layer, unlocking the Graphics layer below.
Edit > Paste the icon directly onto the page. Hold Shift while you resize it and position it playfully inside one of the letters on the cover. Adjust the Fill Color of the icon to match the letter.

Return to the vector pack again and choose a second icon, copying and pasting it across and adapting the Fill Color as before.

4. How to Create a Template Spread for Your Brochure
By creating a basic layout for a single spread in your brochure, you can use this as a basis for populating more pages in your document.
Step 1
Scroll down to the first spread in your document. Remaining on the Graphics layer, Copy and Paste one of the icons across from the front cover, enlarging it and adjusting the Fill Color to pale blue.

Step 2
Lock the Graphics layer and unlock the top Type layer.
Use the Type Tool (T) to create one or several frames for a header at the top of the spread. Type in the header and set the Font to Chronograph SemiBold and a contrasting Font Color.

Set a subtitle below also in Chronograph SemiBold, and the text in All Caps.

Step 3
Use the Type Tool (T) to create the first column for body text on the far left of the left-hand page.
Set the first paragraph in Chronograph Bold, All Caps, and a pale blue Font Color.

Set the remaining body text in Chronograph SemiBold and a [Paper] Font Color.

Step 4
Pick up any overflowing text from the first column text frame by clicking on the small square icon at the bottom-right of the text frame.
Click onto the page to create a second text frame, and resize it to create a second column on the left-hand page.
Repeat to create more threaded columns on the right-hand page.

Step 5
Create a pull quote by creating a separate text frame and setting the text inside to a larger Font Size.
Open the Text Wrap panel (Window > Text Wrap), click on the Wrap around Bounding Box option at the top of the window, and set the Offset width to 0.25 in.
You can position the quote amongst the body text columns, pushing the text neatly away.


Step 6
Lock the Type layer and unlock the bottom layer, Photos.
Select the Rectangle Frame Tool (F) and drag across the page to create a whole-page image frame.

File > Place, select an image, such as one of the faded lines backgrounds used here, and Open it, allowing it to fill the whole frame.

Step 7
You can now use this spread as a basis for creating other spreads in your brochure.
Unlock the Type and Graphics layers and select all the elements sitting on the spread. Copy them, scroll down to the next spread, and Edit > Paste in Place.
Then you can start to play about with the arrangement of text on this second spread, as well as adjusting Font Color and the choice of icons, if needed, to create interest and contrast.


Create a new image frame on the left-hand page, beneath the transparent red rectangle, and File > Place a different image, such as this photo of a scientist.

Step 8
When you’ve finished populating the inside of your brochure, make sure to add a final touch to the back cover.
The back cover is a good place to put contact details, for example. Set these in Chronograph SemiBold.

5. How to Export Your Brochure Template for Printing
Step 1
Go to File > Export and choose Adobe PDF (Print) from the Format menu at the bottom of the window.
Name the file and click Save.
In the Export Adobe PDF window that opens, choose [Press Quality] from the Adobe PDF Preset menu at the top, and make sure the document is set to Export As Pages, not Spreads.

Step 2
Click on Marks and Bleeds in the window’s left-hand menu, and check both All Printer’s Marks and Use Document Bleed Settings.
Then you’re ready to click Export and create your press-ready brochure file.

Great job! You can send this PDF straight off to the printers.
Conclusion: Your Finished Science Brochure Template
This modern and stylish science brochure template can be used in its original style or as a versatile template for creating your own unique brochure design.
Why not try mixing up the fonts and color swatches for a fresh look?
Looking for more stylish brochure templates? These InDesign templates on GraphicRiver and Envato Elements come in a huge range of modern and customizable styles.
Don’t miss these brochure design tutorials and brochure templates for InDesign and Photoshop:
-

25 Best Professional Brochure Templates
Create a lasting impression with a professional brochure. Check out this amazing collection of 25 brochure templates from Envato Elements. -

How to Make a Brochure
This is your essential checklist for designing brochures that are guaranteed to grab and hold someone’s attention. Read on to get to know your bifolds,… -

How to Make a Business Brochure in InDesign
In this tutorial, you’ll learn how to make a business brochure with a clean, corporate style in Adobe InDesign. Business brochure templates are quick and… -

26 Best New Business Brochure Templates for 2019
Every business can benefit from a well-made brochure. Find the perfect design for your startup in this list of brochure templates from Envato Market and…

{excerpt}
Read More
Skullcandy’s Crusher ANC block noise while you feel the bass

Zero’s 2020 electric motorcycles include one that’s loaded for adventures

Jonah Hill tackles bullying in new Instagram TV series

FCC creates two ‘innovation zones’ to test next-gen wireless