
Category: Tutorials
Tutorials,freelance,projects,joomla,php,mysql,wordpress,blancer.com
19+ Best WooCommerce Themes: To Make a Better Online Store
Adding an online store is a big step toward expanding your customer base and increasing your revenue. WooCommerce has many benefits that make it an ideal solution for small business owners who want to sell online in an elegant way, whether they are selling physical or digital products, or a combination of both.
Why Choose WooCommerce?
WooCommerce is easy to setup and use. The core plugin is free, which means you can have a fully functional store up and running within minutes.
It integrates with any WordPress theme, and it features a clean and minimal design which means your store won’t look out of place.
Payments are also easily setup and you can choose between PayPal, card handlers like Stripe, direct bank transfer, cash on delivery, or check payments. It’s worth mentioning that you can add additional payment methods with various WooCommerce extensions.
And that last point there is the most compelling reason for using WooCommerce. From adding email optin integrations to integrating WooCommerce with popular accounting software such as QuickBooks, WooCommerce can handle all of that and much more.
Finally, since WooCommerce is so popular, you can easily find answers and support from other users or developers who specialize in WooCommerce development and customization.
“WooCommerce powers over 26% of all online stores” — stats from Builtwith
So yeah. It’s pretty cool.
Best WooCommerce Themes on Envato Market and Elements
In this post (updated regularly) we feature our best WooCommerce themes that will help you make a better store. Check out the best WooCommerce themes on Envato Market and Envato Elements now!

1. Flatsome
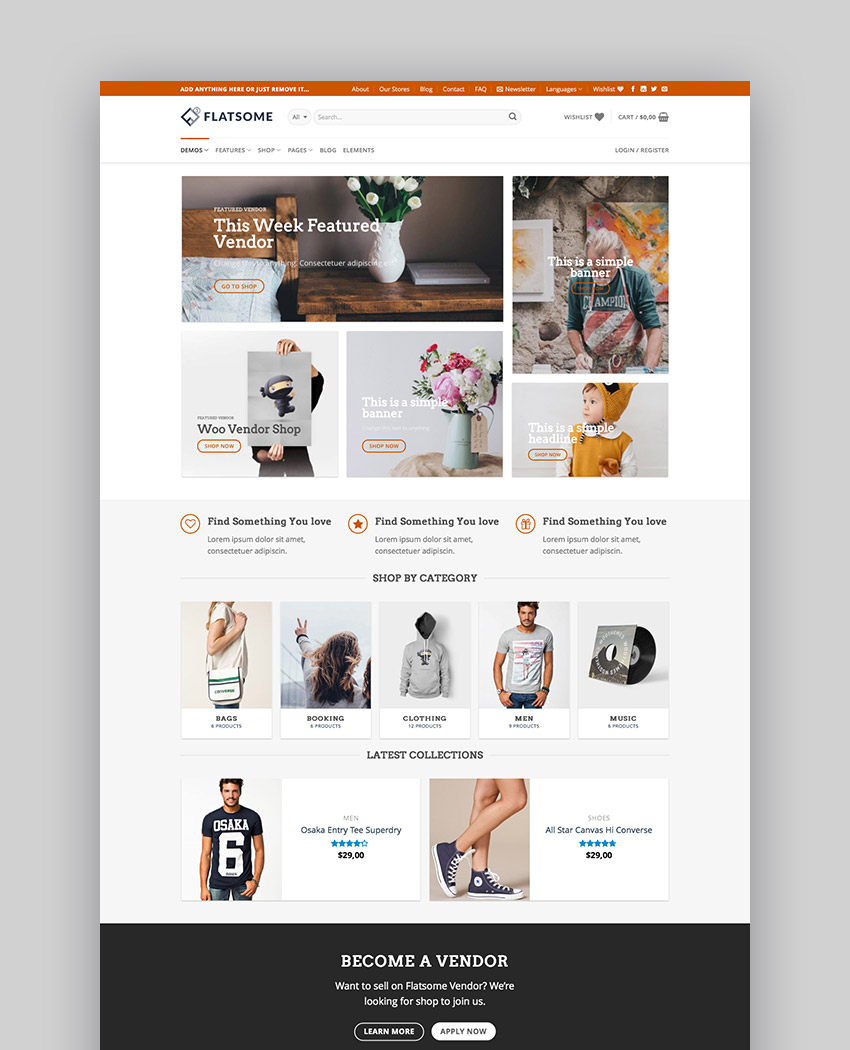
Flatsome is a stunning, responsive WooCommerce theme with modern design and plenty of features. It comes with Flatsome page builder which makes it easy to create unique and interesting layouts for your store, such as using a Pinterest-style layout for your homepage.
The Theme options panel is easy to use and includes customization for colors, fonts, adding your own logo, and a shopping cart icon. Other features include instant live search, customized check-out pages, a built-in quick-view feature, unlimited sidebars, and much more.
Flatsome is one of the biggest sellers on Envato Market, and with its constant updates it’s not difficult to see why it’s sold over 100,000 times since launching in 2013!
2. WP Configurator: WooCommerce WordPress Theme
Let’s kick off the list with a really cool example; this theme lives up to its name by allowing customers to configure their own products. WP Configurator comes packaged with the Panorama Addon giving you an awesome full width configurator:

The possibilities for selling configurable products are endless; apparel, equipment, cars, furniture.. you name it! It comes with a ton of seriously stylish demos too–take a look at this parallax homepage selling headphones (configurable, of course):

3. Marketo – eCommerce & Multivendor Marketplace
Marketo’s nine gorgeous homepage examples make it really difficult to choose which one to showcase for this roundup! Launched in July 2018, Marketo is a large scale storefront, making it ideal for multiple vendors or anyone looking to sell volume. Amongst the included options and extras comes Elementor; a superb page builder for anyone more comfortable with a visual, rather than code-based, design environment.

4. Barberry – Modern WooCommerce Theme
Brand new as of November 2018, Barberry has a touch of class; clean typography, elegant lines, and can turn its hand to many different products. Emphasis is placed on its confident use of AJAX, from pages, to products, to searches, and filters, there’s barely a single browser refresh to get in the way. Its maker, temash, is an Elite Author, and offers extensive support for this WooCommerce theme.

5. WoodMart – Responsive WooCommerce WordPress Theme
WoodMart offers a wide range of styles within a single theme (take a look at some of the real world examples to see just how varied WoodMart can be). The screenshot below demonstrates a rich, delicious layout, perfect for quality food products, restaurants, and catering.
With great touches like advanced swatches for variable products, and a full screen AJAX search UI, WoodMart offers all the familiarity of WooCommerce with some brilliant extra bells and whistles.

6. Handmade Shop – Handicraft Blog & Creative Store WordPress Theme
Handmade Shop is a stylish niche theme, a trending item on Envato Market, and is a refreshing antidote to multipurpose alternatives.

7. KALLYAS – Creative eCommerce Multi-Purpose WordPress Theme
Kallyas is a multi-purpose, responsive WooCommerce theme with an easy-to-use page builder, which allows you to create any type of layout, as well as go beyond a simple eCommerce website. This theme is optimized to load fast, thanks to its smart loader that loads only the necessary resources your page needs.
Other features include unlimited custom color schemes, support for Google Fonts, SEO optimized code, multi-language support, 12 pre-defined layout options, integration with MailChimp, and more—allowing you to make a full-featured online store.

8. Shopkeeper – eCommerce WP Theme for WooCommerce
Shopkeeper features a very clean and elegant design with plenty of powerful features behind the scenes. On top of being responsive, Shopkeeper allows you to choose from a number of predefined layouts to get your store running as quickly as possible; as well as allowing you to create your own custom layout.
Other features include unlimited header options, custom color schemes and fonts, a gorgeous Revolution slider, a built-in order tracking system, intricate tax and shipping options, and a built-in coupon system.

9. Porto | Multipurpose & WooCommerce Theme
With 25 unique homepage layouts, light and dark versions, responsive design, and a powerful admin panel that allows you to customize almost any aspect of the theme, Porto is a great choice if you want your store to stand out.
Make an online store quickly with options such as unlimited header and styles, sidebar layouts, vertical and horizontal mega-menus, customizable shop categories, integrated quick-view, and zoom options. These are just the tip of the iceberg with this popular WooCommerce theme.

10. XStore | Responsive Multi-Purpose WooCommerce WordPress Theme
If you want a theme that will let you show your individual product pages in style, look no further than XStore. Individual product pages can be customized using different layouts and take it a step further by adding custom hover options which allow your customers to immediately purchase the product, zoom in on it, or add it to their wishlist.
Design features include unlimited header options, the ability to filter products, adding videos to products, as well as showcasing brands you’re selling with a custom widget.

11. Electro Electronics Store WooCommerce Theme
Electro is a robust and flexible theme suitable for an electronics store with responsive design and integration with several popular WooCommerce extensions such as YITH Wishlist, YITH WooCompare, Revolution Slider, and Visual Composer page builder.
Features include advanced live search, a product carousel, product deals, store directory, powerful customization features such as unlimited colors and fonts, different header options, and a mega menu. If you have an online store to make, and you’re selling cutting edge gadgets or electronics, Electro is a go to theme!

12. Oxygen – WooCommerce WordPress Theme
Oxygen features a minimal, elegant design and offers many options to customize the look and feel of the theme via the theme options panel. You can choose between four header types, change the fonts, customize your shop and blog settings, and create unique page layouts with Visual Composer.
You can also showcase your products as a beautiful slideshow thanks to the Revolution Slider plugin. Oxygen is also optimized for SEO and includes custom search and 404 pages.

13. Basel – Responsive eCommerce Theme
Basel is a clean, responsive WooCommerce theme suitable for a variety of niches. Thanks to the drag and drop page builder, customizing it is easy. What’s more, this WP theme integrates with Revolution Slider, Wishlist plugin, Contact 7 Form, MailChimp Newsletter as well as giving you the option to customize your colors, fonts, product pages, and more.
Features include the ability to search products by categories, a quick-look view, four different product hover effects, product sliders, various shop filters, and attribute swatches. Make an online store now!

14. Atelier – Creative Multi-Purpose eCommerce Theme
Atelier is a creative multipurpose theme which offers more than WooCommerce integration alone. On top of the responsive design and the fact that it’s designed to load fast, Atelier allows you to add a social dimension to your store with included support for bbPress and BuddyPress.
Atelier’s design features include video or parallax backgrounds, animated headers, different cart layouts and animations, built-in shortcodes, custom icons, and multiple color scheme options. Atelier also comes with a built-in Swift Page Builder which makes it easy to create custom layouts.

15. Aurum – Minimalist Shopping Theme
Aurum is a responsive minimalist WooCommerce theme with a modern design. It’s a beautiful, flexible, and super fast theme with features that include four demo layouts, a custom regional welcome page that redirects users to the appropriate store based on their location, and a design optimized for touch devices.
It also supports multiple header styles, image and category banners, a FAQ page, and includes support for Visual Composer and several other premium plugins.

16. Merchandiser – Premium WooCommerce Theme
Merchandiser is a simple, lightweight WordPress eCommerce theme perfect for a simple store that doesn’t need additional advanced features. This theme is responsive, loads fast, and is optimized for SEO.
Even though it’s lightweight, it still has powerful customization options which allow you to tweak it to your liking. It also features gorgeous product images, an off-canvas shopping cart and quick-view, widgetized search, and extended shop catalog options.

17. The Retailer – Premium WooCommerce Theme
If you’re selling both digital and physical goods online, then The Retailer is a great choice. It’s easy to showcase both with this theme and it also support product variations.
This is a responsive WP theme capable of adapting to any niche. With features like Google Fonts, custom color schemes, pre-built page layouts, and sample content ready for import, it allows for quick and efficient store setup.

18. Mr. Tailor – Fashion and Clothing Online Store Theme for WooCommerce
Mr. Tailor is a WooCommerce theme suitable for a variety of niches, with responsive design, advanced typography options, multiple layout options built-in, and the ability to create completely custom layouts with a Visual Composer.
The theme options panel allows you to customize any aspect of your website and create a unique store. Your products will stand out thanks to bold imagery, filterable products, a built-in coupon system, and zooming options.

19. Royal – Multi-Purpose WordPress Theme
Royal is an easy-to-use professional WooCommerce theme with a clean and elegant design. It offers several store layouts, as well as landing page templates, services templates, and corporate layouts which are perfect for a larger company that needs eCommerce features.
This theme includes several powerful plugins such as a Live Chat plugin and Revolution Slider which are nice added bonuses that can come in handy when building eCommerce sites.

20. Suprema – Multipurpose eCommerce Theme
Suprema is a trendy, functional theme featuring a responsive design capable of adapting to a variety of niches. It supports striking imagery on both category and individual product pages, gorgeous product slideshows, wishlist functionality, and multiple shopping list options.
Customization features include complete control over every aspect of your store, multiple header behaviors, the ability to include video in slides, parallax sections, widgets for social media accounts, and much more. It’s a great WP theme to make an online store with!

What You Should Look for in a WooCommerce Theme
Choosing the right theme isn’t always easy but here are some tips that will make the process easier:
- Attractive Design – On top of looking good, your chosen theme should be appropriate for your audience and the type of products you sell. For example, if you sell clothes or toys for children, use a theme that has a playful look and bright colors.
- Continued Updates and Support – Choose a theme that is well-supported and maintained to avoid any possible conflicts when WooCommerce or WordPress itself as they release their updates.
- Custom Functionality – if you know that you will require custom functionality like sliders, custom widgets or different layout possibilities, choose a theme that already has those features integrated.
- Responsive Design and Fast Loading Time – Keep in mind the increasing use of mobile devices and look for a theme that has responsive design and loads fast.
Many of our WooCommerce themes already have all those features built in and are sure to take your online store to the next level.
Online Store Best Tips and Practices
The key to a successful online store is to focus on improving your users’ experience so that shopping at your site is easy, quick, and delightful. Here are a few ideas that will ensure your site is running smoothly and brings customers back to your store time and again.
1. Make Sure Your Store is Properly Set Up
Even though WooCommerce is easy to install and set up, take time to go through the more advanced settings options after the initial setup and make sure everything is configured to your liking.
Customize the colors so that the store matches the rest of your website and add a personal touch to the emails that are automatically generated after a purchase. For more tips about setting up WooCommerce, check out our free course: Beginner’s Guide to WooCommerce. Here is an introduction to WooCommerce from the course:
2. Use Quality Photos
Don’t underestimate the power of photography when it comes to an online store. Make sure your product images are high-quality, show off plenty of details of each product, and are presented on a well-lit background. Also, make sure they scale nicely when viewed on smaller screens. Consider using a WooCommerce theme like Suprema or Mr. Tailor.
3. Optimize for Search Engines But Write for Humans
When writing product descriptions, include keywords related to your product but make sure your descriptions are written in a way that’s appealing to your human visitors. Let your brand’s personality shine through and incorporate storytelling. Keep in mind that compelling copy can make all the difference in your conversion rate.
4. Include Plenty of Details
Buying online is certainly more convenient than buying from a physical store. However, it can also be harder to find out particular details. This can be done by including a 360 view of your products, zooming features like those found in the Porto or XStore eCommerce themes, and adding custom pages like Aurum’s FAQ page which allows you to outline your shipping and return policies and any other important information. Finally, consider adding a Live Chat option or using a theme such as Royal which has this functionality built in.
5. Build Relationships with Your Customers
There is no better way to ensure repeat customers than to stay in touch with them. Sending out newsletters when you have a special offer at your store or sending them an email with a special discount code or a coupon as a thank-you note is a great way to establish a connection and show them that you care. This can ultimately lead to establishing trust and creating loyalty to your brand. Consider adding newsletter integration to your store by using a WordPress eCommerce theme such as Basel.
Finally, no matter which theme you end up choosing, make sure it’s well-documented, updated regularly, and the authors are available to help you along the way.
Launch Your WooCommerce Store!
To start your WooCommerce store on the right foot, take a look at the best WooCommerce themes which not only have great design but also come with six months of free support.

{excerpt}
Read More
How to Create Particle Effects in Photoshop (With Photoshop Action Examples!)

In this tutorial, you will learn how to create particle effects in Photoshop. I will explain everything in so much detail that everyone can create it, even those who have just opened Photoshop for the first time.
What You’ll Need
To recreate the design above, you will need the following resources:
1. How to Start Creating an Action
First, open the photo that you want to work with. To open your photo, go to File > Open, choose your photo, and click Open. Now, before we get started, just check a couple of things:
- Your photo should be in RGB Color mode, 8 Bits/Channel. To check this, go to Image > Mode.
- For best results, your photo size should be 2000–4000 px wide/high. To check this, go to Image > Image Size.
- Your photo should be the Background layer. If it is not, go to Layer > New > Background from Layer.

2. How to Select the Subject
Step 1
In this section, we are going to make a selection of our subject and then copy the subject to a separate layer. Choose the Quick Selection Tool (W) and select the background of the photo. Use the Shift-Alt buttons on your keyboard to add or subtract areas from the selection. After you’ve made a perfect selection, press Control-Shift-I on your keyboard to invert the selection.

Step 2
Now go to Select > Modify > Smooth and set the Sample Radius to 5 px. Next, go to Select > Modify > Contract and set Contract By to 2 px. Finally, go to Select > Modify > Feather and set the Feather Radius to 1 px.

Step 3
Press Control-J on your keyboard to create a new layer using the selection. Then, name this new layer Subject.

3. How to Create the Particles
Step 1
In this section we are going to create the particles. Go to Filter > Pixelate > Crystallize and set the Cell Size to 60.

Step 2
Now press Control-Shift-U on your keyboard to desaturate this layer and hide the Background layer. Then, go to Select > Color Range, set the Fuzziness to 10 and, using the Eyedropper Tool, select the particles of any color by clicking on any of the particles inside the subject area.

Step 3
Go to Select > Select and Mask and set the Smooth to 2, Feather to 2 px, Contrast to 50%, and Shift Edge to -2%.

Step 4
Now select the Background layer and press Control-J to create a new layer using the selection. Name this new layer P_1.

Step 5
Repeat this process by following the previous two steps to create as many particle layers as you like. Name the layers according to the sequence number of the particle layer. Feel free to use different Color Range and Select and Mask settings each time.

Step 6
Now Right-click on the Subject layer and choose Delete Layer. Then, show the Background layer and select the P_1 layer. After that, using the Move Tool (V), click and drag anywhere inside the canvas to position the layer as you like.

Step 7
Repeat this method to position the remaining particles layer as you like. Here is my result:

4. How to Make the Final Adjustments
Step 1
In this section we are going to make some final adjustments to the design. Select the P_1 layer and press D to reset the swatches. Then, go to Layer > New Adjustment Layer > Gradient Map to create a new gradient map adjustment layer and name it Overall Contrast.

Step 2
Now change the Blending Mode of this layer to Soft Light and set the Opacity to 40%.

Step 3
Go to Layer > New Adjustment Layer > Hue/Saturation to create a new hue/saturation adjustment layer and name it Overall Saturation.

Step 4
Now Double-click on this layer thumbnail and, in the Properties panel, set the Saturation to +18.

5. How to Crop the Image
In this section we are going to crop the image. Choose the Crop Tool (C) and transform the Crop Box as shown below:

You Made It!
Congratulations, you have
succeeded! You have learned how to create a particle effect Photoshop action. Here is our final result:

15 Particle Effects from Envato Elements
Want to see more exciting photo effects? Check out this list of dispersion effect Photoshop actions from Envato Elements. Enjoy incredible styles from vintage effects to so much more!
Pixelum – Digital Dispersion Effect Photoshop Action
Particle effect Photoshop actions can transform your sports photos into awesome, energetic visuals. This digital dispersion effect from profactions creates an explosion of digital pixels in any direction you need. Use it with Photoshop CS3 and above.

Tornadum – Powerful Dispersion Effect Photoshop Action
This next dust particle effect Photoshop action looks pretty wild! Create one-of-a-kind images for Instagram or Twitter in just a few short clicks. Explore lots of graphic elements within this download as well as ten color preset options. Check it out!

Forge – Particle Dispersion Effect Photoshop Action
Need a wicked intro for your vlog channel or videos? This particle effect Photoshop action looks amazing with 3D text and more. Enjoy a high-quality, professional result that will blow your audience away. Works best with Photoshop CS4 and above.

3D Dispersion Effect Photoshop Action
Need a 3D Dispersion effect? Photoshop can help you achieve exactly what you need with this next download. Create amazing flying particles and realistic 3D pieces that are incredibly entertaining and visually effective. Add it to your collection.
Commetum – Cosmic Tail Photoshop Action
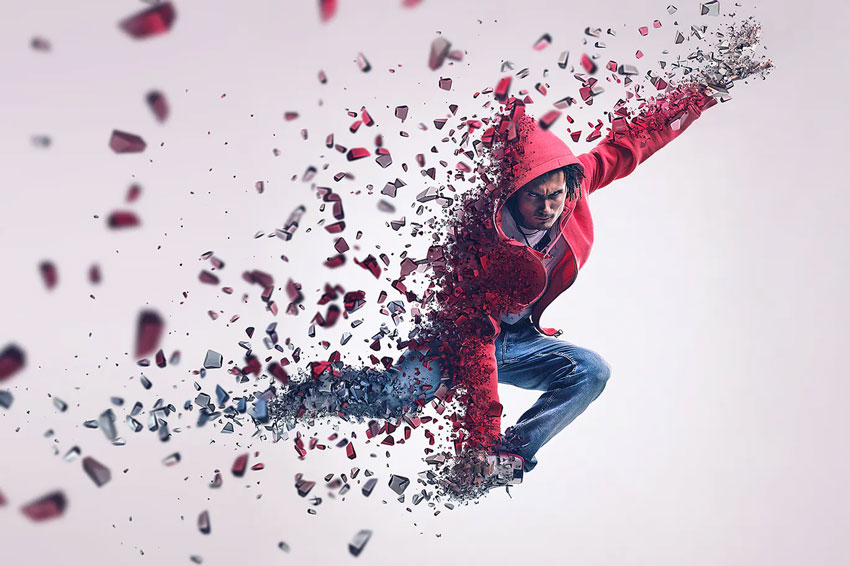
Create an epic cosmic tail with this next particle effect action. Created by profactions, this Photoshop action creates a fully editable image with ten color presets and many more great options. Use it with high-quality images for the best results.

Numeric – Photoshop Particle Effect Plugin
This next add-on features a cool numeric touch as a particle photo effect. Instantly turn your portraits into a wicked typographic effect for social media and more. Just download and install the action to get started. Check it out.

Geometric Dispersion FX Photoshop Add/On Extension
Geometric effects have been trending for years! Now you can use this dispersion particle effect that splits your sports and action shots into edgy, geometric shapes. Use it with any image or resolution and the latest versions of Adobe Photoshop.

Liquify 2 Rain Effect Photoshop Action
Liquify your subjects in seconds! This next Photoshop action creates an unbelievable liquid effect that simulates rain or splashing water. Just mask out the area where you would like to apply the effect, and then play the action. It’s that simple!

Fragmentum – Breaking Distressed Effect Photoshop Action
Feeling a little edgy? Explore a distressed effect Photoshop action like this next one. Fragmentum explodes any object, face or area into millions of tiny dust particles. Easily create this effect yourself using Photoshop versions CS3 and above.

Seizure Photoshop Action
Seize new opportunities to express yourself. Photoshop actions like this seizure effect from codetoform turn any boring portrait into a digital masterpiece. Enjoy the well-organized layers and add-ons including a step-by-step tutorial.

Ashes n Embers – Fire Effect Photoshop Action
Need a fire effect Photoshop action? You can create this next phenomenal look in much less time. Free up your workflow with this easy-to-use Photoshop action that includes ten color presets. Edit the directions to create the best look.

Feathers Photoshop Action
Dispersion effects aren’t just for dust and sparkles. This next Photoshop action bursts any subject into a cluster of floating, natural feathers for a bold, new style. Upload your result to Instagram to see how your numbers do! Check it out.

Dispersion 2 Photoshop Action
Trendy dispersion effects are used on dancer photos, but you can also apply them to ordinary objects or photos. This Dispersion 2 Photoshop action from sevenstyles creates a mind-blowing effect with realistic particle details. Edit and add to it to fit your needs.

Fractal – Sparkle Effect Photoshop Action
Create an electrifying look with lightning and sparkle effects. Simply fill in your model with color and play the action to enjoy this awesome result in seconds. Included in this download is also a helpful video with step-by-step directions. Add it now.

Elementum – Dispersion Photoshop Action
Highly detailed and easy to customize, this next photo effect action includes four options with different directions to choose from. Explore up, down, left, and right directions to switch up the style to fit your needs. Great for Instagram and social media!

More Particle Effects
From sparkles to unique snow effects, Photoshop actions make it possible to create magic in just a few seconds. Explore this list of incredible resources and let us know a few of your favorites.
Enjoy more particle effects from these links:
 PhotographyHow to Add Cool Particle Effects in Photoshop With a Stylish PSD ActionMarie Gardiner
 Photoshop ActionsHow to Create an Ashes & Embers Dispersion Action in Adobe PhotoshopIndranil Saha
 Photo Effects45 Best Photoshop Actions With Creative Photo EffectsSean Hodge
 Adobe Photoshop26 Best Glow Effects in Photoshop (Actions and Text Effects)Melody Nieves
 Photoshop ActionsHow to Create an Awesome Dispersion Action in Adobe PhotoshopMarko Kožokar
 Photoshop ActionsHow to Create a Typography Dispersion Action in Adobe PhotoshopMarko Kožokar
 Photoshop ActionsHow to Create a Shatter Photoshop Effect ActionMarko Kožokar
 Photoshop ActionsHow to Create a Rock Blast Effect Action in Adobe PhotoshopMarko Kožokar

{excerpt}
Read More
Can DJI compete against GoPro in the action camera arena?

HTC recreated the ‘Mona Lisa’ in 3D for the Louvre’s da Vinci exhibition

Apple TV app is now available on the Fire TV Stick

How to Create File Upload Forms on Your WordPress Site
{excerpt}
Read More
What is Motion Graphics Software? (And How to Create Video Animations)
{excerpt}
Read More
The Principles of Design
Have you ever wondered what goes into the creation of a successful design piece? Here are some visual tools that can help you structure your design compositions.
In this article, I’ll show you the definition and importance of the principles of design. This set of visual tools can help you create an organized structure to deliver a clear message. These principles are also applied in art and different design sub-disciplines. Along with definitions, we’ll show you a few principles of design examples that will help you better understand their meaning.
What Are the Principles of Design?
The principles of design are a set of rules that designers can follow when creating a composition to create visually pleasing work. The purpose of these rules is to deliver a message in the most organized and functional way.
Here’s a list of the main design principles:
- Balance
- Unity
- Contrast
- Emphasis
- Repetition
- Pattern
- Rhythm
- Movement
- Proportion
- Variety
- Harmony
While we’ve seen a fair share of experimental pieces out there, it’s important to know the significance of the fundamentals. Every design piece has a structure below the surface that holds up the design and makes it visually interesting and balanced. Once designers understand the usage of the principles, they’ll understand better how to break these rules.
In my previous article, The Basic Elements of Design, I talked about the elements that create everything we perceive. With a solid understanding of those elements, you’ll be able to learn more about the principles of design.
Principles of Design: Balance

Any element placed on a page carries a visual weight. It can range from form to size, color, and texture. In order to make a design feel stable or have balance, the elements need to have a certain scale.
For instance, in a symmetrical design, the elements on the right side have the same visual weight as the elements on the left side. Symmetrical designs are easier to balance but can also come across as boring. Asymmetrical designs have different sides but equal visual weight. Being able to achieve balance in asymmetry can result in a visually interesting design that has movement.
Lack of balance would make your design feel heavy on one side and empty on the opposite. You’ll know your design lacks balance when it feels as if it’s falling off to one side.
Principles of Design: Unity

Unity is the harmony produced by all the elements in a design piece. For instance, using similar colors that match and integrate elements organically makes it appear as if they belong together and are not just put on a page.
You can achieve unity by making clear relationships between visual elements. You can find unity wherever you find clear organization and order, and the elements of the page won’t be fighting for attention. Instead, they’ll work together to make the message stronger. Too much unity can result in a sterile design with a lack of personality. That’s when you can start incorporating other elements to add movement.
Lack of unity would make your design feel cluttered and confusing. Viewers will be attracted to the wrong element of the design and won’t get a clear message. A good rule of thumb is to place an element in your design only if it enhances the message. Ask yourself what the element is adding to the composition.
Principles of Design: Contrast

Contrast refers to the level of difference between design elements in order to create visual hierarchies. The variation makes certain elements stand out more than others. You can apply contrast by using colors, textures, sizes, and shapes.
In a layout, contrast is applied to create hierarchy between the font sizes. Larger text tends to be read before any smaller text. Contrast is important when it comes to pairing fonts. For instance, in the example below, we have a font duo that includes a script font and a sans serif font. The script font adds movement to the static sans serif.
Contrast can create a focal point to certain elements that can draw the viewer’s eyes. Contrast can also be used to create balance and harmony by making sure items are distributed nicely on a page. Lack of contrast can make a design look dull, and viewers can overlook the important message. Contrast is important especially when designing accessible documents. For instance, black type on a white background will be easier to read than black on a brown background.

Principles of Design: Emphasis

Emphasis is a strategy to get the viewer’s attention to a specific design element. This can be in any form: a button, a website, or an image. The purpose is to create something that will stand out from the rest of the page. You can use different elements to highlight a specific part of your design, like lines, color, positive/negative relationships, and many more. As long as you can create contrast, either with elements or color, you’ll be creating emphasis.
- Lines create direction on a page by pointing to specific elements that help the viewer’s eyes know where to go.
- Shapes can also draw attention. Using a group of similar shapes and breaking the group with a different shape will create tension and draw the eyes.
- Color can create an emphasis in any design. Buttons on a website tend to contrast with the background to create a sense of urgency and attention.
- Texture can be seen in materials to enhance tactile features. For instance, a business card can have an emboss or relief on a logo to emphasize it. Digitally, texture can be applied as a drop shadow on a button to appear three-dimensional.
- Space is also an option to emphasize certain elements in your design. Enough white space around an object can prioritize the focus on a single element. For instance, Apple has a clean and direct idea of emphasizing products.
Principles of Design: Repetition

Using repeated elements on a layout can be pleasing to the viewer. Repetition is repeating a single element through the design. We can call a grid a repetition of lines because it creates a certain consistency. In layout design, repetition is shown through the folio placement to help viewers find their way in a book or magazine. The same folio placement creates continuity in the repetition.
In a website, repetition is seen on the menu placement, which gives the viewers a constant placement that can make them feel comfortable and familiar. Repetition can also be achieved by repeating elements in a design like a logo or a tagline in a brand development project. Below, the repetition of waves gives a feeling that the page is endless.

Principles of Design: Pattern

Pattern is the repetition of more than one design element. While repetition focuses on a single element being repeated, pattern refers to multiple elements repeated throughout a design (e.g. wallpapers and backgrounds).
A seamless pattern is a repeated set of elements that flows without a flaw to create a unit. You can see seamless patterns predominantly in interior design when using tiles. The use of patterns can enhance the viewer’s experience and the look of a final design.
In the example below, the pattern repeats itself from edge to edge without any disruptions. The pattern is composed of multiple elements with varying sizes and depths.

Principles of Design: Rhythm

Rhythm has more complexity than the previous principles of repetition and pattern. Repetition and pattern are applied to the same element throughout a design. Rhythm is the visual tempo of a combination of elements when used repeatedly, and with variation, it gives the feeling of organized movement.
Rhythm is usually hidden in works of art and is not as obvious as the design principles of repetition and pattern. In the example below, the diagonal lines aren’t arranged in a specific pattern. Instead, there’s a repetition of the elements with variations.

Principles of Design: Movement

Movement refers to the path the viewer’s eye takes through a composition. In an image, every element can affect how the eyes move. Important elements will lead to secondary elements and so on. Movement in a composition creates interest and dynamism that keeps the viewer engaged.
Movement can be created with rhythm when using a variation of an element repeatedly. Using curved lines and diagonal lines creates more movement compared to straight lines. Use lines to trace the path to the focal point. Color can help enhance the feeling of movement, juxtaposing high and low key colors to create energy. A literal way of showing movement is by using an image that includes motion, like a dancer or hair in the wind. Some artists use illusions like optical art, in which the repetition and contrast make our brains want to organize the information.
In the example below, movement is created by the slightly curved lines and the overlapping colors. Both effects enhance the movement because the lines are unstable and the gradient blurs the lines instead of being static.

Principles of Design: Proportion
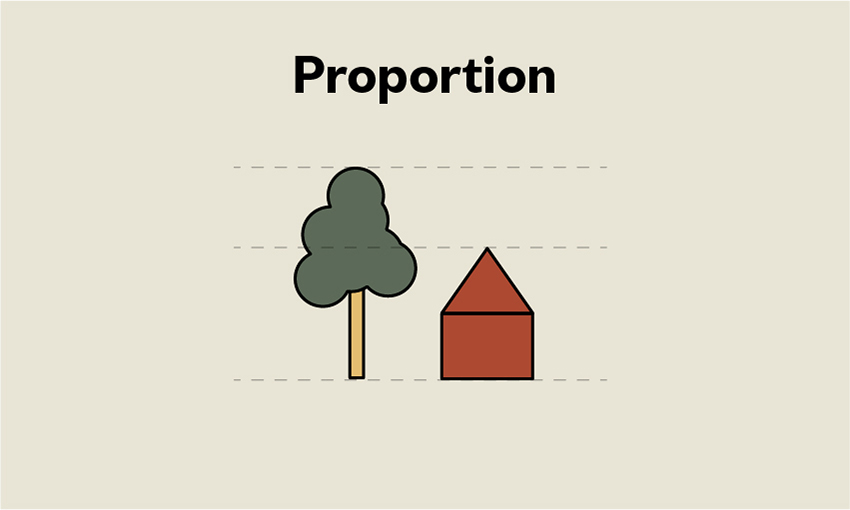
Proportion is the sense of unity created when all the elements in a composition relate well with each other. Proportion is mostly about scale and size when two elements are compared. For instance, in art and drawing, proportion is important for the elements to look realistic. Proportion doesn’t necessarily refer to the size of one element but to the relationship of two or more elements.
In layout hierarchy, the proportion of the headline compared to the photo caption needs to be larger as the headline is the most important element. Smaller elements have less importance. When you achieve a good sense of proportion in a composition, it can add harmony and balance.
Principles of Design: Harmony
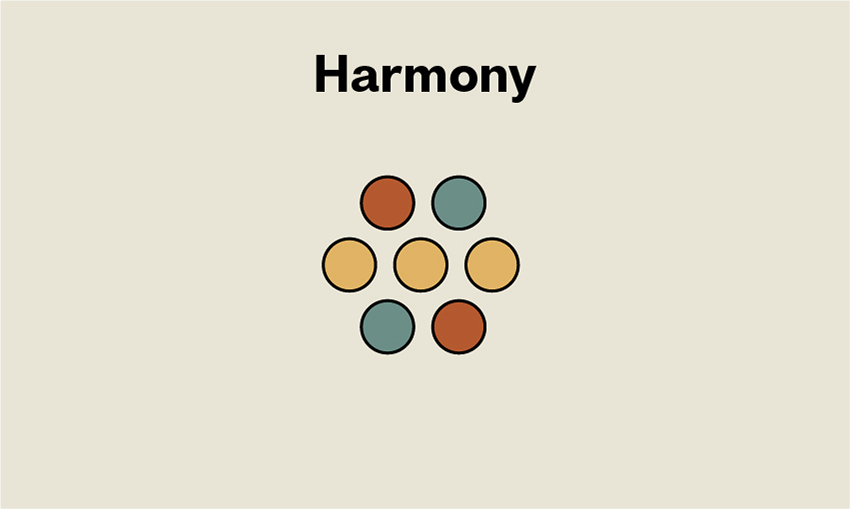
Harmony is the sense of cohesiveness between the elements in a composition. The elements shouldn’t be exactly the same or completely different but related in some way. Color palettes or similar textures can create a sense of unity between different components. Using similarly shaped items will create harmony because they will seem related.
Not enough or too much harmony can make a design dull; there needs to be some kind of variety for it to be visually interesting.
Principles of Design: Variety

Creating visual interest will keep viewers engaged with your design. Holding their attention and guiding them through the composition will create a powerful user experience. Variety adds something interesting to the composition to create contrast and tension. For instance, mixing organic shapes with geometric shapes adds variety. This concept should reinforce the message you are trying to communicate in your design—otherwise, it can look pointless.
That’s It!
The elements and principles of art and design are the foundation for creating a composition. The use of these principles can give structure and help you understand how other design pieces and artworks are built. It can help you determine whether a composition will be successful or determine the missing piece of the puzzle.
The use of these principles will help you design with purpose by giving function to every single element in a composition. Communicating a clear message isn’t only about the message but how we carry it to deliver it cleanly and clearly.
When you look at a design composition from now on, think of these principles and how they are being applied. You’ll be able to decode the most intricate designs and understand what’s working and what’s not.
If you liked this article, you might like:
 TypographyThe Ultimate Guide to Basic TypographyLaura Keung
 FontsThe Rise of the Sans SerifLaura Keung
 FontsThe Different Types of Fonts: When to Use Each Font Type and When NotLaura Keung
 PrototypingPrototyping in Design Thinking: Fail Fast, Fail OftenLorca Lokassa Sa
 Adobe IllustratorThe Ultimate Guide to Adobe Illustrator SwatchesAndrei Stefan
 FontsA Brief History of Display FontsLaura Keung

{excerpt}
Read More
How to Add a Booking Calendar to WordPress with the Bookly Pro Plugin
{excerpt}
Read More
10 Top Tips for Designing Awesome Packaging and Labels
Designing packaging can seem daunting at first glance, but it needn’t be—some of the most effective designs are based on surprisingly simple templates.
Whether you’re looking for tips for creating cosmetics packaging, food cartons, bottle labels or origami-inspired boxes, you’ll be sure to find something here to inspire you.
Packaging takes 2D designs and transforms them into printed, tactile 3D creations—it’s an incredibly effective way of bringing a strong branded look to a product, or helping the consumer to commit to purchasing. In this article we’ll take a look at ten pro tips for giving your packaging a stylish, eye-catching look, as well as technical tips for choosing templates, software and print finishes.
Looking for the perfect packaging template? Take the time to browse the huge range of creative templates over on Envato Market.
1. Origami Styles Aren’t Only for the Brave
Sometimes you encounter packaging that’s so pretty it simply takes your breath away. Folded, origami-inspired designs look incredible and transform packaging into a work of art.
Many origami-inspired designs are surprisingly simple at their core, and are based on thoughtfully laid-out templates. With so many creative packaging templates at your fingertips through sites like Envato Market, these complex-looking designs are no longer out of reach.

The quirky packaging for these bath salts is tactile, portable and looks fantastic embellished with slices of citrus fruit.

If you’re brave enough to try creating your own origami designs from scratch, try experimenting with rough mock-ups on low-grade paper before you commit to the computer—it will help you to visualise how a 2D layout will translate to a 3D product.

Origami styles are not always the most practical or stackable of packaging designs, so they tend to suit display packaging best.
2. Simplify Packaging With Easy-Peasy Labels
At one end of the packaging spectrum is origami-style beauties, and at the other the refreshing simplicity of an easy-to-produce label.
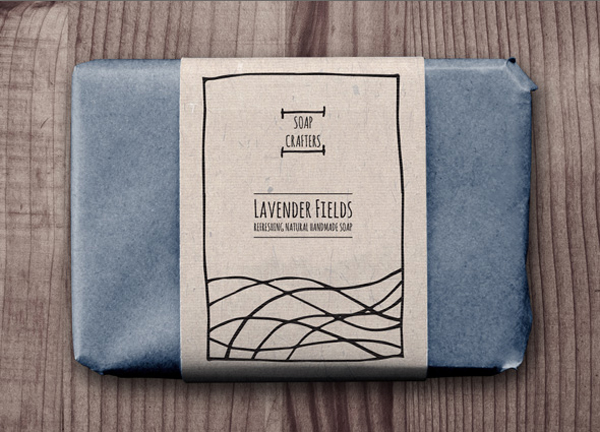
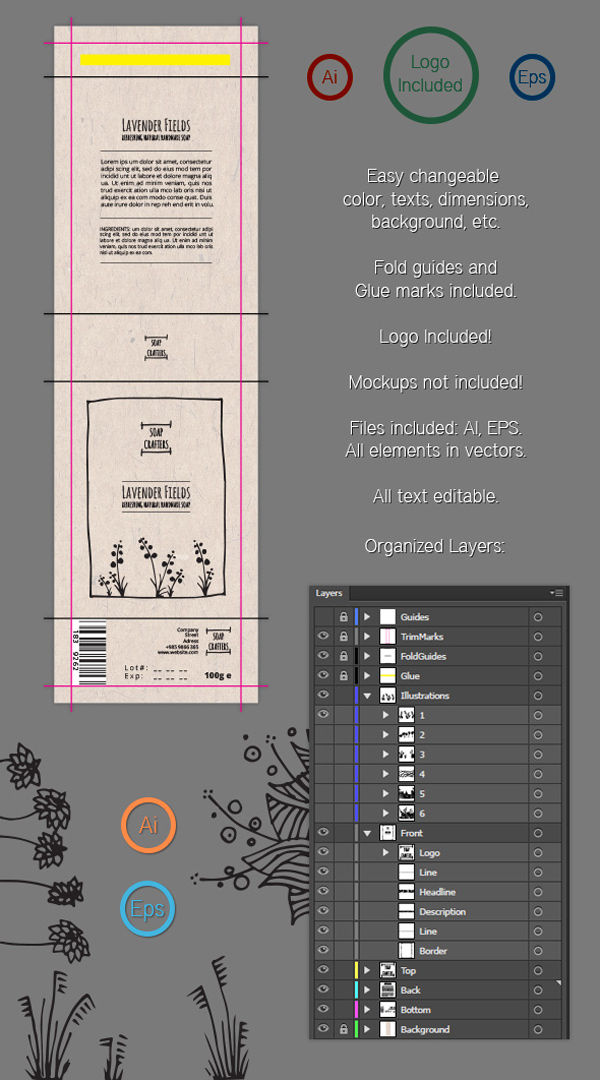
Labels can be attached to bottles, or wrapped loosely around tissue-wrapped items. They’re super-simple to design (no tricky folds to accommodate) and cheap to print, which is great if you’re on a tight budget.
This isn’t to say that labels lack impact—a well-designed label can bring a lovely hand-done look to packaging, as with these rustic soap wrap labels.

Labels are the perfect choice for independent shops and other small businesses looking to produce branded packaging quickly and cheaply, and they really can add to the charm of the product. Labels and simple stickers are also really practical—they’re easy to edit and can be resized quickly to suit various products.
3. Let Your Typography Sell the Product
Typography is such a transformative element in graphic design—choose a classic serif and create an aspirational product, or go for a pared-back sans serif instead and you’re pitching a product that’s suddenly cool and trendy.
Packaging for wine and beer bottles provide some great examples of the power of typography to sell a product to a particular market.

You’ll notice that most champagne labels use traditional serif typefaces or heavily-tracked headers which communicate luxury and high-end quality.
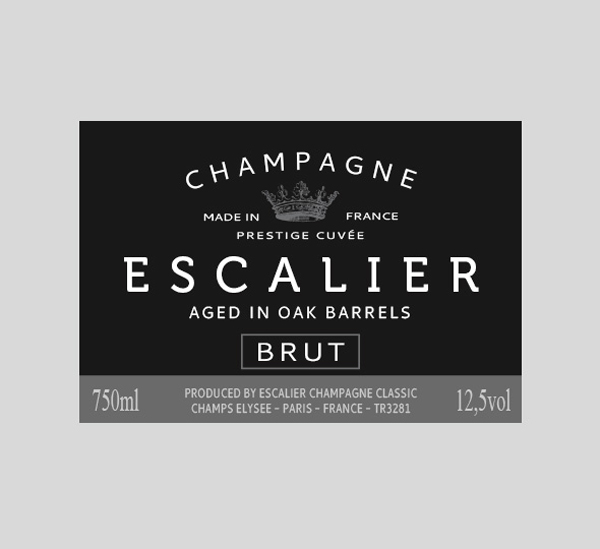
A lot of beer bottles feature informal sans serif or grunge typefaces, to emphasise the laid-back, relaxing nature of their products. Wine bottles can vary—an expensive wine might feature a classic serif to help justify the price tag, or a new wine on the block might use a modern slab type, as on this modern label template, to appeal to younger, fashion-conscious consumers.

When you design your packaging, try experimenting with a number of different type styles in your initial designs. Show the different designs to a market sample or friends/family—which type styles appealed to particular demographics? Does age, disposable income or lifestyle choice sway particular groups towards one typeface or another?
Once you’ve done your experiment, you’ll feel better prepared to use the type style that appeals best to your target market.
4. Use a Natural Color Palette
The days of bold, brash packaging have come to an end. To be relevant in the modern market, you need to tone it down.

Nature-inspired, tonal colors have a calming effect, and tap into the general trend for commercial products that are more eco- and ethic-conscious.
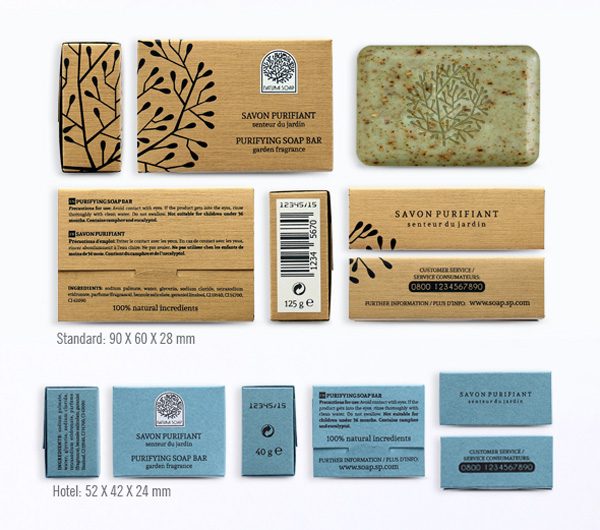
Try using tints of brighter colors to give a wash effect to packaging, or team colored elements with natural brown paper or card, as in this packaging design for natural soaps.

Even if your products aren’t 100% organic or don’t come fresh from the farmer’s market, you can still give a touch of wholesomeness to your packaging with a pared-back color palette.

5. Combine Photography With Minimal Styles
Packaging trends come and go, and one thing that is always in flux is the sort of graphics that feel appropriate. At the moment, illustrated graphics or simple typographic designs seem to be the most popular graphic media.
Photography may not be commonplace on packaging at the moment, but that’s not to say that it can’t look stylish and relevant if designed in the right way.

To keep photography on packaging looking slick and modern, stick to striking, graphic images, and consider using black-and-white photography. Teamed with colorful typography, this can look really eye-catching and on-trend.
Or take inspiration from these minimal templates for cosmetic products and team color photography with simple, sans serif type in a matching color.

Adding solid-color graphics set behind the white text keeps the design looking ultra-modern and app-like.

6. Go Arty!
Sure, a label might be small, but that doesn’t mean it can’t pack a punch. Labels are the perfect place to get really creative, and they’re the stuff of dreams of many a graphic designer.
Many brands are exploring ways to make their products look unique, and some produce special-edition products to increase desirability amongst their loyal customers.
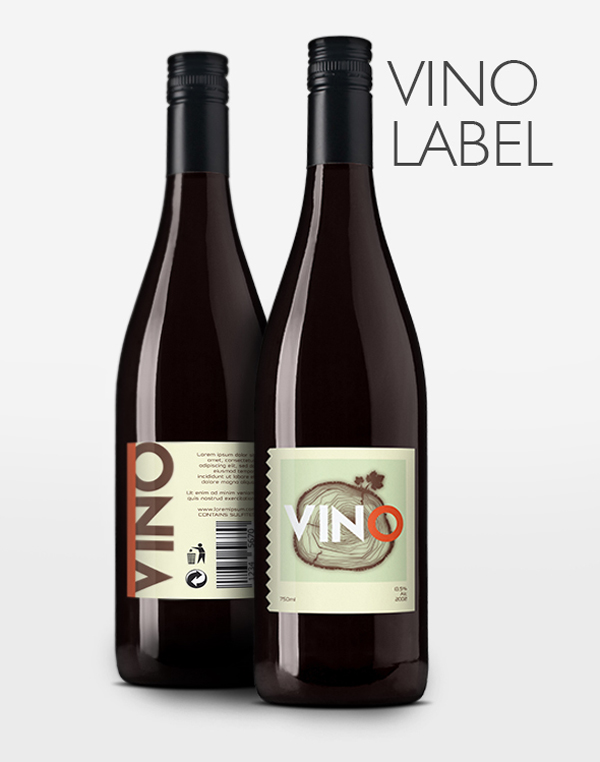
As a result, collaborations with artists are becoming more common in the packaging design world. Particularly for wine bottles, cosmetics and clothing, labels with an artistic touch help to define products as unique, aspirational and special.

If you don’t have Damien Hirst on speed-dial, you’ll have to put on your artistic hat. Painterly finishes, unusual type styles, and hand-drawn illustrations look incredible on packaging and will help your design to stand out from the crowd.

If you’re not a deft hand with a paintbrush, don’t fret—digital and vector art is equally desirable on modern packaging right now.

7. Go Masculine With Black and White…
Although it’s true that more retailers are pitching their products at a unisex market, there’s still a clear visual divide in products that are aimed at specifically men or women.
For products aimed at men, such as shaving products and men’s toiletries, there’s still a strict design code as to what sort of colors and type styles will convert to sales.
Though I wouldn’t condone the traditional blue for boys, pink for girls (that’s just lazy), you can add a masculine or unisex touch to your packaging designs with a strong, graphic black and white color combination. This modern packaging template does just that, and is visually very strong while communicating a masculine vibe.

Team your black-and-white designs with square sans-serif type for a modern take on traditional masculine packaging styles.

8. …or Add a Feminine Touch With Pattern
A ‘feminine’ design doesn’t mean your product will only appeal to women—in fact, adding a feminine element to your packaging only means that you will bring particular qualities to the design, which often have broad market appeal, including elegance and beauty.
Adding a patterned design to your packaging is a fantastic way to bring a beautiful quality to your designs. Mid-century wallpaper-style designs add retro appeal to all sorts of products, or why not try an ornate, William Morris-inspired pattern, as in the packaging template below?

Patterned packaging is not only beautiful, but also a great way to create a uniform series of packaging designs.

These soaps may have different scents, but they are brought together into the same category or brand by simply switching up the color of the pattern, not by changing the design of the pattern itself.

Pattern is also surprisingly simple to design, thanks to its repetitive elements. Work on creating a single ‘unit’ of pattern, and then copy this repeatedly to create a whole sheet of pattern that can be pasted onto a packaging template easily.
9. Think About the Full Packaging Range
Your packaging designs don’t stop at just the box. Once a product is opened, you should consider how the style of the packaging can be extended to internal wrapping, labels, and sub-containers.
Designing a box for a clothes retailer? Once the customer opens up that box, how will the clothing inside be presented? Can you create a branded sticker to place on colored tissue paper? Can you design a stylish clothes tag to place on the garment inside?
This complete packaging range for tea bags is a great example of how to adapt packaging design to a range of purposes—a unified style, using colors, pattern and a strong logo, is extended across the main box to the tea bag packaging and label inside.

Keep in mind that packaging is not only for display purposes—to encourage a customer to repurchase, the whole experience of opening and engaging with the product needs to be as pleasurable as possible. A full range of packaging designs will help you to achieve this.

10. Turn Your Packaging Into a Walking Ad
Think about where you see packaging—on display in shop windows or on supermarket shelves are the obvious places. But you can think about extending your packaging ambitions even further and turn your designs into a mobile advertisement for the product or company.
Creating branded shopping bags is a great way of extending your advertising past the single customer interaction and bringing your brand to a much wider audience.

If your business is setting up shop at a conference or expo, this is a particularly effective way of advertising your stall around the convention hall. These modern branded bags are eye-catching and stylish, and certain to be both practical and a visual talking point for stall visitors.

If your budget won’t stretch to custom printed bags, why not design a simple sticker or stamp in the brand’s style that can be applied to a plain paper bag or canvas tote?
You’re Ready to Start Designing Awesome Packaging!
In this article, we’ve looked at ten tips for designing amazing packaging and labels. The next time you’re looking to tackle a packaging project, keep these ten useful tips in mind:
- Origami-style packaging doesn’t have to be complicated—with the help of templates and mock-ups, it’s surprisingly simple to create folded designs that look striking and decorative.
- Try out labels for a simple yet effective packaging design—wrapped around, tied to or stuck to boxes and bottles, labels can give a lovely hand-done look to your product.
- Let typography sell the product—switch up the style of your typefaces to transform the personality of your packaging and pitch it at particular consumers.
- Use a natural color palette—stay on trend with subtle tints and washed-out tones.
- Team photography with minimal design styles—keep photos looking modern and relevant by pairing them with ultra-modern sans serif type styles and tech-inspired graphics and colors.
- Go arty! Bring an artistic, unique touch to labels with hand-drawn or vectorized illustrations and logos.
- Add a masculine edge to packaging with a strong black-and-white color combination…
- …or bring feminine flair with pattern, for a look that’s elegant and beautiful.
- Think about the full packaging range—extend your designs to stickers, labels and internal packaging for a truly immersive consumer experience.
- Turn your packaging into a walking ad—design custom shopping bags or add logos to totes for an easy way to advertise your business’s presence on the high street or at a convention.
Have any more top tips for designing your own packaging? We’d love to hear about them in the comments below.
If you’re still on the hunt for that elusive perfect label or box template, you’re in luck! You can find a whole range of great-value packaging templates on Envato Market. Or find even more packaging design tips in this article:


{excerpt}
Read More
New Course: Vuex for Efficient Vue State Management
{excerpt}
Read More
How to Make Instagram Stories in Seconds Without Photoshop

Need to create beautiful looking Instagram stories, but don’t have the required tools to start doing so?
Well, what if I told you that there’s an easy way you can change that, using Placeit’s online Instagram Story Templates.
Believe it or not, you can actually use templates for Instagram stories, such as an Instagram caption template, an Instagram story highlight template, an Instagram story cover template, or maybe an Instagram question template, which you can customize in order to tell the world what you feel.
By using an Instagram template, you remove any need for a third-party design app such as Photoshop, and rely completely on Placeit’s online Instagram stories templates, which as you will see are incredibly easy to use and customize.
From finding the perfect Instagram story template to how to make Instagram story templates, I’ll walk you through the entire process and show you how easy it is to do so using just a couple of clicks here and there.
So, if you feel you’re ready to design your own Instagram template story, grab a fresh cup of coffee and let’s jump straight into it!
Follow along with us over on our Envato Tuts+ YouTube Channel:
1. What Is Placeit?
Before we begin, I wanted to take a couple of moments and quickly talk about what Placeit is and how it can do all the hard work for you.
If you aren’t a designer yourself, most of the time that means that you won’t have access to the tools and resources that designers usually use, such as Adobe Illustrator, Adobe Photoshop, Affinity Designer, Sketch, etc.
But what if sometimes you actually need to create something yourself, but don’t feel like spending a lot of money on a graphics suite that you probably won’t use all that often?
Well, when this happens, Placeit can prove to be the perfect fit, since it comes with a set of dedicated online tools that help you create professional banners, mockups, logos, etc. using just a couple of clicks.
That being said, let’s see how easy it is to design your own Instagram Story using Placeit’s custom Instagram Story Templates.

2. How to Access the Instagram Story Templates
Before we can begin working on the actual design, we first have to navigate to the correct section of the website in order to be able to access the Instagram Story Templates.
To do so, we’re going to be using the horizontal navigation menu by heading over to Designs, and then clicking on Instagram Stories.

As soon as we click on the link, the website will redirect us to a new page, on the left side of which we’ll find the Tags menu. This will allow us to filter the available designs using the provided categories.

3. How to Use the Instagram Stories Templates to Make a Custom Instagram Story Design
So now that we’ve seen how easy it is to find the tool, let’s take a look at the actual process of using it.
The first step that we need to take is decide which design template we’re going to be using for the actual Instagram Story. As you’ve probably seen, there are quite a large number of really good-looking designs that we can choose from, depending on what we’re aiming for. Here are some that I really liked.
Insta Quote Template

Black Friday Sale Template

Sale Discount Template

Save the Rainforest Template

Romantic Post Template

For the current example, I decided to go with this autumn-themed design, which looks absolutely beautiful.

Once we’ve decided which design template we’re going to be using, it’s time to go through the process of customizing and making it our own.
Quick tip: no matter what template you end up using, the layout will mostly be the same. On the left side you’ll have all your text-related options, while on the right one you’ll find all your background and design-related ones.

Step 1
We’re going to quickly change the default text using the two input fields, by simply selecting and then overwriting it with our own.

Step 2
Once we’ve entered the desired text, we can go ahead and customize both the font and colors for the two text segments using the provided dropdown lists.
For this example, I’m going to set both fonts to TragicMarker, and the colors to white.

Step 3
Once we’re done working on the text part of our design, we can move over to the right side of the page, where the first section that we’ll see is Doodle, which lets us change the center illustration used by the template.
We can choose from one of the provided illustrations, or we can upload one of our own using the Custom Image button. We can even remove it completely by clicking the No Image button.
For this example, I’m going to go with the fox one since I really like how it looks, and it works better with the “Sweater Weather” message.

Step 4
Moving on down we have Background, where again, we can go with one of the provided background images, upload a custom one of our own, or even remove it completely so that we can use a solid fill color.

In my case, I’m going to stick to the default image used by the template, since the colors blend perfectly, creating the autumn feel that I’m going for.

Step 5
Since the template supports interactive editing, we can easily adjust the position and size of some of the text and shapes. Just select them, which will bring up their bounding box, and then click and drag them to another location, or drag the bounding box’s squares outwards or inwards, depending on what you’re trying to achieve.
For the current example, I’m going to enlarge the two text segments just a little bit to make them more visible.
Quick tip: If for some reason we aren’t happy with our changes, we can easily undo all of them using the Reset Layout button.

Great Job
As always, I hope you had fun working on this little project, and most importantly managed to learn something new and useful during the process.
If you have any questions, feel free to post them within the comments section and I’ll get back to you as soon as I can!
Expand Your Creative Skills!
Just finished going through this quick tutorial, and feel like learning more of what it takes to become a visual creative? Well, if that’s the case, then you’re in luck since I’ve put together a little list which should get you up and going in no time!
-

15 Best Instagram Story Templates on Placeit for 2019
Get noticed with engaging and eye-catching Instagram Story posts by using these quick and easy templates from Placeit. -

How to Make Your Own T-Shirt Design in 5 Easy Steps
Always wanted to make your own T-shirt design, but lacked the courage since you didn’t actually have the required tools or skills to start designing one?… -

What Is a Mockup?
Always wondered what a “mockup” is but never managed to fully figure it out? Well, in today’s video, we’re going to break it down and see how easy it is to… -

How to Make a Banner for a YouTube Channel (With a Banner Maker)
Want to design your own YouTube background banner but don’t know exactly where or how to start? Learn how you can easily do so using Placeit’s online banner… -

How to Make a T-Shirt Video Mockup With Placeit
You can make a high quality promotional video for a product that does yet exist. Placeit offers a comprehensive array of online marketing tools that allow… -

How to Make a Quick Tutorial Video (Animated Slideshow) With Placeit
Are you a cracking cook, a makeup marvel or a top traveller? Whatever skill you have to share, excite and engage your viewers with an insightful and… -

How-To Make a YouTube Intro Video with Placeit (Fast)
Use any of these 10 templates from our YouTube intro maker to create eye-catching starts to your videos. -

How to Make a Fantasy Book Cover (With a Book Cover Maker)
Learn how to make a book cover for a fantasy book by using an online book cover generator: Placeit.

{excerpt}
Read More
How to Choose the Best Wedding Fonts for Invitations and More
Choosing the best wedding fonts for your wedding invitations needn’t be daunting—here you’ll find a selection of the most beautiful wedding calligraphy fonts, wedding script fonts, wedding cursive fonts and unusual wedding invitation fonts to add the perfect finishing touch to your invitations and event stationery.

Looking for the perfect rustic wedding fonts, fancy wedding fonts, or perhaps more modern wedding fonts? You won’t want to miss our selection of the best fonts for wedding invitations, below, as well as professional tips for font pairing wedding invitations and incorporating typography into your wedding designs.
Discover a huge range of stunning script fonts, calligraphy fonts, and decorative display fonts on Envato Elements and GraphicRiver.
-

50 Stylish Wedding Invitation Templates
In this collection of premium design assets, check out 50 stunning wedding invitation templates from Graphic River and Envato Elements. -

How to Make a Wedding Menu Template in InDesign
Make a statement with your wedding stationery by learning how to make an InDesign menu template in just a few easy steps.
For the Traditionalist: Wedding Script Fonts
Script, cursive and handwritten fonts are firm favorites for wedding stationery, and with good reason. Able to give a romantic and elegant mood to designs, they also work beautifully for setting the names of the couple.
From simple brush scripts to ornate calligraphy styles, discover our selection of the best wedding script fonts below.
Pro tip: Team a script or cursive font with a clean, minimal sans serif for a balanced font pairing. The romantic mood of a script font will be tempered and made modern and stylish with a simple sans serif like Magdelin or Liber.
-

How to Create a Marble Wedding Invite in Adobe InDesign
Marble is a big trend in wedding stationery right now, and it’s a beautiful way of making print invitations look instantly more luxurious and expensive…. -

How to Create an Invite for a Winter Wedding in Adobe InDesign
This is a romantic, rustic invitation which would be a perfect fit for winter weddings. Learn how to create this wintry invite in Adobe InDesign.
1. Qindom
A simple and striking brush font which retains the legibility of text, Qindom is a hard-working and versatile script font that would work just as well for rustic invitations as more traditional and formal stationery.

2. Brandine
This thin and flowing brush script has an understated and homespun quality, which would make it a perfect fit for rustic country wedding invitations or discreet save-the-date cards.

3. Marison Brieny
Looking for a script font with a modern spirit? Marison Brieny balances clean lines with a romantic sensibility, making for a simple and elegant cursive style.

4. Catties
A calligraphy font with a casual, youthful style, Catties would work beautifully for informal invitations. Or why not try setting the script in metallic foil to add a touch of luxurious glamor?

5. Charlotte
Charlotte is a jaunty and feminine handwritten font, with a joyful and celebratory mood. With a carefree style, this font would be an excellent choice for couples looking to create chic and modern wedding invitations.

For the Modernist: Modern Wedding Fonts
Whether you’re planning a ceremony in the city or simply feel that ornate or traditional fonts are not your style, these modern wedding fonts will help to give your designs a more contemporary edge.
Pro tip: Some sans serifs can lack romance and emotion, but you can inject more romance into the style by using decorative borders and metallic foiling or by pairing a sans serif with a script font or serif typeface.
-

How to Create a Fall-Themed Wedding Invite in Adobe InDesign
Fall is such a romantic and atmospheric time of year to get married. Learn to create a fall-themed wedding invitation in Adobe InDesign. -

20 Elegant Wedding Program Templates
With premium wedding program templates, you can achieve professional results right at home! Check out this collection of 20 elegant wedding programs to make…
6. Enriq Round Sans
This rounded sans serif has a hand-crafted style that lends it a cheerful and fashionable personality. Reminiscent of 1930s sans serif type styles, this font would also work beautifully for creating wedding logos or place settings.

7. Orchid
Another sans serif with an old-world feel, Orchid is an elegant typeface that would work equally well as a display or body font. The varied line thicknesses of the letters gives the font a faint Art Deco mood, making it a supremely elegant choice for wedding stationery.

8. Valencia
An Art Deco sans serif with a minimal and clean style, Valencia would be the perfect choice for city ceremonies or glamorous hotel-set weddings. Set the type in gold foiling to maximise its Jazz Age elegance.

9. Kenjo and Omega Sans
Blending Japanese minimalism with calligraphy traits, Kenjo is a very modern and stylish take on a script style. The display font is paired with a geometric sans serif, Omega Sans, to create the perfect cosmopolitan font pairing.

10. Aadam
A serif font with modern leanings, Aadam is simple and charming with a minimal, 1930s-inspired design. Its chiselled style would be further enhanced by embossing the type onto your invitations.

11. Giaza
Taking cues from modern serifs like Didot and Bodoni, Giaza is an ultra-stylish display font with enhanced swashes and ligatures. Perfect for fashionable or ultra-glamorous weddings.

For the Old Soul: Vintage and Rustic Wedding Fonts
If you adore the design styles of eras past or are perhaps planning a wedding with a historic theme, these vintage-flavored fonts will be sure to give an air of old-world romance to your wedding stationery.
Pro tip: Vintage fonts can be given a more authentic feel by overlaying textures or printing your invitations onto more rustic and unrefined paper stock. Look for materials that add purposeful imperfections to your designs, such as grainy textures, discoloration or fluted edges, to maximise the vintage mood.
-

How to Create an Art Nouveau Wedding Invite in Adobe InDesign
Art Nouveau is a romantic, decorative design style that works beautifully for wedding stationery. Here, we’ll give a modern update to this ornate style with… -

24 Stylish Vintage Fonts
In this collection of premium design assets, we feature 24 amazing vintage fonts curated from the font sections of GraphicRiver and Envato Elements.
12. Hamilton Font Family
Complete with a serif, sans serif and script, this comprehensive font family allows you to recreate an authentic vintage design. Inspired by old maps and wine labels, Hamilton has plenty of hand-painted texture and unique quirks to help your invitations to feel as if they were created in a bygone decade.

13. My Dear
Inspired by the handwriting found on vintage postcards and old manuscripts, My Dear is a soulful and romantic calligraphy font with a 1940s feel. Why not use the font to create a postcard style design for your save the date cards and invitations?

14. Airwaves Font Duo
A combination of a condensed sans serif and a signature-esque script font, this duo contains everything you need to give your wedding designs an authentic 1930s or 1940s vibe.
This versatile font package contains six styles, allowing you to use the fonts in various ways across stationery, signage, and table plans.

15. Hanty Kagote
If you’re looking for a typeface that channels a Jane Austen mood, look to ultra-romantic and ornate Hanty Kagote. With beautifully executed ligatures and hand-crafted details, this font accurately mimics 18th-century calligraphy styles.

16. Avellino
Balancing Art Deco geometry with the organic curves of Art Nouveau, Avellino is the perfect font if you’re aiming for a 1920s look on your wedding stationery. This is a sleek, minimal and stylish take on vintage type styles.

17. Grodna
Inspired by the type used on storefront signs in the early 1900s, Grodna authentically mimics a late Art Nouveau style. With condensed lettering and angled brackets, this is an extremely elegant tribute to early 20th-century design.

For the Maverick: Unique Wedding Fonts
With more modern-day couples looking for wedding designs that communicate the theme and mood of their event, as well as their personal taste and aesthetics, the traditional criteria for what constitutes as a wedding font no longer applies. If you’re looking for something a little quirky or different for your big day, these novel display fonts might be just the ticket.
Pro tip: Forget about being ‘wedding-appropriate’—if you have your heart set on a more alternative celebration, pick a type style to match! Big, bold and colorful fonts can really make a statement and build your guests’ excitement for the big event.
-
10 Design Tips for Creating Amazing Wedding Invitations
Designing wedding invitations can be scary—which style to choose? Which font to use? Go for pared-back elegance or flashy decadence? Vintage florals or… -

How to Design a Tropical Wedding Invite in Adobe InDesign
If you or a friend are planning a destination wedding, these invites would be great for giving guests a tropical taster in advance of the big day. This…
18. Bouquet Flower & Watercolor
Looking for a beautiful font that adds the decorative wow factor to your designs? This duo of a floral and watercolor-floral display font family has romance and beauty by the bucketload. Pair with a minimal serif font to allow the extravagant letters to take center-stage.

19. Mojita
This unusual but exceptionally elegant font borrows elements from Japanese styling, geometric modern sans serifs and Aztec design to create a fusion type style. This would be a beautiful and unique choice for contemporary ceremonies or celebratory parties.

20. Ciera
Ciera is not the most unconventional wedding font in our selection, but it does have a dual style, coming in both a solid and watercolor version, which gives this painterly font a more distinctive and hand-crafted quality.
This would work beautifully for a variety of wedding themes, from rustic to more urban affairs.

21. Karin
Extremely fashionable and modern, with a slightly exotic air, Karin would be a beautiful font choice for glamorous destination weddings. Maximise its oriental mood with warm colors like terracotta and copper.
Conclusion: Your Perfect Wedding Font
When you’ve found The One (wedding font that is!), you might want to adapt a wedding invitation template to create the perfect design for your big day.
I hope you’ve discovered your dream wedding font to use on your wedding invitations, programs, or menus, but if that perfect typeface is still proving elusive, make sure to check out the huge range of beautiful script fonts, calligraphy fonts, and decorative display fonts on Envato Elements and GraphicRiver.
Below, discover more tutorials and tips for making your wedding designs the very best they can be:
-

How to Create a Rustic Wedding Invitation Template in Adobe InDesign
We’re celebrating all things love-themed this week, and with wedding season just around the corner, there’s no better time to create a gorgeous rustic-style… -

How to Create a Romantic Wedding Photo Manipulation in Adobe Photoshop
Weddings are a magical time of love and romance, so celebrate your new journey with a creative photo manipulation. Learn how to create an entire wedding… -

How to Create a Simple Wedding Confetti Text Effect in Adobe Photoshop
Use a couple of textures, brushes, and layer styles to create a wedding-themed, confetti text effect. -

How to Create a Laser-Cut Wedding Invitation in Illustrator and InDesign
Wedding season is upon us! If you’ve been hunting for the perfect invitations, your search may be over. These lace-inspired cards balance vintage-inspired… -

How to Create a Watercolor Wedding Invitation in Adobe InDesign
Painterly designs are a big trend for wedding invitations right now. In this tutorial that’s suitable for beginners to the software, we’ll walk through the… -

10 Creative Ways to Design Your ‘Save the Date’ Cards
If you’re planning a wedding, either for yourself or someone else, one of the nicest gestures you can make for your guests is to send a beautifully designed…

{excerpt}
Read More
Make Business Profile Video: How to Edit the Story
{excerpt}
Read More