Advertise here
Fortunately, it isn’t required to go to design school in order to be a graphic designer. A good foundation in graphic design history, theory, and practical application will help you hit the ground running. There are plenty of resources available in which you can learn graphic design on your own. Don’t set your expectations to high at first, as it will take enthusiastic study for years to become great. You can do it though!
If you would like to learn graphic design from the ground up, through self directed study, then this article lists some great resources that will get you started with your design education. Also, even if you do go to design school, at least three-fifths of your education will be through self directed study anyway. Let’s get to it!
Editor’s note: This article was original posted on Psdtuts in May 2009.
1. Understanding the Principles and Theory of Graphic Design
There are a few graphic design principles that effect every project you’ll create. Understanding these principles conceptually and learning to apply them practically will formulate the foundation of your graphic design education. Let’s take a look at the basic areas you should study to get a solid footing in graphic design.
Shape, Spacing, and Rhythm
I remember first learning these basic design principles, and they seamed so foreign at first. It took me quite some time to get comfortable with these techniques. In school we did a beginner project that consisted of drawing triangles, just to communicate emotion through placement, shape and spacing alone. Below are some good resources on these principles.
Color, Texture, and Imagery
Understanding the basics of color theory is important and getting a feel for how to work with colors. Color can make areas of a design pop off the page or recede into the background. The use of texture can enhance the feel of a design. In print design texture can be the actual feel of paper or other materials. Imagery can also blend in with texture and is loaded with colors. Learning how to balance these is a delicate craft that will take some practice to apply well. Here are some resources on using color, texture, and imagery in graphic design:
Working with Type
Your ability to use type is one of the things that differentiates graphic design from other visual professions. A big part of graphic design is understanding typography, developing your knowledge of typefaces, and how to apply them in your design. This will be a constant study throughout your career. Here are a few great resources on type:
2. Standing Strong with a Historical Graphic Design Grounding
Philip Meggs book (see below), is a must have for every graphic design. You should read it from cover to cover. Also, as you go through spend time researching areas that interest you the most. Pick at least three areas to go into detailed study with and learn as much as you can about them. One area of interest for me is the Bauhaus, which was a graphic design and craft school founded in the early twentieth century. I find the subject captivating, probably because it combines so many of my passions: art, design, history, and education.
3. Internalize the Graphic Design Process, Conceptual Solutions, Real World Experience, and Creative Application
Graphic designers solve visual problems. The key to teaching yourself graphic design is to understand the process of solving a visual problem. This means you’ll benefit from tackling design briefs. You’ll learn to apply the skills you study by solving fictitious design problems to begin with and as you advance tackling real world problems and working with clients.
Visual and Conceptual Problem Solving
Visual and conceptual problem solving is the core of what we do as graphic designers. Clients come to us with a brief, which is a problem that needs to be solved. A new company may need to enter a specific market and come to you for a comprehensive identity solution. Or you may work at a newspaper and have to lay out a page to deadline. The problems are endless and your job is to solve these issues.
What is a visual concept? Well it’s more than a pure visual solution. It’s a unification of a graphic and an idea, which is placed in context to solve a problem. Let’s look at the example of a logo. It’s a visual mark, which represents the idea of a company, presented in the context of all the company’s identity, marketing, and history. Let’s look at some resources for developing your visual and conceptual problem solving skills for graphic designers. Keep in mind though practicing your craft will help build your visual problem solving skills.
The Design Process
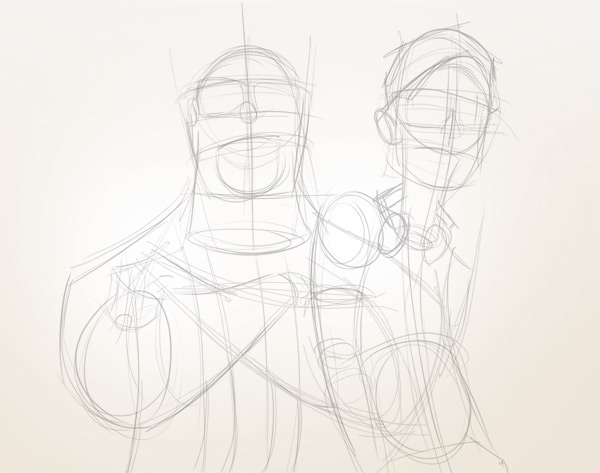
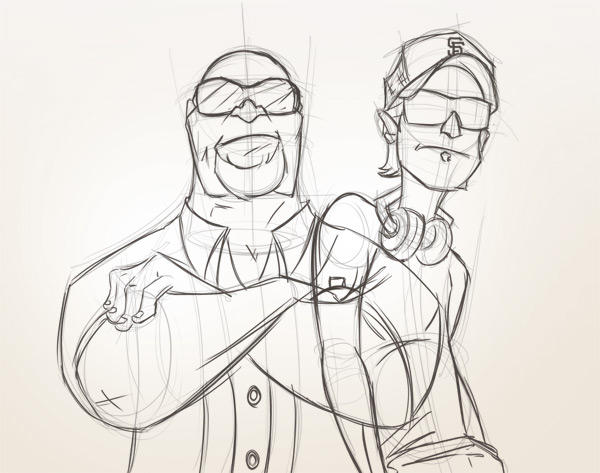
Learning to research, create thumbnails, refine sketches, work up visual solutions in programs, and present to clients are just some of the basics of the design process. Every subset of design may have a slightly different procedure, and your working methodology, or a company you work for may implement things in a somewhat unique way in their production environment. Even so, the basics remain the same. Get familiar with the design process from start to finish, and work on getting faster and better at each stage of the process on each project you work on.
Real World Graphic Design Application
A business card, like a canvas, has boundaries. A book has specific dimensions and technical print limitations. These type of practical and technical limitations are an important part of practicing the craft of graphic design. Work to learn about these technologies and build up your knowledge through real projects. You’ll learn a whole lot about print by having to get a big project printed on a budget. Also, keep in mind that creative solutions are often driven within contained creative environments. Part of the fun of graphic design is solving technical problems with creative solutions.
4. Consider Advanced Study and Development
Advanced study can take many different paths for each designer. You may become interested in a related field, and then mold your graphic design education to apply to that field. However, every graphic designer will benefit from advanced study and planning.
Of course, there’s no limit to the depth you can study on any subject of graphic design. Grid Theory, Graphic Information Design, and Career Planning are just a few areas to focus on. You could certainly go much deeper in other areas as well.
Grid Theory
Many areas of graphic design incorporate grid based solutions. In many ways, grid theory is advanced principles of spacing, flow, and rhythm, though applied to real projects, like laying out an entire book or website. Putting together any multi-page document will likely benefit from a grid, as it makes the design feel cohesive. Below are some resources to get started with grids.
Graphic Information Design
While many of the principles of graphic information design are similar to graphic design, it takes on a more technical and practical approach to visual problems. Rather than looking at the concept on a billboard, a graphic information designer might analyze the proper font size to use for traffic passing the billboard at 40mph, so as to have maximum impact. It’s a blend of scientific research and practical application to visual design. Edward Tufte has written many good books on the subject, and I recommend you read them all. They are elegantly written, the layout of the books are beautiful, and the principles taught have strong, illustrative examples.
Planning Your Career
Spend some time getting acquainted with the graphic design landscape and plan your career. Graphic design is a large discipline, which is directly involved in numerous occupations. Learning the potential of the field will help you decide what you want to focus on. You may be attracted to print design, advertising, interface design, or another graphic design or related field.
5. Learn from Professional Graphic Designers
Aside from studying graphic designers throughout history, you’ll also benefit by studying contemporary designers whom you identify with. A couple designers I found inspirational while I was in design school were David Carson and Carlos Segura. Both of these designers utilize typography in intuitive, innovative, and illustrative fashions. They helped encouraged me to get expressive with my use of type, spacing, and texture. While the approach they practice in design isn’t appropriate for every project, it certainly helped develop my graphic range and ability to think illustratively through graphic design.
You may fall in love with some other approach to design. Also, you’ll go through numerous phases, where you’ll be attracted to something else in design. This is part of what’s great about the field; it’s so diverse. Don’t be afraid to emulate designers approaches on some projects. It’s a good way to learn. Then you’ll move on to something else and it will become part of your collective design experience.
6. Developing Your Proficiency, Intuition, and Flow
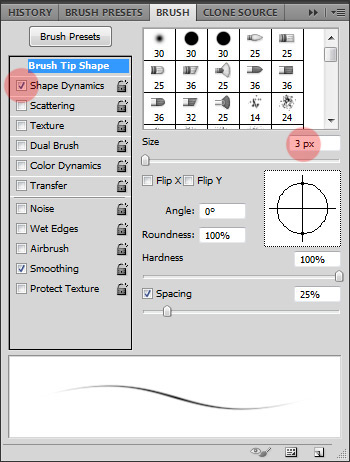
Part of becoming a good graphic designer is becoming one with your tools. If you can wield a pencil, and quickly sketch down conceptual solutions, then you’re a more proficient designer. Of course, when working within programs the same thing applies. If you’re a logo designer, the better you know Illustrator, the better a designer you’ll be. That’s one of the reasons why sites like Vectortuts+ are so useful.
Being proficient with your tools helps you to be able to enter an intuitive flow like state when working, but it’s more than that. The better you know design, your medium, your chosen field of focus, your toolsets, and your workflow, the easier it will be to sink into that space where decisions come easily and time disappears. This flow state is a big reason why people choose any art related field, like graphic design; they enjoy being in the flow of creating and working visually.
7. Put Together Your Portfolio and Blog
Make sure to create a portfolio (a home base with your own url), and blog regularly on what you learn as you grow as a designer.
Three things help get you hired as a graphic designer (in order of importance): your portfolio, your demonstrated experience, your ability to communicate your knowledge on graphic design. You build all three of these over time. It’s not something that happens overnight.
Your portfolio is your most important tool in marketing yourself as a graphic designer. It demonstrates your abilities to practically apply your skills. When interviewing it also holds some of the greatest weight in you being hired.
Experience takes time to grow. Someone that has worked in the field for years, run an agency, or worked with large known companies has a tremendous leg-up in the industry. Don’t get discouraged though, everyone started from ground-zero to begin with.
One of the greatest skills one learns in design school is how to talk and write about design. It’s not just being able to create something that looks cool, but being able to critically analyze a problem, apply a proven workflow to solving it, and communicate the process. In the field, this will equate to needing to sell your solutions to clients or bosses. Or when interviewing, describing how you solved a design problem.
Writing articles for your blog is a great place to practice discussing graphic design, and how you’ve solved specific design problems. It also, in itself, demonstrates your knowledge in the field. Don’t be afraid to add case studies to your blog, even for personal projects, as it’s a great way to build this analytical skill set. Through self-study, use your blog to write articles as you learn about design. This serves as a good substitute for assignments you would receive in a design class, and will compliment the design projects you do.
8. Participate in Online and Professional Graphic Design Communities
Becoming involved in the graphic design community and professional associations will increase your connections in the industry and knowledge of the field. Also, attend conferences and network whenever possible.
Join Professional Associations
A great way to learn about the workings of the graphic design profession is to join professional organizations. They run conferences, produce articles, books, and other resources. Some of these organizations work to improve the profession as a whole by lobbying and other activities.
Becoming Part of the Graphic Design Community Online
Aside from professional communities, there are loads of communities on the web that you can participate in. Below are some graphic design forums you may want to participate in.
Getting Critical Feedback Online and Promote Your Work
Interaction and critique is really important to your growth as a graphic designer. If you’re not in design school, then you need to find other places that people will tear apart your work, and that you can develop your own critical eye. The best thing for a young design is to have someone tell them why something they made isn’t well designed, and what they might do differently. This prepares you for clients doing this (gives you a thicker skin), and it helps you grow with your visual and creative problem solving abilities.
I don’t know of the perfect place on the net to find this, but try different online communities or forums. And if you can find a mentor, even someone with just one or two more years of experience than you, who is willing to critique your work, this can be invaluable. Try some of the places mentioned below and search further.
Aside from your main portfolio, it also helps to have satellite portfolios, which are submitted to portfolio communities, and where you can get feedback on your work. They are also great places to promote your work and gain new clients. Below are some communities to explore.
9. Keep in Mind that Graphic Design as a Discipline Doesn’t Exist in Isolation
Any study of graphic design will include some connection to related disciplines. Studying art and illustration will help develop your ability to create graphics. Studying Marketing will help you place your conceptual solutions within the context of business and consumer needs. Also, graphic design is often a part of the foundational study for related disciplines. You’ll be a much stronger web designer, if you have a solid graphic design education for example.
10. Finding Work as a Freelance Graphic Designer
Aside form landing a job directly, freelancing is a career path available for designers. There is work out there for almost all skill levels. You’ll need to work at building your portfolio, negotiating, and your business skills.
There are numerous communities and resources online that can help you grow as a freelance graphic designer, and freelancing is a great way to get a broad set of graphic design projects under your belt. It’s a great way to grow your skills and learn through real projects, as you study independently.
11. Evaluate if Self Study or Graphic Design School is Right for You
After evaluating the above steps, do some research on schools, and consider the best course of study for you. Not everyone has the financial ability or desire to go to college. Fortunately, it isn’t a prerequisite to becoming a professional designer. The biggest resource in landing a job is your ability to demonstrate your skills, done through your portfolio, and in interviews your knowledge and passion should show.
Going to design school is great, but if you’re diligent you can learn graphic design through independent study. Keep in mind, I’m not saying don’t go to college, as that decision is up to you (I went to Undergraduate school and I took some Graduate courses). Also, you may be in a position that you’re studying something else, but are passionate about graphic design. Plenty of great designers started in other fields or learned on their own.
Even while I was in design school, some of the greatest lessons I learned came from doing projects on my own, studying online, and books. A good teacher can be a great resource though and I appreciate all those that helped me learn while I was in school.
If you do plan on going to design school, then spend some time deciding on the right school for you. What school fits your budget, goals, and ability to attend. You may want to consider online professional programs as well. Or for the brave of heart, do it without formal schooling.
Graphic Design Schools
Putting it All Together
Good luck with learning graphic design. Keep in mind, an undergraduate course takes numerous years to complete, and some even go on to grad school, so don’t set your expectations to high in the beginning, whether you attend school, or go it independently. It’s OK if it takes even years to master graphic design. Just study, grow as a designer, don’t give up, and you’ll get there. Be sure to have fun along the way, or else what’s the point!
Besides, by the time you’re a great graphic designer, you’ll probably be interested in learning something else. That’s just the nature of things, right!
Feel free to link to your favorite graphic design resources (books, articles, and others), as their is an endless amount of great material to get started with, and then to advance your skills as you grow!