Category: Tutorials
Tutorials,freelance,projects,joomla,php,mysql,wordpress,blancer.com
Louis Vuitton’s ‘League of Legends’ biker jacket can be yours for $5,650
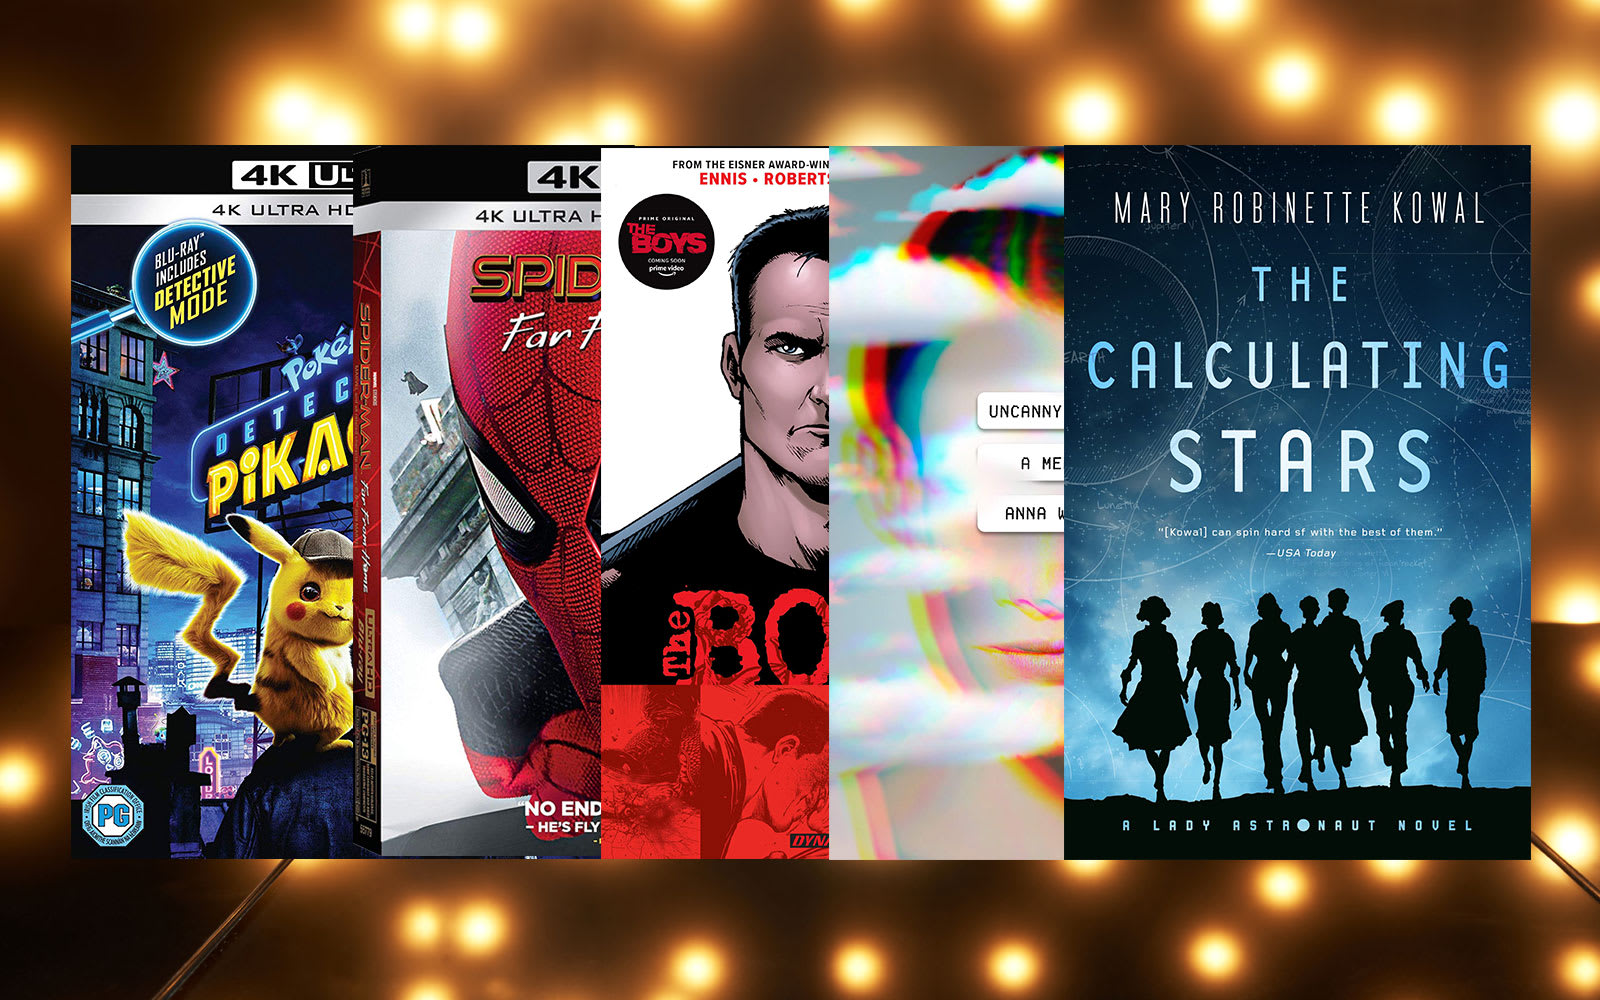
The best books and movies to give the geek, techie or sci-fi fan in your life
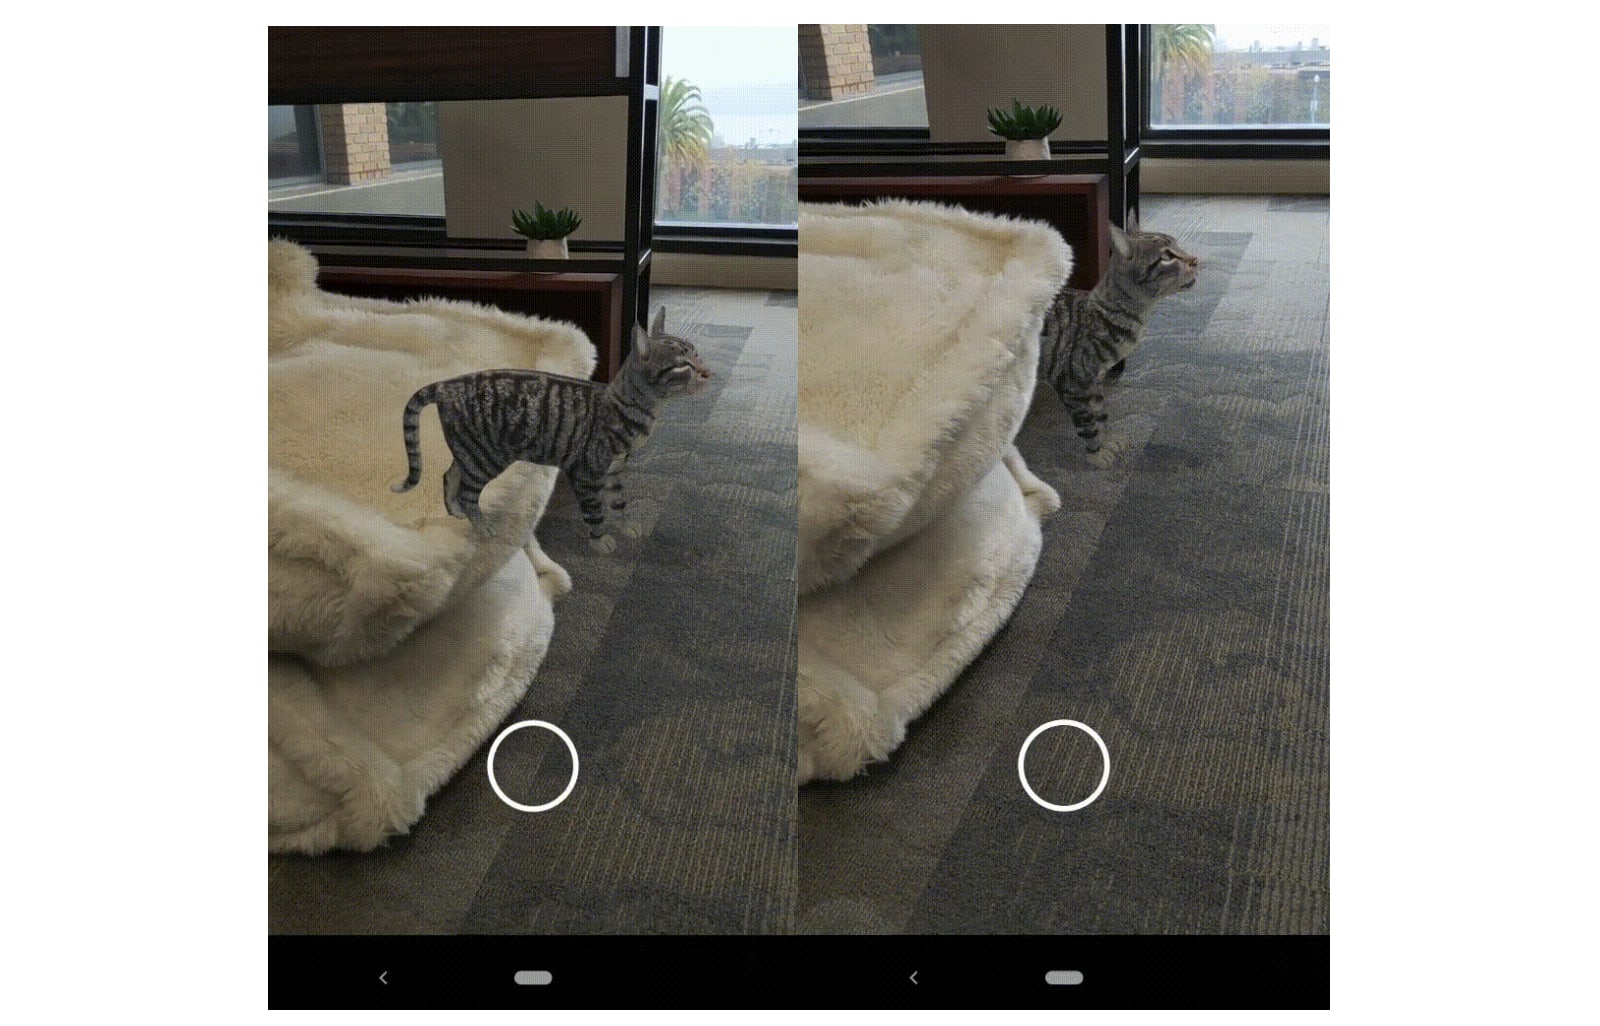
Google’s new depth feature makes its AR experiences more realistic
‘Minecraft’ will finally support cross-platform play on PS4

First ‘Ghostbusters: Afterlife’ trailer entrusts Ecto-1 to Egon’s grandkids
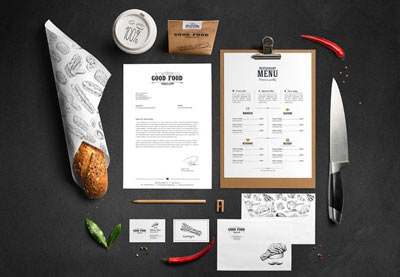
How to Make a Fancy Menu Template

In this tutorial, you’ll learn how to create a restaurant menu template in Adobe InDesign. Complete with a luxurious color palette and a vintage style, this fancy menu template is perfect for high-end restaurants or luxury bars.
This InDesign menu template, which consists of an A4-sized food menu and A5 drinks menu, can be easily adapted with your own text content and is set up for professional, full-color printing.


Looking for a different menu style? Discover more delicious and easy-to-edit menu templates over on Envato Elements.
What You’ll Need to Create Your Fancy Menu Template
We’ll be using Adobe InDesign to create the menu layout, and dipping into Adobe Illustrator to edit the vector graphics for the menu design.
You’ll also need to download the following fonts and image files:
- Coellack font
- Fiona font
- Rosemary Signature font
- Pack of textile backgrounds
- Art Deco ornament pack
- Kitchenware engraving illustration set
Once you’ve installed the fonts onto your computer and saved the graphic files to a safe place, you’re ready to get started with creating your menu design.
1. How to Set Up the Menu Template in InDesign
Step 1
Open InDesign and go to File > New > Document.
In the New Document window, choose Print from the options at the top of the window, and select A4 for the page size.
To the right side of the window, uncheck Facing Pages. Increase the number of Columns to 3 and set the Gutter to 9 mm.
Add Margins of 15 mm and a Bleed of 5 mm, before clicking Create.


Step 2
Expand the Layers panel (Window > Layers) and double-click on Layer 1, renaming it Background.
Select New Layer from the panel’s main menu at the top right, and create two new layers: Material and Type.

Lock all the layers except the bottom layer, Background.

Step 3
Expand the Swatches panel (Window > Color > Swatches) and choose New Color Swatch from the panel’s menu.
Set the Color Type to Process, Mode to CMYK, and the levels below to C=10 M=2 Y=26 K=0 (Peppermint). Click Add and then OK.
Repeat to create three more CMYK swatches:
- C=100 M=83 Y=29 K=27 (Blue)
- C=25 M=20 Y=19 K=7 (Silver Gray)
- C=13 M=35 Y=85 K=7 (Gold)

2. How to Add Color and Texture to Your Menu Template
Step 1
Working on the Background layer, select the Rectangle Tool (M) and drag across the whole page and up to the bleed.
From the Swatches panel, set the Fill Color to Blue.

Step 2
Lock the Background layer and unlock the Material layer above.
Use the Rectangle Frame Tool (F) to create an image frame across the left half of the page. File > Place, navigate to the Cloth Backgrounds folder, and choose image 25.jpg, before clicking Open.
Select the image inside the frame directly by double-clicking, and Right-Click > Rotate 90 Degrees CCW.
Allow the paler half of the cloth image to fill the image frame.

Then select the image frame and Edit > Copy, Edit > Paste it. Then Right-Click > Transform > Flip Horizontal. Move it over to the right side of the page.

Step 3
Select both image frames on the Material layer and go to Object > Effects > Transparency. Set the Mode to Multiply and click OK.

3. How to Add Typography to Your Menu Design
Step 1
Lock the Material layer and unlock the top layer, Type.
Use the Type Tool (T) to create a text frame across the center of the top of the page.
Type in the restaurant name and, from the Character panel (Window > Type & Tables > Character), set the Font to Coellak Rad, Size 60 pt, and increase the Tracking (letter-spacing) to 40. You might want to use the Glyphs panel (Window > Type & Tables > Glyphs) to insert different variations of the characters.

From the Swatches panel, set the Font Color to Silver Gray. You can add an optional subtitle below, set to a 20 pt Font Size.

Step 2
Open the Art Deco Ornament Pack illustration in Adobe Illustrator.
Delete the background color and select the four elements of the design shown below, before going to Edit > Copy.

Return to InDesign and Edit > Paste the design directly onto the menu.
Switch the Fill Color of the graphic to Silver Gray, and position it to the left of the restaurant name.

Step 3
Edit > Copy the graphic and then Right-Click > Transform > Flip Horizontal.

Position it to the right of the restaurant name to frame the header.

Step 4
Copy and Paste the restaurant title text frame and move it below, reducing the Font Size to 42 pt and editing the text to read the menu name, e.g. ‘A LA CARTE’ or ‘FOOD MENU’.

Step 5
Open the kitchenware01.ai file in Adobe Illustrator. Select the spoon graphic on the far left side and Edit > Copy it.

Head back to InDesign and Edit > Paste it, switching the Fill Color to Silver Gray. Paste a spoon graphic on either side of the menu title.

Step 6
Create a text frame spanning the width of the left-hand column, typing in the first subtitle (e.g. ‘STARTERS’), and setting the Font to Coellack Rad, Size 25 pt, and the Font Color to Peppermint.

Create a text frame below this, typing in the name of the first item on the menu, followed by a series of ellipses, and the price on the right side of the text frame. Set the Font to Fiona Regular, Size 16 pt, and a Peppermint Font Color.
Copy and Paste the text frame repeatedly, creating a block of dishes under the ‘STARTERS’ title.

Step 7
Select all the ‘STARTERS’ text frames you’ve just created and Right-Click > Group them.
You can now use this group as a block for populating the rest of the menu design.

Step 8
Return to the Art Deco Ornament Pack illustration and select the elements around the edge of the graphic, as highlighted below.

Edit > Copy this border graphic. Then head back to InDesign and Edit > Paste it onto the Type layer, rotating it to fit any large gap on the menu layout.
Set the Fill Color to Silver Gray.

Inside this border, you can feature a special dish or dish of the day. Set the header in Coellak Rad with a Gold Font Color.

Copy across one or a few of the dish text frames to place inside the border.

Step 9
Don’t forget to add a little key at the bottom left of the menu, for dishes with special dietary requirements.

The final decorative touch is to add a large text frame across the bottom-right of the page, rotating it slightly and typing in a slogan or quote, before setting the Font to Rosemary Signature and a Gold Font Color.

4. How to Create a Matching Drinks Menu
Step 1
Expand the Pages panel (Window > Pages).
On Page 1, Right-Click > Duplicate Spread, to create a copy of the menu.

Scroll down to Page 2 of your document. Select the Page Tool (Shift-P) and click onto the page to select it. From the top Controls panel, set the Liquid Page Rule to Scale, and then switch the Page Size to A5 from the size menu.

This scales all the elements on the page down to a smaller A5 page size, without the need to resize elements individually.

Step 2
Working on the Background layer, select the rectangular shape and switch the Fill Color to Peppermint.

Lock the Background layer and unlock the layer above, Material. Delete the image frames on this layer, before creating a new one with the Rectangle Frame Tool (F) that extends across the whole page.
File > Place, go to the Cloth Backgrounds folder and choose the 28.jpg file, before clicking Open.

Select the image frame and go to Object > Effects > Transparency. Switch the Mode to Screen and bring the Opacity down to 75%, before clicking OK.

Step 3
Working on the Type layer, select the restaurant name text frame(s) and switch the Font Color to Gold. Do the same for the border graphics too.

Switch the name of the menu to ‘DRINKS MENU’ or similar, and the Font Color to Gold.

Step 4
Delete one of the columns of type from the far left or right side, leaving just two columns of text. Move these centrally onto the page, and revise the headings of each section as required (e.g. to ‘COCKTAILS’, ‘BEERS’, etc).
Keep the decorative frame, moving it to the top right of the righthand column, and use this to frame the name of some special drinks.

Change the Font Color of the script text at bottom right to Silver Gray.

Step 5
Return to the kitchenware01.ai illustration in Adobe Illustrator. This time, select a teapot graphic and Edit > Copy it. Paste it onto your InDesign drinks menu.

Select a teacup image separately and Copy and Paste it too.

Adjust the Fill Color of both to Silver Gray.

5. How to Export Your Menu for Printing
When you’ve finished working on your menu and are ready to send it to print, go to File > Export.
Choose Adobe PDF (Print) from the options in the Format menu at the bottom of the window, name the file, and click Save.
In the Export Adobe PDF window that opens, choose [Press Quality] for the Preset.

Then click on Marks and Bleeds in the window’s left-hand menu. Check both All Printer’s Marks and Use Document Bleed Settings.

Click Export to create your menu PDF. You can send this document straight off to the printers—great job!
Conclusion
Your menu layout is finished and ready for sending to the printers! Congratulations!

In this tutorial, we’ve covered a range of skills and techniques which are really useful for creating print documents in Adobe InDesign. You can now feel more confident in:
- setting up a full-color menu layout in InDesign
- using vector graphics to add visual interest to your menu designs
- choosing and using suitable and effective fonts for your menu layouts
- layering color, texture, type and graphics to give your menu designs a modern, on-trend look
- exporting your artwork to a print-ready PDF format
Menu Templates From Envato Elements
Discover more delectable InDesign menu designs over on Envato Elements. Check out our edit below of some of our favourite menu templates:
Seafood Menu Template
This restaurant menu template has a rustic style which could be adapted for seafood restaurants, cafes, or coastal pubs. Available as both a Photoshop and InDesign template, this menu template also makes use of free fonts.

Bakery Menu Template
A simple and stylish two-page restaurant menu template, this menu design would be a great match for bakeries, cafes, or ice-cream bars.

Rustic Menu Template
Complete with vintage-inspired typography and a punchy color palette, this restaurant menu template is available as Illustrator and Photoshop versions. If you’re designing for a steak restaurant or diner, this menu layout would be a perfect choice.

Drinks Menu Template
Looking to design a menu for a cocktail bar, nightclub, or pub? This colorful Photoshop menu template is set up to a large-scale A3 page size—perfect for doubling up as table placemats.

Simple Menu Template
On the hunt for a minimal, easy-to-edit restaurant menu template? This stripped-back menu design is supremely stylish and could be adapted for almost any type of restaurant or bar.

Don’t miss these menu design tutorials:
-

How to Create a Tasty, Trendy Menu Card in Adobe InDesign
Menus play a huge part in shaping a diner’s experience, for the better or worse (we’re aiming for the former!). Whether you’re creating a menu for a… -
25+ Free Restaurant Menu Templates & PSD Mockups
Let’s eat! Create compelling images for your shop or restaurant. Check out this collection of free and premium resources. -

How to Create a Burger Menu Template in Photoshop
Learn some Photoshop basics with this simple and easy tutorial. Learn how to create a Photoshop burger menu template the easiest way. -

10 Design Tips for Creating Mouth-Watering Menus
A menu design can make or break a diner’s experience. Make sure that your menu layouts are the best they can be with these pro tips for designing and…
{excerpt}
Read More
How to Create a Japanese Brush Font Text Effect in Photoshop

Creating a completely custom font effect from scratch may sound like a daunting task, but it’s much less complicated than it might seem! And the task becomes even simpler when you put some high-quality resources to use—resources that you can customize and alter so you still end up with something that’s unique to you and your project!
In this quick tip, we will be taking a look at how to create a Japanese brush font text effect in Adobe Photoshop.
Follow along with us over on our Envato Tuts+ YouTube channel:
What You’ll Need
To complete this project, we are using the following resources:
- Brush Stroke Background
- Inky Brush Strokes Graphic Collection
- Japanese Matcha Green Tea
- Little Samurai Font
Find more resources on Envato Elements!
1. How to Create Paint Stroke Photoshop Brushes
First, let’s start by creating an ink brush Photoshop brush.
Step 1
Import an image of painted brush strokes. Ideally, you want them to be long, with tapered and textured edges.

Step 2
Turn the image black and white by going to Image > Adjustments > Desaturate.
These paint strokes are a little light, so let’s darken them by going to Image > Adjustments > Brightness/Contrast and bringing the Contrast up to 100 and the Brightness down to -150.
Repeat this step until your paint strokes are a nice solid black.

Step 3
Select your paint strokes by going to Select > Color Range and clicking on the black paint. Bring the Fuzziness all the way up to 200 and hit OK.
Step 4
Create a Color Fill layer set to black. The color fill layer will automatically take the shape of the selection!

Step 5
Smooth out the edges of the paint stroke by double-clicking on the color fill layer’s layer mask and choosing Select and Mask.
Set Smooth to 9, Contrast to 24%, and Shift Edge to -30%. Your settings may vary, but we don’t want to lose too much of that streaky brush texture, so be careful!

Step 6
Finally, Crop down your paint stroke and go to Edit > Define Brush Preset. Name your brush, and you are done!
You will want to make as many brush strokes as possible, but alternatively, you can also download a set of premade brush strokes that come on a transparent background or a premade brush pack that is all ready to go!

Step 7
If you’re not sure how to install Photoshop brushes, you will want to select the Brush Tool, open the Brush window, click on the Gear icon found in the top right-hand corner, and then select Import Brushes.
From there, you will want to navigate to wherever you save your brushes, select them, and that’s it!
2. How to Create a Brush Stroke Font Effect
Finally, let’s move on to creating our Japanese-inspired text effect.
Step 1
This first step is optional, but it might help you out for your first few tries with this effect!
Choose a font that’s similar to the structure you want your text to have. In this case, the Japanese brush font “Little Samurai” works perfectly.
Type out your word or phrase. Now, we can use this as a template when we are placing our brush strokes!

Step 2
Import your brush stroke brushes, or have your brush stroke images (with a transparent background) in a folder nearby so you can drop or paint them in as needed.
I will be using these brush stroke PNGs found on Envato Elements.

Step 3
Now, it’s a matter of combing different brush strokes to make different letters. Let’s start with an easy one, “M.”
Drag and drop your strokes to match up with the three vertical lines that make up the lower section of the “M”, using our text as a guide.
Make sure to use different strokes for each line. You want to avoid patterns and repetition!

Step 4
Place a fourth line going through the upper portion of all three lines. You have an “M”!
I suggest grouping all of the brush strokes into their own group and naming it according to the letter they create.

Step 5
You can use the Paint Brush and Eraser Tool to add or take away detail from each line to add further fine-tuning and variation.
Also, remember to Flip lines Vertically and Horizontally and adust both their height and width to avoid the look of repetition.

Step 6
Use the Warp Transform Mode to create and match curves, and to fit the strokes to match the shape of the template text.
Do these steps over and over until all of your letters are created!


Step 7
Change the color of the text by adding a Color Fill layer and clipping it into your master group—the group holding all of your letters.
You can also go ahead and fill in any sparse spots quickly by creating a New Layer below all of your text layers and painting using a hard white brush. This will help your paint look fuller, if that’s the look you are going for!

We’ve Done It!
And there you have it! You can whip up these painted letters in a matter of minutes, and if you find yourself reaching for this kind of text effect fairly often, go ahead and create the whole alphabet, save it in a PSD file, and you’ve officially created your very own template!
So, as always, keep experimenting with different techniques and practicing, and don’t forget to post your version below, along with any questions, comments, or critiques!

More Japanese Brush Fonts
Okami – Brush Font
Okami is a hand-drawn brush font with rough and bold letters. It’s great for logos, branding, print projects, and of course creating a Japanese brush font text effect!

Petal Brush
Petal is a beautiful brush font that was handcrafted by yours truly with a Japanese brush pen. The font is full of character and personality and sits comfortably with modern trends.

Wonderfont Brush Typeface
This font face is ideal for creating a Japanese brush font effect that comes off more rustic and unrefined!

30 Acrylic Brush Strokes
This collection contains 30 isolated high-resolution brush texture strokes made using yellow acrylic paint and many different paintbrushes perfect for creating a Japanese brush font effect.

66 Long Ink Strokes Photoshop Stamp Brushes
Download 66 hand-painted ink Photoshop brushes that work with any Photoshop version! This ink brush Photoshop pack is high resolution and would be a great addition to any project.

Looking to learn more? Why not check out the following tutorials:
 Text EffectsHow to Create a Disney Frozen Inspired Text Effect in PhotoshopEnrique Eliçabe
 Text EffectsHow to Create an Animated Text Effect Photoshop ActionIvan Gromov
 Text EffectsHow to Create a ‘Stranger Things’ Inspired Text Effect in Adobe PhotoshopRose
 Text EffectsQuick Tip: How to Create a Metallic Text Effect Using Layer Styles in PhotoshopEnrique Eliçabe
 Text EffectsHow to Make a 3D Text Effect in PhotoshopMonika Zagrobelna
 Photoshop ActionsHow to Make a 3D Hologram Text Effect Photoshop ActionAnderson Luiz
{excerpt}
Read More
3 Top After Effects Video Templates for Hospitals and Medical Clinics
{excerpt}
Read More
30 Best Printable Digital Scrapbook Paper (New for 2020!)
Looking for an exciting collection of scrapbook paper for your latest project?

Today I’ll show you 30 of the coolest scrapbook papers available in 2020. Whether you’re into traditional scrapbooking and looking to download and print new and exciting papers or want to dip your toes into the world of digital scrapbooking, these beautiful papers are perfect for you.
Some of you may be wondering: What is digital scrapbooking? So before we get going with this fabulous new collection of papers, let’s explore what digital scrapbooking is.
What Is Digital Scrapbooking?
If scrapbooking is the art of adding photos, memorabilia, text, and embellishments to the blank pages of a book, digital scrapbooking involves doing the same thing but on your computer.
So digital scrapbooking involves using a computer and graphics software to arrange and recombine digital or scanned photos, papers, memorabilia and text on blank pages.
If you want to know more about digital scrapbooking, check out this terrific guide:

Now you know what digital scrapbooking is, let’s look at some of the best digital scrapbook papers available today.
Best Digital Scrapbook Paper for 2020
1. Watercolor Seamless Patterns Set

Starting off our collection of digital scrapbook paper is this sumptuous set of printable papers. The set contains ten watercolour patterns in the form of high-resolution jpegs. To use them, simply download and print, or apply them to your project using your creative genius.
2. Mosaic Seamless Vector Patterns Set of 6

If you’re a fan of mosaics, you’ll love these mosaic-inspired printable scrapbook papers. The set contains six seamless patterns presented in the form of EPS, AI and JPEG files for your convenience. These high-resolution files are 2500 × 2500 px.
3. Summer Exotic Palm Design Elements SVG

Looking for a collection with a summer theme? This printable scrapbook paper collection captures all the wonderful things about summer. It contains a whopping 58 high-resolution patterns presented in several file formats for your convenience: EPS, AI, SVG, and PNG. A great selection for digital scrapbooking.
4. Watercolor LAVENDER Digital Paper Pack

What could be more refreshing than a bouquet of lavender? How about 14 bouquets of lavender. That’s just what this lavender-inspired collection of JPEG files delivers. Download and enjoy.
5. Watercolor Eucalyptus Digital Paper Pack

If you love watercolour, you’ll love this pack that features 14 handpainted watercolours of eucalyptus leaf designs. The high-resolution files are presented in JPEG files that are ready for you to download and print or apply to your digital scrapbooking project.
6. Moroccan Patterns and Ornaments

Bring a touch of the eastern Mediterranean to your scrapbooking project with these tiles inspired both by the Portuguese and Moroccan tradition of tile-making. The pack contains 32 patterns and 16 ornaments in AI, EPS, and PNG format. All files are adjustable and editable, so download them and get to work creating awesome projects.
7. Watercolor Colorful Texture, Pattern

Puffy clouds of colour. That’s the vibe these gorgeous watercolour abstractions will bring to your digital scrapbooking project. The six individual handpainted watercolour textures are presented as high-resolution A4 JPEG files. Download and have fun.
8. Woodgrain Seamless Vector Patterns

Inspired by the patterns of woodgrain, this beautiful set of six digital scrapbook papers will bring a touch of nature to your scrapbook, as well as a wonderful, tactile texture. For your convenience, the papers are offered in four high-resolution file formats: EPS, AI, JPEG, and PNG.
9. Watercolor Wonderful Papers

Wonderful watercolours. This beautiful set of hand-painted abstract watercolour scrapbook papers with their pastel shades will bring a soft and whimsical touch to your scrapbook project. The 28 high-resolution files are offered in PNG and JPEG file formats. Fast to download, easy to use.
10. Portuguese Geometric Patterns

Take your digital scrapbooking project up a notch with these wonderfully vibrant and colourful geometric patterns. The 32 patterns are offered in three different colours in AI, EPS, and JPEG file formats. These printable scrapbook papers are super easy to use, but there’s a help file included with the download in case you get stuck.
11. Watercolor Seamless Patterns. Flowers and Stripes

Check out this awesome pack of watercolour printable scrapbook paper. It offers 12 seamless watercolour patterns, flowers and stripes to add a soft, colourful touch to your digital scrapbooking. The pack contains six striped patterns in high-resolution JPEG files and six lovely patterns of flowers, leaves, feathers, and hearts.
12. Bamboo Seamless Vector Patterns

Use this bamboo-inspired printable scrapbook paper in your next project. The black and white backgrounds will bring an eye-catching graphic quality to your pages. The set consists of six seamless patterns in high-resolution EPS, AI, JPEG, and PNG files.
13. Old Chevron Digital Paper Pack
Chevrons are such a beautiful, classic pattern, and this particular pack of chevron patterns incorporates age spots and tones to add a touch of the vintage. The set of ten high-resolution JPEGs comes in various colours, with five bright colours and five pastel colours.
14. Wild Autumn Seamless Vector Pattern Collection

Who doesn’t love the colours of autumn? If you’re a fan of this season, this pack will make you very happy indeed. It incorporates the many hues of autumn in its 12-piece collection of JPEG files featuring leaves, flowers, and shapes.
15. Geometry Watercolor Vector Patterns

What could be lovelier than watercolour and geometric shapes combined? This set combines some of the best printable scrapbook papers for 2020. It offers 24 different geometric patterns in EPS, JPEG, and PNG files. A great way to add colour and dimension to your digital scrapbooking.
16. Tribal Chic Seamless Vector Patterns

This set of tribal-inspired printable scrapbook paper is bound to catch the eye of anyone enjoying your scrapbook. The six seamless patterns are offered in three file formats: EPS, AI, and JPEG. Easy to download, scalable, and easy to incorporate into your projects.
17. Grey Wedding Digital Paper Pack

No list of the best digital scrapbook papers for 2020 would be complete without including wedding-inspired paper. And these 12 are as beautiful and delicate as you would want them to be. These gorgeous quality papers are offered as high-resolution JPEG files.
18. Lace, Wedding Invite Champagne Digital Papers

Another winsome choice for wedding scrapbooking, this collection offers more of a rustic touch. The ten digital scrapbook papers are offered as high-resolution JPEG files.
19. Abstract Water Painting Textures

These beautiful, organic, abstract textures combine watercolour painting, drawing, and pencil images to create eye-catching backgrounds to complement your digital scrapbooking projects. The pack contains ten different abstract textures in high-quality JPEG files.
20. 35+ Patterns & 8 Instagram Templates

These 37 seamless floral digital scrapbook papers are excellent value on their own, but even more so as the set includes eight Instagram templates and six bonus hand-drawn wreaths. The files are offered in EPS, PSD, JPEG and PNG formats and are all fully editable. A bonanza for creatives.
21. Watercolor Vision Vector Patterns

More watercolour goodness for scrapbooking with these 20 seamless patterns. The EPS, JPEG and PNG files are fun and easy to download, modify and print or use for your digital scrapbooking.
22. Camouflage Glam Patterns + Papers

This terrific set of six printable scrapbook papers use camouflage as their inspiration to create a very stylish set of patterns. The set comes with six bonus gold-textured files to make a total of 12 high-resolution AI, EPS, and JPEG files.
23. Burlap/linen Grey Digital Paper Pack

For those times when you need a subtly textured background with soft, neutral colours, there is this terrific pack of 12 high-resolution files with a linen and burlap pattern. These JPEG files are easy to download and print or apply to your project digitally.
24. Cosmic Patterns Collection

This collection of 24 printable scrapbook papers adds a kaleidoscope of colour to enliven your scrapbook project. The set offers six different palettes with four patterns for each of them in high-resolution EPS, JPEG, and PNG file formats.
25. Geometric Seamless Patterns Bundle

This sophisticated bundle of 40 seamless geometric patterns will appeal to those with a modern, minimalist style. In the pack you get a variety of file formats: EPS, AI, JPEG, and PNG, to be exact. Just download the bundle, select your favourite pattern, modify as needed, and print or add to your digital scrapbooking project.
26. Hydrangea Digital Paper Pack

This gorgeous set of paper delivers spring and fresh air on sight. Download these digital scrapbook papers and get a floral bouquet of 12 seamless designs in high-resolution JPEG files.
27. Abstract Water Paint Backgrounds

Colour, abstraction and retro are all captured in this beautiful collection of ten different abstract backgrounds with marbling effects. The high-resolution JPEGs are quick to download and easy to work with.
28. Delicious Patterns Pack + Bonus

A set of 20 patterns in 4 beautiful palettes that’s perfect for digital scrapbooking. Download the EPS, JPEG and PNG files quickly, and modify them to suit your needs.
29. Animal Skin Seamless Vector Patterns

Get in touch with your inner leopard with these beautiful animal-skin-inspired papers. The six papers offer a nice selection of snakeskin patterns that you can scale without loss of quality. The collection is offered in EPS, AI, JPEG and PNG file formats. Go get ’em, tiger!
30. Rose Gold Watercolor Seamless Vector Patterns

It’s no wonder that this delectable collection of hand-drawn patterns made our list of the best digital scrapbook papers. Perfect for a wide range of scrapbook styles and tastes, these 12 patterns are offered in high-resolution EPS, AI, and JPEG formats.
Select Your Favourite Digital Scrapbook Paper Today
These 30 best digital scrapbook papers for 2020 are just a small sample of the terrific digital scrapbooking resources you can find at Envato Elements. If you haven’t found just the right one for you here, head on over there and have a browse.
Meanwhile, if you’re looking for cool fonts to enhance your digital scrapbooking, check out these fabulous resources below:
 Fonts30 Beautiful Modern Script Fonts (Typefaces for 2020)Melody Nieves
 Fonts30 Best Stylish Cursive FontsMelody Nieves
 Fonts40 Best Fonts for Making Monograms & Logo Designs in 2020Melody Nieves
 FontsVintage Trend: Best Mid-Century FontsLaura Keung
{excerpt}
Read More
Envato Tuts+ Community Challenge: Created by You, December 2019 Edition
Hello, and welcome back to our monthly feature! Let’s take a look at some of the wonderful results created by you, the Envato Tuts+ community! Each month, we’ll take a look at some of the lovely works you created and shared with us.
These works are specifically from the Design & Illustration section of Envato Tuts+, where readers like you shared their work in the comments section. Let’s check out some of the wonderful submissions this month!
And remember, you can join in on the fun too! Just comment below your favorite tutorial and attach your completed work, inspired by that tutorial. We’ll be keeping an eye out—we love to see what you’ve created!
Vector Tutorial Results
Let’s start things off with a look at some of the submissions we received, over the past month, that were vector works. Check out these lovely results, as well as the tutorials that inspired them.
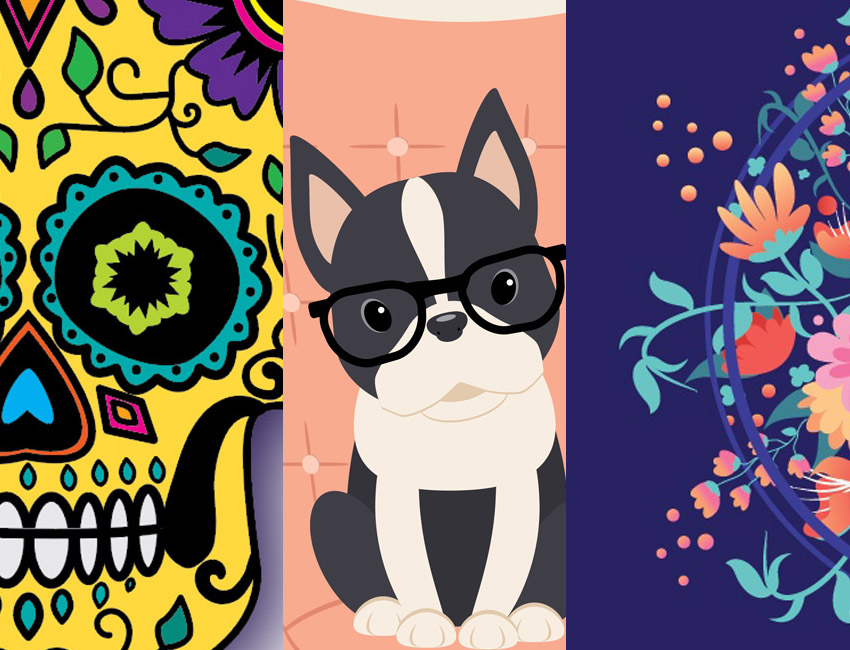
How to Create a Boston Terrier Illustration in Adobe Illustrator

Yannie created this super cute vector illustration, based on a tutorial by Nataliya Dolotko. So glad to hear you learned a lot from this one, Yannie! I love your take on the glasses frames! How cute!

How to Create a Vintage Camera in Adobe Illustrator
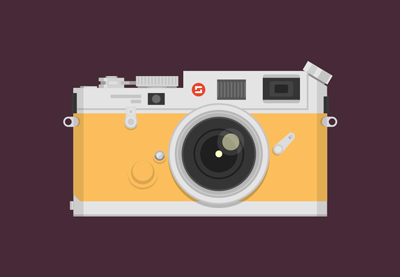
Here’s Joshua_red’s take on this Adobe Illustrator tutorial by Hector Heredia. The dark blue is a lovely color choice! Really glad to hear that you thought this was a great way to get more familiar with Illustrator’s tools! Thanks so much for sharing your results with us. This looks great!

How to Create a Scary Back Alley Scene in Adobe Illustrator

I was so impressed with this submission by Barnali Sarkar! Not only did they do an awesome job, creating their own take on this tutorial by Andrei Stefan—they animated it too! Wow! Check out their post, in the tutorial comments! Fantastic work!

How to Create a Sleeping Cat on a Pile of Books and Indoor Plants in Adobe Illustrator

How cute is this illustration by Kylie Kessler? It’s based on an Illustrator tutorial by Nataliya Dolotko—really loving your color choices here, Kylie! Good luck with the Adobe Illustrator class you’re taking! Hope we see more wonderful work from you soon!

How to Create Vector Floral Typography in Adobe Illustrator

Svetlana Mraovic created this lovely take on this lovely floral type tutorial by Yulia Sokolova! I really like the small dots, as an alternative to the larger petals. Thank you for sharing your results with us—they look wonderful!

It’s Guy Fawkes Night! Create a Bonfire With Blends in Adobe Illustrator

Check out Elena’s bonfire illustration, created in Adobe Illustrator and inspired by a tutorial by Diana Toma! Love the smoke and the texture here, Elena! Thanks so much for sharing your results with us!

Quick Tip: How to Create a Wicker Seamless Pattern in Adobe Illustrator

This submission is such a fun one—ajmaar created this lovely wicker pattern, inspired by a tutorial authored by Tatiana Sharanutsa. Then, ajmaar applied this pattern to some of their work! Awesome result here, ajmaar. Really happy to see it serving your project well!

Adobe Photoshop Tutorial Results
Now, let’s check out some of the submissions that had a specific focus on Adobe Photoshop! From photo manipulation to digital painting, it was such a pleasure checking out these fun submissions. Take a look!
How to Create a Wanted Poster Photo Manipulation in Adobe Photoshop
 Photo ManipulationHow to Create a Wanted Poster Photo Manipulation in Adobe PhotoshopMelody Nieves
Here’s Nursyahmah Saini’s submission—a wanted poster, inspired by a tutorial written by Melody Nieves. I like where you opted to place the bullet holes! Thanks so much for sharing your lovely results with us.

How to Paint a Realistic Ear in Adobe Photoshop
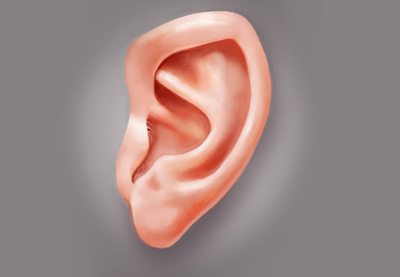
Check out Raffael Andrade’s illustration! This is from another tutorial by the lovely Melody Nieves. Digital painting can be really tough, and human anatomy can be really tricky too! Awesome work here, Raffael! The values here seem really well placed. Hope to see more of your progress and practice soon!

How to Create a Stylized Chalk Text Effect in Adobe Photoshop

Olly (olandiano57) created this lovely (and thoughtful) take on a tutorial by Rose! How nice of you to extend your thanks this way—and it’s really cool that you experimented with this tutorial and made it your own. Lovely work!

Design and Illustration Tutorial Results
And finally, last but not least, let’s check out some submissions that didn’t fit into the two categories above—but are still part of the Design & Illustration section, here at Envato Tuts+!
Fractal Art: How to Create Basic Fractal Flowers in Apophysis

This fractal flower tutorial by Stan Ragets is really lovely—as is this beautiful result by ???! Thank you so much for sharing your take on this tutorial. I really like your color choices. Very glad to hear you felt this was helpful for beginners! Keep up the lovely work!

7 Exercises to Improve Your Digital Painting Skills

This tutorial, by Monika Zagrobelna, is all about exercises to help you with your digital painting. This submission is from space boy—what a charming style! Thank you so much for giving us a sneak peek at your process. Glad to hear you found the tutorial helpful!

How to Draw a Sugar Skull

Check out this beautiful sugar skull illustration by victori48! This illustration was inspired by a tutorial by the lovely Monika Zagrobelna once again—victori48 took this tutorial further, however, adding color and extra details too! Really wonderful work; thank you so much for sharing it with us!

Tried Out a Tutorial? We Want to See Your Work!
Share your work with us—we absolutely love to see what you’ve created, inspired by our tutorials here on Envato Tuts+! From recreations to your own take on the tutorial content, we’re so happy to see your work.
We’ll be keeping an eye out for your submissions, and a selection of them will be showcased, each month, in our Community Showcase. Here’s how to get involved:
- Your artwork or design should be similar to a tutorial that you followed, here on Envato Tuts+. Again, we encourage you to have fun with it, but the relationship should still be visible.
- To share your work, comment on the tutorial that you finished and make sure to attach your results. You don’t have to be a pro to share either—all skill levels are welcomed and encouraged!
- Sharing your work elsewhere, like Facebook or Behance? Please link back to the tutorial so others can check it out, as well!
A big thank you to all of the wonderful artists, designers, and creatives who shared their work with us this month—we can’t always feature everyone, but we love seeing what you made. Thank you for sharing your work with the community! We’ll be on the lookout for more of your work next month—so keep on creating!
Check out last month’s community feature:
 Community ProjectsEnvato Tuts+ Community Challenge: Created by You, November 2019 EditionDaisy Ein
{excerpt}
Read More
3 Top Baby Video Slideshow Templates for After Effects
{excerpt}
Read More
Google is ending support for the Explorer Edition of Glass

Despite the HQ2 debacle, Amazon will add office space in Manhattan
Apple plans software fix for 16-inch MacBook Pro ‘speaker popping’