On August 14th, 2019, the International LIGO-Virgo Collaboration — an array of antennae in the US and Italy — detected odd gravitational waves. The readings indicated that an object with a mass 2.6 times that of the sun was gobbled up by a black ho…
Category: Tutorials
Tutorials,freelance,projects,joomla,php,mysql,wordpress,blancer.com
Slack lets up to 20 companies chat in the same channel
Slack, which is commonly used as a chat program within organizations, is now introducing a way to communicate with people from other organizations. The feature is called Slack Connect, and when implemented, it’ll let you use channels and all sorts of…
‘Fortnite’ will host a Christopher Nolan movie night this Friday
Fortnite players are about to go to the movies. A month or so after a new trailer for Christopher Nolan’s Tenet premiered in the game, you’ll be able to watch one of the celebrated filmmaker’s blockbusters inside Fortnite for free this Friday as part…
Tinder’s catfish detector is now available in the UK
Meeting someone you connected with online can be awkward. It’s even worse when that person looks nothing like their photos. Tinder’s Photo Verification feature prompts a user to pose for two real-time selfies and uses AI to compare them with their ex…
Sonos will lay off 12 percent of its workforce due to COVID-19
Sonos is the latest company to announce layoffs due to the COVID-19 pandemic. It plans to eliminate 12 percent of its global headcount and close its New York retail store and six satellite offices. The company outlined these plans in a filing with th…
Fujifilm X-T4 review: The best APS-C mirrorless camera, for a price
It was going to be tough for Fujifilm to follow up on the X-T3, a mirrorless camera that I and many others believe to be the best APS-C camera on the market. It was not only the prettiest and best-handling flagship out there, it was fast, compact and…
How to Create a Twitch OBS Stream Overlay in Photoshop

Do you live-stream on Twitch? Ever wanted to make your own live-stream Twitch overlay graphics from scratch? In this tutorial, we’ll walk through the basics of creating a stream overlay, for your custom Twitch live-stream, in Adobe Photoshop. We’ll make a custom Twitch overlay from scratch, and then we’ll put it to use in Streamlabs OBS.
Streamlabs OBS is only available for PC, at this time. However, you can also use OBS Studio, with a tool like Muxy Alerts as an alternative, if you use a Mac. The premise behind using these tools is similar.
In addition, if you’re looking for a quick and customizable stream Twitch overlay—or even an OBS overlay maker—you might also want to take a look at Placeit! There’s so much stream content and Twitch graphics here—from Twitch overlays to intro screens to Twitch panels! If you’re looking for a Twitch overlay maker, this right here might fit the bill, as this content is customizable, too!
So, if you’re looking for a super easy, OBS stream overlay maker, you might want to give Placeit a peek!

Now, let’s dig in, talk about how overlays work, and make one of our own, from scratch!
Follow along with us over on our Envato Tuts+ YouTube channel:
What You’ll Need:
The followings assets are used within this custom Twitch overlay tutorial:
Take a moment to consider what imagery you might like to use in your Twitch overlay! I also like to work with screenshots, to help me get a feel for how things will look, while I’m designing in Photoshop.
1. How OBS Stream Overlays Work
Step 1
First, let’s talk about what an OBS Stream Overlay is and how it works.
When you watch your favorite live streamer, it’s common to see graphics on top of the content that’s being streamed. This could be anything from static graphics to animated elements, interactive text that’s influenced by viewer interaction, and more.

Step 2
This might sound really complicated, but it’s surprisingly simple! I want to note that I have not received any compensation for my recommendations here—these are my genuine thoughts and opinions, based on my experiences of streaming and how I make my own overlays.
Generally speaking, when working with OBS, we typically have three things going on here:
- First, we have our graphics or media. This is the content that we can create using graphics software, like Adobe Photoshop or your software of choice.
- Second, we have a tool that generates content based on your stream. OBS Studio alone, for example, doesn’t keep track of your new followers. One of my favorite free tools for stream alerts is Muxy Alerts, but there are a lot of choices out there!
- And third, we have broadcasting software, which brings all of your content together. Think of it like arranging everything from different sources into one, finalized presentation. An example of this would be OBS Studio.
That said, in this tutorial, we’ll be using Streamlabs OBS—the benefit here is we can largely “skip” the second criterion here. Streamlabs OBS handles the alerts and the broadcasting, all in one nice, neat place.

2. How to Create a Stream Overlay
Step 1
Before we jump right into the design phase, we need to clearly define what we hope to create. There are lots of things we could do with our stream overlay—and the right choice is going to depend on what you’d like to do. Some streams have a lot of supplemental, visual content on them, and others prefer to keep things minimal. Again, there’s no right answer—just what’s best for you and your broadcast.

Step 2
Here’s a list of some things you might want to consider, for your overlay:
Viewer Interaction—this would include things like the most recent follower, most recent subscriber, and most recent donor.
Goals—you could display things like your donation goal, subscriber goal, or follower goal, for example.
Social Media—you may want to make your social media accounts visible on the overlay itself, so viewers are further encouraged to interact with you.
Web camera—many streamers have a web cam where viewers can watch both them and the subject of the stream at the same time.
Chat window—you could also display your channel’s chat on the stream itself. Personally, I’m not a huge fan of this, because it takes up a lot of real estate, but it can also be a fun way to capture the chat with the video.
The stream focus itself—we have to, of course, allot space for the focus of the stream itself. This is often where the gameplay is shown, if it’s a gaming live stream.
Note, this list isn’t exhaustive; there are plenty of other things you could do with your live stream and its overlay. For example, I have interactive lighting in my room, and I’ve used an animated carousel, on screen, to showcase a small selection of my artwork. Once you know the basics, you can expand on them in any way you like.

Step 3
So, how do you know what to include in your overlay? I’d recommend keeping the following in mind:
Where is your focal point? It’s fun to have a lot of interactive things on screen, but make sure to keep the emphasis on the focus of your stream. So, for example, if you’re streaming a game, it might be wise to keep it as your focal point.
Additions should supplement your stream. This means that content you add should enhance the experience and not distract from it.
Make sure the content is legible. If things are difficult to read or understand, it might defeat the purpose. For example, decorative fonts are often best suited to titles and headers as opposed to things like body copy or smaller text.
Be cohesive. Consider a visually unified theme, especially if you’re trying to build a professional brand. Have a logo, signature colors, and a consistent aesthetic—that’s not to say you can’t change it up, but consistency can make for a more cohesive, visual experience. For example, using six different fonts might look rather chaotic.
Your decisions on these points should be influenced by your goals. For example, maybe you don’t want a logo—maybe you’d prefer an avatar. Maybe you want to showcase artwork, so the visuals will change regularly. Consider your goals and you’ll likely have a more successful outcome.

3. How to Design a Stream Overlay
Step 1
So, now that we have an idea of what we’d like to include, let’s dig in and start designing. There are plenty of different ways to approach this—personally, I like to start in Adobe Photoshop and plan my design out there.
Open up Adobe Photoshop and start a New Document.
Our New Document needs to be 1920 pixels wide by 1080 pixels tall—this is going to be the size of our total visible area.

Step 2
Before we create our document, let’s change our Background Contents to Transparent.
Once you’ve done so, click Create to create your document.

Step 3
For this tutorial, I’m going to include the following in my layout:
- on-screen viewer interactions
- space for a web camera
- social media content
- space for a subscriber goal
- my main stream footage
I decided to start off with some content areas for my on-screen viewer interactions. I wanted the overlay to display the newest followers, the newest subscriber, and the latest donation—you can choose to include (or exclude!) whichever you prefer.
I began by creating a New Layer. You can do so in the Layers panel, as highlighted below. I like to name my layers, to keep things organized. You can name your layers by clicking on the name of the layer itself, in the Layers panel.
Then, using the Polygonal Lasso Tool, highlighted below in the Tools panel, I drew a polygon with my mouse. Each click is a point in your selection. An extra tip—hold Shift while drawing your shape to create perfectly straight lines!
Finally, fill this selection with the Paint Bucket Tool—I chose to do this in black.

Step 4
Next, duplicate this layer. You can do so by right-clicking (on PC) or Control-clicking (on Mac). From the resulting menu, select Duplicate Layer.
We want three copies of this layer in total—one for each of our planned interactions.

Step 5
Next, merge these three layers together.
To do so, hold Shift to select multiple layers at once. Then, right-click (on PC) or Control-click (on Mac). From the resulting menu, select Merge Layers.
Note, this combines the layers together. You may want to keep them independent. Keep in mind, however, that if you decide that you want to separate this content, it’s as simple as cutting and pasting onto a new layer, once again.

Step 6
Now, Duplicate our merged layer, using the same process.
This leaves us with two copies of the same three polygons. Use the Move Tool to adjust their alignment—if you’re following along with me, we want it to look as if one is “on top of” the other, as shown below.

Step 7
Now, Lock Transparency on our bottom set of polygons. This will allow us to apply color without worrying about going “outside of the lines”. You can Lock Transparency in the Layers panel, as shown below.
Select a blue and a cyan color for your foreground and background colors—or select any colors you prefer! You can find your colors in the Tools—click on the colored squares to open up the color picker.

Step 8
Use the Gradient Tool to apply a gradient to our bottom polygons. Simply click and drag to apply your gradient.
Again, the color will “stay” in this area, because we have Lock Transparency on in our Layers panel.

Step 9
Now, let’s add some text with our Text Tool. It’s hard to see, below, but I’ve typed out “new follower”.
Since it’s hard to see, let’s add a Stroke to this text to help improve its visibility.
To do so, select the text layer and then click on Add a Layer Style, in the Layers panel. That opens up the following menu, as shown below—select Stroke.

Step 10
Here’s what our Layer Style options look like—feel free to copy my values! I went with a 3 px Stroke.
Once you’re happy with your settings, click OK.

Step 11
Repeat this process twice, so that we have text above all three polygons.

Step 12
When I’m working on an overlay, I often like to insert sample content, just so I can get a feel for how things look. In this case, I added some test names to each of my sections, in blue, so I could see what it looks like when there’s content there.
I did so using the Text Tool—and I put this content within a Folder. You can create folders at the bottom of the Layers panel. Folders (or groups) are a great way to keep your content organized. I’ll be using them, in this tutorial, but they are optional.

Step 13
Now, let’s create a space for some social media content.
Similar to our original polygons, I created a New Layer, in a new folder (I want to keep the different parts of my layout organized).
I started out by drawing a selection using the Polygonal Lasso Tool. Then, fill the space with the color of your choice, using the Paint Bucket Tool—I went with black, again.

Step 14
Notice a pattern here? We’re going to repeat the process that we did with our other black shapes:
- Copy the layer.
- Move the Layer, using the Move Tool, so one looks “in front of” the other.
- Lock Transparent Pixels in the Layers panel, so we can’t apply color “outside of the lines”.
- Then apply your gradient, using the Gradient Tool.
Our goal is to create a similar look, so the content here matches.

Step 15
Now, let’s add some content here.
You could add anything you like here—social media icons, names, URLs, a notice, anything you like! In this case, I added two social media shout-outs here, so they remain on screen and easy to see.
I used the Text Tool to write the social media handles, and then I copied and pasted some social media icons into my layout.
Here are the social media icons I used, if you’d like to use them too!

Step 16
Next, I decided to add a space for a web camera. Again, I want to note that this all depends on what you want to include in your layout—you could, for example, leave this section out entirely!
Repeat the same process from Step 14 and 15—only for our web camera’s space.
Note, you may want to take into consideration your web camera’s dimensions. I chose to work with 640 pixels wide by 480 pixels high as my general basis (for example, create a new document at this size, paste it into your document, and then scale it using the Move Tool or Free Transform).
Then, I scaled this down, so I knew the aspect ratio would remain the same.

Step 18
Again, I like to have sample content in my layout, so I can get a feel for how things are coming together. In this case, I chose to apply a test image to my web camera space.
If you’d like to do so, too, paste your image into your document. Make sure the layer containing this image is right above the black square we’ve designated for the web camera’s space.
Then, select the image layer and right click (on PC) or hold control and click (on Mac), and select Create Clipping Mask from the resulting menu. Now, we’ll see a sample image displayed within this space.

Step 19
Let’s add a space for our subscriber goals, too! I want this to look like a progress bar, so I kept that in mind when creating these shapes.
Don’t worry about the progress bar itself, just yet—just make sure there is a space for it, and that it visually matches the rest of our composition. Follow the same steps to create the blue gradient look behind our black content spaces.

Step 20
I decided I wanted to add some additional decorative elements to my layout.
In this case, I created a New Layer. Then, I used the Rectangular Marquee Tool to draw a horizontal selection. I then used the Paint Bucket Tool to fill this space with black. Sound familiar?

Step 21
As you might have guessed, I used the same process again to create a gradient blue line beneath this long black line! I’m trying to keep the visuals here consistent.
Follow the same steps with any colors you prefer!

Step 22
We don’t have to stick to straight lines—in fact, our layout uses some fun diagonals, so I thought it might be fun to create a bottom line that plays into this. Again, this is the same process as the previous line.
Experiment with different visual directions!

4. How to Prepare Graphics for a Stream Overlay
Step 1
At this point, I was pretty happy with my layout—so let’s prepare it for OBS!
First, make sure to remove or hide any test content, like names or pictures that you put into your layout, just for example purposes.
Then, we need to selectively merge our layers. For example, I want the contents of my “Top Line” folder to be merged into one layer, so I can export it as one image.
Hold Shift while selecting the layers you’d like to merge. Then right-click (on PC) or Control-click (on Mac) and select Merge Layers from the resulting menu to combine them.
Don’t merge everything together! Merge specific elements so they no longer have layered components. Think about what images you want to act as one unit, and which you’d like to keep independently.

Step 2
Here’s an example of my layers, after everything has been merged. No more folders, no more multiple parts to each component of my layout.
Below, only the top information bars are visible (you can toggle visibility on and off by clicking on the “eye” next to each layer). Notice, again, that this is all on one layer—the black polygons, the blue polygons behind them, and the text.
Keep the layer you’d like to export selected.

Step 3
Now, we need to select this content. Go to Select > All to select your entire canvas.

Step 4
Then, Copy (Edit > Copy) and Create a New Document.
Now, Paste (Edit > Paste)—Photoshop should paste the content we copied from our layout, as shown in the example below. Notice, however, that it is exclusively the one, merged part of our layout that we had selected.
Save this content as a PNG file—so the background stays transparent.
Repeat this process for each part of your layout. You could, in theory, export your entire layout as one transparent PNG, but I often prefer to keep different pieces separate. The choice is yours!

5. How to Use a Stream Overlay
Step 1
Now, let’s take our work and discuss how to add a stream overlay to OBS. While we’ll specifically be using Streamlabs OBS in this tutorial, the premise is similar in OBS Studio—adding in your sources, so you can broadcast with them.
Make sure you have Streamlabs OBS installed. If you don’t, or you have questions about installation, check out this tutorial from Streamlabs.
Start off by creating a new Scene. Under the panel that says Scenes, click on the plus sign to create a new scene. When you do so, you’ll be prompted to name your new scene.
I decided to call my scene “My Overlay”. Name yours whatever you would like!

Step 2
But our scene doesn’t have anything in it yet! That’s because we haven’t defined any Sources.
Again, click on the plus sign, this time in the Sources panel.

Step 3
Doing so brings up a whole host of options! However, we’re going to start off with Image, from the list of possible sources.
Select Image as the source, and then click Add Source.

Step 4
Here are the resulting popup options. We want to Add a new source instead—give it a name, and click Add Source.
If we don’t toggle “Add a new source instead” on, we can choose from old sources that we’ve already defined. Handy!

Step 5
Now, select the image you’d like to import—this would be one of the images we exported from Photoshop.
In the example, below, I’ve selected the transparent PNG that contained our three black polygons.
Once you’ve selected your image, click Done.

Step 6
Now, you’ll see that Streamlabs OBS has imported the image into our visible area.
Click and drag to position the image where you’d like it to display in your layout.
Repeat this process, and continue to import your images.

Step 7
Let’s take a look at an example.
In this case, I’ve imported two images—I have the line that goes across my layout (which I’ve called “Top Line”), and my three polygons (which I’ve called “Top Notifications”).
However, they’re in the wrong order here—the line should not be on top of my notifications.

Step 8
Luckily, rearranging sources is easy!
Simply click and drag to rearrange your sources. Now, I’ve got my line behind my polygons, so they display together as I intended in my design.

Step 8
Here’s a look at my Streamlabs OBS, after I’ve imported all of my imagery.
(I included a static background image, as well, just for visibility. This is where I’d have my gameplay or stream footage). If you’re unsure of how to import images, please return to Step 2.
But, we’re not done yet! What about our notifications? Click on the plus sign in your Sources, again, to add a new source.

Step 9
However, this time we don’t want to select Image—we want Stream Label.
Select Stream Label from the list of Sources, and then click Add Source.

Step 10
Just like when we added an Image, we want to select Add a new source instead to create a new source.
Give your new source a descriptive name, for your reference, and then click Add Source.

Step 11
We have so many options when it comes to our Stream Labels!
Most importantly, make sure to look at the Label Type. Below, I’ve selected Most Recent Follower, because that’s the information I’d like displayed. Take a look through the list, however! There are so many different things you could choose here, like your top donor for the month, most recent cheer, and much more!
You can change the font, the color, the opacity—a whole bunch of options here! Change them to best suit your design. For example, I set my font family to Quinta Pro, the size to 36, and the color to #0000faff.
Click Done when you are happy with your selections.

Step 12
Now, just like when importing imagery, click and drag to align your text in your layout. I positioned mine on top of the corresponding black polygon—the one that says “new follower”.

Step 13
Repeat this process for any other dynamic text in your layout.
Again, there are so many Stream Labels to choose from—I chose to work with my newest follower, my newest subscriber, and my latest donation.

Step 14
Now, let’s add in our subscription goal! Start by adding a new source.
Looking at the Add Source options, again, we can choose Subscription Goal, instead of Image or Stream Labels. It’s located under Widgets.

Step 15
Familiar yet? Add a new source instead of working with an existing one, and give your source a name, for your reference. Then, click Add Source.

Step 16
Here’s a look at our Subscription Goal settings.
Go ahead and put in the values that you prefer. For example, give your goal a title, set the amount of your goal, add a starting amount, if you like, and an end date. You can also edit the width and height in the upper left-hand portion of the settings.
Click on Start Goal once you’re happy with your properties.

Step 17
Once we’ve clicked Start Goal, we can see a preview of our subscription bar.
If you want to change the properties, click on End Goal and adjust them.
If you’re happy with your values, click Done.

Step 18
Now, as we did with previous sources, click and drag to adjust and align your subscription goal bar. You can also resize things from this preview—just use the resize handles.

Step 19
Let’s take a look at some other common sources that you might want to use in your stream layout.
First, check out the Display Capture. This captures your entire monitor. I like to use this if I’m using more than one program at a time—for example, if I want to share both Photoshop and AfterEffects (my entire screen).

Step 20
Then, we have Game Capture. This will capture a game that you’re playing on your computer. Generally speaking, most of my computer games have worked properly with this source. Simply define the game, and voila!

Step 21
Window Capture does what it sounds like—it captures a specific window on your computer. This is handy if I want to exclusively stream Photoshop and nothing else, for example.

Step 22
Video Capture Device is the source I typically use when I want to display my webcam. I can define it as my video source, and then preview my camera, within Streamlabs OBS.

And This Is Just the Beginning!
As you may have guessed, there are so many things you could do with your stream overlay. I like to experiment with animated GIFs and MP4s, for example. You can add text right here in Streamlabs OBS, you can show your chat on screen, and more! You can even have a credits roll!
Hopefully, this has given you a taste into some of the possibilities! Streamlabs has an awesome tutorial on how to get started, if you have questions about installation, stream settings, and more!
This is just a taste of what you could create and how you could create it—good luck with your stream overlays!

I love experimenting with new stuff for my stream—videos, panels, lighting—it’s all a lot of fun! If you’re looking for extra help in customizing your stream and your channel, you might want to check out Placeit! It’s a user-friendly stream overlay maker, “stream starting soon” overlay maker, and more!
There’s so much content to customize, and it’s super easy to use. Check it out!

If you enjoyed this tutorial, here are some others you might enjoy!
 Resources32 Best Twitch Banners Using a Banner Maker (Including Offline Banner Designs)Nona Blackman
 Banner AdsHow to Make a Twitch Banner Design Using a Banner MakerAndrei Stefan
 Photo EffectsHow to Make a Soft Light Photoshop Action to Create a Backlight EffectMarko Kožokar
 Adobe PhotoshopTry a New Course on Creative Compositing in Adobe PhotoshopAndrew Blackman
 InstagramHow to Create an Instagram Post Template in PhotoshopAbbey Esparza
{excerpt}
Read More
How to Create a Newsletter Template in Affinity Publisher (Free Newsletter Template)

In this tutorial, you’ll learn how to create a newsletter template in Affinity Publisher. This simple newsletter template is easy to put together and quick to customise, and it also features an on-trend color palette and contemporary typography, making for one of the best newsletter templates you can find for corporate businesses.
This tutorial comes complete with free newsletter templates to download for both Adobe InDesign and Affinity Publisher, allowing you to quickly create your own business newsletter template and use it as a blank canvas for your own designs.
Follow the steps below to learn how to create a printable newsletter template in Affinity Publisher, and put your newsletter design ideas into practice.

Looking for more business newsletter templates? Discover some great options over on Envato Elements.
Follow along with us over on our Envato Tuts+ YouTube channel:
What You’ll Need to Create Your Affinity Publisher Newsletter Template
In this tutorial, we’ll be using Affinity Publisher to create our simple template newsletter. If you’re an InDesign user, you can download the InDesign newsletter template attached to this tutorial. In the enclosed ZIP file, you’ll also find Publisher newsletter templates.
As well as access to Affinity Publisher, you’ll also need to download the following fonts and images from Envato Elements to recreate the newsletter format and Affinity Publisher newsletter template pictured here:
Images for newsletter design (pictured in tutorial):
1. How to Set Up Your Blank Newsletter Template in Affinity Publisher
Step 1
Open Publisher, and go to File > New.
Select Print from the options along the top of the window. Set the Page width to 11 in and Page height to 8.5 in. Deselect Facing Pages.

Step 2
From the Margins options, set a margin width of 0.5 in for all sides of the page. Add a Bleed width of 0.25 in.
Then click Create.

Step 3
Go to View > Guides Manager.

Increase the number of Columns to 3. Then click Close.

Step 4
Double-click on Page 1 in the Pages panel to make sure you’re on the main page of your document, not the master page.
Then go to the Layers panel (View > Studio > Layers) and click on the Add Layer button at the bottom-right of the panel. Name this layer Background.
Repeat to create two more layers, naming them Color and Type.
Select both the Color and Type layers and lock them by clicking the padlock icon at top-right.

Step 5
Go to the Swatches panel (View > Studio > Swatches) and choose Add Global Colour from the drop-down menu at top-right.

Name the swatch Newspaper White and set the levels below to C=0 M=8 Y=9 K=0. Then click Add.

Repeat to create four more swatches:
- Coral: C=0 M=81 Y=78 K=0
- Blue: C=79 M=47 Y=0 K=0
- Yellow: C=4 M=26 Y=88 K=0
- Green: C=73 M=0 Y=71 K=0

2. How to Add Color and Images to Your Affinity Publisher Newsletter Template
Step 1
Working on the Background layer, select the Rectangle Tool (M) from the Tools panel and drag across the whole of Page 1, extending the edges up to the bleed.
From the Swatches panel, set the Fill Color to Newspaper White.

Step 2
To divide up the newsletter layout further, we can add rows across the page. To do this, head back to View > Guides Manager.
Increase the number of Rows to 5. Set the width of the Gutter to 0.01 in. Then click Close.

Step 3
Working on the Color layer, use the Rectangle Tool to create a shape on the page, filling the top three rows of the right-hand column.
Set the Fill to Blue.

Step 4
Create a second shape across the bottom-left corner of the page, meeting the bottom-right corner of the blue rectangle. Set the Fill of this shape to Yellow.

Add a third shape in the bottom-right corner of the page, setting the Fill to Green.

Step 5
The newsletter design will look better with all the images set in black and white. You can use Affinity Photo to quickly adjust color images to black and white, and resave them for using on your newsletter.
Open your color image in Affinity Photo and duplicate the Background layer, working on the copied layer.
From the Adjustments drop-down menu at the bottom of the Layers panel, choose Black and White.

In the Black & White window that opens, adjust the color sliders until you’re happy with the result.
Exit the window, and File > Export the image as a JPG file.

Step 6
Back in Affinity Publisher, switch to the Picture Frame Rectangle Tool (F) and create a frame across the top-left corner of the page.
Go to File > Place, choose your edited image, and click Open.

Double-click inside the picture frame to select the image directly, and scale it until you’re happy with the position.
Here I’ve extended the height of the image by using the Colour Picker Tool (I) to pick up a grey color from the top of the image and applied this to the Fill of the image frame.

I then use the Transparency Tool (Y) to fade the top of the photo by directly selecting the image inside the frame and clicking the tool from bottom to top.

Step 7
Use the Rectangle Tool to create a tall shape over the top of two-thirds of the photo, setting the Fill to Red.

With the shape still selected, choose Multiply from the blending menu at the top of the Layers panel.

Select all the other colored shapes and apply a Multiply effect to these too.

Step 8
Use the Picture Frame Rectangle Tool (F) to create an image frame across the right half of the yellow rectangle.
File > Place, dropping another black and white image into the frame.

On the image frame, Right-Click > Arrange > Move to Back.

Step 9
Create another image frame, this time over the green rectangle.

If you need to hide the top or side of an image, use the Transparency Tool (Y) to create a subtle fade on any visible edges.

Then, as before, Right-Click > Arrange > Move to Back.

Step 10
Use the Picture Frame Ellipse Tool (F) to create a circular image frame over the bottom of the blue rectangle.

File > Place an image, before Right-Click > Arrange > Move to Back.


3. How to Format Type on Your Affinity Publisher Newsletter Template
Step 1
Lock the Color layer and unlock the top layer, Type.
Use the Frame Text Tool (T) to create a text frame to the left side of the red shape, typing in ‘1’.
From the Character and Paragraph panels (View > Studio > Character) set the Font to Liber Grotesque Bold, and from the Swatches panel set the Font Colour to Red.

From the Layers panel, adjust the blending mode of the text frame to Multiply.

Repeat to create a second number text frame above the yellow shape.

Create a larger ‘3’ text frame to the left of the blue shape.

Finally, add a ‘4’ to the right side of the green rectangle.

Step 2
Create another text frame across the top-left corner of the page, typing in the title of the newsletter template. Set the Font to Okana Bold, All Caps, and reduce the Tracking (letter-spacing) to -40%.

For color contrast, set the Font Color of the text over the colored shape to Newspaper White, and any outlying text to Red.

Add the issue number and date to the top-right corner, setting the Font to Okana Bold, as before.

Step 3
Use the Frame Text Tool (T) to create a smaller text frame to the left side of the red rectangle.
Type in the first article heading, setting the Font to Okana Black and the Font Size to around 14 pt.

Create a new frame for the start of the body text on your newsletter format, setting this to Ava Bold, Size 8 pt. Create more linked text frames for body text by clicking on the red arrow icon at the bottom-right corner of the text frame.

Click again to create a linked text frame. Arrange these into two columns, adjusting the Font Color of text in each to improve contrast.


Step 4
Copy and Paste the title and body text frames to populate other areas of your Publisher newsletter layout.

Step 5
Create a pull-quote set in Okana Black across the bottom of the red corner, setting the Font Size to around 21 pt, All Caps, and the Tracking to 40%.

Copy and Paste the quote text frame to create a second pull-quote above the yellow corner, adjusting the Font Color to match.

Step 6
The final green square is a good place to list contact details, a web address, or social media handles.
Set the Font to Okana Black and a Newspaper White Font Color.

4. How to Export Your Simple Newsletter Template for Print
Step 1
When you’ve finished working on your Affinity Publisher newsletter template, it’s time to export your newsletter design as a PDF, ready for sending to print.
File > Save your work, before going to File > Export.
In the window that opens, choose PDF from the icon options at the top, and select PDF (press ready) from the Preset menu.
Make sure the Raster DPI is set to 300, and that the Include Bleed box is checked.
Then click Export.

Step 2
Name your file, select a folder to save it into, and then hit Save.

You can send the exported PDF straight off to the printers—awesome work!
Conclusion: Your Finished Affinity Publisher Newsletter Template
Your Affinity Publisher newsletter template is finished—great job! Here you’ve learned how to create a newsletter template with a colorful, corporate style.

In this tutorial, you’ve picked up a wide range of skills and techniques for how to create Affinity Publisher newsletter templates, from setting up a blank layout to creating color swatches, placing images, and formatting typography to create a stylish and contemporary business newsletter template.
If you want to compare your newsletter design ideas with my own, make sure to download the completed Affinity Publisher newsletter template. It’s also available as an InDesign newsletter template.
It’s quick and easy to customise your end result by swapping in different color swatches, fonts, and images.
Looking for more business newsletter templates and newsletter examples? Discover some of the best newsletter templates over on Envato Elements.
Eager to develop your print design skills further? Don’t miss these Affinity Publisher tutorials for creating your own templates and discovering some awesome newsletter examples:
-

33 Best Company Newsletter Templates (New for 2020)
Release a monthly newsletter! Explore this list of professional newsletter templates from Envato Market and Envato Elements. -

How to Create a Church Newsletter Template in InDesign
In this tutorial, you’ll learn how to create a four-page newsletter template. We’ll put this template together in no time, and you’ll be able to reuse it for… -

How to Create a One-Page Newsletter Template in InDesign
In this tutorial, you’ll learn how to create a one-page newsletter template. InDesign newsletter templates are quick and simple to put together and are… -

How to Create a Real Estate Newsletter Template in InDesign
Looking for an InDesign newsletter template for your real estate business or architecture practice? This one-page real estate newsletter template has a sleek…
{excerpt}
Read More
36 Most Useful PHP Scripts (And 5 Great Free Scripts)
{excerpt}
Read More
39 Best Sublimation T-Shirt Mockups (Using a T-Shirt Mockup Generator)
If you’ve created great designs that you want to use for sublimation transfers, and you’re looking for just the right T-shirt mockup template to preview how your designs will look or showcase them to a client, then this article is perfect for you.
Today we’ll share 39 of the best sublimation T-shirt mockup templates you can customise quickly and easily online using the T-shirt mockup generator from Placeit.

But first, let me show you how easy it is to use the Placeit sublimation T-shirt mockup generator.
How to Create a Sublimation T-Shirt Mockup
1. Go to Placeit.net > Mockups > Sublimated

You will find a wide selection of clothing templates and other mockups that you can add your sublimation designs to, but for our purposes today, we’re looking for T-shirt mockups. So go to the column on the left and select T-shirts.
2. Peruse the Blank Sublimation Shirts > Choose a Mockup

3. Go to Left Menu > Upload Design > Choose Your Design

4. Go to Right Menu > Background > Choose a Background Colour

5. Select an Illustration
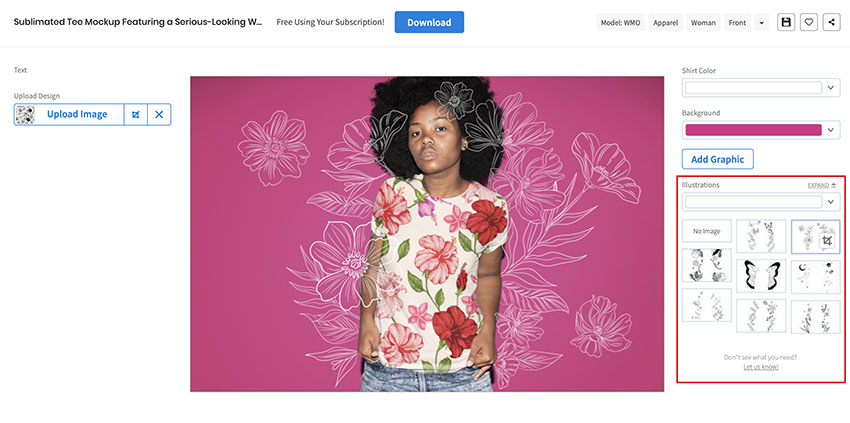
6. Download Your Customised Sublimation T-Shirt

Now that you know how easy it is to create sublimation T-shirt mockups, let’s look at the range of sublimation T-shirt mockup templates available at Placeit.
39 Best Sublimation T-Shirt Mockups
T-Shirt Mockup of a Woman With a Hijab and Mug

What better way to show off your designs for sublimation T-shirt printing than with this awesome T-shirt mockup template that features a young woman standing in her kitchen enjoying a cup of coffee? What’s great about this template is that you can use it to test your design on both a T-shirt and a mug.
Man With Sunglasses and a Customizable Long Sleeve T-Shirt Mockup

This is an excellent long-sleeve T-shirt mockup for sublimation transfers. The template, which is shot in a studio, allows you to customise the background to suit your brand, or you can make the background transparent so it will blend the photo into the background of your choice.
Long Sleeve Shirt Mockup of a Boy Lying Down on the Grass with His Mom

Are your designs primarily for kids? Then you will need this long-sleeve shirt mockup which features a boy reading on his mother’s lap. A great summer-time mockup for your spring- and summer-themed sublimation examples.
Activewear Mockup of a Female Athlete Wearing a Tee and Leggings

Need a T-shirt and leggings combo mockup to test your design for an upcoming sublimation T-shirt printing project? Check out this terrific mockup—a perfect palette for your casual or athletic-wear designs.
Long Sleeve T-Shirt Mockup Featuring a Smiling Woman

Here’s another great T-shirt mockup template for your sublimation transfer design. Just upload your design from your computer using the T-shirt mockup generator to see how your design will translate in a real-life context, and then add your mockup to your website or send it to a client.
Boy in Sublimated Baseball Jersey About to Hit the Ball

Designers of sublimated baseball jerseys will be happy with this terrific long-sleeve shirt mockup designed specifically for baseball uniforms. Try out several design sublimation examples to make sure your designs work and your client is happy with the outcome before investing in a whole print run.
Sublimated T-Shirt Mockup of a Man in Studio

Sometimes you need a real-life context for your T-shirt mockup template, and sometimes you need a plain background that allows you to manipulate the background. This template allows you to create a background in whatever colour you need or leave it transparent to integrate into other backgrounds.
Long Sleeve Shirt Mockup of Girl Sitting in Bed

Here’s a sweet long-sleeve shirt mockup of a little girl sitting in bed that’s perfect for your child-centred sublimation transfer designs. Upload your design, and the generator will integrate it into the template for you in seconds.
T-Shirt Mockup Featuring a Man on His Motorcycle

Are you designing a sublimation transfer for motorcyclists or another target group? Well, Placeit mockups include a large demographic and range of interests and hobbies, so no matter how unique or specific your design, you can find a sublimation T-shirt mockup template to suit your needs.
Long-Sleeve Tee Mockup Featuring a Man Ready to Practice Yoga

This is another example of a speciality T-shirt mockup template for sublimation shirts. This one targets yoga practitioners. So if you’ve been tasked with creating a sublimation transfer for a yoga studio and you need a long-sleeve T-shirt mockup to test how your design will look in a real-life situation, this mockup is perfect.
Back of an Elderly Man Wearing a Long Sleeve Tee Mockup at a Park

There are loads of mockups of blank sublimation shirts at Placeit that feature front designs, but there are also mockups that show the back of your design as well, so if that’s what you need, you will find several featuring models from across a wide range of our population demographic.
Long Sleeve Tee Mockup Featuring a Young Woman Standing on a Sidewalk

Sometimes you just need a simple yet beautiful general-use T-shirt mockup template which shows your design clearly. This is the perfect mockup for such times, and what’s more, you don’t need any fussy software to customise it. Just use the online T-shirt mockup generator to upload your design, and your job is done.
Long Sleeve Tee Mockup Featuring a Man in an Urban Look

Here’s the male equivalent of the simple, general-use long-sleeve T-shirt mockup template which shows your sublimation examples clearly.
Long-Sleeve Tee Mockup Featuring a Man Walking on the Street

If you like the idea of a straightforward template but are looking for something with a cool weather vibe, then you’ll like this beautiful mockup template for your sublimation T-shirt printing. It features a young man standing in a park against autumnal leaves.
Happy Kid Posing Sublimated Baseball Jersey Mockup

If you’re making sublimated baseball jerseys for a kids’ team, use this mockup to show then how their design will look in a real-life scenario. Customising your baseball jersey mockup is as easy as hitting the upload button on the mockup generator.
Mockup of a Smiling Man with a T-Shirt Holding His Baby Girl in a Onesie

How sweet is this father-daughter T-shirt mockup template? You can see how your sublimation transfers will look on two different sized shirts or use the mockup to show off complementary father-daughter sublimation examples.
T-Shirt and Shorts Mockup of a Woman Taking a Selfie

Since it’s such a ubiquitous sight in this day and age, we had to include a T-shirt mockup template featuring someone taking a selfie. This template is best suited to someone looking for a mockup that allows them to add sublimation transfer designs to both T-shirt and sports shorts.
Woman Wearing a Long-Sleeve Polo Shirt Mockup

Looking for a long-sleeve polo-shirt mockup for your sublimation transfer designs? Here’s a terrific mockup for you. It features a young woman standing in front of a cafe on a city street, peering over her sunglasses. Use the upload image feature to add your design.
Long Sleeve T-Shirt Mockup Featuring Young Woman Against a Plain Background

Need an edgy, fashion-forward long-sleeve shirt mockup for your sublimation transfer design? Then this is the template for you. It features a stylish young woman shot against a plain background. After you upload your design, change the background of the image to suit your taste.
Sublimated Baseball Jersey Mockup

How about this sublimated baseball jersey mockup for showcasing your team design ideas? Use the mockup to display several design options so your clients get a clear idea of how the design looks in a real-life scenario, and let them choose their favourite.
Halloween Mockup of Kids With T-Shirts and Tote Bags Asking for Trick or Treat

It doesn’t get any better than this sublimation T-shirt mockup template featuring kids trick-or-treating for Halloween. Not only can you use the template to showcase three different Holloween-themed designs, but you can also see how your design will look on a tote bag.
T-Shirt Mockup of a Man Standing on a Deck at the Marina

One of the great things about sublimation T-shirt mockup templates from Placeit is that they feature a wide demographic, so whether your target customers are the very young or old, LGBTQIA or heterosexual, from the Pacific, Arctic, Africa, Asia, Europe, or North America, short, tall, round, or straight, you can find a model that suits your needs.
Sublimated Round Neck T-Shirt Mockup of a Woman in a Studio

This is a great template for seeing how your sublimation shirt design will look on a real person. Just upload your design, change the background colour, and your T-shirt mockup template is ready to download.
Mockup of a Woman Wearing a T-Shirt Against a Wall Covered in Leaves

This is a mug and T-shirt mockup template that is perfect when you want to test the versatility of your design. There are separate controls for the mug mockup and the T-shirt mockup, so you can test different sublimation transfers or try the same design.
Mockup of a Man with a Sublimated V-Neck T-Shirt Standing by a Chain Link Fence Gate

We’ve featured a ton of circle-necked sublimation T-shirt mockups here, so let’s throw in a V-neck tee just to let you know that if that style’s your preference, Placeit’s got you covered.
Woman Sitting Down in a Restaurant While Wearing a Sublimated T-shirt Mockup

Looking for blank sublimation shirt mockups for your leisurewear line? Then this mockup is a good place to start. It features a young woman sitting casually in a restaurant and will show off your design clearly.
T-Shirt Mockup Featuring a Happy Graduate with a Coffee Mug

Creating a special line of T-shirts and mugs for graduates? Then this is the mug and T-shirt mockup template for you. It features a proud and happy graduate holding her mug and wearing her gown so the T-shirt underneath shows clearly.
Young Woman Sublimated T-Shirt Mockup

Check out this awesome approach to sublimation T-shirt mockup templates that features the same model in different poses that are then combined to overlap each other. A cool and dynamic way to showcase your design.
Mockup Featuring a Woman with a T-Shirt and a Sublimated Tote Bag

Here’s a cool tote and T-shirt mockup combination you need to try. Try one design on both templates or two different complementary designs.
Sublimated Tee Mockup Featuring a Woman on a Stool

Here’s another awesome template for your sublimation shirt mockup. This lovely clothing template is perfect for casual designs that pair well with jeans.
Sublimation T-shirt Mockup Featuring a Stylish Man With Sunglasses

Go bold with this blank sublimation shirt mockup of a young man posed in front of a blank wall. Another great clothing template for that urban casual look.
T-Shirt Mockup of a Woman Wearing a Hijab with Mug

How about this terrific sublimation mug and T-shirt printing mockup to display your amazing designs? You can add the same design to see how they would work at different scales or try complementary designs created specifically for each item.
Mockup of a Curly-Haired Woman Wearing a Sublimated Crop Top

Clothing templates often include a lot of other details in the image, but this one is simple and uncluttered: just a smiling woman wearing a T-shirt, giving you the perfect opportunity to show off your design.
Sublimated Tee Mockup Featuring Two Smiling Kids at a Playground

How cute are these two? If you want to make a success of your sublimation T-shirt printing business, you’ll need a good design, and then you’ll need to choose the right mockup to sell it. If your target market is children’s clothing, then this one is ideal.
T-Shirt Mockup of a Woman Wearing Leggings and Doing a Tree Pose

This one is more than a sublimation T-shirt mockup: you also get to customise the model’s leggings. You can choose different patterns for each, so this would be perfect if you want to show how two of your designs complement each other.
T-Shirt Mockup of a Woman Holding a Tote Bag at an Office

Or how about this mockup, which lets you show one design on the T-shirt and another on the tote bag? With the plain grey slacks and neutral background, your designs will really stand out!
Mockup of Three Folded Sublimated T-Shirts Lying on a Surface

Show three sublimation examples in one image with this simple but very useful mockup template. The outer two are on top, so your full design will be shown there, but the middle one also has plenty of space for the viewer to see what they’ll be getting.
Mockup of a Man Showing His Sublimated Tee in Front of the Bars at a Gym

Looking for a T-shirt mockup template with a health or exercise theme? This one is a great choice, with its subtle gym imagery in the background. But notice how the background is still faded, putting all the emphasis on your sublimation T-shirt design.
T-Shirt Mockup of a Woman Sitting on a Chair Holding an 11 oz Coffee Mug

And last but not least, here’s another great mockup that lets you show off your design on a coffee mug as well as a T-shirt. It’s a striking image that creates a mood of elegant sophistication, so use it for a design that fits that vibe.
Select a Sublimation T-Shirt Mockup to Promote Your Designs Today
These fabulous sublimation T-shirt mockup templates are just a few of the wide range of mockups available at Placeit. I hope our selection has made you excited about all the possible ways you can display your designs. Why not add your design to your favourite mockup and share it with us here? We’d love to see which you choose.
And if you’re interested in other cool mockups for face masks, sweatshirts, computers, iPads, and more, check out these handy roundups of the best mockups in different categories:
 FaceMask Mockups20 Best Face Mask Mockups (PSD, Mockup Generator)Nona Blackman
 Product Mockup22 Best Tote Bag Mockups (Using an Online Mockup Generator)Nona Blackman
 Product Mockup26 Best Coffee Mug Mockups (Using a Mug Mockup Generator)Nona Blackman
 Mockups22 Best Hat Mockups (Using a Hat Mockup Generator)Nona Blackman
 Mockups29 Best Long-Sleeve Shirt MockupsNona Blackman
 Designing24 Best New Crew Neck Sweatshirt Mockup TemplatesNona Blackman
{excerpt}
Read More
How to Install and Use Fonts in Procreate

Want to learn how to download fonts for Procreate, or how to add fonts to Procreate? We’ve got you covered. From downloading to using fonts for Procreate, we’ll tackle it all in this tutorial.
What You’ll Learn in This Tutorial
- How to download fonts on iPad for Procreate
- How to add fonts to Procreate
- How to use fonts in Procreate
Ready to start adding type to your next Procreate project? Let’s dig right in.
Follow along with us over on our Envato Tuts+ YouTube channel:
What You’ll Need:
We’ll be using the Springloved font in this walk-through. Download it and follow along, or download and work with a different font of your choice. There are plenty of different ways to download fonts for Procreate, but these methods will generally apply to most of them.
Not sure what font to choose—or where to find high-quality, professional fonts, appropriate for commercial use? Looking for Procreate fonts? Check out the amazing selection over on Envato Elements.
Now, let’s dig in and start at the beginning—how to add fonts in Procreate.
1. How to Download Fonts on iPad for Procreate
Step 1
First, let’s look at how to download fonts to Procreate on your iPad. This will vary, based upon the source of the font—in this demonstration, we’ll download a font from Envato Elements.
However, you could also use fonts from your computer, using a cloud saving service. The goal is to simply get the font file onto your iPad.
So, in this demo, we’ll tap to download, as shown below. Note that I am using the default Safari browser to do so—different browsers or services may vary.

Step 2
Then, you’ll need to navigate to the location where your iPad stored the downloaded file. By default, this is typically your Downloads folder on the iPad (although, again, this may vary, based upon your preferences).
In the case of Safari, I can tap the Download Button to view my recent downloads, and then tap the file to open up the folder, as shown below.

Step 3
Here we are within the Downloads folder—and here’s my downloaded file.
Many fonts are distributed within a compressed zip file. This is especially the case if the font includes more than one style or type—and this is the case with the font I’ve downloaded.
So, before we can proceed, we’ll need to “unpack” this compressed file. Simply tap on the zip file to begin.

Step 4
And here’s the result. Notice how my iPad created a new folder for the content that was inside the compressed zip file.
All we need to do now is tap on the folder to view its contents.

Step 5
Here’s what the inside of the folder looks like. You’ll notice that multiple files were included, some with different file types.
Procreate can use TTC, TTF, and OTF font file types. In this case, I’m going to choose one of the available OTF files here in my folder.
Tap and hold on the file until you see the resulting menu. Then select Move.

Step 6
Then, select the Fonts folder in your iPad’s Procreate folder. Once you’ve selected it, tap on Move to move the file to this location.
Once you’ve done so, we’re ready to add our fonts to Procreate.

2. How to Add Fonts to Procreate
Step 1
Now, let’s turn to Procreate. Begin in a New Document, or any document of your choice.
Start by tapping on Actions (the wrench icon), then Add, and then Add Text.
This will add a new text layer to our Procreate document.

Step 2
Here’s what it looks like when we’ve created our initial text layer. Notice how we’re presented with a whole host of options—we’ll take a look at them a little later.
Check the Font List, and you may already see your font listed there and ready to use. If so, awesome—you’re good to go!
However, let’s walk through manual import too, just in case you don’t see your font, or you’d like to import from a different location on your iPad.
Tap on Import Font, highlighted below, to add a new font for use here in Procreate.

Step 3
Next, we’ll need to navigate to our Procreate folder—our goal is to navigate to the location where we saved/stored our font file. Tap on the Procreate folder to go inside it.

Step 4
From inside the Procreate folder, tap on the Fonts folder.

Step 5
Then, from inside the Fonts folder, we should see our newly downloaded font file, as shown below. Simply Tap on the font file to import it into Procreate.

Step 6
Finally, look at the Font List, on the left-hand side of the text options at the bottom of the screen. This is what your text layer looks like when we opt to Edit Style.
Tap and Drag to page through the list of available fonts from the Font List. Then, you can select your newly imported font. It’s all ready for use.
Note, if you’d like to remove a font from Procreate, simply remove the font from your Font Folder within your Procreate Folder. It will then disappear from the list. Keep in mind, however, that this will also make the font unavailable for any existing projects that may have used it.

3. How to Use Fonts for Procreate
Step 1
Let’s take a look at some of the things we can do here, when it comes to editing and styling our text in Procreate.
Use the Font List to browse and select from your available Procreate fonts.
The Style List lists any available style variations included with the font—like light, heavy, or italic weights and variants, again, if available.
The Design Panel contains a number of options to help you style your text, including:
- Size changes the overall size of the text.
- Kerning is used to adjust the spacing between select (often two) letters.
- Tracking adjusts the spacing between all applicable letters.
- Leading adjusts the vertical space between lines of type.
- Baseline adjusts the location of the baseline—think of it like the line the text “sits on”.
- Opacity is the text’s opaqueness, with 100% being fully visible and 0% being invisible.
Note, you can also move the text by tapping and dragging on it.
Tap and drag on the blue dots, on either side of the text box, to change the size of the text box itself.
You can also resize and rotate text using the Transform Tools, as you would artwork.

Step 2
If you’d like to change the text’s color, make sure you’re in this text edit mode first—where you can see the text box.
Start by tapping on your text to open up your text options.
Then, tap on the color picker to select a new color.

Step 3
You’ll notice that our text is on a special Text Layer. Below, the Text Layer is selected, but the text itself isn’t necessarily in its edit mode.

Step 4
We get a number of familiar options here, when looking at our Text Layer—like renaming, copying, and merging.
If you aren’t familiar with Procreate Layers, check out this free tutorial:
However, take note of these two additional inclusions:
- Edit Text—you can jump right back into the Edit Text mode from this part of the Layers Panel, if you prefer.
- Rasterize—convert your Text Layer into a standard, rasterized layer, much like your standard artwork.

And There You Have it!
Using Procreate fonts is a snap—it’s easy to dig right in and employ type in your illustrative work in Procreate!
Here’s a sample that I created, below, using the type that we installed in our demonstration. If you’d like to check out how I created it, make sure to watch this tutorial’s video walk-through for a quick process video. It’s a taste of some things you could try out with Procreate fonts!

15 Best Fonts for Procreate to Try Out
There are so many beautiful fonts out there, and the best fonts for Procreate are going to vary, based on your project and even your taste. However, here’s a collection of versatile and beautiful fonts that would make an awesome addition to anyone’s tool kit.
Take a look, and consider adding one to your font collection today.
1. Leah Gaviota Decorative Font

Looking for a fun, quirky, visual mix of hand-drawn type? Look no further—Leah Gaviota is such a whimsical font. It includes six different looks to experiment with, making for so many fun combinations.
2. DJADOEL Quirky All Caps Font

This typeface could be a wonderful fit for illustrative projects. It has two styles to choose from, and it’s easy to import it right into Procreate. Download it today and try it out in your next project.
3. Strong West Retro Tattoo Font

Love working with tattoo design or maybe a tattoo inspired aesthetic? Well, then this font might be right up your alley. Check out the beautifully drawn characters and give them a shot in your next Procreate design.
4. Oatmeal Jack Serif and Script Font

This stylish typeface has a lot of interesting visual variation to experiment with. You get both a serif and a script typeface to play with in this font—mix and match them for a whole host of creative combinations.
5. Catalina Avalon Drawn Type Family Font

If you’re looking for a beautifully hand-drawn typeface, take a look at this one. It comes with eight variants, as well as some really lovely alternative characters, too!
6. Avaline Script Sketch

If you love hand-drawn type, this script font is definitely worth a look—it even includes 400 elements to work with too! There are flourishes, wreaths, banners, dividers, and more!
7. My Dear Script Font Typeface

Isn’t this a beautiful hand-drawn typeface? It has alternate characters too—this one could be a perfect fit for any project that would benefit from an elegant script font. Use it in projects like illustrations, digital collage, and more.
8. Neverland Fantasy Display Serif Vintage Font

This decorative typeface is super illustrative. It could work great for fairy tales, children’s books, and so much more! Try it out with your illustrations, or experiment with it in a number of ways in Procreate.
9. American Traditional Tattoo Font

Here’s a classic tattoo-inspired font—perfect for experimenting with tattoo design concepts in Procreate. Or use it in any project that would benefit from a stylistic, decorative, hand-drawn feel.
10. Robofor Mechanical Engineering Font

Decorative typefaces can be a lot of fun to work with, and this one is no exception. There’s a mechanical influence here, but mixed with a hand-drawn, organic quality. It could be an awesome one to experiment with in Procreate.
11. Lonssa Ornament Cute Symbol Font

Now, let’s look at something a little different! This font is all about symbols, graphics, and borders, rather than numbers and letters. Use these pretty, hand-drawn assets as embellishments and additions in your next Procreate drawing.
12. Lineat Creative Decorative Font

If you love working with line, check out this decorative typeface. The letters are composed of decorative line—and this could be such a fun one to try out in Procreate, especially if intricate line art is an aesthetic you enjoy.
13. Dazey Display Font

Isn’t the line width variation in this font fun? This one is such a fun fit for any project that benefits from whimsical line work. Use it as the title on your next zine or as an addition to your next illustrative project.
14. Grocery Rounded Hand Drawn Font

If an organic look is your project’s style, this font delivers. It also includes some lovely vegetable and fruit glyphs that you can use to finish off your type inspired design—or add them to your design.
15. Tall & Tiny Font Duo

This font duo has so much potential—and it even comes with 52 illustrated extras too, like the leaves and other natural elements shown above! Mix and match these two fonts for a fun, whimsical, hand-drawn look.
Want to Learn More About Procreate?
Check out some of these other, free Procreate tutorials on Envato Tuts+ for more Procreate walk-throughs, tutorials, and more!
 ProcreateHow to Create a Summer Portrait With Ice Cream in ProcreateMaria Dimova
 ProcreateHow to Install and Use Procreate BrushesDaisy Ein
 ProcreateHow to Use Photoshop Brushes in ProcreateDaisy Ein
 BrushesHow to Create and Customize Procreate BrushesDaisy Ein
 ProcreateHow to Use Procreate LayersDaisy Ein
{excerpt}
Read More
35 Video Logo Animations (In After Effects) AE Templates for 2020 Inspiration
{excerpt}
Read More
Google Maps may offer routes connecting bikes and cars to public transit
Many people still aren’t commuting to work in light of the pandemic, but Google Maps might give you more travel options when it is safe to return. As 9to5Google reports, app sleuth Jane Manchun Wong has discovered that Google is exploring “connection…
Potential NASA mission would explore Neptune’s moon Triton
NASA’s quest to explore the Solar System's many moons might include one of the most distant. Researchers have proposed a NASA mission that would explore Neptune’s eccentric moon Triton. Nicknamed Trident for its “three-pronged” goals, the mission wou…
Best jQuery Flipbook Plugins Compared (Free and Paid)
{excerpt}
Read More