In an attempt to take down the elite global piracy ring Sparks Group, US officials have charged three men with copyright infringement. Two of those men have been arrested, and law agencies in 18 other countries helped shut down servers used by the pi…
Category: Tutorials
Tutorials,freelance,projects,joomla,php,mysql,wordpress,blancer.com
Joe Budden’s podcast will no longer be a Spotify exclusive
Spotify is set to lose one of its most popular exclusive podcasts next month. Joe Budden is splitting from the service, which has been home to his hip hop-focused show for the last two years, when his contract expires. The company made an offer to ke…
25+ Best Free Distressed Fonts (& Grunge Fonts)
If you want to give your text a weathered look, use a grunge or distressed font. Depending on the context, these fonts can convey either an edgy urban vibe or a vintage style.

Check out this list of the 25+ best free distressed fonts available online. But first, let’s look at some premium grunge distressed fonts that you can find at Envato Elements.
Download Unlimited Distressed Fonts From Envato Elements
Free distressed fonts are great for personal projects or when you just want to do some experimentation. But for that all-important commercial project, they have some limitations. Some may be available for personal use only, so you have to check the licencing information very carefully. And others may offer limited features.
That’s why we recommend using a premium grunge font from Envato Elements. You get to choose from a huge selection of high-quality fonts created by expert designers, and you get a clear licence for commercial use.

For a single low monthly fee, you can download and use as many fonts as you like. Plus you also get unlimited access to millions of high-quality digital assets like graphic templates, photos, mockups, and much more. Let’s take a look at some of the best distressed fonts you can find at Envato Elements.
12+ Best Distressed Fonts From Envato Elements
Visage Demolished Grunge Font (OTF)

“Demolished” is just the right word for this grunge distressed font. The letters look as if they’ve been attacked with a sand blaster, or perhaps just rusted away over decades. This uppercase font is the perfect choice for titles and headlines where you want that grunge appeal.
Distractor Grunge Distressed Font (OTF, TTF)

Distressed can mean different things—this font has more of the look of a letterpress font or an old-fashioned stamp, where not all of the ink has come through on the page. It has a very tactile feeling, and it comes in OTF and TTF formats, with 280 glyphs.
Burford Rustic Book UltraLight (OTF)

This font is a weathered, textured version of the regular Burford font family. You get an impressive selection of 20 font files, with different texture variations, weights, and more. You get extruded fonts, drop shadow fonts, and a whole range of contextual alternatives to ensure that your text is truly unique.
Fake Empire Distressed Letters Font (OTF)

In these days of digital wizardry, it’s refreshing to come across a font that was created the old-fashioned way: with paper, glue, and scissors. You can see the retro grunge style at work in this striking display font. You wouldn’t want to use it for large amounts of text, but for an attention-grabbing headline, it’s perfect.
Habanos Retro Distressed Letters Font (OTF)

Here’s another one for the letterpress fans out there. You don’t have to get your hands dirty with ink and paper to create that wonderful retro quality: just download Habanos! It’s more than a typeface—it’s a full-featured toolkit that includes regular and light versions, as well as 30 JPG textures, 33 high-resolution vector illustrations, and ten premade logos. That’s hard to beat!
Gutenberg – Font Family (OTF, TTF)

It was Johannes Gutenberg, of course, who started the printing revolution back in medieval Europe with his movable type technique. We’ve come a long way from there to digital fonts, but it’s good to pay tribute with the Gutenberg font family. With its irregular edges and the look of partially transferred ink, this is a perfect distressed typewriter font for situations where you want to recreate the old look of ink on paper. And you get 296 glyphs, with multi-language support.
Tamaki-Pro Distressed Letters Font (OTF)

The creators of Tamaki Pro promise that “every letter is different”, and they’ve achieved that by applying contextual substitutions, with five different alternatives for each letter. As long as you use software that supports OpenType features, each letter will be replaced automatically with alternative versions to give you plenty of variety.
Bladekade Distressed Stencil Font (OTF)

Can’t you just see Bladekade on a stylish T-shirt or hoodie design? Or perhaps you could use it for a logo? This distressed stencil font has a hand-drawn style combined with a grungy, weathered quality, making it perfect for lettering, branding, posters, and more.
Moorgate Distressed Script Font (OTF)

Font designer Simon Stratford created Moorgate by hand, with a brush and ink pot, inspired by the hand lettering on U2’s Achtung Baby album. This distressed script font is best used at a larger point size, for headlines and titles. Make sure to switch on discretionary ligatures to get the full set of variations in this impressive typeface.
Hoverage Typeface (OTF)

Hoverage is another grunge font with a letterpress look and feel. It offers both a regular and vintage version, with uppercase and lowercase letters and numbers. Use it to give your project a modern style, with a retro twist.
Vescona – Grunge Serif Font (OTF, TTF, WOFF)

Vescona is an interesting combination: it’s quite a traditional, elegant serif font, but with a grunge texture that transforms it and gives it a rustic vibe. You’ll get uppercase and lowercase characters, numerals, punctuation, and multilingual glyphs.
Portico Urban Rough (OTF)
Portico Urban Rough is a wonderful option, offering not only a weathered texture, but also those filled letters. Like most distressed fonts, it’s best used in small doses, but for a striking headline or logo, it could make just the right impression.
Funkrocker Distressed Font (OTF)

Looking for something a little rough around the edges? Try Funkrocker, a grunge distressed font with some funky glyphs to give your text the energy and fizz it needs. It comes with plenty of accents, punctuation, alternates, and support for the Cyrillic alphabet. This fun, creative typeface would look great on an album cover or poster.
Stupid Meeting (OTF)

If you’ve ever worked in an office, you’ve probably sat through a stupid meeting at some point. You know, the ones where you learn nothing but end up with a notepad full of doodles and scribbles. The Stupid Meeting font is inspired by those corporate nightmares, with its all-caps, hand-scribbled appeal. It also has plenty of sophistication, with basic/advanced Latin, diacritics, punctuation, and kerning.
25+ Best Free Distressed Fonts to Download
OK, now that we’ve gone through the premium options, let’s see what kinds of free distressed fonts you can find around the web.
Rosewell – Free Distressed Font

Rosewell is a stylish uppercase typeface that would look great on posters or signage. But beware: like many free distressed fonts, it’s only free for personal use. For commercial uses, you’ll have to buy a licence. Rosewell supports multiple languages and comes with a full range of numbers and punctuation.
Progress Distressed Font

With its combination of regular, blocky uppercase letters and distressed ink textures, Progress is the ideal distressed typewriter font for your next project. It’s free for personal use and supports foreign languages.
ROWO – FREE FONT

ROWO is a cursive distressed font with the texture of natural brushstrokes. It’s free for both personal and commercial use, and it comes with uppercase and lowercase characters, numbers, punctuation, and alternates.
Rebel Scene

Looking for a distressed letters font with energy and attitude? Try Rebel Scene. It offers not just weathered textures, but also smudges on the edges of the letters that give it a kind of glitch effect.
Nova Stamp

Here’s another distressed typewriter font that combines regular sans serif letterforms with irregular, grungy textures. It includes uppercase and lowercase characters, foreign characters, and punctuation.
Gipsiero

The Gipsiero family of free distressed fonts was inspired by old horror movies, but don’t be scared: you’ll enjoy downloading and using all three (uniquely named) weights: Gipsiero Regular, Gipsiero Kracxed, and Gipsiero OwtLine.
Walk This Way

Can’t you just see this font on an album cover or music poster? It’s free for personal use, but commercial licenses are available, and donations are also welcome.
Ahoy Distressed Script Font

Ahoy there! This distressed script font looks like something from a captain’s log on an 18th-century sailing ship. With its unique, old-fashioned handwriting and weathered texture, it would be perfect for a project set way back in the past.
Street Reich

Street Reich speaks for itself: those grungy textures and unusual letterforms, with some characters reversed and crosses in the counters. Perfect for making a strong visual impression.
High Voltage Rough

Although this font was inspired by those “High Voltage” warnings on old buildings and electrical stations, it comes with both uppercase and lowercase alphabets, numbers, and foreign characters. Use it for a much wider range of projects than just a high voltage warning!
Nightmare Alley Font

Remember those classic horror movies from the 1950s, with invading aliens or escaped monsters causing havoc in peaceful towns? Nightmare Alley is reminiscent of those movie titles—and if this one doesn’t look quite right, there are 20 other styles to choose from.
Marcelle Cursive Distressed Font

If you’re looking for a free cursive distressed font, Marcelle is a great option. It looks like elegant handwriting, but scratched and weathered to give it a grunge appeal.
FREE Font Firefly 2015

Try Firefly 2015 if you want a grunge distressed font for display purposes. It’s uppercase only, with numbers and punctuation, and it also includes support for multiple languages.
Sonder – Free Type Family

With its regular, blocky uppercase characters, Sonder could work well as a distressed stencil font, but it also offers several different styles to help you mix things up. Give it a try!
BLACKSHORE SVG – FREE HAND PAINTED FONT

Blackshore comes in both a free and premium version—you get more features in the premium one, of course, but the free version is also impressive. Try this hand-painted grunge font in your next project!
MORNING BREW – FREE HAND PAINTED FONT

Here’s something a little different: Morning Brew is a hand-painted sans serif font with a natural, uneven appearance, and it also comes with a distressed script font designed to complement it. As the name suggests, this would be perfect for a coffee shop, but you could also use it on a wide range of other projects.
HALDEN

Halden is a stylish brush font that gives you the authentic texture of paint in each character. Like Morning Brew, this one also comes with a distressed script font that’s designed to go well with the main sans serif typeface. Download it and give it a try!
OLD GROWTH – FREE FONT

If you’ve ever been to California and seen the awe-inspiring redwood forests, you’ll instantly see the inspiration for Old Growth, an earthy sans serif that features the rough textures and uneven edges of nature. Try it out on your next headline or pull quote.
MR. GRIEVES

Here’s a hand-painted sans serif grunge font you’ll love. The brushstrokes are heavily textured, creating a unique, offbeat style. It’s free for personal and commercial use.
LRC Type – Stamp AMY Collection (Free)

Why not give this distressed stencil font a try? It has the authentic look and feel of old-fashioned wood-block stamps, and there are several different versions you can use to create variety and interest in your text.
Typeface Kontiki

Kontiki is one of the best free distressed fonts you’re likely to find. It was lovingly created by hand to ensure a one-of-a-kind result—click through to read a full description of the process. Download a free version for testing and personal use, but you’ll have to pay for commercial uses.
BRUX BOLD BRUSH FONT

This bold, energetic brush font is ideal for any project where you need a touch of creativity. It’s available in OTF, TTF, and web font formats, with Swedish, German, and Spanish characters.
Repo Pocket Sans

If Jackson Pollock created a grunge font, this is probably what it would look like. The text looks as if it’s breaking apart in front of your eyes, with an irregular baseline and splashes and shards coming out of each character. Give it a try!
Free Font: Lev Black Distressed Typewriter Font

Now let’s try something more regular, like this distressed typewriter font with its weathered characters and tactile texture. If you want to combine the grunge look with something more legible, this would be a great option.
PHALANX – FREE FONT

Mark Richardson designed this hand-drawn typeface based on print catalogues from the early 1900s. Unlike some of the other free distressed fonts we’ve looked at, this one is free for both personal and commercial use.
BARK Font

Like the Old Growth typeface we looked at earlier, this grunge distressed font is inspired by the rough textures of majestic old trees. It’s free for personal use, so why not download it and see what you can create with it?
What’s Your Favourite Distressed Font?
Today’s we’ve looked at a wide selection of premium and free distressed fonts. Which is your favourite? Let us know in the comments.
When you’re experimenting or working on personal projects, free fonts are a great option. But for a high-stakes commercial project, we recommend choosing a premium distressed font from Envato Elements. The bonus is that a single monthly fee gives you access not just to unlimited font downloads, but to unlimited logos, mockups, photos, and much more.
Looking for more font ideas? Check out these helpful articles:
 Fonts35 Best Block Fonts (Ready to Download Now)Nona Blackman
 Fonts26 Best Sci-Fi Fonts (Science and Retro Styles)Nona Blackman
 Text Effects55+ Cool 3D Fonts to Download & 3D Text Effect TutorialsNona Blackman
 Fonts36 Best Wild and Crazy FontsNona Blackman
 Fonts39 Best Futuristic FontsNona Blackman
 Fonts29 Best Monospace FontsNona Blackman
 Fonts29 Best Heavy Metal FontsNona Blackman
 Graphic DesignThe Best Alternatives to the 10 Most Popular FontsLaura Keung
{excerpt}
Read More
Walmart joins Microsoft’s bid to buy TikTok
Walmart says it’s joining forces with Microsoft in an attempt to buy TikTok US, CNBC reports. Microsoft was one of the first companies named as a potential buyer for TikTok, though Twitter and Oracle have also explored deals. “We believe a potential…
A Bungie veteran will attempt to get ‘Halo Infinite’ back on course
Between tepid reactions to the first gameplay trailer and the news Halo Infinite won’t be a launch title for Xbox Series X this November, it’s no secret things aren’t entirely rosy with the game’s development. To help shepherd the game along, a Halo…
How to buy a vlogging camera
The number of YouTuber creators has exploded over the last few years, with videos running the gamut from eating ASMR to Rube Goldberg-style trick shots. With that, vlogging cameras are now popular enough to be their own category. Some models are even…
Valve shares a trailer for the first ‘Left 4 Dead 2’ update in years
More than a decade after Valve released Left 4 Dead 2, the apocalyptic zombie game is getting an update. Valve shared a trailer for The Last Stand on its blog. The company hasn’t released many details, so we still don’t know when the update will arri…
Tesla worked with the FBI to block a million dollar ransomware attack
Earlier this week, the FBI arrested a 27-year-old Russian citizen for attempting to carry out a ransomware attack against a US company. It turns out that company was Tesla, Electrek reports.According to a complaint shared by the Department of Justice…
15 Top Instagram Templates for Local Shops: Quickly Make Story Videos With After Effects
{excerpt}
Read More
Algoriddim spins off its AI audio tools into the standalone Neural Mix Pro app
Algoriddim, the company behind the Apple-centric djay Pro software has decided to take its recently announced Neural Mix AI feature and spin it off into a standalone app called Neural Mix Pro for macOS. This venture isn’t quite like Serato’s foray in…
Flipboard TV expands to all Android and iOS devices
A decade into its life as a company, Flipboard is getting serious about video. After launching Flipboard TV on Samsung devices earlier in the year, the company is expanding the availability of the feature to all Android and iOS devices.In addition to…
Amazon Halo is a subscription fitness wearable and platform
Amazon is no longer content to allow mainstream wearable technology companies to dominate the fitness space. Today, the mega-retailer is launching a subscription fitness product dubbed Amazon Halo that’s designed to encourage users to improve their h…
How to Make a Pastel Duotone Effect in Photoshop

You can create a duotone photo effect in a few simple clicks using a duotone Photoshop action or create it manually with adjustment layers. In this duotone tutorial, I will show how you how to create a duotone effect in Photoshop using adjustment layers.
If you want to learn these techniques via video, check out our lesson on the Envato Tuts+ YouTube channel:
What You’ll Learn in This Photoshop Duotone Tutorial
- How to create a duotone palette
- How to make an image duotone in Photoshop using Adjustment Layers
Tutorial Assets
You’ll need the following resource in order to complete this tutorial:
1. How to Create a Duotone Palette
Step 1
First of all, let’s open our image. Go to File > Open or just hit Control-O and select the image you want to use.

Step 2
Now we can create swatches for easy access to colors. To open the Swatches panel, go to Window > Swatches.

Step 3
Open the Color Picker and use the following Color Code: #604e74. Once you’ve entered the code, hit Add to Swatches.

Step 4
Let’s add the second color to our swatches using the following Color Code: #fcf9d7. Our little color palette is ready for creating a duotone Photoshop effect, but you can easily add more pastel colors the same way if you want to try different variations.

2. How to Make a Duotone Photoshop Image Using Adjustment Layers
Step 1
Before creating the duotone effect adjustment layer, let’s create a channel mixer layer to make the image a bit darker and save the skin color. Go to Layer > New Adjustment Layer > Channel Mixer and use the Black & White with Blue Filter preset.

Step 2
Change the Opacity of this layer to 20%.

Step 3
To finish the color correction, add a Brightness/Contrast adjustment layer with the following settings: Brightness: -15; Contrast: 25.

Step 4
Now let’s create a duotone photo effect using a gradient map. Go to Layer > New Adjustment Layer > Gradient Map and create a gradient with the colors from our palette.

Step 5
And for the last step, change the Location of the first point to 10% and the second point to 95%.

Awesome Work, You’re Now Done!
In this simple way, we can create a duotone Photoshop effect using a few adjustment layers and a pastel color palette. This combination gives us a great faded look with an atmospheric vintage feel. If you need any help with the techniques we covered, feel free to contact me!

Today we’ve learned how to make an image duotone in Photoshop, but if you are looking for a super fast and easy way to create this kind of effect, check our list of duotone effect Photoshop actions available on Envato Elements:
50 Duotone Actions

This pack of duotone effect Photoshop actions contains 50 instant effects with different well-combined colors. It’s extremely easy to use; just select the action and hit play.
Duotone Master Kit – Super Easy Photoshop Actions

How do you make an image duotone in Photoshop in a few clicks? This master kit with 66 ready -to-use presets is suitable not only for photos but for product presentations, illustrations, and designs.
Duotone Photoshop Action Bundle

In this duotone Photoshop action bundle, you will find 100 color variations of the duotone effect. All the actions work on any size of image and create a professional visual effect with almost no effort. Enrich your collection of actions with this awesome package!
Duotone Photoshop Actions

Want to know how to make duotone Photoshop images in a non-destructive and easy way? Try this collection of 36 duotone Photoshop actions with editable and adjustable end results. In the main archive, you will also find detailed instructions and a quick preview of all the effects in a JPEG format.
Duotone Effects

This product contains 35 different duotone effects in just one PSD file. Create stunning images with different color combinations applied to your photos using a smart object. Some of the duotone effects in this package create cool color transition overlays, so the number of combinations of the final look is huge!
Learn More About Adobe Photoshop Effects!
If you are looking for another duotone tutorial or you want to learn other Photoshop techniques, check out these amazing tutorials:
 Photoshop ActionsHow to Create a Light Leak Photoshop Color EffectIvan Gromov
 Photo EffectsHow to Create a Photoshop Color Effect ActionAnderson Luiz
 Photo EffectsHow to Create an Infrared Photo Effect in Adobe PhotoshopIvan Gromov
 Photoshop ActionsHow to Create a Cyberpunk Photoshop Effect ActionMarko Kožokar
 Text EffectsHow to Create a Quick & Easy Duotone Text Effect in Adobe PhotoshopRose
{excerpt}
Read More
15 Best Swift and Xcode App Templates (+2 Free)
{excerpt}
Read More
How to Create a Sports Banner Template

In this tutorial, you will learn how to create a sports banner template in Photoshop. I will explain everything in so much detail that everyone can create the effect, even those who have just opened Photoshop for the first time.
What You Will Learn in This Sports Banner Tutorial
- How to create a banner design for a sports day
- How to add text information and a call to action for sports templates
- How to add a photo with a Photoshop action applied
- How to add a border to a sports banner
What You’ll Need
To recreate the design above, you will need the following resources:
1. How to Start Creating a Sports Banner
First, create a new file. To create a new file, go to File > New and set the Width to 970 px and Height to 250 px as shown below:

2. How to Create the Discount Field
Step 1
In this section, we are going to create the discount field. Choose the Rectangle Tool, click anywhere inside the canvas to create a new rectangle, and set the Width to 300 px and Height to 250 px.

Step 2
Press Control-A on your keyboard to make a selection of the whole canvas. Then, choose the Move Tool (V), and click on the Align Vertical Center and Align Left Edges to align this layer both vertically and horizontally. After that, press Control-T to open up the transform options, Right-click anywhere inside the canvas, choose Distort, and transform the layer as shown below:

Step 3
Name this layer Photo Background. Then, go to File > Place Embedded, select the photo from the first stock photo link, and click Place. Then, set the Width and Height of the photo to 30%, position it as shown below, and name this layer Photo_1.

Step 4
Now press Control-Alt-G on your keyboard to create a clipping mask. Then, select the Photo Background layer and Alt-click and drag this layer to the top of the layers in the Layers panel to create a copy of this layer in this position. After that, Double-click on this new layer thumbnail and choose the color #ff0000 as shown below:

Step 5
Change the Opacity of this layer to 90% and name it Shading.

Step 6
Now choose the Horizontal Type Tool (T), and set the font to Montserrat, font style to Medium, font size to 35 px, alignment to Center, and color to #ffffff. Then, in the Character panel, check the All Caps option. After that, click anywhere inside the canvas, type the text “50% off”, and position this layer with the coordinates X: 130.00 px and Y: 97.73 px.

Step 7
Select the Shading layer, choose the Horizontal Type Tool (T), and set the font to Montserrat, font style to Light, font size to 15 px, alignment to Center, and color to #ffffff. Then, in the Character panel, check the All Caps option and set the Tracking to 100. After that, click anywhere inside the canvas, type the text “Sitewide”, and position this layer with the coordinates X: 130.75 px and Y: 129.58 px.

Step 8
Now choose the Rectangle Tool, click anywhere inside the canvas to create a new rectangle, and set the Width to 25 px and Height to 1 px.

Step 9
Control-click on the Sitewide layer thumbnail to make a selection of this layer, and choose Align Vertical Center to align this layer vertically. Then, Control-click on the 50% Off layer thumbnail to make a selection of this layer and choose Align Left Edges to align this layer horizontally.

Step 10
Now Double-click on this layer thumbnail and choose the color #ffffff as shown below. Name this layer HL_1.

Step 11
Press Control-J on your keyboard to duplicate this layer, and drag this new layer just below the HL_1 layer in the Layers panel. Then, Control-click on the 50% Off layer thumbnail to make a selection of this layer and choose Align Right Edges to align this layer horizontally. Name this layer HL_2.

Step 12
Now select the HL_1 layer and Control-click on the HL_2 layer to select both layers at the same time. Then, go to Layer > New > Group from Layers to create a new group from selected layers and name it Horizontal Lines.

Step 13
Select the Shading layer, choose the Horizontal Type Tool (T), and set the font to Montserrat, font style to Bold, font size to 10 px, alignment to Center, and color to #404040. Then, in the Character panel, check the All Caps option and set the Tracking to 250. After that, click anywhere inside the canvas, type the text below, and position this layer with the coordinates X: 131.25 px and Y: 163.08 px.

Step 14
Now select the 50% Off layer and Shift-click on the Photo Background layer to select all layers between. Then, go to Layer > New > Group from Layers to create a new group from the selected layers, and name it Discount.

3. How to Add Text Information and a Call to Action for Sports Templates
Step 1
In this section, we are going to add text information and a call to action. Select the Background layer, choose the Horizontal Type Tool (T), set the font to Montserrat, font style to Black Italic, font size to 25 px, alignment to Left, and color to #404040. Then, in the Character panel, check the All Caps option and set the Tracking to 100. After that, click anywhere inside the canvas, type the text below, and position this layer with the coordinates X: 553.77 px and Y: 63.75 px.

Step 2
Select the Background layer, choose the Horizontal Type Tool (T), and set the font to Montserrat, font style to Medium Italic, font size to 15 px, alignment to Left, and color to #404040. Then, in the Character panel, check the All Caps option and set the Tracking to 0. After that, click anywhere inside the canvas, type the text below, and position this layer with the coordinates X: 547.40 px and Y: 170.24 px.

Step 3
Select the Background layer, choose the Rectangle Tool, click anywhere inside the canvas to create a new rectangle, and set the Width to 136 px and Height to 41 px.

Step 4
Now press Control-T on your keyboard to open up the transform options. Right-click anywhere inside the canvas, choose Skew, and set Horizontal Skew to -10° as shown below. Position this layer with the coordinates X: 413.50 px and Y: 176.50 px.

Step 5
Double-click on this layer thumbnail and choose the color #404040 as shown below. Name this layer Background.

Step 6
Now choose the Horizontal Type Tool (T), and set the font to Montserrat, font style to Bold Italic, font size to 15 px, alignment to Center, and color to #ffffff. Then, in the Character panel, check the All Caps option and set the Tracking to 100. After that, click anywhere inside the canvas, type the text below, and position this layer with the coordinates X: 410.75 px and Y: 177.62 px.

Step 7
Select the Background shape layer and Control-click on the Check Out layer to select both layers at the same time. Then, go to Layer > New > Group from Layers to create a new group from the selected layers, and name it Button.

4. How to Add a Photo With a Photoshop Action Applied
Step 1
In this section, we are going to add a photo with a Photoshop action applied. Go to File > Open, select the photo from the second stock photo link, and click Open. Then, remove the ball from the photo using the Eraser Tool (E), press Control-Shift-N on your keyboard to create a new layer, and name it brush. While the brush layer is selected, brush over the subject with a color. You can also make a selection of the subject and fill the selection with a color instead.

Step 2
Now select the Abstract Photoshop Action and click on the Play button. After the action has finished, customize the effect as you like. You can check out the video tutorial (link included in the action help file) for a demonstration of how to use the action and also how to customize the results to get the most out of the effect.

Step 3
Go to File > Save > Save As and save the design as a JPG file. Then, return to the banner file, select the Background layer, go to File > Place Embedded, select the photo that you just saved, and click Place. Set the Width and Height of the photo to 95%, position it as shown below, and name this layer Photo_2.

Step 4
Now go to Layer > Layer Mask > Reveal All to add a layer mask that reveals the whole layer. Then, choose the Brush Tool (B), pick a soft brush, and set the foreground color to #000000. After that, while the layer mask is selected, brush as shown below. Feel free to change the Opacity of the brush.

5. How to Add a Ball to the Design
In this section, we’re going to add a ball to the design. Go to File > Open, select the photo from the second stock photo link, and click Open. Then, isolate the ball from the photo. You can follow How to Create an Isolated Object: Photoshop in 60 Seconds to see how to create an isolated object. After that, Right-click on the ball layer and choose Convert to Smart Object.
Using the Move Tool (V), click and drag the ball layer to the banner file, and drag this layer to the top of the layers in the Layers panel. Then, press Control-T to open up the transform options, set the Width and Height of the layer to 13.84%, position it as shown below, and name this layer Ball.

6. How to Add a Border to the Sports Banner
Step 1
In this section, we are going to add a border. Choose the Rectangle Tool, click anywhere inside the canvas to create a new rectangle, and set the Width to 970 px and Height to 250 px.

Step 2
Now set the Fill to No Color, Stroke Solid Color to #ffffff, and Stroke Width to 2 px. Then, press Control-A on your keyboard to make a selection of the whole canvas, and choose Align Vertical Center and Align Horizontal Center to align this layer both vertically and horizontally. Name this layer Border.

You Made It!
Congratulations, you have
succeeded! You’ve learned how to create sports banner templates for Photoshop. In this way, you can create any sports graphics templates, including sports team banner templates, sports banner background templates, sports day banner templates, senior sports banners templates, and Photoshop team photo templates.

5 Best Sports Banner Templates
Want to see
some of the best banner sports graphics templates? Check out this list of sports templates from Envato Elements. Enjoy incredible templates, from banner design sports templates to logo templates and more!
Sport Web Banner (JPG, PSD)

This sports banner template pack includes 18 cool layered and organized PSD template files. It doesn’t matter if you need Facebook, Instagram, Google Ads, or social media banners, this templates pack has got you covered!
Surf Sport Club Banner Pack Template (EPS, PSD, JPG)

If you want something different to stand out from the crowd, this item could be the perfect choice! There are 21 different size banners included that you can use for websites, social media pages, blogs, and mobile apps to attract more clicks for invitations, party supplies, gift tags, web sites, labels, and so much more!
Sports Tournament Web Ad Banners (PSD, JPG)

Do you need banners to advertise your sport tournament? This retro banner template collection is a great way to refer more people to your website and sport tournaments. There are 22 layered PSD files included, and you can customize everything from the branding to the text and prices before launching it online!
Sport Banner (AI, PSD, SKETCH)

If you are looking for banners to give your Instagram account an adventure feel, check out this banner template pack! There are nine fully editable and customizable Instagram
posts that were designed in Sketch, Photoshop, and Illustrator.
Sport Banners Pack

This sports banner pack includes banners for just about everyone, from bloggers to brands, shops, travel agencies, magazines, and creative businesses. To edit the template, you simply drop in your content and save it!
Did you like this tutorial on creating a banner design for a sports day? Then you may also like:
-

How to Create a Sketch Effect Action in Adobe Photoshop
In this tutorial, I’m going to teach you how to create a Photoshop sketch effect. You will learn how to turn your photos into amazing, advanced sketches. I… -

How to Create a Promotional Flyer in Photoshop
Photoshop is great for graphic design, but it can also be a great tool for print designs—ones you can later import to InDesign. This tutorial will help you… -

How to Create a GTA V Photo Effect Action in Adobe Photoshop
In this tutorial, you will learn how to create an amazing photo effect inspired by the Grand Theft Auto V video game art style. Even if you’re a Photoshop… -
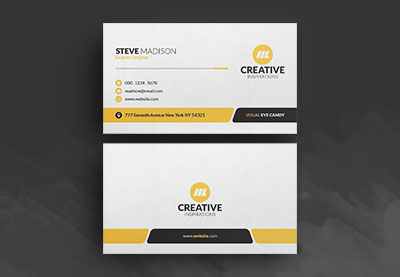
How to Create a Modern Business Card Using Adobe Photoshop
Always wanted to create your very own business card? Jump right in and allow me to walk you through the steps involved in this easy-to-follow tutorial.
{excerpt}
Read More