{excerpt}
Read More
Category: Tutorials
Tutorials,freelance,projects,joomla,php,mysql,wordpress,blancer.com
30 Horror-Inspired Fonts
As the weather cools and the Halloween spirit is thick in the air, thoughts of bone-chilling autumn projects start to play on every creative’s mind. That’s why it’s important to have the best horror fonts in your digital toolbox.

Ready to create the perfect scary movie soundtrack cover or fall sale flyer? Discover 30 unique horror film poster fonts to create chilling designs. Check out this collection of our favorite cool horror fonts from Envato Elements and GraphicRiver!
30 Thrilling, Chilling, and Spooky Fonts
Storytellers know the design of horror. They use creepy writing fonts and dripping typefaces to mimic their favorite visuals related to fear. And you can achieve thrilling designs by knowing how to incorporate the right fonts into your work.
Feeling mischievous? Create a haunting design using horror-inspired fonts from Envato Elements and GraphicRiver. Enjoy 30 creative styles with many spooky elements.
Need a custom old horror font instead? We can still help! Check out the design professionals at Envato Studio for all your font needs!
Cool Horror Fonts From Envato Elements for 2020
There’s a wide selection of great horror film poster fonts right now on Envato Elements. We’d like to show all of them off, but we’ll settle for sharing 20 of the best horror fonts you can use with your Envato Elements subscription!
Exorcist – Horror Display Typeface (OTF, TTF, WOFF)
Named after the famous movie, the Exorcist horror font gives off a spooky vibe. Not only does it include the Latin alphabet and punctuation, but this horror film font also has a full number set. Try out Exorcist for your Halloween promos or movie posters.

Sorrow – Horror Font (OTF, TTF)
This scary text font is enough to chill the blood—or at least enough to drive traffic to your scary-good online deals in the fall. Sorrow is great for physical promotions too. Thanks to its large size, it’s the perfect display font for posters.
Jacmax – Horror Font (OTF,TTF, WOFF)
Are you creating a short horror film and need the perfect creepy writing font for its poster? Then enter Jacmax. This zombie movie font is designed for displays. Jacmax also doubles as a creepy font for online use. It’s easy to use on PC and Mac computers.

Dark & Black Scary Text Font (OTF, PNG)
Not every horror movie font needs jagged edges and slashing strokes to create a scary effect. Just look at Dark & Black, for instance. It looks both refined and creepy. Try out this eighties horror font for a chilling Halloween-themed commercial or personal project.

Gallow Tree Font (OTF, TTF)
Font designers know how to set the mood. And Gallow Tree is an old horror movie poster font that knows it’s spooky! Create the coolest Halloween poster around or decorate your products with unique details. Set a mood that no one will forget with this typeface.

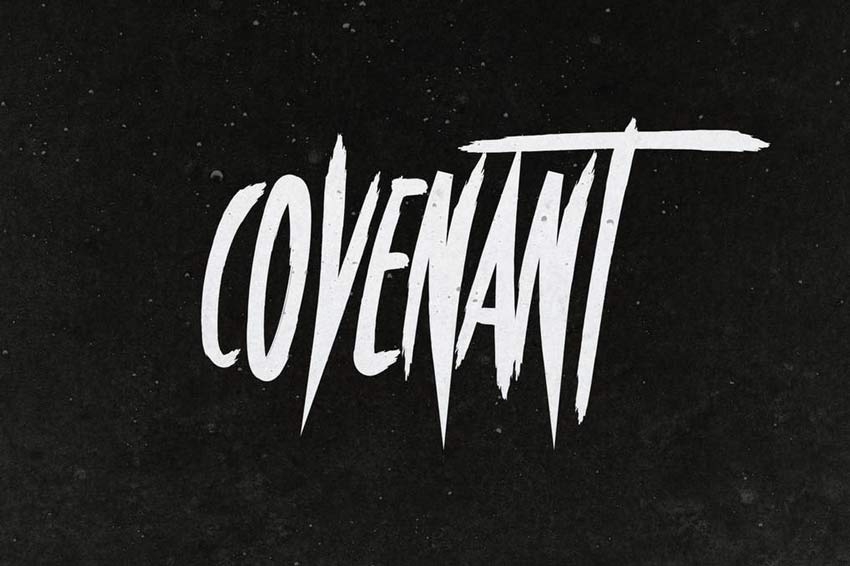
Covenant Font (OTF)
Some creatives get inspired by their favorite scary movies. And this old horror movie poster font is certainly no different! Covenant features an intense design with long letters and a lot of creepy energy. Thrill your audience with this mysterious, creepy writing font.
Horror Joys Font (OTF, TTF, EPS, AI)
A clever contradiction, the Horror Joys font is packed with tons of energy. It’s a handmade typeface that aims at delivering scary vibes and includes additional blood splatters to help. Use this horror film font on cool posters, apparel, and more!

Story Brush Font (OTF, TTF)
Embrace those nostalgic vibes with the Story Brush font. Created with a cool comic book style, this horror movie font features over 240 glyphs. Complete your comic books with this incredible font and enjoy its retro charm! Download it today!

Broken Wings Font (OTF, TTF, JPG)
Specifically designed with a heavy heart, Broken Wings is a creepy font that makes us want to know more. Its chunky style features ragged edges and handmade characters. It will make any design stand out, so choose your canvas wisely!

Harry’s Brush Font (OTF, TTF)
Harry’s Brush font is a highly detailed typeface featuring energetic brush strokes. It looks awesome on any T-shirt design and is suitable for posters, signs, and video transitions. Use this horror movie font to help tell your spooky story with one simple download!

Primal Font (OTF, WOFF)
Rely on your primal instincts with this compelling horror film font. Featuring a science-fiction-inspired theme, this old horror movie poster font is designed with clean, bold letters. Like many modern fonts, the design plays with empty spaces for more impact.

In The Wood Font (OTF, TTF)
Whatever you do, don’t go into the woods! A hardly inviting font, this typeface somehow manages to draw you in. The design features tall, lurking letters with distressed details for that antique look. Download this creepy font today to use it for your projects!

Black Rose Font (OTF, TTF)
Black Rose has a sinister, yet appealing undertone. It’s a handbrush typeface with long strokes and plenty of character. Download it now to get access to letters, symbols, and ligatures. You’ll definitely want this horror font!

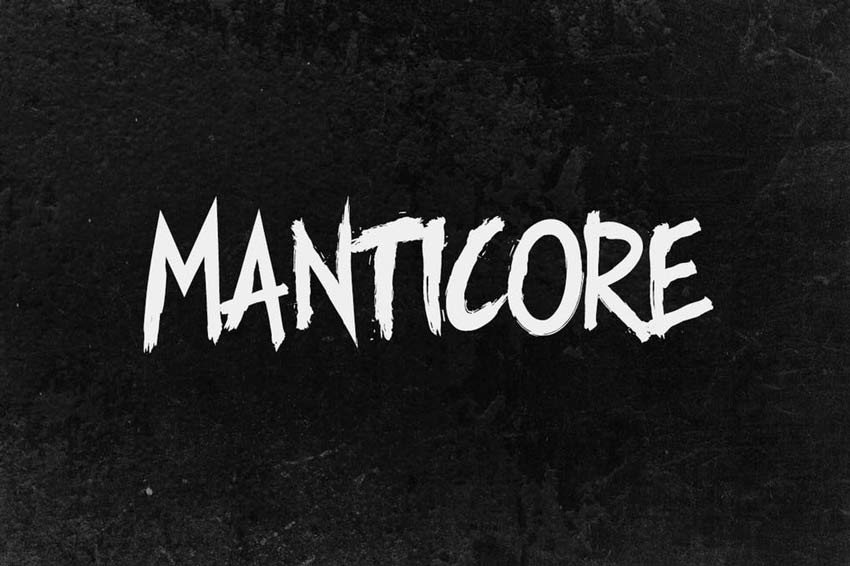
Manticore – Brush Font (OTF, WOFF)
Handwritten fonts are often designed with subtle notes of horror. Grunge is a style that gets the job done, like this brilliant Manticore font. A brush style typeface with punk details, this eighties horror font works best with urban-themed graphics.
Ghoul Typeface (OTF, WOFF)
A creepy writing font for the dead or living, Ghoul delivers a simple, yet mighty punch. This font features thick, handmade letters that work well for captions and titles. Create the best Halloween posters with the Ghoul typeface!

Nigma – Brush Font (OTF, WOFF)
Nigma is bold and daring. It’s a handwritten horror font with hurried letters and strokes. Try it out for a bold design that leaves your audience wanting more. Transform your quotes and typography with this horror-inspired font.

Medusa Gothic Font (OTF, PNG)
Stop your audience in their tracks with a compelling font! This Medusa typeface features a Romanesque Gothic style. It comes with a complete set of letters and numbers, so you’ll be able to add it seamlessly to your designs. Try it out now!

Kreature Halloween Horror (OTF, TTF, WOFF)
Featuring sweeping brushstrokes, the Kreature Halloween Horror font is right at home in all types of projects. This old horror font works for PC and Mac, and it’s compatible with Adobe Illustrator, Photoshop, InDesign, and Microsoft Word.

Savath (OTF, TTF, AI)
Savath’s blocky lettering makes it one of the best horror fonts on Envato Elements. The subtle design in each glyph will look great on your book cover or flyer. Savath comes with six styles of its horror movie font and some cool extras.

Blopwett, New Natural Wet Font (OTF, TTF)
Wet horror film poster fonts like Blopwett do a great job of creating a chilling atmosphere. This zombie movie font is guaranteed to make any design look spooky. Blopwett comes with an OTF and TTF file, and can be used for a video game promo or handout design.

Best Horror Fonts From GraphicRiver in 2020
If you need the best horror fonts but prefer to make a single purchase, you’ll love the options from GraphicRiver. Here are ten cool horror fonts you can use in your projects today.
Histeria Horror Font (OTF, TTF)
Delightfully creepy and easy to install, Histeria is one of the best horror fonts on GraphicRiver. Its style gets inspiration from the hardcore music scene. This scary text font also includes a full character set, including numbers and multilingual characters.

Ewing Julian Typeface (OTF, TTF)
A wicked tribute to a friend of the designer, this creative typeface features sick, zombie details! It’s a highly detailed design that should be included in every designer’s arsenal. This download features five horror font styles and also includes a bonus graphic pack.

Beliung Font (TTF)
Turn any headline into a chilling title! The Beliung font features both regular and expanded styles. Use them to add some thrills to your work and make your favorite quotes pop! Included in this download are two font styles, letters, and so much more.

Creaphy Typeface (OTF, TTF)
Nothing is creepier than fog at night, and the Creaphy typeface manages to make us squirm. A handmade font inspired by horror movies, this font features streaky lines on all capital letters. Create an intense intro with cool horror fonts like Creaphy.

Violence Font (OTF, TTF)
Under normal circumstances, we wouldn’t condone violence. But this horror font features a retro design we’re sure you’ll enjoy. The chaotic design includes only uppercase letters and is great for any powerful poster.

Brain Melt Font (OTF, TTF)
Brains! Embrace the zombie apocalypse with this awesome brain font. This font features a mix of spooky and cartoon elements for an overall funny design that’s great for headlines and more. Use this font for your next Halloween-inspired YouTube video.

Devils Hand (OTF, TTF)
Devil’s Hand is a creepy handwritten typeface that will make you keep the lights on. Suitable for any scary project, this font includes a mixture of lowercase and capital letters. Use this creepy writing font for your designs with caution, of course.

Blood Fingers Font (OTF)
Help save me. Design a poster as creepy as this preview image with the Blood Fingers horror film font. Created to mimic the look of realistic blood, these letters look natural and realistic. Scare anyone with this creepy font!

Halloween Font (OTF, TTF)
Halloween is one of our favorite times of the year! It gives us the chance to do awesome Halloween tutorials with great fonts like this one. This font features a trippy wood-like design with fun details. You’ll simply love this horror font!

Muertos Typeface (OTF)
Celebrate the former lives of the dead with this Dia de los Muertos-inspired typeface. This font features a charming Spanish vibe with additional abstract ornaments for your designs. Try it out and let us know how what you think!

Conclusion
This list features exciting
resources for the avid designer
familiar with OpenType and other font formats. For
additional help with all your custom typography needs, enlist the skills of a
talented
professional by choosing one of the amazing designers from Envato Studio.
And with loads of cool horror fonts available at your fingertips, chances are we’ve missed a few to add to your personal font collection. Be sure to browse Envato Elements and Envato Market for more resources, and let us know your favorites in the comments below!
 Fonts42 Best Fonts for ChristmasNona Blackman
 FontsThe Psychology of Fonts (Fonts That Evoke Emotion)Grace Fussell
 Fonts15 Fonts Similar to GothamLaura Keung
 FontsA Brief History of Display FontsLaura Keung
 Fonts36 Best Wild and Crazy FontsNona Blackman
 FontsAll About the Futura Font and Its HistoryLaura Keung
 Fonts25+ Best Free Calligraphy Fonts (Free Downloads)Nona Blackman
 FontsVintage Trend: Best Mid-Century FontsLaura Keung
 Fonts35 Best Block Fonts (Ready to Download Now)Nona Blackman
 FontsHow to Make a Monospace Pixel FontMiss Chatz
{excerpt}
Read More
10 Top Instrumental Hip Hop Audio Tracks for Slideshows, Podcasts, and Video
Hip Hop is a broad genre of music that often incorporates other elements of art as a reflection of its culture. In this roundup, we’ve put together some of our favourite Hip Hop Instrumentals using Envato Elements to help you find the right sound.
Finding the right music for your project can be enjoyable. Envato Elements allows you to create defined collections you can easily manage, making it a breeze to preview your top choices, quickly and efficiently.

1. Hip Hop Cinematic
This song is for looking for an adventure; epic strings and a great
beat that pulls you closer to the action. Perfect for bringing a sense
of triumph to any of your videos.
2. Lo-fi Hip Hop
A charming abstract beat that serves your project looking for a driving
force, while still being tame enough for your message to shine.
3. Dark Edgy Piano Hip Hop
Deep bass and a seriously bouncy groove; add some gritty suspense to your project with this piano heavy beat.
4. The Inspiration
The feeling of achievement is hard to miss in this versatile
composition. A soft piano opening that doesn’t disappoint. Anthemic
strings and phased bass matched with a snappy beat give you the feeling
of accomplishment.
5. Urban Hip Hop Beat
This song features choppy samples, break beats and melodic synth
flutes. There’s tons of movement that provides a great excuse to add
some exciting editing to match this chopped beat.
6. Night Dreams Hip Hop
A heartfelt ambient track that has you feeling melancholy. Shimmering keys, hand claps, and trapish hi-hats carry you along.
7. Chilled Trip Hop
Chilled Trip Hop is an abstract song with pulsating mids, arpeggiated
keys, and a sci-fi leaning theme. Multiple rises and falls throughout
the composition create a dynamic track that is captivating.
8. Epic Cinematic Hip Hop
Featuring big brass and funk guitars, this beat takes influence from
Chicago Hip Hop and 70’s funk. It’s a punchy groove that works well as a
backing track for one of your shorter projects.
9. Fun Upbeat Summer Hip Hop
This is a great track. Chopped vocal samples make up the melody and a
simple bass line creates an incredibly catchy track. While being
modern, it has an 80’s pop sensibility, making it hard not to tap along.
10. Travel Photography
Travels Photography features dreamy piano, sweeping high pass filters, and a feel good groove.
More Music
Looking for more musical inspiration? Check out this mix:
Keep Learning
Hope you found this list helpful! Here are a few more great resources for making slideshows.
 VideoHow to Make a Video Slideshow in Adobe Premiere ProMarie Gardiner
 Video20 Top Slideshow Templates for After EffectsEnvato Market
 SlideshowHow to Make a Video Slideshow in After Effects (With Template)Andrew Childress
 Video15 Top Slideshow Video Templates for Final Cut ProMarie Gardiner
Read Our Video Marketing Guide
Boost your video marketing skills by reading our comprehensive guide. You’ll learn video marketing from start to finish.
Download Free Video Footage From Mixkit
Check out Mixkit for high-quality royalty-free stock video footage
that you can use whenever you want, wherever you want, free of charge.
Find business videos, lifestyle videos, nature videos, and much more.
{excerpt}
Read More
How to Make a Tri-Fold Brochure Template in Photoshop

In today’s tutorial, we will be creating our very own tri-fold brochure mockup! We will be putting together a tri-fold brochure template in Photoshop perfect for a creative agency or small business. However, you can also use the same steps to create other sizes and styles as well! Just change the colors and images, and you’re good to go.
What You’ll Learn in This Tri-Fold Brochure Tutorial
- How to set up a tri-fold brochure sized document
- How to make a tri-fold brochure template in Photoshop
- How to create a business tri-fold brochure design
- How to copy and paste layer styles in Adobe Photoshop
- Where to find tri-fold brochure template Photoshop downloads
What You’ll Need
To complete this project, we are using the following resources:
- Geometric Shapes Seamless Patterns
- Team Working
- Business Woman Holding Phone
- Wooden Dominoes
- Water Drop Logo
- Adventure Logo
- Real Estate Logo
- Planet Logo
- 15 Space and Astronaut Icons
- Blackboard or Chalkboard
- UI Icon Set
Find more resources on Envato Elements!
1. How Set Up a Tri-Fold Brochure Sized Document
First, we have to set up our document and make sure it’s ready for printing. Let’s look at the specifics.
Step 1
One of the most common tri-fold brochure sizes in Photoshop templates is 8.5 x 11 inches. Though sizes do vary, we will be going with 8.5 x 11 inches today!
You’ll also want to set the Resolution to 300 to ensure a nice crisp and clear printing experience.

Step 2
Now, let’s set up our guides, which will help us know where to place what.
Our first set of guides will be our “bleed” guide, as well as our “fold” guides. These will show us where the tri-fold brochure will be folded once printed.
Turn on the ruler by hitting Control-R, and then right-click > Millimeters.
Click and drag on the ruler to create a guide. Use the left “height” ruler for a vertical guide and the top “length” ruler for a horizontal guide.
Place four vertical guides at the 3, 102, 201, and 300-millimeter marks. We are creating three 99-millimeter columns.

Step 3
Place two horizontal guides at 33 and 213 millimeters.

Step 4
Now let’s create our content areas. We want any important content and text to stay within these lines, unless we want the content to reach onto a different panel.
First, place vertical lines at 11, 94, 110, 193, 209, and 292 millimeters.

Step 5
Finish the guides by placing two horizontal guides at 11 and 20 millimeters.
This will leave us with three 83 x 194-millimeter panels! Keep in mind that there are different tri-fold brochure sizes in Photoshop templates. So this number will vary from template to template.
If you’re making a tri-fold brochure with both a front and back like I am, then go ahead and save two versions of this document to save yourself some time.
You can also save this as a blank tri-fold brochure template for Photoshop and use it over and over again!

2. How to Design a Background for a Tri-Fold Brochure
With our document prepped, let’s lay down our backgrounds. As I mentioned above, I will have two documents in total: one for the front side and one for the back.
Step 1
On the front side document, create a white rectangle the same size as the canvas, using the Shape tool.
Add a Pattern Overlay layer effect to the shape, using the black and gray pattern from this pattern pack.
Bring the Opacity of the Pattern Overlay down to 10%, setting the Size to 25%.

Step 2
While still in the front side document, create a 303 x 153-millimeter rectangle towards the top of the canvas.
Set it to any color.

Step 3
Clip a photo of a Blackboard or Chalkboard into the rectangle shape. Enlarge the image so that only the chalkboard texture is showing if needed.

Step 4
Change to the backside document, and place the same chalkboard texture, filling up the full canvas.

Step 5
Place a light gray #e6e7e8 102 x 216-millimeter rectangle on the right-hand side of the “Back” document. This rectangle should line up with your right-most “fold” guide.

Step 6
Switching to the frontside document, place and clip an image of your team above the chalkboard texture. Set the Layer Mode to Overlay. Add a reasonably harsh Filter > Blur > Gaussian Blur.
Group these layers into a group named “Background.” Do the same to the back document’s background layers.

3. How to Create the Front of a Business Tri-Fold Brochure Design
Let’s focus on each side of the brochure separately so we don’t have to keep switching back and forth. We’ll start with the front.
Step 1
Starting with the right-most panel, extract and place a subject of your choice using your preferred method.
I will be using this stock image of a Business Woman Holding a Phone, and I extracted her using the Select Subject tool, which worked great here as we are going for more of a graphic style look!
Next, make your subject greyscale with Image > Adjustments > Hue/Saturation.

Step 2
Create a pink (#ef5591) to orange (#f26f64) Gradient fill layer. Set it to Style: Linear and Angle: 90, and clip it into the subject.

Step 3
Use a soft black Brush to mask out the gradient covering the subject’s face and upper body.

Step 4
Finish up by placing a white version of your logo above the subject. I used this Planet Logo, and I turned it white with a Color Overlay layer effect.
Group the subject, gradient, and logo, naming the group “Right Panel.”

Step 5
Now, on to the middle panel. Let’s start by creating a row of featured clients, sponsors, or any other logos you may want to feature, depending on your needs!
I used the same Color Overlay layer effect on all logos as I did on the “Design Planet” logo, turning them all white.
Group all of the logos to keep things nice and organized.

Step 6
Create an 83.1 x 22.1-millimeter rectangle using the Shape tool—any color. Place it similarly to what you see below.

Step 7
Add a Gradient Layer Effect to the rectangle in the same pink (#ef5591) to orange (#f26f64) Linear gradient with an Angle: -105.

Step 8
Add icon “10” from the 15 Space and Astronaut Icons pack.
Change the icon to white by copying the Color Overlay layer style from one of the previous logos onto the icon.
You can copy a layer style by holding Alt and then clicking and dragging the style from one layer to another.

Step 9
Add your phone number and a call to action or phrase. For today’s design, I will be using the font Neue Haas Unica!
Use the Light font weight at around 10 pt for the call to action, and the Bold font-weight at approximately 26 pt for the phone number. Change the text size to suit your needs!
Make sure the text is set to Center Text and white.

Step 10
Finish the middle panel by adding any more contact information like your address, any other phone numbers, or a website URL.
I used Neue Haas Unica in Bold at 11 pt in a soft gray #58595b color.
Group your layers, naming it “middle panel.”

Step 11
Let’s finish by designing the left panel!
Type out the first half of your tagline using Neue Haas Unica in Black at 32 pt in any color.
Copy, drag, and drop the same orange to pink gradient layer style from the phone-number rectangle onto the first half of your tagline.

Step 12
Type out the second part of your tagline using Neue Haas Unica in Regular at 30 pt in white. Place it directly below the first half of the tagline.
Both lines of text should be pressed up against the left-most content guide.
Group the two lines of text, naming the group “tag line.”

Step 13
Place any additional flavor text below the “tag line” group using Neue Haas Unica in Regular at 11 pt in white.
Remember, keep all the text in between the two left panel content lines, so they don’t end up in the fold of the brochure!

Step 14
Create a second orange to pink gradient rectangle towards the bottom of the left panel. To save time, you can always copy the first smaller rectangle from earlier and then resize it! My rectangle is 83 x 53 millimeters.

Step 15
Add icon “1” from the 15 Space and Astronaut Icons pack, placing it in the top-middle of the rectangle.
Turn it white like all the other logos and icons.

Step 16
Finally, place some quote Centred Text inside the rectangle. Below, I used Neue Haas Unica in Italic at 11 pt in white.
Group all of your left panel layers, and you are done with the front side!

4. How to Create the Back of a Business Tri-Fold Brochure Design
Let’s move on to the back of the brochure! We will be using the same fonts, layer styles, and icons for the back of our design as we did the front.
Try copying and pasting them from one to the other to save some time!
Step 1
First, let’s add some information to the right-side panel.
Create a title labeled “Services” towards the top of the gray rectangle using Neue Haas Unica in Bold at 32 pt.
The color doesn’t matter as we are going to add a Gradient Layer Effect to the text in the same pink (#ef5591) to orange (#f26f64) Linear gradient with an Angle of -105.

Step 2
Create an orange and pink gradient rectangle coming from the side of the gray square. My exact size is 94 x 31 millimeters.

Step 3
Add a brief description of your services using Neue Haas Unica in Regular at 11 pt in white.
Left Align the text.

Step 4
Now, let’s list our services!
Start by creating a text box that is 56 millimeters in width. Using Neue Haas Unica in Medium at 17 pt set to hot pink (#EF5591), type out the name of your service.

Step 5
In the same text box, type a brief description of the service.
Below I used Neue Haas Unica in Regular at 10.5 pt set to a medium gray (#414142).

Step 6
Add icons related to the service to the left of the text. Again, I am using the 15 Space and Astronaut Icons pack.
Copy and paste the same pink to orange gradient from the rectangle onto the icon.

Step 7
Repeat this step for all of your services!
Group each service into a group, keeping the text and icon together.
Once done, group the different service groups into one final group named “Services Offered.”

Step 8
Finish up the “Services” panel by adding some 1 px medium gray (#414142) lines between the different services using the Line Tool.
Group all of the layers you just created into a group named “Services.”
Step 9
For the rest of the back side of the brochure, we are going to combine the middle and left panel to create one large panel!
Start by adding a 201 x 52 millimeter pink and orange gradient rectangle towards the bottom-middle of the left canvas.

Step 10
Take a copy of your previously extracted subject and place her on the left side of the canvas, aligning the bottom edge of the image with the bottom edge of the gradient rectangle.
Create a pink (#ef5591) to orange (#f26f64) Gradient fill layer. Set it to Style: Linear and Angle: 90 and clip it into the subject.
Use a soft black Brush to mask out the gradient covering the subject’s face and upper body.
Group these two layers, naming the group “Model.”

Step 11
Create a second rectangle below the Model group and above the gradient rectangle.

Step 12
The color of the shape doesn’t matter as we are going to clip a background image into it!
I will be using this Wooden Dominoes image.

Step 13
Adjust the Image > Adjuemnts > Hue/Saturation so that the image is grayscale. Give it a slight blue tint with Image > Adjustments > Color Balance set to +15 blue, -15 red.
Lastly, up the Contrast to +56 using Image > Adjustments > Brightness/Contrast.

Step 14
Add all of your company facts onto the gradient rectangle using Neue Haas Unica.
Below, I used Heavy for the “Our Company” title and Medium for the statistics.
Add any extra fun icons or branding, set to white, to fill up any space if you have it!

Step 15
Add a title to the top of the brochure using Neue Haas Unica in Bold Italic.
Place the same pink to orange gradient onto the text, from the rectangles.

Step 16
Finally, fill the bottom half the brochure with a short “about us” section and a list of results!
For the subtitle, I used Neue Haas Unica in bold at 11 pt set to a hot pink (#EF5591), changing the font to white for the extra text below.
For the right-side list, I used the same Neue Haas Unica in bold at 11 pt set to white.

Step 17
To finish things off, I added some pink to orange gradient checkmarks to the side of each list item using this UI Icon Set!
Group all of your checkmarks into their own group and then group the “checkmarks” group with the list text, and you are all done!

That’s It!
That’s all there is to creating a tri-fold brochure mockup! While it may look like a lot, in reality, it’s just using the same design themes over and over again to keep things readable, minimal, and cohesive! Sticking to one font and only a hand full of colors will not only ensure an attractive design, but it will also save you time.
Remember, you can always copy and paste your layer styles from one layer onto another; there’s no need to apply the same settings over and over again!

In a Hurry?
In a hurry and need a blank tri-fold brochure template for Photoshop right now? Then you’re in luck! Envato Elements has dozens of designs to choose from; just download, place in your info, and you are good to go.
Here are some of my favorite tri-fold brochure designs, all from Envato Elements!
Fitness Tri-Fold Brochure

The fitness tri-fold brochure is all about getting you or your customers pumped for the gym! It features a minimal design that still manages to have a ton of energy thanks to its use of red as an accent color and sharp modern shapes.
Statistics Tri-Fold Brochure

This tri-fold brochure template Photoshop download is ideal for market research, statistics, and financial services! Offering plenty of room for information as well as graphics that are easy to swap out for your own. Give it a try today.
Geometric Brochure Tri-Fold

Jump on the geometric shape trend with the Geometric Brochure Tri-Fold template! Minimal yet colorful at the same time, this brochure has a ton of room for long-form text as well as images. Thanks to its versatile design, it can be used in every field and industry.
Simple Tri-Fold Brochure

The Simple tri-fold brochure template Photoshop download offers you just the right amount of space, so you don’t have to worry about filling in paragraphs of filler information or wondering what images to place where. Add only what you need, and get it done fast!
Brochure – Creative Startup Studio Tri-Fold

Kick-start your creative studio with the perfect tri-fold brochure design! Don’t let the name fool you, however—you can use this template for large corporations, small businesses, startup agencies, or any other professional services.
So now you know how to make a tri-fold brochure. But don’t stop now; why not check out even more tutorials below:
 Flyers23 Best Free Flyer PSD Templates (Photoshop Designs to Download)Nona Blackman
 Print DesignHow to Create a Promotional Flyer in PhotoshopRóbert Šarudy
 Book CoverHow to Design a Vintage Book CoverGrace Fussell
 InDesign TemplatesHow to Create a Book Jacket Template in InDesignLaura Keung
 Magazine TemplatesHow to Create a Magazine Cover Template in InDesignLaura Keung
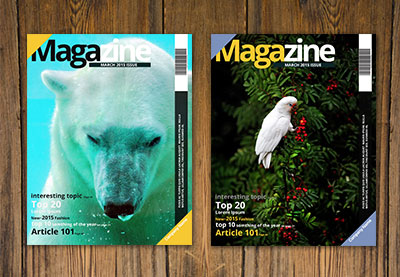 Magazine Design10 Tips for Designing High-Impact MagazinesGrace Fussell
{excerpt}
Read More
42 Best Retro 80s Fonts to Download in 2020
Looking for the best 80s fonts to complete your projects? Check out this new list for exciting pro fonts!
Everyone is in love with the 80s. Inspired by everything from the futuristic sci-fi films to the awesome retro graphics, designers are getting really creative with their 80s style fonts.

Want to incorporate a few into your next poster? Enjoy this inspiring collection of high-quality fonts from Envato Elements and Envato Market.
If you’re a graphic designer or digital artist who constantly needs the best retro fonts from the 80s, then you can benefit from Envato Elements, our subscription-based marketplace. For a low monthly price, you get unlimited downloads of all the fonts that you need. And that’s not all. You can also download templates, add-ons, photos, videos and more with your subscription.
On the other hand, if a subscription isn’t your thing and you prefer to get 80s style fonts one at a time, then you’ll love our single-purchase marketplace, GraphicRiver. There you’ll find everything you need for your creative digital projects.
40+ Best 80s Retro Fonts
Without further ado, let me show you some of the coolest retro fonts from the 80s you can get from Envato Elements and GraphicRiver.
1. Hanahelia 80s Retro Font (OTF, TTF) (Envato Elements)

Hanahelia is a great example of an 80s style font. Add some neon and shiny effects, and you’ll get a cool 80s lettering design. This script font is perfect for logos, flyers, posters, and more.
2. Retrofuturism OTF Vaporwave Font (OTF) (Envato Elements)

In the 80s, futuristic looks were very popular. And this eighties font is all about it. Take advantage of this very complete pack. It comes with the OTF typeface, as well as cool backgrounds and elements in EPS, JPG, PNG and PSD files.
3. Rodagear Script 80s Font (OTF) (Envato Elements)

Neon was trending in the 80s, and it sure is trending now. Check out this cool 80s type script and add a really cool touch to your retro designs. Use it for logos, branding, business, or any project you’ve got in mind.
4. Ferguso – Aesthetic Sans Serif Font (OTF) (Envato Elements)

This nice sans-serif eighties font is described by its creator as the result of mixing “the trends of aesthetic design with the implementation of vintage poster design, and 80s disco boogie music”. We think it’s a really cool 80s typeface for your designs.
5. Gorgom – Futuristic Font (OTF) (Envato Elements)

Gorgom is another cool futuristic font that looks awesome as an 80s style font. It looks great on gaming projects and any other retro designs.
6. Death Star Retro Font (OTF, WOFF) (Envato Elements)

This wicked 80s type design is inspired by Star Wars. Crush the competition with a cool retro font that’s perfect for sci-fi projects and games. Included in this download are letters, numbers, and additional alternates and ligatures. Check it out!
7. The Hurricane Handbrush 80s Font (OTF, TTF) (Envato Elements)

Handmade fonts are created by scanning in high-resolution images of letters elegantly brushed by hand. This set of 80s typeface includes a versatile brush typeface inspired by simple masculine vibes. Try it out on posters, invites, or stationery.
8. Copper 80s Retro Font (OTF, TTF) (GraphicRiver)

Looking for a clear 80s retro font? This popular trend often features a great metallic sheen that will work on many 80s projects. Add it to a movie or product title like the image above. For more great results, personalize the 80s lettering to fit your brand’s style.
9. Raskhal 80s Font (OTF, TTF) (GraphicRiver)

Eighties-style fonts like this one don’t often come with extra bonus features. So make sure to grab this creative typeface inspired by the neon lights of the 1980s. You can even test drive this 80s type font with any word by visiting the preview link. Try it out!
10. Ambisi Typeface 80s Font (OTF, TTF) (Envato Elements)

Eighties text fonts like this Ambisi font are like no other. They feature interesting geometric shapes inspired by abstract and futuristic concepts. Make your work stand out with this cool and unique eighties font text style.
11. Thunderstorm Retro Font (OTF, TTF) (GraphicRiver)

Need another great retro font for your collection? Thunderstorm is a hand-painted 80s typeface that emulates classic show titles from the past. Add it to your YouTube videos, social media pictures and more for a whole new look!
12. Nemphis 80s Font (OTF, TTF) (GraphicRiver)

Nemphis is a brilliant new font based on the popular 80s Memphis Design trend. It uses funky shapes and letter arrangements to create intricate letters with lots of personality. Use this display 80s typeface on almost any project, from web work to print design.
13. Ambrogio Signature Font (OTF, TTF, WOFF) (Envato Elements)

Or wrap your signature around a stunning skyline with the Ambrogio eighties font. This 80s script font is destined to give your work a bold new aesthetic. Designed entirely by hand, this signature font will work perfectly with book covers, magazines, and text effects.
14. Heatwave 80s Font (OTF, WOFF) (Envato Elements)
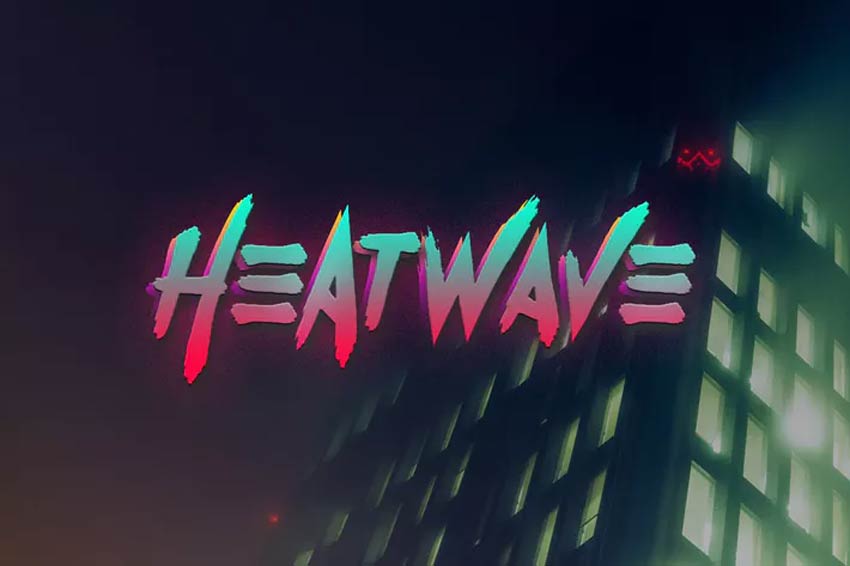
Need a neon 80s font? This Heatwave font might be just the fit for your 80s poster. Inspired by classic retro 80s graphics, this font is cool and edgy. Included in this download is a full set of letters, numbers, and punctuation. Multi-language support is also included!
15. Oh Blazt 80s Font (OTF, TTF) (GraphicRiver)

Get inspired to make great graphics. This next cool 80s font really stands out on posters, logos, and header designs. You can also add it to illustrations for a nice comic effect. Grab this pro 80s text font for just under $20!
16. Vintage Party – 80s Script Font (OTF, TTF) (GraphicRiver)

So where’s the party? Lay out the plans with this incredible 80s script font. Whether you’re throwing a party or creating signs for a tropical bar, this 80s type font will help you set up your brand right. Grab it today for just under $15.
17. Burnout 80s Font (OTF, TTF) (Envato Elements)

Feeling burnt out? Stay inspired with a creative typography project. This burnout font is an all caps typeface that is loud and proud. So stand out with this complete set of letters, numbers, and punctuation. Perfect for retro album covers too!
18. Boldwest Font (OTF) (Envato Elements)

Want a bold font next? Boldwest is a creepy and spooky font type. Inspired by Halloween, the letters were created to emulate spooky ghost shapes and funny characters. Add it to your work for a cute and funny typeface.
19. New York 80s Font (OTF, TTF) (Envato Elements)

Many of New York’s famous buildings were made in the 80s. Now you can get that 80s New York vibe with this retro font. Featuring eight creative fonts, this pack includes amazingly detailed grunge textures and serif typefaces.
20. Crava 80s Retro Font OTF, TTF) (GraphicRiver)

Craving a little nostalgia? Step into a time machine with the wonderful Crava retro font. This 80s font is curvy and big. It’s a unique display font with large, looping letters and an all caps style. Use it for a retro twist to any poster or project.
21. Game Over Retro 80s Font (TTF) (GraphicRiver)

What was your favorite game in the 80s? Many of the 80s style fonts we’ve seen already are inspired by eight-bit pixel games and sci-fi films. And the Game Over font is no different. Grab it for just $11 to see how it will look on your next design. Try it out!
22. Blagious Bold Script (OTF, TTF) (GraphicRiver)

Create bold logos with the Blagious script typeface. An extraordinary design by Cotbada-studio, this script is flirty and makes any packaging stand out. Visit the preview link to see more examples and to test it out!
23. Arcade Machine 80s Retro Font (OTF) (Envato Elements)

Relive the magic of the 1980s arcade. Inspired by 80s classics like Knight Rider, Miami Vice, and arcade games, this retro font pack is sure to make your T-shirts and posters shine. It comes with uppercase and lowercase letters as well as additional ligatures.
24. Outrunner 80s Retro Script (OTF, TTF) (Envato Elements)

Here’s another great neon 80s font to add to your collection. This retro, classic script could easily have come out of any vintage film. It features stylish capital and lowercase letters you can definitely bring into modern designs. Try it out with your work!
25. Friday Sunday Font Duo (OTF, TTF) (GraphicRiver)

Create more harmony in your designs with this creative font duo. Friday Sunday is a cool retro font with a nice modern edge. Easily implement it into logos, websites, and stylish branding material. The possibilities are limitless with this one.
26. Neolion Font Duo – Neon 80s Font (OTF, TTF) (GraphicRiver)

The neon 80s font trend has seen many great fonts, like this Neolion font duo. This download comes with amazing regular, italic, and script neon styles. Suitable for a variety of purposes, this font can definitely help if you need a boost in your creative content.
27. Cred Typeface (OTF) (GraphicRiver)

Many fonts from the 80s are just plain old quirky, like this Cred font. Inspired by the fun and funny fat typefaces from the 80s, this typeface is full of texture and personality. It’ll certainly take up space too, so use it wisely for the best impact.
28. Futurist 6 – Retro Font (OTF) (GraphicRiver)

There is nothing like a classic sci-fi movie from the 80s. The Futurist 6 font explores the wonderful geometric trend with angular shapes and minimalist lines. It’s legible enough to read as a book title or a bold logo. Add it to your collection today!
29. Minority Retro 80s Font (OTF, TTF) (GraphicRiver)

Eighties text fonts are sometimes messy too. The Minority retro font features a hand-painted condensed script that is bold and explosive. Enjoy the realistic spray-painted effect and epic stylistic alternates. How would you use this font in a project?
30. Broken Font (OTF, TTF, WOFF) (Envato Elements)

You can fix just about anything with good design. So fix your work with the Broken font. Made by designer yandidesigns, this bold scratch font is new and unique. It features a full set of uppercase letters with realistic dents and scratches. Give it a go!
31. Saltino 80s Retro Font (OTF, TTF) (Envato Elements)

If you’re looking for a logo design that looks effortlessly natural, try the Saltino typeface. This natural, handwritten typeface was made by designer khurasan. Its sultry style is soft and elegant, making it the perfect fit for wedding designs.
32. Alaska Adventure Sans Serif Type (OTF, TTF) (GraphicRiver)

Want another great 80s text font? The Alaska Adventure typeface has a clean, sans serif style. The subtle letter arrangement has awesome character to it and works incredibly well with minimalist projects like logos and headers. Try it out on invites and print design too!
33. Kust Brush Font (OTF, WOFF) (Envato Elements)

Here’s another impressive brush font to add to your arsenal. Kust Brush is both bold and effective. It features a realistic brush style with lots of texture. Every letter has been given a distorted look, so you’ll truly get a unique vibe with this typeface.
34. Video Game 80s Font (OTF, TTF, WOFF) (Envato Elements)

Love the video games of the 80s? Create your very own video game titles with this amazing video game font. The designer created this pack of fonts and video game characters, including 17 retro Martians. Mix and match this pack for a cool result!
35. School Story 80s Font (OTF, TTF) (Envato Elements)

Or tell your story as you would in school. School Story is a cute display typeface made with a lot of creativity. It can instantly add a cheerful element to your designs and works well with presentations and more. Get letters, numbers, and punctuation with this set!
36. Artzopo Font (OTF) (Envato Elements)

Feeling a little artsy? Express your creative juices with the Artzopo font. This handmade font can easily be fitted for logos on T-shirts and apparel. Make an impact with a cool handwritten look that’s hard to miss. Try it out!
37. Zeky Typeface Font (OTF, TTF) (Envato Elements)

This next 80s text font is sleek and sophisticated. Zeky is a classic typeface with tall characters and sans serif letters. Download this font to get everything you need as well as a helpful instructional guide. Easy installation too!
38. Manticore – 80s Brush Font (OTF, WOFF) (Envato Elements)

Brush fonts are one of the best ways to add a little edge to your projects. The Manticore font is an 80s brush font with letters, numbers, and extra glyphs. It works best on 80s styled prints like punk graphics or horror themes. Check it out!
39. Newtype Typeface Font (OTF, TTF) (Envato Elements)

Looking for something new? Step out of the box with the Newtype typeface. This fresh and unique font is sure to add character to your typography. It’s available in OTF and TTF format and works well with various media. Try it out on video games or movie titles.
40. Jagalana 80s Script Font (OTF, TTF) (Envato Elements)

Or make a lasting impression with the stunning Jagalana typeface. This 80s script font has beautiful, swooping letters and a nice, elegant feel. Calligraphy styles like these are lovely on invites, but you can also try them out on branding material and more. So add it today!
41. Megaton 80s Retro Font (OTF, WOFF) (Envato Elements)

Megaton is a really cool 80s typeface. Check this big and bold stencil font with uppercase and multilingual letters, numbers, and punctuation. If you mix it with a cool sans-serif or script font, it will take your design to the next level.
42. Neoncity – Signature Neon Font (OTF, TTF) (Envato Elements)

We close the selection with a really cool neon 80s lettering. This is a bold display font with a vintage feel, totally inspired by the 80s. The pack includes a neon sans-serif font and a neon script font. Use it to make your logos stand out!
Learn More About Retro Design Trends
Now that you’ve seen our coolest 80s lettering styles, I’m sure you’d like to know more about this retro design trend that is taking over social media and brands. I’ve got this useful video where you can learn more about it:
Don’t forget to visit our Envato Tuts+ YouTube channel, where you can find dozens of interesting and helpful tutorials and videos.
You can also try out these epic 80s design tutorials:
 Graphic DesignRetro Design Trend: Create the 80s Style With Fonts, Text Effects, and More!Laura Keung
 Text EffectsHow to Create an 80s-Inspired Text Effect in Adobe PhotoshopIvan Gromov
Find More Font Inspiration
Fonts used in the 80s are getting their long-overdue praise this year. So how will you incorporate these cool designs into your next work? Let us know your favorites in the comments! Learn more about 80s styled fonts. Check out these links:
 Fonts33 Best New Fonts for 2020Melody Nieves
 Fonts33 Stylish Vintage FontsMelody Nieves
 Fonts100 Insanely Awesome Fonts From Envato ElementsMelody Nieves
 Fonts30+ Free Signature Fonts (Script Fonts to Download Now)Nona Blackman
 Tattoo Design49 Epic Tattoo FontsMelody Nieves
 Fonts30+ Best Graffiti FontsMelody Nieves
 Fonts40 Best Blackletter and Gothic Fonts for DesignersGrace Fussell
 Fonts35 Best Calligraphy FontsMelody Nieves
 Fonts25+ Best Free Hand-Lettering Style Fonts (Designs for 2020)Melody Nieves
 Fonts26 Best Sci-Fi Fonts (Science and Retro Styles)Nona Blackman
This has been a selection of premium resources perfect for the avid
designer. For more retro fonts from the 80s and cool 80s lettering, check out Envato Elements and Envato Market Happy designing!
{excerpt}
Read More
Create a Burning Vector Match Using Gradient Meshes

If you
want to create vector flames in Illustrator, in this tutorial I will
show you how to create an illustration of a burning match using a
fire gradient. You’ll learn how to make a realistic match flame
that is also fully scalable.
And if you need some vector flames, but you want to save time, you can always download these realistic vector fire graphics from Envato Elements:

What You’ll Learn in This Vector Flames Illustrator Tutorial
- How to create a burning match in Illustrator
- How to create a vector fire graphic
- How to create a fire gradient mesh
- How to create vector flames in Illustrator
Follow along with us over on our Envato Tuts+ YouTube channel:
1. How to Create a Vector Matchstick
Step 1
Create a new document in the RGB color mode. Take the Rectangle Tool (M) and create a black rectangle. This will be our background. Lock this layer.

Step 2
Create a New Layer. Take the Rectangle Tool (M) again and draw a rectangle in the shape of a matchstick. Now fill it with a linear gradient of various shades of brown to convey the light distribution at the edges of the match. Here are the shades I used:
#482217#efd195#994521


Step 3
Copy this rectangle and paste it in front with Control-F. Now slightly reduce the height of the rectangle and fill it with a new linear gradient. The shades of brown on this rectangle should be darker than the ones on the bottom rectangle. Here are the values I used:
#310901#996148#782803


Step 4
Select both rectangles and go to Object > Blend > Make. Then go to Object > Blend > Blend Options and set the Spacing to Specified Steps, 50.


Step 5
Create another rectangle of the same width as the previous one. Add a Gradient Fill as shown here. The values I used are:
#340900#984420#792702


Step 6
Set the Opacity to 0%.

Step 7
Copy the rectangle and paste it in front (Control-F). Then resize it to make it very thin, and set its Opacity back to 100%.

Step 8
Select the last two rectangles and go to Object > Blend > Make.

2. How to Create a Vector Match Head
Step 1
Take the Ellipse Tool (L) and create a red circle (#e20612) aligned to the horizontal axis of the matchstick.

Step 2
Take the Direct Selection Tool (A) and double-click the point on the left. Hold Shift an drag it to the left. Then take the Pen Tool (P) and add a new anchor point at each intersection of the head and the matchstick.

Step 3
Hold Alt and click both new anchor points to cut their handles. Then take the Direct Selection Tool (A) and drag the point between them towards the head.


Step 4
Fill the match head with a radial gradient that goes from dark brown to its light shades. Here are the shades I used:
#210900#994521#f1ce94


Step 5
Copy and paste the shape of the head to the back with Control-B. Fill the copy with a solid dark-brown color (#340900) and shift it slightly to the left.

Step 6
Take the Pen Tool (P) and create a place where the wood is burnt. Fill these areas with a linear gradient composed of dark shades of brown color. Here are my shades:
#492117#240700
Move these two objects below the match head layers.

Step 7
Time to create pores on the match head. Take the Ellipse Tool (L) and draw an ellipse. Take the Eyedropper Tool (I) and hold Shift to pick the color from the area to the right.

Step 8
Copy and paste the ellipse in front (Control-F), reduce its size, and fill it with a solid dark brown (the same as the shadow under the match head).

Step 9
Use this technique to create more pores on the match head.

3. How to Create a Vector Match Flame
Step 1
Now I’ll show you how to create the match flame. Lock this layer and create a new one. Drag it under the previous layer. Take the Ellipse Tool (L) and draw a big red circle (#e20612). Using the Direct Selection Tool (A), pull the top anchor point up.

Step 2
Select the shape of the flame, and go to Object > Create Gradient Mesh. Set the number of rows and columns in the dialog box.

Step 3
Use the Direct Selection Tool (A) to distort the grid a little. Every flame is different, so you don’t have to copy me directly.

Step 4
Select the gradient mesh with the Selection Tool (V) and fill it with black. Set its Blend Mode to Screen.

Step 5
Now you can color the flame. Select the grid nodes and apply yellow and red colors to them. Nodes that lie beyond the borders of the gradient mesh should remain black, otherwise we would get the sharp edges of the flame, which looks wrong.
Here are the colors I used for the flame:
#fff38d#d14507

Step 6
Lock this layer and create a new one on top. Take the Pen Tool (P) and draw a similar shape. Turn it into a Gradient Mesh with 4 Rows and Columns, and add colors to it with the same technique. The colors I used are:
#faeda7#d7651e#e78c43


Step 7
Set its Blend Mode to Screen.

Step 8
Now create two more feathers of the flame with the same technique of creating a fire gradient.


4. How to Create Vector Smoke
Step 1
There is no smoke without fire, and vice versa, so let’s add some smoke. Lock the previous layer and create a new one. Take the Rectangle Tool (M) and create a rectangle filled with black. Set its Blend Mode to Screen.

Step 2
Keep the rectangle selected, and create a Gradient Mesh with 2 Rows and 3 Columns.

Step 3
Make the two bottom points blue (#7ba9ca).

Step 4
Now we need to bend the rectangle shape into the shape of a smoke stream. Place the rectangle close to the flame, and then take the Lasso Tool (Q) and select all the nodes of the grid on the right.

Step 5
Take the Rotate Tool (R) and set the center rotation at the middle point of the left side. Then rotate the selection to bend the rectangle.

Step 6
Select the right half of the shape now.

Step 7
Bend this selection by placing the center of the rotation in this spot:

Step 8
Additionally, you can move individual nodes using the Direct Selection Tool (A) to get more control over the final shape.

Step 9
Move the smoke layer under all the other layers. Create a few more streams of smoke using the same technique. Feel free to use different shades of blue. You can also hide the flame layers to see the smoke better.


5. How to Create the Final Composition
Step 1
When working with gradients, it’s easier if an object is placed vertically or horizontally. But this composition looks pretty boring. So now unlock all the layers except the background and rotate the whole burning match for a more interesting composition. At this point, you can also resize the background to fit the composition better.

Step 2
Copy the background rectangle, select the top layer, and paste it in front (Control-F). Select All (Control-A), and then go to Object > Clipping Mask > Make.

Conclusion
Having mastered the techniques described in this tutorial, you can create realistic vector flames, lighters, or torches. Who knows, you might want to make a fire! And give it some heat!

Do you want to try other tutorials about creating vector effects? Check out our recommendations:
 Gradient Mesh ToolHow to Draw Vector Peaches Using Gradient Mesh in Adobe IllustratorVladimir Galantsev
 PatternsHow to Make an Illustrator Chevron PatternMonika Zagrobelna
 Text EffectsCreating an Environmentally Friendly Green Type TreatmentRyan Putnam
 Gradient Mesh ToolHow to Create a Vector T-Shirt Mockup Template in Adobe IllustratorVladimir Galantsev
 Icon DesignHow to Make Social Media Icons in VectorDiana Toma
{excerpt}
Read More
17 Best Bootstrap 4 Plugins
{excerpt}
Read More
18 Best Bootstrap 4 Plugins
{excerpt}
Read More
Crowdfunded dongle brings wireless Android Auto to more cars
While wireless Android Auto will soon be easier to find on phones, it’s another matter for cars. The cable-free tech is still rare outside of a few brands like BMW. A crowdfunded project might change that, however. Developer Emil Borconi-Szdressy rec…
FCC chairman cited false broadband data in spite of warnings
The FCC has proposed fining internet provider BarrierFree for providing false subscriber data, but not before it used some of that data to further its own claims — and it had plenty of warning, too. Ars Technica reports that FCC Chairman Ajit Pai use…
360-degree virtual tours are easier to make with Insta360 and Matterport
As the world continues to battle COVID-19, the likes of realtors, museums and galleries have been seeking alternative ways to serve their clients or visitors remotely. Matterport even claims that its platform helped create more than twice as many 360…
Virgin Galactic’s last round of SpaceShipTwo tests begins October 22nd
Virgin Galactic is finally getting close to that moment when it can put tourists (or at least, its founder) into space. CNBC has learned through an FCC filing that Virgin Galactic will conduct the first of its last two crewed SpaceShipTwo tests on Oc…
China says it landed a reusable spacecraft after a two-day flight
China might have closed an important gap with the US in spaceflight. The country’s state-run Xinhua News Agency says (via The Telegraph) an experimental reusable spacecraft successfully landed on September 6th after spending two days in orbit. Detail…
Amazon bans foreign sales of plants in US after mysterious seed deliveries
The US and other countries have been dealing with a wave of strange, unexpected seed shipments this summer, and Amazon has decided that the best solution is to clamp down. The Wall Street Journal has learned that Amazon has banned all sales of foreig…
Samsung’s Galaxy S20 Ultra gets a whopping $300 discount at Amazon
Samsung’s Galaxy S20 Ultra is normally one of the most expensive phones you can get, but it might be considerably more reasonable if you act quickly. Amazon is offering a daily deal on the unlocked S20 Ultra with 128GB of storage that lowers the pric…