Plenty of phones have a special back panel with a colourful gradient or shimmering effect. Very few, however, actually change color altogether. (Not without a case or Dbrand-style skin, anyway.) The OnePlus 8T Concept is different, though. The experi…
Category: Tutorials
Tutorials,freelance,projects,joomla,php,mysql,wordpress,blancer.com
The Morning After: Tesla’s self-driving subscription slides to 2021
You probably already have your holiday shopping taken care of and are already looking at a stack of confirmed delivery tracking numbers. But if, say, a friend of yours is still in need of last-minute shopping information, or you just want to double…
Samsung’s Galaxy Buds Pro leak confirms Apple-like surround sound feature
Samsung currently has three models of Galaxy Buds earphones, including the original Buds, Buds+ and bean-shaped Buds Live — the latter its first with active noise cancellation (ANC). However, as rumored, a fourth model called the Buds Pro is set to j…
20+ Cool Clothing & T-Shirt Company Brand Logo Designs for 2021
More than ever, consumers want to wear clothing that matches their identities. The logos they wear reflect who they are and what they believe.
If you’re launching a clothing brand in 2021, it’s crucial that you build a logo that stands out from the crowd. It should match the vision you’ve got for your new fashion line.

Let’s learn how to use Placeit to build a memorable apparel logo that’ll find its way to the top of the rack! You’ll also discover some clothing logo ideas from Envato Elements.
5 Quick Logo Design Tips from Top Clothing Brands
In this tutorial, you’ll learn how to build your own clothing logo with some help from starter templates. You’ll learn to use Placeit, a browser-based clothing logo maker, to create an excellent fashion brand logo.
Before we dive into building a clothing brand logo, it helps to draw some inspiration from some of the most ubiquitous designs. Let’s learn from some of the world’s most popular fashion brands with five clothing logo design lessons below:
Note: The logos below are for illustrative purposes only. The companies who own the logos below aren’t affiliated with Placeit or Envato.
1. Focus on Typography
Some of the world’s most memorable clothing brand logos use only text and initials to capture the spirit of the brand.
Focusing on typography means considering custom font faces that aren’t commonplace. Eschew Georgia and Times New Roman for totally custom logo options for T-shirts that won’t easily be replicated.
2. Align the Logo With the Brand
Above all, your logo should capture the same spirit that your clothing and accessories do. It’s all about aligning a logo with the brand’s intent so that everything feels like a natural fit.
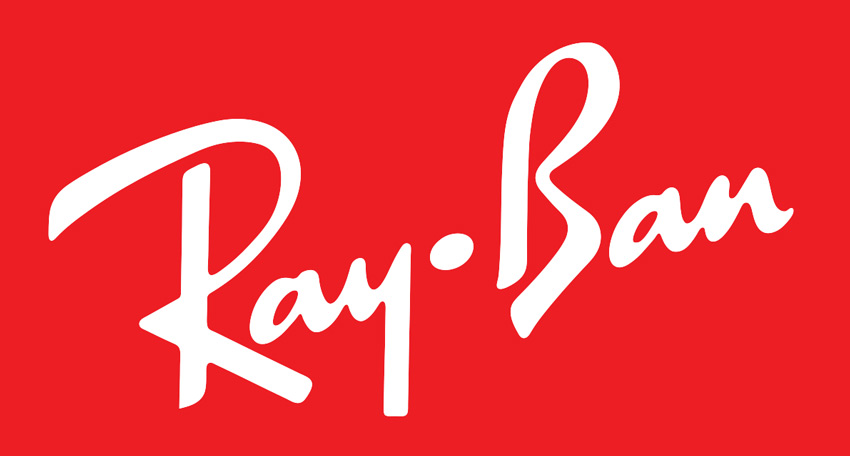
The Ray-Ban logo is a perfect example of this. The simplicity, clean text, and tilt feels like the perfect fit for the fashionable brand known for its sunglasses.
3. Stay Consistent
Once you’ve rolled out your logo, it’s a must that you commit to using it. I’ve seen brands that constantly shift their logo and identity. A constantly revolving set of logos makes it impossible for consumers to connect.
There’s no better example of consistency than Nike’s steadfast commitment to the “swoosh.” It’s quite clearly the face of the brand, and it might be one of the best $35 ever spent.
4. Simplicity Means Memorability
Make it memorable and make it simple. Logos like Chanel remind me that less is truly more. That iconic look of two Cs perfectly captures the creator’s intent. The simplicity also means that it works on practically any clothing or accessory.
5. Abstract Designs Stand Out
Don’t think about building your apparel logo too narrowly. It’s perfectly fine to borrow elements from culture or practically anywhere to bring your clothing logo design to life.
Take the Brooks Brothers logo, for example. The Golden Fleece hardly screams “I’m a southern men’s fashion brand,” but it’s come to be an iconic symbol of well-dressed southern business professionals.
18 Clothing & T-Shirt Company Brand Logo Designs for 2021
Now that you’ve seen what some popular clothing brand logos look like, let’s examine 18 of the best designs for clothing brand logos on Placeit:
1. Clothing Brand Logo Maker With Tattoo Illustration
Looking for a logo with classic tattoo illustrations? This clothing logo is perfect for an urban clothing line with fierce touches. The Clothing Brand Logo Maker With Tattoo Illustrations will look great on your merchandise.
2. Clothing Logo Maker for Kids’ Brands
If your clothing brand logo needs to capture a fun and playful effect, this is one of my favorite choices. Animal shapes and a fingerprint style are sure to be noticed. This T-shirt logo feels perfect for a light-hearted clothing brand that would appeal perfectly to kids’ clothing brands.
3. Clothing Logo Maker for Boutiques and Brands
When you’re building out your clothing brand logo, one route that you can take is an artisanal approach. Brands like this do a great job of capturing the touch of a designer in the branding. Use a logo like this with an almost hand-painted script to capture a look and feel that’s perfectly artistic.
4. Fresh Logo Design Template for Clothing Brand
Make no mistake: this clothing brand logo means business. A big, bold initial means that your brand likely plays a big part if you use this clothing logo design option. Try it out for a way to permanently attach a key initial to your next clothing brand launch.
5. Logo Maker for Tennis Shoe Stores
Shoe culture is as relevant as ever in modern fashion. Even if you’re designing a T-shirt logo or looking for general clothing logo ideas, a shoe logo still captures the spirit of a modern fashion brand. If your apparel line includes footwear, this might just be the perfect way to capture both those needs in a single logo.
6. Logo Maker for Indie Clothing Brands
Clothing brand logos run the gamut of designs and styles, and this preset designed for indie clothing brands is the perfect example. You can use built-in art designs like a flower shape to bring a unique clothing logo design to life. It’s a great reminder that your T-shirt logo can incorporate so much more than simple text and shapes, and that you can build it all in Placeit.
7. Signature Logo Maker for Fashion Brand
Some of the best brands make use of simple signature elements. This T-shirt logo design is the perfect starting point for that type of look. As always, it’s easy to change the brand colors, built-in text, and font, thanks to Placeit.
8. Clothing Brand Maker – Circular Design
This clothing brand logo has the perfect vintage and elegant feel that’ll stand out. Simple, flowery designs and elegant text combine perfectly in the preset you can see in the preview image. Customize it for a brand that combines lifestyle with fashion to build a connection with your potential customer.
9. Cool T-Shirt Brand Logo Design Template
Some of the best clothing brand logos keep it simple, with only a key letter or two that acts as the face of the brand. This example captures that exact spirit. One of the strengths of using a look like this is that it’s easily visible from far away. Choose a design like this for the type of T-shirt logo that someone recognizes from across the room.
10. Seamstress Logo Design Template
The Seamstress clothing brand logo preset has that handmade, craftsman feel to it. Building a great logo is all about aligning the look with the mission of the brand. If your clothing brand is all about the attention to detail and work that goes into the product, this might just be the perfect logo for you.
11. Logo Maker for Fishing Supplies Store
A number of the best clothing brand logos capture the spirit of the sea, and it’s easy to see why. The beach and the ocean are home to many consumers’ best memories, so it makes perfect sense that logos try to capture this. Use this T-shirt logo design to bring a maritime feel to your next apparel line.
12. Logo Design Maker for Outfitters Brand
Fly your T-shirt logo design high with this brand! If your new company specializes specifically in the world of cool logo T-shirts, this is the perfect logo to use. Choose it if you want your potential consumer to know that you’re in the business of T-shirts.
13. Logo Template With 90s Style for Apparel
Another clothing logo design concept is to use something more abstract. The strength of this is that can act as the face of your brand in a way that transcends any medium. Choose an abstract design like the one above if you hope to see your clothing logo design on practically any medium.
14. Fashion Shop Logo Maker With Curved Text
A simple, clean clothing logo design like this one wastes no space. This is flexible enough to be used as a logo design for practically any medium but shines for modern apparel thanks to its simplicity and style.
15. Kids Tee Logo Maker With Dinosaur Graphics
What child wouldn’t want to add a dinosaur to practically every T-shirt they own? Even I’m thinking about adding more dinos to my wardrobe after checking out this T-shirt logo design. You can use it too, with easy customizations of the brand name, color palette, and more.
16. Apparel Stores With 90s Graphic Logo
If the term “shirts” is in your clothing company’s name, this is a great choice thanks to that custom “S” character in the middle. It’s a bit abstract, but that’s just the type of T-shirt logo it sometimes takes to stand out from the crowd. Keep this in mind if your company name fits the bill.
17. Text Only Logo Maker for Clothes Brand
Rounding out our selections is a classy company logo T-shirt design that’s text-oriented. A logo like this one’s ideal for an apparel line that could include a wide variety of items since it’s simple and text-based. Still, the simplicity of this logo is a strength because it feels classy and could be applied to practically any brand.
18. Clothing Brand Logo Creator With Astrology Sign
Astrology signs make perfect, trending clothing logos. This Clothing Brand Logo Creator With Astrology Sign will stand out and look awesome as a brand identity. Customize it to your heart’s content with Placeit’s clothing logo maker.
How to Make a T-Shirt (Clothing Brand) Logo Design Online
Earlier in this tutorial, we highlighted some of the best clothing brand logos that you can build with Placeit. This is an amazing T-shirt logo design maker tool that lives entirely in your web browser and can help you build an easy logo in just a few clicks.
Let’s walk through building a fashion brand logo using Placeit:
1. Choose a Starting Template Preset
You’ve already seen 18 of the best fashion brand logo templates, so make sure you start with a template. It doesn’t have to match exactly what you’ve got in mind. Just look for a few key elements that you can see potential in. Click on one of the templates above to launch your design.

2. Update the Graphic
The starting logo design may not have exactly the image you’ve got in mind, but that’s okay. Just search for a matching idea on the right side, and then choose a matching image to update the logo. In the example below, I quickly swapped in a chick logo to match my brand identity.

3. Add Your Text
Next, you can update the text using the boxes on the left side. Type over the placeholders to add your brand identity. You can also toggle off one of the text boxes, as you can see in the example below.

4. Adjust the Branding Elements
Matching the clothing logo design to the brand is a must. The best way to do that is to incorporate the brand’s color palette in your logo. Click on the color drop-downs on the right side to change the colors to your key color selections.
At this stage, you can easily click on download to export the finished logo, both on a transparent background and with the pastel backdrop we created above.
5. Bring the Logo to Life
If you want your audience to see the logo in the real world, it helps to use another amazing tool from Placeit: a T-shirt mockup tool! With this template creator, just drop in your logo and you’ll see it in a realistic product shot. It’s a great way to build a marketing image.

To learn more about Placeit’s tool, check out the guide below:
Totally Customizable Clothing Brand Logos (With Unlimited Use)
While Placeit is a browser-based clothing logo design maker to help you create your next clothing brand logo, you can also use offline templates to build your next apparel graphic.
If you’re more comfortable in graphic design apps like Adobe Illustrator or Photoshop, Envato Elements might be the perfect choice for you. A single subscription to Elements unlocks everything, including hundreds of logos that are fit for clothing brands.
Here are my favorite templates from Envato Elements to create your next clothing logo:
1. Salt Water Logo
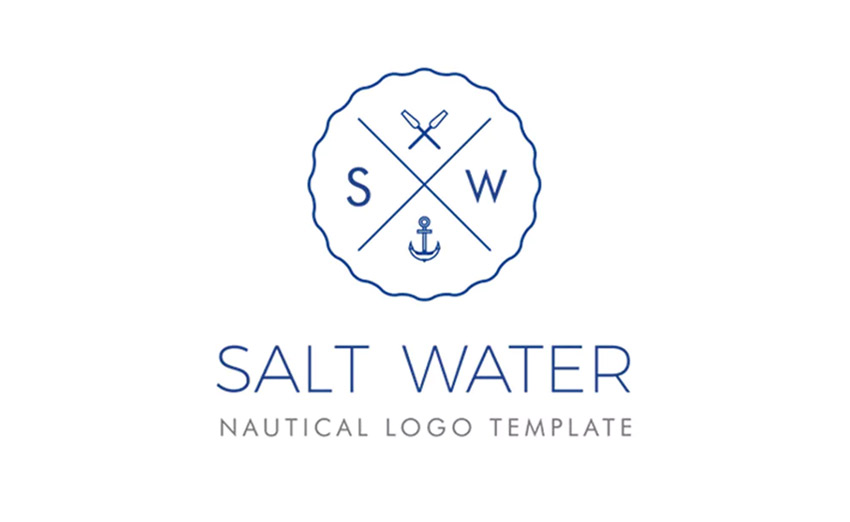
This attractive nautical logo template would easily work for a custom logo T-shirt or other clothing brand logo. This easy-to-use template can be modified using Adobe Illustrator. Your customers are sure to notice the distinct look and ocean theme.
2. Floral Business Logos

This floral-inspired logo template set includes four different logos. The elegant look of these logos is perfect for fashion-related company logo T-shirts. You can customize the colors to match your brand. The templates come with an AI (Adobe Illustrator) file and a CDR (CorelDraw) file.
3. Retro Industrial

Do you love the retro look? Maybe your company sells vintage clothing. It makes sense to have a clothing logo design that matches your company’s mission. In this logo template set, you’ll find eight hand-made logos that you can resize, recolor, or otherwise modify to fit your brand.
4. Fashion Logo
Here’s an Adobe Illustrator logo template designed specifically for clothing brand logos and other fashion-related needs. You’ll love the crisp, modern feel to this one, as well as the ease of editing.
5. Hunter Vintage

Does your clothing brand specialize in outdoor clothing? Consider using one of the ten logo designs from the Hunter Vintage collection as a source of great clothing logo ideas. This set is perfect for T-shirt logo designs and other custom clothing logos.
Explore More Logo Design Resources and Inspiration
I hope you liked the professional clothing logo designs I showed you. Now you know how to use Placeit’s logo maker. Before you leave, I’ll share with you even more logo design resources, tutorials, and templates:
 Logo DesignHow to Make Your Own Logo Design (Do It Yourself Guide)Nona Blackman
 Logo Design10 Best Logo Colour Schemes & Combinations (With Examples)Nona Blackman
 FontsHow to Choose the Right Font for Your BrandLaura Keung
 Logo DesignTypography in Action: Design Simple & Effective Type LogosGrace Fussell
 Fonts39 Best Fonts for Making Monograms & Logo Designs in 2020Melody Nieves
 Logo DesignCool Logo Maker: 17 Minimalist Logo Designs to Customize (2020)Melody Nieves
 Logo Mockups42 Best Logo Mockups (3D, Vector, and PSD)Nona Blackman
 Placeit20+ Best Coffee Shop & Cafe Logo Brand Designs (Caffeine-Worthy)Brenda Barron
 Branding15+ Best Logo Design Templates: For Creative Business BrandingSean Hodge
 Restaurant Websites20+ Best (Unique) Restaurant Logo Designs (Inspiration for 2021)Brenda Barron
Create a Fashion Brand Logo Today
Now that we’ve reviewed the best options for clothing design logos, it’s time for you to jump into designing your own. You can use Placeit to build a clothing brand logo in your web browser, or take your design skills offline with clothing logo templates from Envato Elements. And either choice can be combined with the Placeit T-shirt design maker tool to bring your design into the real world!
Remember: build a logo that captures the spirit of your brand. With a bit of work, you might see your logo on clothing everywhere.
{excerpt}
Read More
How to Save a PDF in Affinity Publisher (For Web & for Print)

When working with Affinity Publisher, you will often need to publish your work as a PDF document. PDF documents are one of the best ways to share your Affinity Publisher designs. Whether it’s a printed brochure or a design brief proposal for a website, PDF will often be the document type that is expected for your clients.
In this quick tip, ill show you how to export to PDF from Affinity Publisher both for web and for print. We’ll open or start a project with Affinity Publisher, edit PDF settings, and then export them as a PDF document.
What You’ll Learn in This Tutorial
- How to export as PDF for web with Affinity Publisher
- How to export as PDF for print with Affinity Publisher
Follow along with us over on our Envato Tuts+ Youtube Channel:
What You’ll Need
You will need an Affinity Publisher project file. This can be a project for either web or print that you’ve been working on or need to export as a PDF.
We’ll be using designs from Envato Elements by taking advantage of the fact that Affinity Publisher can import EPS files. This gives us a lot of options for Affinity Publisher templates!
For exporting to web, we’ll be using this email enewsletter template from Envato Elements.
For exporting to print, we’ll be using this project proposal template from Envato Elements.
Of course, you can use any project you want!
1. How Do I Save a PDF in Affinity Publisher for the Web?
Step 1
Open up your project, and then go to File > Export…

Step 2
This will open the export dialog window. By default, this will be set to PNG.
From the tabs, find and select the PDF icon.

Step 3
This will open the export options for PDF documents. When exporting to PDF for web from Affinity Publisher, we will want to consider file size in our choice.
From the preset dropdown, select PDF (digital – small size).

Step 4
The presets give us a good starting point. We chose digital to keep the file size low, this is always a good practice for delivering content on the web.
Let’s review these settings!

Step 5
Raster DPI
The DPI is set to 72. This is usually a good bet as many monitors are set to 72 DPI. It’s one of the most common DPI settings for digital media. This will keep our file size nice and low.

Step 6
Include Bleed
The Include Bleed option will include the margin areas in your document. When working for print, we use the bleed to allow space around our design. Depending on how you designed your project, you may or may not have had this space in mind. If you’re not sure, leave it unchecked.

Step 7
Preview Export When Complete
If this is checked, your Affinity Publisher PDF will open automatically when you export. Use this if it’s convenient for your workflow.

Step 8
Area
By default, you will typically want the entire document to be included. However, with this dropdown, you can export part of your document based on your current selection.

Step 9
When adjusting these settings, pay special attention to the estimated file size on the bottom left. If you’re exporting a PDF for web, you probably have a good idea of what an acceptable file size is. For the most part, the raster DPI setting will have the most impact on this.
When you’re happy with your settings, go ahead and click the Export button on the bottom right.

Step 10
Now the export file dialog window will open.
Select a folder on your desktop, and then click the Save button.
There you have it! You have saved an Affinity Publisher PDF that’s suitable for distribution on the web.

2. How Do I Save a PDF in Affinity Publisher for Print?
Step 1
With your chosen print project, go to File > Export…

Step 2
Now the export dialog window will open. This will be set to PNG by default. From the tabs, find and select the PDF icon.

Step 3
Now the export options for PDF documents will be displayed. When exporting from Affinity Publisher for print, one of our major concerns will be quality.
From the preset dropdown, select PDF (for print).

Step 4
This preset will give us a good starting point for our print-ready PDF. Let’s review these settings!

Step 5
Raster DPI
The DPI is set to 300. This is a high DPI, which is usually the minimum you want when printing a document. Anything lower, and the quality of your document may suffer.

Step 6
Include Bleed
The Include Bleed option will include the margin areas in your document. As this export is intended for print, you may need this option selected. Projects which require bleeds would be books or newspapers. If what you plan to print has a bleed, you will want to have this checked.

Step 7
Preview Export When Complete
If this is checked, your PDF will open automatically when you export. Use this if it’s convenient for your workflow.

Step 8
Area
For the purposes of print, you will most certainly want to leave this unchecked. However, with this dropdown, you can export part of your document based on your current selection if you desire.

Step 9
When adjusting these settings, you may want to pay attention to Estimated File Size on the bottom left. Don’t worry too much when exporting for print—in fact, it’s normal for print-ready projects to be rather large in file size. The high DPI will make sure of that! It’s always a good idea to keep file size in mind, though.
Once you’re happy with your settings, go ahead and click the Export button on the bottom right.

Step 10
Now the export file dialog window will open.
Select a folder on your desktop and then click the Save button.
There you have it! You have saved a PDF document from Affinity Publisher that’s suitable for print.

Why Export as PDF?
Exporting to PDF is one of the most accessible ways to distribute your work. Whether it is for delivery on the web or for print, it’s going to be an option that just about anyone is going to be able to view. Most browsers can open up a PDF document with no problem, and with the web export settings, you can easily get your documents small enough to share them through email or place them on your website. For print, PDFs have a lot of printing options, making them a really easy way to deliver documents to clients ready for print, or even printing them yourself.
We hope you enjoyed this quick tip on how to export to PDF from Affinity Publisher. You should now be able to create documents in Affinity Publisher, edit PDFs, and export them. If you found this quick tip useful, check out these Affinity Publisher templates and tutorials.
 Affinity Publisher45 Best Affinity Publisher Templates (Including Brochure Templates)Daisy Ein
 Affinity PublisherAffinity Publisher: Your Guide to InDesign’s New RivalGrace Fussell
 Affinity Publisher20+ Affinity Publisher Tutorials (Including Free Affinity Publisher Templates!)Nona Blackman
 Affinity PublisherHow to Import InDesign Templates to Affinity PublisherDaisy Ein
 Affinity PublisherHow to Create a Stylish Magazine Layout in Affinity PublisherGrace Fussell
{excerpt}
Read More
39 Best Twitch Webcam Overlays (Make Your Own With a Custom Webcam Frame Maker)
If you live-stream on Twitch, you need your own custom Twitch webcam overlay. A Twitch webcam overlay is a graphic frame or border which frames your webcam.
If you have terrific Photoshop skills, you can create a Twitch camera overlay yourself, but if not, a Twitch Webcam Overlay Maker like this one from Placeit is a great solution.

It provides you with top-quality Twitch cam overlays which you can customise online quickly and easily and download for a small fee.
How to Make a Twitch Webcam Overlay in Minutes
The Twitch webcam overlay maker from Placeit enables you to create your own webcam frame (PNG) in a matter of minutes. Let me show you how.
1. Select a Twitch Webcam Overlay Template From Placeit
Go to Placeit.net > Gaming > Twitch Overlays > Webcam Frames.

Browse the templates and select one you like by clicking on it. This will open up the Twitch webcam overlay maker.

2. Customise Your Background With the Twitch Webcam Overlay Maker
Starting with the controls on the right, choose a placeholder image from the photos provided or upload your own using the Custom Image button. This will help to give you a good sense of how the final template will look as you continue your customisations.

Next, select the colour scheme for your Background, Banner Colours, Frame Colours, Gradient Colours, and Light Colours.

3. Customise Your Text With the Twitch Webcam Overlay Maker
Move to the left controls and update the text for your webcam frame. You can also change the fonts and font colours using these controls.

4. Resize and Move Elements/Text as Needed

5. Download Your Twitch Webcam Overlay PNG
When you are happy with your design, just click the Download button.

This will take you to the download page, where you have two options for purchasing your Twitch webcam overlay PNG.

You can either pay a single fee for your design or sign up for a monthly or yearly subscription that offers you unlimited downloads of all Placeit’s designs, mockups, logos, videos, and gaming templates.
Now that you know how easy it is to create your own Twitch webcam overlay PNGs, let’s take a look at the wonderful collection of Twitch webcam overlay templates available at Placeit.
39 Best Twitch Webcam Overlays
Webcam Frame PNG for Gamers

Game streamers need to bring their viewers into the moment, and this is the perfect webcam frame PNG for that. Use the Twitch webcam overlay maker to upload a placeholder image to get a good idea of how your template will look, and then continue to customise your template around the image to reflect your gaming identity.
Twitch Camera Border

This gritty night scene, with its bright frame borders and webcam border for Twitch, will add a quality of danger and mystery to your channel. Use the Twitch webcam overlay maker online to change the frame and customise it with your theme colours and fonts.
Twitch Camera Overlay

Though it looks quite polished and sophisticated, this Twitch camera border is easy to create using the Twitch webcam overlay maker. Just upload a background photo, and select your colour scheme. Make sure that the colour you choose creates a nice contrast with your background. Then all that’s left to do is add your text and voila!
Webcam Border for Twitch

Set the scene for your Twitch steam with this awesome selection of background photos. Browse the selection and choose one that reflects the theme and mood of your stream. Remember that although the webcam frame design sits on the left of the frame, you can move it to your preferred location.
Twitch Cam Overlay

How about this awesome stylised webcam frame? There are several other styles of frames to choose from, so have a look and pick the one you like the most to create a dynamic and eye-catching Twitch cam overlay.
Twitch Webcam Frame Overlay

If the dark world of death and destruction is your thing, then you’ll love this template. Use this image or one of the others provided, or for greater personalisation, upload your own.
Twitch Webcam Overlay Template for Live Gaming Tournaments

Create an eye-catching Twitch overlay facecam that draws your followers into your stream. This is a great template for live gaming tournaments.
Twitch Cam Overlay

There’s something very alluring about cityscapes at night, and what’s more, the dark and sultry colours of night light create a wonderful backdrop for your Twitch webcam border and overlay design.
Webcam Frame for Streaming

Looking for an awesome frame for your stream? How about this simple but eye-catching template? It offers 25 different frames for you to choose from, each more stunning than the next.
Webcam Border for Twitch

This Twitch overlay maker is for users who love the abstract. There are a number of cool backgrounds to choose from, so you won’t run out of options for creating a unique and engaging webcam frame overlay.
Twitch Webcam Frame Overlay

A great Twitch webcam overlay template specifically designed to encourage donations, this custom overlay uses almost your entire frame for streaming and is super easy to customise. Just add your own image for the background, select a frame that reflects your style, add your text and brand colours, and your overlay is ready for download.
Twitch Overlay FaceCam

A terrific webcam frame overlay that captures the vibrancy and colour of Asian cities. Use the Twitch overlay maker to customise your template with the colours and text that reflect your gaming identity.
Twitch Camera Border

If you want to live stream yourself while gaming, why not create a great big screen so your viewers can feel as if they’re right there with you? What’s great about this template is that it allows you to show off your hard-earned credentials. Use the Twitch overlay maker to customise the template as little or as much as you care to.
Twitch Webcam Overlay Maker

Here’s another great street image you can use as the backdrop for your Twitch webcam overlay. It features a simple frame within a frame, with plenty of space for your account name and social media platforms. You can use this template as is or customise it in a matter of minutes.
Twitch Webcam Border

If you have a photo of yourself that you would love to use as a Twitch overlay graphic, then upload it to this template. Then add customisations by choosing a frame and colour scheme and adding your text.
Twitch Overlay Graphics

This three-framed template offers a great layout for organising your Twitch content. Customise the frame style, colours, and text, and then you decide which window you will use for your camera and which you will use for other data.
Twitch Webcam Overlay Template

Looking for a webcam frame makeover? How about this cool template, which offers a great selection of stylish frames you can customise to reflect your own taste.
Webcam Frame for Streaming

If you love abstract patterns and vibrant colours, this is the Twitch overlay graphic for you. It provides space for social media icons and for any additional text you wish to add. One of the great things about the Placeit templates is that you don’t have to worry about whether or not you’ve got the correct Twitch webcam overlay size. That’s because Twitch templates are optimised for exactly the right size specifications.
Cam Frame Twitch

This dynamic Twitch webcam border template has everything you need to create a standout frame. Just select your background, choose your style of frame, add your text, and you’re done.
Twitch Overlay FaceCam

Just to show you how flexible these templates are and how easy it is to create your own unique look, here is a customisation of the template above with a different background, frame, colours, and text. As you can see, this Twitch webcam border has a completely different vibe from the one above.
Twitch Cam Overlay

This webcam overlay maker can be adapted in a myriad of ways to create a look that is unique to your channel. Don’t hesitate to experiment with the template to find the look that’s right for you.
Twitch Webcam Overlay PNG

How awesome is this cam frame for Twitch? Make your background as busy or as simple as you like, and then select a frame that suits your taste, add your colour scheme and text, and you’re done. Easy peasy.
Twitch Webcam Border

Here’s another Twitch camera border that’ll keep all eyes on your stream. This template relies on a riveting image, so browse those that come with the template to find one that speaks to you.
Cam Frame Twitch Template

Check out these fancy Twitch overlay graphics. This is not a template for the wallflower. It’s for the bold and daring who are confident in their game and want a template that reflects that.
Twitch Cam Overlay

This luscious, dark background is the perfect foil for your text and an eye-catching frame for your webcam. With the Twitch overlay maker, customisation is easy and quick.
Twitch Camera Overlay

What better way to invite your fans to watch you slay the competition than with this awesome Twitch camera overlay? If you love the concept but aren’t sure about the frame or background, there are plenty of others to choose from within the template.
Twitch Webcam Overlay PNG

Great organisation should never be underestimated when it comes to controlling the information you share with your audience, and this is the perfect template for those who like to be super organised. As usual, you can change just about every element of the template to truly make it your own.
Twitch Overlay Graphics

Here’s another variation on the template above that shows just how far you can take customisation. These two templates represent completely different gaming identities, and that’s the beauty of the variety that is possible with the Twitch overlay maker.
Twitch Overlay Graphics

And just to drive the point home even further, here’s another customisation of the template, which yields completely different results from the two others above.
Twitch Camera Overlay

Using the iconography of gaming to create a frame is pure genius. This one gives over the majority of the frame to the stream and keeps the text to a minimum.
Webcam Frame for Streaming

Neon may not be to everyone’s taste, but it’s always a good choice when you want to stand out from the pack. So don’t be afraid of colour—use it to your advantage when you create your Twitch cam overlay at Placeit.
Twitch Overlay FaceCam

How about this webcam frame PNG? It integrates very well with the background to create a truly stylish and professional look. Upload your own great photo or choose one provided with the template.
Twitch Camera Overlay for War Games

Here’s a template that can be adapted in any number of ways. It has a somewhat retro feel, which is down to the photo used. If you want a more contemporary look, you can choose a different image from those provided with the template.
Twitch Overlay Maker

Into the abyss we go with this dark and dangerous Twitch webcam border template. The template is really simple, so when you customise it, make sure you choose an image that is as compelling as this one.
Twitch Webcam Frame Overlay

Share your work with your audience when you use this streaming frame to give them a great view of how you play. The simple background and bright colour help to focus attention where it counts: on you.
Twitch Overlay FaceCam

This is an excellent choice for a Twitch overlay facecam. The template offers tons of choices for your background image and loads of space to add different kinds of text. Best of all, you don’t have to worry about the Twitch webcam overlay size because all of the templates are created based on accurate size requirements.
Twitch Webcam Overlay Template

This template provides a terrific background foil for the webcam overlay. Select colours that will call attention to your frame rather than distract from it, and then add as much or as little text as you care to.
Twitch Webcam Border

How awesome is this Twitch webcam border? Very, I’d say. You have to admit it’s a great way to focus all eyes on your live stream. If you like the layout but the Twitch camera border doesn’t quite do it for you, no worries. There are so many other options to choose from.
Twitch Webcam Overlay Maker

For those who are looking for that doomsday Armageddon vibe, there is this template, with its dramatic background images which offer a great backdrop for your Twitch camera border and text.
Create a Custom Twitch Camera Overlay Today
Now that you know how to create your own Twitch camera overlay and where to find the best webcam frames on the market today, head on over to Placeit.net and create your own stunning custom webcam frame PNG today.
And if you’re interested in other terrific resources available from Placeit, check out this list of articles below:
 Logo Design39 Cool Gaming Logos (Using a Clan Logo Maker)Nona Blackman
 twitch15 Best Free Twitch Overlays (Including a Free Twitch Overlay Maker)Nona Blackman
 Placeit23 Best Gaming YouTube Banners Made With a YouTube Banner MakerNona Blackman
 Resources35 Twitch Panel Templates (Using a Twitch Panel Maker)Nona Blackman
 twitch35 Awesome Stream Overlays Using an OBS Stream Overlay MakerNona Blackman
 Banner AdsHow to Make a Twitch Banner Design Using a Banner MakerAndrei Stefan
 Live Streaming29 Best Twitch Stream “Starting Soon” Overlays Using a Twitch Overlay MakerNona Blackman
 Logo DesignHow to Make Your Own YouTube Gaming Logo (With Gaming Logo Design Examples)Nona Blackman
{excerpt}
Read More
How to Create a Cloud Effect in Photoshop

Learn how to create a cloud effect in Photoshop using a simple cloud brush and a sky texture with fluffy clouds.
You can also write with clouds with any font you like. Create awesome cloud text using this cloud effect Photoshop action from Envato Elements.

Tutorial Assets
The following assets were used during the production of this tutorial on how to add clouds in Photoshop:
- Leckerli One font
- Blue Sky with Clouds stock image
- Flying Birds stock image
- Hummingbird stock image
1. How to Add the Cloud Background
Step 1
Create a new 1000 x 600 px document. Make a new layer and add the Blue Sky with Clouds stock image.
Use the large image and make sure the center of the blue sky has fewer clouds. Call this layer Clouds Background.

Step 2
Add a Color Overlay to the Clouds Background layer, using the color #3dacfa.

Step 3
Add a Levels adjustment layer to make the Clouds Background lighter in Photoshop.

2. How to Make a Cloud Brush
Step 1
To make this cloud effect, we need to use a cloud brush. We will make a simple cloud brush using a Soft Round Brush.
So pick the Brush Tool and choose a Soft Round Brush from the list of brushes. Toggle the Brush panel and click on the Brush Tip Shape to set the Spacing.
Click on the Shape Dynamics and set the Size Jitter, Angle Jitter, Roundness Jitter, and Minimum Roundness.

Step 2
Click on the Scattering and set the Scatter on Both Axes and the Count Jitter to 40%. You might have to adjust these settings if you use a larger brush.

Step 3
To save the brush, click on the New Brush Preset option.

Give your brush the name Clouds brush.

3. How to Make Cloud Text
This cloud text effect is one of my favorite Photoshop text effects, and it’s not very difficult to make, as you’ll see from the next steps.
Step 1
Add your text on a new layer. Use the color #000000.

Step 2
Right-click on the Clouds Text layer and choose Rasterize Type.

Step 3
Go to Filter > Blur > Gaussian Blur and set the Radius to 3.6 pixels.

Step 4
Go to Filter > Distort > Ripple and set the Amount to around 55%. You can apply the Gaussian blur filter and the Ripple filter again, to create a cloudy text effect.

Step 5
Press Shift-Control-N to make a new layer. Name this layer Clouds Effect.
Pick the Brush Tool and use the Clouds brush to add a cloud effect around the text. Choose the color #000000 for the brush.
To make the cloud effect, use different Opacity levels (around 30%) and paint over the same area multiple times.

Don’t worry about the result—you’ll get the chance to adjust the cloud text effect in the next steps.
Step 6
Select the Clouds text and the Clouds effect layers, and then right-click and choose Convert to Smart Object.

Step 7
Set the blend mode of the Clouds effect smart object to Overlay and the Opacity to 90%.
Also, add these layer styles to the Clouds effect smart object: Drop Shadow, Inner Shadow, Outer Glow, Inner Glow, Bevel and Emboss, and Satin. The colors that I used for the layer style are #ffffff and #000000.


You can adjust the layer style to your liking. It also depends on the size of your text. Because this is an effect where we use hand-painted details, we won’t get an identical effect twice.

4. How to Make a Cloud Texture
Step 1
Make a new layer and call it Clouds Texture. Fill this layer with the color #ffffff.
Set the Foreground Color to #ffffff and the Background Color to #000000. To make a cloud texture, go to Filter > Render > Clouds.

Step 2
Duplicate the Clouds Texture layer and call it Clouds Overlay.

Step 3
Hide the Clouds Overlay layer for now. Right-click on the Clouds Texture layer and choose Create Clipping Mask. Set the blend mode of the Clouds Texture to Lighter Color.

Step 4
Go to Image > Adjustments > Levels and choose the settings you like.

Step 5
Make the Clouds Overlay layer visible again and set the blend mode to Screen.

Step 6
To adjust the contrast of the clouds texture, add a Levels adjustment just for the Clouds Overlay layer.

You can also resize and move the Clouds Overlay layer to your liking.
5. How to Add Flying Birds
Make a new layer and add the Flying Birds stock image. Press Control-I to invert the color of the birds from black to white. Set the blend mode to Screen, opacity 90%.
Then use the Eraser Tool to keep only a few birds.

6. How to Add Color, Contrast, and Sharpen Effects
Step 1
Add a Color Fill adjustment layer using the color #0096ec. Set the blend mode to Color and the Opacity to 48%.

Step 2
Add a Hue/Saturation adjustment layer if you want to change the blue color tones, reduce the color saturation, etc.

Step 3
To increase the contrast of the cloud effect, add a Levels adjustment.

Step 4
To complete the image, you can add a sharpen effect. Press Shift-Control-Alt-E to make a copy of all the visible layers merged. Call this layer High Pass.
Go to Filter > Other > High Pass and set the Radius to 2 pixels.

Step 5
Set the blend mode of the High Pass layer to Overlay.

7. How to Make Cloud Shapes in Photoshop
Step 1
To make a cloud shape, go to the Clouds Effect smart object. Double-click on its thumbnail to open it.

Step 2
Hide the text layers and add the Hummingbird image inside the smart object.

Step 3
For the bird shape, make the same steps that you did for the Clouds Text. First, go to Filter > Blur > Gaussian Blur and set the Radius to 3.6 pixels.
Second, add a Ripple effect. Go to Filter > Distort > Ripple and set the Amount to around 55%. These settings may differ depending on your shape size and look.
Finally, paint over the shape using the Clouds brush.

Step 4
To see the cloud shape result, save the smart object and close it.

Step 5
For every change you make to the content of the smart object or to the other layers like the background, you have to replace the High Pass layer.
So delete the High Pass layer and create a new one. Press Shift-Control-Alt-E to make a copy of all the visible layers merged together. Call this layer High Pass.
Go to Filter > Other > High Pass and set the Radius to 2 pixels. Set the blend mode of this layer to Overlay to make a sharpen effect.

Congratulations! You’re Done!
In this tutorial, you’ve learned how to create cloud text and cloud shapes in Photoshop. The cloud effect is one of my favorite Photoshop effects, and you can use it in so many graphic design projects.
I hope you’ve enjoyed this cloud effect Photoshop tutorial.

For quick results, try the Cloud Shapes Photoshop Creator and make cloud shapes, cloud text effects, and cloud brushes really easily!
And don’t forget this cloud effect Photoshop action. It works with any font type.
Cool Cloud Effect Photoshop From Envato Elements
Learning how to make clouds in Photoshop is a great skill to have. But if you’re crunched for time, an action can help you reach the same result. That’s why I’ve grabbed five cool premium add-ons you can use to add the cloud effect in Photoshop.
1. 30 Realistic Cloud Photoshop Brushes (ABR)
This set of brushes is useful if you want HD clouds for Photoshop projects. There are 30 unique effects for different styles of clouds. Each brush is quick to use. If you think you’re missing clouds in your Photoshop project, try out this download.

2. Smoke Clouds Photoshop Action (ATN, ABR, PDF)
This is the perfect action if you like the look of the smoke cloud effect in Photoshop. It has 19 color options, including for the smoke and particle effects. All you need to do is brush your photo, play the action, and watch the smoke cloud effect take shape.

3. Cloud Photoshop Action (ATN, ABR, TXT)
Here’s another smoke cloud Photoshop effect to add to your arsenal. This action creates photorealistic results with a click. It works in Photoshop CS6 and above. If you’re looking to add smoke clouds in Photoshop, you’ll like this action.

4. Vanquish Photoshop Action (ATN)
Vanquish adds a magical quality if you want to make clouds in Photoshop. Using this action works easily. Just brush over where you want to apply the effect in your photo. Then play the action. It’s a fast way to add HD clouds for Photoshop.

5. Cloud Text – Photoshop Action (ATN, ABR, PSD, PDF)
Who doesn’t like a nice skywriting font in Photoshop? This cloud text effect gets to work quickly with text layers. It includes ready-made PSD files. The action also comes with planes to complete the skywriting font look.
More Helpful Photoshop Resources From Envato Tuts+
I hope you enjoyed this tutorial for how to create clouds in Photoshop. If you want to learn even more skills, check out these amazing resources from the Envato Tuts+ team!
-

How to Turn a Photo Into Comic Book Art in Adobe Photoshop
In this comic book Photoshop tutorial, I’ll show you how to turn a photo into comic book art using filters and textures. Need comic book Photoshop actions?… -

How to Create a Graffiti Effect in Adobe Photoshop
Learn how to create graffiti art from your photos in Adobe Photoshop, using filters and adjustments. -

How to Create a Rubber Stamp Effect in Adobe Photoshop
In this tutorial, I will show you how to create a realistic rubber stamp effect in Photoshop. Turn any photo into a rubber stamp in just a few quick steps. -

How to Create a Sketch vs. Camera Effect in Adobe Photoshop
In the following tutorial, I’m going to show you how to create a pencil sketch Adobe Photoshop action with a unique twist. -

How to Add Grain in Photoshop
In this tutorial we’ll learn how to create a grain effect in Adobe Photoshop from scratch. We’ll focus on adding film grain in Photoshop and using Smart… -

How to Create Your Own Light Ray Brushes From Scratch in Adobe Photoshop
In this tutorial, I will show you an easy way to create your own custom sun ray brushes using adjustments and smart filters in Adobe Photoshop. -

How to Turn a Landscape Photograph Into an Isometric Icon in Adobe Photoshop
In this tutorial we are going to create a 3D isometric map made from combinations of a few landscape photos. There’s no 3D software used in this project—we… -

How to Insert a Photo Into a Product Mock-Up in Adobe Photoshop
Learn how to add your own custom photos and artwork to a product mock-up purchased from Envato Market.
{excerpt}
Read More
Shigeru Miyamoto gives a tour of the Super Nintendo World theme park
The promise of Super Nintendo World is especially tantalizing in a world where the pandemic is cutting into travel options, but now we’ve had a chance to experience the Universal Studios park without going to Japan or waiting for its doors to open in…
‘Cyberpunk 2077’ gets another patch to address HDR and V’s ‘modesty’
The latest update aimed at addressing the long list of problems players are experiencing in Cyberpunk 2077 has already started to roll out on consoles. The 1.05 hotfix measures at 16 – 17 GB on Xbox and PlayStation platforms, and you can read through…
Google details what happened during Monday’s cloud outage
On Monday morning, Google services like Gmail and Drive were down for about 45 minutes, leaving many Workspace users unable to do their work. In the aftermath of the incident, Google promised it would conduct an investigation into what happened. In a…
Space Force announces its personnel will be called ‘Guardians’
While Donald Trump said that at first he was “not really serious” when considering a Space Force branch of the military, it has become real, and has continued to progress despite the ongoing pandemic. As the former Air Force Space Command becomes its…
Microsoft is reportedly developing its own ARM-based chips for Surface PCs
It sounds like Apple isn’t the only company that wants to reduce its reliance on Intel. According to Bloomberg, Microsoft is developing in-house ARM processors to power its Surface devices and cloud infrastructure. While there aren’t many details on…
Canoo’s multipurpose electric van looks like it’s built out of Lego
Electric vehicle company Canoo caught our attention last year with its plan to offer a subscription-only EV. It’s back with its latest creation, a stylish multi-purpose delivery vehicle that’ll start at around $33,000. Pre-orders are open for the mul…
CD Projekt Red announces sweeping ‘Cyberpunk 2077’ refund plan
The fallout from Cyberpunk 2077’s buggy release continues. Developer CD Projekt Red says its intention is to offer a refund to everyone who purchased a physical copy of the game or a digital one at retail, even if it means paying for the expense out…
Skype’s latest update uses AI to make group calls less awkward
Back in July, Microsoft added a feature called Together Mode to its Teams workplace messaging app. The tool uses an AI-powered segmentation technology to put everyone in a video call in the same virtual space. Even if you don’t use Microsoft Teams, y…