Is everyone ready for some football? Today, we have a special treat for you. Chris Modarelli, Art director and Senior Designer for the Cleveland Browns has taken some time from his busy schedule to walk us through the process of creating a season ticket design for the Cleveland Browns. Let’s get started!
Step 1
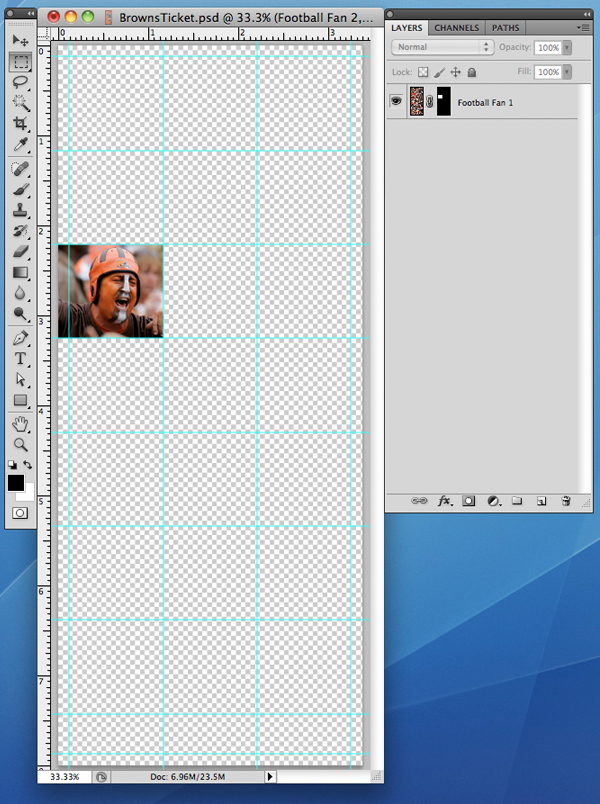
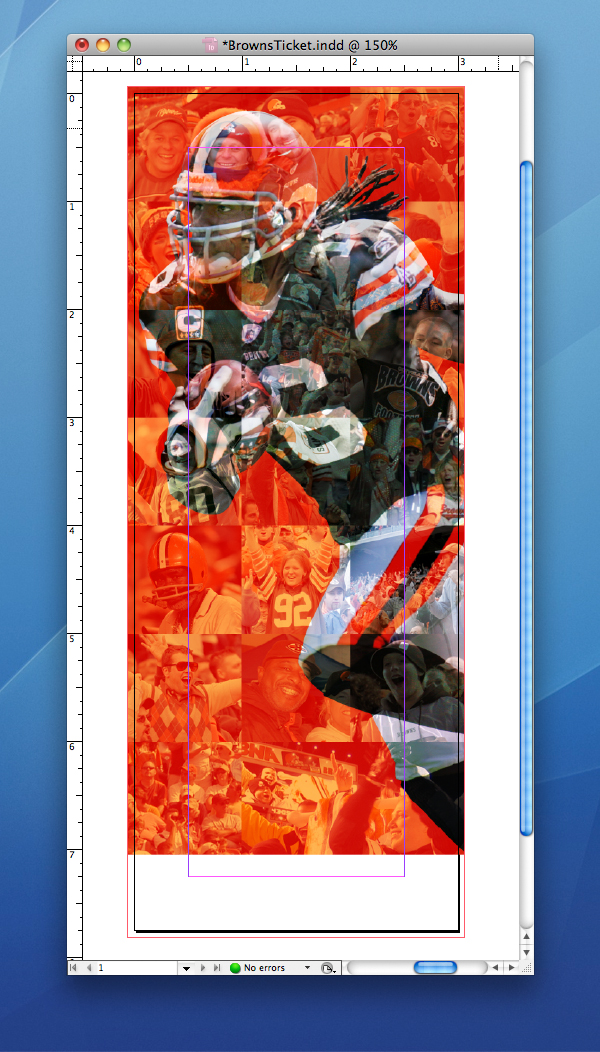
The first thing I did was to create a grid pattern that will contain several images. In this case I chose several images of Browns fans. This grid allowed me to plan the placement of those images. At this point, if needed, you can allow for bleeds.

Step 2
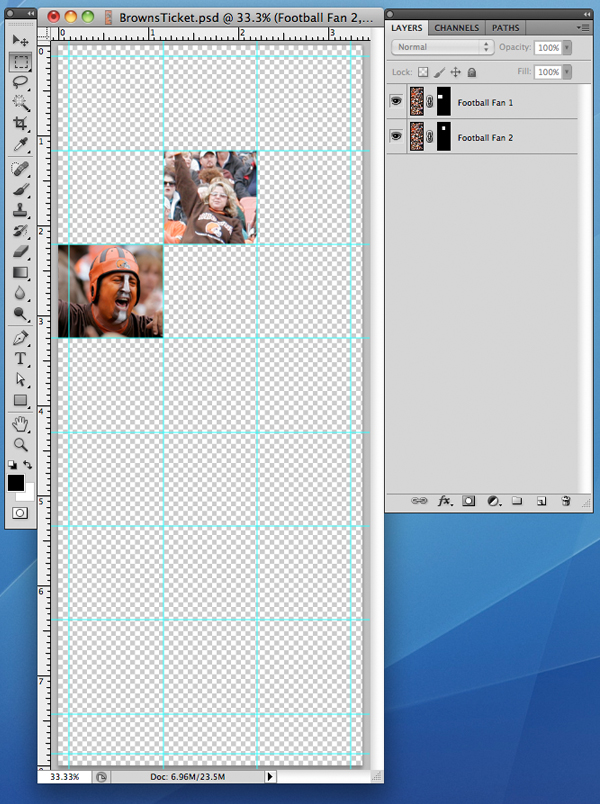
Gather the background images you want to use. Once the grid was created and all the photos where gathered, I placed each photo into the PSD in it’s own layer. Using the "Marquee" tool, I selected around a different grid box for each image. Clicking the "Add Vector Mask" at the bottom of the layers palette, I masked out the unneeded portion for each image. I continued the same process until each square in the PSD was full.
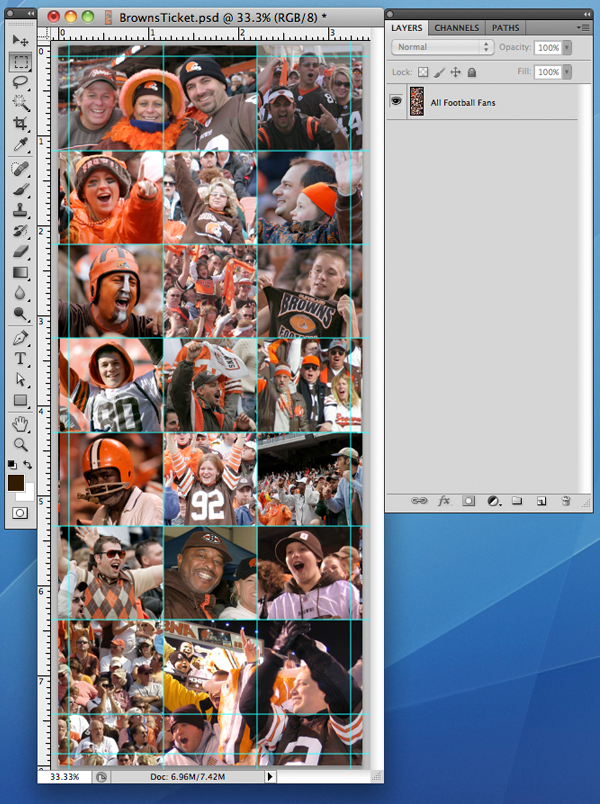
Step 3
After all the squares where filled, I flattened all the layers to create just one final layer for all the football fans. The reason why I did this is that we are going to need to apply an effect to this layer later.
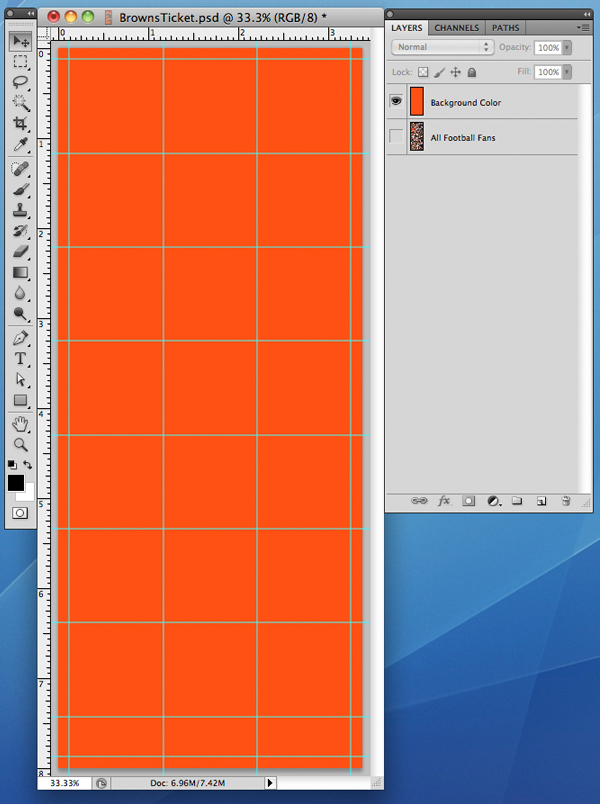
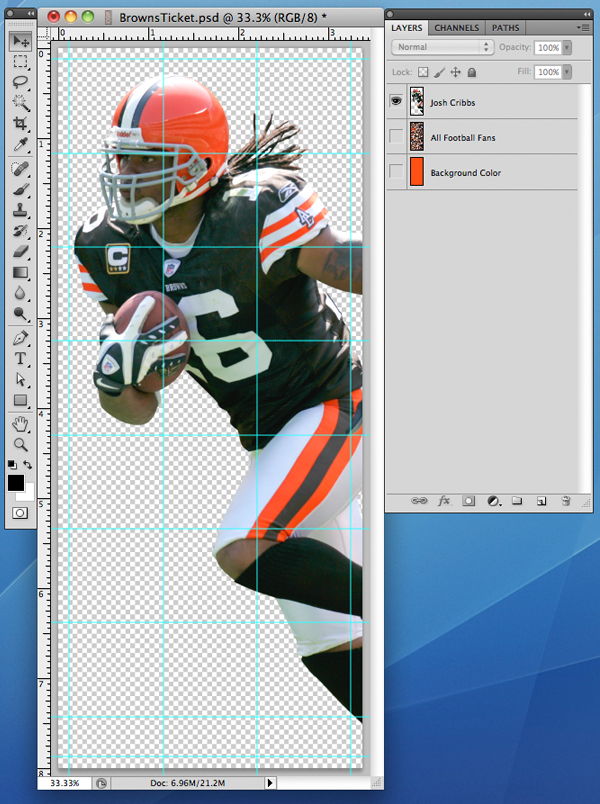
Step 4
I then turned off the "All Football Fans" layer and added the CMYK breakdown of our Pantone orange as a separate layer called "Background Color".
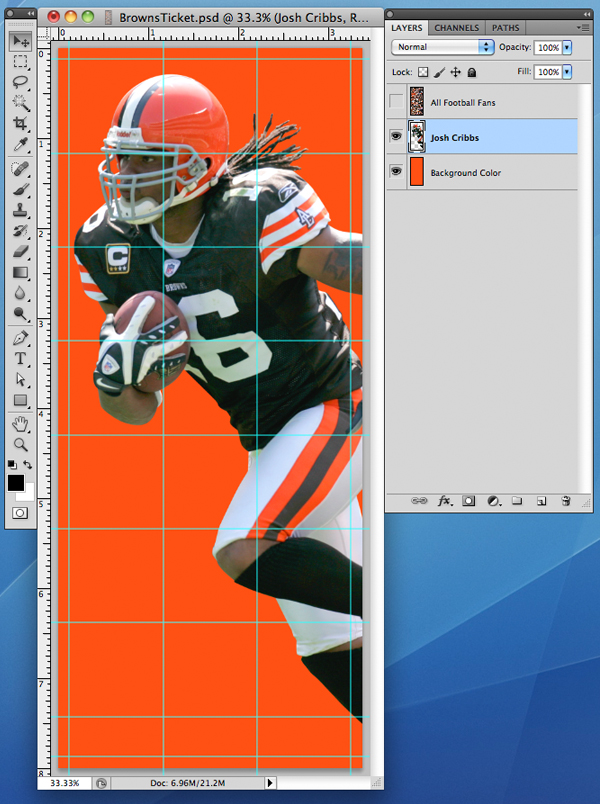
Step 5
Next it was time to select the player shot. In this case I used our Pro Bowl player Joshua Cribbs. I used the pen tool to isolate the subject and put him into a separate layer.
When picking the photography I needed to make sure that the pose was strong enough to be visually appealing and also able to carry the graphic techniques being applied to it. The image also needed to allow for the information area in the final layout, therefore the important part of the image needed to be contained in the upper portion of the player photo. The other criteria I set for myself was that the players needed to be wearing our brown home uniforms. This not only made sense for tickets, but it also allowed for a better result. For example, images with larger areas of solid color work best – as opposed to an image with a bunch of detail. It is trial and error to find the right images to make this really work well and for each ticket I probably created 3 that did not work as well for various reasons.
I should mention that although I may make suggestions on who to use for the tickets, those final decisions are not up to me.
Step 6
Now you need to begin to arrange your layers. Make sure the "Background Color" layer is on the bottom in your layers palette. The next layer above your background is your object – in this case "Josh Cribbs." Finally make sure your "All Football Fans" layer is at the top.
I also turned on the "Background Color" and color corrected the "Josh Cribbs" image using the "Background Color" layer as my guide when tweaking the orange in the player image.
Step 7
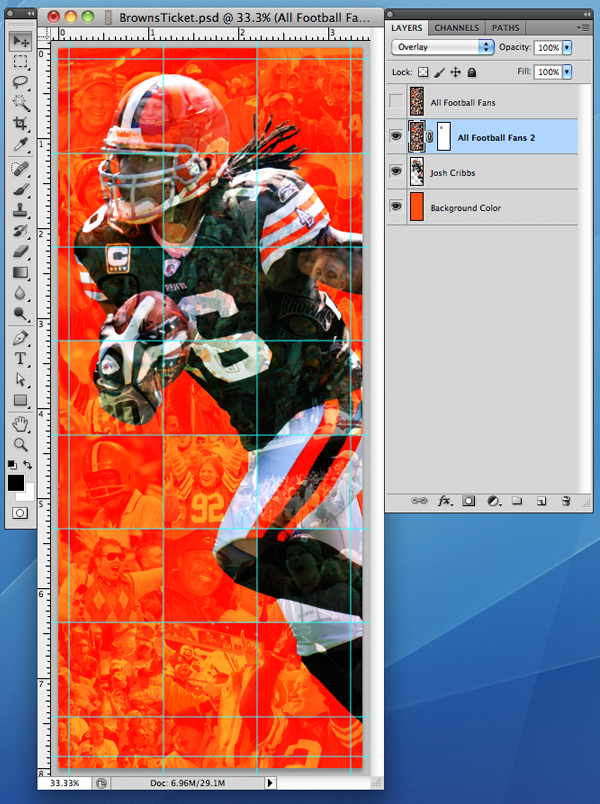
I then made a copy of the "All Football Fans" layer and called it "All Football Fans 2. This new layer needs to be above the "Josh Cribbs" layer. Set this layer to "Overlay" in the drop down menu in the layers palette with 100% opacity.

Step 8
In this layer you’ll more than likely need to mask out portions of the image, that you might want to show more clarity or detail. In this case I did so for the face.
Step 9
Now turn on the top layer called "All Football Fans" and set the layer drop down menu to "Normal" with a 20% opacity.
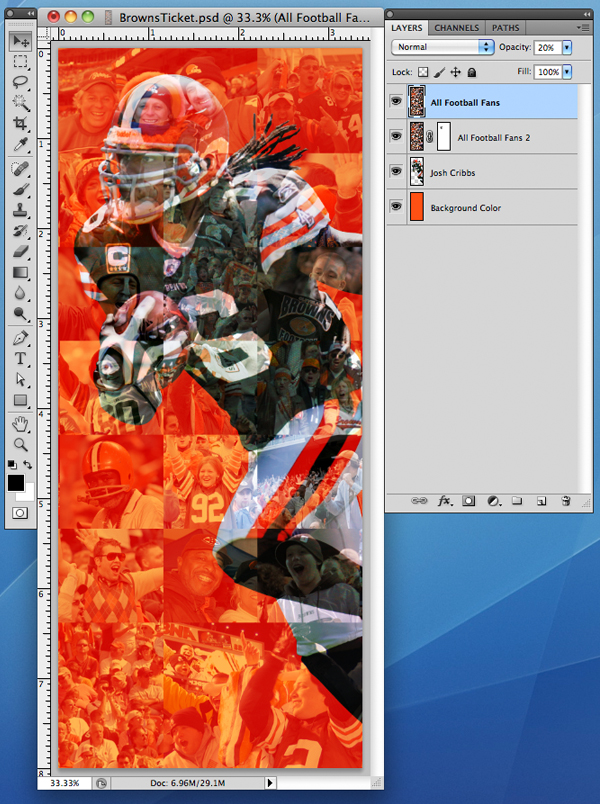
Step 10
I found these settings to be ideal for the look I was trying to achieve, but depending on what you are doing and the images and colors you use, you may need to change them. Make any final adjustments based on your design. And flatten the layers.

Step 11
Now open a new InDesign document and place your PSD into the new document leaving some room at the bottom for the ticket stub portion of the ticket.
Step 12
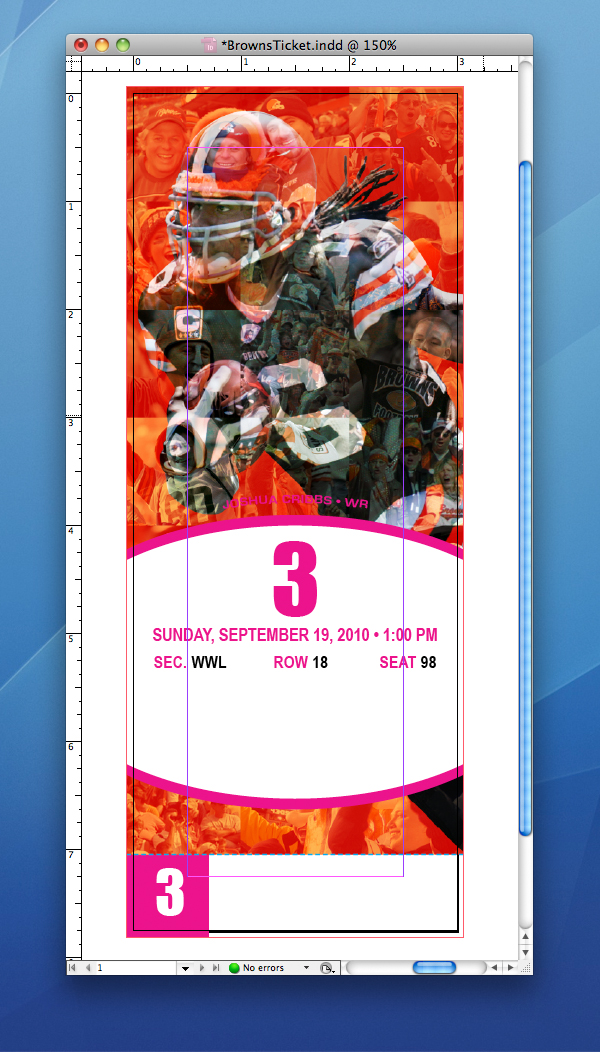
I then created the metallic foil area of the ticket, which included the game number. Since foil is added to the tickets after the printing process, I used magenta as a placeholder for the foil and made sure to let the printer know that the magenta area represented the foil and should therefore not print.
Also indicated are the section, row and seat numbers in black. This is also as a placeholder. This information is variable and therefore cannot be created with foil.
The dashed cyan line also does not print and indicates the ticket stub perforation.
Step 13
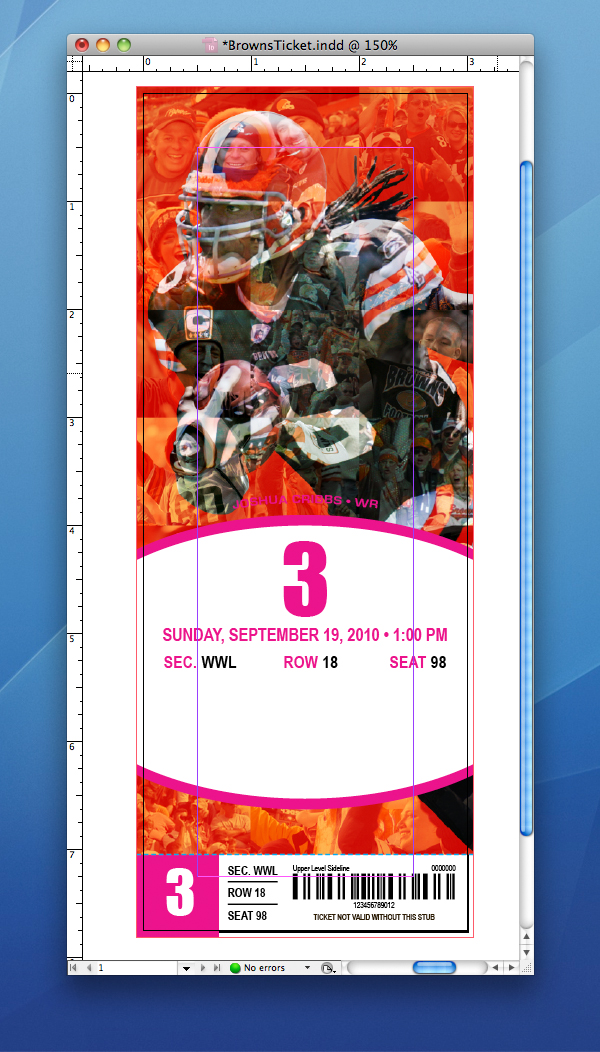
Next, I began to add the information for the stub. The section, row and seat numbers are variable, which means they are different for each ticket. So the information I included was just a placeholder. The barcode is also a placeholder that I created with several vertical lines.
Step 14
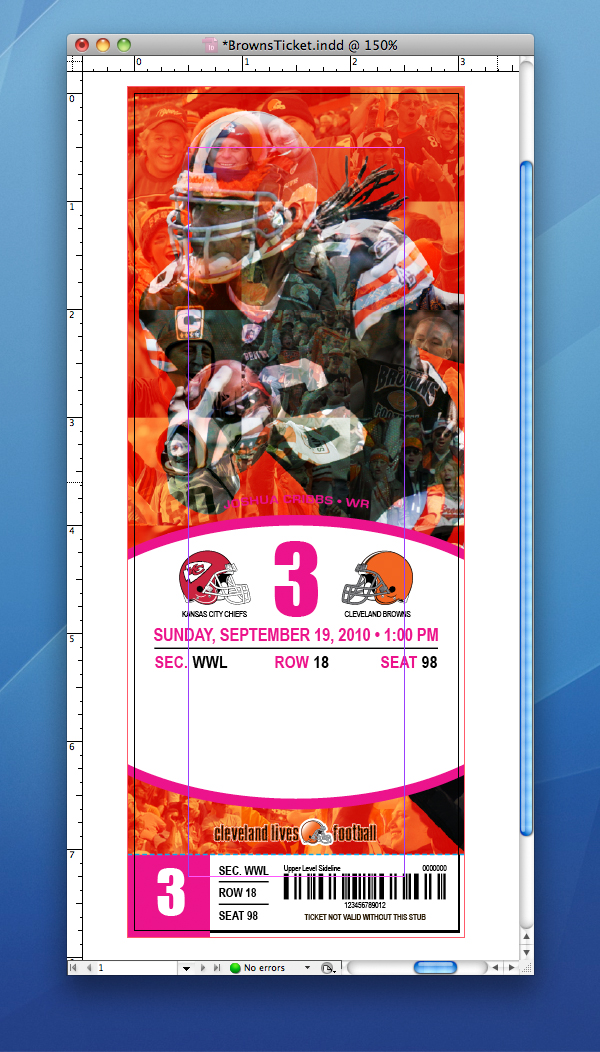
I then placed the team logos made available through the NFL and the "Cleveland Lives Football" logo, which I designed in Illustrator.
Step 15
Finally, I placed the rest of the needed information including another fake barcode as a placeholder. The price is also variable based on seat location.

Conclusion
One of the most important things when designing a ticket is to remember that they are not only cool to look at, but they need to serve a real purpose – to allow admittance into a stadium. If any information is unclear, too small or not there, you’ll not only have upset gate attendants and fans – you’ll be out of a job. You cannot let your great design ideas lead you away from the objective of a ticket – no matter what Photoshop techniques you use.
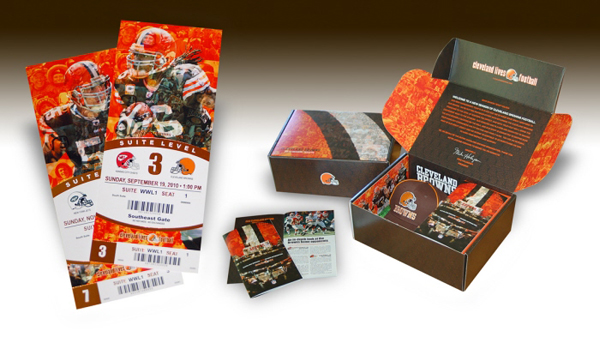
The final step in ticket design is the delivery system; in this case it was a box that held the tickets, a special season ticket holder exclusive hat and a season preview book. I hope you enjoyed this simple, yet effective Photoshop tutorial.
Editor’s note: the Photoshop and InDesign document used to create this design cannot be made available to the readers of this site. As you know, we always try to include these items for our Premium members. In this case, however, we are unable to do so because that file is owned by the Cleveland Browns and features player photos and other assets that cannot be freely distributed – even if properly watermarked.