I’ve been using Coda for a while now, and it’s become my web development application of choice. There are quite a few great web development applications out there (read “18 Wonderful IDEs for Windows, Mac, and Linux“) but if you’re a Mac user, Coda is easily one of the best.
Here are 20 excellent Coda tips to increase productivity that I’ve gathered during my use of Coda so far.
1. Set Your Preferences
There are a few things I had to change right away when I first started using Coda. These are all found in Coda’s preferences.
I never use a GUI CSS editor so I set Coda to always open CSS files with the text editor.
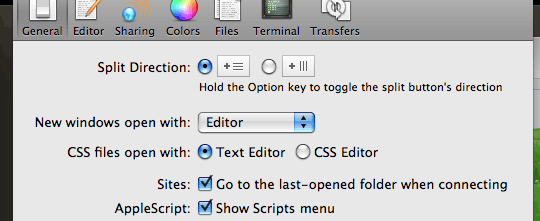
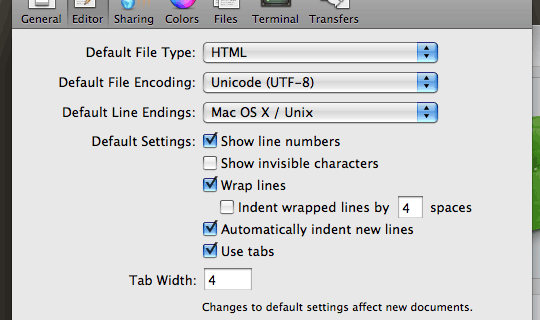
Under the Editor tab I’ve check-marked “Show line numbers” and “Use tabs” for indenting. You can hide/show line numbers by pushing Command + Option + L as well.
Under the Colors tab I’ve check-marked “Highlight Current line” to make it easier to see where the cursor is when switching back and fourth between applications.
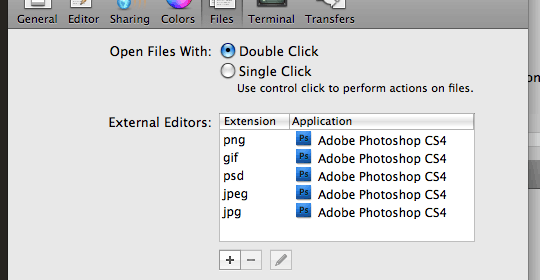
Under the files tab I set files to open when double clicked instead of a single click. You may also need to setup your external editors. Coda automatically used Photoshop for the image formats I use.
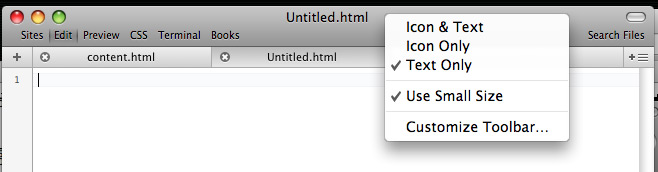
This is how Coda’s navigation bar at the top is by default. This is just a waste of space in my opinion although it is pretty.

I’ve changed mine to display only text titles and as small as possible. Since I don’t use the buttons I have that section minimized most of the time anyway. Instead I use the shortcut keys which I’ll cover next.
Aside from these changes, I’ve left everything else at the default settings. I’ve played around with the color schemes a little but I didn’t find anything I was really happy with so I’ve kept the default color scheme.
2. Switching Modes
If you aren’t using shortcut keys to change modes, now is a good time to learn. Pushing Command + 1-6 changes the mode you’re in. You can switch between your sites, editor, preview, etc. modes very quickly this way.
3. Navigating Open Documents
Pushing Command + Shift + Left or Right Bracket will navigate through your open documents.
4. Line Indenting
Coda automatically indents certain markup for you by default but you’ll still find yourself using the Tab button pretty frequently. Instead of jumping to the front of a line to indent it you can push Command + Left or Right Bracket to indent the line the cursor is currently in.
5. Clips and Text Inserts
Pushing Command + Control + C will open up Coda’s clips. Clips is a place to store snippets of code for quickly inserting into documents. You can save snippets for use in all documents or just site specific clips.
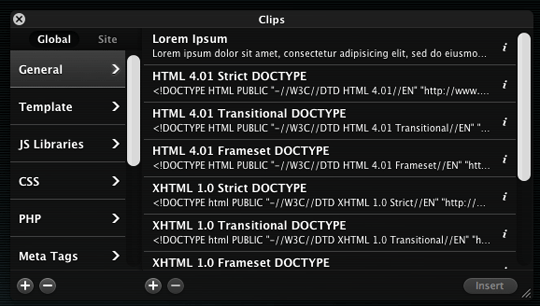
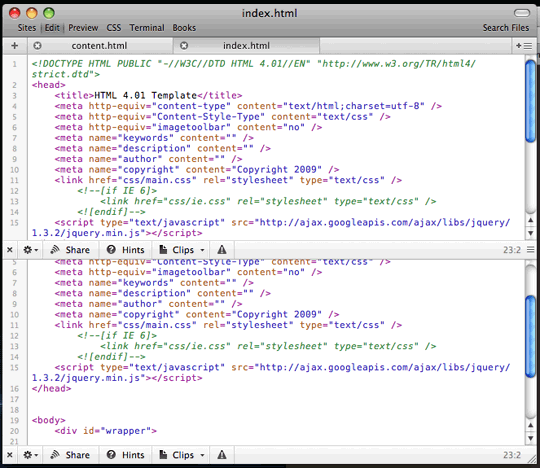
You can assign tags to quickly insert clips. For example, I’ve set “htmltemp” to insert an HTML 4.01 Template when I start a new document. I would type “htmltemp” into the blank document and push Tab to insert the clip. You can also insert a selection placeholder if the cursor needs to go somewhere specific in the clip after being inserted.

6. Inline HTML Validation
Validate your HTML while you’re working. Okay, if you’re experienced with HTML you might only want to use the validation feature when you’re ready to validate, otherwise you’ll have errors popup as you’re typing which can be pretty annoying.

Coda will tell you what needs to be fixed. Sometimes there is a little orange “snapback” button in the balloon that will take you to the beginning of the error when clicked.

7. Use Coda’s Hints
If you aren’t quite comfortable with HTML or CSS yet you can use Coda’s Hints feature to give you a little extra guidance.

8. Use Coda Books
Highlighting something and pushing Command + ‘ will search the books you have available in Coda for the highlighted text. You can also just hold Command and double click a word you want to search for.
9. Setup More Coda Books
Add more books to reference more information. You can read more about adding more Coda books here.
10. Block Edit Text
If you need to edit multiple lines you can do a block edit to do them all at once. You can highlight the text you want to edit and push Command + Shift + B or you can hold down Option and select the lines you want to block edit that way.
11. Shift Text
Highlighting text and pushing Command + Left or Right Bracket will shift the highlighted text left or right. This is great for shifting a whole section of markup for good looking markup formatting.
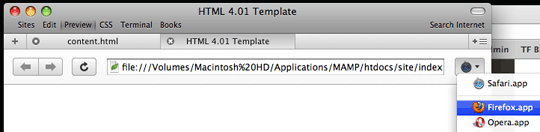
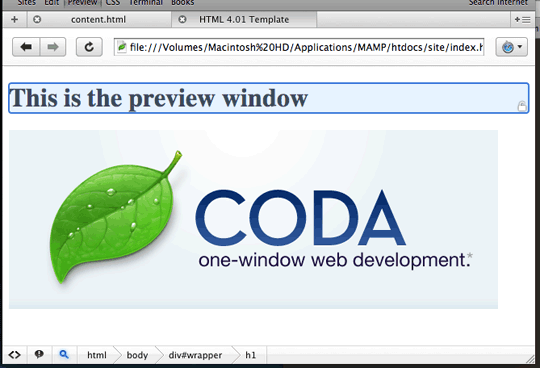
12. Preview in a Browser
You can preview files in Coda’s built in Preview mode (which uses the same engine as Safari) and while in that mode you can click the Preview in Browser button in the top right to open the file in the browser of your choice.
You can also push Command + Option + B while in any mode to open and preview the file in the default browser (Safari). When you make changes to the document you can use this shortcut to refresh the preview in the browser a little faster.
13. Use the Preview Tools
There are three tools included with Coda’s preview mode. These can be helpful for quick development issues (although I still find myself using Firebug ![]() ).
).

The left button lets you preview the source code. Kind of strange since you’re just in the preview mode and you could just switch back to the edit mode. However, this lets you edit the source code and preview the changes without actually editing the document. A great feature for testing and debugging.
The center button is the JavaScript log and the right button is the DOM hierarchy inspector. You can quickly find and see elements with this which is helpful if you aren’t sure what’s going on.
14. Split Windows
You can split windows using the icon in the top right of the window (the plus with lines). Pushing Option will change the direction of the lines meaning the split will change from horizontal to vertical (or the opposite if changed in preferences). You can also push Command + Control + L to split the window using shortcut keys (hold option to split the other direction).
Within each window you can independently change modes.

15. Open Separate Files in Split Window
You can also open separate files in split windows by right clicking files in the File Browser and selecting “Open in Split” or by dragging the file into an already open split. Now you can edit two separate files in a split window.
16. Hide/Show File Browser
Coda’s file browser is great but you won’t be using it the majority of the time so you can quickly hide/show it by pushing Command + Control + B.
17. Hide/Show Code Navigator
If you need a little help jumping around a document you can pop open the code navigator.
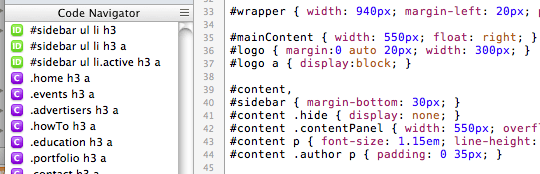
A little hidden feature with Coda and the code navigator is that you can create “bookmarks” within your code to jump around your document faster using the code navigator. For example.
<!-- !THIS IS AN HTML BOOKMARK -->
This would create a bookmark in the code navigator that looks like this.

Basically the bookmark is created with markup comments that use an exclamation point before the bookmark text. You can do this for HTML, CSS, PHP, etc.
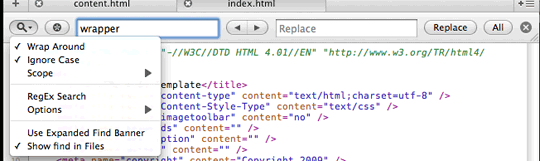
18. Use the Find Features
Instead of using the code navigator to find things, I use the find features. Pushing Command + F opens the bar to search. Then just type in what you’re looking for and push enter. Coda will scroll the document to the first matching text and highlight it. There are several more shortcut keys for searching and several options you can change if needed. Using the find feature is much faster for me than using the code navigator since my hands never have to leave the keyboard.
19. Quick Close Tag Shortcut
By default Coda will automatically close a tag once you’ve opened one. However, that doesn’t always work and I still find myself needing to close HTML tags manually all the time. Pushing Command + Option + . (period) will automatically close the current HTML tag (wherever the cursor is).
20. Get Plugins
While Coda has a lot of great features, there are many features developers still want. There are a few plugins available from third party developers that you can install to give Coda extra functionality. Here is a list of third-party plugins available.
Final Thoughts
These are some great tips for using Coda but like any great web development application, there are plenty more, so take some time to explore. With some practice, you can pick up tons of keyboard shortcuts that will keep your hands on the keyboard instead of wasting time mousing around. ![]()
For video tutorials, tips, guides and other information, visit Panic’s Coda Developer Zone.
If you have some great tips, feel free to share them with us by leaving a comment below.
This article was originally posted on the ThemeForest blog late last year. We are currently porting over some of the more popular articles to Nettuts+.