In this quick tutorial, I’ll show you how to change page size in Adobe InDesign, so you can create custom page sizes for your projects.
Whether you are working on an Adobe InDesign template or your own design, knowing how to change page size in InDesign is crucial. Many editorial designers use these tricks when designing magazines that contain pull-out folds. While there are a few ways of changing page sizes, you need to know which applies to what situation.
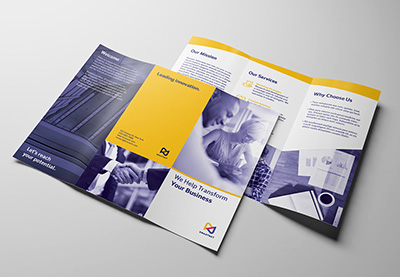
But what other Adobe InDesign templates can you resize? If you are working with an InDesign brochure template—especially trifold or gatefold brochures—this tutorial is essential. You’ve found an InDesign newsletter template style you like, but the size is not what you are looking for? This tutorial is the answer for that too! InDesign book templates and book jackets, you say? We’ve got you covered.
In this tutorial, we will take a look at three different ways of resizing a page. You can resize the whole document, multiple selected pages, or only one page—it really depends on the project you are working on. In the last example, we’ll create a gatefold brochure to show you we can use different page sizes as spreads. So let’s get on to the assets you’ll need in the section below.
Looking for templates? We’ve got amazing pamphlet templates and InDesign brochure templates over at Envato Elements and GraphicRiver. Go check them out!
Follow along with this tutorial over on our Envato Tuts+ YouTube Channel:
What You Will Need
You’ll need access to Adobe InDesign; if you don’t have the software, you can download a trial from the Adobe website.
Also, download the Adobe InDesign template Exercise File. The font I am using is Helvetica, but feel free to replace it. The Exercise File contains six pages. Pages 1-2 will be used for Steps 1 and 2, while pages 3-6 will be used for Step 3. Ready to dive in?
1. How to Change Page Size in InDesign With the Document Setup Option
If you’re planning on resizing all the pages on your document, use the Document Setup option. This option gives you the chance to resize all the elements on a page. It’s useful for InDesign newsletter templates or multi-page documents.
Step 1
Open the Exercise File in InDesign. Let’s work on pages 1-2. Head over to File > Document Setup.

Step 2
If you are using the latest version of Adobe InDesign CC, you will notice that this window is the older version of the New Document set up in InDesign. Here you have various options you can change, starting with page numbers, sizes, margins, bleed, and slug.
To change the page size, check the Preview box on the bottom left. Change the Width to 8 in and the Height to 6 in. You will notice the pages in the entire document expand, while the elements are in the original size. If you’d like to proceed, click OK.

Step 3
If you’d like the elements on the page to expand with the page, click on Adjust Layout. A new Adjust Layout option window will open. Set the Width to 8 in and the Height to 6 in.
In this option window, you can also find options to auto-adjust margins to the page size or to leave it to maintain the original settings. You can change the bleed—this setting won’t expand like the elements.
A very useful option is the Adjust Font Size setting. You can allow the font to resize along with the page or keep it the same size. In the example below, I’ll choose not to adjust the font size. You will notice that the pages have expanded, but the font is the original size.
Under the Options setting, you can also find the Adjust Locked Content option, which will allow any locked elements to adjust to the page.

Step 4
In the example below, I’ve checked the Adjust Font Size option. You can see that the text has expanded proportionally with the page. Within this option, you can set limits on the size. If you’re making a document smaller and you’d like to keep the font at a legible size, for example, you’d set a minimum size.

2. How to Change Page Size in InDesign in the Pages Panel
Use the Change Page Size option on the Pages panel if you are planning on changing a single page on the document and don’t want the elements to resize.
Step 1
Open the Pages panel by going to Window > Pages.

Step 2
On the Pages panel, click on the Edit Page Size button, and select Custom.

Step 3
In the Custom Page Size option window, you will be able to find previous sizes you’ve used that you can select from. You can also create a new size by adding a Name and changing the Width and Height.
Let’s create a new option, and set the Name to Project 1. Set the Width to 8 in and the Height to 6 in. Click on Add. Select the new setting from the options below and click OK.

Step 4
In the image below, you can see that page 1 is bigger than page 2. This will be reflected in the layout window but not in the Pages panel. This approach won’t allow you to resize the elements on the page, only the size of a single or multiple pages of your choice.

3. How to Change Page Size in InDesign With the Page Tool
Use the Change Page Size option if you’re planning on changing a single page or multiple pages in the document and don’t want the elements to resize. This option is great if you want to create a gatefold, trifold brochure, magazine fold-outs, or InDesign book templates that include a spine. It’s also useful if you are working with an InDesign brochure template and want to adjust the sizes.
Step 1
On the Tools panel, select the Page Tool (Shift-P).

Step 2
Head over to the Control bar to make changes. Before we resize, let’s take a look at the options.
On the far left side, you will find the Reference Point buttons, the X and Y page location, the Width and Height settings, and the Orientation.
In the second compartment, you will find the Liquid Page Rule options. These pages give you the flexibility to design multiple page sizes, orientations, or aspect ratios. This is great if you are working on a publication and, let’s say, you’d like to create a web version to be viewed on a horizontal screen.
In the last compartment, you’ll find a checkbox for Objects Move with Page, which will readjust the elements on the page. You will also find Show Master Page Overlay to show the Master Page outline.

Step 3
With the Page Tool (Shift-P), select Exercise Gatefold 1. Select the top-right corner reference point. Make sure Liquid Page Rule is set to Off. Set the Width to 3 in. You’ll see the page change sizes.

Step 4
With the Page Tool (Shift-P), select Exercise Gatefold 3 on the layout. This time, select the top-left corner reference point. Set the Liquid Page Rule to Scale so we can see the difference. Set the Width to 3 in. And now you’ve got a gatefold brochure.
From here, you can adjust the elements on the layout as you wish.

Great Job! You’ve Finished This Tutorial!
In this tutorial, we learned how to change page size in InDesign. While not many would think it’s necessary, this is a great tool to have in your back pocket when it comes to designing brochures, book jackets, and magazines. InDesign templates come in specific sizes, so this is a great tutorial you can use to change sizes. Got questions? Let us know in the comments below!
If you are new to the software and need InDesign brochure templates or InDesign newsletter template right away, head over to Envato Elements and Graphic River. We’ve got many options to explore!
If you liked this tutorial, you might like these:
{excerpt}
Read More


