
Learn how to transform your drawing from one look to another in this tutorial. With a few drawings and some Toon Boom tricks, give your character that awesome magical reveal!
1. How to Set Up the Scene
Step 1
Let’s begin by starting up Toon Boom.
I like to customize my resolution settings by clicking the + button and filling in my preferred dimensions. For this project, I set the Width and Height to 850, and the Frame Rate to 12.
When all the boxes are filled in, go ahead and click Create.

Step 2
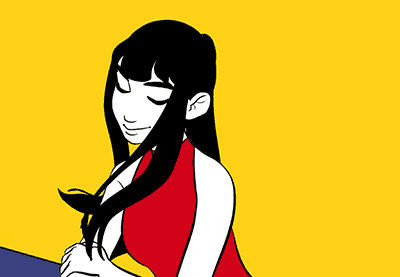
Next, create the before and after images. It’s best that they have the same pose. Here, their difference is their hair and outfits.

Step 3
On your Timeline, create your before image on a layer named pose1.
Then create the after image on a new layer named pose2.
Make sure that pose2 is on top of pose1, and make sure they are perfectly aligned with each other.

Step 4
Create a new layer, and name it rough_path. This will serve as our guide for the effects we will be adding later on.
To animate the path, draw loops around the character from top to bottom.

Step 5
Play your animation.
Now, we have a rough idea of what our output will look like. As demonstrated below, larger spaces between drawings result in faster movement, and narrower spaces result in slower movement.

2. How to Mask Drawings
Step 1
Next, we’re going to create a mask for the transformation effect from pose1 to pose2.
Create a new layer and name it mask. Go to the frame where the drawing from the rough_path layer first makes contact with the pose1 and pose2 layers—in this case, Frame 4.

Step 2
Using the Polyline, create a new shape. The bottom of the shape should conform to the drawing from the rough_path layer. The top of the shape should be able to cover the rest of the character.
Using the Paint tool, fill the shape. The color used isn’t important.

Step 3
Do the same for the next frames, until the pose1 and pose2 layers are completely covered.
Extend the last frame by dragging the Playhead to the end of the Timeline and pressing F5.

Step 4
Create a new layer named mask2, and Copy and Paste the frames from mask onto this layer.

Step 5
Now, we go to the Network tab. To find it, simply click the downward arrow symbol on your right-side panel, and select Network from the drop-down list.
You’ll see a bunch of nodes that are named according to our layers on the Timeline, and these nodes are connected to a rectangle labelled Composite.

Step 6
If the nodes on your network are all clumped into one spot, simply select all the nodes and click the button with the symbol of three rectangles. If you can’t find this button on your interface, go to Windows > Toolbars and make sure Scripting is checked.
Once the button is clicked, the Order Network Settings tab pops up. Simply click OK, and your nodes will become evenly spaced.

Step 7
On the panel where your camera view is, click the downward arrow symbol and select the Module Library from the drop-down menu.
Look for the Cutter and drag it onto the Network.
Repeat, so that you’ll have two Cutter nodes on the Network.

Step 8
Take a look at the Network.
For more consistency, double-click mask and rename it to mask1.
Arrange your network such that the mask1 and pose1 nodes are beside each other, and likewise with the mask2 and pose2 nodes. Then drag a Cutter node right underneath each pair.

Step 9
Click the cable of mask2 and drag it to the left-side port of the Cutter.
Click the cable of pose2 and drag it to the right-side port of the Cutter.
Click the bottom port of the Cutter and drag the cable to the Composite.
Click the yellow box on the Cutter node. When the Layer Properties box pops up, make sure the Inverted check box is checked.

Step 10
Do the same for the mask1 and pose1 nodes.
On the Layer Properties of the Cutter, make sure the Inverted check box is unchecked.

Step 11
Go back to the camera view and play the animation. Now, pose1 and pose2 are properly masked!

3. How to Add a Blur Effect
Step 1
Go to the Module Library again and look for Matte-Blur. Drag it onto the Network, and then return to the Camera view.

Step 2
Disable the rough_path layer by clicking the check mark aligned under the eye symbol.
Enable the Render View by clicking the button indicated below. This gives you a preview of what your frame would look like when rendered.

Step 3
On your Network, take the cable of mask2 and connect it to the Matte-Blur. Connect the Matte-Blur to the left-side port of the Cutter.

Step 4
Click the yellow box on the Matte-Blur node to bring out the Layer Properties settings.
Make the following changes:
- Blur Type: Directional
- Radius: 70
- Directional Angle: 90
- Directional Falloff Rate: 1

Now you have a blur effect on your animation!
Note: You can only see this effect on the Render View or once your project is rendered into video format.

4. How to Create a Ring of Sparkles
Step 1
Animate three variations of sparkles. We’ll just be using these over and over again.
To animate a sparkle, start by drawing a small dot, and then expand it into a bigger and bigger shape. The shape could be a diamond, or an eight-pointed star, or whatever you like.
Then break the shape apart into several smaller shapes. Make them smaller and spread them apart.

Step 2
On the timeline, create new layers for the sparkle animations, namely spark1, spark2, and spark3.
Situate the first drawings of these layers on Frame 2.
Select these three layers, and click the Add Peg button indicated below. This will add pegs to your layers, which helps make the animating easier.

Step 3
Make sure the rough_path layer is enabled again.
On Frame 2 of the spark3 peg (or spark3-p), use the Transform tool to drag the drawing to the loop from the rough_path guide.
This creates a Keyframe, which you can see as a red dot that appears on the peg layer.

Step 4
At the end of the animation, which is on Frame 8, use the Transform tool again to drag the drawing along the guide.
This creates another Keyframe. Now, an animation has been created between the two Keyframes, where the drawings are moving from the first position to the second.

Step 5
Do the same on spark2-p and spark1-p, and set Keyframes on the start and end of the animations.
You just want to make the sparkle animations follow the loop guides.

Step 6
On spark3, copy and paste the frame animation. Basically, select Frame 2 to 8, press Control-C, and then go to Frame 9 and press Control-P.

Step 7
Since the animation on the rough_path is quite inconsistent from here, we’re going to set the Keyframes one by one.
Starting on Frame 9, drag the drawing along the loop guide. Then go to the next frame and drag again, and then keep repeating.

Step 8
Copy and paste the frame animation again up to the end of the scene.

Step 9
Continue dragging the drawing along the loop guide.
When you’ve reached the end of the loop guide or the rough_path animation, drag the sparkle drawing to different parts of the scene.

Step 10
Play the animation. Here, we have a few animated sparkles on our scene.
Now, the goal is to make a whole ring of sparkles surrounding the transformation.

Step 11
Keep Copy and Pasting the three variations of the sparkle animation onto new layers and keep setting Keyframes along the loop guide.
This is the most tedious and repetitive process. Just keep getting creative with the Transform tool, the Reposition All Drawings tool, and Copy and Pasting. Then just keep filling the curve of the loop with as many sparkles as you can manage.

5. How to Set the Background Color
Click the + symbol on the Timeline and select the Colour-Card from the drop-down list. A white color comes out by default.
Double-click the Colour-Card layer so the Layer Properties tab pops up. Click the color on the tab so that a color wheel pops up. Select the color you like, and then close the tabs.

6. How to Export the Scene
When you’re satisfied with your animation, go to File > Export > Movie. Browse where you want to save your animation, and then click OK.
When your animation finishes rendering, you’ll have a .MOV file of your scene.

And We’re Finished! Awesome Job!
Hope you learned a few neat tricks from this tutorial! There’s a lot you can do once you’ve gotten the hang of some basics and learned some cool techniques.
So keep practicing and experimenting to unleash all that creativity inside you!

Looking for more tutorials? Why not try these:
-

The Beginner’s Guide to Toon Boom
Getting into animation can start from anywhere, from a pad of paper and a pencil to a computer and a drawing tablet. The first step always begins with… -
How to Animate Flowing Hair in Toon Boom
Learn how to animate your character’s hair frame by frame. Using Toon Boom, you’ll see how you can give a wind-blown effect to your artwork! -

How to Animate an Explosion in Toon Boom
Effects animation can be so mesmerizing to look at. Continue reading this tutorial to get a glimpse of how you can create your own! -

How to Animate a Twirling Girl in Toon Boom
In this tutorial, we will walk through the steps in animating a twirling character using Toon Boom Stage 10. We will learn how to draw rough poses, how to…
{excerpt}
Read More