
Photorealistic paintings are impressive, but they’re also very valuable for artists for one special reason: by painting one, you learn what reality looks like, so that you can later paint unreal things—people, creatures, and places that don’t exist—as if they were real.
In this tutorial, I will show you how to create such a study in SketchBook Pro, and how to learn from it in the process.
What You Will Need
We need a high-quality photo reference for this study. It must be big enough to see all the details. I’m going to use Various Fresh Fruit from Envato Elements—fruit is a perfect subject for study, because it has a variety of colors, materials, and textures. However, feel free to use any other reference you find fitting—the instructions will be universal. You can also limit the whole scene to one or two pieces of fruit, to make it all easier.
Of course, you’ll need SketchBook Pro as well. I’ll be using the desktop version with brushes from various free brush sets (Basic, Texture, Fur Brushes, Textured Watercolors). You may already have most of them, but to make the whole process more convenient, I’ve collected them in a set that you can download and pin to the palette. Find the attachment on the right.
The method I will be using is based on 3D modeling. Each light effect is painted separately in the form of a “map”. All the maps affect each other, adding to the final look of the object. The maps I’ll be using are shape, ambient occlusion, color, shadow, and shine. This isn’t the most efficient way of painting from a reference, but it really helps understand how the image is created, so you can get full control over it—which is especially useful for painting from imagination.

I will assume you know your way around the interface of SketchBook Pro. If not, read this quick tutorial first: The Beginner’s Guide to SketchBook Pro.
1. How to Start a Painting
Step 1
First, we need some kind of line art. Open your reference in SketchBook Pro, lower its Opacity a little, and create a new layer. Use the Pencil or the Inking Pen to draw the lines.
Normally, tracing isn’t a proper way to create art, but today we’re studying painting, not drawing. It would be a waste of time to copy all the lines when all we want to learn is coloring and shading. And tracing gives us a clean piece of line art, without any mistakes that could lead to confusion in the later steps.

Step 2
There are a lot of objects in our scene, and each of them will have to be colored and shaded separately. You can do it in two ways: paint slowly, trying to stay away from the edges of other objects, or use Clipping Masks—containing the strokes in a previously defined area.
SketchBook Pro doesn’t have real Clipping Masks, but it offers a workaround that we’re going to use today. First we need to define the “masks”—the shapes of the objects. Each shape should be painted on a separate layer. Take the Inking Pen and draw the outline of one of the objects.
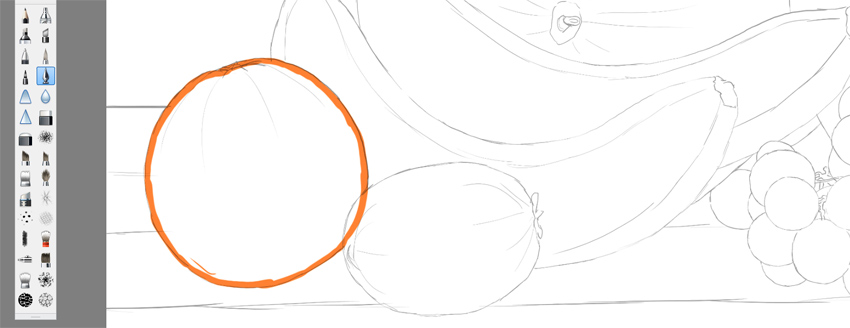
Step 3
Fill the outline using the Flood Fill tool.

Step 4
To make the rest of the process easier, the masks should only contain the visible part of the object. You can remove the concealed parts by selecting the object in the front with the Magic Wand tool…

… and pressing Backspace to cut the selection from the object in the back.

Step 5
You can paint multiple shapes on the same layer, but only if they don’t touch each other.

Step 6
After you’ve painted all the masks, you may notice there are so many of them that it would be hard to find the one you want to edit. And we’ll be copying them, too! To avoid a total mess, let’s combine some masks into one layer—select the layers with shapes that don’t touch each other, and select Merge Layers in the Layer Menu.


Step 7
There are two more things we can do to keep order in our file. First, number each layer.

Step 8
Second, select all the layers and Group them.

Step 9
Finally, to turn the painted shapes into functional masks, lock their pixels.

2. How to Paint Ambient Occlusion Shadows
Step 1
Duplicate the group (select Duplicate in the Layer Menu). Take the Inking Pen and fill all the masks in the copied group with 50% bright grey.
Duplicate the group once again. Name the copy grey masks, and the original ao. Hide the grey masks group.

Step 2
Change the background color to 50% bright grey as well.


Step 3
Time to start painting! Ambient occlusion is a name for the little shadows that stay dark no matter where you put the light. They’re perfect for defining the form before you decide the actual lighting—they take the function of the line art while contributing to the final painting as well.
Ambient occlusion is very easy to paint. First, use the Inking Pen to paint the area that would get the most light, regardless of the position of the light source. You can imagine the light being everywhere.

Step 4
Now simply blend the light and shadow with a blending brush. My favorite is Bristle Blender—it creates a nice subtle texture.

Keep blending until there’s only a hint of shadow left. That’s all we need!

Step 5
Use this method to paint all the other objects:


If you have problems with seeing the individual grapes, you can hide the layers to reveal the colorful masks beneath.


Every object should get the same treatment—even the ground.


Step 6
When you hide the lines, you should already see the form of the objects pretty nicely, but we’re not done yet. A good ambient occlusion map consists mostly of white, with a subtle hint of grey between the objects.

To finish this map, focus on the details first: draw the tiny shadows in the small elements.


Step 7
Don’t forget about the details of the “ground”.

Step 8
Ambient occlusion is the darkest when two objects touch each other (“contact shadows”). Create these strong but small shadows under each piece of fruit touching the wood.


Step 9
Finish every object by making them mostly white, with some shadow only where the objects are close to each other. The closer, the darker the shadow.

Step 10
But ambient occlusion isn’t really supposed to be white. White simply means light, and grey means shadow. To make it work that way, change the Blend Mode of the ao group to Multiply.


3. How to Color a Digital Painting
Step 1
Let’s add some realistic colors to the scene! Go back to the original group and color all the fruit in a more natural way. Imagine the scene is perfectly illuminated, and that every piece of fruit is as bright as it can be, while being 100% matte and uniformly colored.
This is a valuable exercise, because it’s impossible to paint a whole surface at once. You need to do it step by step, starting from something incomplete. This process teaches you how to separate the local color from patterns and lighting effects.

Step 2
But most of the objects in our scene have more than one color. They even have patterns! Let’s add these details now.
Paint the bright green bands on the watermelon. Make sure they follow the 3D form of its surface. Use a textured brush, for example Brush 3.

Step 3
Make the bands ragged.

Step 4
Paint with the Scratches brush to make the pattern more uneven.

Step 5
Use the Dotted_2 brush to sprinkle the watermelon with dark dots.

Step 6
Use a textured brush to paint a detailed pattern between the bright bands.

Step 7
Accentuate the bright bands with green-yellow.

Step 8
Perfection is unrealistic! Paint some scratches on the surface.

Step 9
Use the Charcoal brush to make the surface of the pomegranate less uniform.

Step 10
You can successfully recreate its pattern with the Short Fur brush.

Step 11
Use a textured brush to manually finish the pattern.

Step 12
Don’t forget about imperfections, too!

Step 13
Finish the calyx.

Step 14
Use a textured brush to add a subtle pattern to each grape. The pattern should follow their 3D form.

Step 15
Add more detail to the grapes, for example by painting with the Short Wirey Fur brush.

Step 16
Use a textured brush to finish the sprig.

Step 17
The dark tips of the bananas should look as if they are merged with the rest of the fruit.

Step 18
Don’t forget about adding some detail to this part.

Step 19
Bananas are generally uniformly colored, but you can sprinkle them with some shades of yellow. They will also look great with some bruises and spots.

Step 20
Use the Charcoal brush to make the surface of the melon less uniform.

Step 21
Finish its stalk as well.

Step 22
The kiwi doesn’t need much work—just paint it with the Charcoal brush.

Step 23
Finally, take a closer look at the wood. It’s just the ground, but it’s still a part of the scene and it can easily break the illusion if we’re not careful. You can make it more textured with the Short Fur brush…

… and Brush 5.

4. How to Shade a Digital Painting
Step 1
For now, our scene is perfectly illuminated, with all the colors at their full brightness. It’s not something we’re used to, so it looks unnatural. Let’s add some shadows to add more depth to the objects.
Duplicate the grey masks group and make it visible. Change its Blend Mode to Multiply. This will flood our scene with shadow.

Step 2
We can now simply reveal the light by painting with white. Do it just like you did with ambient occlusion before—first sketch the light area sharply…

… and then blend it.


Step 3
Pay special attention to the ground—every object should cast a shadow in the proper direction and shape.

Step 4
These shadows still look kind of unnatural—they’re too uniform. Use darker greys to create a difference between the darker and less dark shadows.

Step 5
Don’t forget about the small shadows cast by objects—they’re very important!

Step 6
Shadows reveal the thick textures as well. Make the surface of the melon less smooth by painting grooves filled with shadow.


Step 7
The orange needs a similar treatment—sprinkle it with dots to simulate the uneven surface.

Step 8
Make sure the shadows in the whole scene point to the same light source.

5. How to Paint Shiny Surfaces
Step 1
Our scene looks pretty nice, but there’s still something amiss. It looks quite like an underwater scene, doesn’t it? It’s because there’s no shine in there. Shine is very important, because it adds more information about the form of the object, even if it’s not glossy at all. It also reveals the subtle textures that are too shallow to cast shadows.
We’re going to add the shine on another map. Duplicate the grey masks group and make it visible. Select one of its layers and go to Image > Adjust > Brightness/Contrast. Drag the Brightness all the way down to turn the layer black. Do the same with all the layers.

Step 2
Change the Blend Mode of the group to Screen. In this mode, every shade brighter than black brightens the colors below. The darker the shade, the more transparent it is.

Step 3
Paint a stroke of bright grey on the watermelon with the Inking Pen. You should be able to see the pattern below.

Step 4
Blend the stroke. Only super glossy surfaces have sharp highlights; the more matte the surface, the more you should blend.

Step 5
You can also use this layer to add reflected light. Simply pick the color of the near object and paint with it to create the reflection. The Screen mode will take of the proper opacity—the brighter the reflected color, the more visible it will be.


Step 6
Even mostly matte objects, like bananas, will have some shine to them.


Step 7
The pomegranate doesn’t have a smooth surface, but it still has some shine. You can use a fur brush to simulate shine disturbed by the subtle texture.


Step 8
Even the dark calyx has some shine to it, revealing its texture.

Step 9
The grapes are unique in this scene, because they have a special thin, waxy layer on them, which reflects light in a different way than the rest of the fruit. Paint this thin layer first using the Camo brush.

Step 10
Only then you can add the normal shine. To keep the waxy texture intact, paint the shine with the Airbrush.

Step 11
Don’t forget about the sprig!

Step 12
Finish the melon as well.


Step 13
Surprisingly, even the fuzzy kiwi has some shine under the “fur”.


Step 14
The orange, with its prominent texture, will require some more work. First, add the shine to it as you would to every other fruit, just with a more chaotic brush, like Charcoal.


Step 15
Use the Short Wirey Fur brush with black to simulate a texture on the sides of the sphere.

Step 16
Paint with the Short Sparse Fur brush to create a texture in the rounder area.

Paint the texture with bright and dark greys to simulate the grooves.

Step 17
All done!

6. How to Finish the Digital Painting
Step 1
The painting is almost finished; we just need to make a few final adjustments. Create a new layer and fill it with 50% bright grey. Change the mode to Overlay.

Step 2
Use a red-orange Airbrush to paint over the grapes that get the most light. Because grapes are translucent, the light coming through them brightens them from the inside. This phenomenon is called subsurface scattering, and it’s responsible for brightening/warming the shadows of materials that are not fully opaque, like human skin.

Step 3
You can use this trick to liven up the surfaces of other fruit as well, to a certain extent.

Step 4
Let’s not forget about the kiwi! Create a new layer and paint some fur on it. It doesn’t need to look perfect.

Step 5
Lock the pixels of this layer and paint on it with various shades of brown picked from the kiwi.


Step 6
Take a closer look at the wood. Can you improve it in any way? Feel free to go back to any of the previous maps to add some changes.

Step 7
To make the wood brighter without adding shine to it, we can use a special trick. Create a new layer and fill it with black. Change its mode to Glow.

Step 8
Glow brightens the bright parts and ignores the black parts. This makes it perfect for adding a brightening texture without a risk of disturbing the shadows.


Step 9
Select all the layers and merge them (select Merge Layers in the Layer Menu). We’re going to fix them all at once now. Take a closer look at the edges of the fruit. Are they smooth? Fix any problems you find.

Step 10
Take the Blur tool and try it on the edge of the melon. We want to make the edge blurred, but not too much. Experiment with the Strength for a while to pick the right amount.

Step 11
Blur the edges of the objects, using more blur for the ones in the background and less for the ones in the foreground.


Good Job!
I hope you’ve learned a lot while painting this study! If you want to dive deeper into the theory behind all of this, I recommend these articles:
 DrawingImprove Your Artwork by Learning to See Light and ShadowMonika Zagrobelna
 DrawingColor Fundamentals: ShadingMonika Zagrobelna
 DrawingColor Fundamentals: Advanced ColoringMonika Zagrobelna
 Digital PaintingThe Secret to Realistic Painting: How to Master ValueMonika Zagrobelna
{excerpt}
Read More