
Want a new fresh look for your Facebook profile? In this tutorial, we’ll design a template to create a custom Facebook cover photo and profile picture that interact seamlessly with each other. We’re going to do this by making your profile and cover photos overlap so the two appear as one whole image. Many have tried to achieve this polished look, but they don’t always succeed due to sizing issues. Well, let’s see if we can get this right.
Feel lazy? Check out my plugin for Photoshop to get an amazing result in seconds! “Seamless Identity Action for Facebook” is a Photoshop plugin that allows you to create an eye-catching cover and profile picture for your Facebook page.

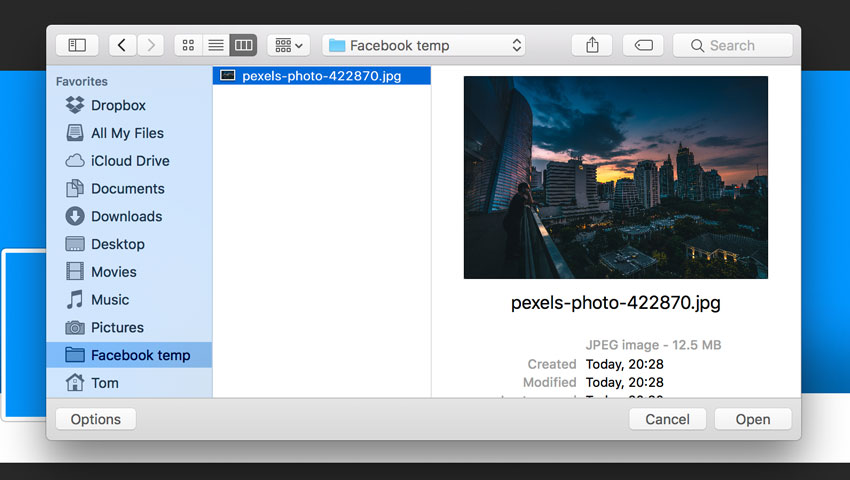
Tutorial Asset
The following asset has been used during the production of this tutorial:
1. How to Create a Facebook Template
Step 1
Create a new document specifying the following options for the selected preset:
- Width and Height: Specify the size of the document. Type 1630 px for width and 734 px for height.
- Orientation: Specify a page orientation for the document. Select Landscape.
- Color Mode: Specify a color mode for the document. Select RGB.
- Resolution: Specify the fineness of detail in a bitmap image measured in pixels/inch or pixels/centimetre. Since we’re using this template for web images, the resolution is irrelevant. Keep the default resolution 72 Pixel/Inch.
- Background contents: Specify a background color for the document. Select White.

Step 2
With the Rectangle Tool (U), click somewhere on the canvas to create a new 1630 x 605 px rectangle.
Open the Properties panel by selecting in the top menu Window > Properties, and set the rectangle position to 0 for X and Y axis, and then set the Stroke and the Fill to No color.

In the Layers panel, rename the layer just created by double-clicking on the layer’s name and typing “Cover Photo“.
Step 3
With the Rectangle Tool (U), click somewhere on the canvas to create a new 307 x 307 px rectangle. In the Properties panel, set its position to 38 for X and 341 for Y axis and then set the Stroke and the Fill to No color.

In the Layers panel, rename the layer just created by double-clicking on the layer’s name and typing “Profile Picture“.
Step 4
Right-click on the layer “Profile Picture” and choose Duplicate Layer and then press OK. Rename this new layer “Frame“.

Step 5
Add a new Layer Style to the “Frame” layer by double-clicking on the layer, outside the layer name or thumbnail.
Add a new Stroke effect. This outlines the object on the current layer using color, a gradient, or a pattern.
Set Size to 8 px, Position to Outside, and Fill Type to White Color. Keep Opacity to 100% and Blend Mode to Normal.

Now add a new Drop Shadow. This adds a shadow that falls behind the contents on the layer. Set Blend Mode to Normal, Color Black, Opacity 22 px, Distance 0, Spread 100%, Size 10 px. Keep the other options like the image below:

Step 6
Select the layer “Profile Picture” and then with the Rectangle Tool (U) click somewhere on the canvas to create a new 1630 x 129 px rectangle. In the Properties panel, set its position to 0 for X and 605 for Y axis and then set the shape Fill to White and the Stroke to No color.

Rename this new layer “Base“.
Step 7
Select the layer “Profile Picture” and choose in the top menu Layer > New Fill Layer > Solid Color. Press OK and choose any color. Rename this layer “Fill“.

Step 8
Now we’re going to add some new anchor points to modify the path.
In the Layers panel, select the layer “Base” and then, to select the path, choose the Path Selection tool, and click anywhere inside the path component.

Selecting a path component or path segment displays all of the anchor points on the selected portion. Selected anchor points appear as filled squares and unselected anchor points as hollow squares.
Select the Add Anchor Point Tool.

To add an anchor point, position the pointer over the path segment and click. Add four anchor points like the image below:

Step 9
Select the Convert Point Tool and click on each of the four points we just created to convert them.

Step 10
Select the Direct Selection Tool.

Click on point 2 and drag the segment to its new position behind the frame. Do the same with point 3. Now the path of the “Base” layer should be similar to this:

Step 11
Double-click on the “Base” layer, outside the layer name or thumbnail, and add a new Layer Style. Add a new Drop Shadow, setting the Blend Mode to Normal, Opacity to 35%, Color to Black, Angle to 90°, Distance to 0 px, Spread to 40%, and Size to 200 px.

Step 12
Now we need to edit the “Base” effect separately from the layer. To do this, we can ask Photoshop to put the layer style on its own separate layer (or layers if necessary). Click on the “Base” layer, and then move down your mouse on the “Drop Shadow” effect, open the contextual menu by right-clicking on it, and choose Create Layers. Your effect will now appear on its own layer beneath the “Base” layer.

A message may alert you that: “Some aspects of the Effects cannot be reproduced with layers“. If so, press OK.
Step 13
In the Layers panel, select the layer just created. For an English version of Photoshop, its name should be “Base’s Drop Shadow“. With the layer selected, Command-Click (Mac) on the thumbnail of the layer “Frame” to select the shape.

Step 14
Our purpose now is to delete the shadow inside the profile picture frame. Choose Edit > Cut (Command-X) and deselect by choosing Select > Deselect.

Step 15
Select the layers “Base’s Drop Shadow“, “Base“, and “Frame“. To select multiple contiguous layers, click the “Frame” layer and then Shift-click the “Base’s Drop Shadow” layer.
Right-click on one of the layers and select “Merge Layers” to combine them all into one.
Step 16
It’s time to save our progress. Choose File > Save As. Choose the PSD format from the Format menu. Specify a filename (Facebook-Frame.psd) and location and click Save.

Your Facebook frame is ready! Go forward and discover how to add a photo to the Facebook frame, and save a new ready-to-upload profile picture and cover photo!
2. How to Add a Photo to the Template
Step 1
Locate the Layers panel on the right side of your workspace and notice that we made four layers:
- “Frame”: This layer is the preview of the real Facebook page and will help you to position correctly your photo and see how your profile will look once uploaded to Facebook.
- “Fill”: This layer contains a placeholder fill. Position your photo above it.
- “Profile picture”: This layer will be used to crop and export your profile picture.
- “Cover Photo”: This layer will be used to crop and export your cover photo.

Step 2
Select a photo that you want to use as your profile picture and cover photo. If you’re following along with the sample photo, download this. Open it with Photoshop.
Try to use a photo that is at least 2,000 pixels wide so that you can easily place it into the template.
Learn to choose the best photo for this purpose. The profile picture will be in the bottom left corner of the photo. In the photo I’m using for this tutorial, the subject is in the bottom left corner of the composition so that it’s easier to reposition. A good photo will have the subject small or in the distance. Perfect for this purpose are photos with a landscape behind the subject.
Step 3
Locate the file tabs at the top of the workspace and click on the photo file. Go to Select > All. Press Command-C (Mac) on your keyboard to copy the photo.

Go back to the template by clicking on “Facebook-Frame.psd” from the file tabs at the top of the workspace. Click the “Fill” layer from the Layers panel to make it active, and press Command-V (Mac) on your keyboard. This will paste the photo above the Facebook frame layer.
Step 4
Click on the layer with the photo just imported in the Layers panel to make it active.
Go to Edit > Free Transform, or press Command-T (Mac) on your keyboard. A bounding box will appear around the edges of the photo.
To Scale, drag a handle on the bounding box. Press Shift as you drag a corner handle to scale proportionately. When positioned over a handle, the pointer becomes a double arrow.
To Reposition, click and drag anywhere within the bounding box.
To Rotate, move the pointer outside the bounding border (it becomes a curved, two-sided arrow), and then drag. Press Shift to constrain the rotation to 15° increments.
You can also flip your photo by choosing Edit > Transform > Flip Horizontal.
When you transform a bitmap image (versus a shape or path), the image becomes slightly less sharp each time you commit a transformation; therefore, performing multiple commands before applying the cumulative transformation is preferable to applying each transformation separately.
Make sure to position the photo so that it fills both the cover photo and profile picture areas. When you’re done, press Enter on your keyboard.

Step 5
Once you’ve positioned the photo, click on the small eye icon to the left of the “Frame” layer in the Layers panel to hide the layer.

3. How to Save the Profile and Cover Image
Step 1
In the Layers panel, locate the “Profile picture” layer thumbnail. Hold down Command (Mac) on your keyboard and click on the layer thumbnail. This will select the area of the profile picture, a square image of 307 x 307 px.
Go to Image > Crop to crop the image to the profile picture area.

Step 2
Go to File > Export > Save for Web (Photoshop CC 2015) or File > Save for Web & Device (before Photoshop CC 2015).
From the Format dropdown, choose JPEG. From the Quality dropdown, choose Very High.
When you’re done, click Save. Choose a name for the profile picture and click OK.

Step 3
Click on the History panel from the right side of your workspace. If you can’t see it, go to Window > History.
Click on the previous step in the History panel. This will reload the uncropped image.

Step 4
In the Layers panel, locate the “Cover Photo” layer thumbnail. Hold down Command (Mac) on your keyboard and click on the layer thumbnail. This will select the area of the Cover Photo, a rectangular image of 1630 x 605 px. Go to Image > Crop to crop the image to the cover photo area.

Step 5
After cropping, go to File > Export > Save for Web (Photoshop CC 2015) or File > Save for Web & Device (before Photoshop CC 2015).
From the Format dropdown, choose JPEG. From the Quality dropdown, choose Very High.
When you’re done, click Save. Choose a name for the cover photo and click OK.

4. How to Upload Your Photos to Facebook
Step 1
To add a profile picture or change your current profile picture:
Go to your profile and hover over your profile picture. Click Update Profile Picture. Now you can:
- Upload a photo from your computer.
- Take a new photo.
- Select a photo you’ve already uploaded or one you’re tagged in.
Choose “Upload a photo from your computer“. Select the Profile Picture just created. Don’t crop your photo! Click Skip Cropping in the bottom left, and click Save.

Step 2
To add or change your cover photo:
- Go to your profile.
- Hover over Update Cover Photo in the top-left of your current cover photo.
- Click Update Cover Photo. If you don’t currently have a cover photo, click Add Cover Photo.
- Select Choose from my photo and navigate to the cover photo just created.
- Once you choose the photo, you could reposition it by clicking the image and dragging it up or down. Don’t reposition the photo, don’t drag the image in this step!
- Click Save Changes.
Remember that the images created with this tutorial are sized in proportion to the display dimensions on Facebook, so you don’t need to reposition or crop the images when uploading them.

5. Facebook Pages and Mobile Layout
Unfortunately, Facebook made bold changes to the layout for pages, and the images created with this tutorial won’t work with Facebook pages. Facebook has removed the profile picture from the cover image territory. Now the profile picture has moved to the left-hand column of the layout. At the moment, it is possible to create a seamless profile picture and cover photo only for personal profiles.
The same problem exists with the mobile layout. If you’ve visited any Facebook pages on your iPhone, you might have noticed that the cover photo isn’t displayed the same way it is on desktop—only the middle section will appear on mobile, while the profile picture will move significantly towards the centre.

Anyway, we can optimize our images to look good on mobile devices.
In order to avoid ugly discrepancies, don’t place important information on the right of the profile picture, especially if you know that the majority of your page users are mobile users.
Congratulations, You’re Now Done!
Great job! Our seamless profile picture and cover photo are finished. You can use your imagination and continue playing around and adding details until you are fully satisfied with the result. I hope you’ve discovered some new tips and tricks that you can use for creating wonderful projects in future. Feel free to share your results in the comments below!

If you need more control over your images, my advice is to download the “Seamless Identity Action for Facebook”, a Photoshop plugin that allows you to create an eye-catching cover and profile picture for your Facebook profile with some premium options such as bigger profile images, parallel updates with the Facebook layout changes, and more.
{excerpt}
Read More