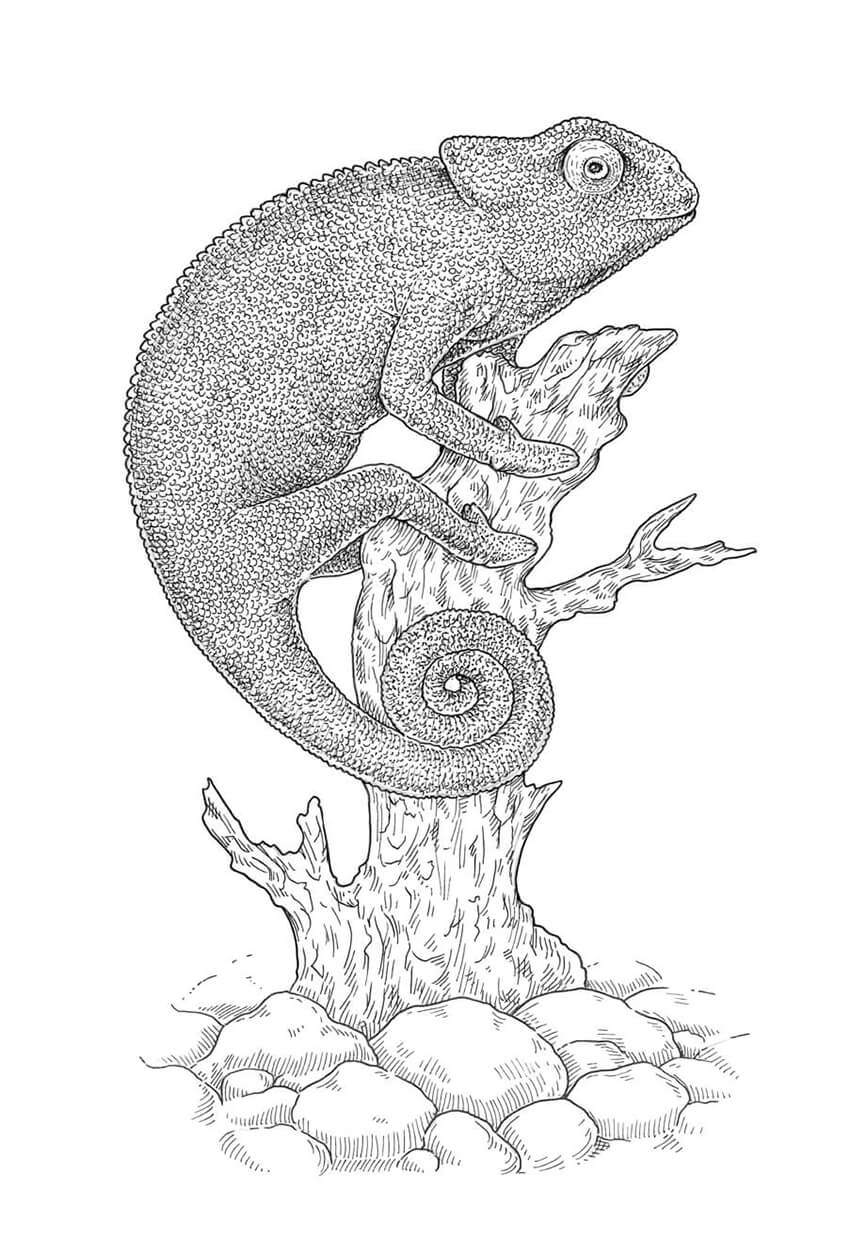
In this tutorial, I’ll show you how to draw a lizard with ink liners. We’ll also explore the textures of scales, wood, and stones, and learn how to create the illusion of these surfaces in your drawings.
We will use only black color, but the artistic ways in which we can apply our tools are abundant. I’ll show you simple yet effective ways to combine hatching, crosshatching, and dotwork to achieve impressive results.
Once you focus your attention on these methods, practice observation and drawing with ink, you will be able to depict anything you want. So let’s begin!
What You Will Need
You will need the following equipment in order to create this project:
- ink liners number 0.05, 0.1 and 0.3, black color
- a pencil (HB or B type is best)
- a sheet of paper (I recommend using thick and heavy types)

1. How to Draw a Pencil Sketch
Step 1
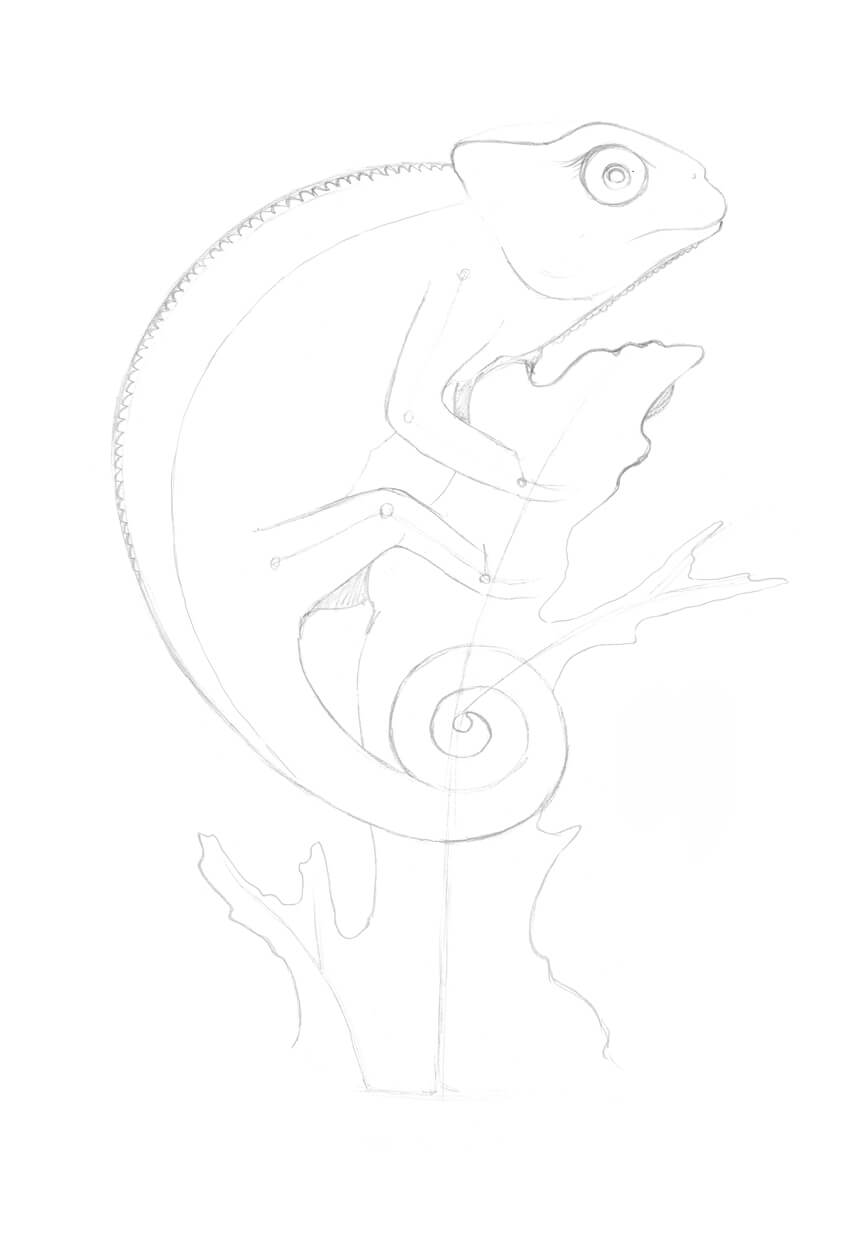
With a pencil, I draw an oblong shape for the lizard’s head.
Then I add a line that represents the direction of the lizard’s body (or its backbone). This line ends with a spiral of the tail.
When planning the composition, please be sure to leave enough space for the rest of the drawing.

Step 2
I mark the limbs of the animal with lines. The small circles represent the joints.
I recommend applying the first pencil lines lightly so you can easily erase them or cover with ink later.

Step 3
I draw the core of the tree and add a couple of branches.

Step 4
I refine the head of the lizard, outlining its specific curved shape. Then I draw the eye; it resembles three circles of different diameter, one inside another.

Step 5
I refine the body of the lizard. The real back of the animal doesn’t repeat the core line because the body has its own fullness and volume.
I also mark the limbs, only general forms without the details of the paws. Drawing the paws requires additional explanations, so we’ll finish them later.

Step 6
I draw the silhouette of the tree. The best option is to use organic, smooth lines. Just trust your hand; there is no wrong way of drawing a tree.

Step 7
I add the jagged details to the lizard’s body. The first line of small jags is on the back, and the second is under the jaw.
I also mark the hollow of the eye and accentuate the relief there.

Step 8
It is time to add the limbs that are hidden from the viewer. If we don’t do this, it will seem as if the lizard is floating in the air. I mark the back limbs with soft pencil strokes, so they become more visible.

Step 9
A lizard’s paw resembles a claw: it has two groups of fingers that grow together. I mark the general shapes of the paws.
By the way, feel free to erase unnecessary pencil lines as you go.

Step 10
I refine the paws, adding the fingers: two on one side and three on the other, as far as the foreshortening allows me to insert the details.

Step 11
The lizard’s body has numerous folds. I add them, paying attention to all the joints and points of bending.

Step 12
I outline the stones in the bottom part of the drawing. Basically, stones are uneven spheres of various sizes.
Our pencil sketch is ready!

2. How to Draw the Texture of Scales
Step 1
The scales on the lizard’s skin resemble a mosaic of round or chamfered shapes. Some circles are bigger, and some are smaller.

Step 2
To add volume to the scales, I create groups of short rounded hatches. Please keep in mind the light source and leave areas of blank paper.

Step 3
I add dots; they unite the look of the texture and make it more velvety. It is also important to darken the gaps so that the scales will look more protruding.

3. How to Draw Wood
Step 1
I draw long, spontaneous lines. They allude to the pattern of bark.

Step 2
I add hatching to mark the shady areas.

Step 3
I add crosshatching by placing groups of horizontal hatches above the existing ones.

Step 4
To make the wooden texture more credible and organic, I add dots.

4. How to Draw Stones
Step 1
Usually, stones have a smooth surface. That’s why the best option is using simple parallel hatching. However, let the lines be slightly uneven, as it will help the texture look more natural.
The hatches that are drawn very close to each other create an illusion of a black-out area.

Step 2
To increase value in your drawing, you can apply layers of additional hatching, placing new lines into the gaps between the existing ink strokes.

Step 3
It is possible to create crosshatching by drawing rounded perpendicular lines. This method is very popular when it comes to giving an object in the drawing more volume.

5. How to Draw With Ink Liners
Step 1
I outline the main contours with the 0.3 ink liner.

Step 2
With the thin 0.1 ink liner, I draw small circles and semicircles to mark the scales on the lizard’s body.
To complete this step, you have to be patient. Please, take your time and have fun.

Step 3
I use the 0.1 liner to add long lines and hatching to the tree shape and to mark the pattern of the bark.

Step 4
With the 0.1 liner, I add groups of short parallel hatches to the tree. It helps me to reveal the relief.

Step 5
I create core shadows on the stones with accurate parallel hatching, using the 0.05 liner.

Step 6
It’s time to refine the eye of the lizard. Using the 0.05 liner, I darken the pupil and draw rounded lines around it.

Step 7
I make the lizard more three-dimensional by applying rounded crosshatching at the sides of the figure. I also accentuate the folds. For this step, I use the 0.05 liner.

Step 8
With the 0.05 liner, I add groups of horizontal and inclined hatches to the tree. Now it looks more three-dimensional.

Step 9
I add crosshatching to the stones, using the 0.05 liner. I leave spots of blank paper in the light places; it is important not to overdo the hatching.

Step 10
With the 0.3 ink liner, I make dotwork to emphasize the texture of the lizard’s skin. Try to imagine the gaps between the scales and aim for them.
I add dots mostly to the sides of the figure to accentuate its volume.

Step 11
I add dots to the wooden texture, too. The 0.3 ink liner is a great tool for that.

Step 12
I draw groups of dots to complete the texture of the stones, using the 0.1 liner. It isn’t an obligatory step; however, I find it useful for a visual unification of all the textures in this drawing.

Step 13
I add groups of dots made with the 0.3 liner to create the illusion of a stripy pattern on the lizard’s skin.

Step 14
I evaluate my drawing. It looks nice enough, but I think that accentuating the drop shadow from the lizard on the tree is a great final touch. I darken the tree with dots made with the 0.3 ink liner.

Your Drawing Is Complete
Congratulations! I hope you enjoyed both the process and the result. Drawing with ink is an exciting journey. Sometimes it can be challenging, but the outcome is always worth it.
Thanks for your attention! I wish you much joy, new experience, and many amazing artworks on your way!

{excerpt}
Read More