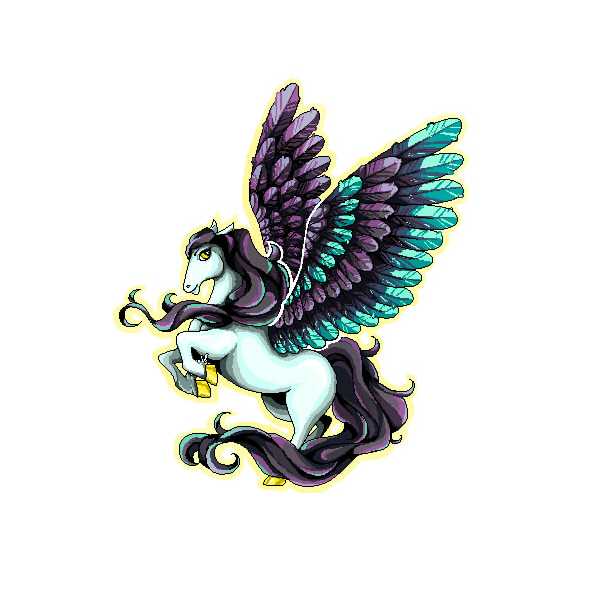
Do you like pixel art? In this tutorial I will guide you through the process of creating pixel art, and we will make a magical creature known as a Pegasus. Lots of pictures will help you to get the idea of working with pixels in Paint Tool SAI. Let’s do it!
1. Create a Clean Outline
Step 1
Our first step is to create a New Canvas with 450 x 450 px resolution. We don’t need a big canvas, because we will work with pixels. Take the Pen tool and start sketching! Because generally a Pegasus is a horse with wings, find some references of horses and bird’s wings.
You can find some inspirational photos here:
We can add motion to the image with a dynamic pose and flying locks of mane and tail. When an image has motion, it is always more interesting and fun.
Also remember: the clearer your sketch, the easier it will be to pixelate it, so try to make tidy lines.

Step 2
To create the basic structure, we will make a black outline. Set the opacity of the sketch layer to 20-30% and create a New Layer on top. Take our Binary tool (in some versions of the program it can be called the Pixel tool), and start to pixel the outline. Your brush should have 1 px size and 100% opacity—make sure of it. Try to make your lines as smooth as possible.
At first you can experiment on a different layer or canvases, until you feel confident working with the Binary tool and satisfied with your outline. Anyway, you can always erase all mistakes and move on.

Step 3
When drawing wings, it would probably be better to create another layer and draw pixels there, so you don’t have to worry about messing about with lines. Then Merge down all layers except the sketch layer—you can either delete it or turn off its visibility.

2. Pixel Coloring of the Pegasus
Step 1
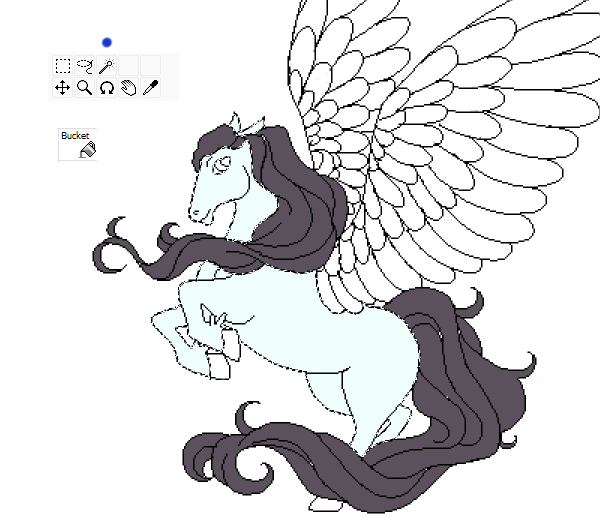
Now that our pixel outline is complete, we can begin to fill our Pegasus with color. First, take the Magic Wand and select the part you want to color, such as the body or tail. Then create a New Layer on top and, using the Bucket tool, fill in the selected area.
Repeat these steps with all parts of the Pegasus. And it would be better if you make a separate layer for each big part, because it makes coloring work so much easier.
Step 2
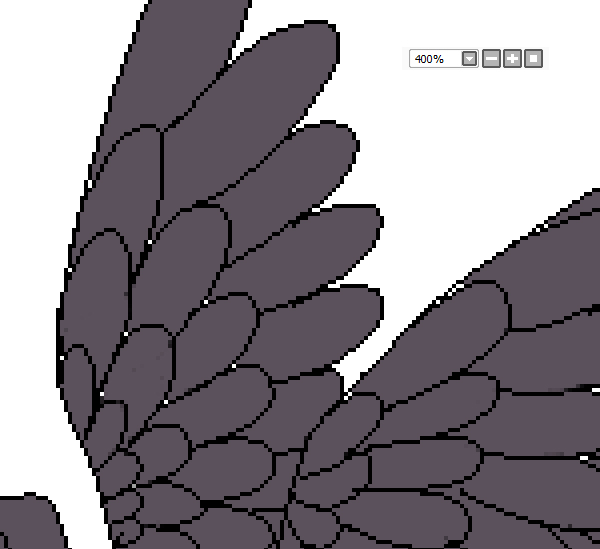
Zoom in on your drawing to about 300-400%. While working with the Bucket tool, you can see that there are some gaps of single pixels in some places. We’ll have to paint them separately with the Binary tool.
Step 3
After finishing work with the base colors, we can move straight on to creating shadows. On top of our body base color layer, create a New Layer and Clipping group it to the base color layer. Now we can paint in this area without worrying about stepping out into other areas.

Step 4
When drawing with pixels, you can get a desire to use many colors to make it look more realistic, but try to avoid this. It is better to use two colors for shadows and two colors for light and also a base color. It will make your pixel art look cleaner.

Also, you can experiment with adding one more bright color for highlights. This new color can be completely different from your main color palette—for example, I chose this emerald green, and it worked well in creating an interesting appeal.
And pixel coloring of the tail is complete! Well done!

Step 5
Now get to the mane—basically repeat the same steps you used with the tail. Create a New Layer and Clipping group it to the base color layer, and then, using the Binary tool, make the base middle shadows and dark shadows. You can either stay on the same layer for drawing highlights, or create a New layer for them.
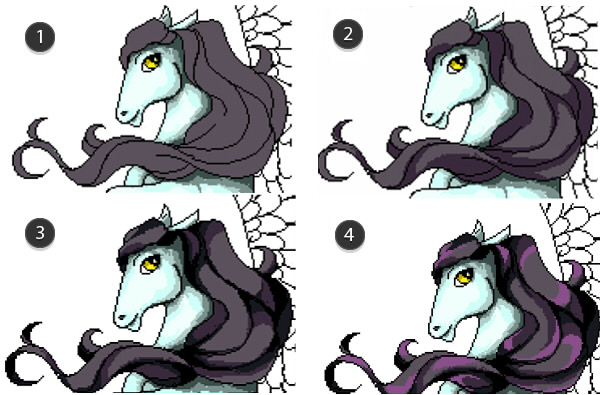
Gradually work on the highlights and add one more hue to make an interesting effect. I used the same emerald green as with the Pegasus tail.
Also it’s a good time to work on other details like the hooves and Pegasus’s eye. We can make them look golden, just with the use of a dark yellow hue plus white.
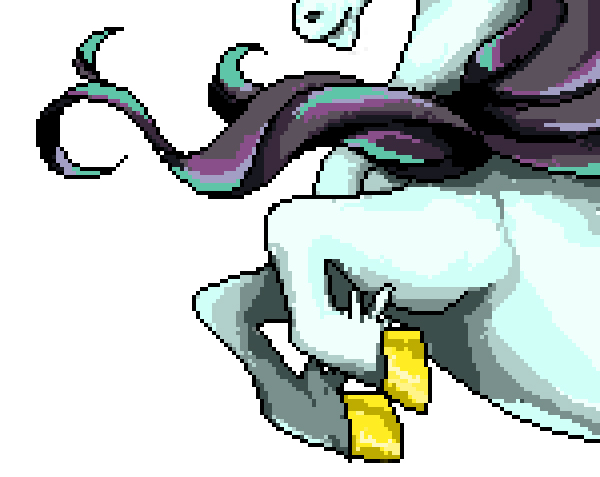
Our progress, for now, looks pretty good. And as we’ve finished with the body of the Pegasus, let’s move to the wings.

Step 6
And again, create a New Layer on top of the wing base color layer and Clipping group it to the base color layer.
At first, choose a color palette to work with. Two main color variations are enough. In this case I chose purple and emerald green, as for the tail. At this stage you can draw without worries—we need this step only to lay down all base colors for the wing. You can also work on the basic pattern for the feathers, pointing out color placement.

When we have all the basic colors in their places, we can continue detailing the feathers. Also, to make the working process more comfortable, you can use the Rotate tool to achieve better access to some parts of the drawing.

And… done!

3. Continue Detailing
Step 1
We can make the wings more realistic by adding details to the feathers. Look at real-life birds—they all have these jagged edges on their feathers. Just create a New Layer on top of all layers and use the Binary tool to continue drawing.

Step 2
Also, to separate and distinguish the wings from each other, we can draw a white line
between them, and also with the mane. Generally, we may draw this line to separate
parts that have the same color palette, like wings, mane and tail.

Step 3
Also, there is a cluttered place on the drawing that we shall fix. Create a New Layer for that and take the Binary tool to draw on this spot. Make the wing look as if it is on top of the tail, and don’t forget about a white separating line to distinguish the wing and tail.

Step 4
And finally, let’s make a pale yellow stroke around our Pegasus to emphasise the drawing.
![]()
Awesome, We’ve Done it!
Now you know how to work with the Binary (or you may find it as Pixel) tool in the Paint Tool SAI program. I hope this tutorial was helpful and you learnt something new about the topic. Good luck, and have fun with pixels!

{excerpt}
Read More