
Posters are a classic, eye-catching and effective way of advertising an event. In this tutorial we’ll design the layout of a poster advertising a Henna Workshop, inspired by Moroccan art, dusty desert colors, and Arabic calligraphy. This style would apply equally well to a festival event, BBQ or music gig.
We’ll be using Adobe InDesign for this tutorial, placing a graphic created in Adobe Illustrator. Many thanks to Sirine Matta, aka Miss Chatz, for the fantastic henna illustration used in this tutorial.
1. Set Up the Document in InDesign
Step 1
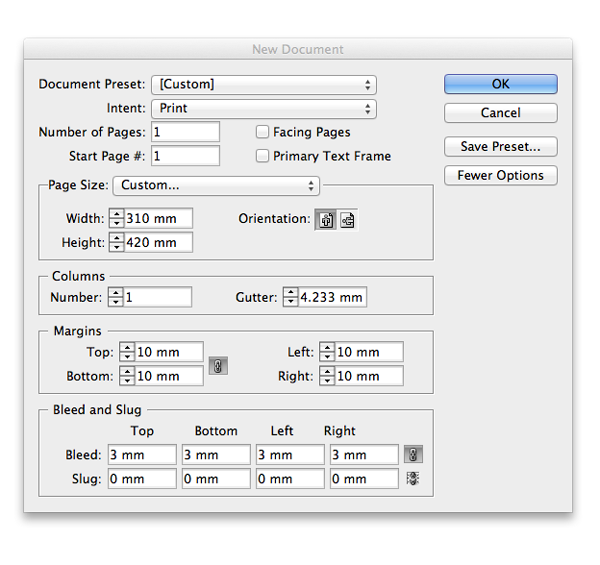
Open InDesign and select File > New Document. In the New Document window set the Intent to Print and set the No. of Pages to 1. Deselect Facing Pages.
Under Page Size select ‘Custom…’ to open the Custom Page Size window.
Step 2
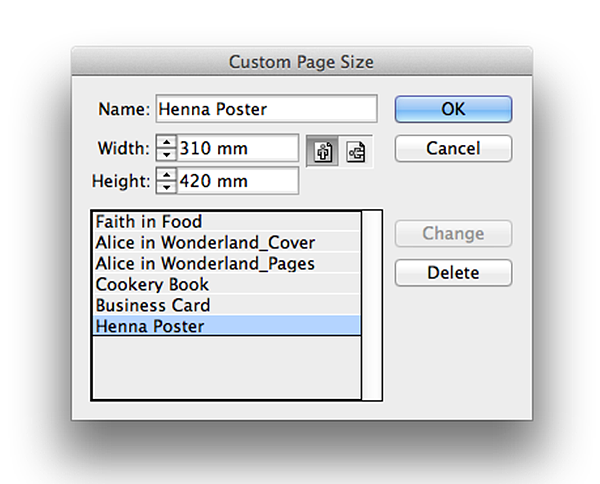
Type ‘Henna Poster’ under Name and set the Width to 310 mm and Height to 420 mm (just slightly larger than A3). Maintain the default Portrait Orientation. Click Add and OK to return to the New Document window.
Set the Margins on all sides to 10 mm and set the Bleed all round to 3 mm. Click OK.
2. Create Background Texture for Your Poster
When creating posters in InDesign it’s a wise idea to make good use of the Layers panel. This allows you to create a sequence of Layers which build depth to your poster, creating a 3D design. In this tutorial we’ll be creating 4 Layers. For now, open the Layers panel if not already open (Window > Layers).
Step 1
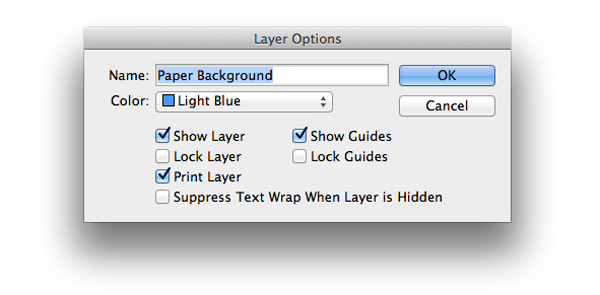
Click on the Create New Layer icon at the bottom right of the Layers Panel. Double-click the default ‘Layer 1’ name and rename this Layer ‘Paper Background’.
Step 2
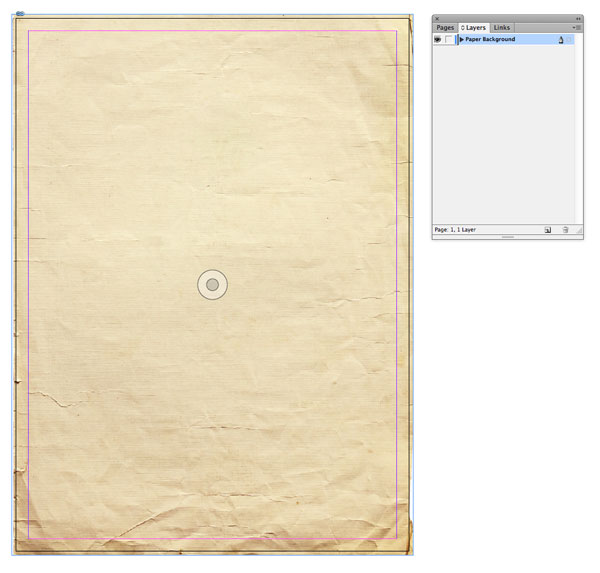
Using the Rectangle Frame Tool (F), drag to create a frame which extends to the edges of the bleed, across the whole page.
Go to File > Place and select a textured background image. In this case, I’ve gone for a paper texture. Click Open. Use the Fill Frame Proportionally icon in the top control panel to arrange the background, making sure none of the edges of the paper are visible on the document.
3. Introduce Background Color and Effects
Step 1
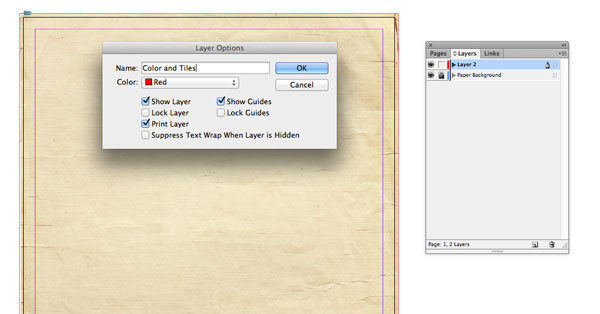
Return to the Layers panel and Lock the ‘Paper Background’ Layer. Click the Create New Layer icon.
Double-click the on the new Layer’s default name and rename this Layer ‘Color and Tiles’.
Step 2
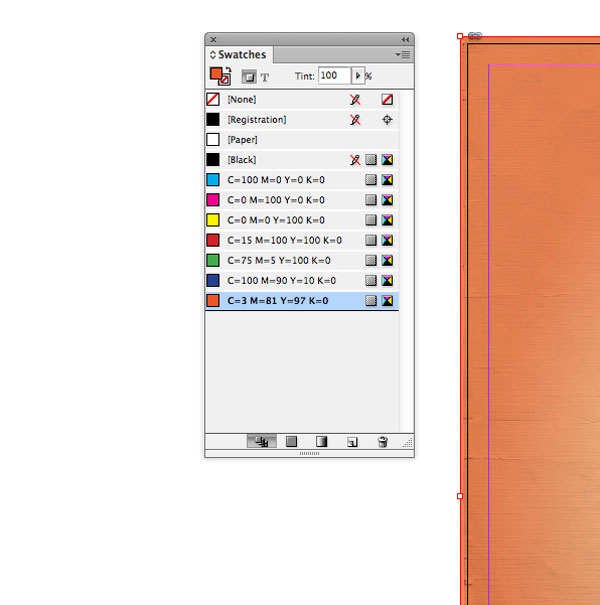
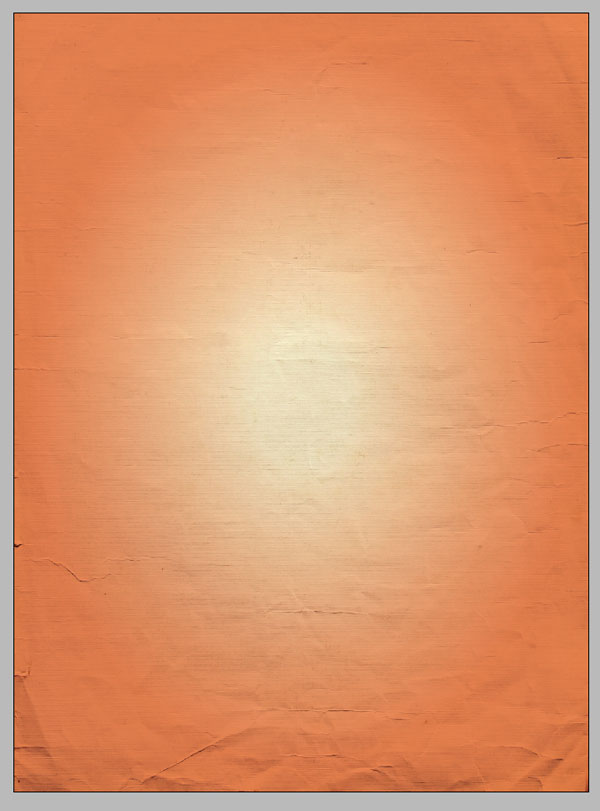
Open the Swatches panel (Window > Color > Swatches) and click the New Swatch icon at the bottom right of the panel. Define a new CMYK Swatch, values C=3, M=81, Y=97, K=0. Click OK.
Use the Rectangle Tool (M) to create a new frame that, as before, extends to the edges of the bleed on all sides. Set the Fill to the new Swatch you just created.
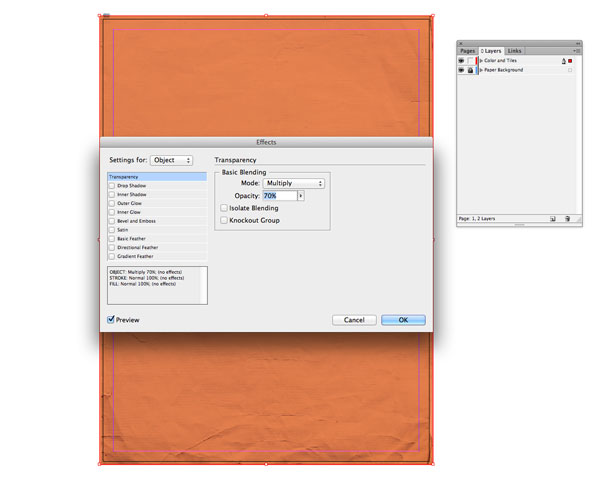
Go to Object > Effects > Transparency… and set the Mode to Multiply (to bring out some of the background texture in the Layer beneath) and set the Opacity to 70%.
Step 3
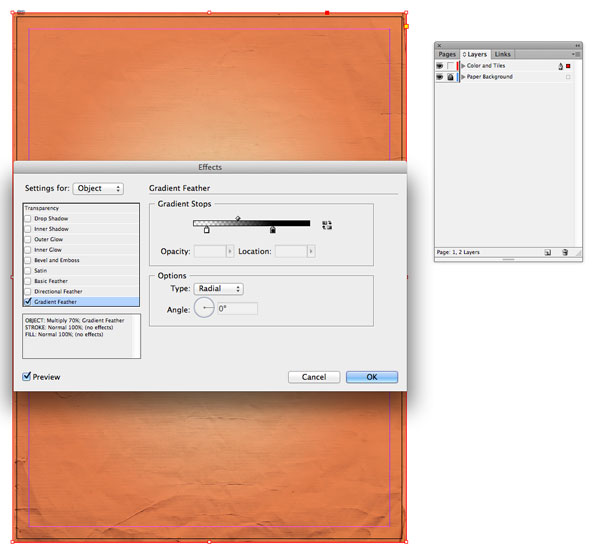
Remaining in the Effects panel, go to the Gradient Feather option on the left-hand side of the panel. In the Options menu set the Type to Radial. To the right of the Gradient Stops slider, there is a small Reverse Gradient icon. Click this to ensure the gradient is lighter towards the inside of the poster. Move the sliders roughly into the position as shown below.
4. Create a Moroccan Tiled Border
Step 1
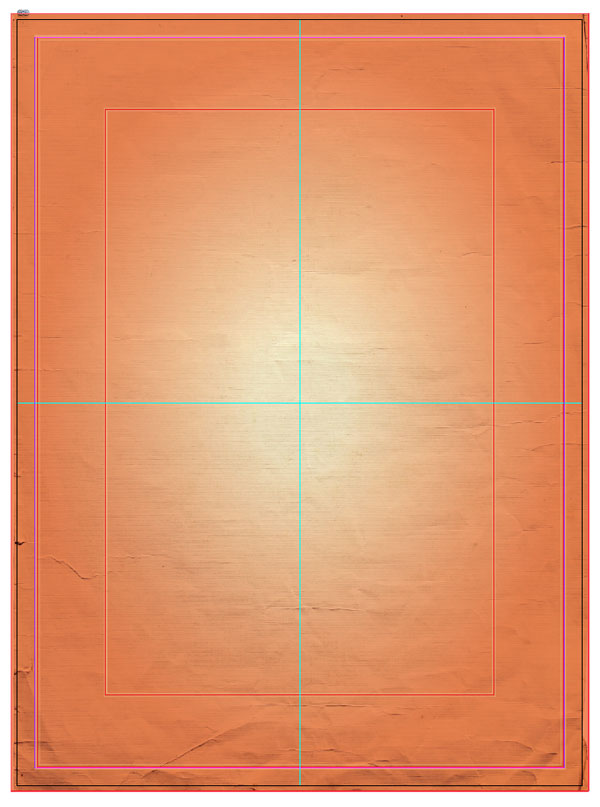
We want to be able to see the Center Point of the Poster more clearly. Drag a horizontal Guide from the top ruler (View > Rulers) downwards to 210 mm and drag a second vertical Guide from the left-hand ruler to 155 mm.
Step 2
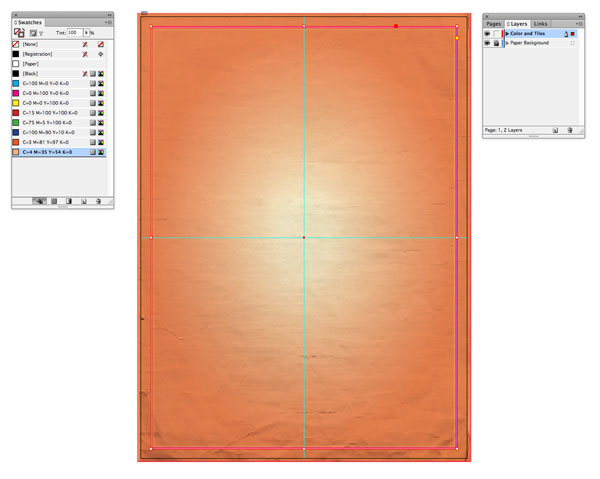
Go to the Swatches panel and click the New Swatch icon. Define a new CMYK Swatch, values C=4, M=35, Y=54, K=0. Click OK.
Remaining on the ‘Color and Tiles’ Layer use the Rectangle Tool (M) to create a new frame 291 mm in Width and 404 mm in Width. Center this on the document, using the guides as a reference point.
Set the Stroke Color of the frame to the new swatch you just created. In the top control panel, next to the Stroke and Fill icons, set the Weight of the Stroke to 3 mm and Type to Thick-Thin (you can also set this using the Stroke Panel; Window > Stroke).
Step 3
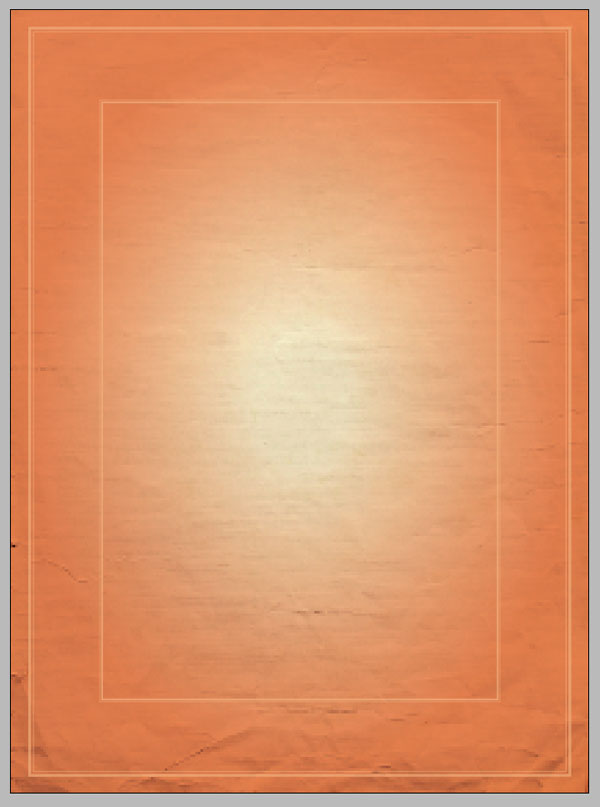
With the frame selected, go to Edit > Copy and Edit > Paste in Place. Adjust the dimensions of this second frame to Width 215 mm and Height 323 mm and center on the page.
You now have a basic framed border, into which we can insert a decorative tiled pattern for an extra Moroccan touch.
Step 4
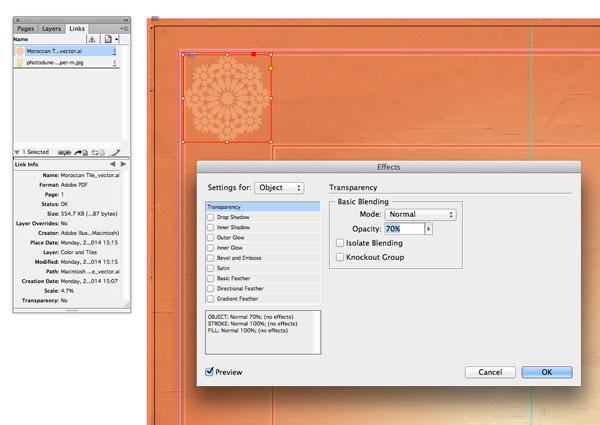
Remaining still on the ‘Color and Tiles’ Layer, select the Rectangle Frame Tool (F). Holding Shift, create a small square frame around 36 mm in Diameter. Fit this snugly into the top right corner between the two border lines.
What you want to create here is a repetitive square element to fill the border and give a tiled effect. In the example here, I traced the outline of a Moroccan ‘star’ tile in Illustrator (using Image Trace in the Black and White Mode) and gave it a uniform Fill in the same sand-colored Swatch I used for the border lines (C=4, M=35, Y=54, K=0). I then saved this as an EPS file with a transparent background.
Go to File > Place, select your EPS image and Click Open. Use the Fill Frame Proportionally icon in the top control panel to arrange the image so that it fits perfectly within the frame.
Go to Object > Effects > Transparency and set the Opacity to 70%.
Step 5
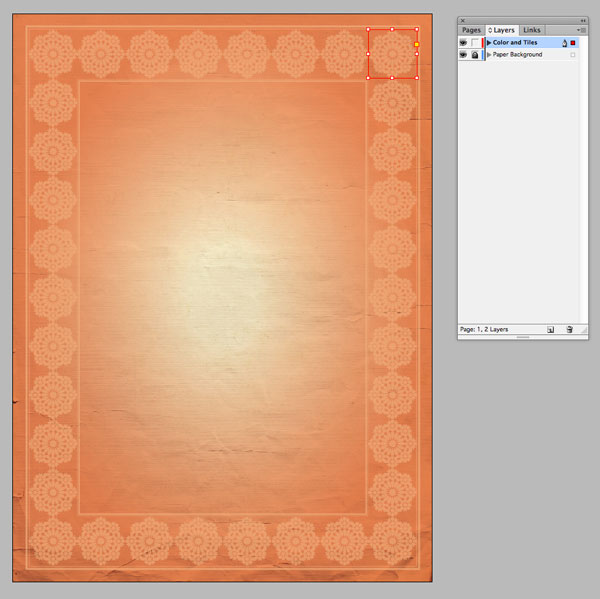
With the image frame selected, go to Edit > Copy and Edit > Paste. Move this new image frame directly below the first image, and repeat until the border is filled all the way around.
5. Place the Henna Graphic
Step 1
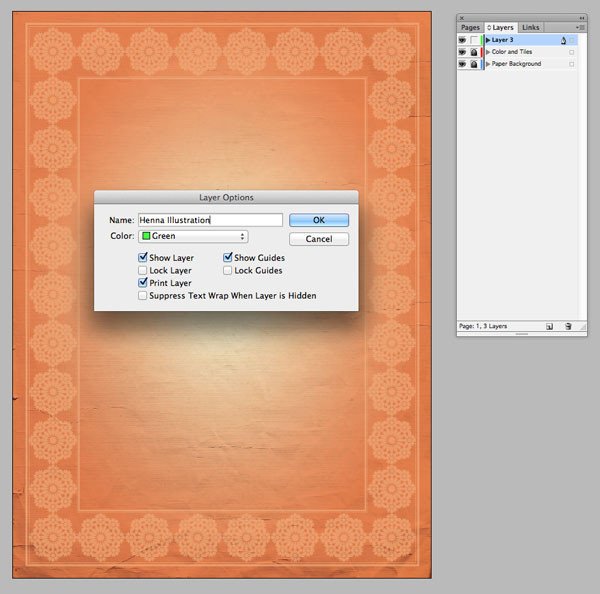
Return to the Layers panel and Lock the ‘Color and Tiles’ Layer. Click Create New Layer and double-click to rename this Layer as ‘Henna Illustration’. Click OK.
Step 2
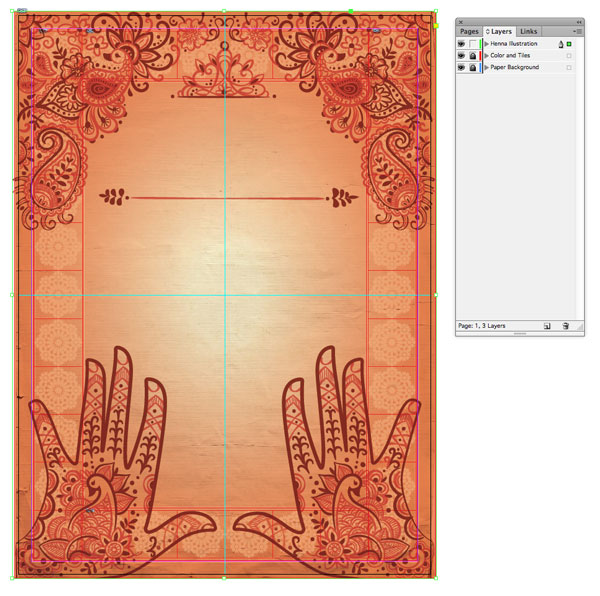
Use the Rectangle Frame Tool (F) to create a new frame that extends up to the edge of the bleed on all sides of the page. Go to Edit > Place and select your Henna image, saved as an EPS file with a transparent background; click Open.
Use the Fill Frame Proportionally option in the top control panel to arrange the image centrally in the frame.
Step 3
With the image frame selected, go to Edit > Copy. Drag the top edge of the frame downwards to the center point of the document, so just the lower half of the image is showing.
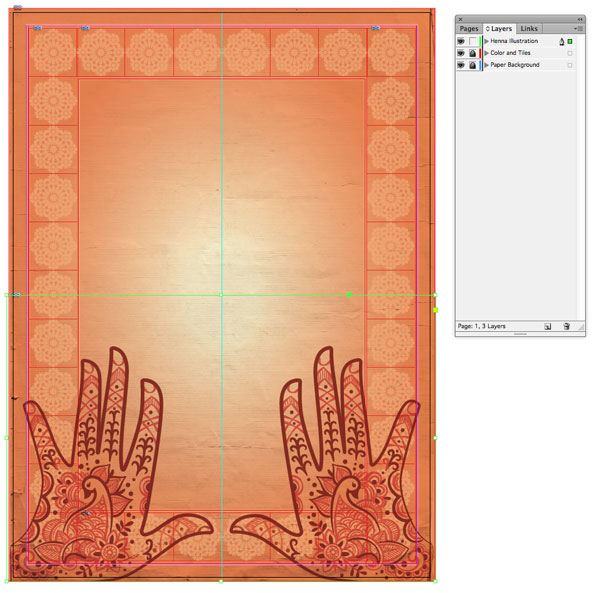
Step 4
We can apply an Effect to part of the Henna image to give it depth and integrate it with the rest of the design, so it doesn’t look too ‘stuck-on’.
Go to Edit > Paste in Place and drag the bottom edge of this second image frame upwards to the center point of the page, so that just the top half of the image shows in this new frame.
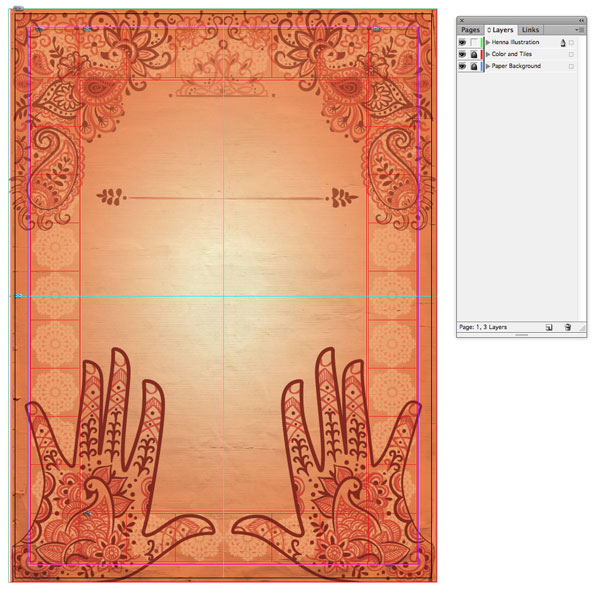
Step 5
Go to Object > Effects > Transparency… and set the Mode to Multiply and the Opacity to 75%.
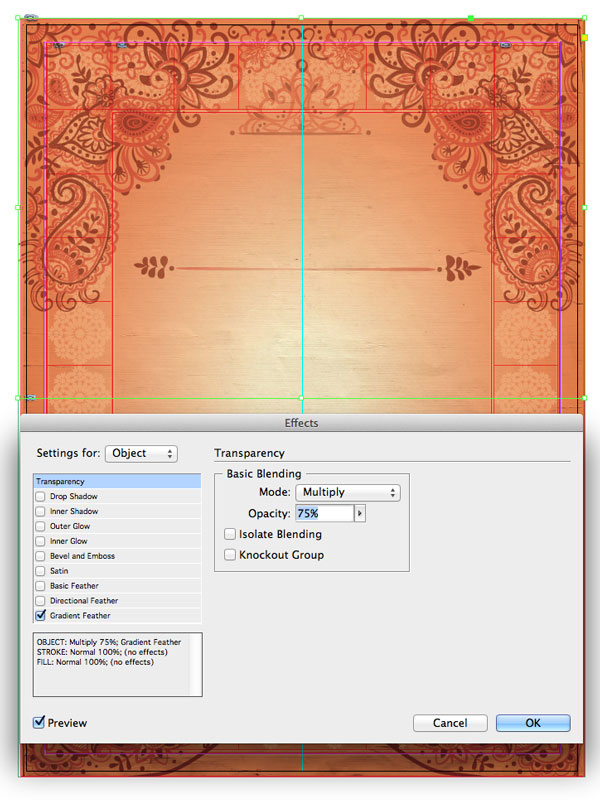
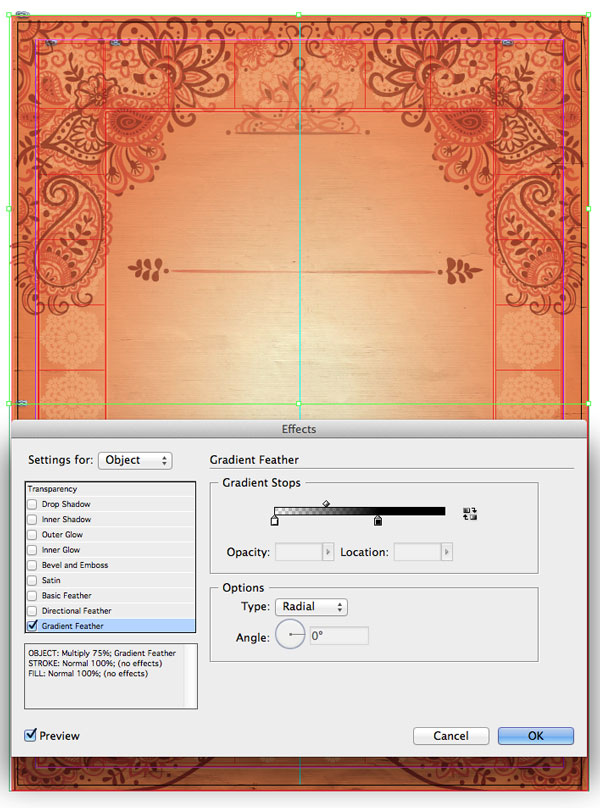
Go to the Gradient Feather option in the Effects panel and set the Type to Radial. As we did earlier, click the Reverse Gradient icon and move the sliders roughly into the positions indicated below.
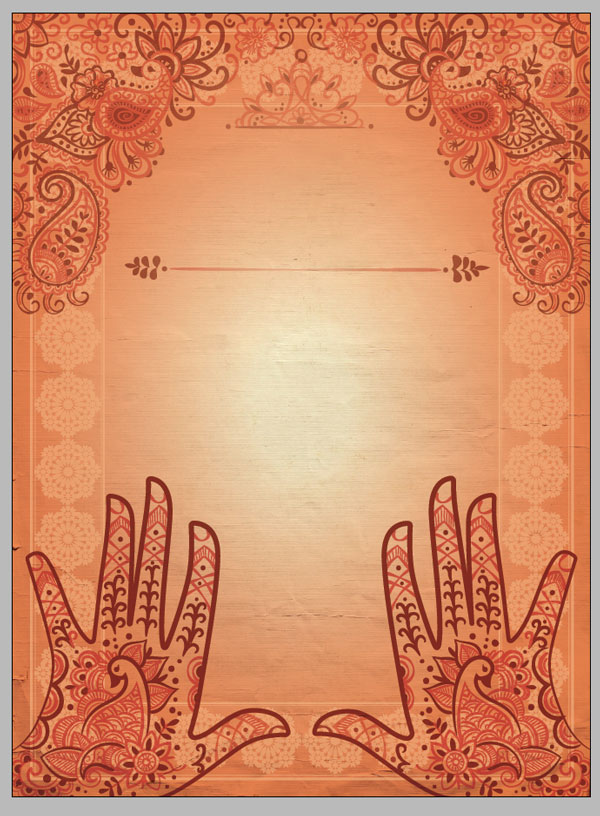
Awesome – your poster’s starting to look great; now let’s add some text!
6. Add a High-Impact Heading to your Poster!
Step 1
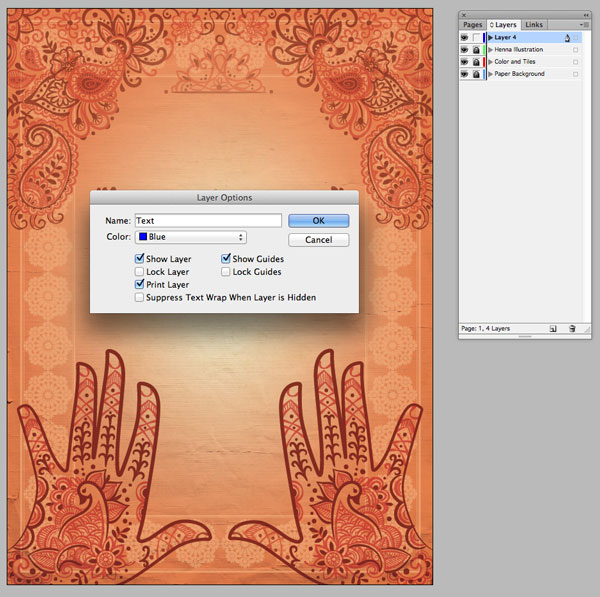
Return to the Layers panel and Lock the ‘Henna Illustration’ Layer. Create a New Layer, as before, and double-click to rename this as ‘Text’. Click OK.
Step 2
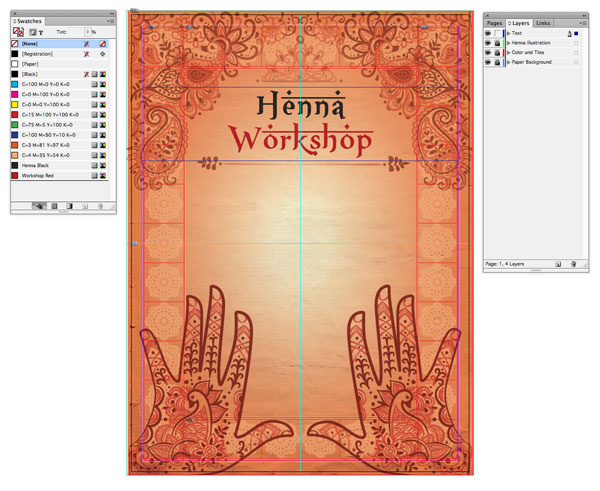
Go to the Swatches panel and click the New Swatch icon. Define a new CMYK Swatch with values C=20, M=100, Y=98, K=11 and rename this ‘Workshop Red’. Click OK.
Create a second new CMYK Swatch, values C=33, M=32, Y=34, K=89 and rename this ‘Henna Black’. Click OK.
Introduce a new text frame using the Type Tool (T) 290 mm in Width and 67 mm in Height. Position this centrally on the page, between the top decorative Henna element and the calligraphic line beneath it. Type ‘Henna (paragraph break) Workshop’ and set the alignment to Align Center.
Select an Arabic-inspired font which still retains English language legibility – Here I’ve used a great free font, XXII Arabian OneNightStand, which is inspired by Arabic calligraphy.
Set the Font of ‘Henna (paragraph break) Workshop’ to XXII Arabian OneNightStand Bold, Size to 84 pt and Leading to 88 pt. Highlight ‘Henna’ alone; set the Font Color to ‘Henna Black’ and adjust the Tracking to 40. Highlight ‘Workshop’ alone; set the Font Color to ‘Workshop Red’ and adjust the Tracking to 20.
You can make all these formatting adjustments in the top control panel, under Character Formatting Controls.
Step 3
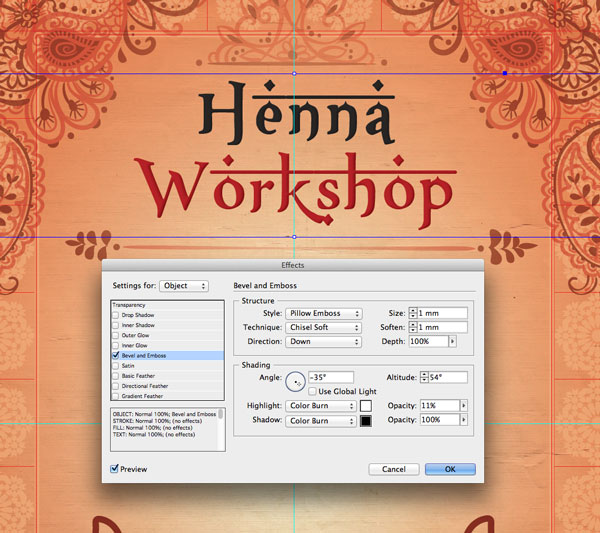
You can apply some interesting Effects to text in InDesign, which can mimic the results of some Filters or Effects you would typically use in Photoshop. What would work really nicely here is an Effect to give a subtle 3D look to the heading, as if it had just been created in real ink, which gives text a slightly raised look.
With the text frame selected (not the text itself), go to Object > Effects > Bevel and Emboss. Under the Structure options, set the Style to Pillow Emboss, Technique to Chisel Soft, Direction to Down, Size and Soften to 1 mm and Depth to 100%.
Under the Shading options, set the Angle to -35 degrees, Altitude to 54 degrees, Highlight to Color Burn with an Opacity of 11% and Shadow to Color Burn with an Opacity of 100%.
7. Add Typographic Details to Your Poster
You’re going to need to add some information to your poster, perhaps a description of the event, as well as the date, time and location.
Step 1
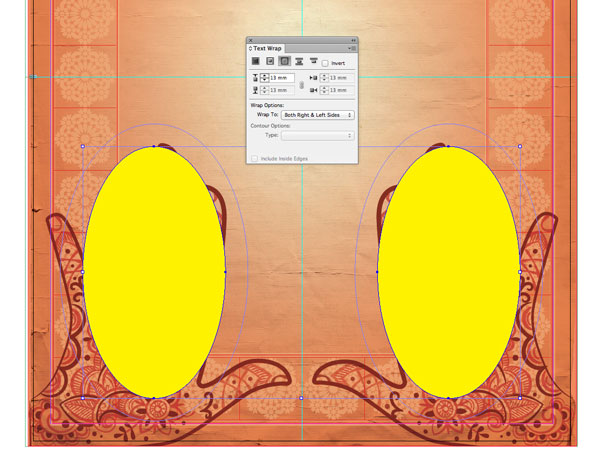
The henna hands image creates an irregular frame towards the bottom of the poster. We can insert a Text Wrap effect around them to push the text into a narrow channel between them.
Remaining on the ‘Text’ Layer, use the Ellipse Tool (L) to create an irregular oval around 145 mm in Height and 80 mm in Width. Go to Window > Text Wrap and set the wrap to Wrap Around Object shape and the Offset to 13 mm. Position this oval frame over the main area of the left henna hand illustration.
With the oval frame selected, go to Edit > Copy > Edit > Paste, and move this second oval into a mirrored position over the right henna hand. I have shown the ovals in a bright Fill Color for demonstration here, but ensure in your own artwork that the Fill and Stroke of both frames are set to [None].
Step 2
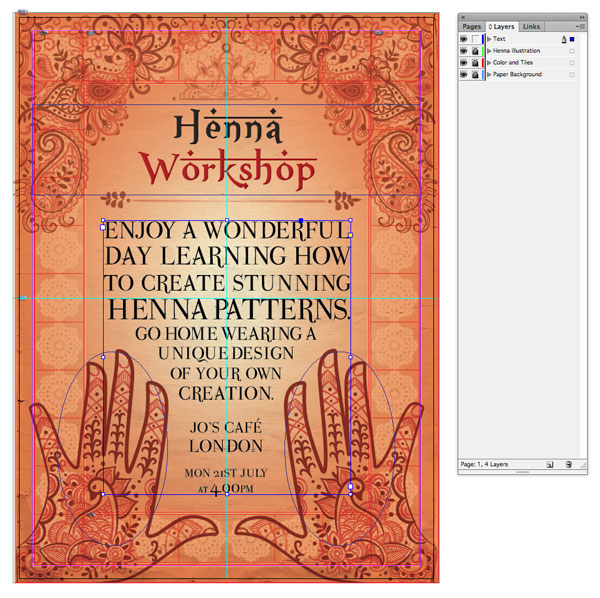
Use the Type Tool (T) to create a new text frame 185 mm in Width and 205 mm in Height. Position this centrally below the Heading, around Y position 152 mm.
You want the text frame to look filled up, and varying the Size, Leading and Tracking of your text is a stylish way to do this. But first, you need to pick a suitable second font. I wanted to use something that was more legible than the Heading font, but still retained a Moroccan feel. ParmaPetit is a great choice, particularly as it also looks great in All Caps, making it perfect for posters.
Now you can insert your text! Here I went for a 21-word, 8-line description of the event, followed by a paragraph break, the venue and location, paragraph break, then the date and time. Split the text into chunks of 2-4 words, and vary the Size, Leading and Tracking throughout. You may want to pull out certain phrases in larger type, e.g. in this case ‘Henna Patterns’, that will draw the eye, and reinforce the message of your poster.
Step 3
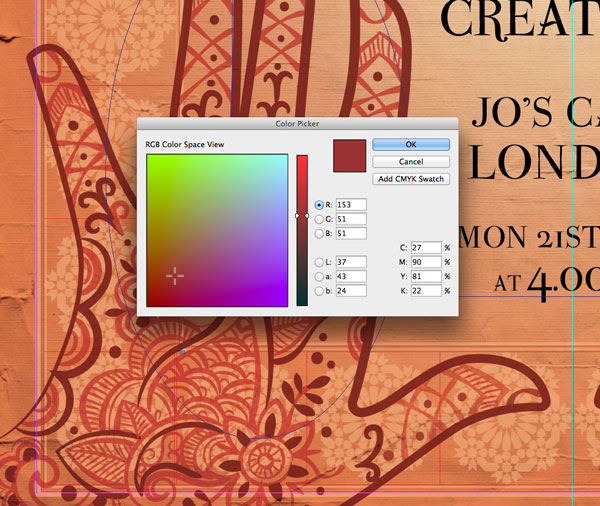
Select the Eyedropper Tool (I) and hover over a darker color in the henna illustration. Click once to pick up the Swatch. In the Tools panel double-click on the Fill icon to open the Color Picker window. Click once into the C, M, Y, or K value boxes and click Add CMYK Swatch and then OK.
Step 4
Apply this new Swatch to the Font Color of alternate lines, interchanging with ‘Workshop Red’, and using ‘Henna Black’ to pull out key information, such as the venue and date.
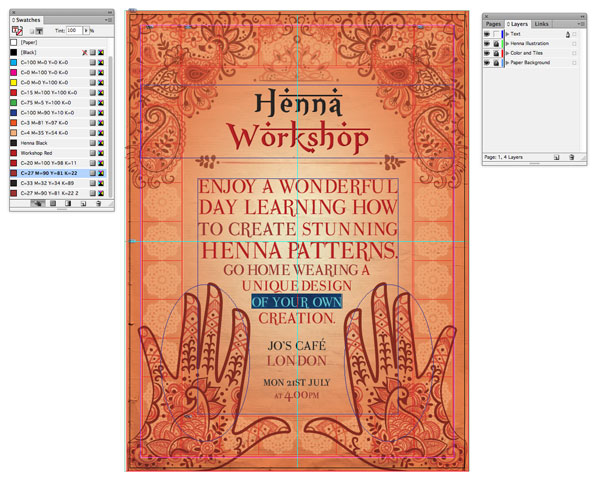
Great work – your poster design’s looking amazing! Now read on to export it for print…

8. Prepare Your Poster for Printing
Step 1
If you’re going to send your poster to a professional printer, you need to export the file as a very high quality file. Ensure the EPS illustration file you have used is above 300 dpi to ensure a sharp, crisp result.
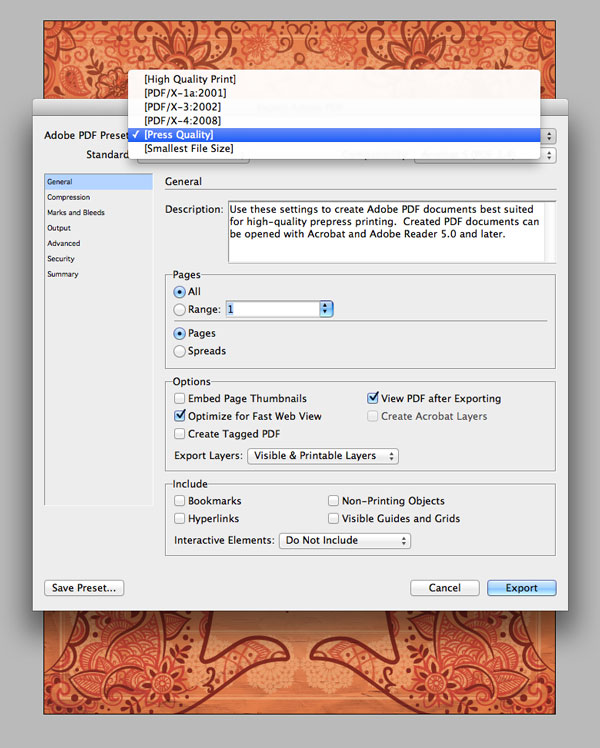
Go to File > Export and select Adobe PDF (Print) from the Format drop-down menu. Under the General Options, select Press Quality from the Adobe PDF Preset drop-down menu.
Step 2
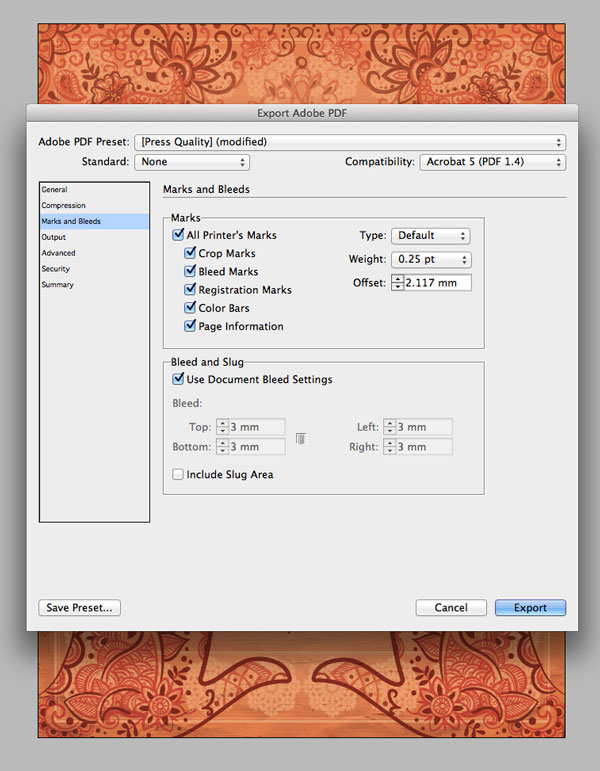
Under the Marks and Bleeds options, check All Printers’ Marks and Use Document Bleed Settings. Click Export.
And you’re done! Now all you need now is a few helpful volunteers to distribute your posters before the event…
{excerpt}
Read More