For many of us, painting a portrait from scratch may seem like an impossible task. What you may not know however is that it may not be as tough as you think. In today’s tutorial we will demonstrate how to paint a fantasy portrait from scratch without any references. We will begin with a sketch then demonstrate how to paint in color, skin, texture, and shading. Let’s get started!
Step 1
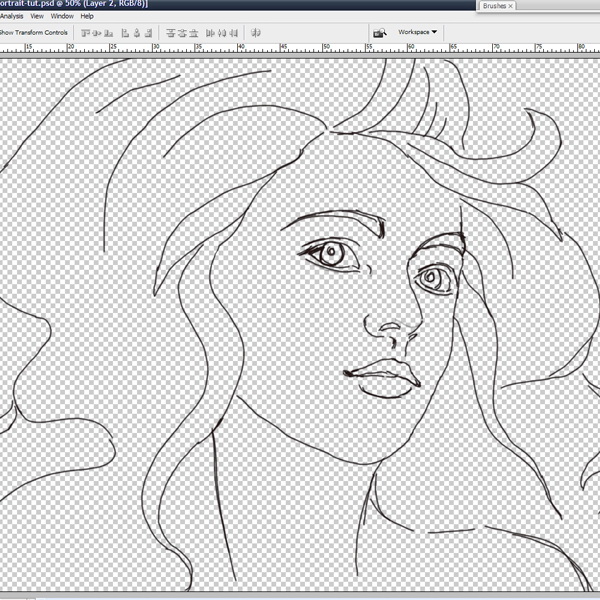
Let’s begin by first sketching out our portrait. In my example, I sketched it directly into Photoshop using my tablet. If it is easier, feel free to sketch your portrait on a piece of paper and scan it into Photoshop. If sketching isn’t your strength, you can download my sketch here.
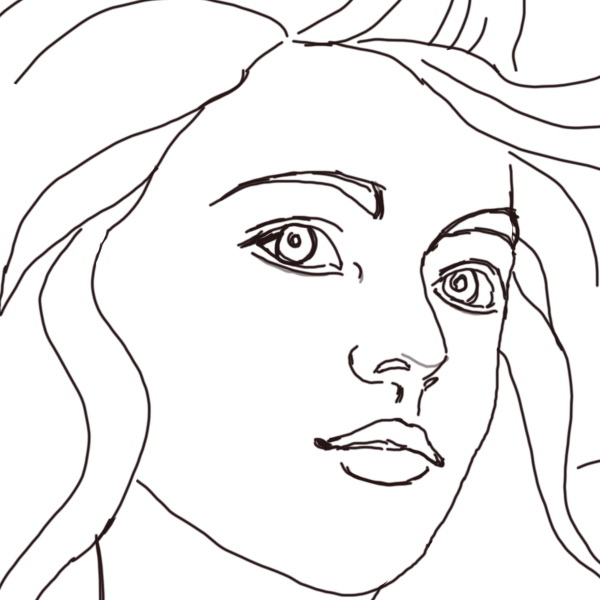
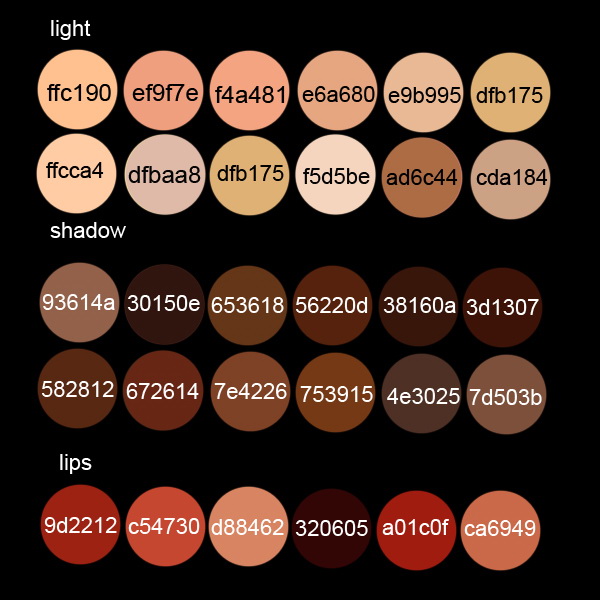
When painting skin, it is easier if you begin by making a quick palette of colors that you may potentially use. Create a palette on a different layer using the eye dropper tool (Cmd (Ctrl)+I ). I chose some beige colors from light to dark and some hues of pink. If you use more tones, the skin will look more dynamic.
Step 2
Tones will vary depending on the type of skin you are painting. When you paint skin, you will have a base tone, mid-tones, shadows, highlights and a warm zone (usually in the cheekbones). Begin by coloring with a neutral tone of beige (#dfbaa8) and cover all the skin. This will be the base. You can use the Paint Bucket Tool or a basic Brush with sharp edges.
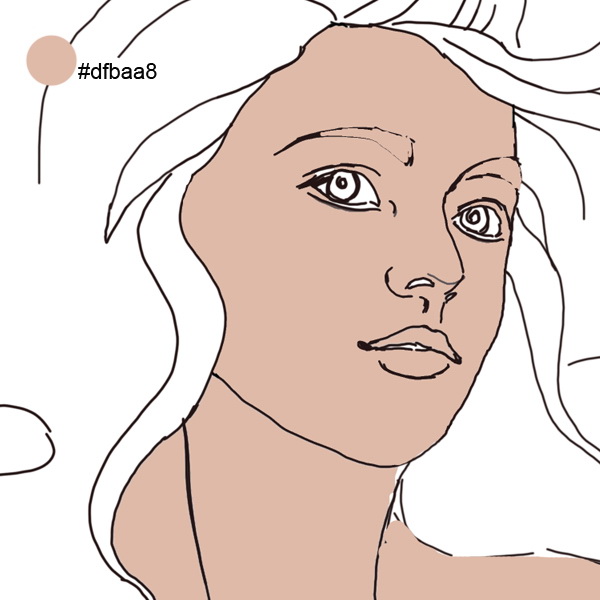
Select a darker color from the palette and apply some shadows. Fill the lips with a soft pink base.
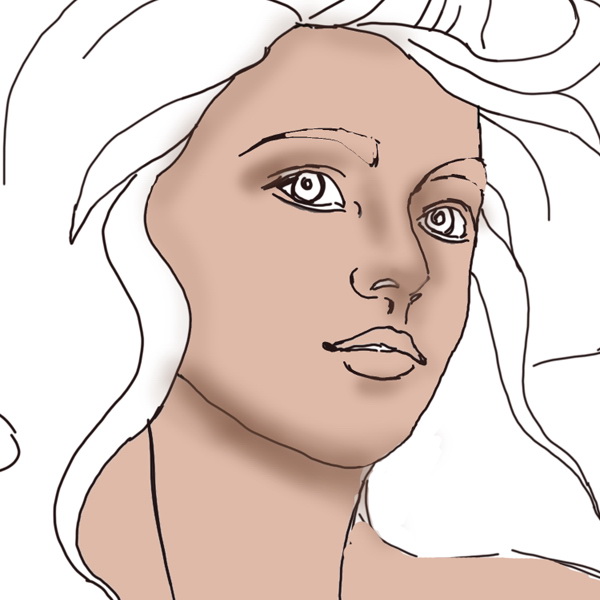
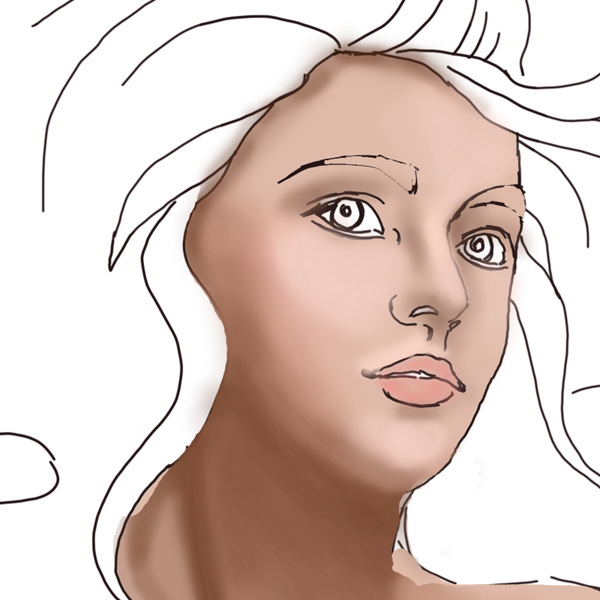
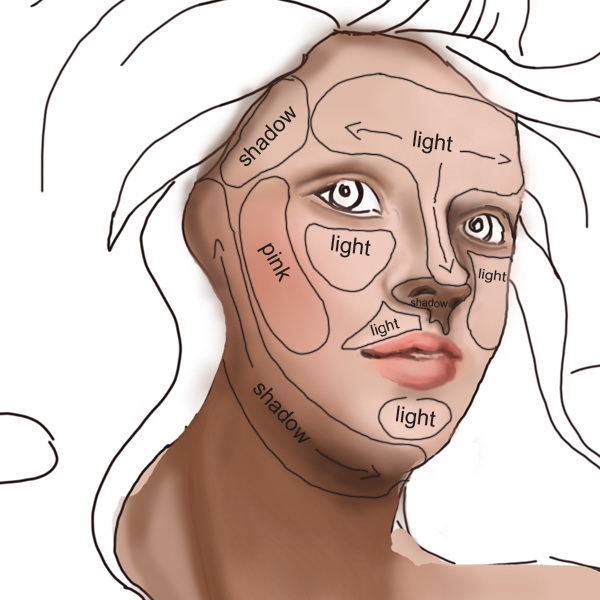
These are the areas were you need to apply the shadows and the highlights.
Step 3
In this step we will paint the eyebrows. This is very easy. The first thing to do is to cover up the areas of the eyebrows with the skin’s base tone.
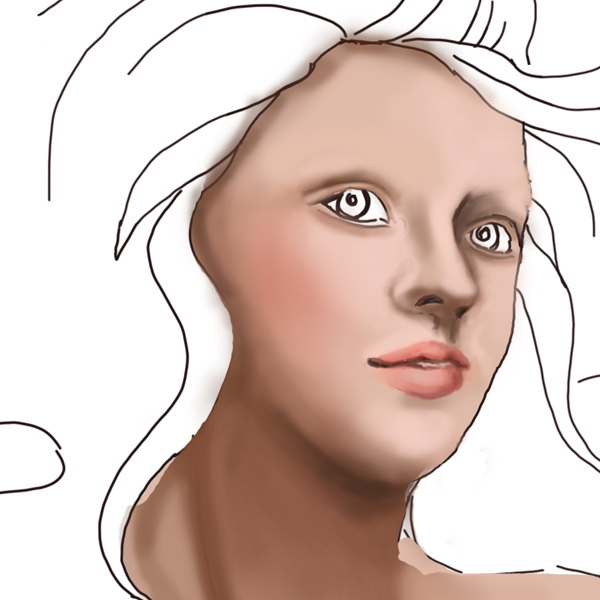
Select a basic brush. Go to brush presets and select shape dynamics. Set the brush opacity to about 60-70 px and paint it strand by strand. The brush size has to be 2-4 px. This is very easy if you have a graphic tablet, because the pen pressure will do the job for you. If you don’t own one, than just use the smudge tool and smooth out the edges of the eyebrows.
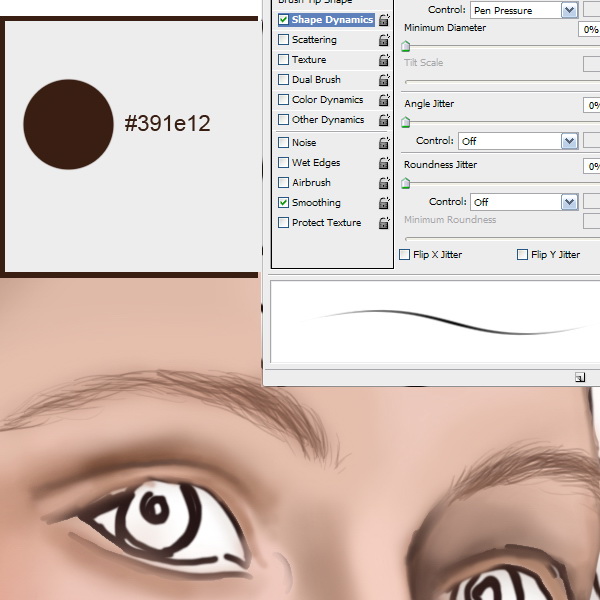
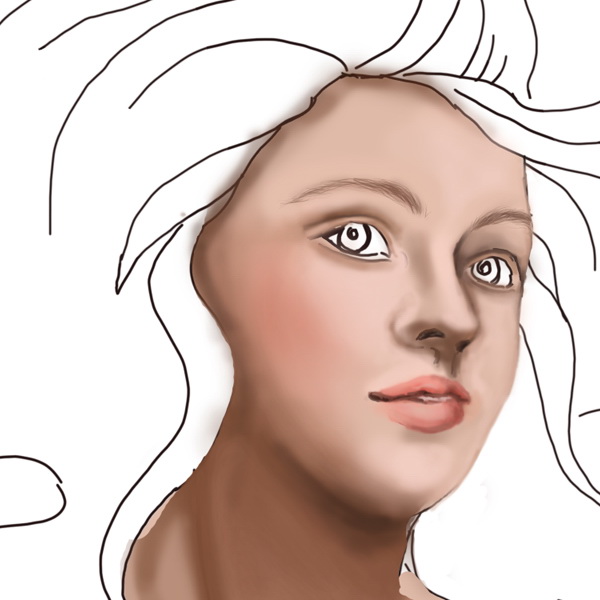
Step 4
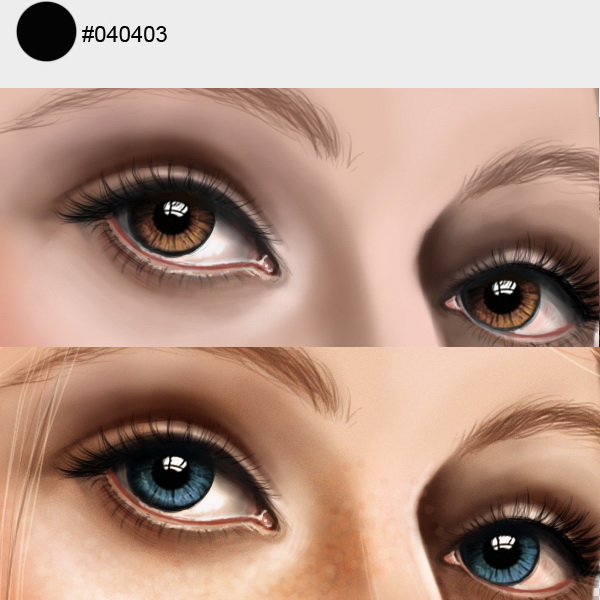
To paint the eyes, first you need to cover up the areas with base colors.
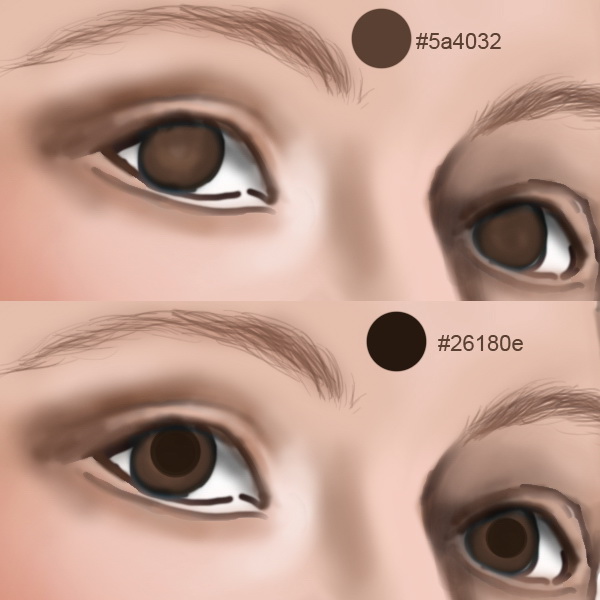
Remember that eyes are round so the corners will always be darker and the center, lighter.
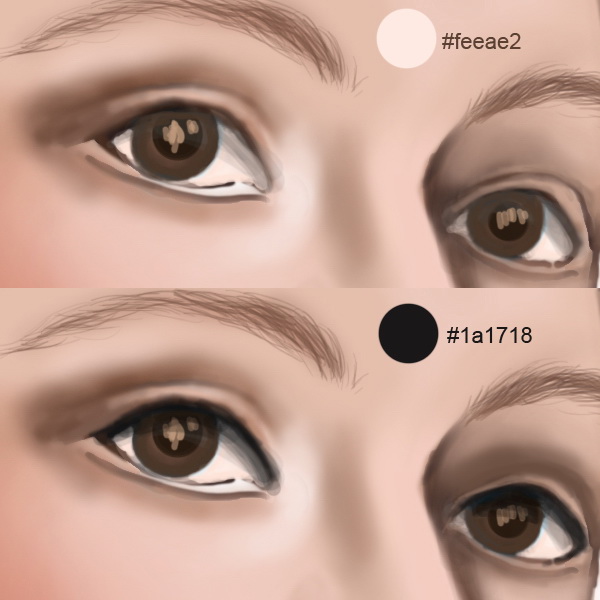
The upper eyelid is going to be under a shadow. Do the same for the lower one, only with a lighter color. Paint some light on the iris. Irises are made of many tiny lines spread around the pupil. Draw them with a small brush (max 3px) Keep the brush set to shape dynamics. Make some lines darker, lighter or thicker to achieve this effect.
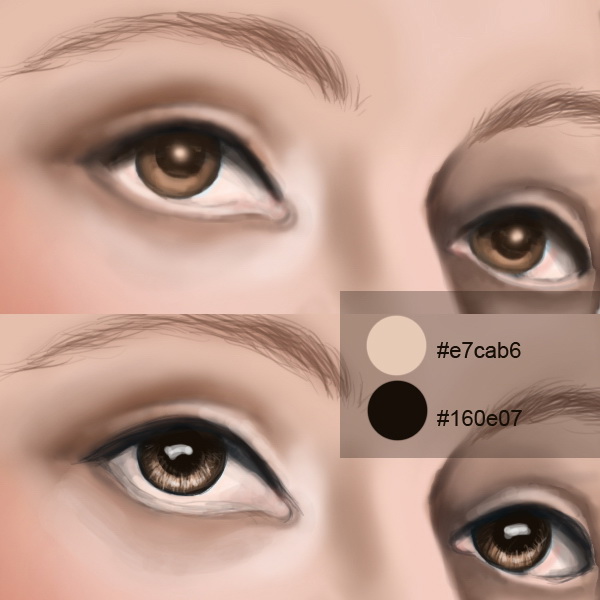
Add a bit of shadow under the lower eyelid and a bit of light in the interior corner of the eye. This will add a bit of depth.
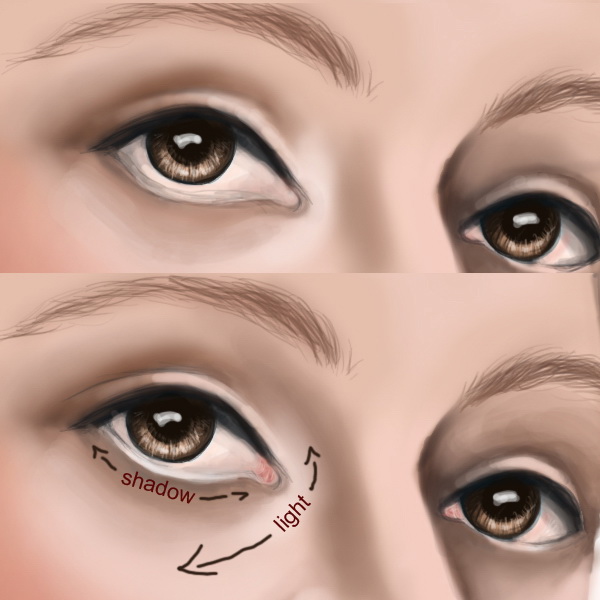
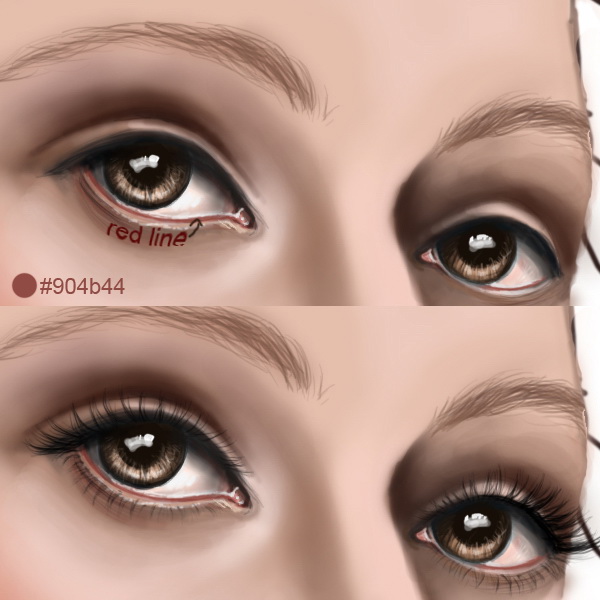
Now let’s mark the pink flesh of the eye. After you paint a line select a whiter color and add some tiny lines in the corners and above the pink line. Create a new layer and add some eyelashes. Use a dark color and the same presets you did for the eyebrows. Look at the image below to see how the eyelashes should look, use a 50-60% opacity for the lower eyelashes.
Let’s improve the eyes a bit by adding some detail. Use the dodge and burn tools to add more depth to the iris and the pupil, and some soft colors to add more light.
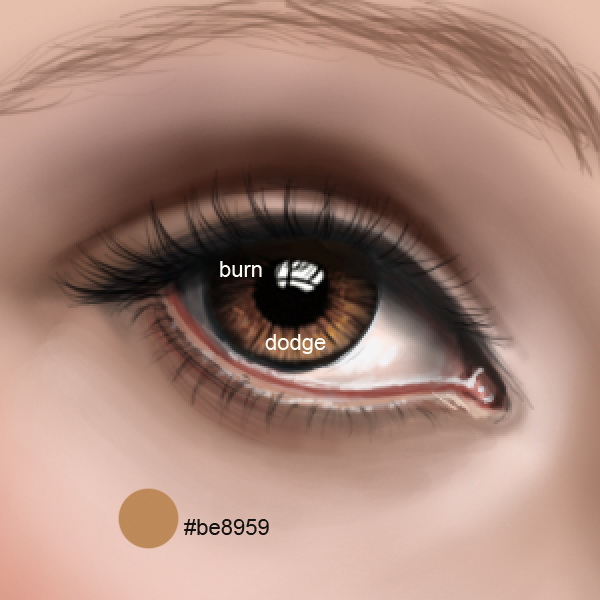
Add a bit of eyeliner to the upper side of the eye. You can also change the color of the eyes by using Hue/Saturation on a clipping mask.
Step 5
Next, let’s paint the lips. This is very easy since we are going to use the same technique as we did on the eyes. Look at the image below to see the lighted areas.
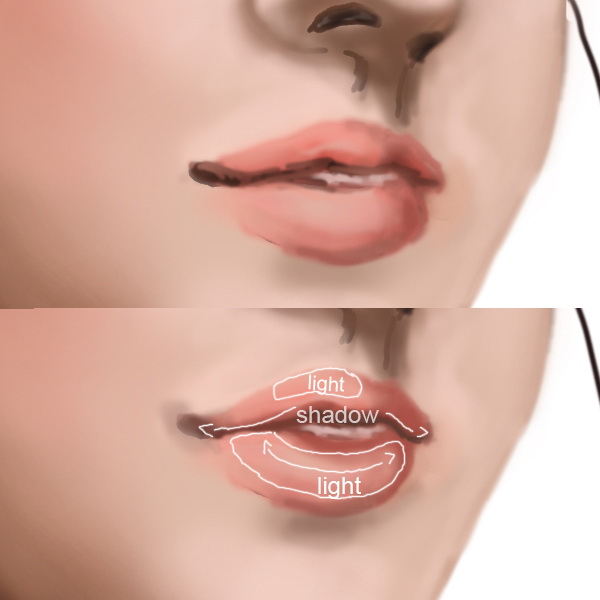
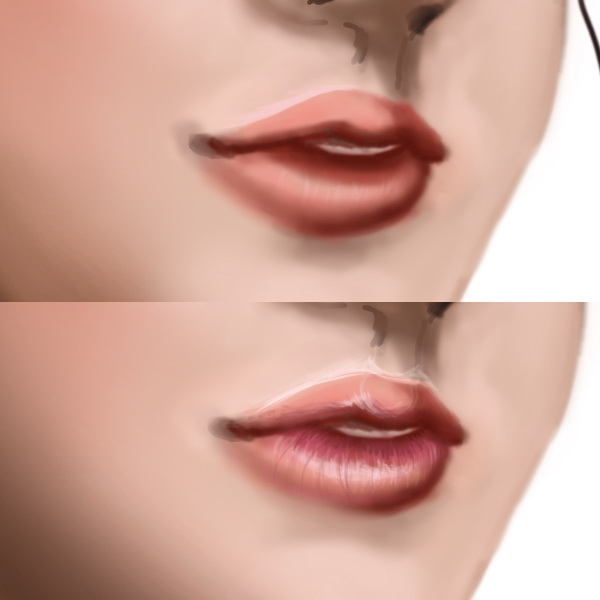
Apply shadows to both edges of the lips. Now with a light pink, start adding some curved lines like you did for the iris. Make the center of the lips lighter than the sides. Change the tones and keep adding lines on the lips. It’s important that in the brush presets panel (F5) the shape dynamics should be checked leaving the default settings.
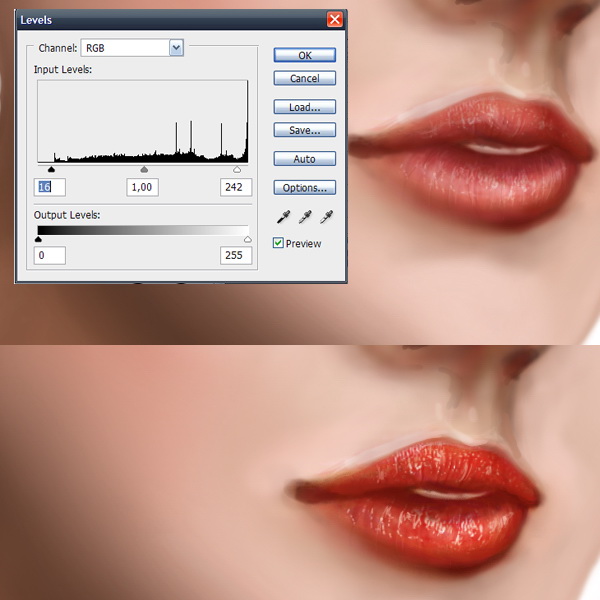
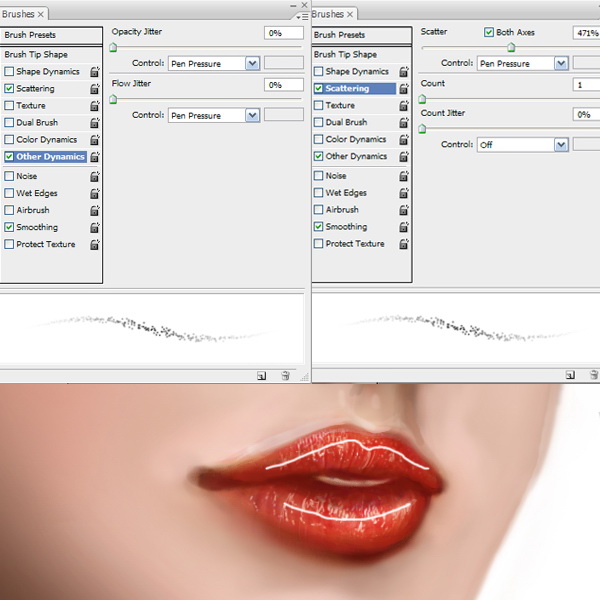
Create a clipping mask (by holding the ALT key) and go to Adjustment Layers > Levels and input the values shown in the image below. You have to change the brush settings in the presets panel for the texturing of the lips. Go to brush presets and check: Scattering (both axes 470%), Other Dynamics (0%) and Smoothing. Choose a light color and run the brush over the highlighted parts (the middle). This creates the impression that she is wearing lip-gloss.
Step 6
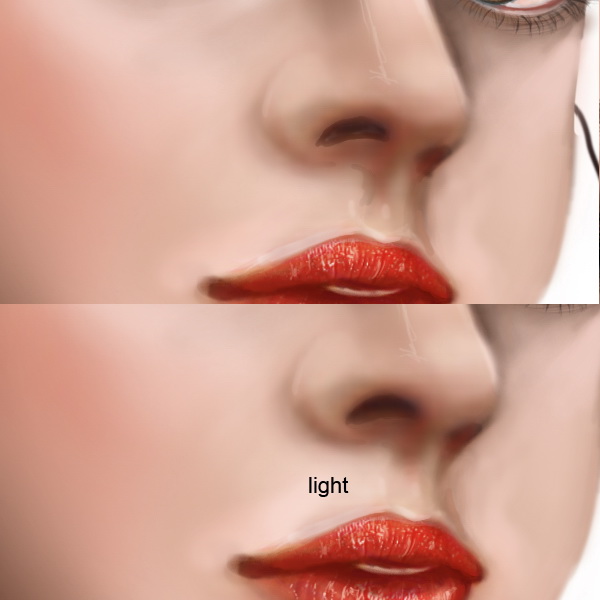
Add some more light near the upper lip.
Step 7
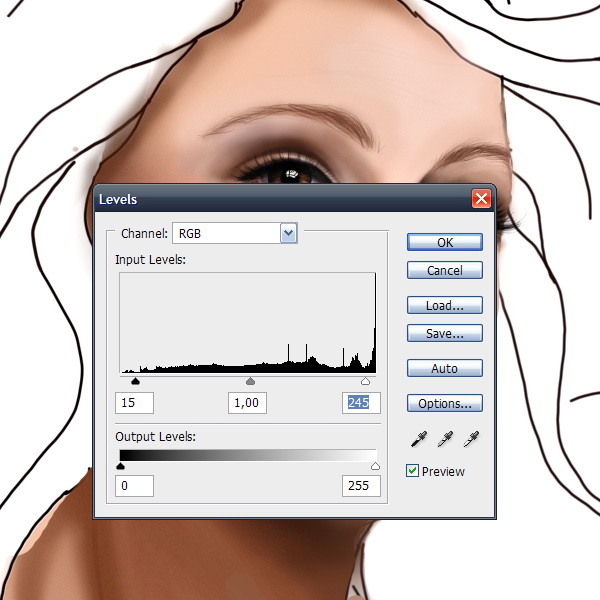
Go to Adjustment Layers > Levels. Use the values in the image below.
Step 8
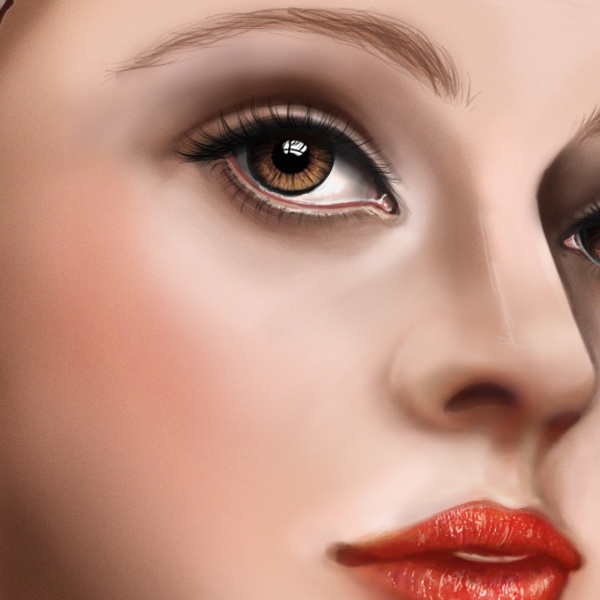
Once you have the base laid down add some detail. Merge all visible layers into the active one (Cmd (Ctrl) + Alt + Shift + E) . Go to Filter > Noise > Add noise (about 7-9 px). Leave the noise on the skin and erase it from the other parts on a mask.
Step 9
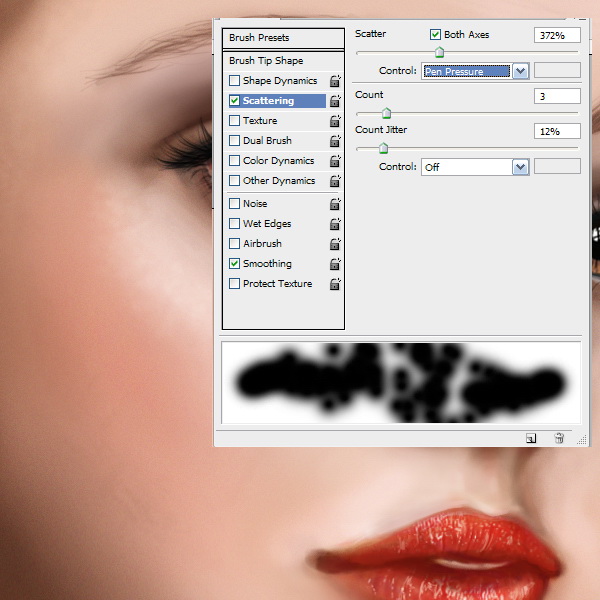
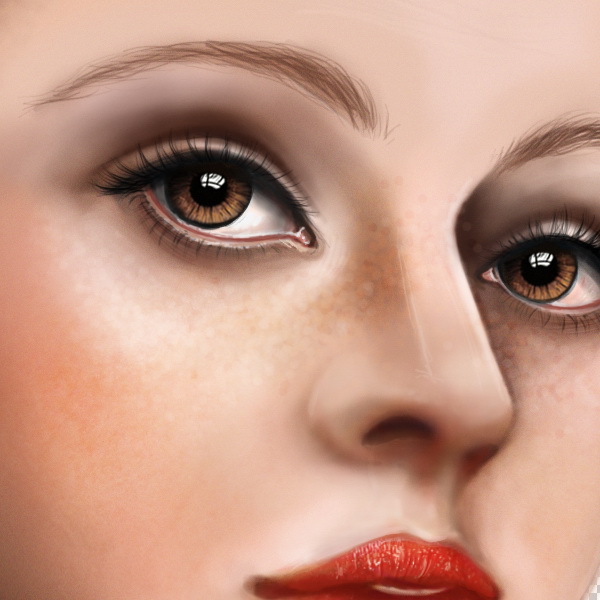
In this step we will add some texture to the skin. First select the brush tool and select the appropriate presets: check the scattering box, scatter about 350%, control: pen pressure, count jitter: 12%. Now select 3 colors: a bright cream, a soft pink and a beige and start adding some freckles on her cheekbones and nose. Set the opacity to about 30 – 40%.
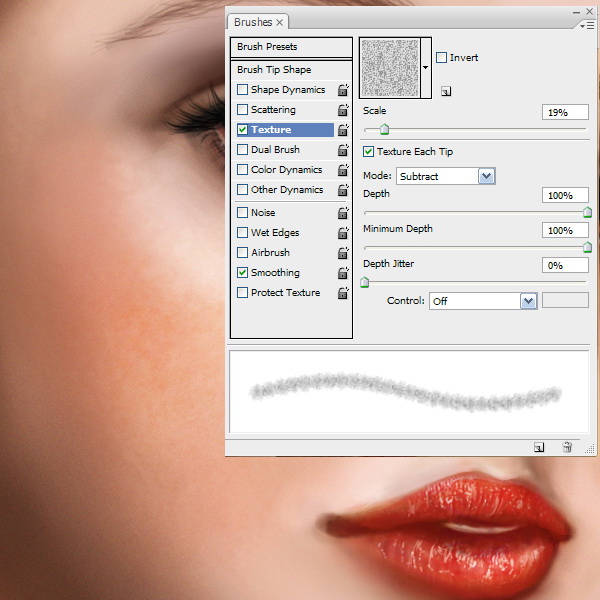
Create a new layer and make some new presets for the brush tool to add more texture. Make sure that the texture box is checked. Select a similar texture as shown below. Again, set the layer’s opacity to about 30%.
Step 10
Our last step is to create her hair. This is not very hard, just select the color you want the hair’s base to be and draw the shape of the hair. The color I’ve used is #d28c6a.
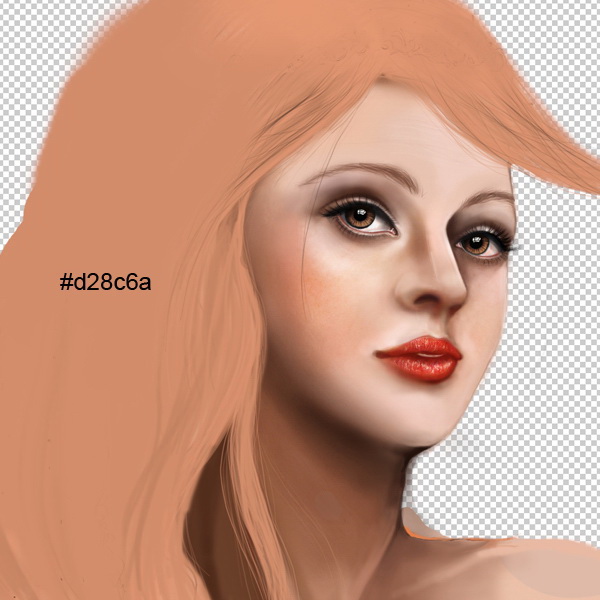
Create a new layer. You have to begin with the thicker hair strands and finish with the thinner ones. Make sure that shape dynamics is checked in the brush presets. This will make the edges more realistic.
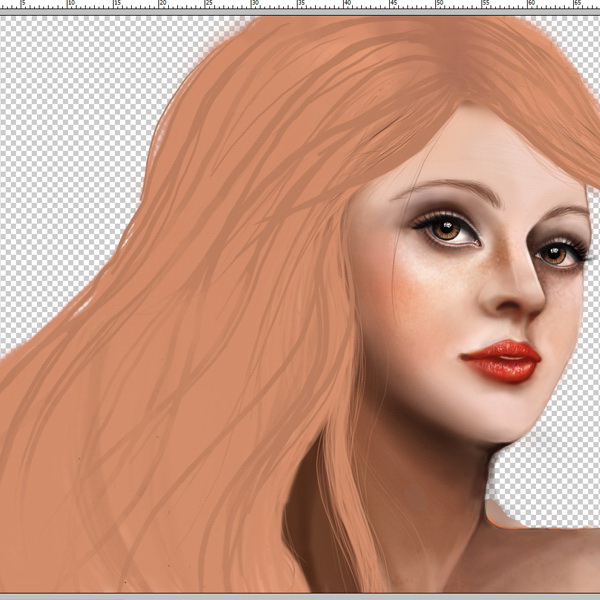
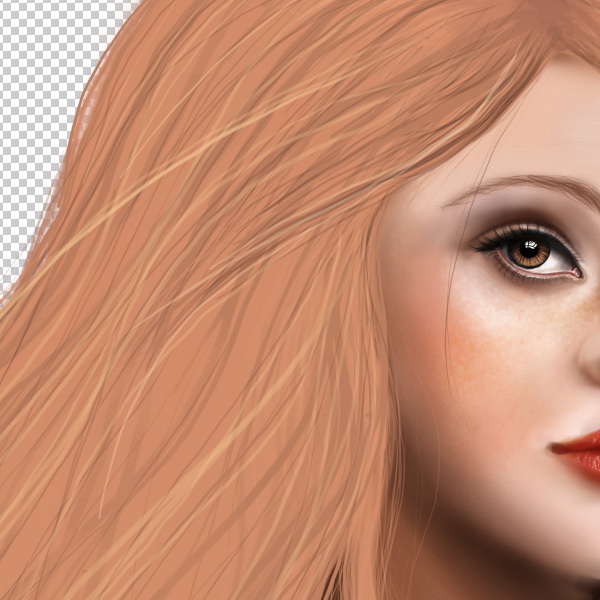
On a new layer, add some more hair strands with different colors. Don’t be afraid to add some crazy colors in the hair, it will look great since this is a fantasy painting. I’ve chosen a soft yellow and set the brush opacity to about 70%.
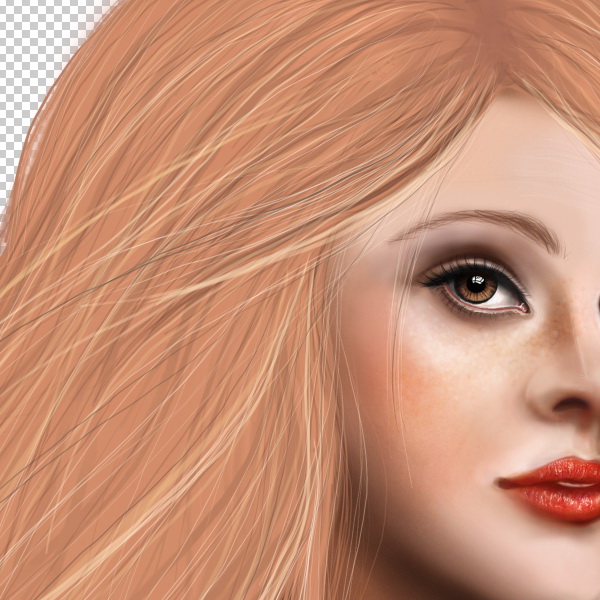
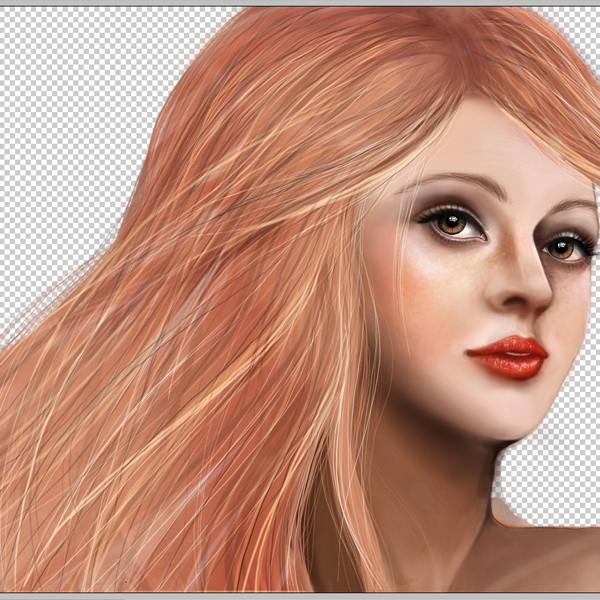
Merge all visible hair layers into one and add some light with the dodge tool and some shadow with the burn tool.
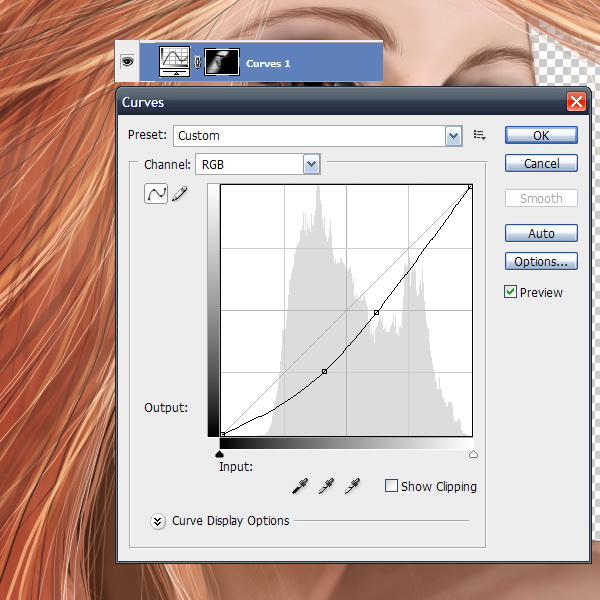
Go to Adjustment Layers > Curves. Use this adjustment only on the hair.
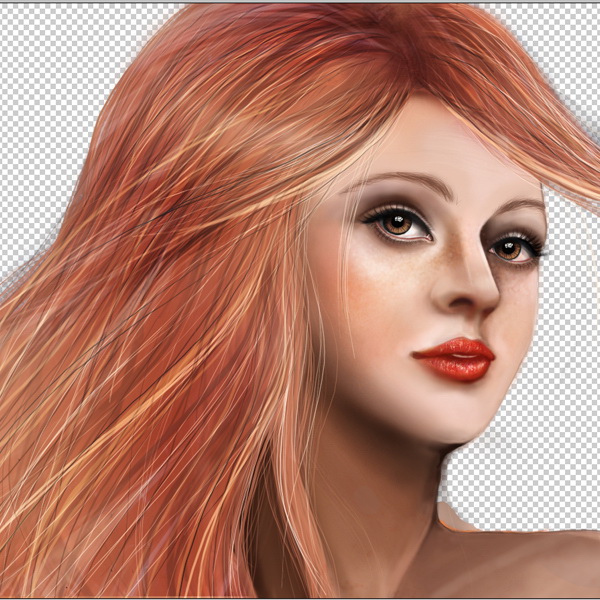
Step 11
Now let’s add a background. Download a texture you like from here. Drag the background to a layer under the portrait.
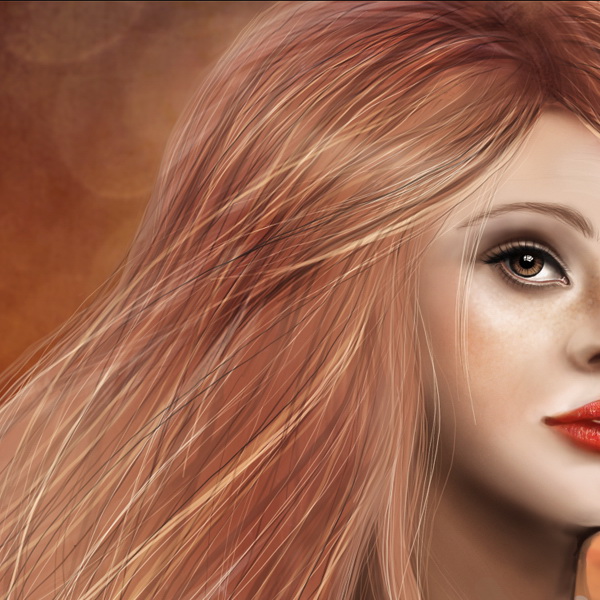
Go to Adjustment Layers > Gradient Fill. Use the settings as shown below. This layer must be above the one with the background. It should not be visible on the portrait. Opacity to 40%.
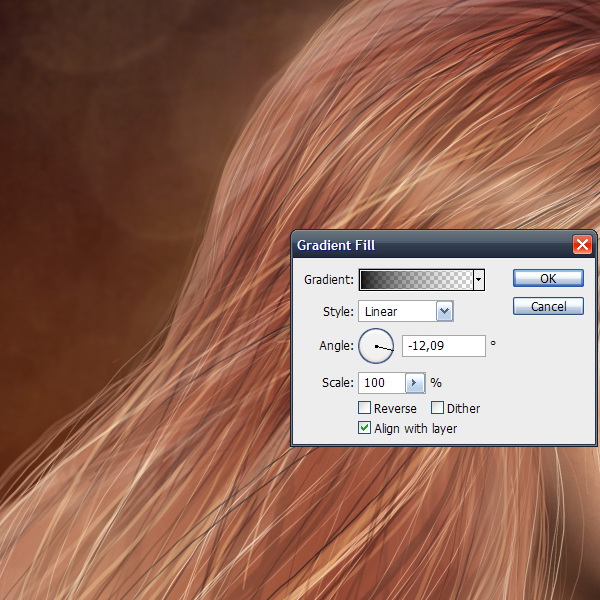
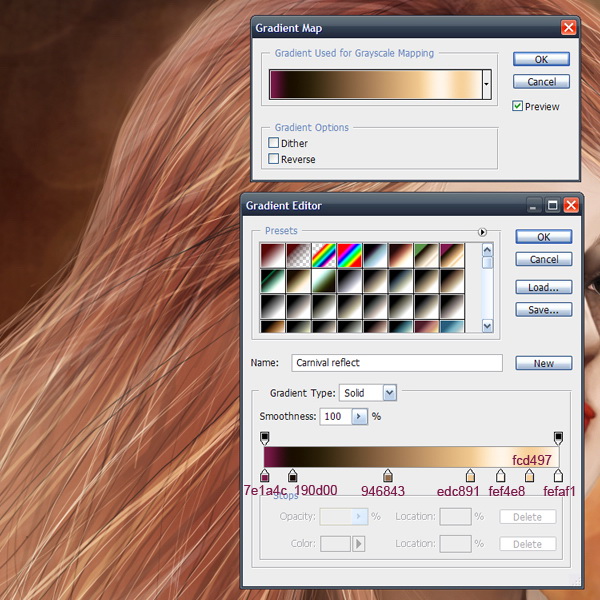
Go to Adjustment Layers > Gradient Map. Use the color codes shown below. Set the opacity to 50%.
Step 12
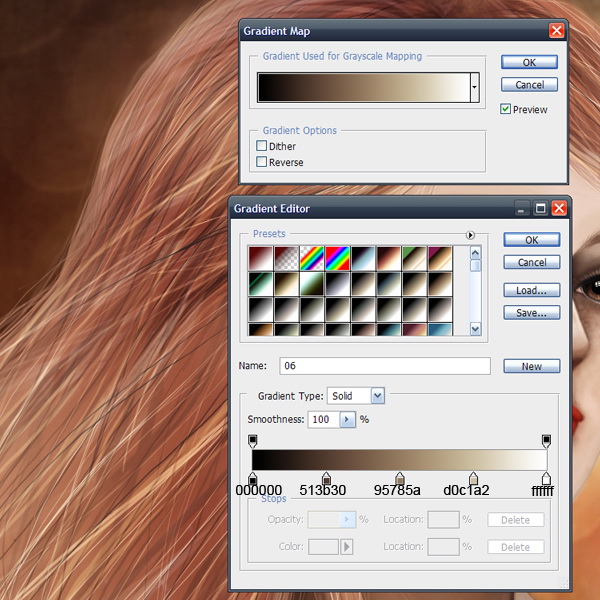
Now, above all layers, go to Adjustment Layers > Gradient Map and apply the settings as shown. Opacity to 30%.
Step 13
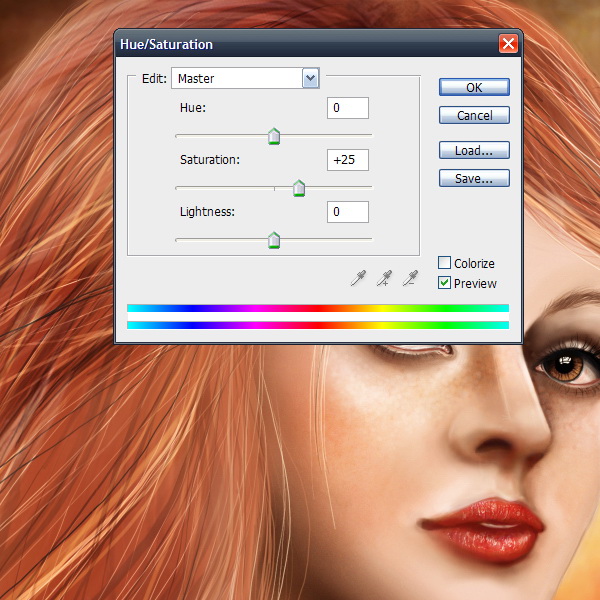
Adjustment Layers > Hue/Saturation. Saturation to +25.
Step 14
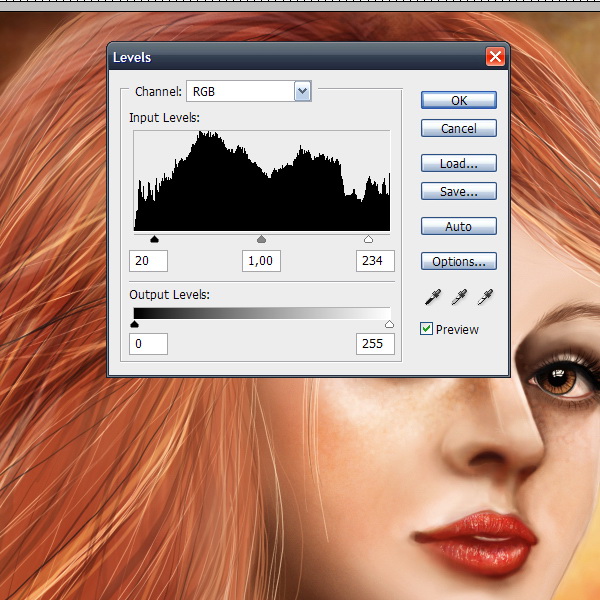
Adjustment Layers > Levels. Use the settings as shown.
Step 15
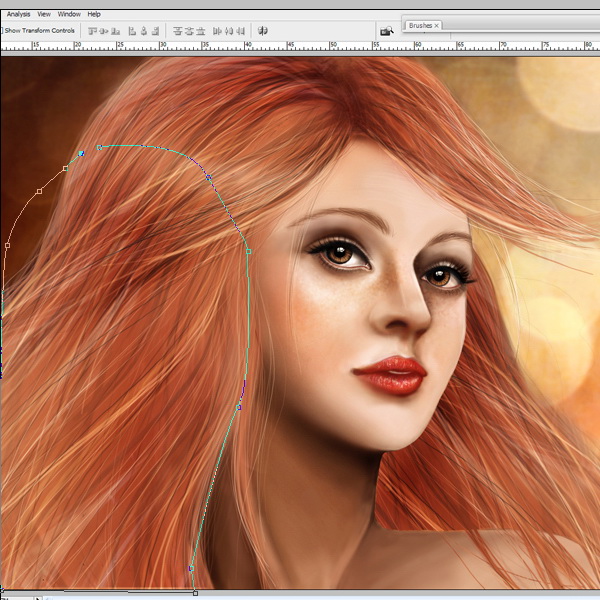
The last part is to add some hair under the face. Select the pen tool and cut out a part of the hair, flip it horizontally and place it under the face on the right side. That’s it! We are done!
Additional Examples
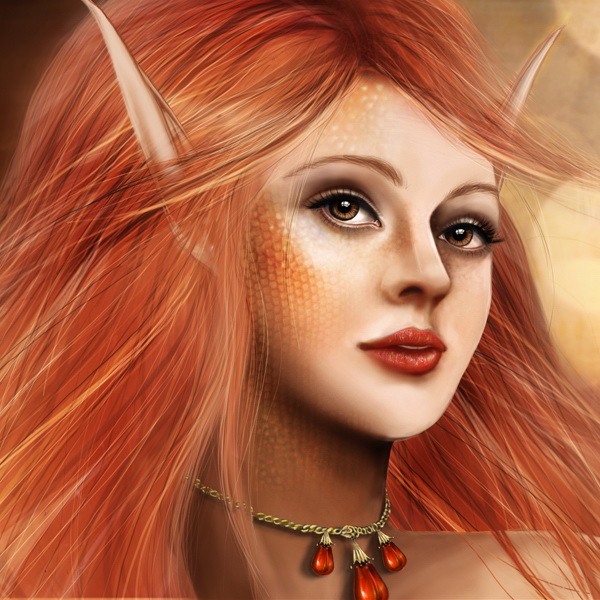
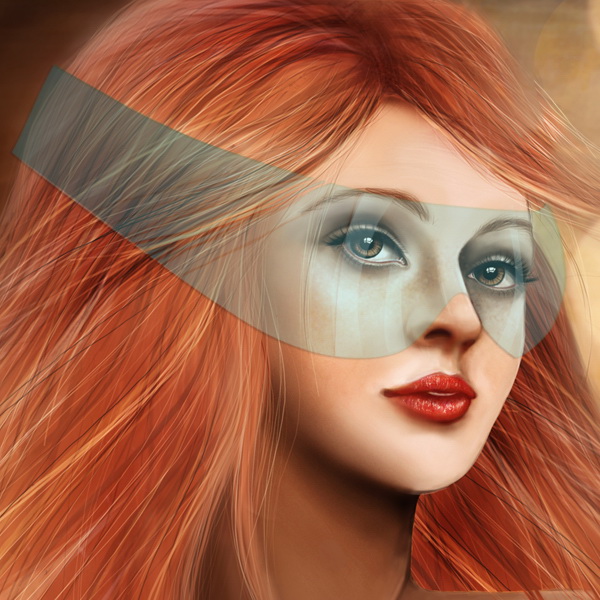
Here are some additional examples; elf ears, a necklace or maybe some futuristic glasses can be added.
Download Wallpaper
You can download this tutorial as a wallpaper for your computer.