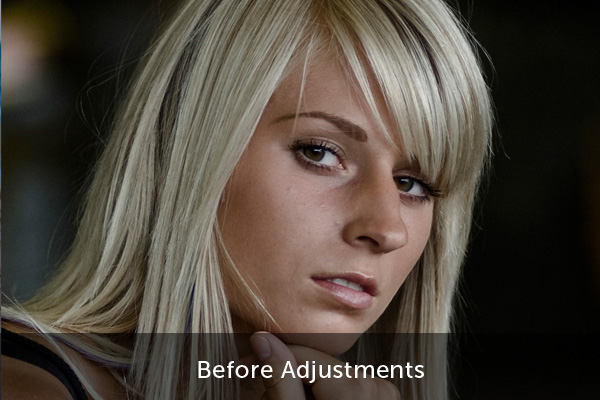
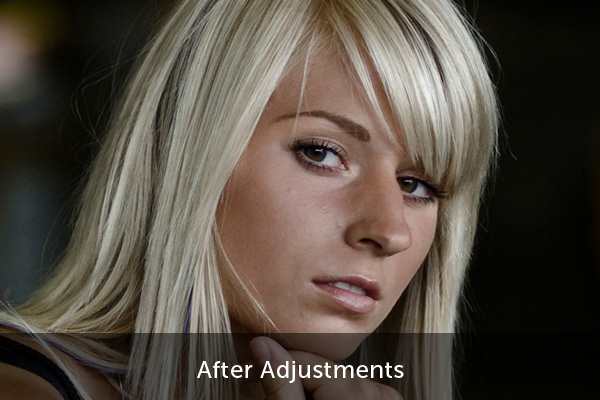
In this video tutorial we will introduce you to the Adjustments Brush and put it to work. This tool can really help to improve certain types of photo, and is great fun to experiment with. You can control exposure, brightness, contrast, saturation, clarity and even color in very specific areas of a photo.
Watch the Video
What Does it Do?
The Adjustment Brush allows you to make subtle or drastic adjustments to a localized area of your photo. Think of it like painting on top of your photo except you can undo anything you change.
Feather: This controls how soft your brush is. The more feather you have the more gradual the edges of your brush will fade out.
Flow: This is how much “paint” is coming out on each pass of the brush. The more you go over the same area the greater the effect added.
Density: Think of this like a maximum cap. Set this to the highest setting that you would like to opacity to get and it will go no higher no matter how many times you go over the same spot.
We’re using another picture from photographer Dusan Simonovic to show how we can add subtle light to the hair and face as well as remove some of the shadow under our model’s eyes.
By just using the exposure setting and different flow and feather sizes on the brush we can add some nice highlight areas to the photo.


A word of reminder – while the brush can be very fun to play around with, don’t go overboard. Too many or too drastic of an adjustment can make the photo look horrible. Take it easy and go light on the adjustments. You can always start off strong and pull back the effect if you feel that it’s gone too far!