In this tutorial we will be creating a waterfall inside of After Effects. We will use Trapcode Particular to fake the water effect by playing with the size, opacity, and shading settings. Along the way you’ll get some tips on how to make the effect as realistic as possible.
Step 1
Create a new Composition.

Step 2
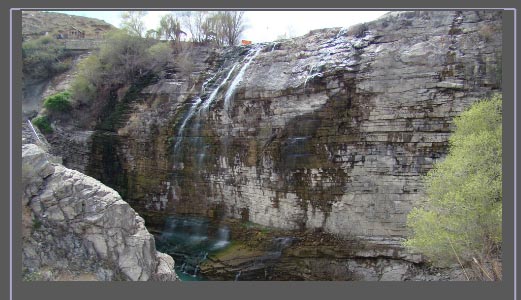
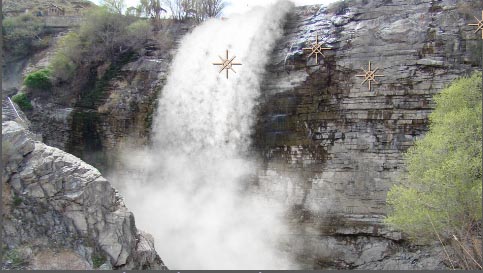
Insert your image or video. In this case I am using a still image, which you can download from the source files attached to this tutorial.
Step 3
Insert the image that you will use as a Particle Sprite. I’ve provided an example you can use in the source files.

Step 4
Pre-compose it.

Step 5
Apply the Tint effect to the asset.


Step 6
Make a new Solid.

Step 7
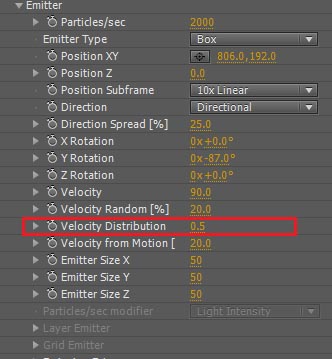
Apply Trapcode Particular on the new Solid and use the following Emitter settings.

As you can see, I have used a little rotation on the Y axis. That is because the picture is a little tilted and we need to match the direction of the waterfall according to it. Your settings may differ depending upon your scene.
Step 8
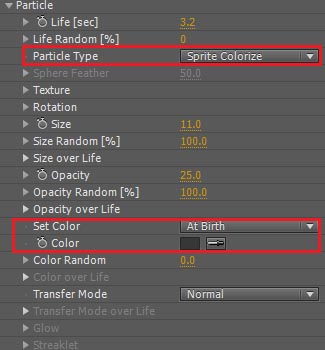
Use the following settings for Particle and Physics.


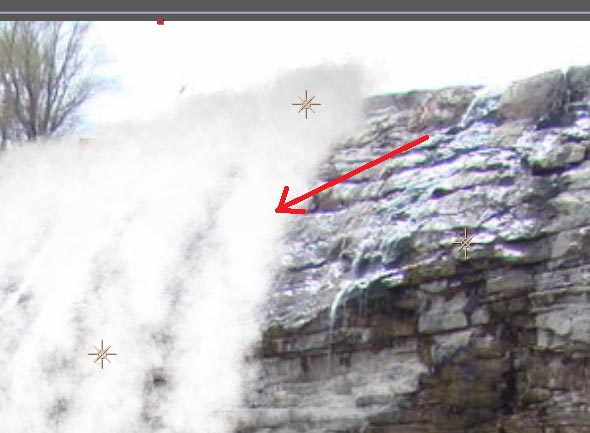
Step 9
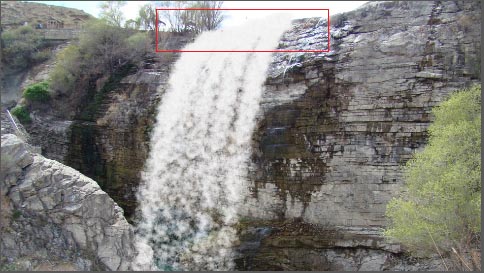
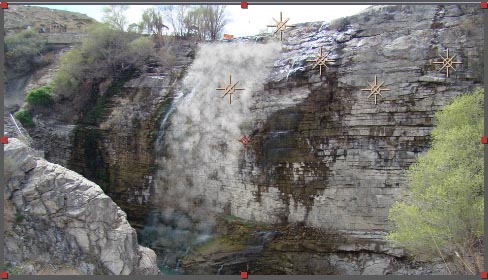
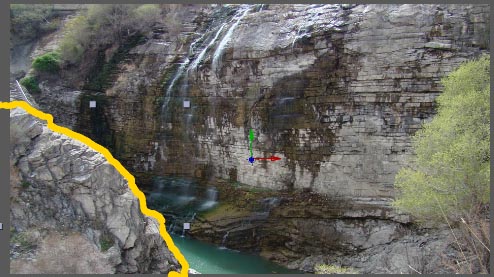
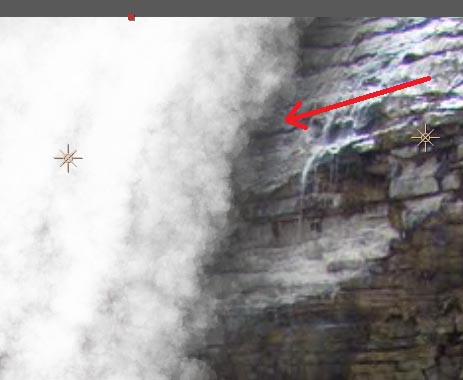
Make the edge of the mountain as your point of Emitter and you should see this result.

Step 10
Now make a few copies of the Particular layer.

Step 11
Change the Velocity Distribution settings slightly for all of these Particular settings or change any other setting slightly to give it randomness.
Step 12
Change the Emitter position of each of the Particular layers to make a wider range of waterfall.
Step 13
Now enable the Shading options in Particular.

This will allow your particles to be affected by the Light Source. They will go black unless we put some light in the scene.

Step 14
Make an Ambient Light.

Step 15
Now make a Point Light and copy it a few times to put them in different places.

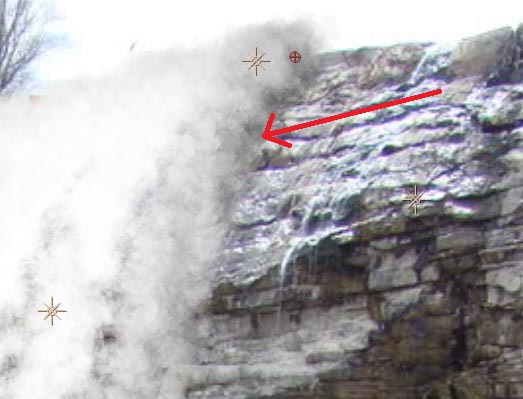
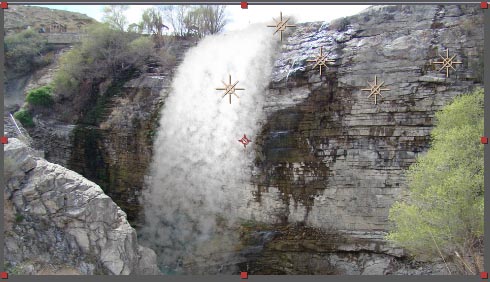
Once you have adjusted the lights according to your needs, you should see something like this.

You can see the top part of the waterfall is reflecting some light which we wanted to fake because the light source is coming from the sky.
It took me about a half hour to test and place the lights in proper places to get the desired look. You should also experiment as per your requirements.
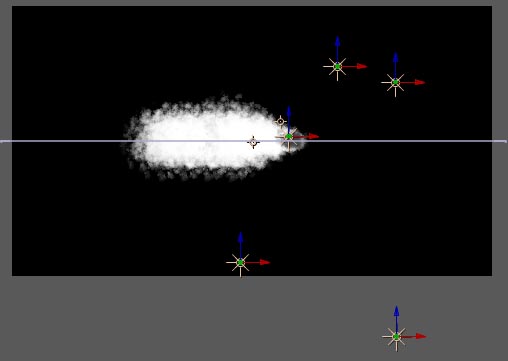
Lets have a top view look at the lights and particles.
Step 16
You can see here that the particles are absolutely diffused. Naturally the inner side of the water should be a little darker.
For this we enable the Shadowlet for Main option.
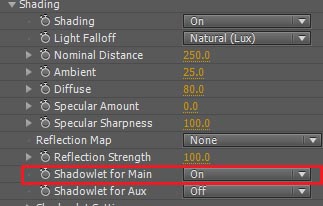
Now you can see the inner water is a little darker. Make sure to enable Shadowlet for Main for only the first Particular layer, not for all of them.
Step 17
The overall water effect is looking a bit thin. We need to make it denser. For this, make another copy of the Particular layer and change the following settings.

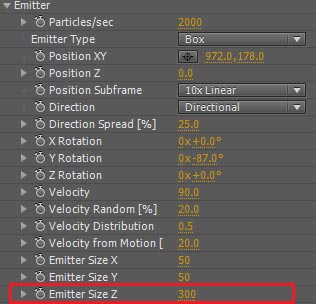

Since we increased the Z size, we will see a wider range of water.
Step 18
Put this Particular layer under all the other Particular layers.
Now the water looks a little denser than before.
Step 20
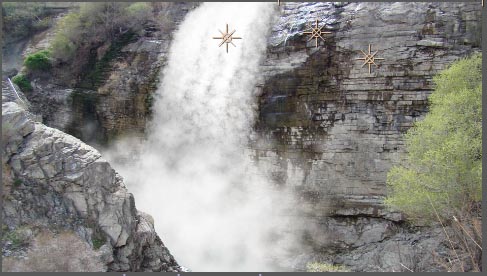
To make the fog effect, create a new Particular layer and use the following settings.


The main thing to remember about this is to adjust the Opacity over Life setting, otherwise you would just see random particles popping in and out of the scene. Put the Emitter Position at the bottom of the scene where you want to fake your water hitting the ground.
Step 21
Duplicate this fog layer and change the Emitter Position to give it more width.

Step 22
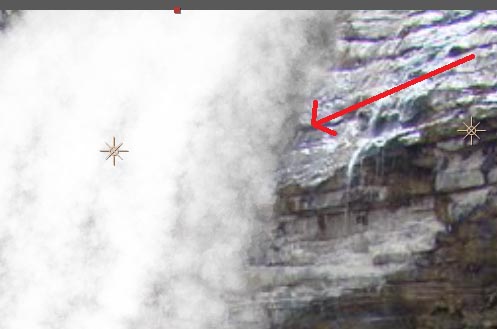
As you can see, the fog is overlapping the mountains in the foreground. To avoid this, make a copy of the BG image.

Step 23
Make a mask on the mountain.
You can also use the Roto Brush Tool.

Step 24
Put this masked layer on top of everything.

Now the mountain will be in front of the fog and the waterfall.
Step 25
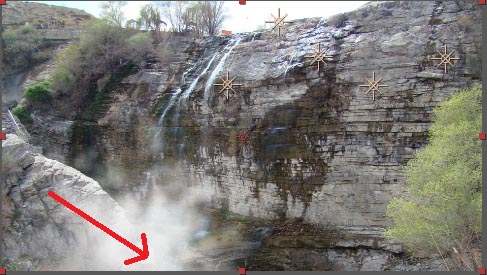
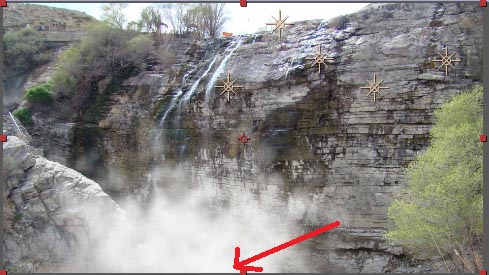
One thing you won’t see in the preview video is that there is no shadow of water on the rocks.
To solve this issue, make a copy of the first Particular layer and change the following settings.
Apply a Fast Blur effect to the layer.

Put this under all of the Particular layers and slightly change the Emitter Position towards the right side. You should see something like this.
Conclusion
In this tutorial, you have learned how to make a realistic waterfall effect with the help of Trapcode Particular. We achieved this look by playing with the particle settings which included the Size, Opacity, and Shading Options. If you have any questions or suggestions, please feel free to leave a comment below. I hope you learned something useful in this tutorial.
{excerpt}
Read More