Have you ever wanted to cut a kick drum out of a loop but found it difficult to do so without bringing the other instruments with it? Even if you’re dealing with loops that are drums-only, the vast majority of the kicks in these loops have cymbals and hats playing at the same time. But there are ways to extract the kicks cleanly, without the hats and cymbals. This tutorial will demonstrate three surprisingly effective techniques, useful for three different situations ranging from simple to difficult.
Technique 1: EQ Automation
Some of the best kicks that come with FL Studio, and in sample packs, are in loops. They are buried under hat and crash sounds, but we can dig them out using the tools of EQ automation, Slicex’s undo envelope, and Edison’s denoiser.
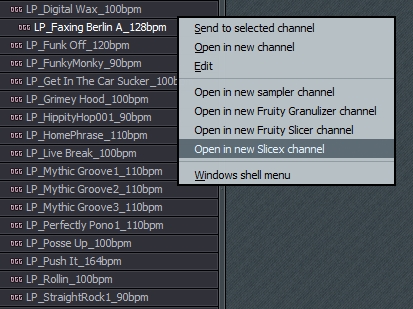
To begin, we’ll start with the simplest method, EQ automation. If you’re following along in FL Studio, navigate to the royalty-free Packs > Loops > Drums folder in the Browser and load up the loop named LP_Faxing Berlin A_128. Right click on the sample’s name and select Open in new Slicex Channel.
Download audio file (01atcleaning.mp3)
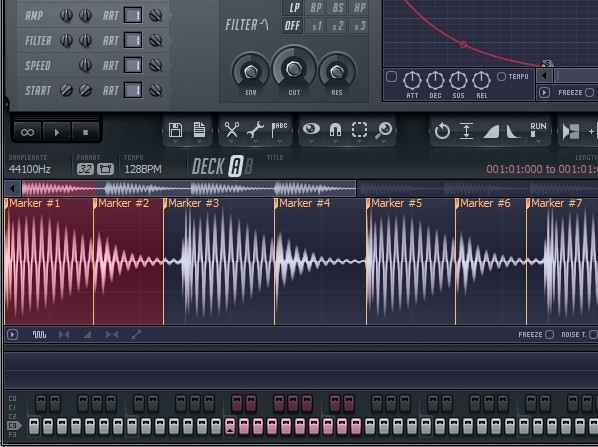
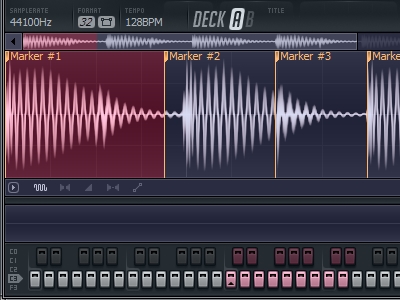
Sampling this kick will be easier than in most situations, because for the most part we can hear the kick alone. I played the loop at a tempo slower than its original to show that the kick’s tail is interrupted by the hi-hat. You can also see it visually in Slicex.
Our goal is to extract this kick cleanly for use in other songs, and we have a few options. To avoid having the hat in the sound, we could just use the kick without the tail, but that would make it have an unpleasant, abrupt ending.
Download audio file (02atcleaning.mp3)
Or, we could use the whole sound. Then we’d have a kick with a hi-hat sound on the end of it, which is not very useful, but at least it would have a more natural ending. To see what this sounds like, go ahead and delete Marker 2 so that the first marker will also include the kick’s tail and hi-hat. This will bring us a step closer.
Download audio file (03atcleaning.mp3)
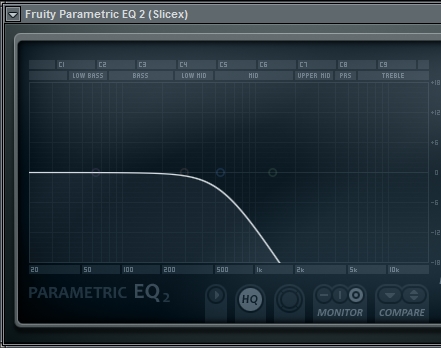
Now, we could try to filter out the hat with EQ, but then we’d lose the punchy, high attack of the kick.
Download audio file (04atcleaning.mp3)
This is brings us a step closer, but it puts us in a tough compromise. If we want more clarity in our kick sound, we’ll have to hear more of the hat, and if we eliminate the hat, we’ll be left with only the sub-bass of the kick. This is where automation comes in. We can automate the frequency of our low-pass EQ so that it stays up during the attack of the kick and then dives quickly at the end to eliminate the hat. This will enable to us to have the punchy attack and low release of the kick sound, with no hat.
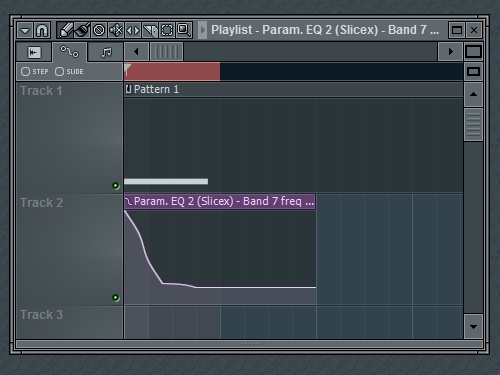
Download audio file (05atcleaning.mp3)
Now you have a useful, fully intact kick drum sound that you can render for use in your own songs. You may want to save this project file because this set-up will come in handy more often than you might think.
Technique 2: Slicex Undo Envelope
Unlike the other techniques in this tutorial, this technique seems to work even in extreme situations, but it is the most technical. In order to demonstrate this, let’s try for something a little more challenging. Load the drum loop Power Break into a new Slicex plugin. (I recommend using FL’s Smart Find feature, CTRL+F.)
Download audio file (06atcleaning.mp3)
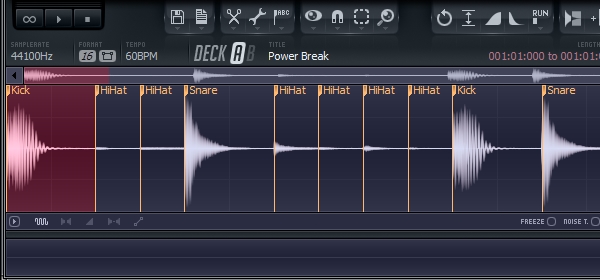
I want to save this kick, but it has a cymbal that plays at the same time throughout the whole sound.
Download audio file (07atcleaning.mp3)
This means that previous technique won’t work well, here is what it would sound like:
Download audio file (08atcleaning.mp3)
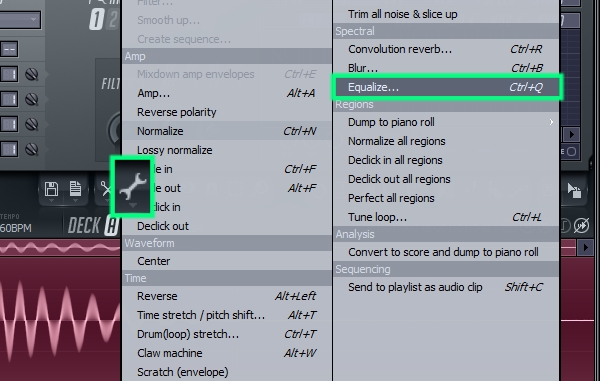
That actually could be a good sound in its own right, but it doesn’t achieve the goal of removing the kick as transparently as possible. To do this, we’ll combine Slicex’s internal EQ and the Undo Envelope feature to surgically remove the cymbal. So let’s delete everything except the first kick, and then select Equalize from Slicex’s Tools menu (wrench icon). You may also want to clone this instance of Slicex so that you’ll have a backup copy–we’ll be doing some heavy editing.
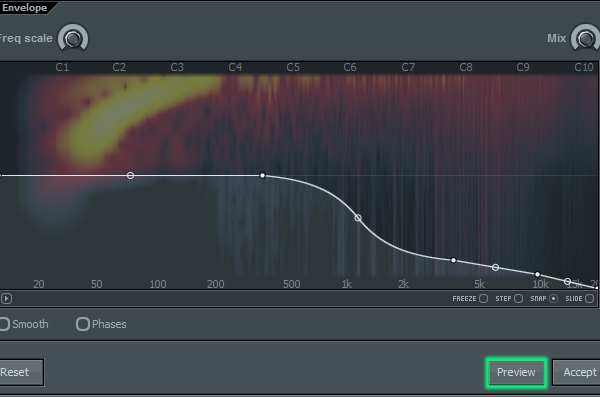
Next, try out equalization curves and use the preview button to hear how it affects the sound. It’s all about trying to find that difficult middle ground between the cymbal and the kick’s attack. Keep too much of the highs, and you keep the cymbal, but if you completely lose the highs, you lose the kick’s attack. In the next step we’ll reclaim the kick’s attack so you can remove more of the highs than you’re used to. Also, feel free to be creative and shape the EQ according to the sound you’re looking for.
Download audio file (09atcleaning.mp3)
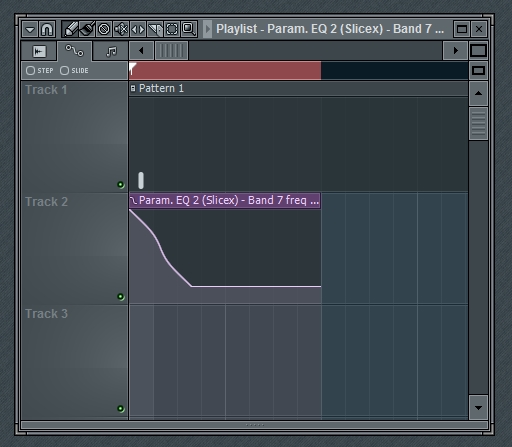
Now let’s create an envelope to reclaim our kick’s attack. Click on the all purpose envelope icon and draw something like the picture below. You won’t hear an audible difference yet, but in the next step we’ll tell Slicex to undo the equalization in proportion to the envelope. Where the envelope is high, we’ll end up with the before EQ sound. Where the envelope is low, we’ll end up with the after EQ sound, and where the envelope is in the middle, we’ll have a mix of the before and after.
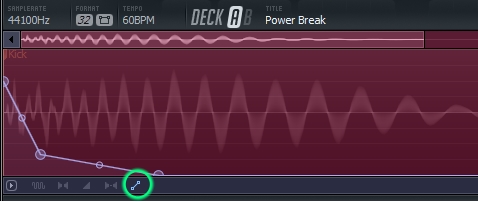
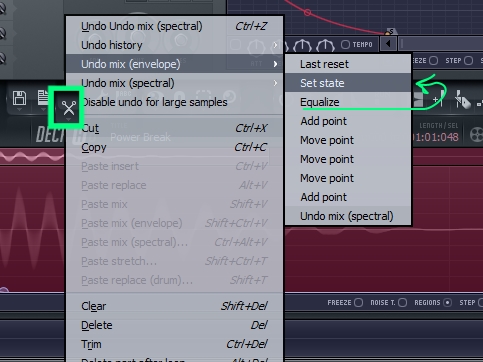
On Slicex’s GUI, select Edit (scissors icon) > Undo Mix (envelope) > and click not on Equalize, but on the step listed just above it. Now we have reclaimed our attack without introducing a sweeping filter sound.
Download audio file (10atcleaning.mp3)
If you listen closely, with headphones, to the tail of the kick, you can still hear some of the cymbal’s ring in the background, so I’m going to use Technique 1 to finish off that noise. To save time I’m going to route it to the mixer track I used in Technique 1, and I’ll make a slight adjustment to the automation timing. I made the filter take longer to move down, in order to retain the mid-range crunch of this kick.
Download audio file (11atcleaning.mp3)
Technique 3: Noise Profiles with Edison
This third technique is useful in situations when you are trying to cut a kick out of a loop that has a cymbal on it, but that cymbal also plays alone somewhere else in the loop. What we’ll do is tell Edison that the cymbal is noise and then we’ll have Edison denoise the kick.
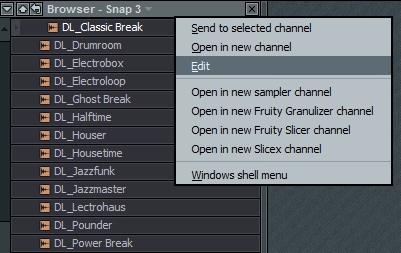
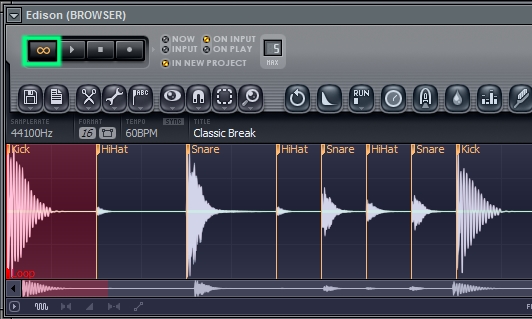
Load the drum loop Classic Break. As a shortcut, right-click on the file name and select edit. This will open the file in an instance of Edison, on the Browser Mixer Track.
Download audio file (12atcleaning.mp3)
Press the loop button and use the right and left arrow keys to switch between playing the different slices in the loop. The kick has a hi-hat on it, and we’re looking to see if a similar hi-hat plays on its own anywhere else in the loop.
It appears that the third solo hi-hat may be the closest. At first listen, it sounds like the third hi-hat is higher than the hat that plays with the kick, but we need to listen more closely. By A-B’ing the sounds and trying to filter out the kick (for comparing purposes) as we listen, we can hear that they are similar, perhaps the same.
Download audio file (13atcleaning.mp3)
If it sounds close, it’s close enough. Select the third solo hat and go to Tools > acquire noise profile, or use the keyboard shortcut ALT + U.
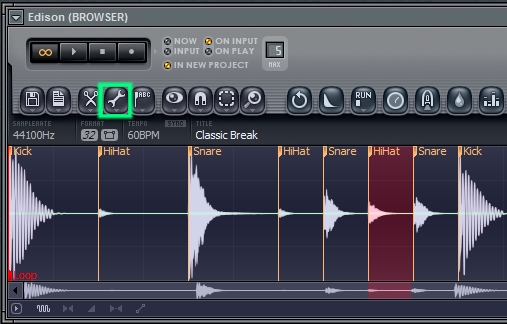
Next, select the first kick, and go to Tools > Clean up (denoise), or use keyboard shortcut CTRL + U. I wanted Edison to pay more attention the highs so I boosted them a little, which resulted in more metallic sizzle being removed.
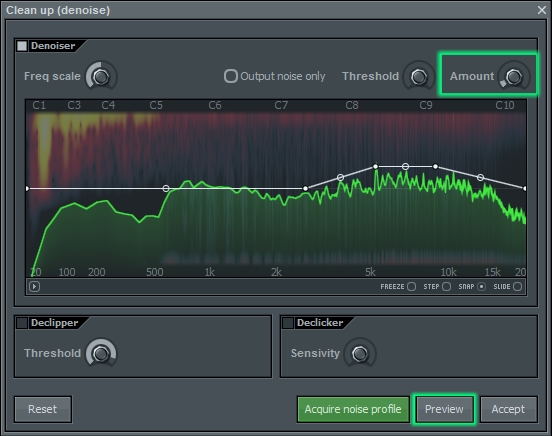
You may want to adjust the amount knob differently than I. With more amount, more frequencies from the hat get removed, but there are many frequencies that the hat and the kick have in common. So we find ourselves with same old question, “how much of the kick are you willing to give up in order to get rid of the hat?” Use the preview button to find your answer, and then hit the accept button once you’re satisfied with the results. The audio file below plays my settings for a bar, then plays the “before” for a bar, then plays the “after” again.
Download audio file (14atcleaning.mp3)
There we go! We removed the nasty metallic sound. As with the previous examples, we could remove some of the ultra-highs before saving the sound, but I find that in most cases, it’s better to wait until I’m working on a song to bring out the static EQ. This way, I can tailor the EQ to each song project and reuse the kick without having it sound exactly the same in each track. This is also why I’m choosing not to compress this kick for now.
That demonstrates our last method for this tutorial. In summary, we rescued three kicks from a variety of situations. We used EQ automation to get the Faxing Berlin kick, Slicex’s undo envelope to get the Power Break kick, and Edison’s denoiser to get the Classic Break kick. There are many other kicks out there, perhaps sitting in your loops folder, waiting to be extracted, and now you have a way to do it! I encourage you to explore the possibilities inside of FL Studio’s powerful, high-fidelity tools.
Final Tips
- Mix and match techiques. Each method colors the sound a certain way. If you want to prevent the coloring and preserve the original kick sound, it’s better to use a few techniques gently rather than try to use one technique dramatically.
- In Technique 2, I suggested cloning the Slicex plugin. I recommend doing this so that you can try out different EQ shapes and undo envelopes and compare them. It takes awhile to get a hang of it, and comparison will help show you the effects of different settings.
- Sometimes, dirty is better. Sometimes the noise, cymbals, and hats work as a part of the drum sound and it’s better to leave it. But, if you are able to extract a solid kick cleanly, you can reuse that kick many times, maybe by adding your own custom dirt to it in each track.