It’s hard to go past the benefits of vector illustration for use in printing. Editable scale, color and composition put vector ahead of traditional illustration but it can’t compare to the style of hand drawn images. In this tutorial we will learn how to easily take a pen and pencil sketch and turn it into a vector illustration without losing the aesthetic of a hand rendered image.
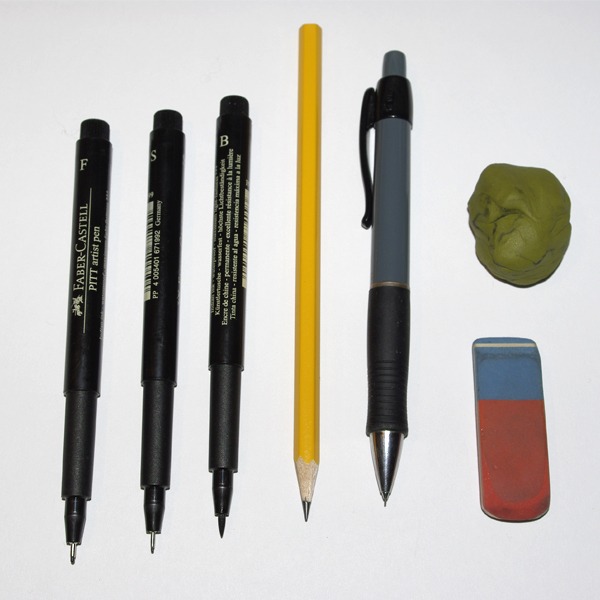
Drawing materials and tools you need:
- Thick drawing paper with smooth matt surface
- Pencils – B & 2B
- Fine-liner pens with 0.1 – 0.2 mm line width
- Eraser, preferably kneadable style
- Scanner
Step 1
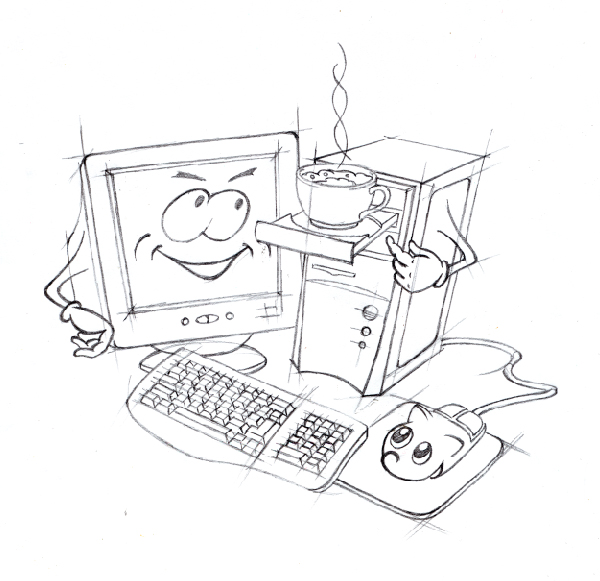
Begin your pencil sketch on thick paper. The drawing doesn’t have to look perfect; it is just a starting point for our further work. Try to avoid using the eraser too much at this stage – it can ruin your paper. The drawing should not be too small; otherwise it will be inconvenient to work with it. The width of the drawing covered in this tutorial is about 7 inches.
Step 2
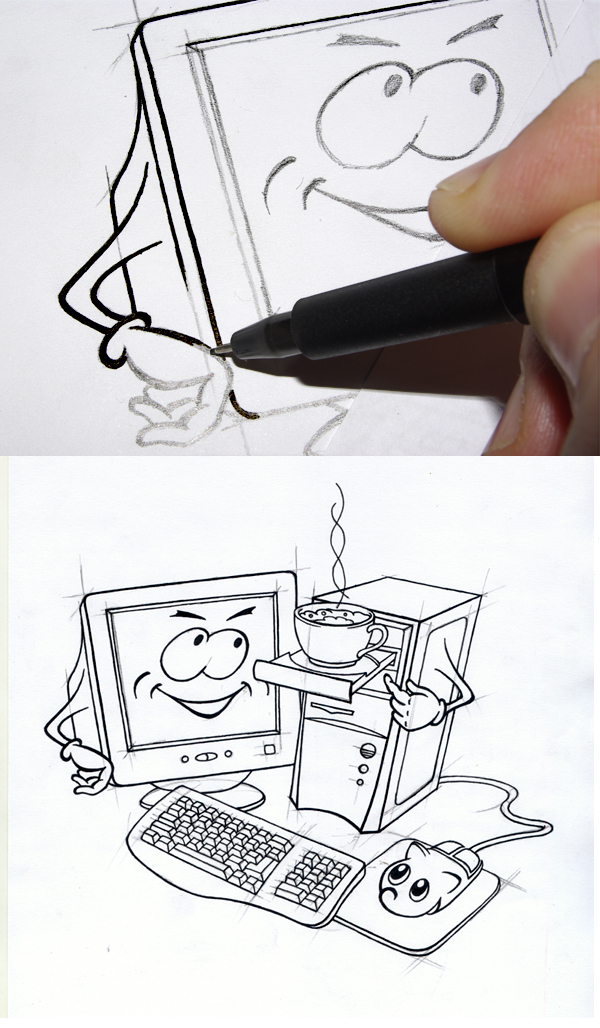
Draw through the outline of the pencil sketch with the Fine-liner. Remember that the line width allows to reproduce dimensions of the objects. The outlines that are closer to the viewer are outlined with wider lines. Make sure that all the outlines are closed – it will further simplify the work of coloring the vector image. When you work with Fine-liner put a clean sheet of white paper under your hand in order not to accidentally smudge your pencil drawing.
Step 3
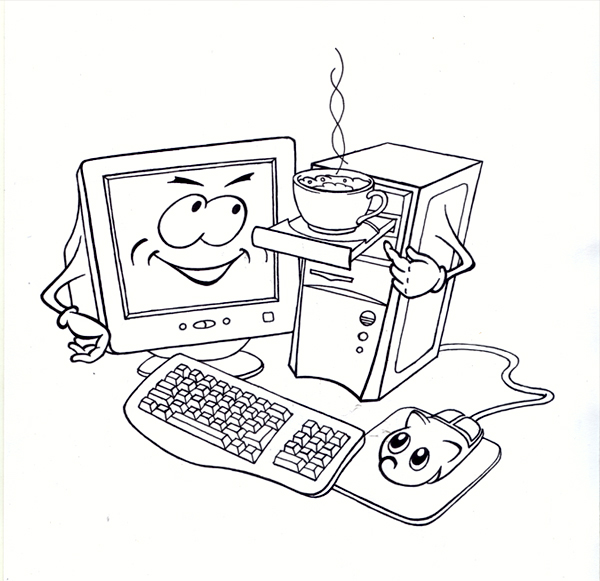
Carefully erase all the pencil lines from the surface of the paper. First remove as much of the pencil as possible with a kneadable eraser. It’s less likely damage the paper; moreover it doesn’t leave such eraser residue that may smear a drawing while being removed. Use a regular eraser for the pencil lines that failed to be removed. Now your drawing is ready for scanning.
Step 4
Place the image in the scanner and start up Photoshop. Click on File> Import> in the open tab select the installed scanner. Scan with the resolution 600 dpi in Grayscale mode. Name the image Coffee and save it as TIFF file (coffee.tiff). TIFF stores uncompressed data without losing quality, and unlike the PSD it is more widely supported.
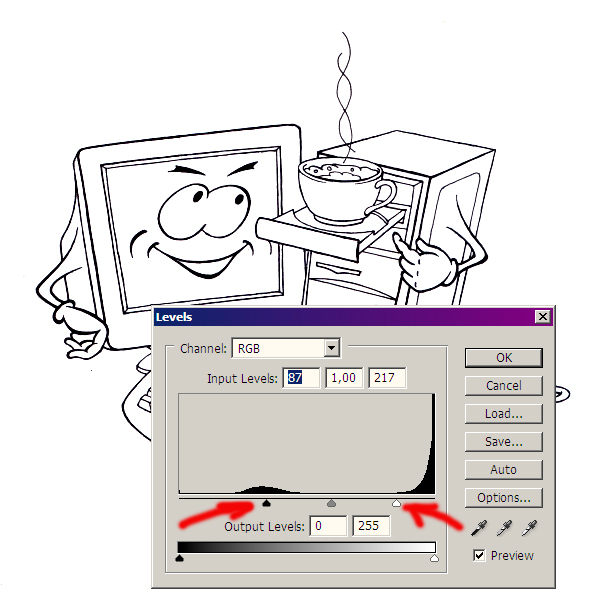
Now remove all the unnecessary shades, leave only Pure Black and Pure White. Go to Image> Adjustments> Levels. You will see a histogram of our image. The horizontal axis represents the brightness of image points, while the vertical axis represents the number of brightness points. In our case the histogram has two splashes – the right one corresponds to a white background, while the lower left one corresponds to the black lines of the image. Move the right arrow towards the beginning of the right splash. This is how we get rid of the light grey shades on a white background, making it pure white over the entire surface. Move the left arrow in the middle of the left splash. This is how we turn dark-grey shades of the drawing into pure black lines. Click "OK". Now our image contains only a black drawing on a pure white background with no shades of grey. Save the file.
Step 5
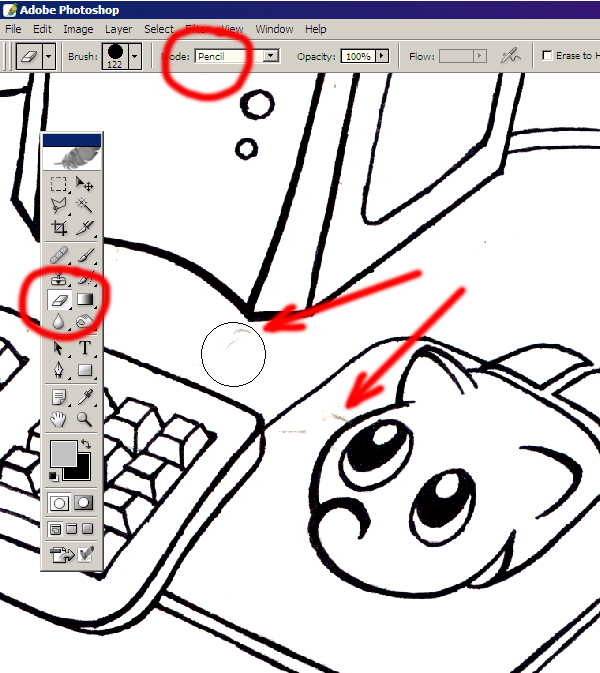
The surface of the paper can never be perfectly smooth, so the scanned image has sometimes small dark spots, not visible on the image on paper in regular lighting. Let’s see the enlarged scanned image. Remove the spots this time with the electronic eraser if they appear while scanning. Select the Eraser Tool and chose the Pencil option. After the spots are removed the image is ready for tracing.
Step 6
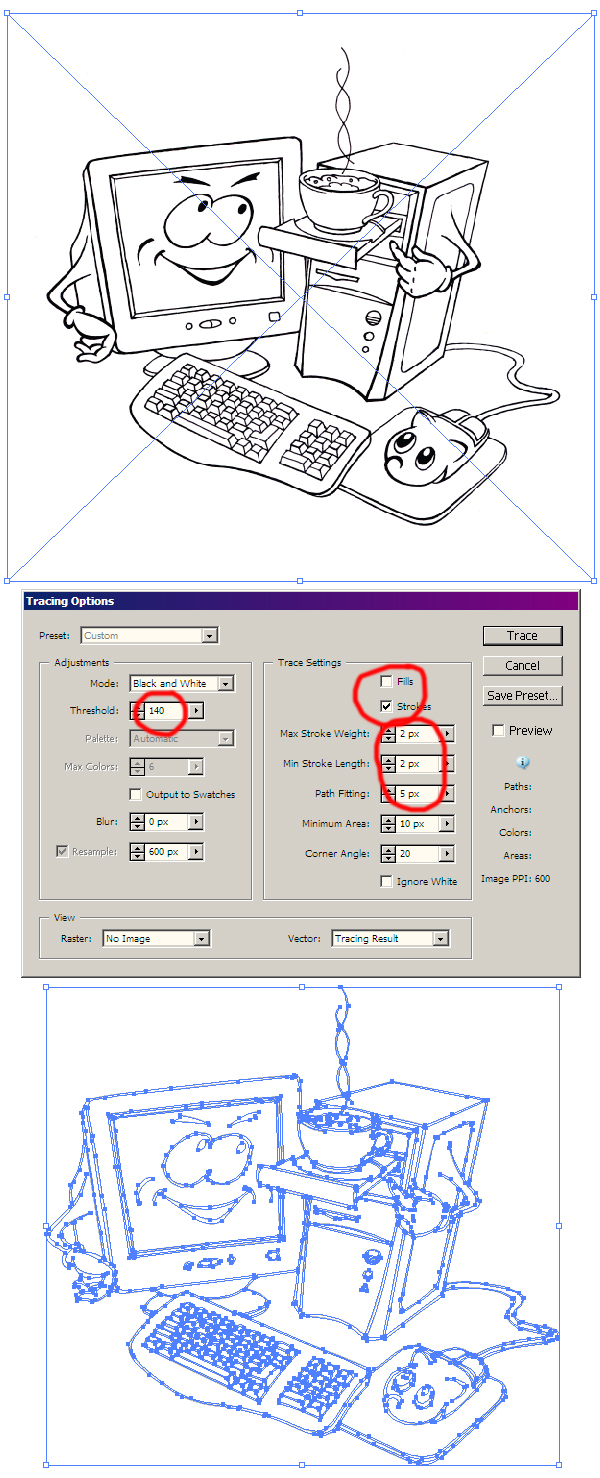
Now the image must be converted to a vector file. Start up Illustrator, create a new document and upload our image into it. Go to File> Place and chose the file coffee.tiff. Select the image and go to Object> Live Trace> Tracing Option. In the Tracing Option dialog choose the settings shown in the figure below. Preview the appeared on display image and click Trace. Now go to Object > Expand. Now we have our image in vector. It just has to be colored. Let’s get down to it.
Step 7
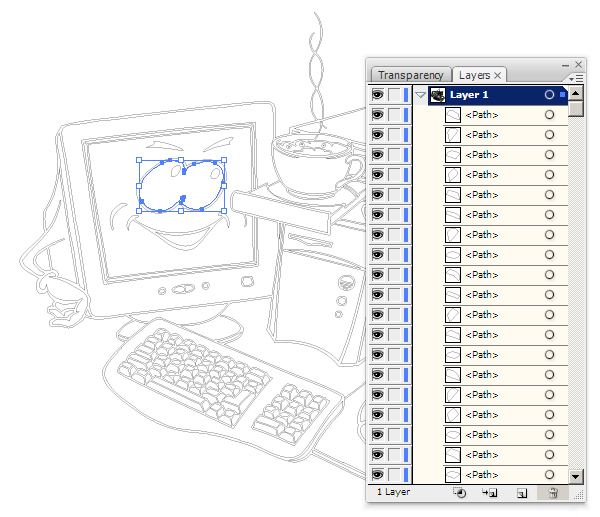
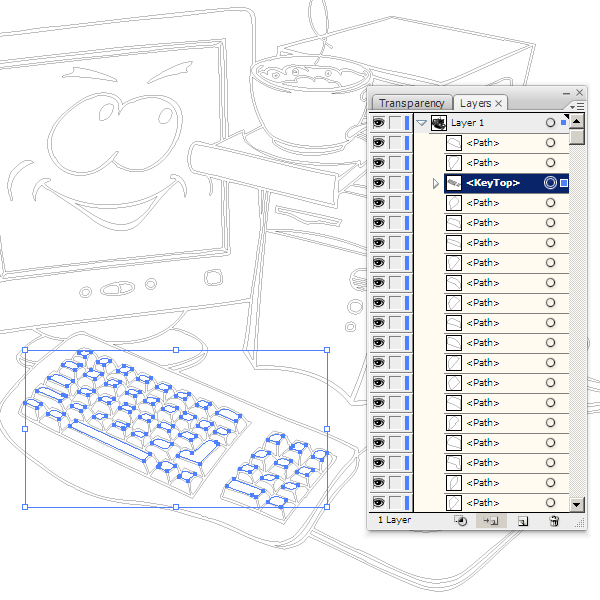
First ungroup the image. Select the object go to Object> Ungroup. After that the Layer dialog has to look as in the figure, while each of the elements of the image must be located in its own sublayer.
Step 8
It will be more convenient for our further work to group elements of the same color. Let’s start with the keyboard. Select the key tops, pressing the Shift button. Go to Object> Group. In the sublayer dialog name somehow the created group, e.g. KeyTop. To do this double-click on the Group field and enter a new name. By analogy group up side and front part of the keys, elements of the computer case. Name the newly created groups – KeySide and KeyFront, etc.
Step 9
You can now proceed directly to the coloring of our image. Since the drawing is made in a simplified manner, the coloring also does not have to look photorealistic. When coloring, we will apply solid color fills, and linear gradients in some cases. Two parameters determine the influence on the brightness of the surface – the paint color and the angle at which the light strikes this surface (in fact, there are much more parameters, but in simplified drawing manner they are not taken into consideration). The rule states that the closer the right angle is to the angle at which the light strikes the surface the lighter it is.

Step 10
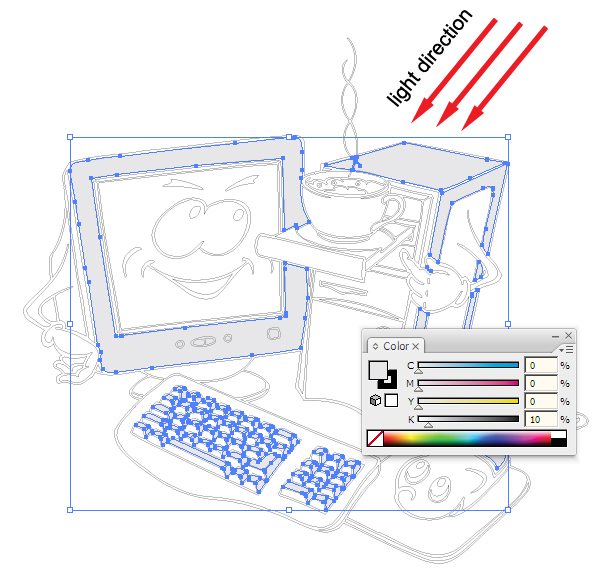
Now let’s proceed to the coloring of our image. Let’s assume that computer equipment in our picture is of the standard grey color. (Color accents will be added only to faces, mouse pad, to the front part of computer and of course to coffee in a cup). The light direction is taken from the top right. In this case the following details of the image will be the lightest: monitor display bezel, the upper and lateral side of the computer, tops and sides of the keys on the keyboard. Apply grey fill (K=10) to these elements.
Step 11
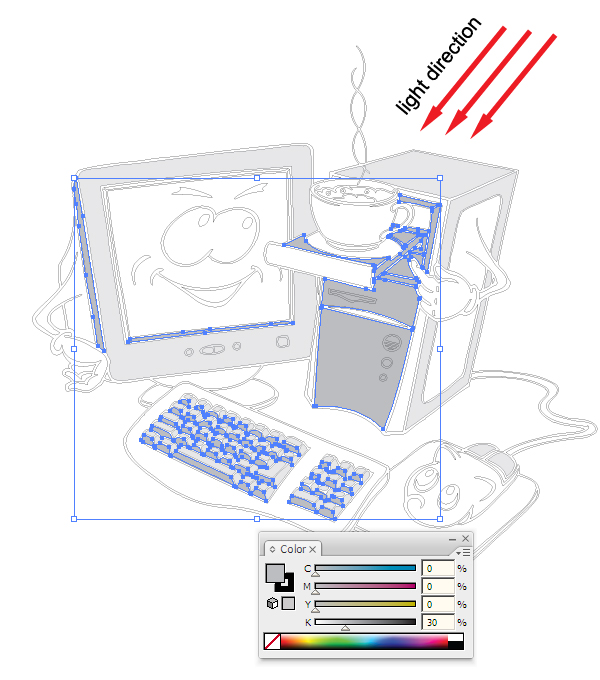
Now let’s color parts of the image with the corresponding halftones. Select the front surface of the keys, the front of the computer, elements of the monitor bezel, and apply grey fill (K = 30) to them.
Step 12
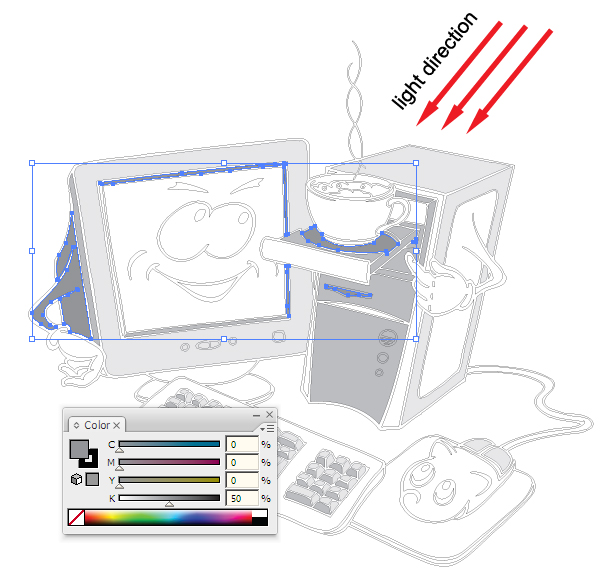
Color the shades. Select the corresponding elements (see the figure) and apply dark-grey fill (K=50) to them.
Step 13
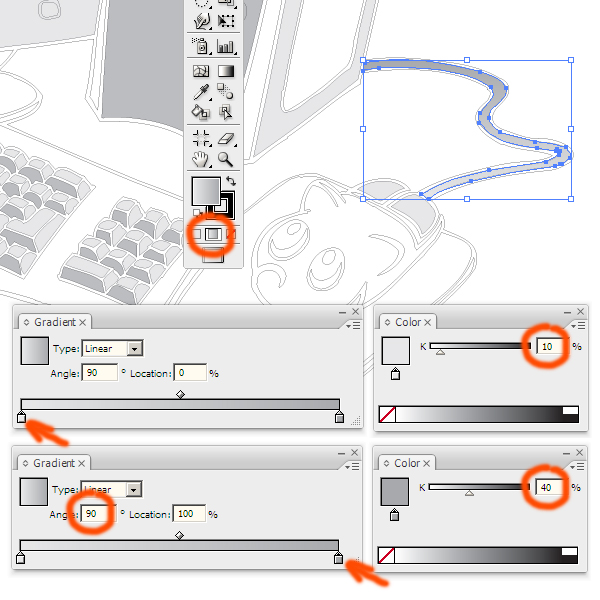
The use of gradient fills for the transfer of the depth of space. The way we see the color of objects depends not only on the illumination, but also on the distance between the eye and the viewed object. So among two identical and equally illuminated viewed objects located at different distances from us, the object located farther will seem darker. This effect is known as aerial perspective, and is used by artists for creating an illusion of depth in a flat drawing. Let’s start with the “mouse tail” it is almost perpendicular to the plane of the drawing and should gradually dim into depth. Select the element representing the tail and fill it with a linear gradient from light grey (K = 10) to grey (K = 40) color.
Step 14
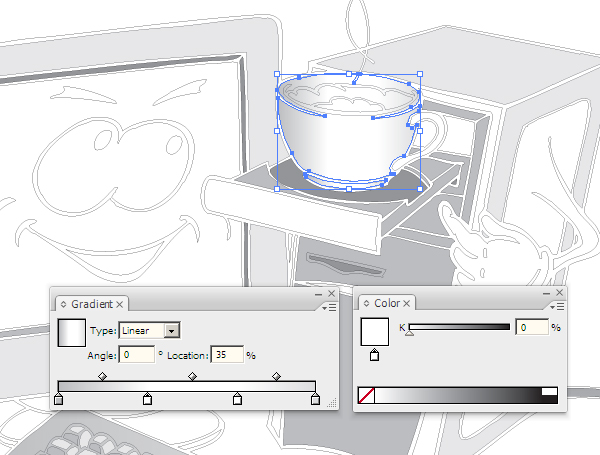
The use of gradient fills for the transfer of rounded surfaces. Let’s color a coffee cup. It has a shape resembling the cylinder. See light distribution on such a surface in step 9. Therefore the real color of an object is located on the border between the Light and Halftone. While this style of drawing these subtleties can be ignored, so we believe that the Light will match the color of our cup – white. Fill the cup with a linear gradient consisting of three colors: grey (K = 30), white and light grey (K = 15).
Step 15
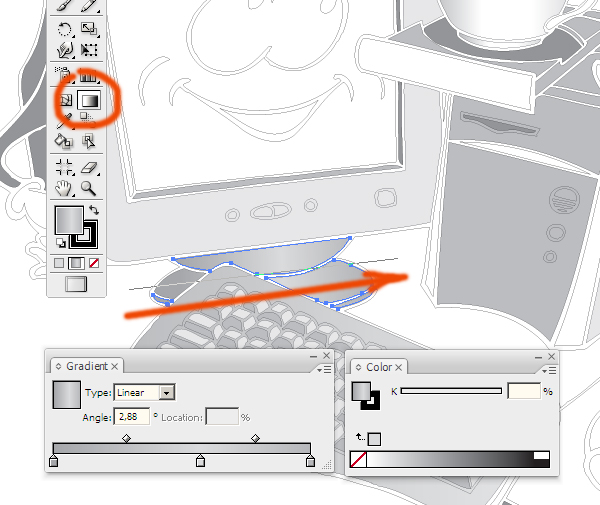
Color the monitor stand. Select all the stand-forming elements. Create a gradient with three shades of grey (K = 41); (K = 16); (K = 31). Choose the Gradient Tool in the Tool Palette and drag it along the monitor stand pressing the mouse button.
Step 16
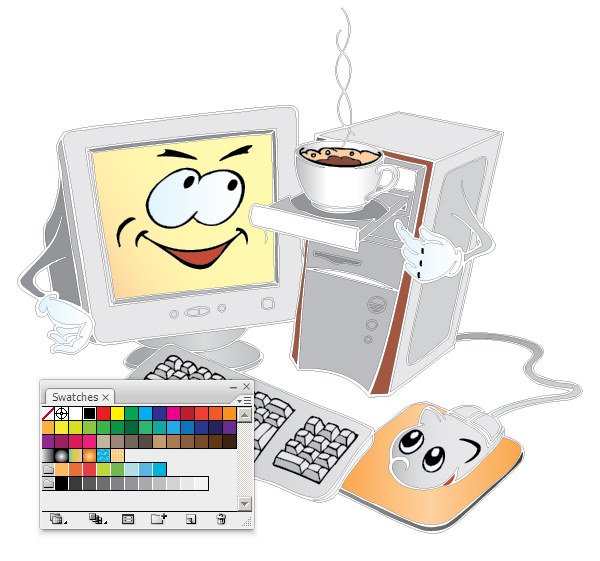
Color colored elements. Coffee in a cup – (C = 0, M = 60, Y = and K = 52). Coffee foam – (C = 0, M = 20, Y = 40 and K = 0). Mouth – (C = 0, M = 80, Y = 80 and K = 20). Colored stripe on the front part of the computer (C = 0, M = 60, Y = 60 and K = 40). Mouse Pad – gradient fill of 3 colors – the side colors (C = 0, M = 40, Y = 80 and K = 0), the central color (C = 0, M = 20, Y = 40 and K = 0). Monitor screen – gradient fill from the color (C = 0, M = 20, Y = 40 and K = 0) to color (C = 0, M = 0, Y = 40, K = 0). Whites of the eyes, and gloves are supposed to be white. But white color is traditionally accepted as the background color, so the elements that were supposed to stay white preferably should be slightly toned, otherwise there may be a feeling that they were simply forgotten to be colored. Apply a gradient fill from light blue (C = 10, M = 0, Y = 0 and K = 0) to white to the whites of the eyes and gloves. Fill eyebrows, pupils of the eyes, edging around the elements with black.
Step 17
Color small elements – buttons, front panel drives. You have a complete freedom of creation, the main thing is that they have to differ in color or tone from the surrounding elements, so that the image is not too dull. Fill the edging around the colored elements with black.

Step 18
As a final touch to our image fill the outline of the entire image with black. Note that after tracing, elements that make up the gaps in the entire outline of the image represent individual curves. In order to make these areas transparent, it is necessary to combine all these elements into one object. Select background and outlines, which should form the gaps (between the elbow and computer, gaps between steam jets, clear space between the monitor and computer) Go to Object> Compound Path> Make. Now apply black fill to the newly combined contour. Picture is ready.

Conclusion
This is one of the optional techniques used by artists working with traditional graphic when preparing an image for printing. It allows the combining of the freedom of creative expression, achieved in a traditional drawing, with the benefits of computing vector graphics – a wide range of scaling and easy changeability of the color solution. A pleasant feature of this method is that you have two art objects – an electronic file and the original drawing made on paper that represents an independent artistic value. I wish you creative success!