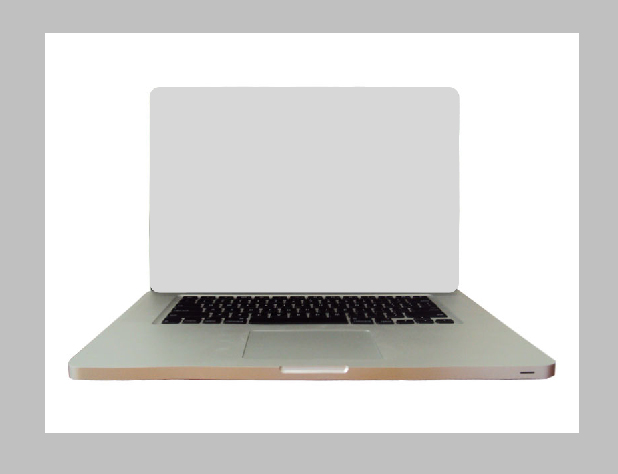
Illustrating an electronic device such as a laptop may seem like a difficult task but it’s actually not as hard as you might think. In this tutorial, I will demonstrate how to create a MacBook Pro in Photoshop. Let’s get started!
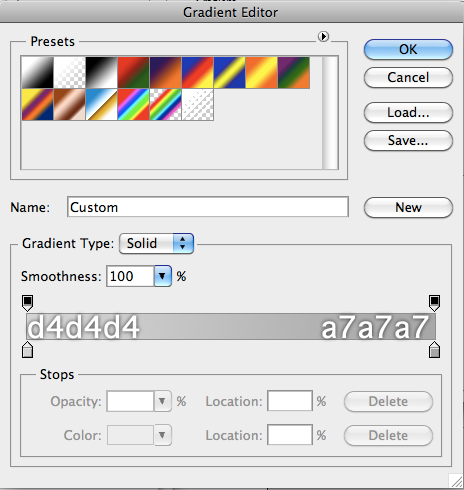
Step 1
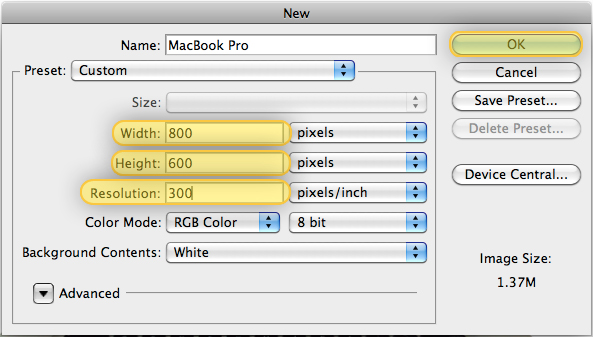
First, go to File > New. Then change the Properties as is shown below:
Step 2
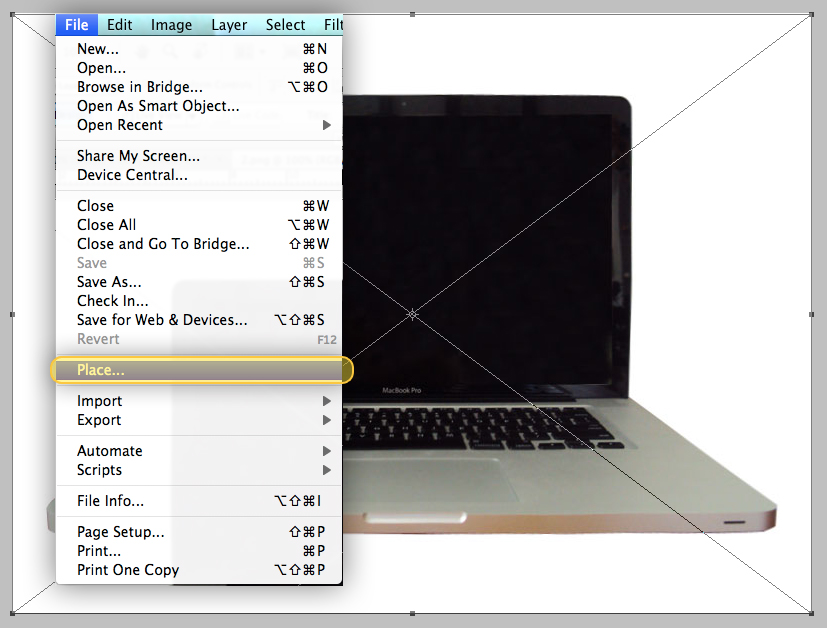
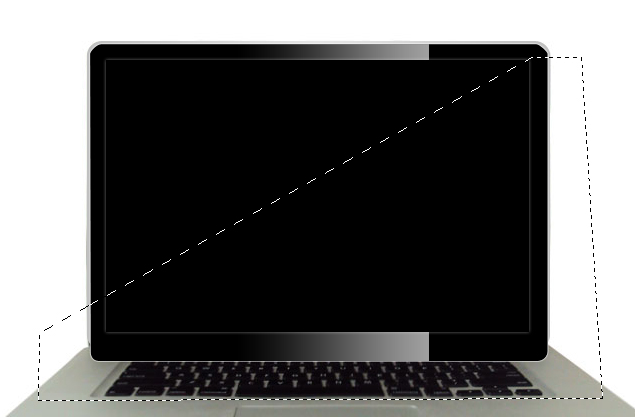
Now you will need to find a photo to use a reference. To do this, just head over to Google and run an image search. Once you’ve found a photo, place it into your document by going to File > Place, then center it as shown below.
Step 3
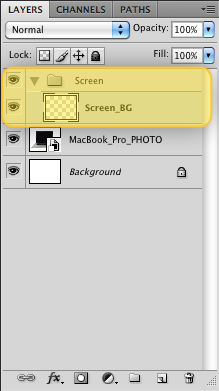
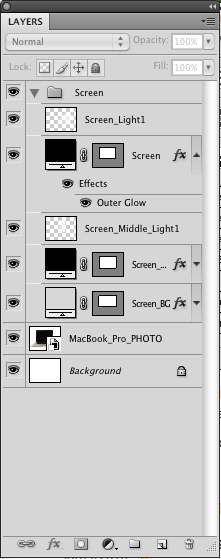
Make a new Folder, name it "Screen". Then, make a new Layer and name it "Screen_BG." Make sure you insert the "Screen_BG" layer to the "Screen" Folder.
Step 4
In the "Screen_BG" layer draw a Rounded Rectangle (Shift + U) on the MacBook’s Screen with a Radius of 15px as shown below.
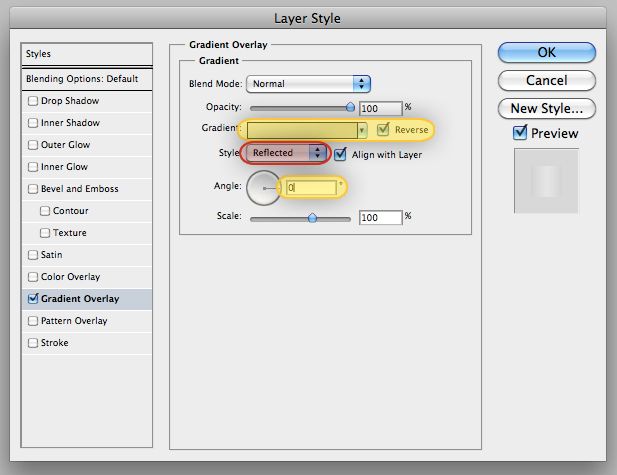
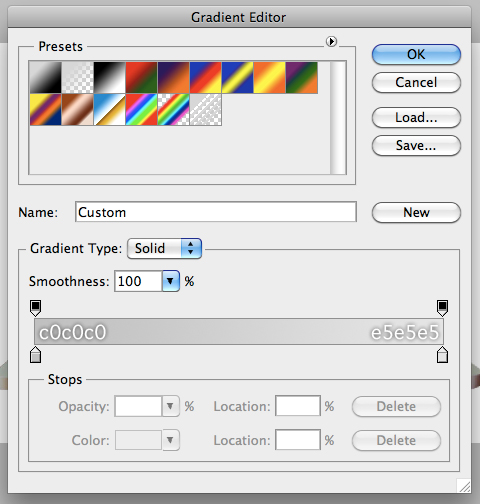
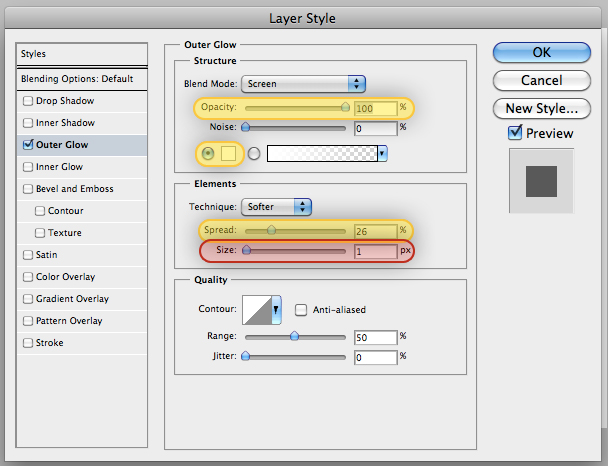
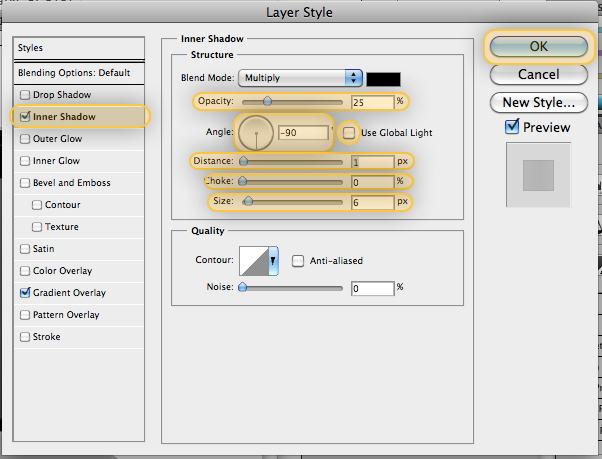
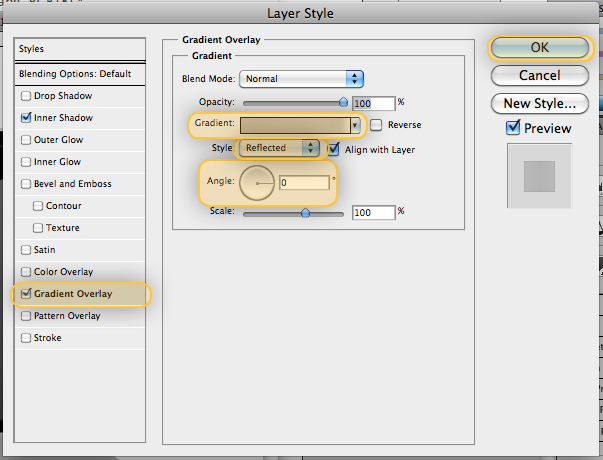
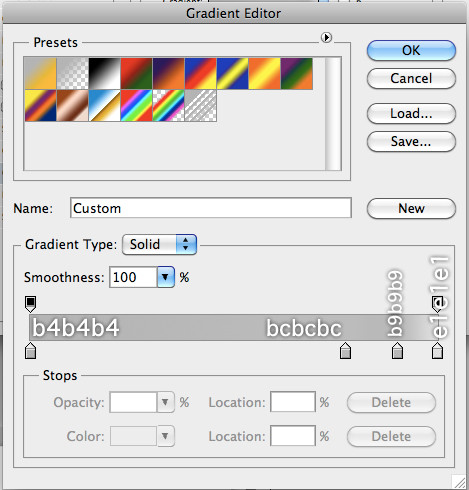
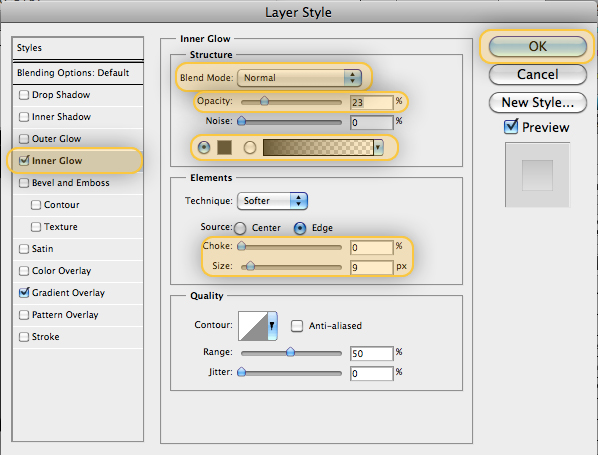
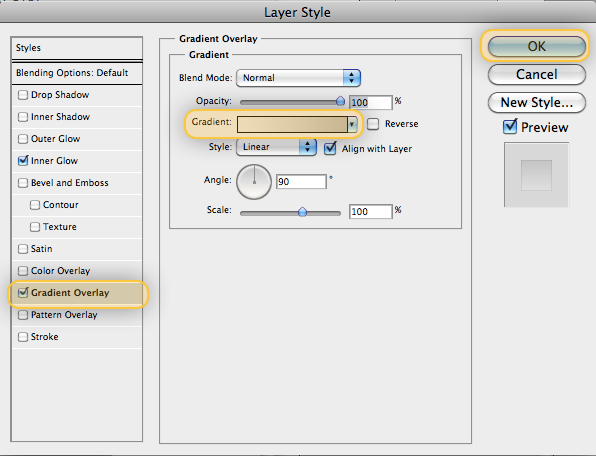
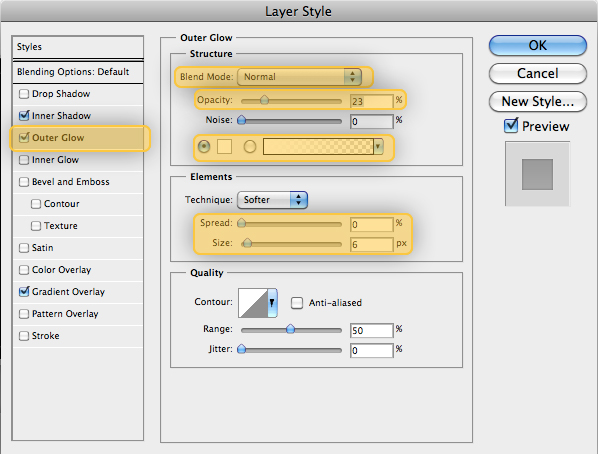
Step 5
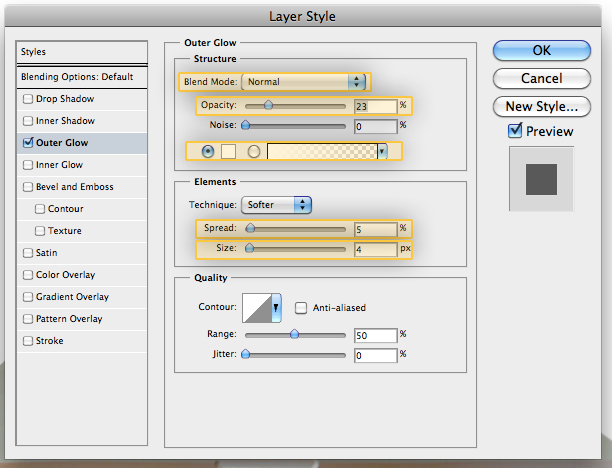
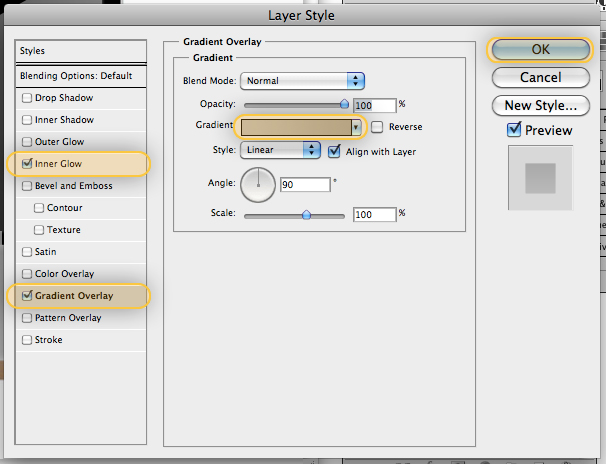
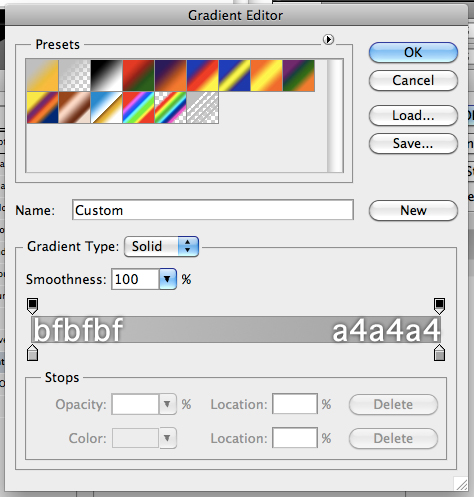
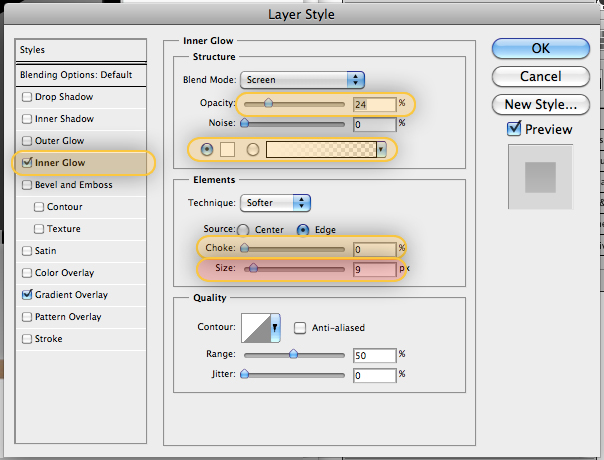
Now apply the following Layer Styles to our "Screen_BG" layer.
Step 6
Draw a Rounded Rectangle (Shift + U) over the edge of the MacBook’s screen with a Radius of 15px and choose a black color. Name this layer "Screen_Middle".
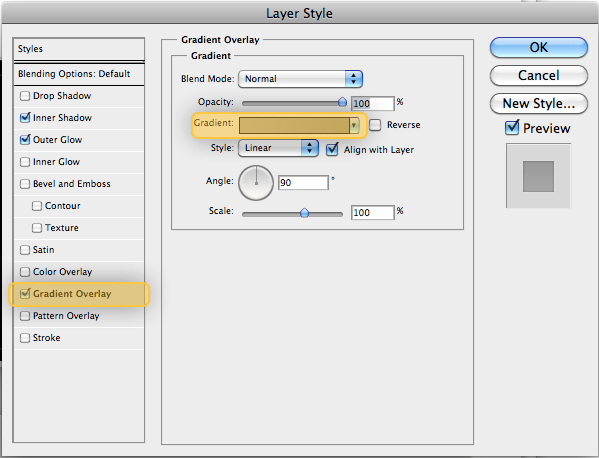
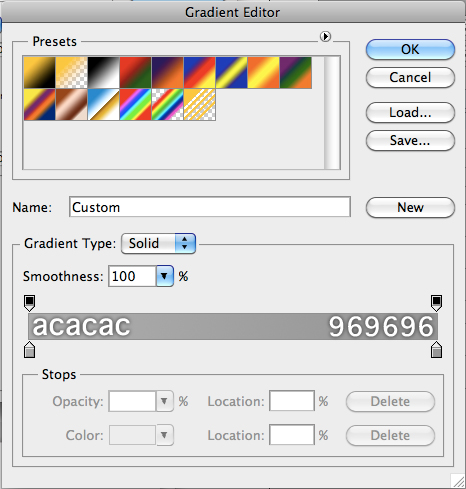
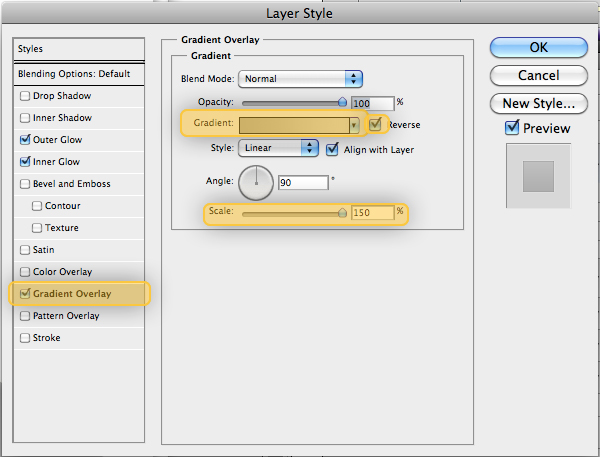
Step 7
Apply the following layer styles to Screen_Middle.
Step 8
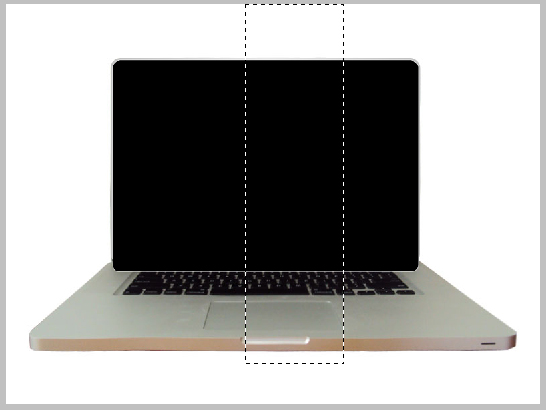
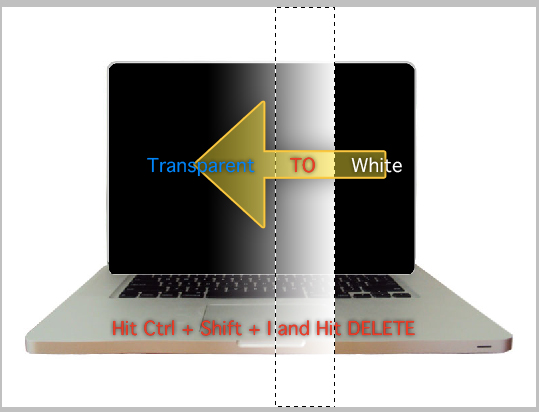
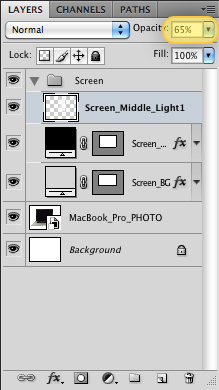
Create a new layer and name it "Screen_Middle_Light1" and drag it to our "Screen" Folder. With the layer selected use the Rectangle Marquee Tool (Shift + M) and draw a rectangle as shown below. After that, fill this selection with a transparent to white gradient using the Gradient Tool (Shift + G). Then, Cmd + Click the "Screen_BG" layer’s thumbnail and then Cmd + Shift + I and hit delete. Finally, reduce the "Screen_Middle_Light1" layer’s opacity to 65%.
Step 9
Now we have to draw the MacBook Pro’s screen. First, draw a Rectangle using the Rectangle Tool (Shift + U). Make sure the rectangle is black, and draw it above the MacBook Pro’s Screen. Name this layer "Screen" and drag it to our "Screen" Folder. Then, apply the layer styles as shown below.
Step 10
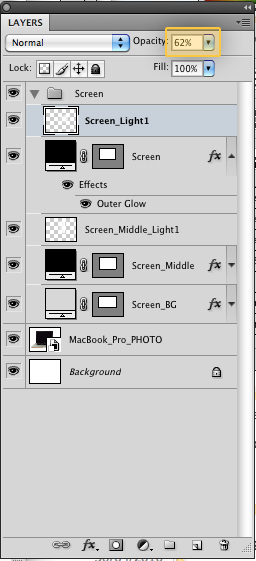
Now let’s add a reflection to the MacBook’s screen. Create a new layer and name it "Screen_Light1", use the Polygonal Lasso Tool (Shift + L) and draw the following shape.
Step 11
With the "Screen_Light1" layer selected, use the Gradient Tool (Shift + G) to apply a white to transparent gradient, make sure you select the Linear Option a shown in the following images, when you are done deselect the selection using Cmd + D.
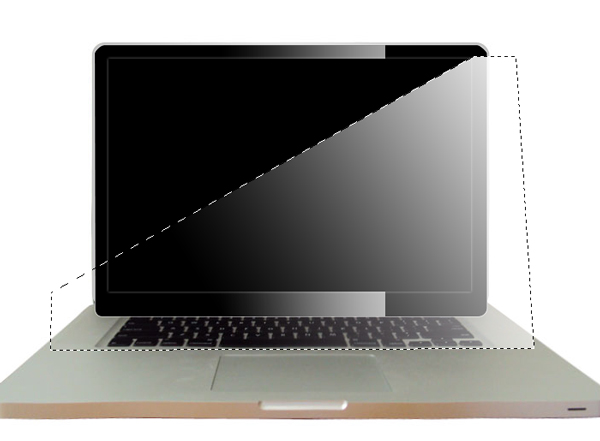
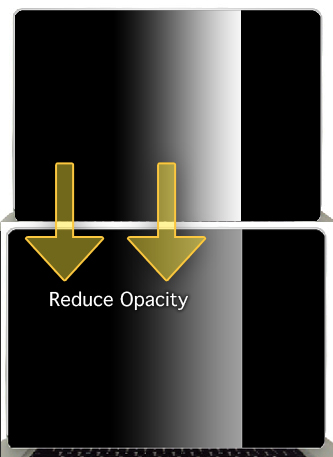
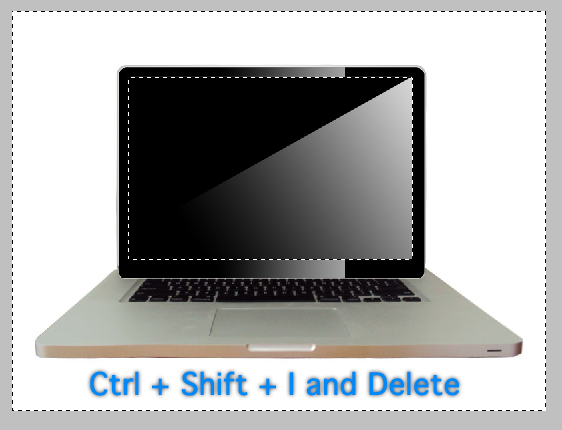
Step 12
Cmd + Click the "Screen" layer’s thumbnail and then Cmd + Shift + I and then hit delete (Make sure to be in the "Screen_Light1" layer). After that, reduce the opacity to 62%.
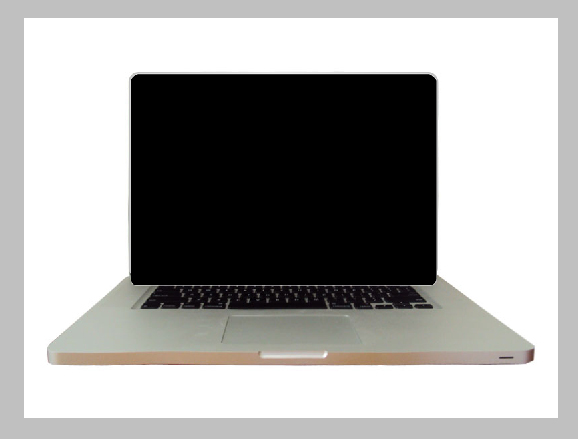
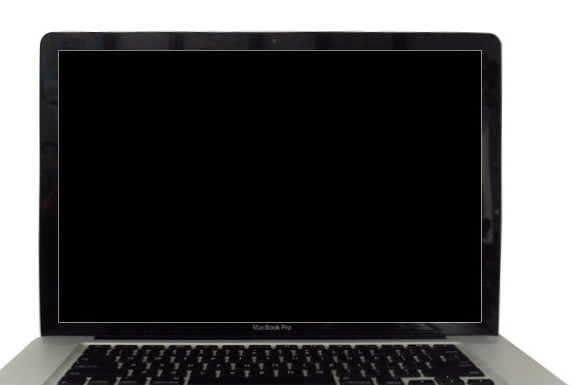
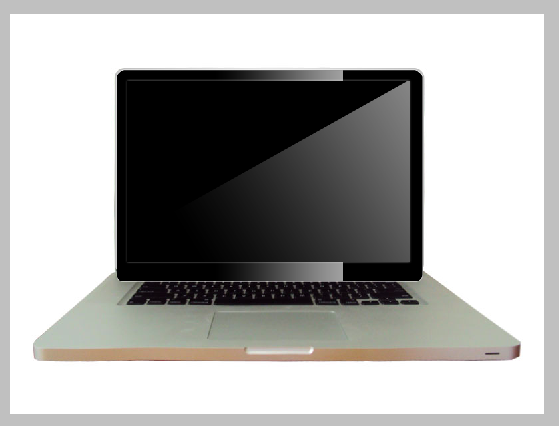
At this point your illustration should look similar to the image below.
Step 13
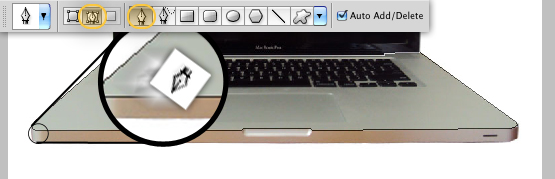
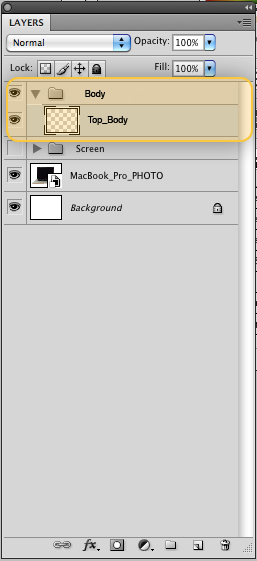
Our screen is ready! Now we have to create everything else. First, make a new Folder and call it: "Body". Then, make a new layer and use the Pen Tool (Shift + P) to trace the laptop’s body, make sure to have the "Paths" option selected as in the following image. Drag this layer into the "Body" Folder and call it "Top_Body".
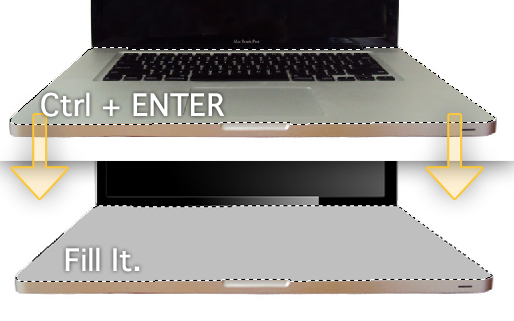
Step 14
With the "Top_Body" layer selected hit Cmd + Enter to make a selection. Then fill this selection with a gray color.
Step 15
Apply the following layer styles.
Step 16
Now lets create the outer body, this is very similar to Step 14. Create a new layer and name it "Outer_Body" and insert it in the "Body" Folder. With the layer selected use the Pen Tool (Shift+P) and trace the outer part. When you’re done fill it with a different gray tone.

Step 17
Apply the following layer styles to the "Outer_Body" layer.
Step 18
Now, we will create the laptop’s opening. To do this, make a new layer in the same Folder and call it "Opening_Body". Repeat steps 14 and 16.
Step 19
Apply the following layer styles to the "Opening_Body" layer.

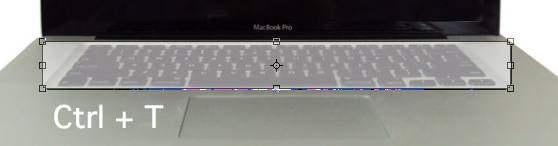
Step 20
Now, we have to draw the sunken area where the keyboard goes. Select the Rounded Rectangle Tool (Shift + U) with a radius of 5px and a color that you can distinguish from the body’s gray. Then, draw a rectangle, select Cmd + T to bring up the Transform Tools, right-click the rectangle and then choose Perspective and play with it until it looks similar to the shape below. Name this layer "Keyboard_Sunken".


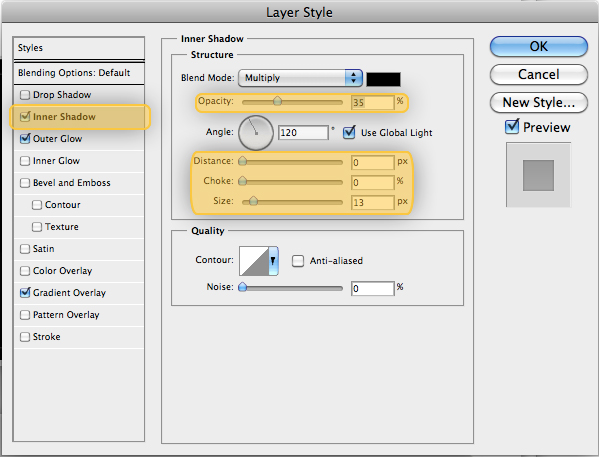
Step 21
Apply the following layer styles.
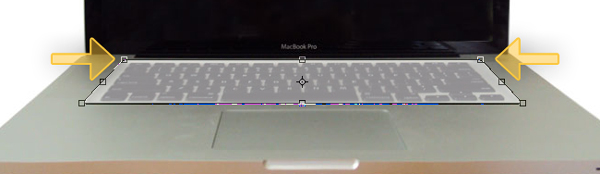
Step 22
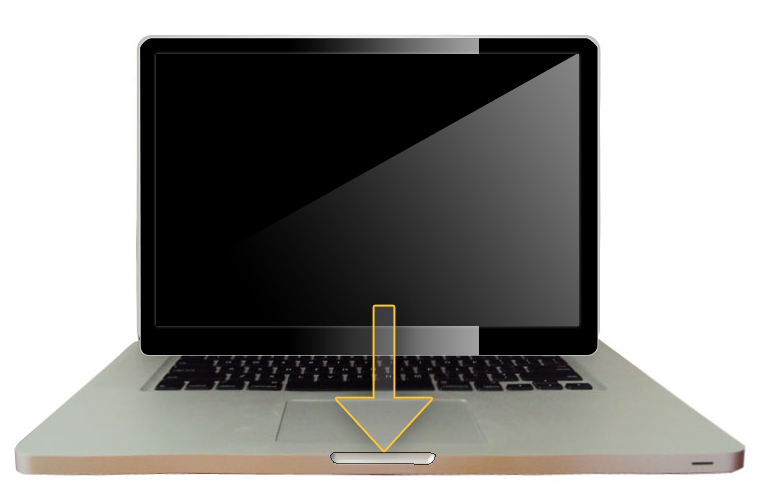
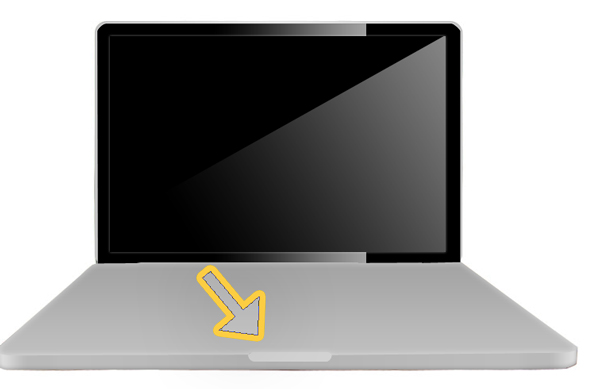
Now let’s create the TrackPad. We have to make a Rounded Rectangle (Shift+U) with a Radius of 5px, and do the same steps to transform it as we did on Step 20 and of course apply some layer styles. Name this layer "TrackPad" and drag it inside the "Body" Folder.


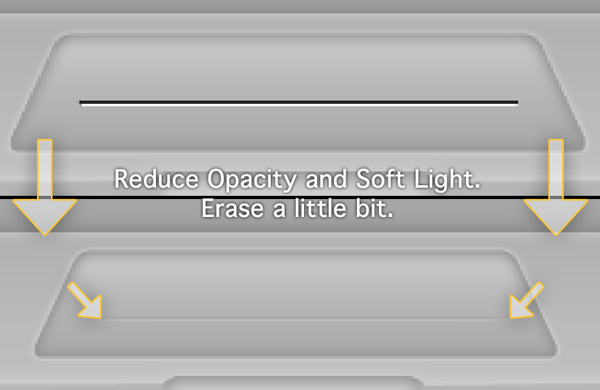
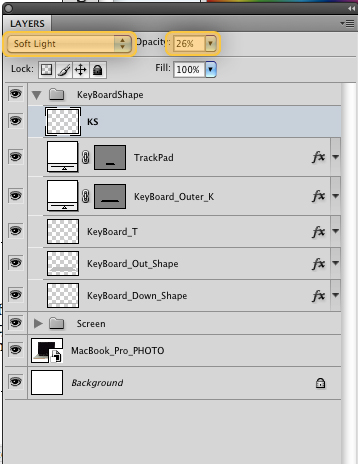
Step 23 (Optional)
In case you are building a different kind of laptop you can add a separation on the TrackPad. This step is optional because the new MacBook Pro doesn’t have this line. Anyway, select the Line Tool (Shift + U) and make one black line and one white line, give them a weight of 1px. You will realize that it makes two different separate layers, so you have to merge them. Select the two layers and the press Cmd + E. Then, change the name of the merged layer to "TrackPad_Line" and change the Blending Mode to Soft Light and reduce the Opacity to 26%. Also, erase a little bit the edges using the Eraser Tool (Shift + E).
Step 24
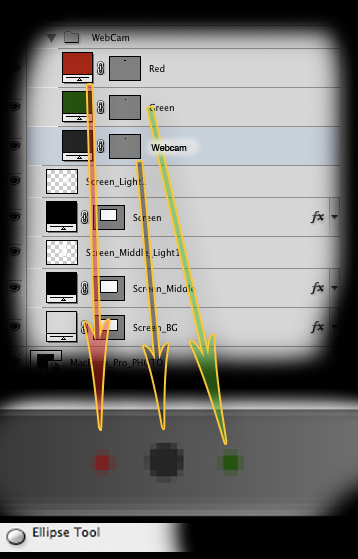
Before we start work on the Keyboard, we need to add lots of small details, such as the webcam, the power button, etc. So, go to the "Screen" Folder and make a new Folder, Name this Folder "WebCam". Make a new layer and call it "Webcam". Take the Ellipse Tool (Shift + U) and draw a circle as shown.
Step 25
Also add the MacBook Pro text (use Helvetica or Myriad Pro), the Infrared sensor, and the power button.

Step 26
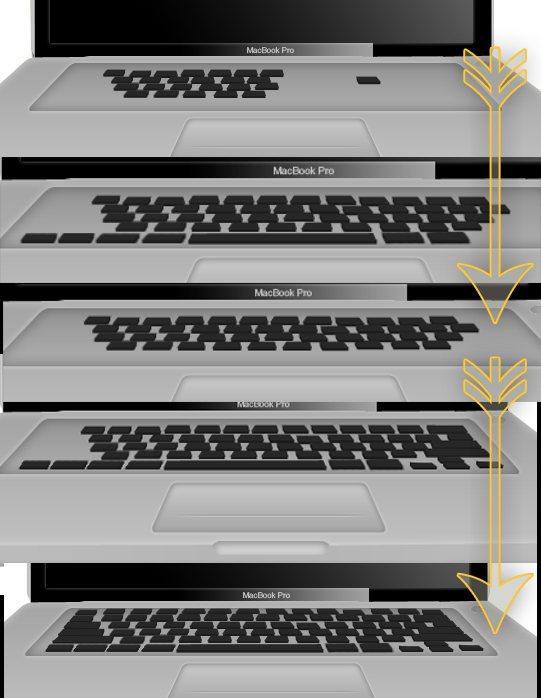
Finally, we will start work on the Keyboard. Make a new Folder and name it "Keyboard". Grab the Pen Tool (Shift + P) and trace as we did it in the Step 14. Make sure to make the keys in three positions.
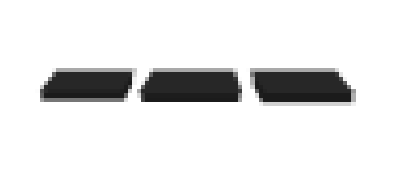

Step 27
Now duplicate these layers (Hold Alt and Click and Drag) and complete the KeyBoard, remember to drag these layers on a folder named "KeyBoard". You should also make a new shape for the Space Bar, Delete Button, etc.
Step 28
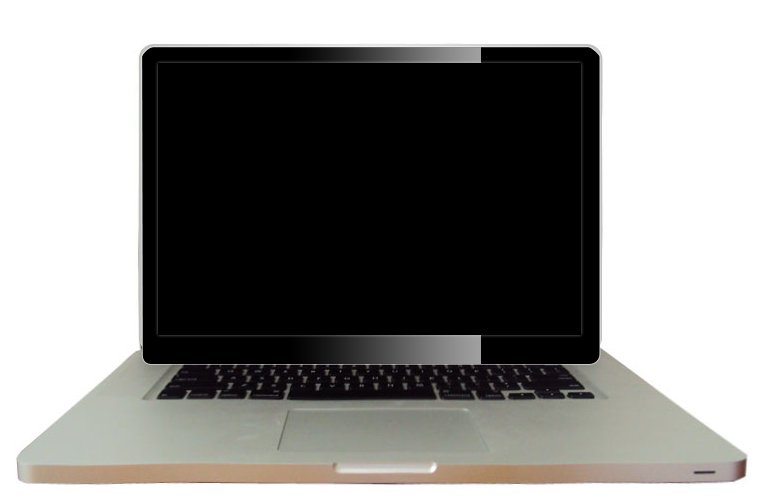
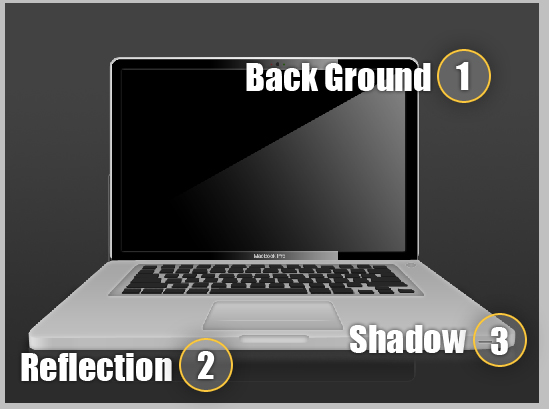
To finish things off, use the gradient tool to add a background as shown below. You may also choose to add a reflection. To do this, duplicate all your layers, flip them vertically, place as shown below and lower their opacity. In addition, you can add a shadow as well using a blurred black rectangle as shown.
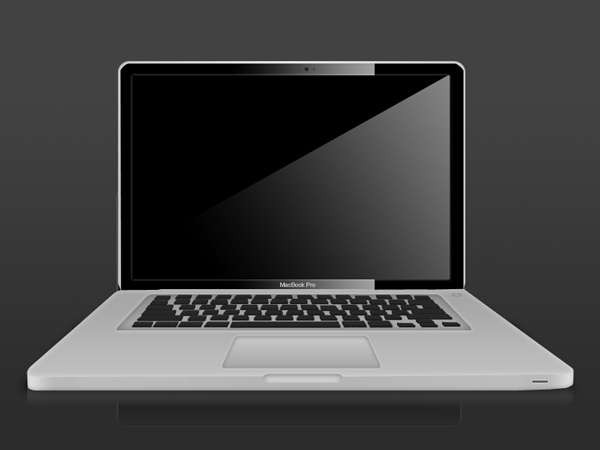
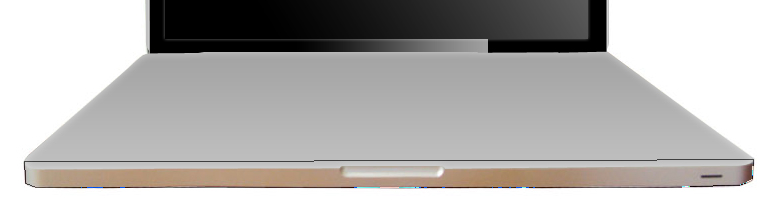
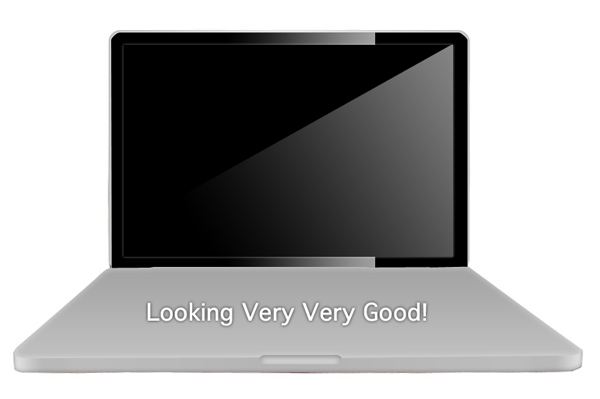
Conclusion
Take a look at the final image. I hope you learned something new!