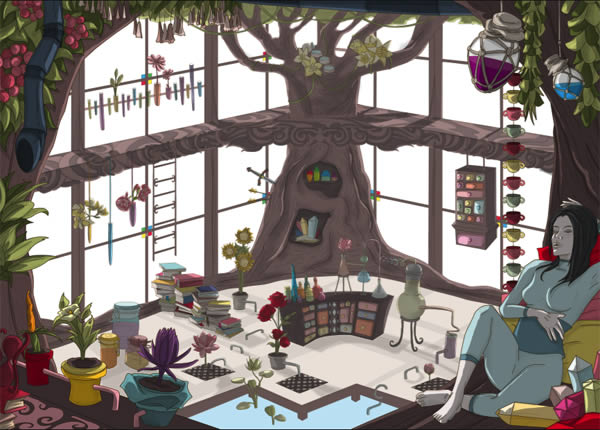
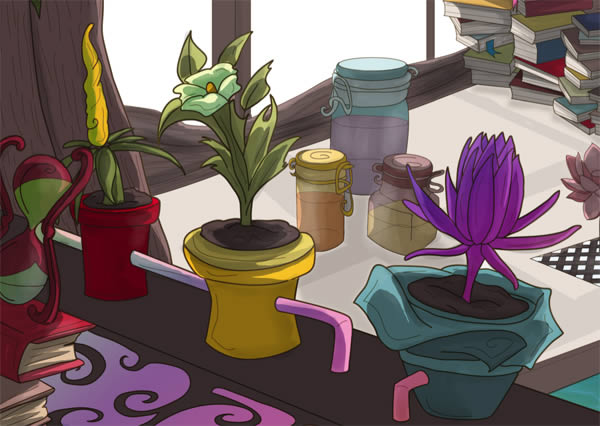
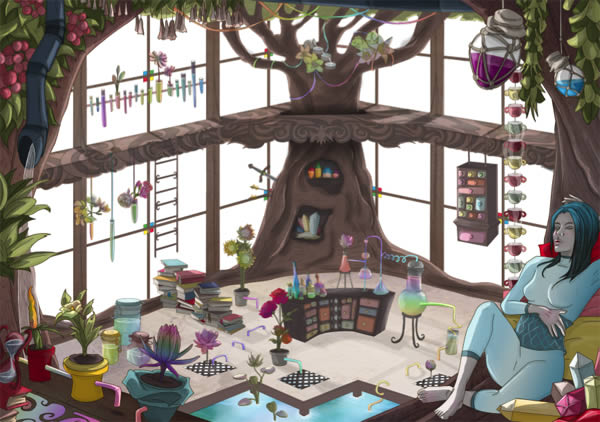
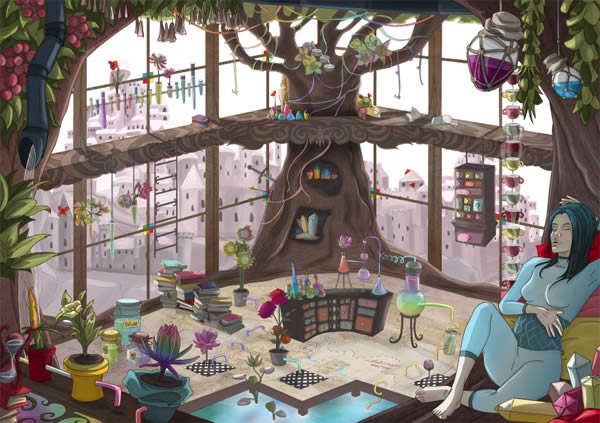
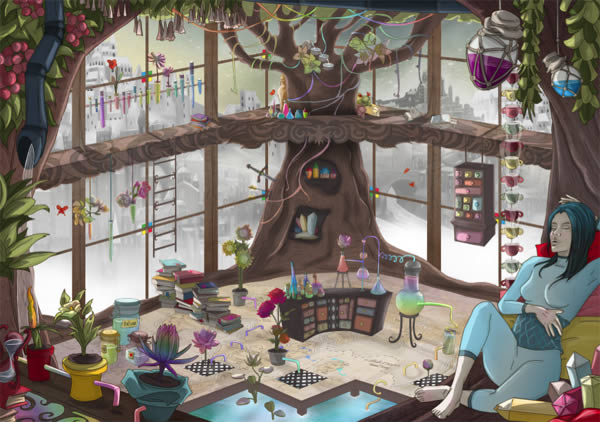
Photoshop and Illustrator work very well together. Lots of designers start out in Illustrator and then import their artwork into Photoshop to add shading and texture. In this tutorial, we will show you how to do this with an illustration that we originally created in a tutorial on Vectortuts+. Let’s get started!
View Part 1
This tutorial is a 2-part tutorial. Part 1 of this tutorial can be seen here.
Tutorial Assets
The following assets were used during the production of this tutorial.
- You can find some textures for this tutorial in the free download accompanying this tutorial.
- Foreground and Background PNGs are included in the free download accompanying this tutorial.
- Sand Castle Stock from Photodune.com
- Castle Stock from Photodune.com
- Castle Stock from Photodune.com
- Loarre Castle Stock from Photodune.com
- Edinburg Castle Stock from Photodune.com
- Glamis Castle STock from Photodune.com
Step 1
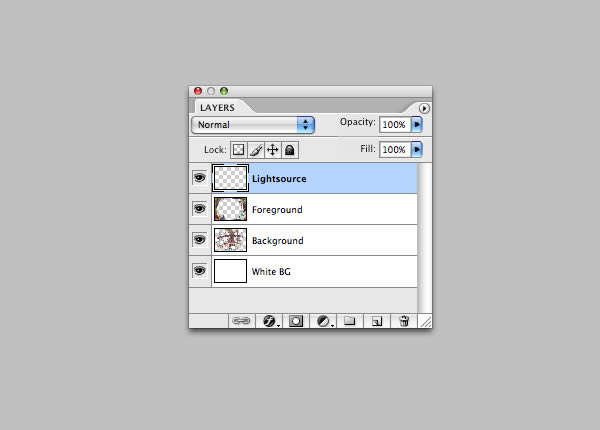
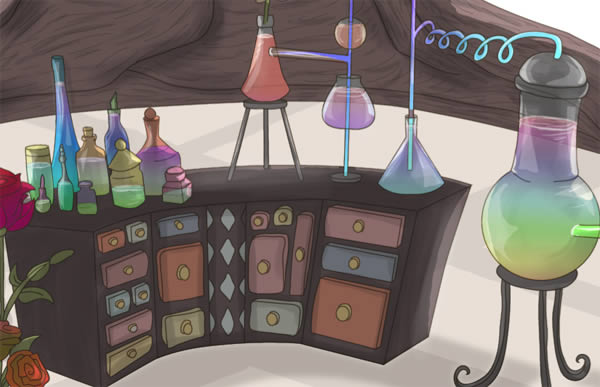
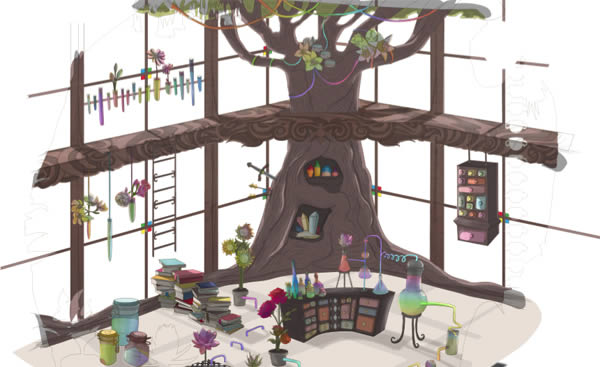
After having created the line art and added the flat colors to your illustration in Illustrator, we want to open the files in Photoshop and prep the file before starting. We have made sure to separate the foreground from the background since the beginning of the first tutorial and this is where it comes in handy. It makes your file lighter to work on when you can hide the foreground while working on the background (vice versa) and you don’t have to worry about shading within the lines and going on top of the foreground (or background). Due to them being separated, when, for example, you are shading the foreground, you don’t have to worry when you go over the background since you can simply select the background layer, return to the shading layer and hit delete. But we’ll get to that in a bit. Load both files into your program; File > Open > Select the foreground file and the background file and click OK.

Step 2
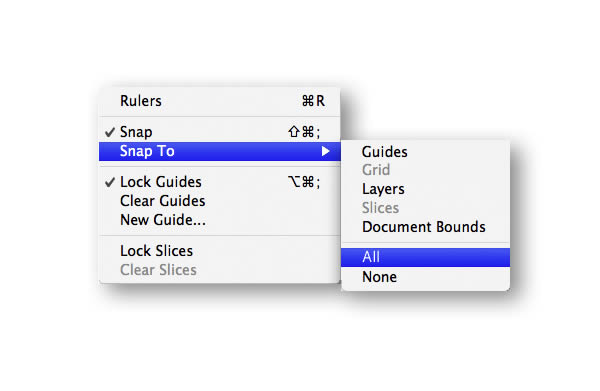
Choosing the Selection Tool (V), we are going to drag the foreground out of its file and drop it on top of the background file. Normally it will click in place perfectly (default setting), but if that isn’t the case, then you want to check what option your magnetism is set on. Go to Appearance > Magnetism. There are two, choose the one with the option arrow beside the word and a side window will appear. This is where you will see the options ‘All’ or ‘Without’. Select ‘All’. Apologies, my program is in french, so everything appears in french. You can’t change the language without re-installing the program.
Step 3
We are going to create a handmade reference as to where the light will hit. It doesn’t have to be neat or perfect, this is just to ease yourself into the process of shading. I know I personally sometimes get confused throughout this step and this ‘trick’ tends to help me out. Create a new layer on top of the foreground and background layers, titling it "Lightsource". Now choose your Paintbrush Tool (B) and select a hard, round edged brush (Photoshop’s default brush set) at about 50px. The size of the brush will depend on how big you saved your Illustrator files. Since I want this to be able to be printed largely, my canvas is at 6000px width, hence why I selected a relatively large brush so the lightsource will be easy to see. After having chosen your brush size, lower its opacity between 40 and 50%, so you’ll be able to see the illustration underneath. Once that done, we can start!
Step 4
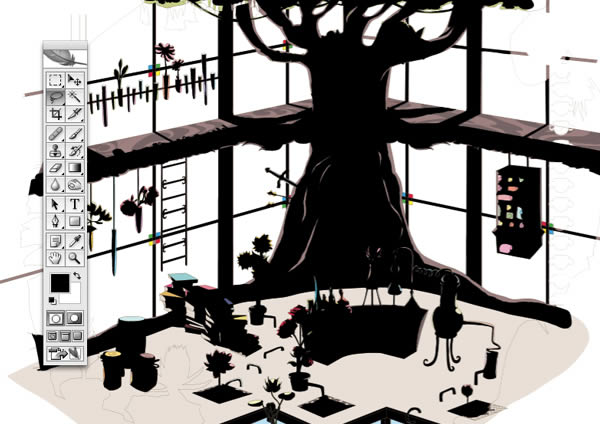
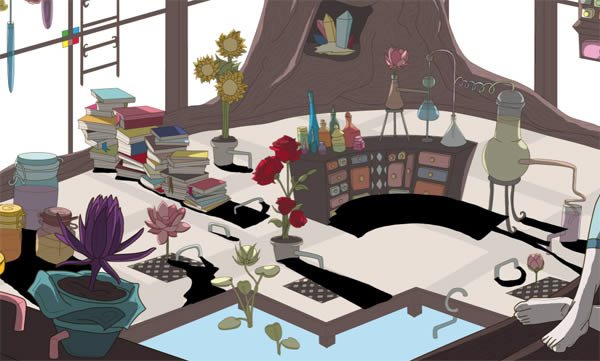
In this illustration we have windows on the left and the right and they are located behind the objects, flora, character etc. So we want to make the center of the objects dark and allow light to hit both the left and right side of them. The purpose of sketching it out with the paintbrush (B) is to make sure it looks right before actually starting to shade. Select the white color on your color palette and roughly paint over the edges you think the light will appear. If you find the light source reference we made to be hindering, select the layer and lower it more in opacity before starting on the shades. I lowered it to about 10%. Now that we have an idea of where the shadows should be, we want start. Either start with the background or foreground, it doesn’t really matter in what order you do it. What does matter is that you shade them separately, as the shade on the foreground will need to be more pronounced than the background. I’m going to use the background as an example.

Step 5
Create a new layer on top of the background layer and title it "BG-Shadow1". Select the Lasso Tool (L), zoom in and pick any spot to begin. Shape out your shades neatly, since this will be the shadow that defines the light source of the entire image. To make more selections at once, rather than one by one, hold down shift as you draw out the shapes with the lasso tool. If you accidentally selected a part you don’t want there to be a shadow, hold down alt and trace over the part you want to delete out of your selection. Once you’ve created the selection that will contain your shadow, pick a black color in your color palette and hold down alt + delete; it’ll fill your selection with the black (It’s Command/Ctrl + delete to have the background color appear – If I were to do that as shown in the screenshot, the selection would fill with white). You could use the Magic Wand (W) for certain areas, but were you to click on the line art, it would select all of the line art since it’s all the same color and we don’t want that. And by clicking within the line art, it excludes the line art and so when you fill it with black, it won’t shade the lines and that’s another thing we don’t want. Hence why we’re using the Lasso Tool.
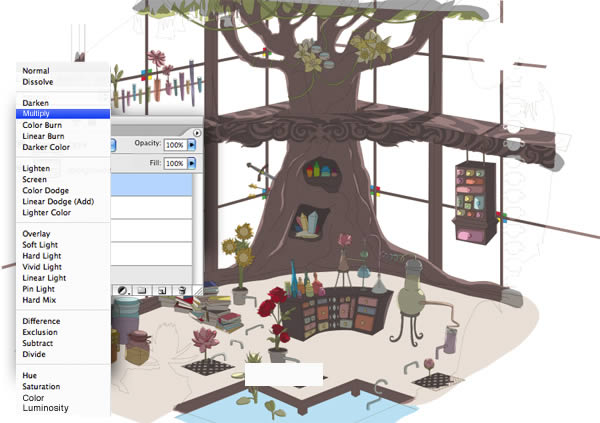
Step 6
Deselect it (Command/Ctrl + D) and set the entire layer (BG-Shadow1) to the Blend Mode ‘Multiply’, continue to lower its opacity to a level you find nice. I chose 30%.
Step 7
Apply this same process to the foreground on its own layer (Title it "FG-Shadow1" and place it on top of the foreground layer). Only here we want the opacity to be darker. Since the foreground is essentially further away from the windows it means it receives less light and by allowing the shadow to be darker in that area, you create depth in your illustration. I put mine at 40% (10% higher than the background).
Step 8
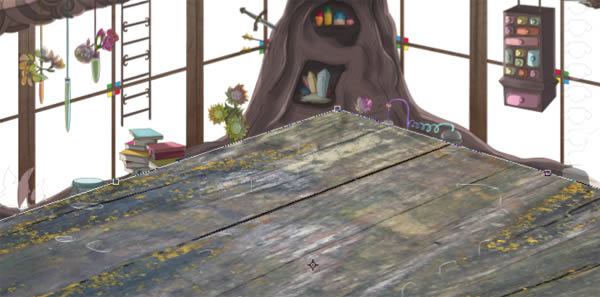
We are going to apply the window frame shadow on the room now. We’re making this separate from the overall background shadow because we want it to be lighter so it doesn’t attract all the focus and for aesthetic reasons. After hiding your foreground and FG-Shadow1 layers, create a new one that we are going to title "BG-Shadow2" and place it on top of BG-Shadow1. Choose the Polygonal Lasso Tool (L) and then create a similar window frame, only trace it on top of the room floor. Don’t worry about going over the objects, we’ll get to that later. The polygonal lasso tool allows you to create very straight selections, which is handy in this case since the window frame is made out of squares.
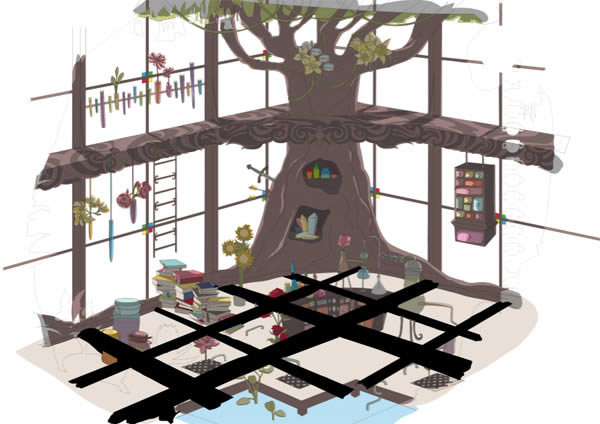
Step 9
Before we set this layer to blend mode multiply and lower its opacity, we want to remove the black areas that go over the objects. Choose the Magic Wand Tool (W) and select the layer that contains your background illustration. Click on the floor area (hold down shift to make more than one selection) where the shadow should appear (I hid the shadow momentarily so I could be sure I didn’t miss any areas).

Step 10
Now we want to invert it so it will delete the parts that cover the room objects. With the selection still active, go to Selection > Invert. That done, select the layer that contains the shadow you made earlier (BG-Shadow2), unhide it and then press onto your delete button on your keyboard.
Step 11
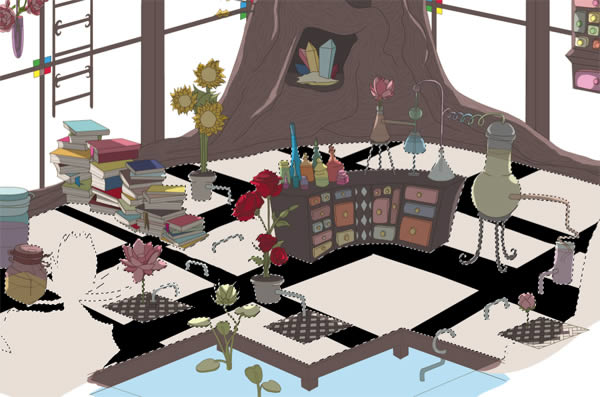
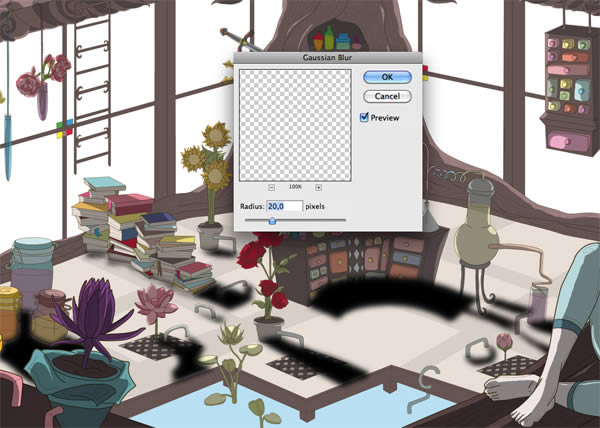
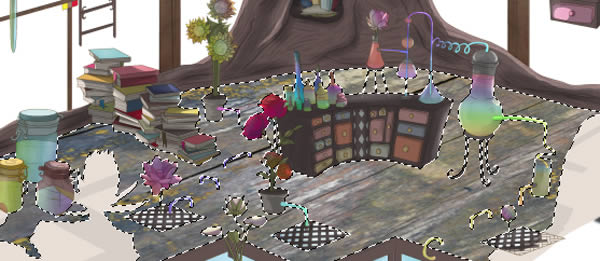
Deselect (Command/Ctrl + D) and set that layer to blend mode multiply and lower the opacity to 6%. It doesn’t need to be very dark since that whole area of the room has a lot of light coming in. Create yet another new layer, titling it "BG-Shadow3" and use the Lasso Tool (L) to shape out the shadows created by the objects in the room. Once you’ve filled them in with black (Command/Ctrl + delete if your black color is at the front or alt + delete if your black color is in the back), repeat the invert selection option. So just like we did with the window shadow on the floor, select the layer that holds the background and choose the Magic Want Tool (W) to select the ground. Once the selection is made, return to the layer that holds the object shadows and then go to Selection > Invert and then hit delete on your keyboard so the shadow won’t cover the objects anymore. I found it to be too harsh on the eye, so I added a Gaussian Blur to it. To do this, go to Filter > Attenuation > Gaussian Blur. I went with 20% and then clicked OK.
Step 12
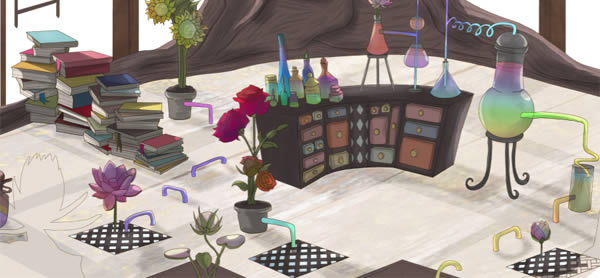
Once that complete, we set the BG-Shadow3 layer to multiply and lower the opacity (I set mine to 20%).

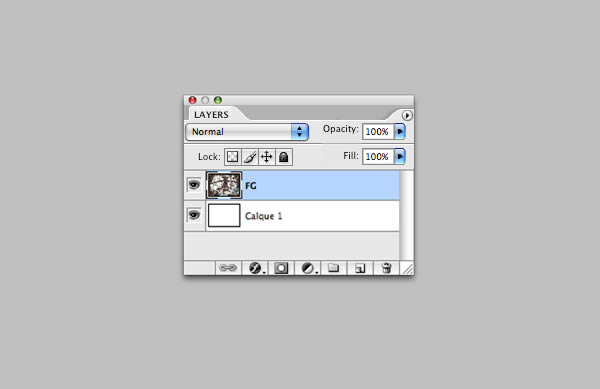
Step 13
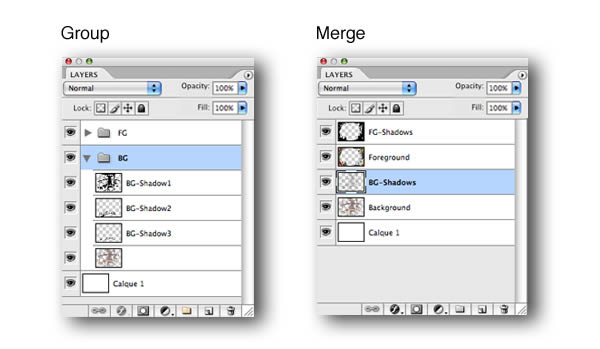
We’ve finished the first round of shades! Before we continue onwards, we want to organize our layers to avoid clutter. If you believe you’ll return to these shadow layers at a later point in the illustration, create a folder, titling it "FG", and place the foreground and FG-Shadow1 layers into it. To create a folder simply find your layers window and at the bottom you’ll find a folder icon. Press on that and drag the layers you want in it, into it. Create a second folder beneath that one tilting it "BG" and put in the background, BG-Shadow1, BG-Shadow2 and BG-Shadow3 layers into it.We can delete the light source layer now. I’ve created folders for the tutorial, but normally I just merge all the shadow layers together (it lightens your file and allows Photoshop to run faster).
Step 14
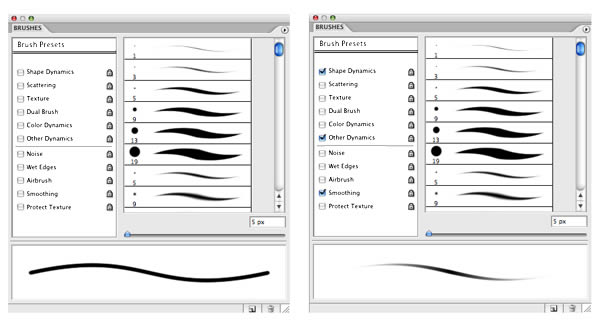
To make the second round of shades we’re going to use the PaintBrush Tool (B) with a round hard edge (Photoshop’s default brush set) with the color black. I tweaked the settings of my paintbrush to my liking, making it reactive to when I press harder or softer on my tablet. In the following screenshot you can see the version when everything is unchecked, and beside it I showed my Paintbrush settings to compare. Both the options inside the Dynamic form of the brush and other dynamics are set at 0%. You can change this by clicking on the text of the checked boxes. To find this window go to Window > Shapes (Or press F5 on your keyboard).
Step 15
layers, one to place on top of the FG folder (Title it "FG-Shadow2") and a second to place on top of a BG folder (Title it "BG-Shadow4"). Then ignore all the cringes that will threaten to crawl their way onto your face and start drawing away. It is cringeworthy because it won’t look particularly pretty at first. And although it looks completely uncontrolled, notice that I used a thinner px for the brush to define the tree texture some more, but used a thicker px for the brush to accentuate its curves. Make sure to paint the darker areas of the background in the newly created BG-Shadow4 and those of the foreground in the newly created FG-Shadow2 so the FG and BG remain separated.

Step 16
Now we want to set both the BG-Shadow4 and the FG-shadow2 layers to blend mode multiply and their opacities at 20%. This allowed us to add more depth to the illustration.
Step 17
Place your new shadow layers into their respective folders (make sure they set at the top and not underneath your line art and background/foreground layer), and create two more layers; "FG-Highlights" and "BG-Highlights". Here we’re going to do the exact same thing as we did in step 15, only this time we’re going to use a white color. Select your Paintbrush (Round, hard edged) and touch the areas where the light would be most prominent. I used a thick px for my brush and thanks to my settings, whenever I paint it has a soft feel to it, more so when you use a brush slightly larger than you normally would go for. You could also use a round, soft edged brush, but I find it to give a blurry feel to things, especially on top of a vector created base since vector is so clean cut and you don’t want to alienate it completely.
Step 18
No blend mode necessary here, simply tone down the two layers their opacity to 30%. Move the highlight layers into their respective folders; FG-Highlight > FG and BG-Highlight > BG.
Step 19
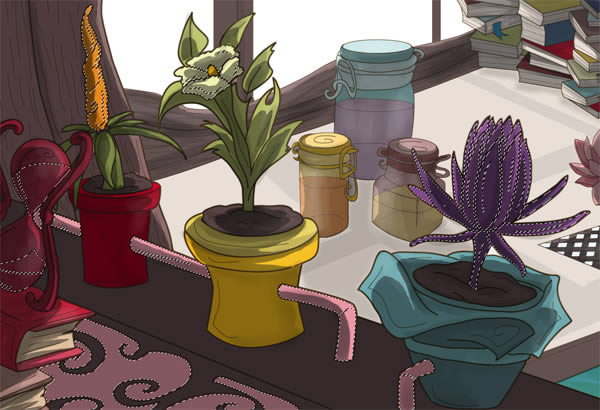
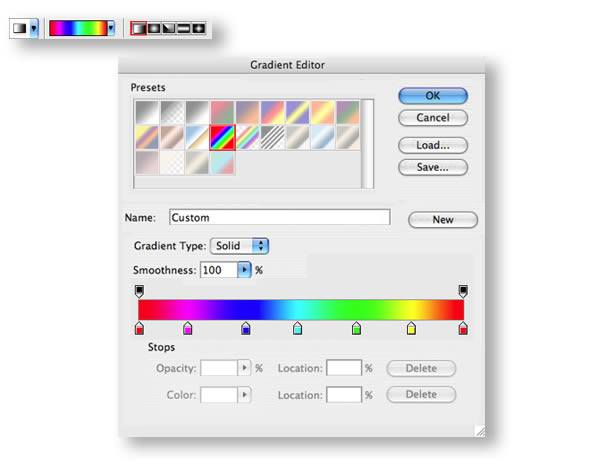
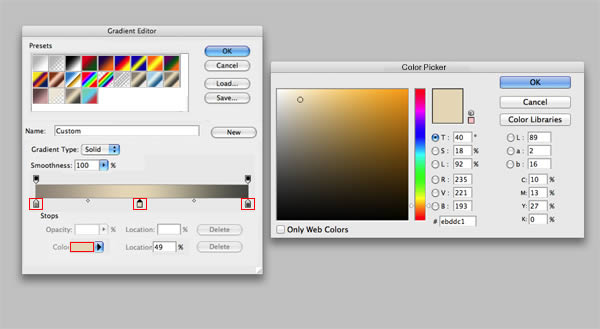
So after having worked in all those shades and highlights, the liquid in the pots and beakers isn’t as vibrant anymore and I find the flowers to have become muted as well. Create a new layer and title it "Gradient1". Then select your foreground layer in your FG folder, choose the Magic Wand Tool (W) and click on the areas you want to make more colorful (To select more than one area at a time, hold down shift). Make sure you click within the line art. Return to your "Gradient1" layer and switch to the Gradient Tool (G). In your options bar (located at the top of your program), you’ll see the gradient options appear after you’ve clicked on the tool. Select the linear gradient (first one in the row) and then click on the gradient color options. A window will appear and inside it you’ll find the default Photoshop gradients and the options needed to make your own. Since it has a rainbow gradient available in the default series, we’re going to choose that one.
Step 20
Once you’ve selected your gradient’s colors, use the Gradient Tool (G) and draw a gradient into your selection (the one you made with the magic wand). Deselect (crtrl + D) and then set you "Gradient1" layer to blend mode Screen and lower the opacity to 30%. Fancy, the flowers aren’t dying anymore! Tip: Sometimes it’s better to apply a gradient flower by flower (or whatever it is you’re drawing), since then the entire gradient can cover that one flower rather than three of them at once. You want to apply these same steps to all the other flowers and liquids inside the pots and beakers of the illustration.

Step 21
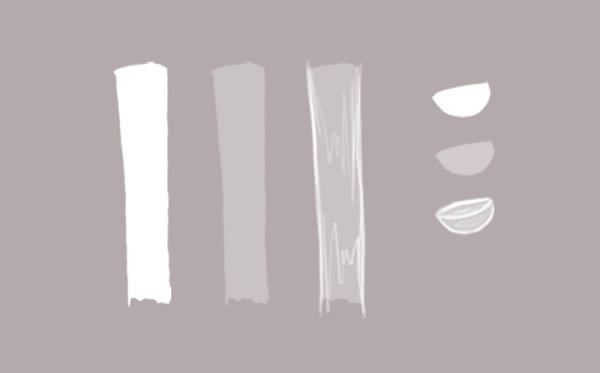
We are going to add the water elements in this Illustration. Water is really hard to draw and I avoided it like the plague until I couldn’t anymore. I found a simple way to draw this element and hope you’ll find it effective as well. Draw out the shape of the water with the color white (I do this with the Lasso Tool (L)), and then lower it in opacity (somewhere between 20 and 40%). Select a thin in px brush and give it a highlighted outline and some zig zaggedy lines in the middle to show water motion. And that’s pretty much it. This works on waterfalls and inside pots, not so much on large surface water like oceans. You can give it a blue highlight. I did this in the pond at the bottom center of the Illustration, I selected the white shape I drew and applied a blue gradient on top of it in a new layer, setting it to blend mode screen and lowering it in opacity. I also accentuated the water rings inside the pots and beakers more by painting white ringlets onto them.
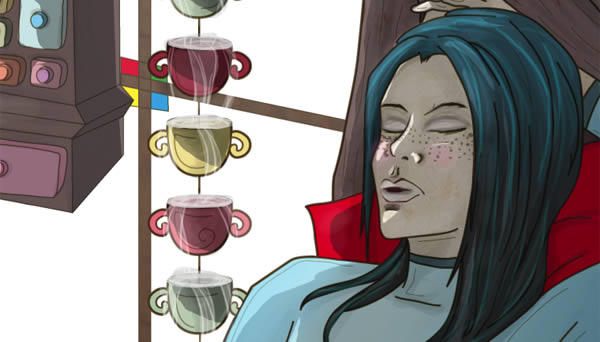
Step 22
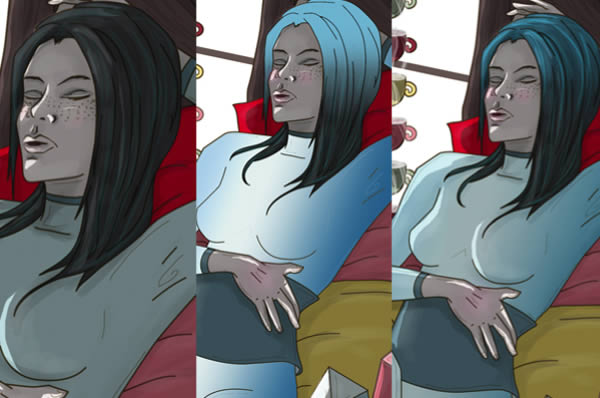
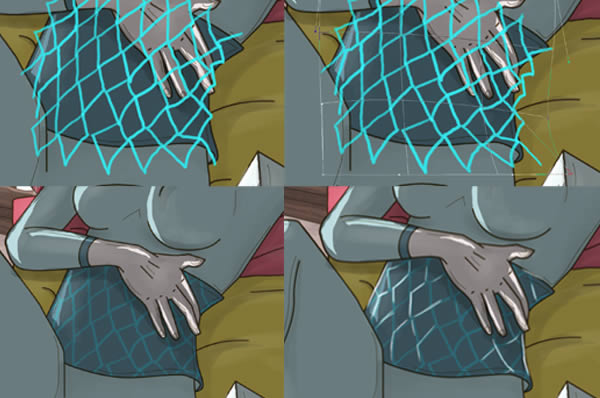
We’ve been working on the overall illustration for a while now, and much like the flowers, pots and beakers, the character isn’t standing out much anymore. So we are going to give her some details to make her pop out again. Since we’ll be using the Paintbrush Tool (B) and Gradients (G) I won’t go into explaining the hows of them anymore. I added a blue gradient to her hair and her clothes and on the waistband I drew out a pattern with a thin in px brush, which I then altered the shape off by using the deform option (Go to Edit > Transform > Deform) so it can follow her body curve. Each gradient and the pattern were set to blend mode soft light and lowered in opacity between 30 and 50%. I added some harsher highlights using a thin in px brush and white color.
Step 23
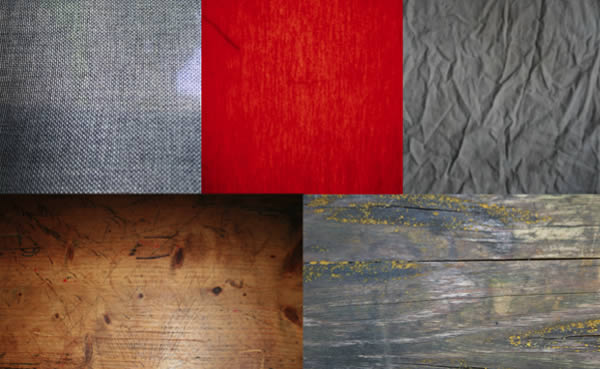
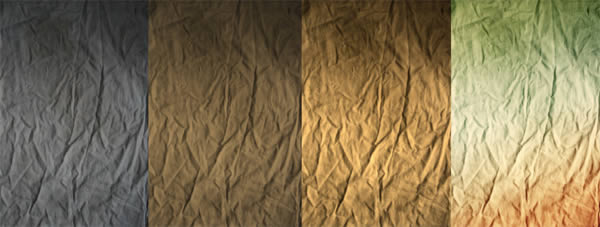
Textures are awesome. They can bring and add a lot. For this illustration I made my own textures. You can download them for free, their links are at the top of this tutorial in the Assets. It is good to know what type of textures you need before you search for them or make them. In this case we want wood texture and something with a gritty feel for the floor. I took close up pictures of whatever wood I could find around the house and went outside to take pictures of things I thought may come in handy. I ended up with a curtain, office lamp, kitchen towel, wooden desk and garden bench (shown in that order). Some could use work. We are going to mix the first two textures together and add a photo filter, adjust contrast and change the color in the third.
Step 24
Open the second texture first (the close up of the red office lamp). File > Open > OfficeLamp.jpg. Once it’s open, go to Image > Adjustments > Pigment and Saturation. We want to make the red slightly less flashy, so lower the saturation to about -30 and then click on OK. Now we’re going to open the first texture (the close up of the curtain) and drag it out of its canvas to place it on top of the red. Once it’s snapped perfectly on top, we are simply going to set its blend mode to multiply. Then we choose the Eraser Tool (E) and use a large in px brush set to about 50% in opacity. Now erase the areas that are really dark in contrast, removing those areas to make the red texture beneath it appear a bit again. Once that done, create a new layer, choose the Gradient Tool (G) and pick one that you like (I went with muted greens and ambers with a linear shape) to then create a gradient covering the texture so far. Set this layer to blend mode soft light. Merge your layers together, save the file and there, you’ve made a useable texture!
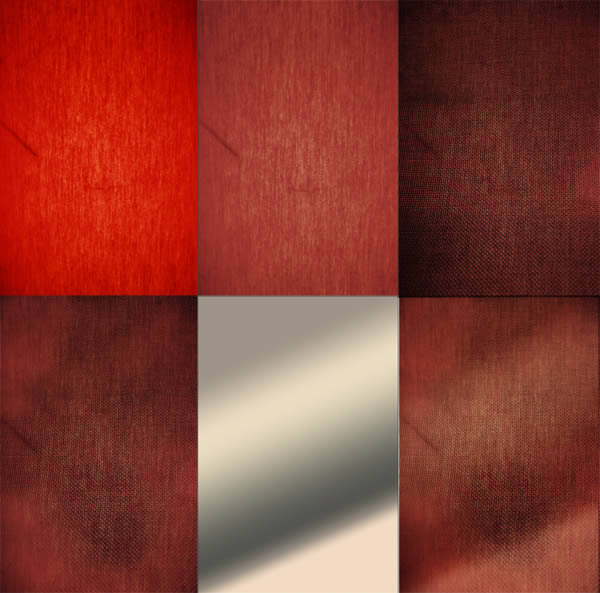
Step 25
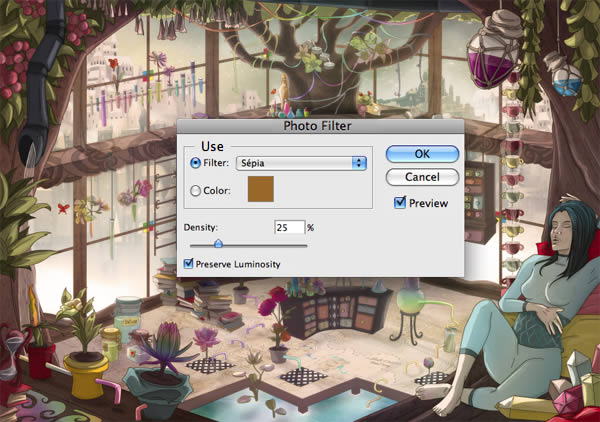
Now open the third texture (kitchen towel). File > Open > KitchenTowel.jpg. Once it’s there, go to Image > Adjustments > Photo Filter. A window will open and we are going to click on the filter bar and choose ‘Sepia’. I used a very high density (60%) all the while conserving the light. Once you’ve chosen a tone you like, click OK. Now go to Image > Adjustments > Light and Contrast. Set the contrast to + 20 and the light at -5 then click OK. And then last, create a new layer on top to place a gradient in it (I went with red, soft yellow and green with a linear shape). Set this to blend mode overlay, save the texture and you’re done!
Step 26
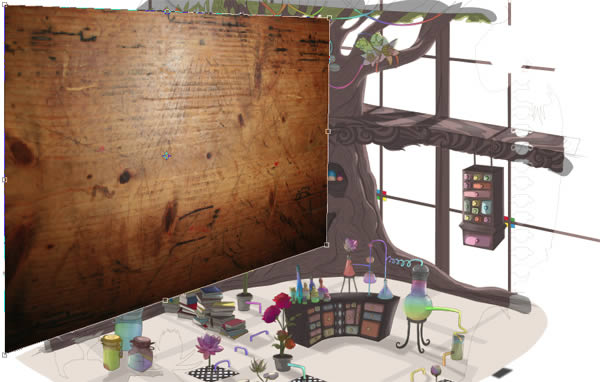
Now that we’ve prepped our textures, we want to open all four and drag them into the illustration’s file. Hide all textures with the exception of the wooden desk texture. Place it between your BG and FG folders (You can hide the FG folder for now). We’re going to use it on the wooden railing that frames the middle of the windows and on the window frame itself. Due to the perspective, we are going to manipulate the texture so it follows the shape of the illustration. Let’s start with the left side. Go to Edit > Transform > Torsion. This will select your texture in a way where you can manipulate its direction. Now we want to move the top and bottom corners on the right towards the center of the tree and the top and bottom corners on the left backwards and making them larger than the right side (See screenshot). You can use the illustration’s ground for reference, try to align the bottom of the texture to the floor. Once you are happy with its new direction, hit enter so the transformation releases. Now we duplicate it (Command/Ctrl + J), then right click on it and mirror it horizontally. Hit enter so it releases the transformation and move it to the right side of the Illustration so it covers the right window frame.

Step 27
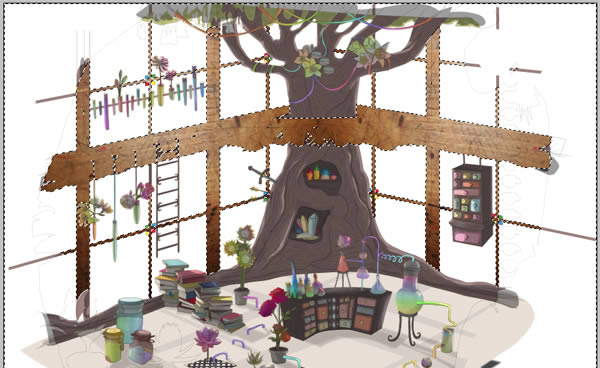
Merge these two layers together. At the top right corner of your layer window there is a small arrow, click on this and then click on ‘Merge with bottom layer’. Once the two textures are merged together, hide it and go inside your BG folder and select the background layer. Choose the Magic Wand Tool (W) and click within the line art that holds the window frame and the wooden railing. Once you’ve selected all the areas the texture will need to appear in, invert the selection (Select > Invert) and then click on your texture layer. Hit delete on your keyboard. Now that the wooden texture appears only in the areas you need it in, you can set the texture’s blend mode to soft light and lower its opacity to 30%. If you find some areas are to obvious, use the Eraser Tool (E) at a low opacity and erase the areas until you are happy with the result.

Step 28
Repeat these steps on the garden bench texture to fit the floor of the illustration, but instead of setting it to blend mode soft light, set it to blend mode Overlay and don’t change the opacity. If you find it needs more texture, add the towel kitchen texture on top of it and play with the blend modes and opacities until you’re happy with it.
Step 29
The last texture we will add to the background is the office lamp texture that we previously mixed with the curtain texture. Since it will go over the tree, we don’t need to do any torsion transformation. But like before, we will select the background layer, use the Magic Wand Tool (W) to select the tree within the line art, invert the selection, return to the texture layer and then hit the delete button. I used blend mode overlay and an opacity level of 25%. I used these same steps to add the wooden desk texture on the two trees in the foreground as well (Blend mode soft light, opacity 30%).
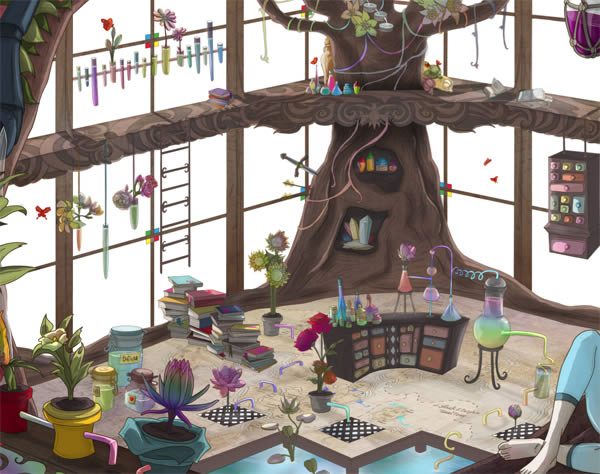
Step 30
I don’t know about you guys, but the file is getting so heavy, my computer is screaming for retirement. So lets save this psd file, close it and then duplicate it (My psd was located on my desktop). Open the duplicate in Photoshop. Now merge all your layers together and save. You could also just merge all your layers together in your original psd file and continue working on it from there, but if you wish to keep your layers and be able to return to it, then duplicate and merge. I titled the merged layer FG since now we need to create the true background that will be seen through the windows and the illustration we have so far, essentially becomes the foreground.
Step 31
Before we start on the background that will be seen through the windows, I realized that I found some things were missing. I used two ways to add more to the illustration. The first was painting in elements with the Paintbrush (B) and the second was duplicating existing elements and simply changing the colors using the Magic Wand Tool (W), so it isn’t as obvious that I duplicated them. I also touched up the character’s face some more one last time. You’ll find butterflies, extra pots and beakers, a semblance of a map drawn out on the floor and more books and cushions. I also painted small name tags on the pots to give them more detail.
Step 32
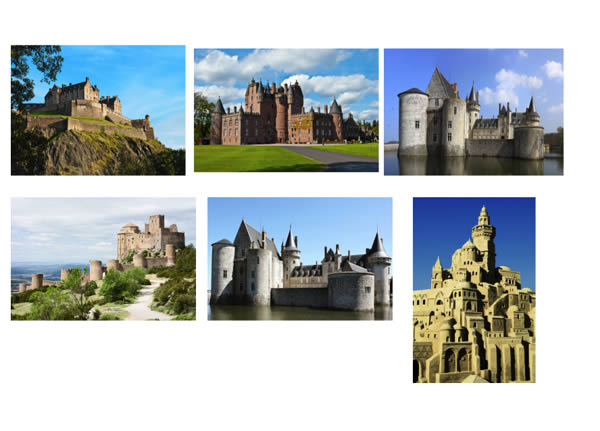
Save your file, close it and open a new one; File > New > Choose an A4 size and then click OK. Now go to Image > Rotate > 90 degrees. Now we have a new canvas to start drawing our ‘far off’ castle. For this we are going to use stock reference (which was kindly bought for me off Photodune.com by Sharon Milne), which you can find the links to in the Assets at the top of this tutorial. They don’t need to be big since we aren’t going to draw a lot of detail, what will matter here is the overall shape. Open the stock photos and drag them into your newly created canvas. I wanted castles seen from the front without too much of an angle, since I’d like the Greenhouse to be surrounded by the castle and not placed on top of a hill looking out over the castle.
Step 33
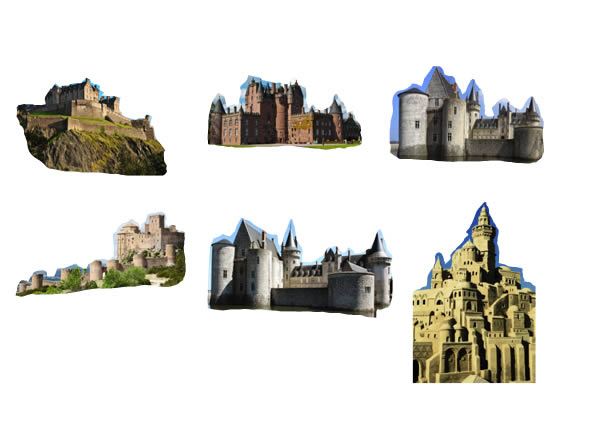
Now we are going to butcher a bit. Choose the Lasso Tool (L) and select only the castles shapes. Once that complete, invert (Selection > Invert) and hit the delete button so the skies, grounds and whatever else surrounds them is now gone. You don’t need to be precise.
Step 34
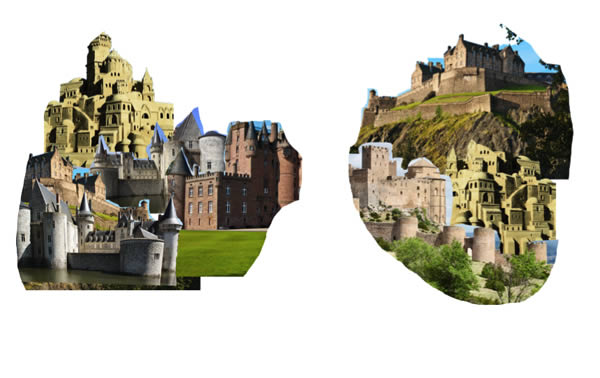
Now you want to use the castle selections you made and create one big castle that will come in view through the illustration’s windows. There is no real logic to this, I just stick them together randomly, aiming for something that’ll look good. I duplicated (Command/Ctrl + D) the sand castle stock as I found that one particularly nice. I mirrored some (Right click > flip horizontally). The white space between them is where the center tree off the illustration will be located.
Step 35
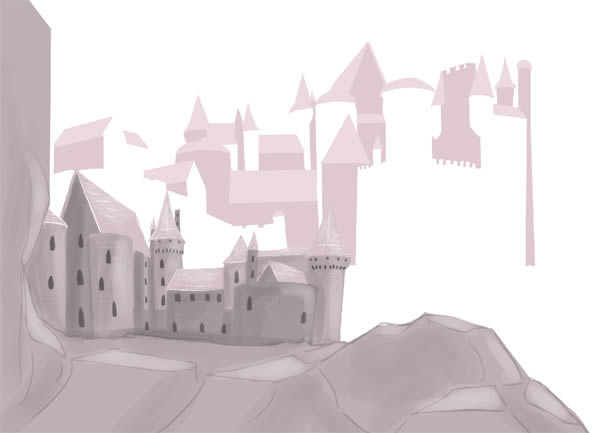
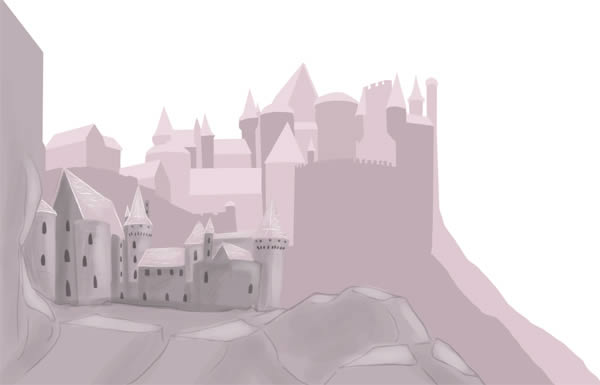
Now lower you reference in opacity (between 30 and 50%) and then create a new layer on top of it, titling it "Roofs". I focused the screenshot on one part of the castle so it’s easier to see thanks to the close up. Choose the Lasso Tool (L) and pick a light color (I chose pink, not that it matters, we’ll be changing the color of the castle later on when we add it to the illustration). Now locate all the roofs in your castle reference and start shaping these out with the lasso tool. Once you’ve completed your selection, press down on Command/Ctrl + delete to have the light color you chose appear (alt + delete when you want the background color to fill in your selection).

Step 36
Create a new layer underneath the "Roofs" layer and title it "Walls1". Choose a darker color and using the Lasso Tool (L), select all the walls that have the most light in your reference. Once the selection is made, press down on Command/Ctrl + delete to have the darker color you chose appear.
Step 37
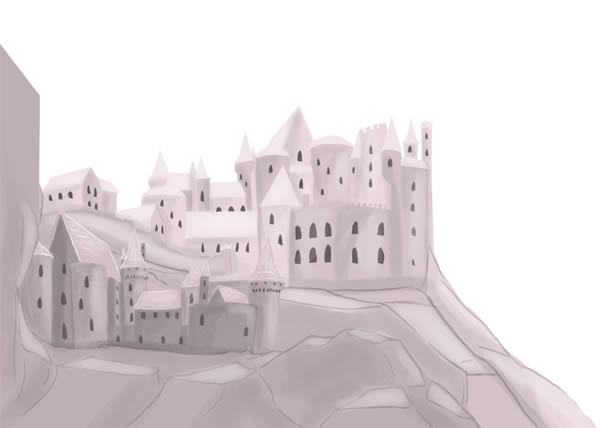
Create yet another new layer, placing it under the Roofs and Walls1 layers, titling it "Walls2". Choose an even darker color and with the lasso tool we are going to select all the remaining walls in the reference. Press Command/Ctrl + delete so the darker color you chose can fill in your selection. Now merge the Roofs, Walls1 and Walls2 layers together, lower its opacity low enough so the reference can be seen through it, and see if there are any walls that could use a different shade (Pick a color between your first wall shade and your second wall shade). If so, select those areas with the lasso tool and fill them in with the chosen color. Keep the opacity as it is so the reference is still showing.
Step 38
Now that we’ve created a solid base, using the reference as guide, we are going to select the PaintBrush Tool (B), round and hard edge, and paint in the windows (I chose a darker color than the darkest walls). It doesn’t have to be very precise since it won’t show once the castle is placed in the illustration. We can also give the rocky areas a bit of an outline so they are more defined. In this same step we are going to add some shadow. Create a new layer and start painting over the areas where walls separate from one another. Don’t worry about it being messy since after that’s been done, we put it on blend mode multiply and lower the opacity somewhere between 20 and 50% (Whichever you feel comfortable with).
Step 39
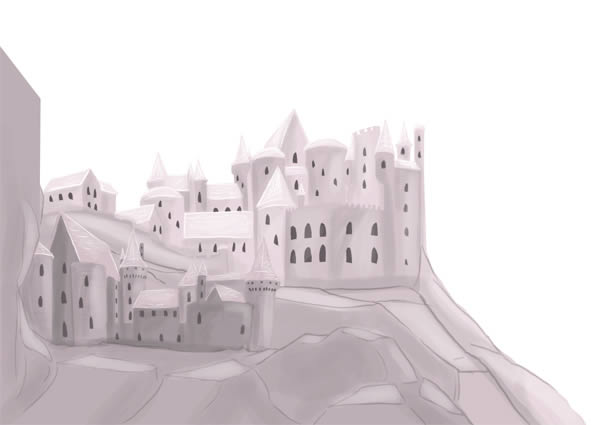
Now come the highlights. So create a new layer, choose the Paintbrush Tool (B) and a white color (don’t use too small px, it’s okay if it’s messy) and dab it on the areas that need a bit of highlight. If it’s too harsh, lower the layer’s opacity until you are satisfied with the look. Now downsize the paintbrush in px (I went from 20 px to 5px) and zoom in on the roofs to paint over the edges, giving them a more important highlight than the rest of the castle. I personally do bit by bit rather than the entire castle at once.
Step 40
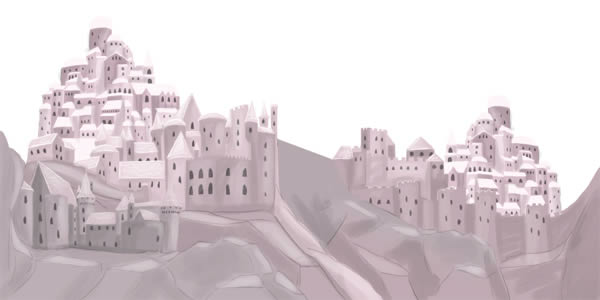
Now that the castle is complete, delete the reference and merge all layers together. Open the illustration’s psd file again and then drag the castle in. Place it underneath your FG layer so it can appear behind the illustration. I found it to be too straight and I wanted more towers, so I opened the sand castle stock and the dark brown castle stock again and used the same steps described earlier to draw a castle over it.
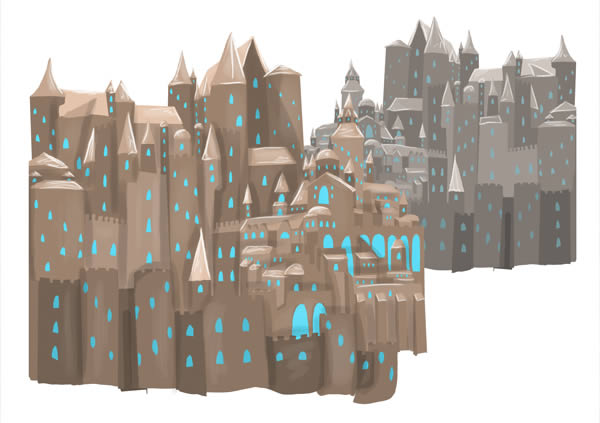
Step 41
I Desaturated both castles (Image > Adjustments > Desaturation) and then moved them around until they were positioned in a way that I liked. You can use the Eraser Tool (E) to remove certain areas and have the two separated castles mesh into one another a little better. Or paint more towers, walls, etc. The first screenshot shows the first castle’s new composition, and the second shows the second castle’s new composition placed on top of the first:
Step 42
To hide cut off areas, we can either draw more of the castle, or cheat/be lazy and add in mist. For this we choose the Paintbrush Tool (B), large in px, round and hard edge at a low opacity (20%). Or use a white transparent gradient in a circular shape and allow it to take shape over the castle, hiding the part you wish to hide. Now either leave the sky behind the castle white, or use a gradient to give it some color. I chose a gradient made out of green and blues and added white spots on it with the paintbrush tool. For those who don’t know how to make your own gradients, click on the gradient preview you find in your options bar, and once the gradient window appears, select whichever gradient and it’ll show it at the bottom of the window. You’ll find that you can choose colors when you click on the gradients colors. Once you’ve chosen your colors, click on ‘New’ and it’ll add it to your gradient list. Then click on OK and use it through the Gradient Tool (G).
Step 43
To bring back color to your castle, we’re simply going to put a gradient on top of it, set it to blend mode soft light and then lower the opacity between 60 and 80%. Once that complete, merge all your castle layers together (gradient background included). I found the castle to be slightly to visible, so I lowered the layer’s opacity to 85%.
Step 44
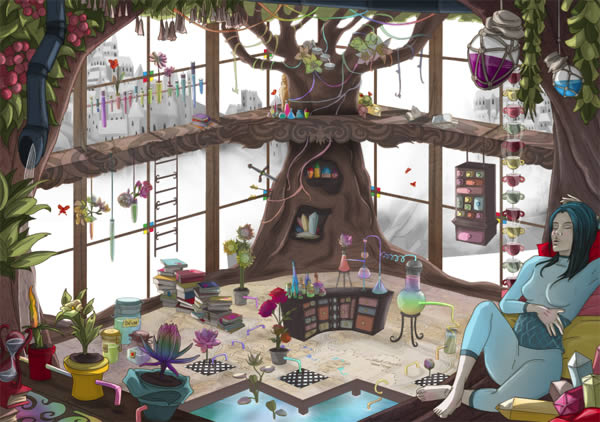
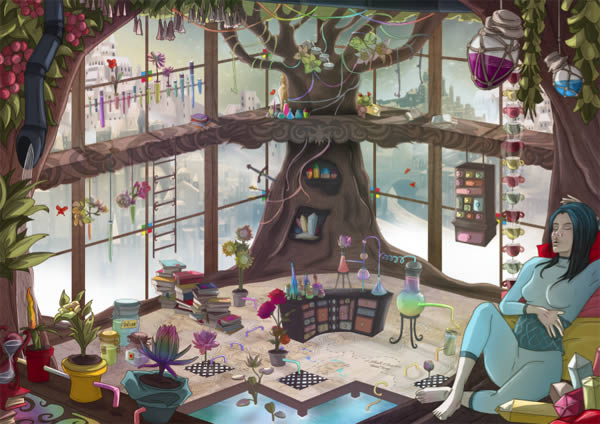
Now come the final touches before we call it quits. We now have the FG layer and the Castle layer. Unless you wish to keep the castle separate from the foreground, merge them together. Otherwise put them in a folder together. Either way, we are going to duplicate it (Command/Ctrl + J) and add a Surface Blur to it. Go to Filter > Attenuation > Surface Blur. Set the Radius to 4 and the Threshold to 14. Click on Ok. Set this layer’s opacity somewhere between 50 and 60% so the blur isn’t overwhelming but gives a dreamy atmosphere instead. Then choose the Eraser Tool (E), set it to a large px and lower the opacity to 60% so we can ‘gently’ erase the front frame area in the blur (Front frame: The two trees at the front, the three plants, the character and the hanging pots).

Step 45
Now we want to unify all the colors a bit and warm up the atmosphere. Create a new layer and then go to Image > Apply an image. Once it has created it, return to Image > Adjustments > Photo Filter. Choose the Sepia filter and set its density somewhere between 20 and 30%. Make sure the ‘Conserve the light’ button is checked.
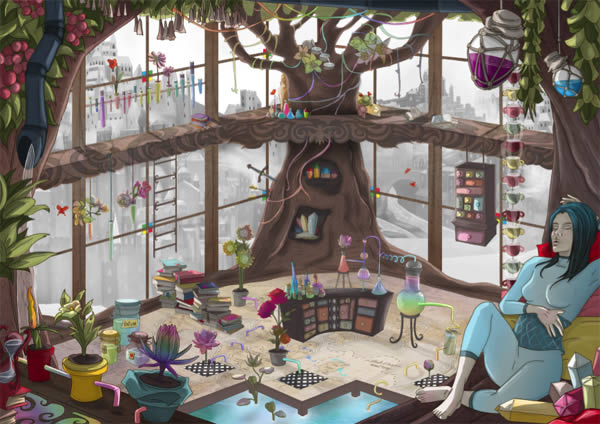
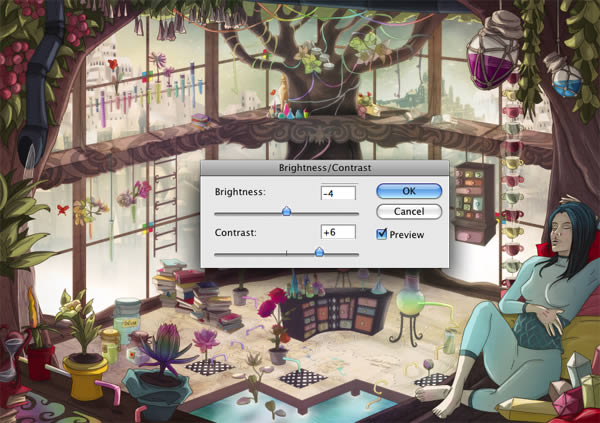
Step 46
Then the final step would be to adjust the contrast. Go to Image > Adjustment > Light and Contrast. I set the light to -4 and the contrast to + 6.
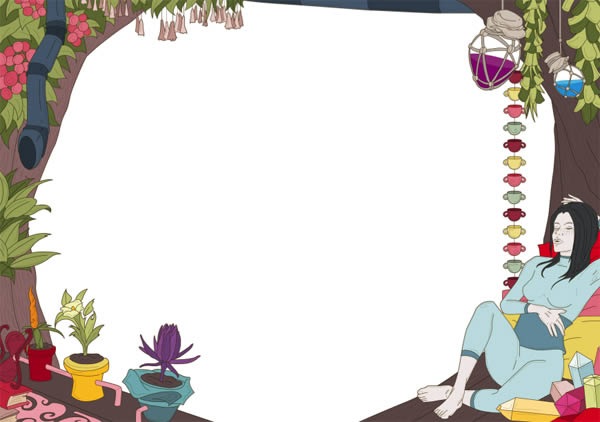
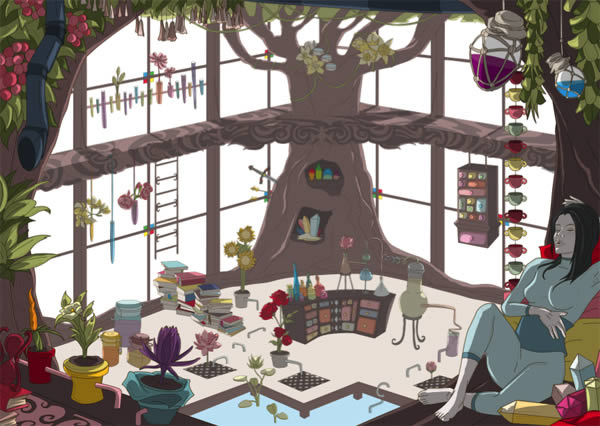
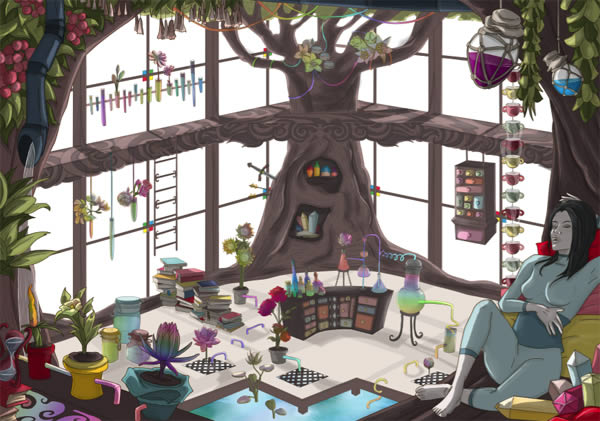
Final Image
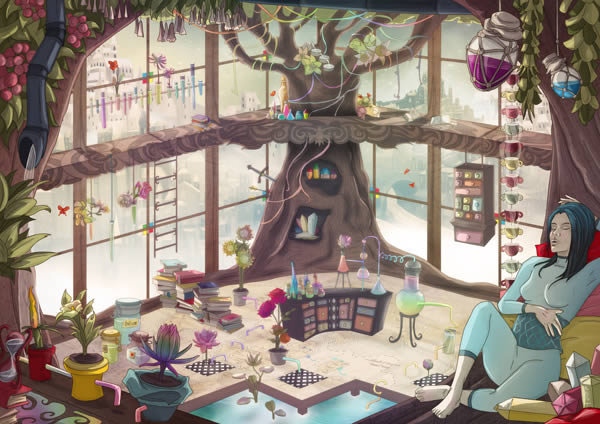
{excerpt}
Read More