In this tutorial you will learn to create 3D Typography using the Perspective Tool, Blends and some of the new features of Adobe Illustrator CS6.
Step 1
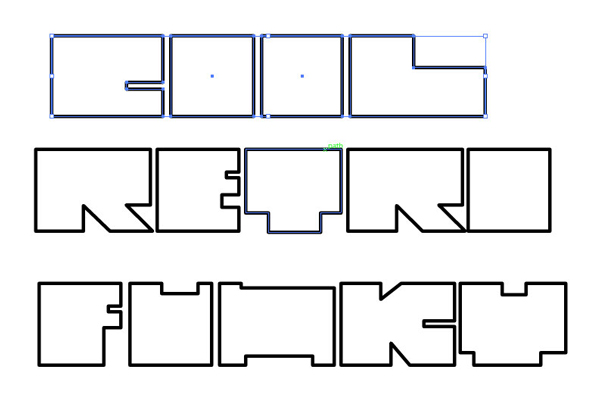
Start by creating the text or shapes in 2D. This particular effect works best with bolder text with a wider surface area. If you are using text it is important that you Right Click > Create Outlines to change the font to paths. I have created my own font created using the Rectangle Tool (M) and the Pathfinder tools (Shift+Ctrl+F9). It’s easier to use the smart guides to help you do this. Use Ctrl+U to put on guides
Step 2
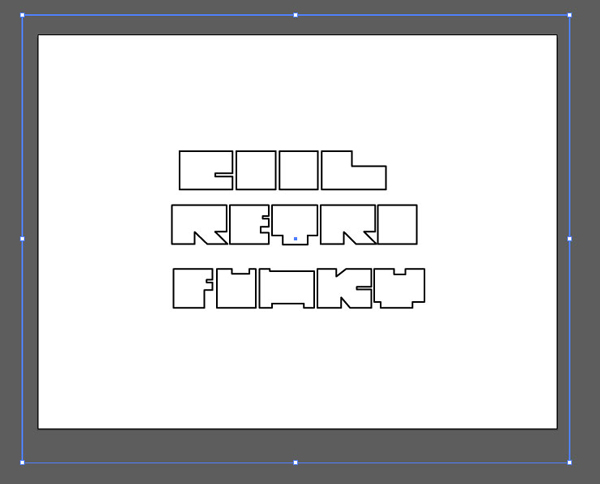
Select each word and Group the letters together (Ctrl+G).
Step 3
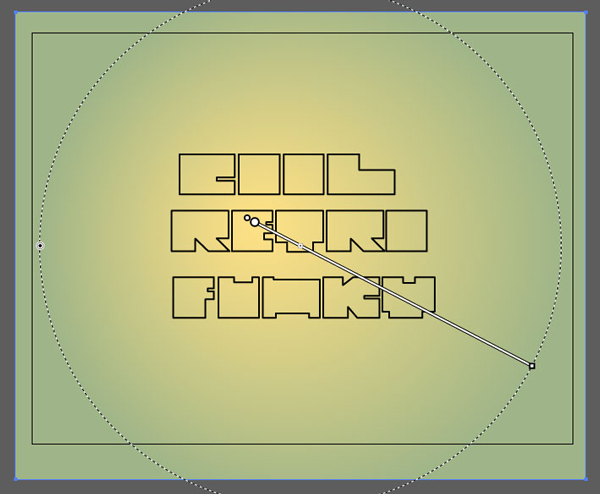
On a new layer, draw a rectangle larger than the artboard which will be our background. Apply a radial gradient which transitions from a light center to a darker outer. Rename this layer "Background" and send it backward, behind the first layer.
Step 4
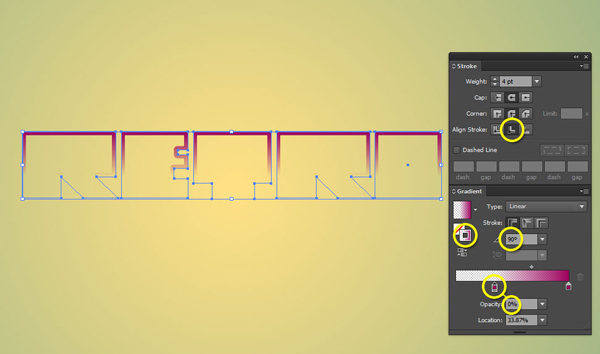
Select all of the word shapes and increase the Stroke Weight to 4pt.
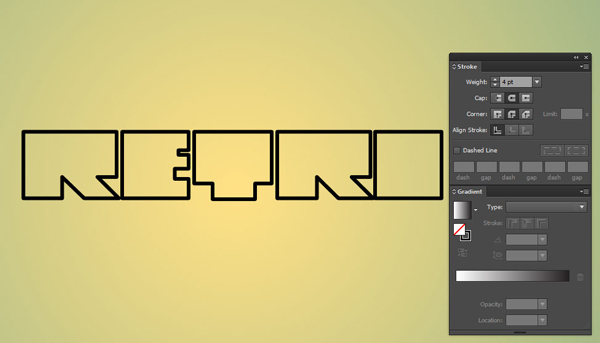
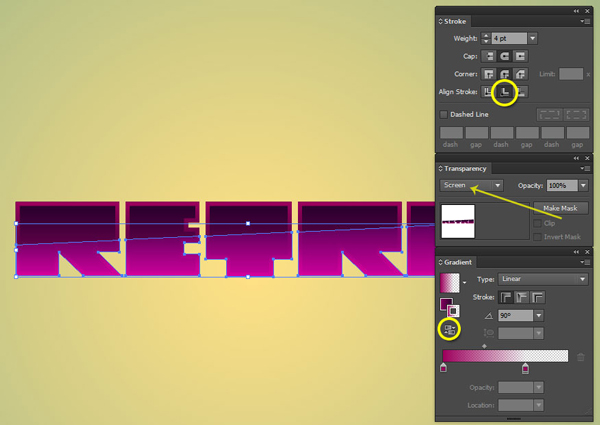
Select Align Stroke to Inside, then add a Linear Gradient to the stroke. Edit the gradient so the two colors are exactly the same and change the opacity of one of the colors to 0%. The gradient should go from 100% (opaque) to 0% (transparent) top to bottom.
Step 5
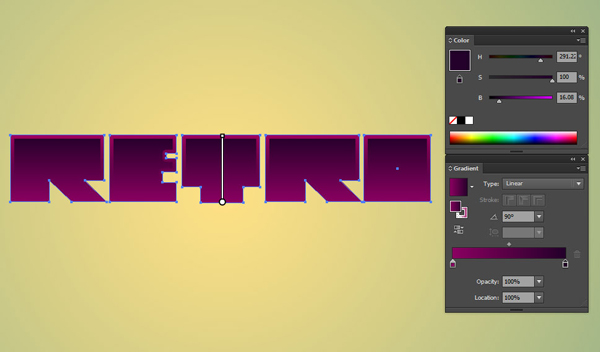
Select the Fill and add a dark to light gradient to it vertically, so the stroke contrasts with the fill and gives us a highlight effect.
Step 6
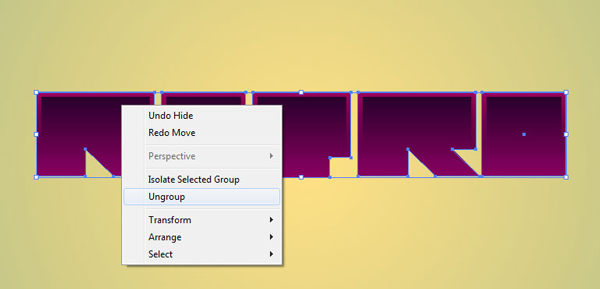
Now we are going to create a simple gloss effect on each of the letters. First select the group of letters and press Ctrl+C to copy then Ctrl+F to paste directly in front once, then choose Right Click > Ungroup.
Use the Pen Tool (P) to draw a shape over the letters which cuts through diagonally (as below).
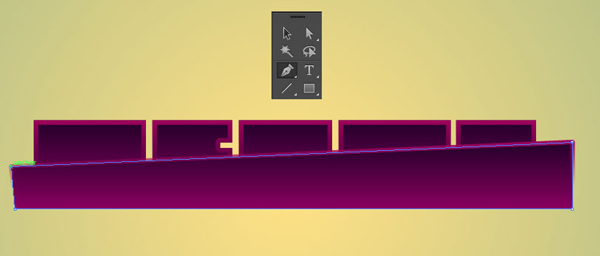
Select the shape and press Ctrl+C to Copy it. Select one letter then hold Shift and select the shape in front. Use the Pathfinder Intersect to cut off the excess part of the shape.
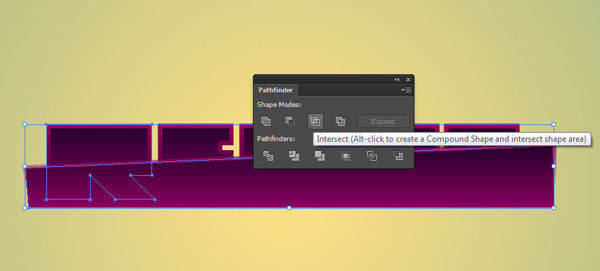
Repeat this for each letter.

Step 7
Select all of the new shapes made with the Pathfinder and select Align Stroke to Inside. Change the Transparency to Blending Mode Screen and with the stroke selected, hit the Reverse Gradient button to make the stroke transparent at the top rather than the bottom. With them still selected press Ctrl+C to copy then Ctrl+F to paste in front.
Step 8
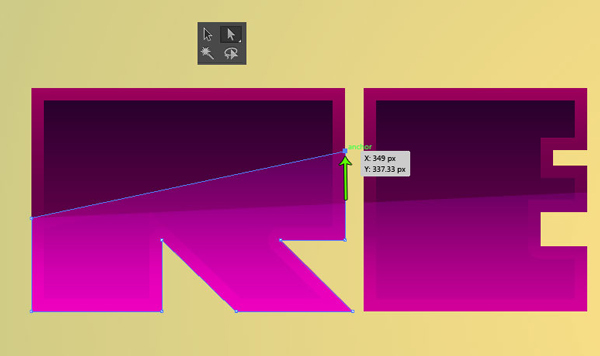
With the Direct Selection Tool (A), select the node to the top right of the shape which you just copied and move it up slightly. It’s useful to turn on Smart Guides (Ctrl+U) and View > Snap to Point for this. Repeat this for all letters

Step 9
Ensure all of the gloss effect shapes are selected and Group them (Ctrl+G).

Step 10
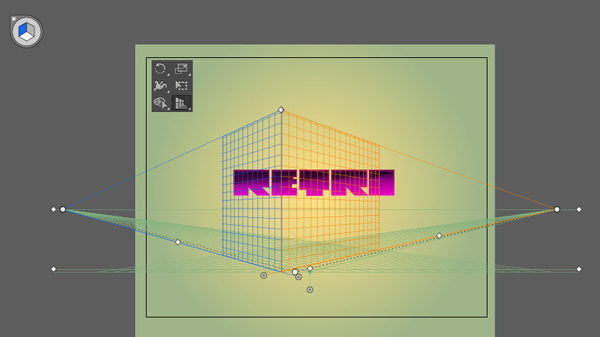
Switch on the Perspective Grid Tool (Shift+P) then use the Perspective Selection Tool (Shift+V) to adjust the nodes of the grid and make the grid look similar to the one below.
Step 11
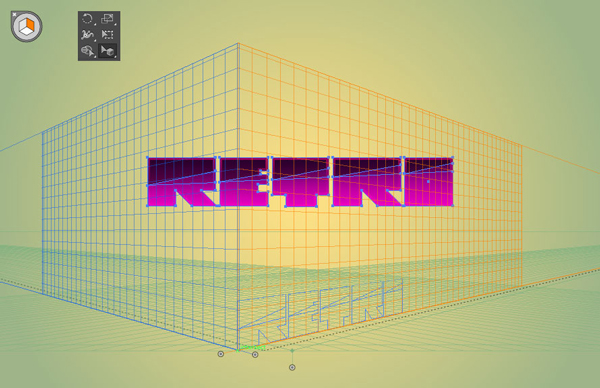
Now we need to move the letters into perspective. The Perspective Grid Tool uses three grids which can be used to make a left face, right face and horizontal face to a pseudo 3D object. Each face can be selected using the icon which appears when the perspective grid is turned on.

We need to put our word onto one of these faces. Use the Selection Tool (V) to select all of the word then choose the Perspective Selection Tool (Shift+V) to drag the word into the bottom-left corner of the right grid. Notice how the word has been angled to the perspective grid.
Step 12
Next we will make the pseudo 3D effect. Select the word minus the grouped gloss effect on the front then copy it and paste it in front, (Ctrl+C then Ctrl+F).
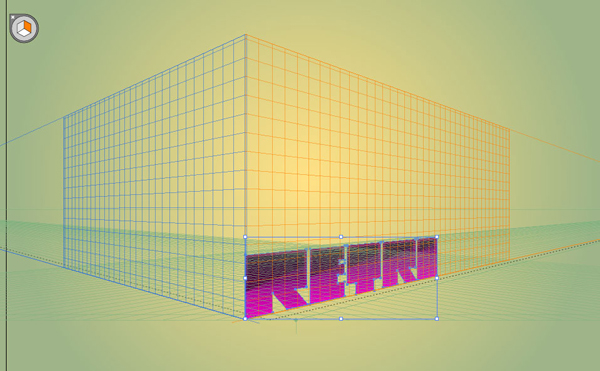
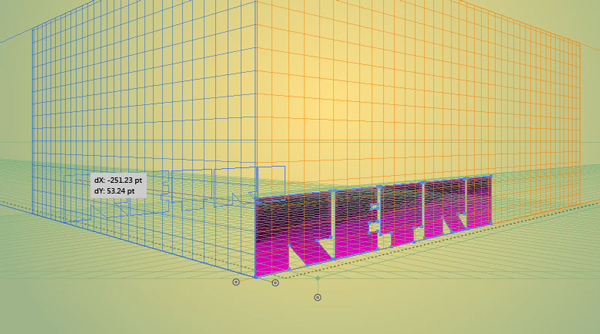
Using the Perspective Selection Tool (Shift+V), hold the ’5′ key and dragging the word to move it backwards in perspective. This will become the back face of the 3D word (although it won’t be seen). Send Backward (Ctrl+[) until it is behind the original word.
Step 13
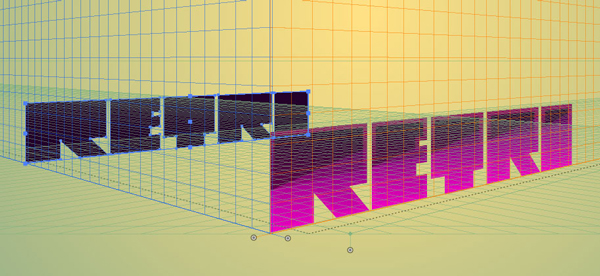
Change the stroke and fill to one solid color which is slightly darker than the color of the original.
Step 14
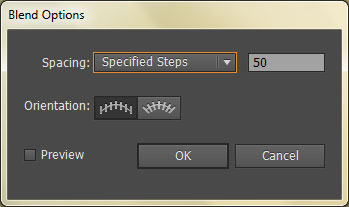
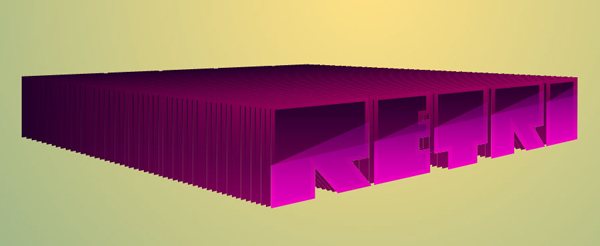
Select both words (without the gloss effect) and choose Object > Blend > Make. Next go to Object > Blend > Blend Options. Change the spacing to specified steps and set the amount to 50.
Step 15
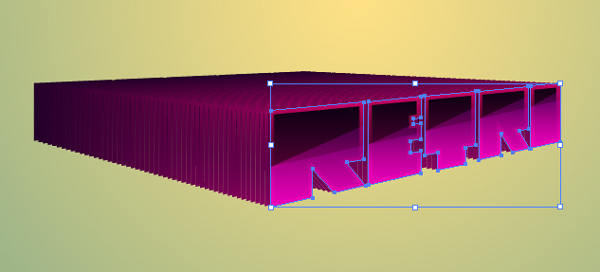
Double click on the blend to enter isolation mode then select and copy the front face of the word (minus the gloss). Then exit isolation mode and paste it in front of the group of gloss shapes then Send Backward (Ctrl+[) once. Change the Blending Mode to Soft Light.
Step 16
You can repeat the above steps for any other words you may want in your composition. I’ve used the same methods with different colors and stacked them on top of each other. For the cool word I started from the left perspective grid.
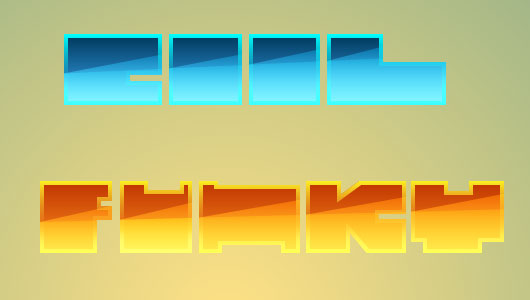

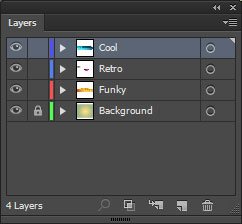
It’s a good idea to put each word on a different layer to make selection easier
Step 17
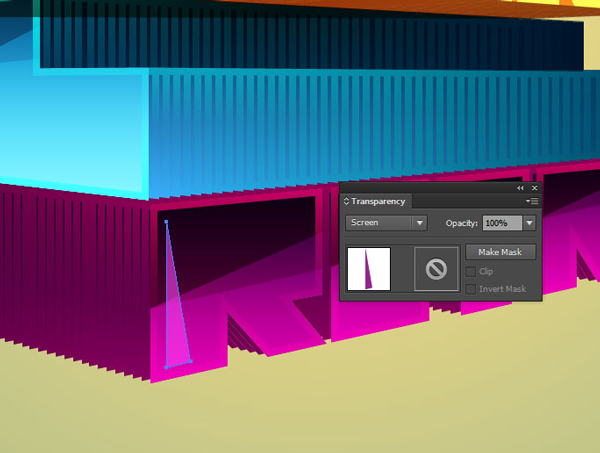
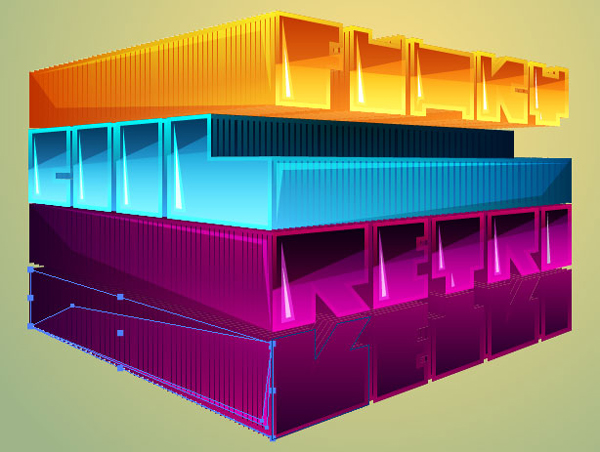
Now use the Pen Tool (P) to add extra highlights and shadow details. This part is pretty much down to your creativity and how you want your type to look. I drew triangular shapes on the left side of each letter and set the Blending Mode to Screen.
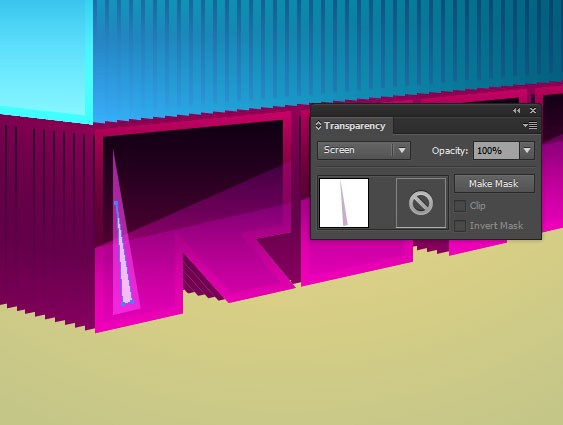
Then I added a smaller highlight inside that one with a lighter color and also set the Blending Mode to Screen.
Use the Pen Tool (P) with the aid of Smart Guides to add a highlight to the side of each word (as below) and set it to Blending Mode Overlay, then add another shape with the same color and Transparency settings to make a stronger highlight.
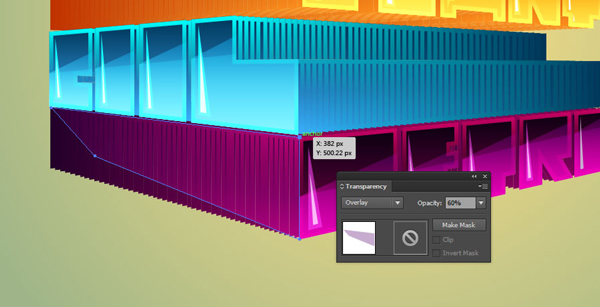
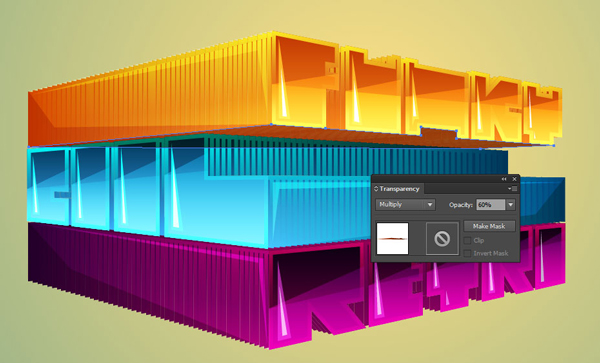
You can also add in some shadow with the Pen Tool (P). Use a darker shade, set the Blending Mode to Multiply and lower the Opacity to 60% to make it slightly transparent.
Step 18
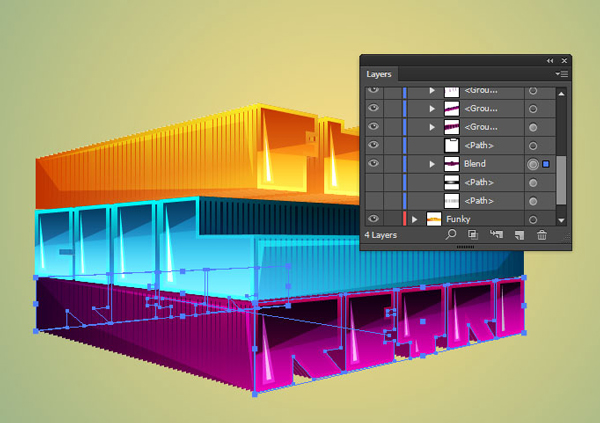
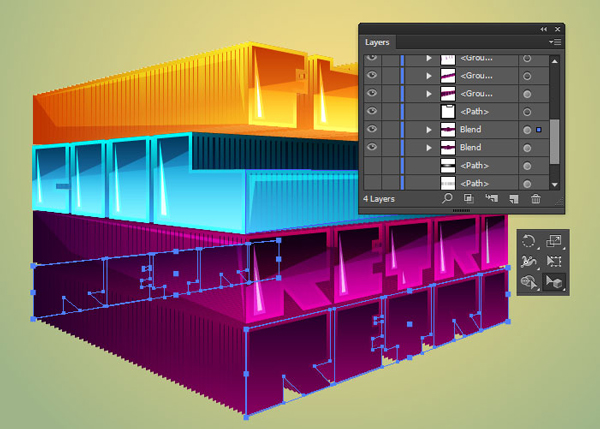
Now we are going to make a floor reflection. Selecting the different parts can get a bit tricky here so it may be useful to use the Layers panel. First of all, with the Direct Selection Tool (A), select the blend of the word at the bottom and press Ctrl+C, Ctrl+F to Copy and Paste in Front. Then use the Perspective Selection Tool (Shift+V) to move the blend down just underneath the word.
Step 19
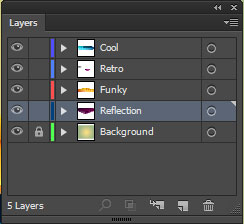
In the Layers panel, Create New Layer and rename it "Reflection", then drag the new blend into the layer and place it just in front of the "Background" layer
Step 20
To flip it upside down, we will use Perspective Selection Tool (Shift+V). Select the front face, hold Alt and drag from the top-middle handle down to line up with the bottom so it is mirrored (this doesn’t need to be perfect). Do this again for the back face of the blend.
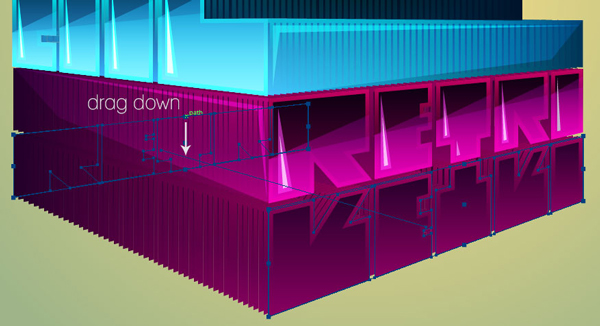
Step 21
Double click on the blend to enter Isolation Mode then with the Direct Selection Tool (A), select the front face group and reverse the gradients on both the stroke and the fill.
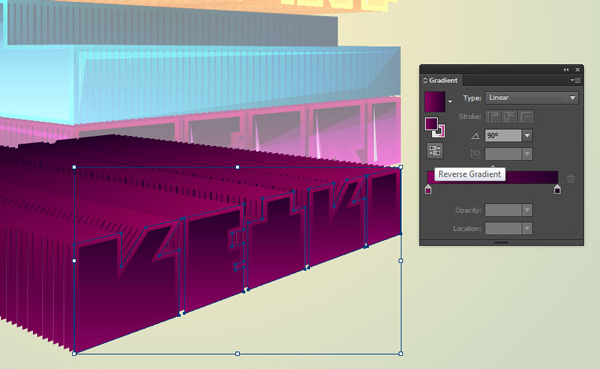
Step 22
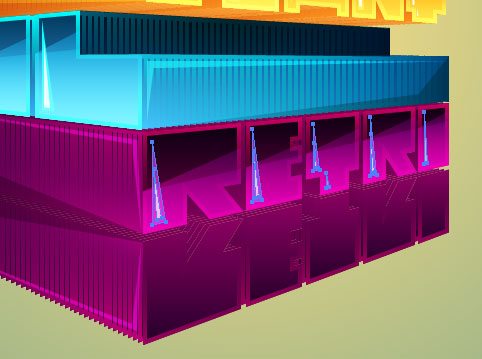
Exit Isolation Mode, then select the highlights on the side of the word and Group them (Ctrl+G).
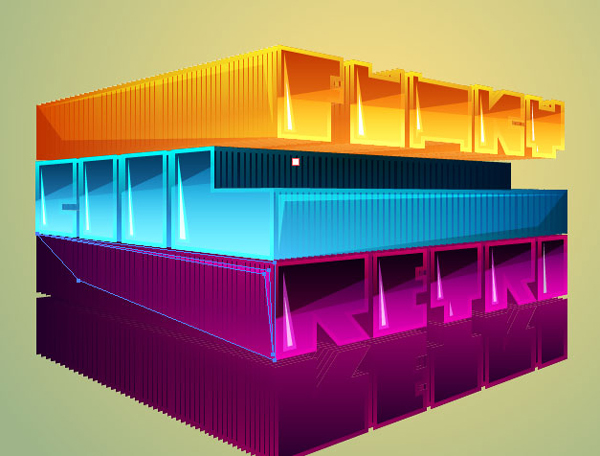
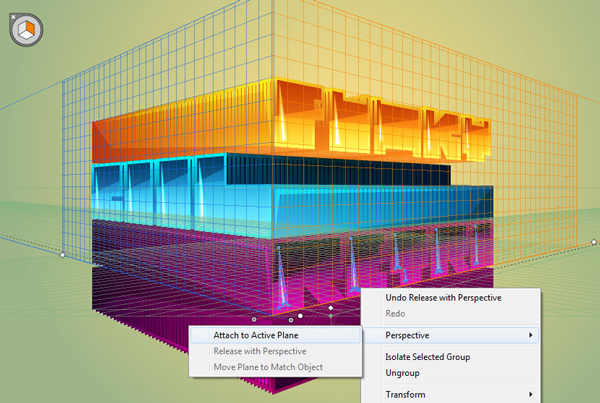
Switch on the Perspective Grid and then activate the grid which corresponds with the highlights (in my case the left grid) then choose Right Click > Perspective > Attach to Active Plane.
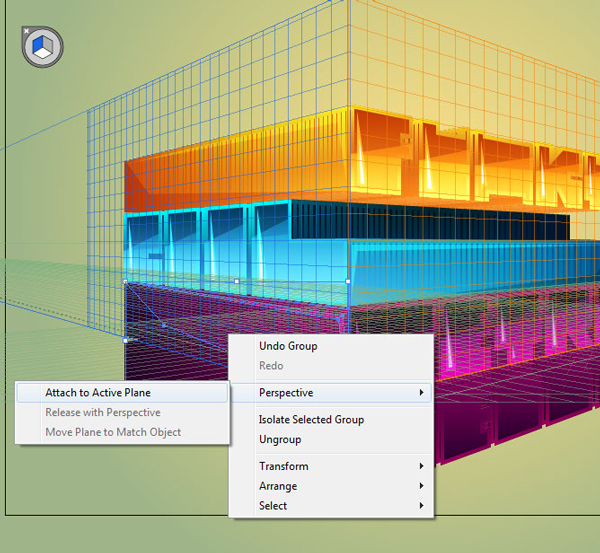
With the Perspective Selection Tool (Shift+V) you should now be able to move the group in perspective. Move it down in perspective until it is aligned in the right place on the reflection (again, this doesn’t need to be perfect). As before, hold Alt and drag from the middle handle to flip the highlights upside down.
Step 23
Next Group the highlights on the front face of the word then as before activate the corresponding grid (right) and choose Right Click > Perspective > Attach to Active Plane.
The other highlights and the word should already be attached to the correct perspective plane so hold Shift and select them also.
With the Perspective Selection Tool you should be able to move them down in perspective to be in line with the reflection and then drag from the middle handle and flip them upside down as before.
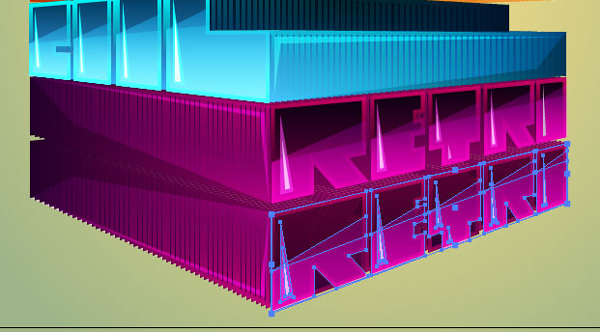
Step 24
The gradients on these also need to be reversed so double click to enter the group in isolation mode and reverse them in the Gradient panel.
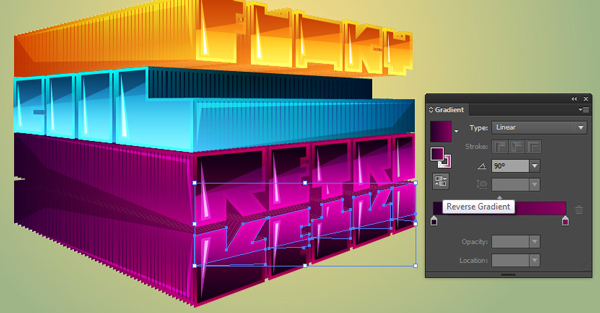
Step 25
Now group all of the elements of the reflection and in the Transparency panel, double click on the box to the right of the selection preview to create an Opacity Mask.
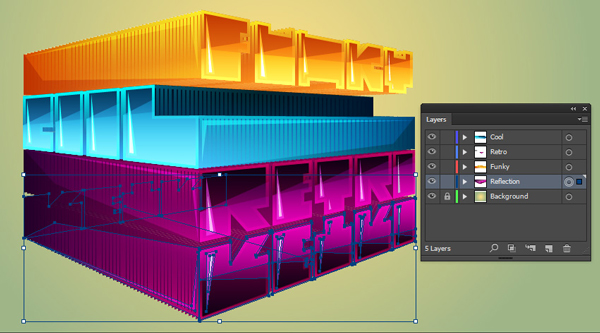
Use the Rectangle Tool (M) to draw a rectangle which goes from the center of the image to the outside as below.
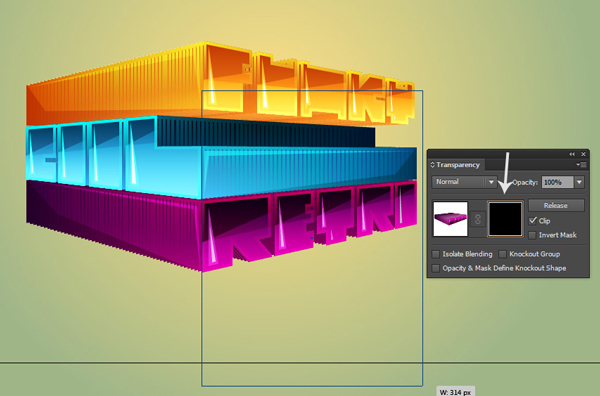
Step 26
Add a black to white gradient and with the Gradient Tool (G) direct it so the gradient is roughly parallel with the angle of the bottom of the reflection
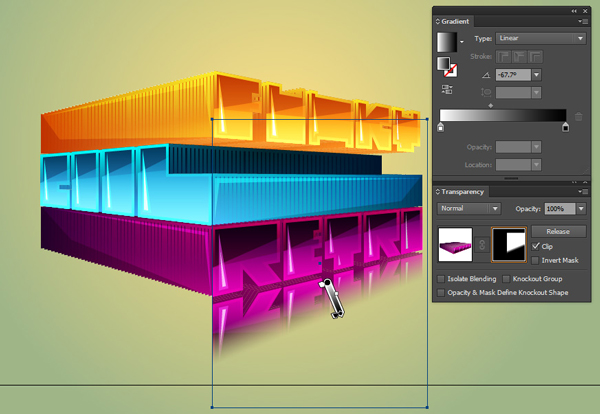
Step 27
Press Ctrl+C then Ctrl+F and drag the middle-right handle to the left until the rectangle covers the other half of the reflection and adjust the gradient to be parallel with the bottom of the reflection on this side.
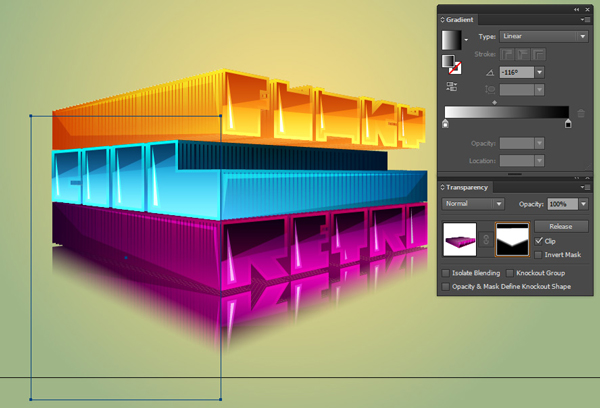
Then in the Transparency panel, click the selection preview box to exit the Opacity Mask editor.
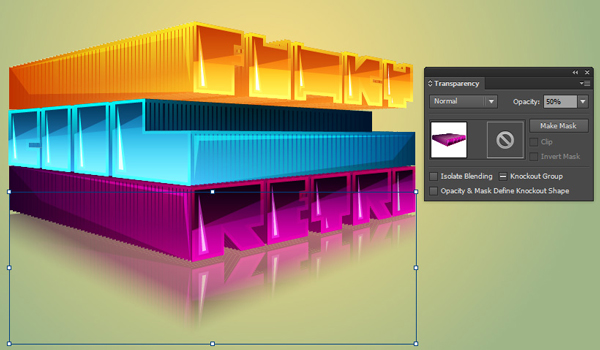
Step 28
To add a shiny effect to the floor, first draw a rectangle. Turn on the perspective grid and resize it to meet the horizon line of the grid. Add a linear gradient as below and set the Blending Mode to Screen at 20% Opacity.
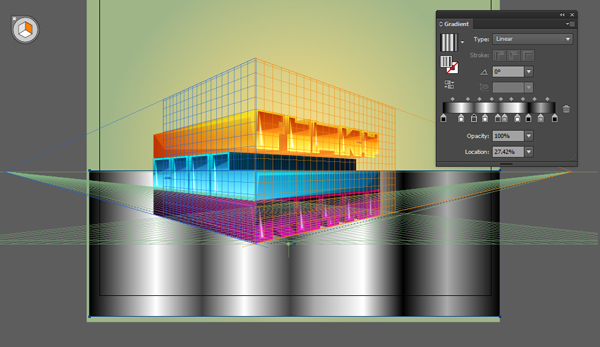
Step 29
Copy and Paste in Front then change it to a white to black radial gradient and leave the Opacity at 20% and the Blending Mode as Screen
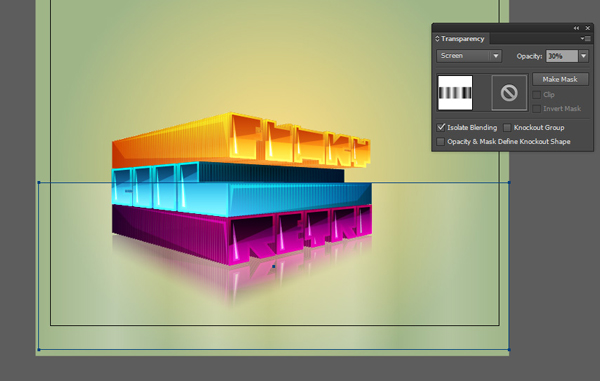
Step 30
As a finishing touch select all of the elements except the background and rotate them slightly.
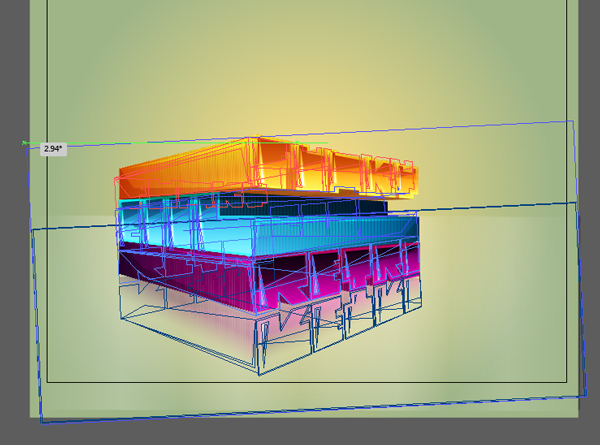
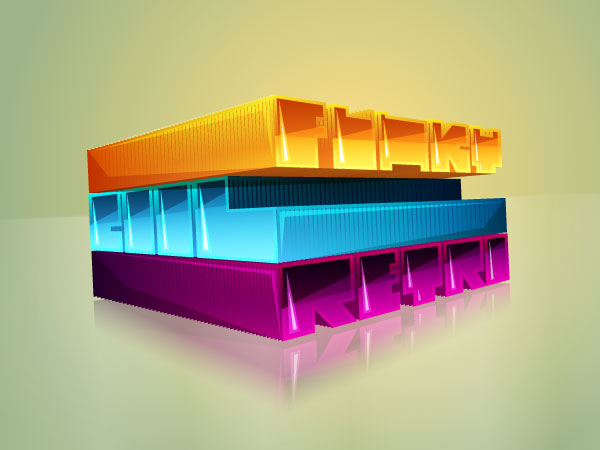
Final Image
And you’re done… these techniques can be useful for drawing 3D perspective in other styles so keep experimenting!
{excerpt}
Read More