In today’s tutorial, we’ll look at creating a quick and easy mosaic background effect using gradients and the Transform Effect. Together with Blending Modes, you can create a variety of different styles. So let’s begin!
Step 1
Using the Rectangle Tool (M), click on your artboard and enter the values 100px by 100px in the dialog box to create a square.

Step 2
Null the stroke and apply a linear gradient as shown below.
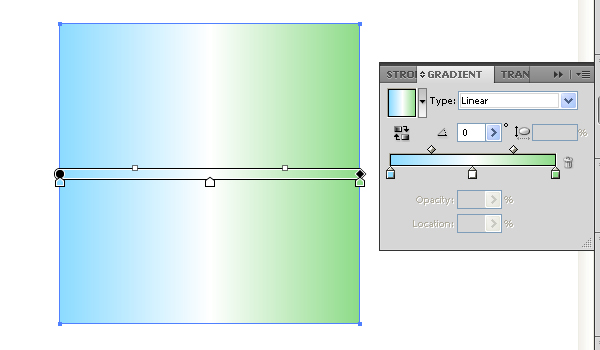
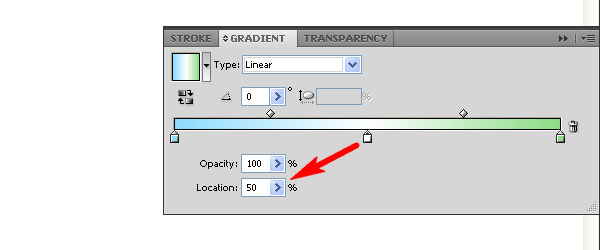
The Location of the central Gradient Slider (in white) should be set to 50%.
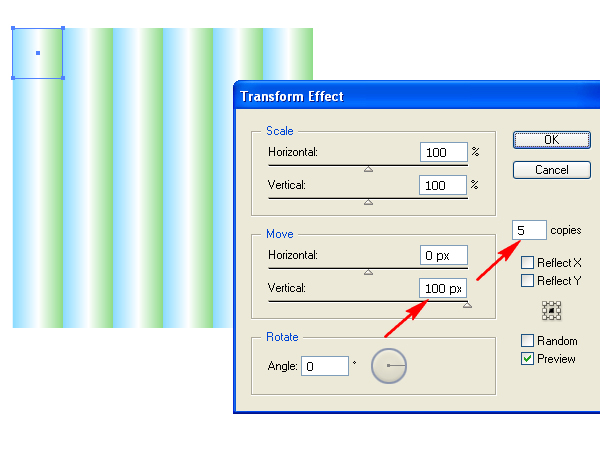
Step 3
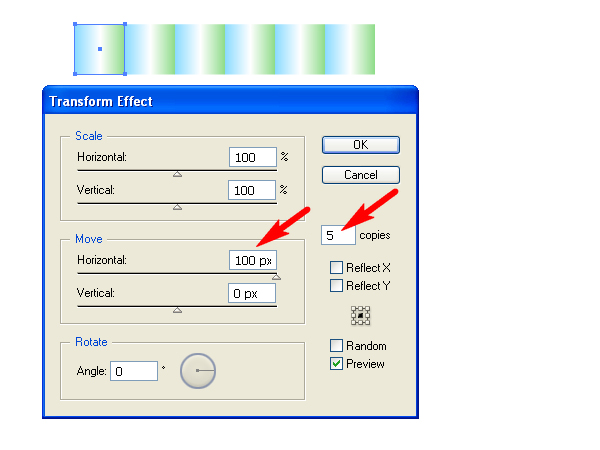
While your path is selected, go to Effect > Distort & Transform > Transform. Enter the Move > Horizontal value as 100px as this is exactly the same width as your starting shape. Then make 5 copies and click on OK.
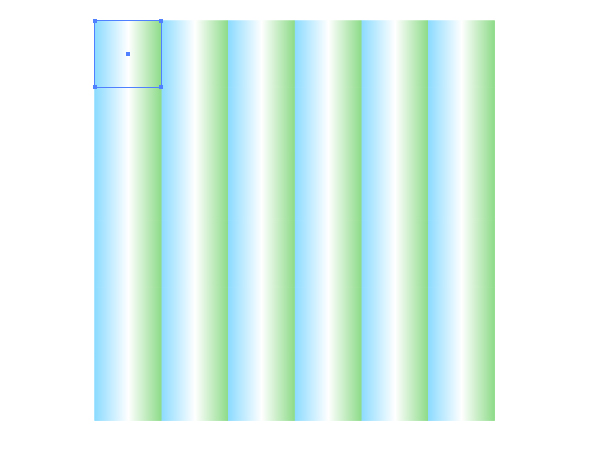
Step 4
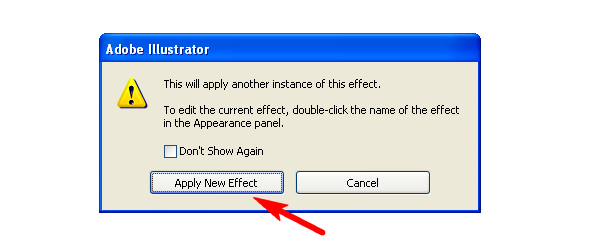
Then go to Effect > Distort & Transform > Transform again, click Apply New Effect when you are shown the below dialog prompt.
Enter in the same number of copies and this time enter 100px in the Vertical Move value box.
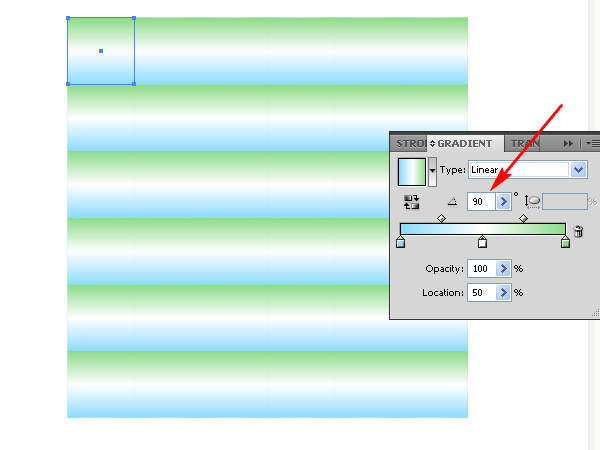
Step 5
Copy the original rectangular (and double transformed) path, and Paste it in Front (Command + C then Command + F).
Change the angle of gradient filling of the duplicate to 90 degrees in the Gradient panel.
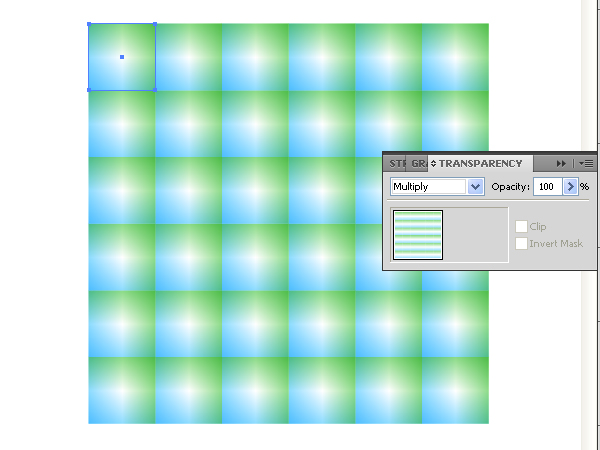
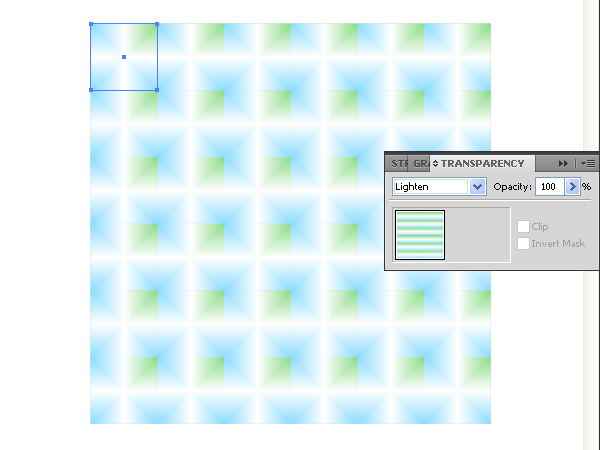
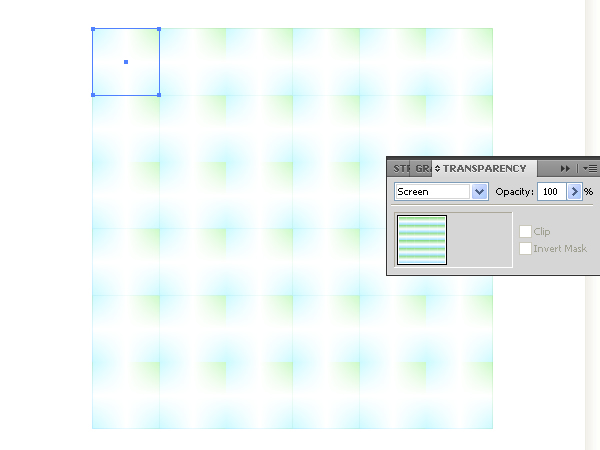
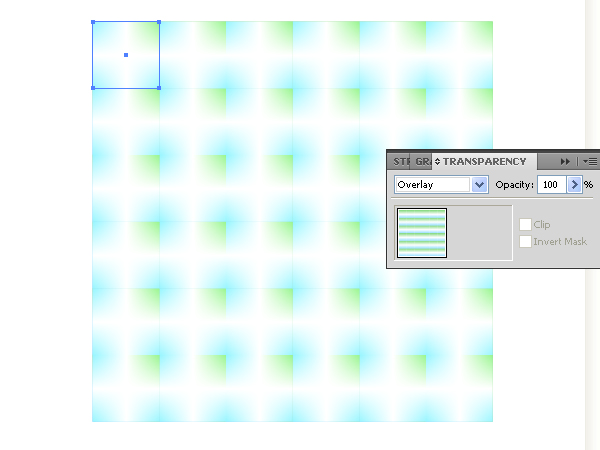
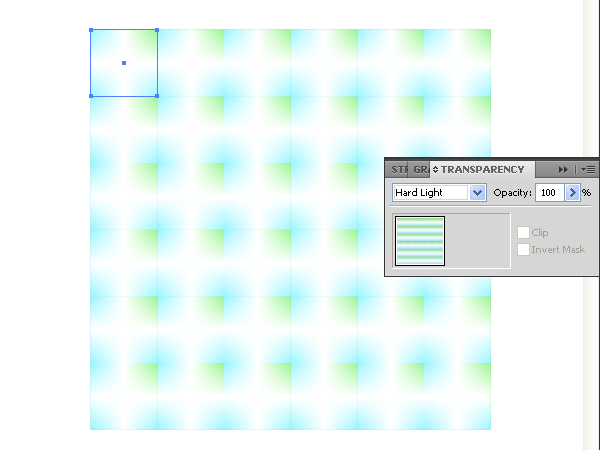
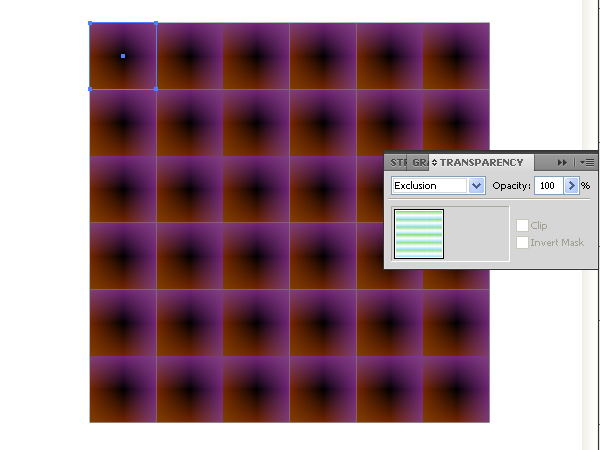
Step 6
Go to the Transparency panel and change the Blending Mode of the copy to any different from Normal. See the image below for reference.
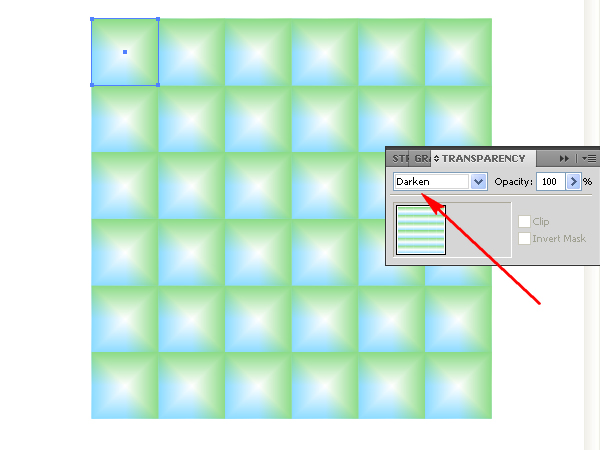
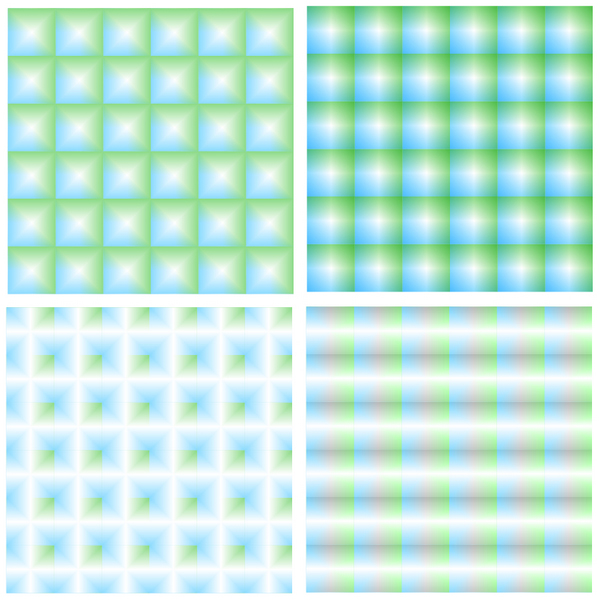
By applying different Blending Modes you will be able to create different seamless mosaic backgrounds.
Conclusion
Try experimenting with different gradient combinations and Blending Modes and Opacities to see what you can achieve.
{excerpt}
Read More