In this tutorial we will learn how to create the trash bin icon using such techniques, as 3D modeling, gradient mesh, blend tool and blending modes, as well as tracing raster images. This tutorial is made by Iaroslav Lazunov and a professional Ukrainian designer Sergii Korolko.
Step 1
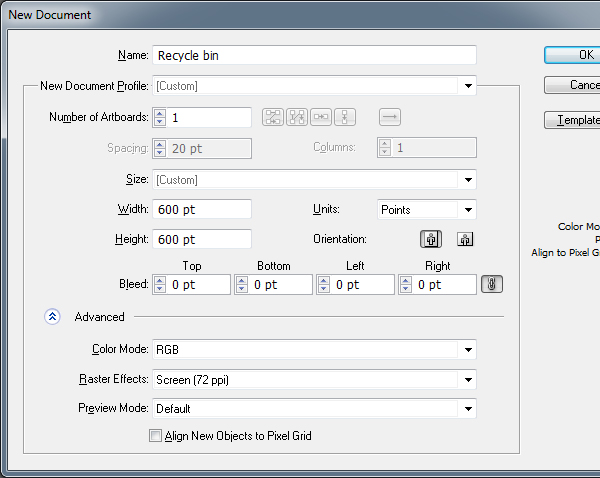
Open Adobe Illustrator and create a new document of 600 x 600 pt size, RGB color mode. The Align New Objects to Pixel Grid should be turned off.
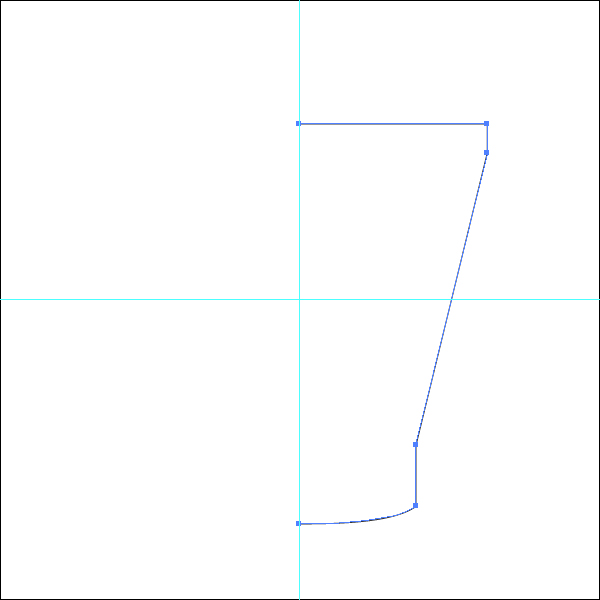
With the Pen Tool (P) create the form which is shown below, the form should be without filling with the thickness of the stroke set to1pt. The two leftmost points should align vertically . Create the vertical guide and turn the Smart Guides mode on (Command + U) for its more precise positioning.
Step 2
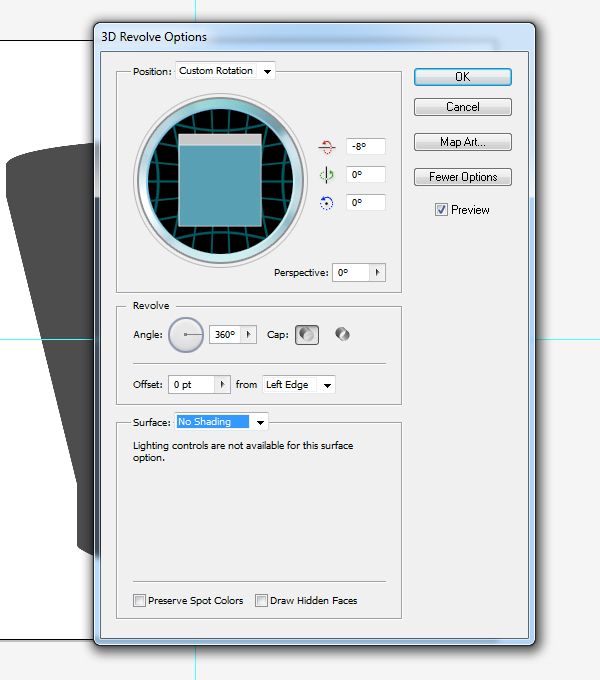
Keep the path, which was created in the previous step, selected and change the stroke’s color to grey, then go to the Effect > 3D > Revolve and set the following parameters.
Step 3
Copy the created object and paste it in front (Command + C then Command + F). Turn off the visibility of the lower object with the Layers panel, thereby eliminating the possibility of its accidental movement. We will need this object later.
Step 4
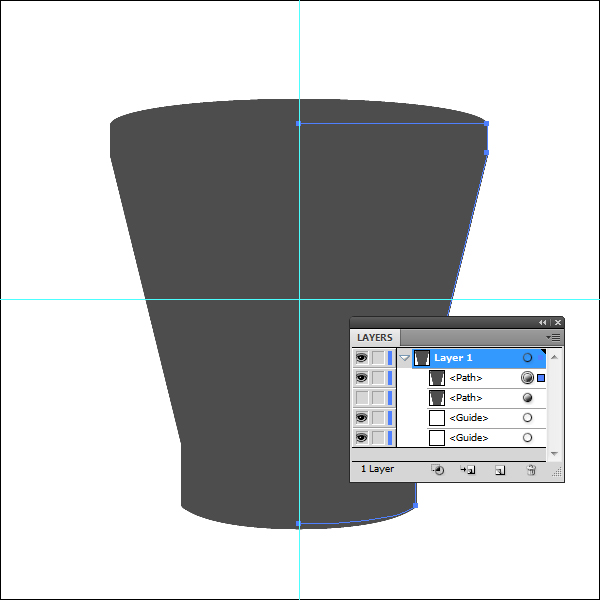
Now go to the Object > Expand Appearance. After that action, our object transforms into a group, which consists of visible objects, with which we will continue working, and hidden, unnecessary objects. Ungroup the group three times (Command + Option + G). Now the layers panel looks like this.
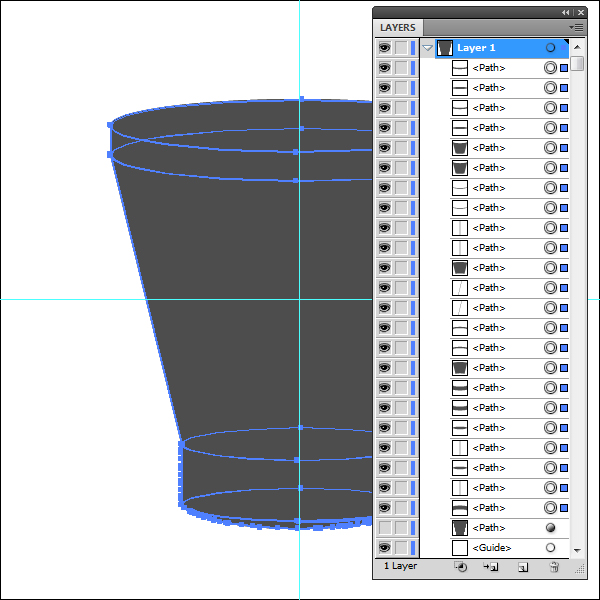
Our task now is to separate objects for further work, to do so take the Selection Tool (V), hold down the Shift key and click on the upper objects.
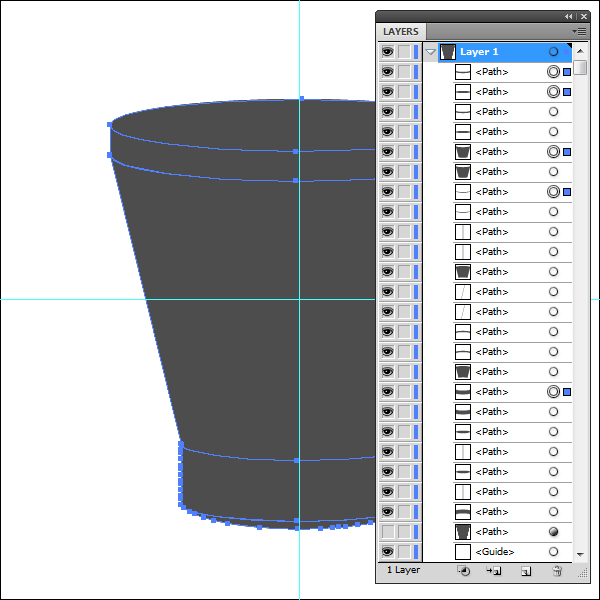
Go to Select > Inverse and press Delete. As the result, we’ve got five objects corresponding to different parts of our trash bin. To see it better, color them differently.
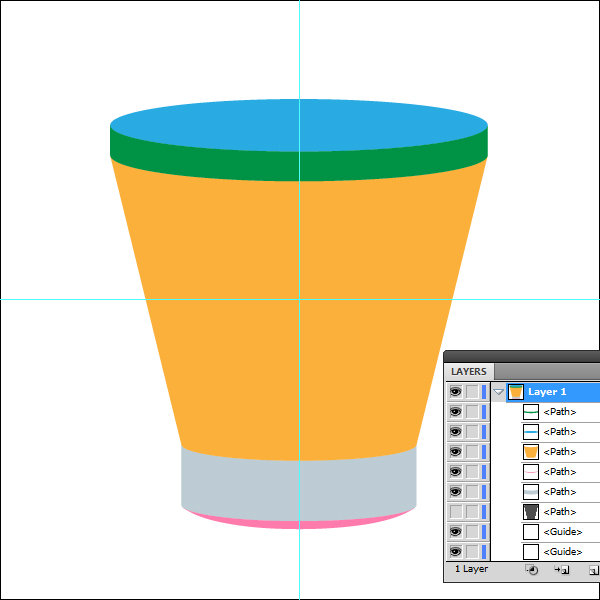
Step 5
Before you start working on the details of the icon, we should adjust its geometry a little bit. As we can see, the areas highlighted in red look are wider than blue areas. I think it spoils the visual effect.
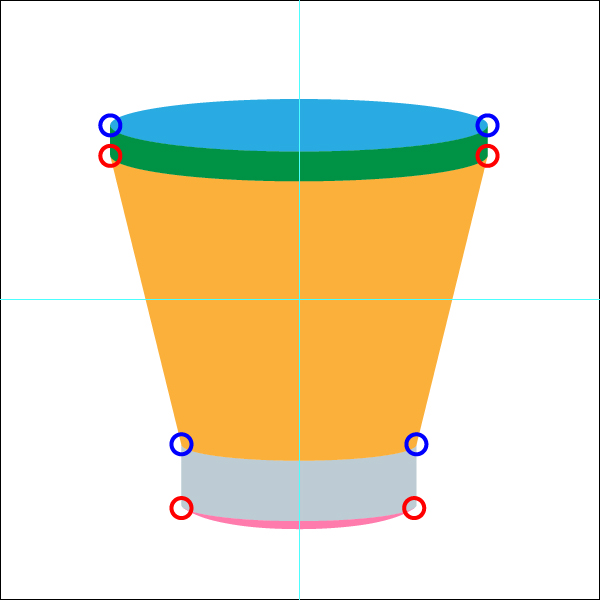
Take the Lasso Tool (Q) and select the part of the figure that will be edited.
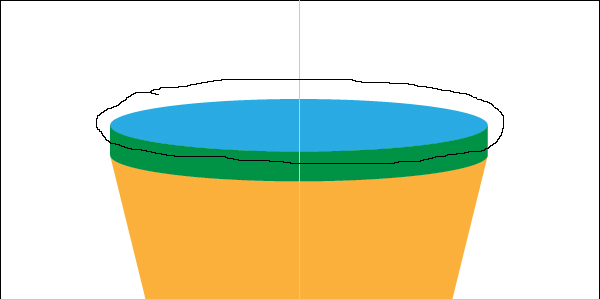
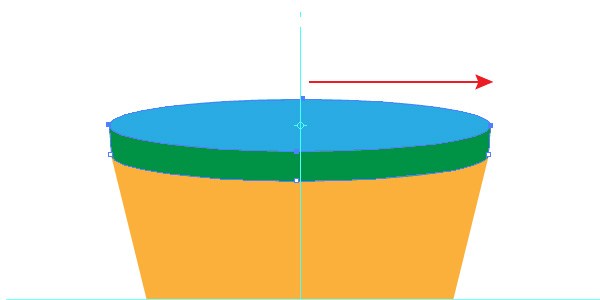
Then, take the Scale Tool (S), click on the blank area and without releasing the mouse button, gently drag it to the right.
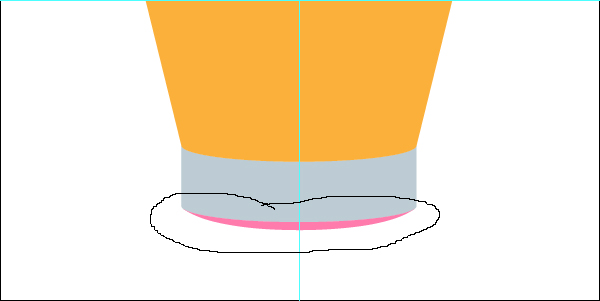
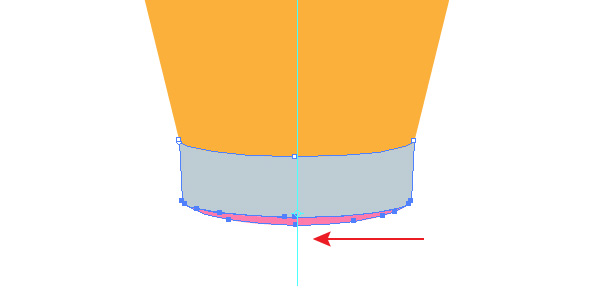
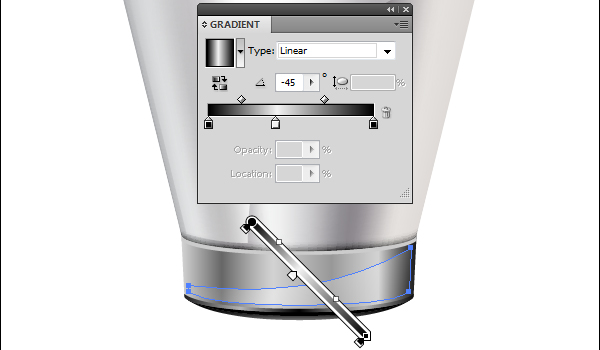
We do the same work with the bottom of the basket, but now, instead of stretching the selected area horizontally, we reduce it, i.e. use the Scale Tool (S), hold the mouse button and move it towards the vertical axis.
Step 6
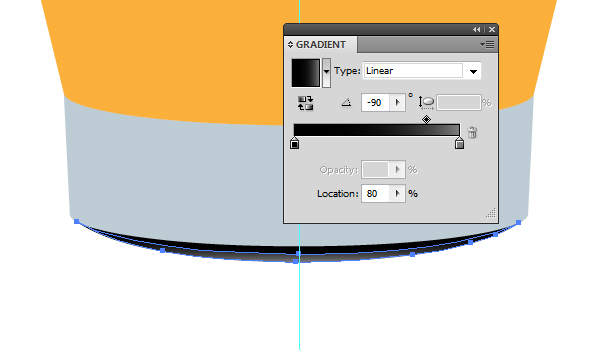
Let’s proceed to the work with the lowest object of the trash bin (it is pink on the figure below). Take the Line Segment Tool (Backslash) and create a horizontal line as it is indicated on the figure below.
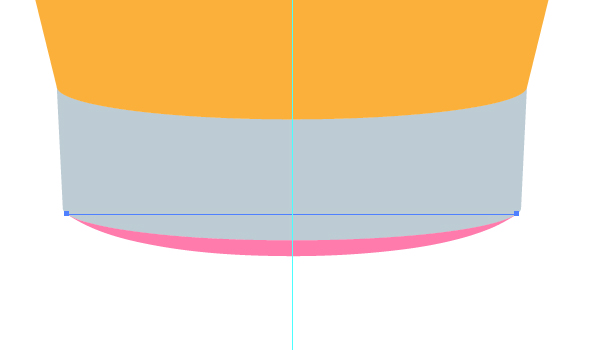
Select the straight line segment with the Direct Selection Tool (A) (The points themselves should remain unselected), then with the Reshape Tool drag the section down along the vertical guide while holding down the Shift key. Stop roughly in the mid-height of the pink object. Our line changed into curved shape now and there appeared a smooth point in the center.
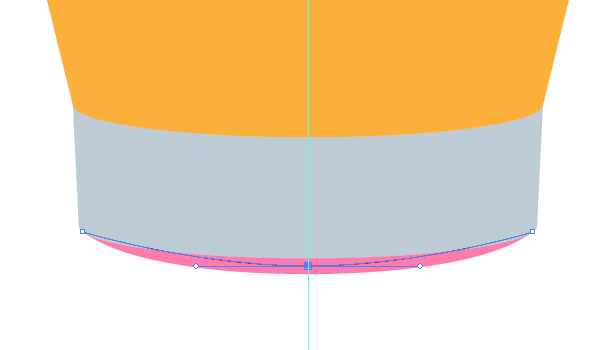
With the Direct Selection Tool (A) give to the line the complete form in such a way, that it divides the pink object along its length by about a half.
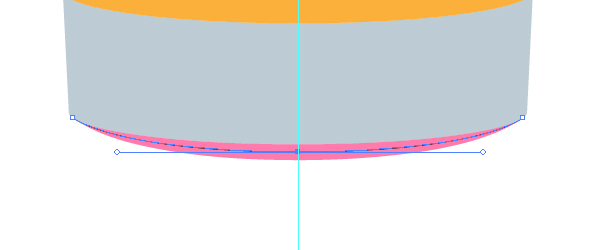
Select the pink object and the line then click on the Divide in the Pathfinder panel.
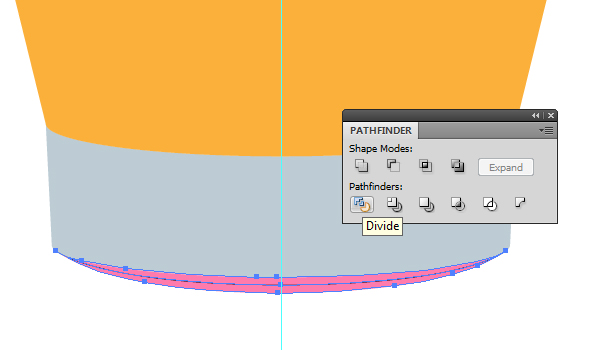
As a result, we’ve got a two objects group. Fill the top object with black, and the bottom with linear gradient from black to grey.
Step 7
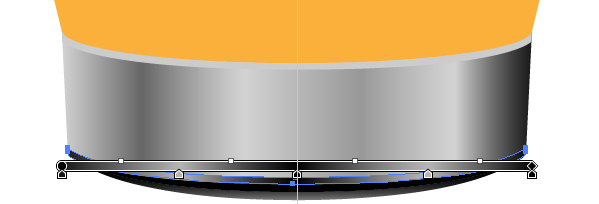
Go to the next object, it is light-grey for now. In order to give it the look of the chrome metal surface, apply the linear gradient in gray scale with the Gradient Tool (G).
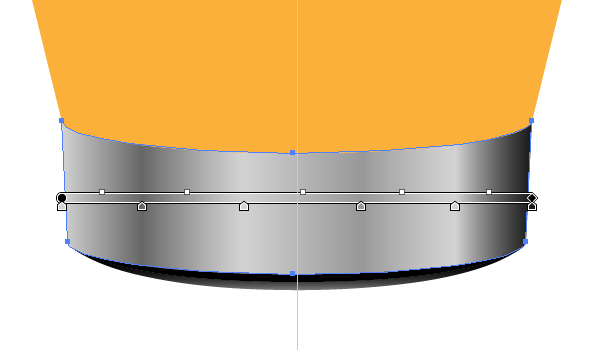
Copy this object and place it to the front (Command + C then Command + F), and using the previous step technique create a curved line above the chrome part of the trash bin.
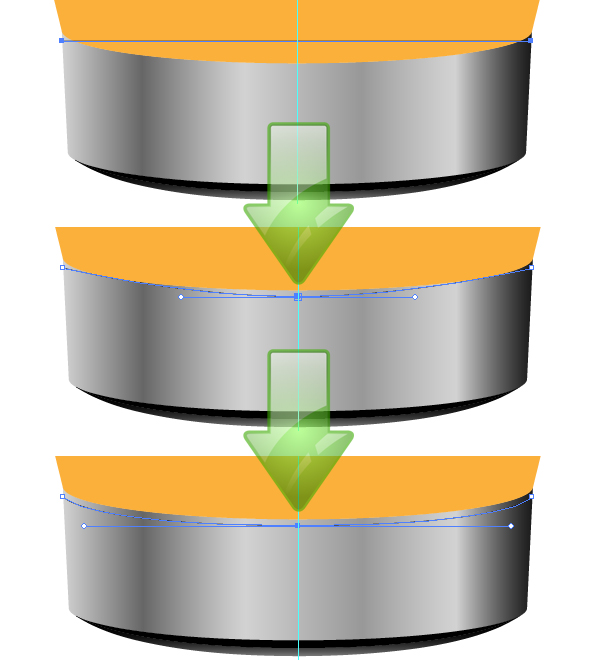
Create the same line in the lower part of the basket.
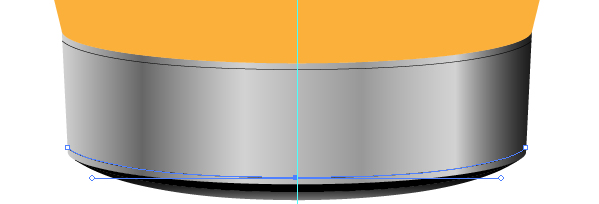
Select both lines and chrome object and click on the Divide in the Pathfinder panel. In the resulting three objects group delete the middle object. Fill the upper object with light-grey and the lower object with linear gradient which consists of light and dark shades of grey color.
Step 8
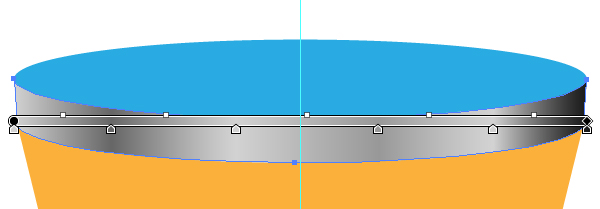
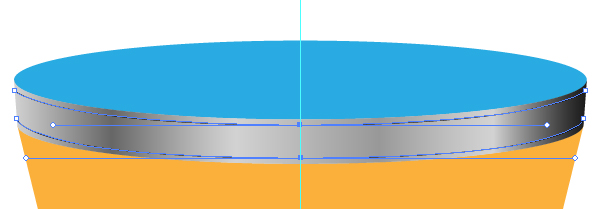
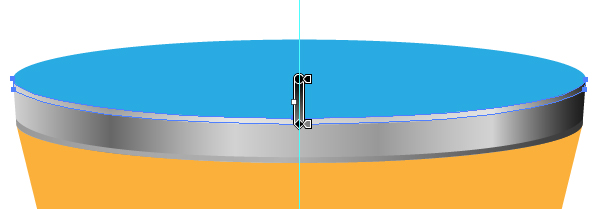
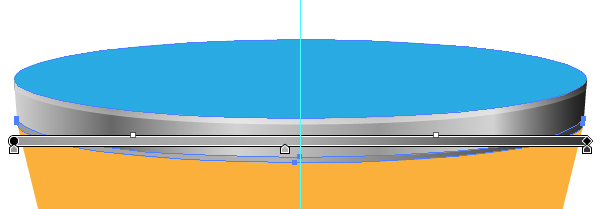
Using the described techniques create the top metal rim of the trash can.
Step 9
Now it’s time to work with an object that imitates the inside part of the basket. Select the blue ellipsis, fill it with linear gradient from dark-grey to grey.
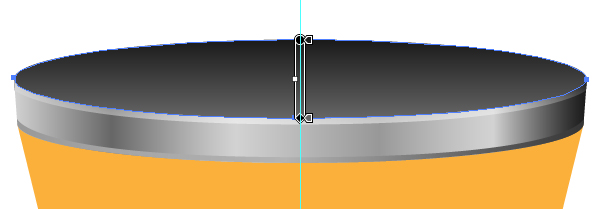
Make a duplicate of this shape (Command + C then Command + F), and with the Scale Tool (S) change its size as it is indicated on the figure below.
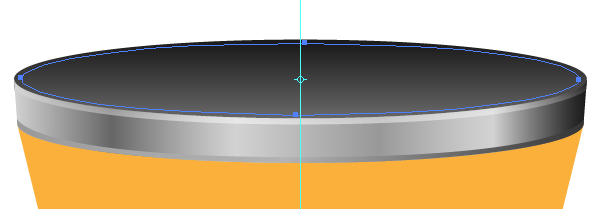
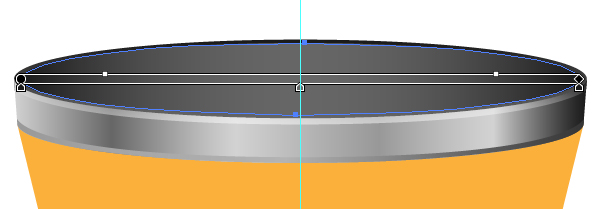
Change the gradient fill of this object.
Step 10
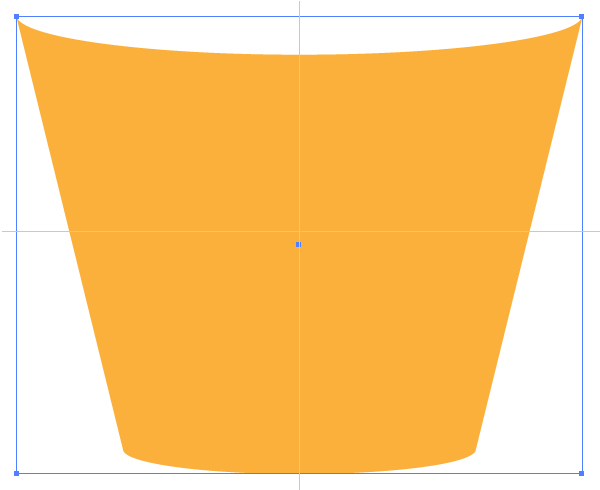
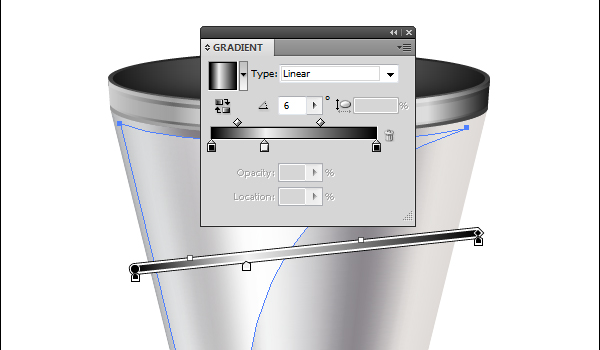
Now let’s color the biggest part of the trash bin which is orange now. As our figure is conical-shaped and Adobe Illustrator doesn’t create conical gradients, we have to use the Gradient Mesh. Take the Rectangle Tool (M) and create a rectangle with the size of orange object.
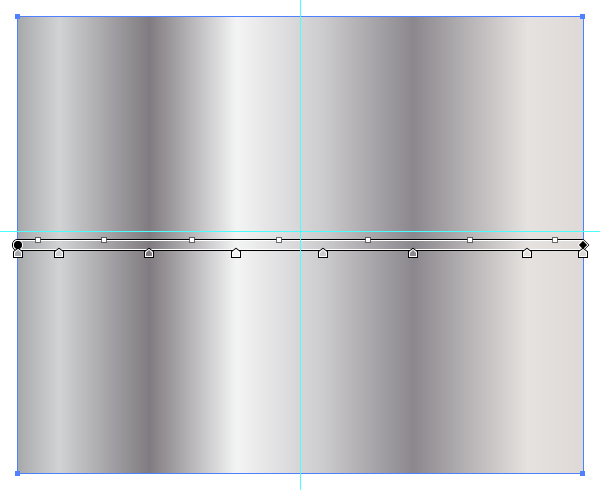
Apply a linear gradient as the fill, as it is shown on the figure below.
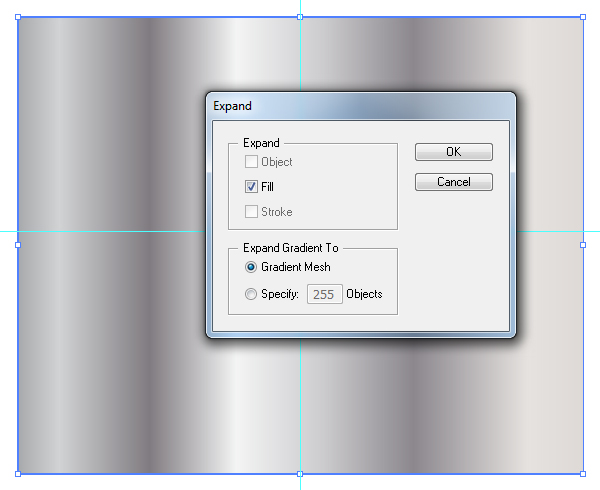
Keep the rectangle selected and go to Object > Expand, choose the parameters which are indicated on the figure below.
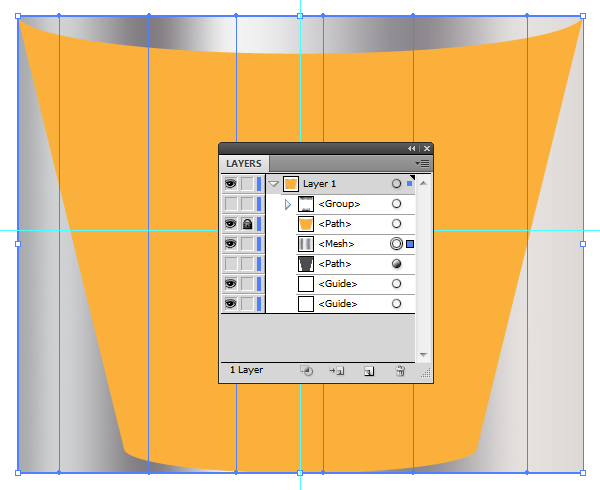
As the result, we have a group of objects which consists of the Gradient Mesh and the Clipping Path. Ungroup this group and delete the Clipping Path in the Layers panel. Move the Gradient Mesh below the orange object, which should be locked in the Layers panel.
Step 11
With the Direct Selection Tool (A) select the lower nods of the grid and with the Scale Tool (S) drag the form of the Gradient Mesh closer to the form of the orange object.
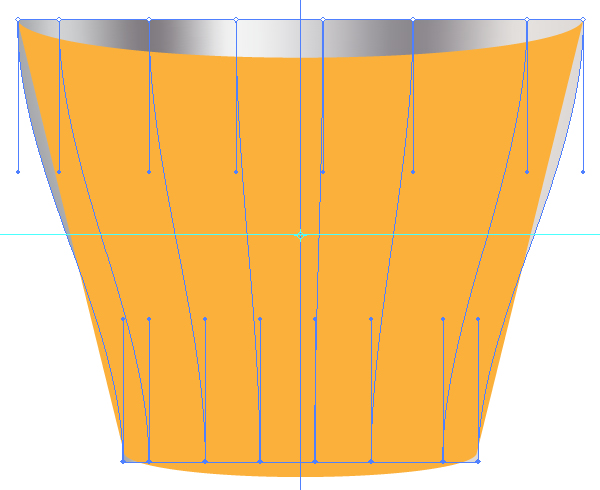
Then with the Direct Selection Tool (A) change the shape of the Gradient Mesh in accordance with the form of the orange object.
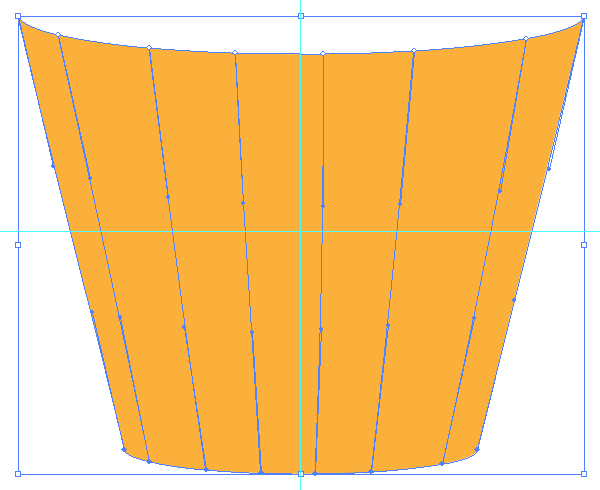
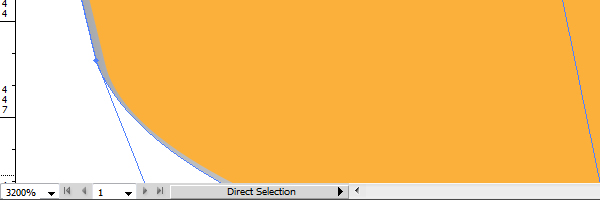
It can be done only approximately, the main thing is that the borders of the gradient mesh should slightly exceed the borders of the top object.
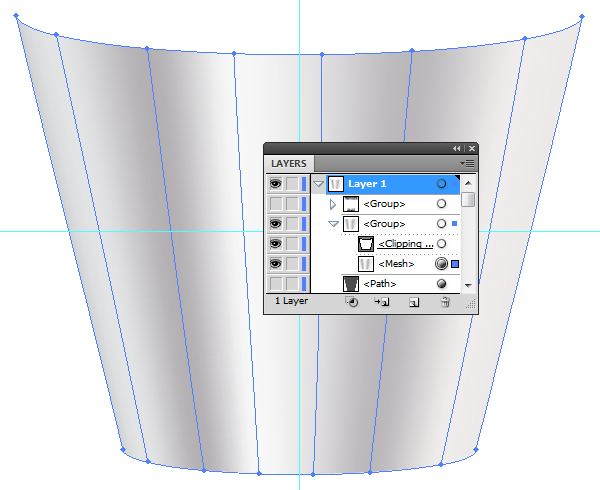
Select the Gradient Mesh and the orange object that is located above, press the shortcuts Command + 7 to creating the Clipping Mask.
Step 12
To get a better picture slightly darken the lower edge of the gradient mesh. To make our work more comfortable let’s isolate the gradient mesh. Select the object in the Layers panel and click on it twice.
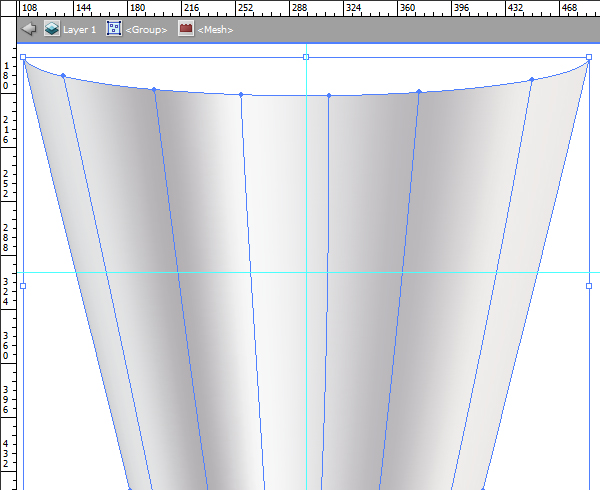
With the Mesh Tool (U) add one more row of nodes near the lower edge of the gradient mesh. Select the very low row of nodes with the Lasso Tool (Q) and go to the Edit > Edit Colors > Recolor Artwork.
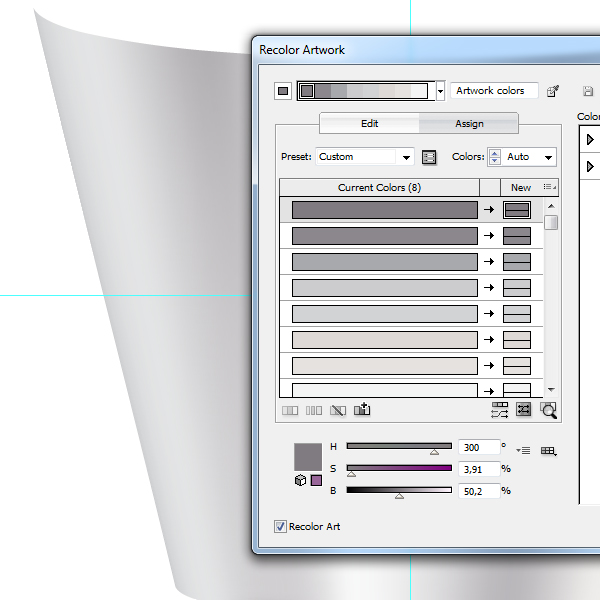
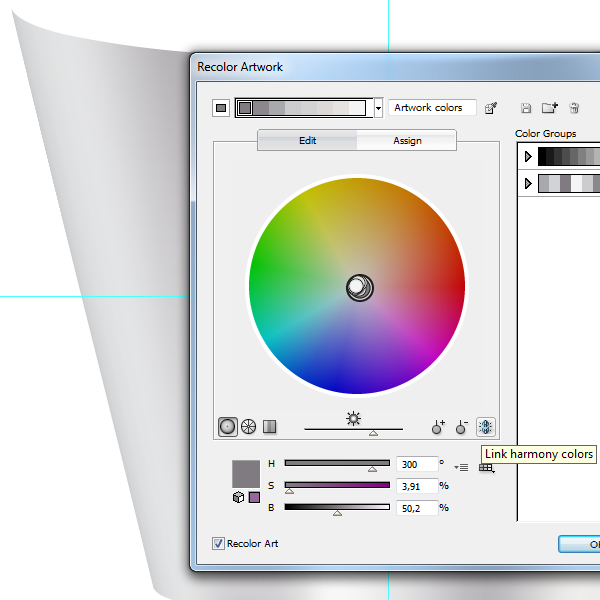
Go to the Edit tab and click on the Link harmony colors.
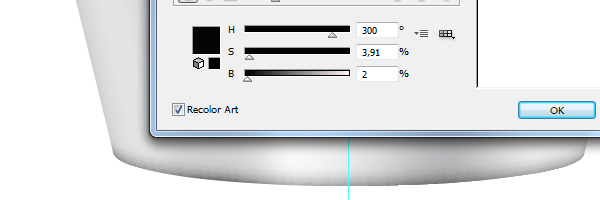
Decrease the Brightness parameter approximately to 2%
Take a look at your work critically and, if necessary, make some corrections.
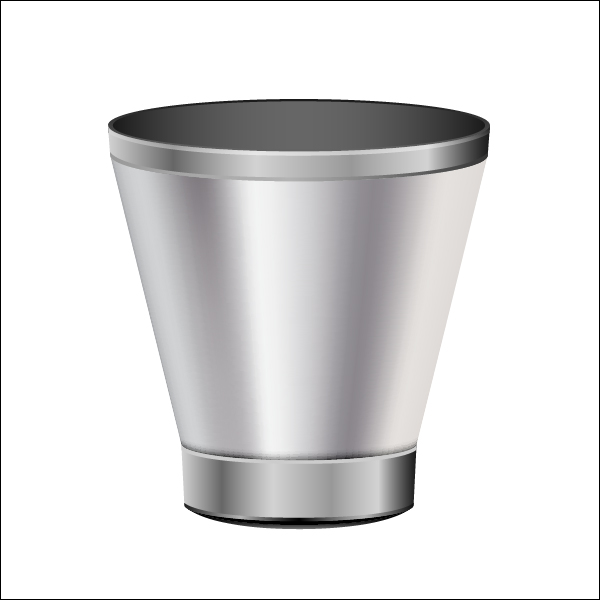
So as we can see, the inside of the trash can looks unnatural, for better visual appeal we need to add patches of light. Correct these shortcomings.
Step 13
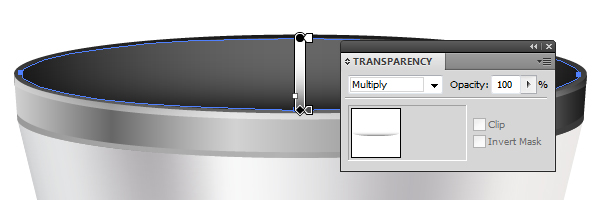
Double the ellipsis which corresponds to the inside part of the trash bin, apply to the fill the linear gradient from white to dark-grey and set the Multiply blending mode in the Transparency panel.
With the Pen Tool create three forms, these are in green on the figure below.
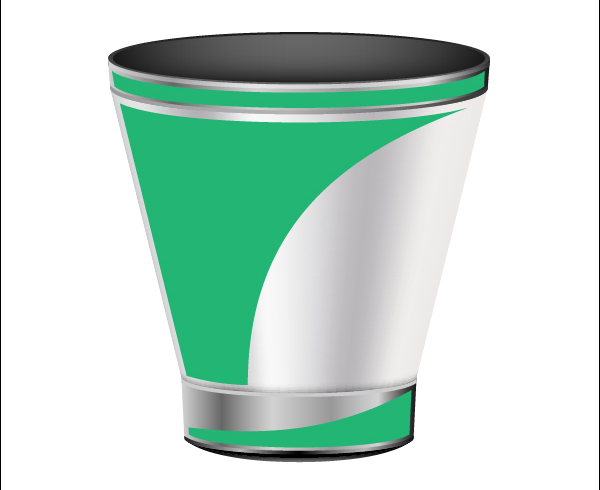
Fill these forms with the linear gradient, which consists of black and grey sliders. Apply the Screen blending mode to these forms.
Step 14
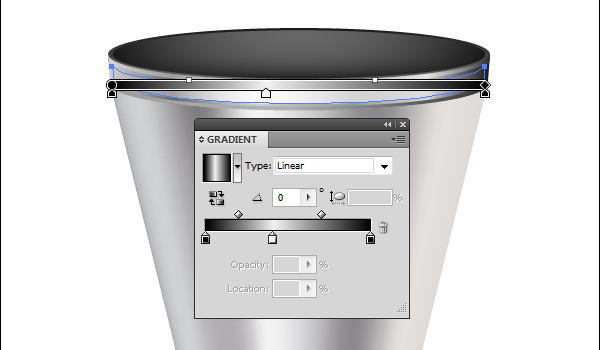
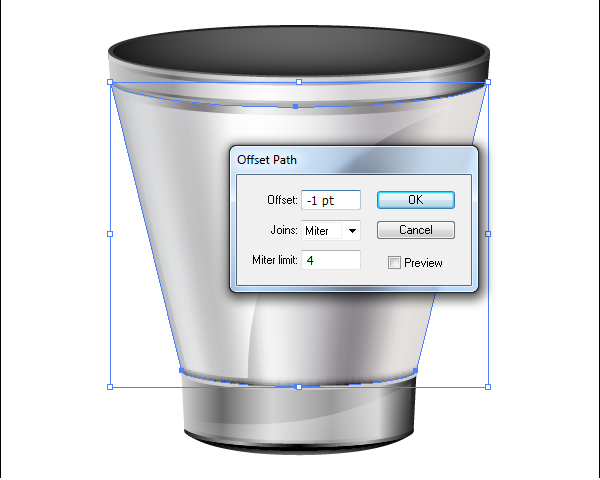
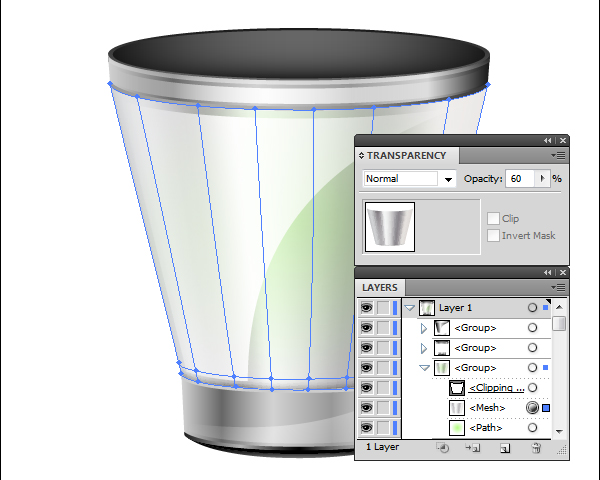
Select the highlights created in a previous step, and group them (Command + G). Select the Clipping path, which is located in the gradient mesh group, and go to the Object > Path > Offset Path. In the dialog box set the offset value to -1pt and click OK.
Apply the radiant gradient fill to the created form from light-green to white.
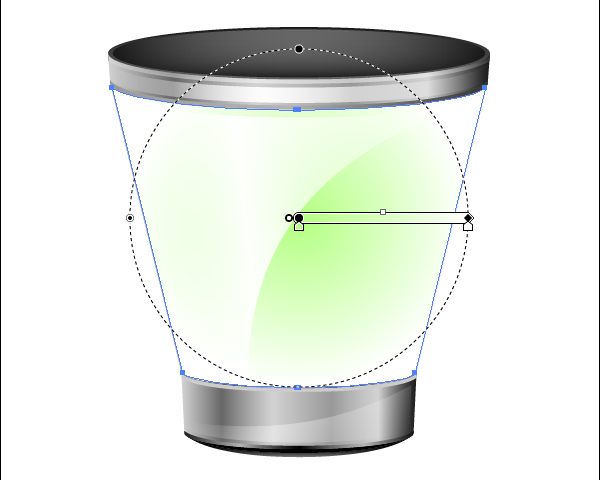
Place this object below the gradient mesh and set the Multiply Blending Mode to it. Reduce the opacity of the gradient mesh to 60%.
Step 15
Create a shadow underneath the trash bin. With the Ellipse Tool (L) create an ellipsis with a grey fill.
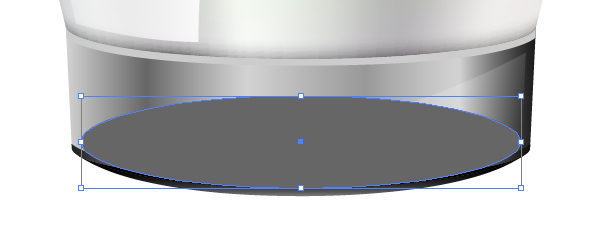
Underneath this object create another, bigger size ellipsis with white fill. Set the opacity of 0% for it.
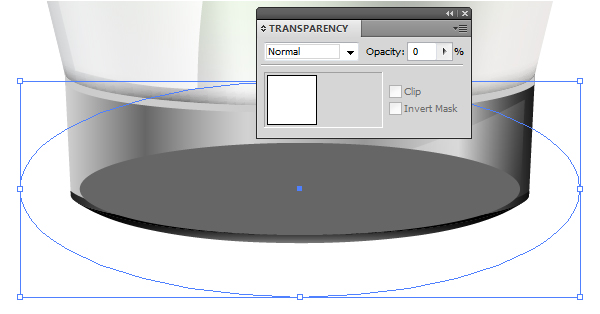
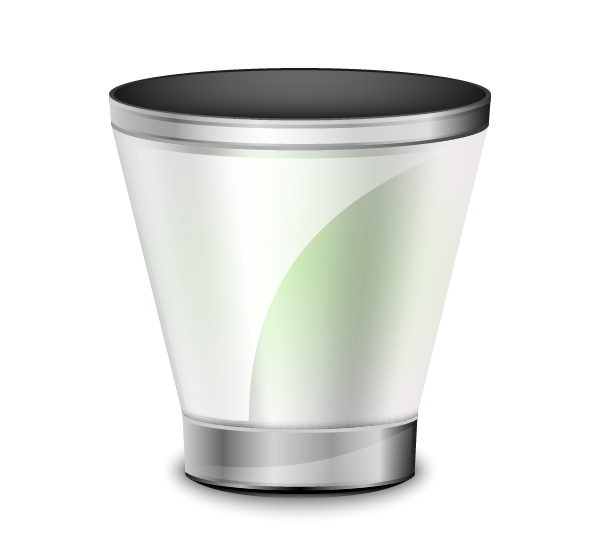
Select both ellipses, click on the shortcuts Command + Option + B, this action creates a blend-object. Move this object below all the objects.
Step 16
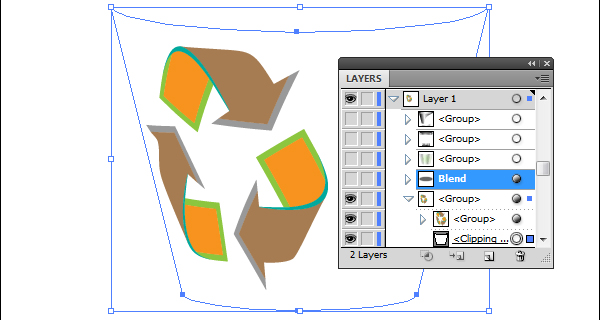
Let’s create a Recycling symbol. With the Pen Tool (P) create a curved arrow consisting of five parts filled with different colors.
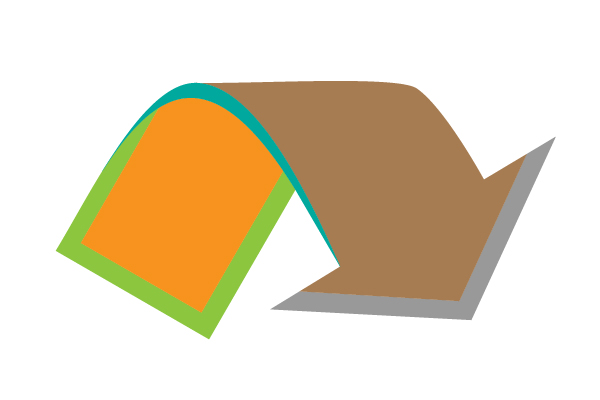
Group all the objects of the arrow and create two copies. With the Rotate Tool (R) turn one of the arrows to 120 degrees, and the other to 240 degrees.
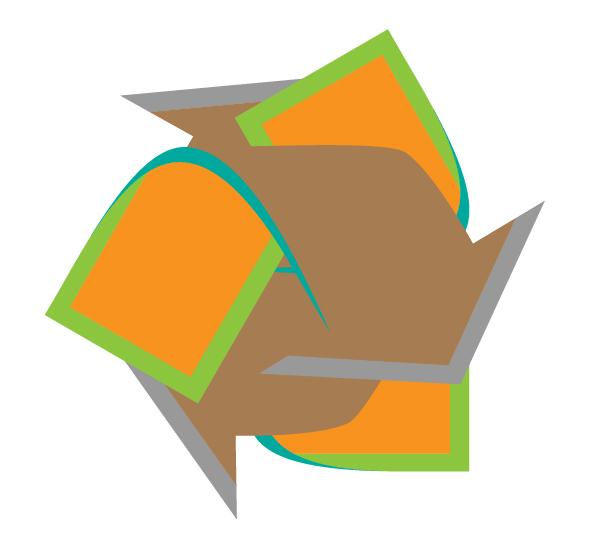
Now, with the Selection Tool (V) place the arrows in accordance with the Recycle symbol. For more exact placing create a helping triangle with the Polygon Tool.
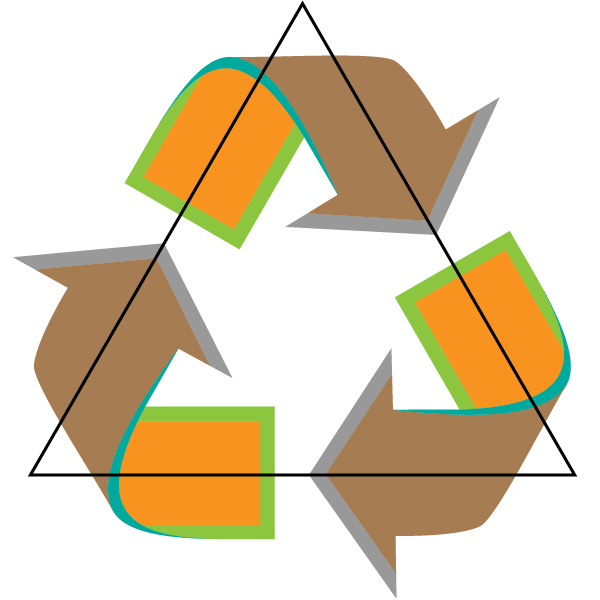
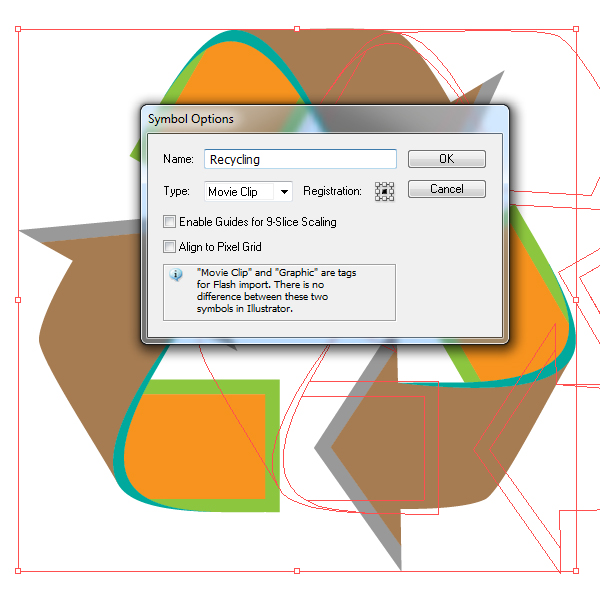
Delete the triangle, group the arrows, drag this group to the Symbols panel.
Step 17
And now, my dear friends, in the third step we’ve created a duplicate of the 3D object and turned off its visibility. Now it’s time to get back to it. Turn the visibility of this object, select it. Click on the 3D Revolve line in the Appearance panel.
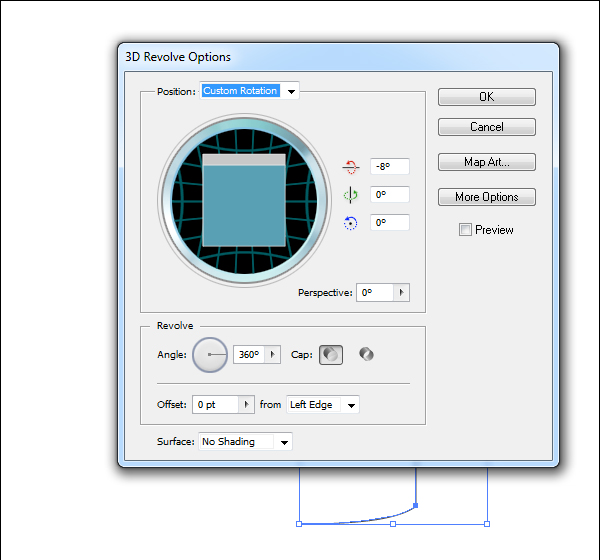
Click on the Map Art in the opened dialog box and set the parameters indicated in the figure below.
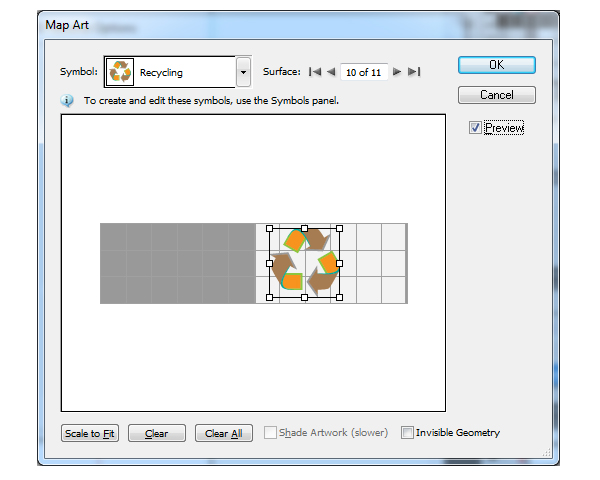
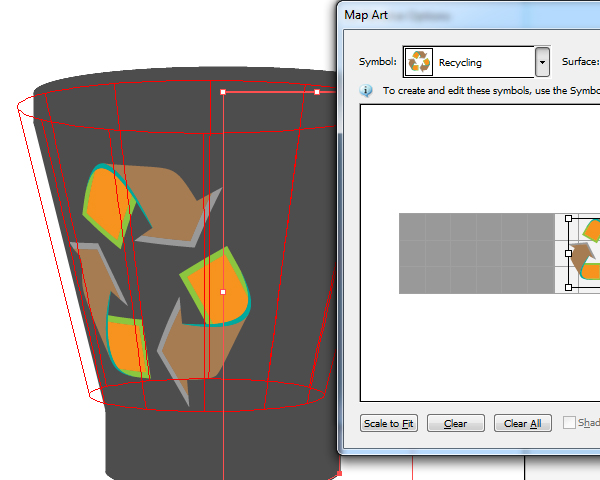
Keep the object selected go to the Object > Expand Appearance.
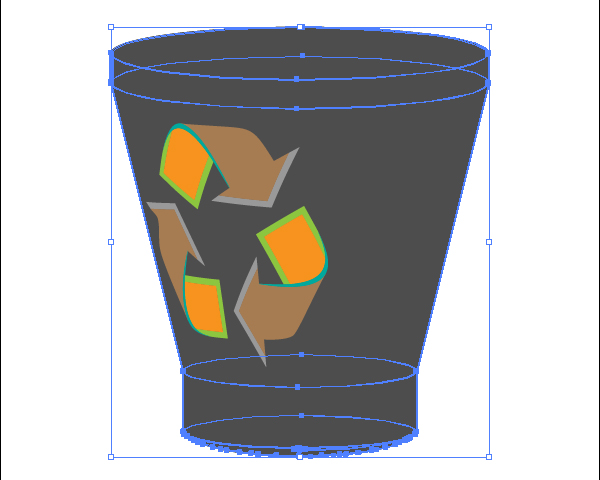
In the Layers panel remove the selection from the Recycling symbol and delete the rest of the group. The group where the symbol is situated has the Clipping Path which should be deleted as well.
Step 18
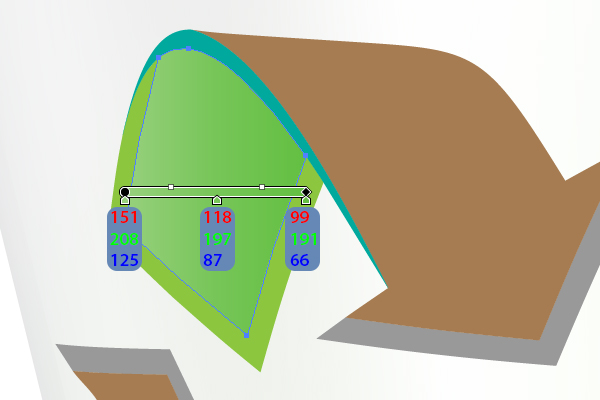
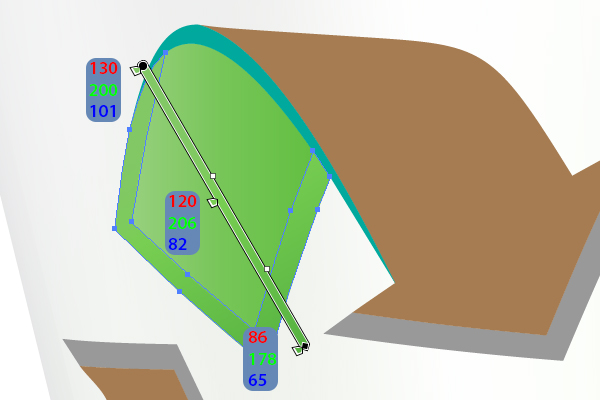
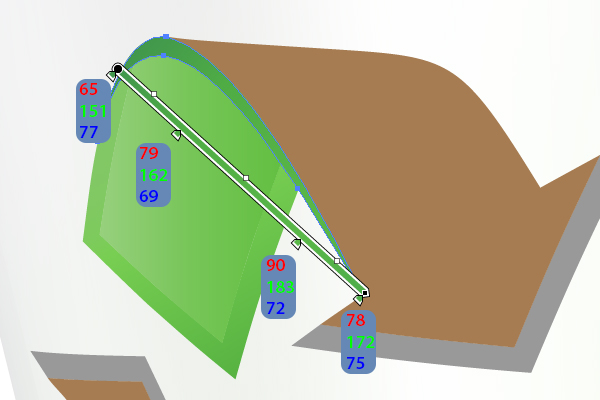
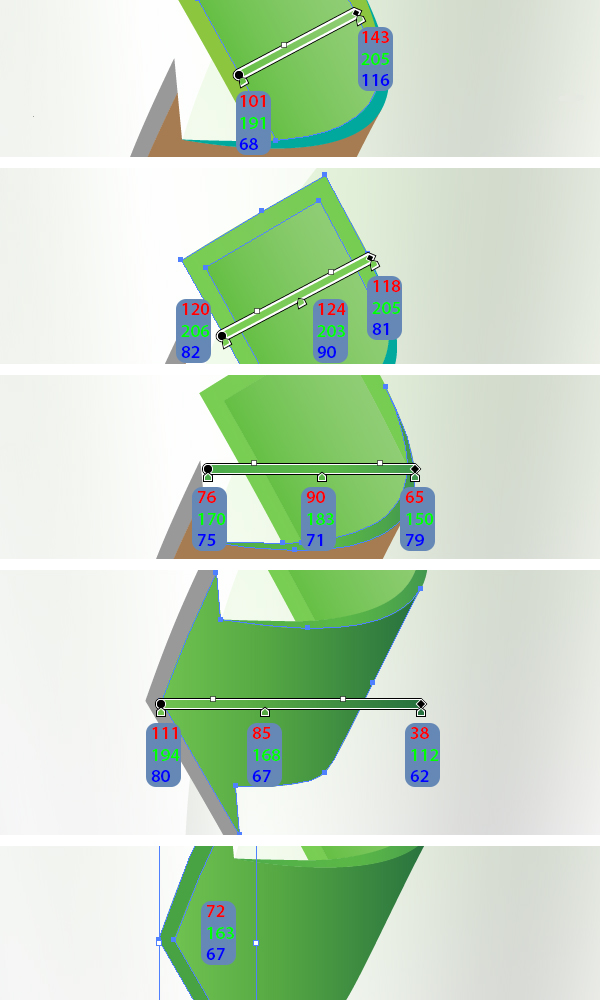
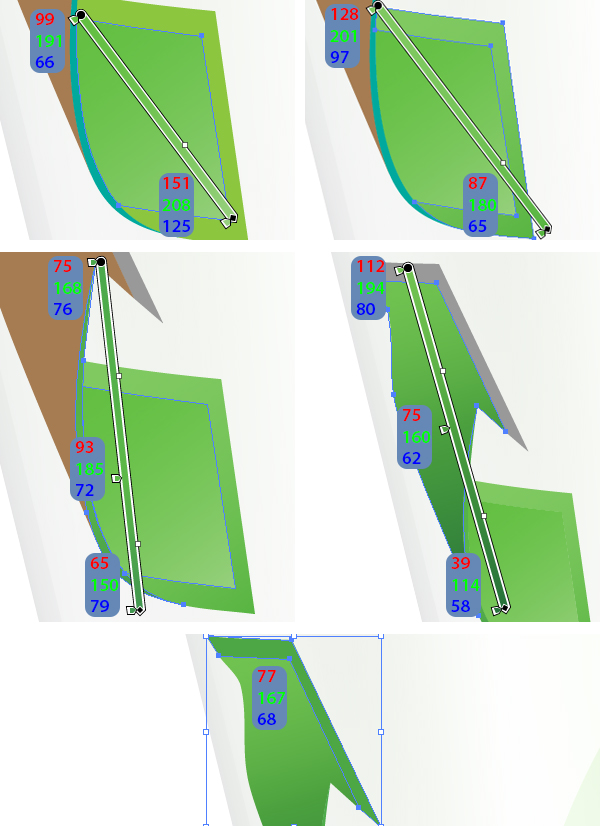
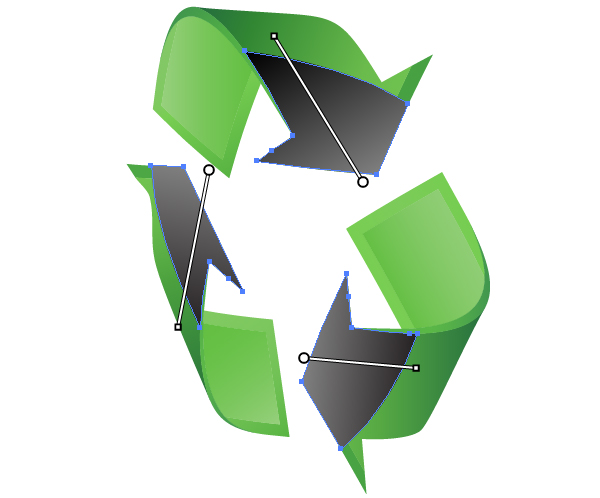
Now let’s color the Recycling symbol. The process of coloring is indicated on the figure below.
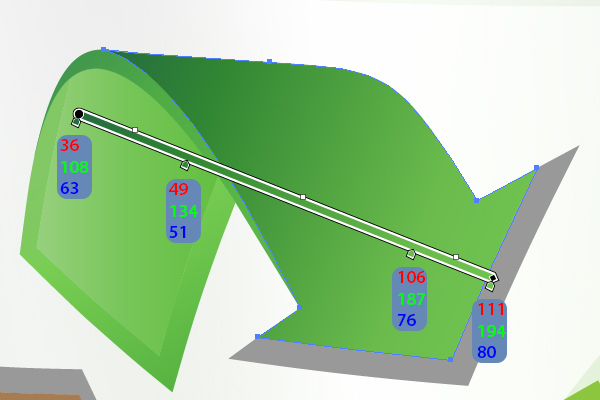
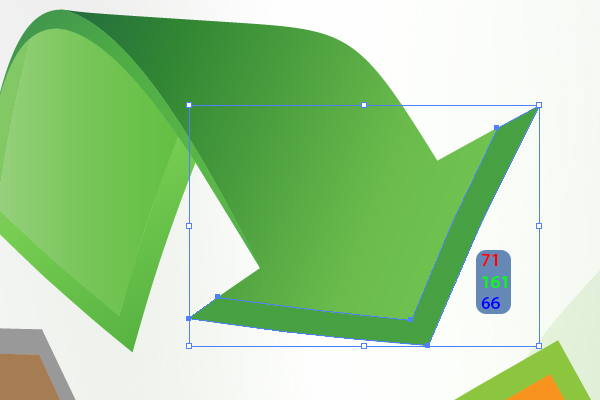
Step 19
Color the rest of the object arrows by analogy.
Step 20
Now let’s create highlights on the arrows. Draw three form as it is indicated on the figure below; fill every form with linear gradient from grey to black and apply the Screen blending mode. Group all the objects of the symbol and reduce the group opacity to 80%
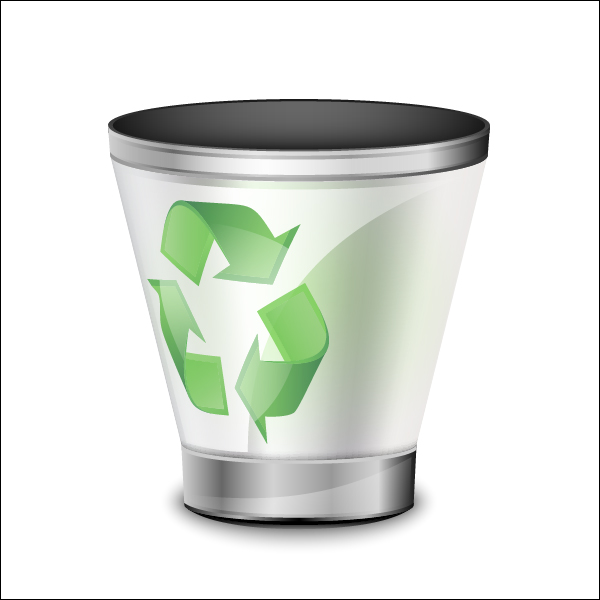
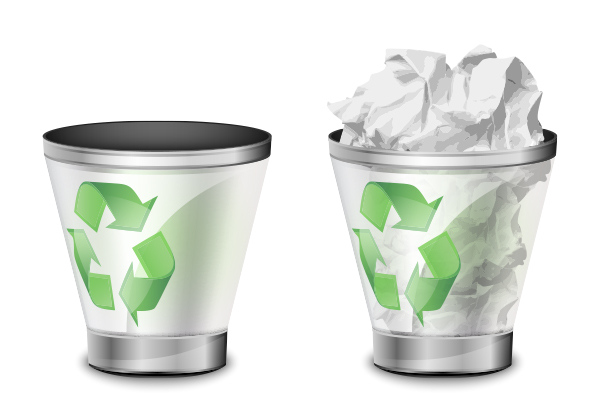
We’ve finished creating the icon of the empty trash bin. As we know, every trash bin has two looks- the empty and the full trash bin. So let’s spend a little more time and fill our trash can with rumple paper.
Step 21
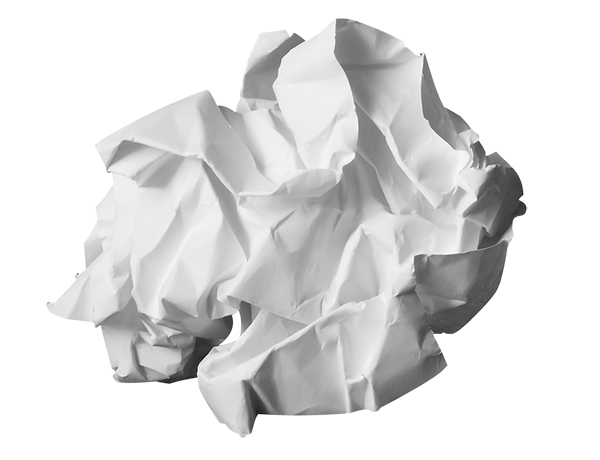
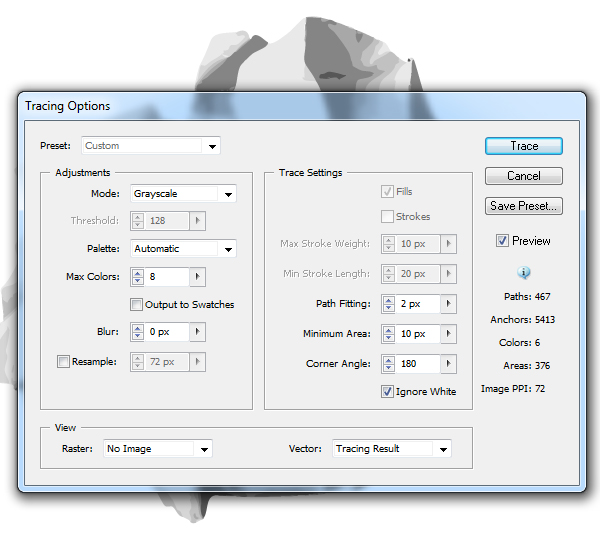
I will use a specially made photo to create the rumple paper. Paste the raster image into the document (File > Place…), keep it selected and go to the Object > Live Trace > Tracing Options. Set the parameters which are indicated on the figure below and click on the Trace.
Now click on the Expand key in the Control panel.

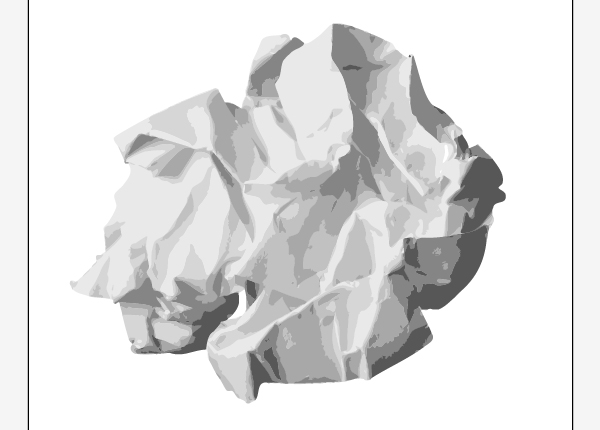
Step 22
Change the size of the rumple paper in such a way that it matches the size of our trash can, double it twice.
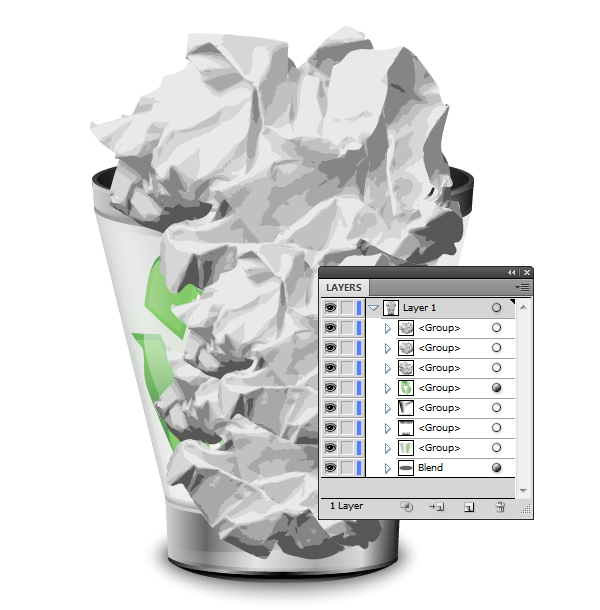
Now group all the copies of the rumple paper and place them below the group with the gradient mesh.
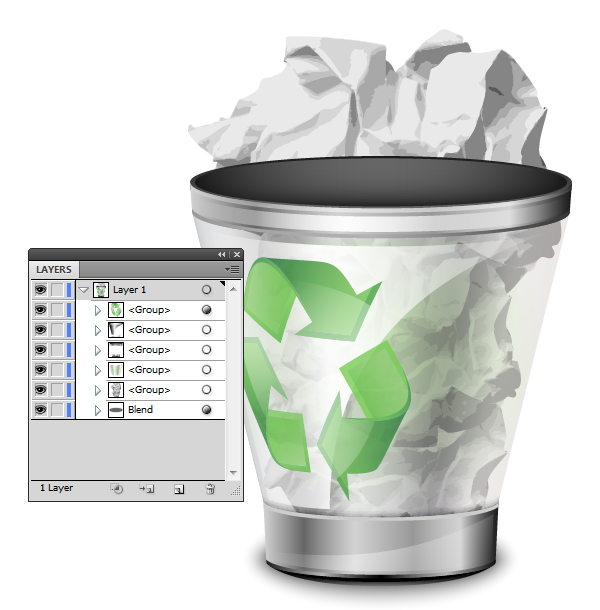
Step 23
Double the group with paper (Command + C then Command + F). Keep the new group selected click on the Unite in the Pathfinder panel. Now go to the Object > Compound Path > Release. As a result, we’ve got a multitude of selected objects. Hold down the Shift key remove the selection from the paper silhouette; delete the rest of the objects.
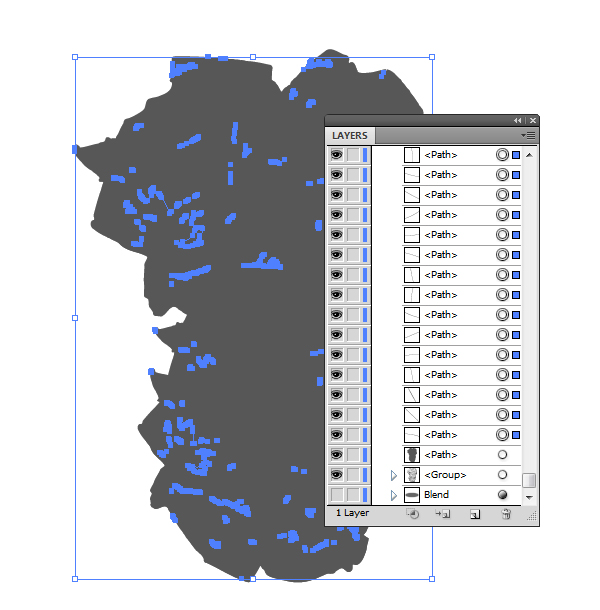
Now find the biggest of three ellipses which make the inside part of the trash bin (check out steps 9 and 13), make a copy and drag it beyond the group boundaries.
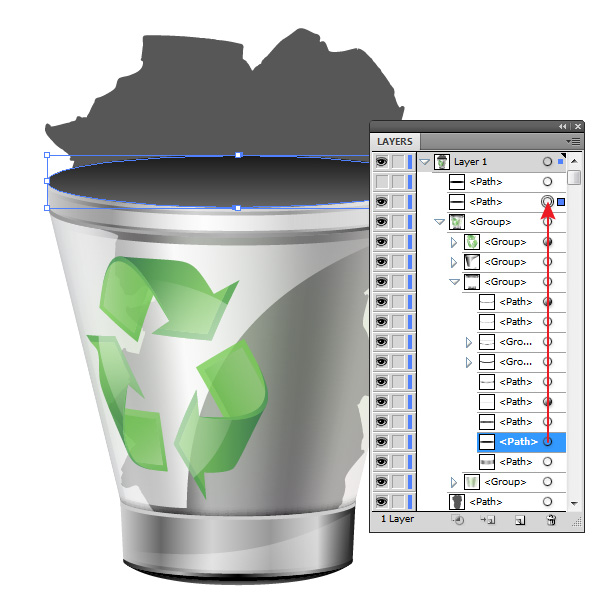
Select this ellipsis and the silhouette of the paper.
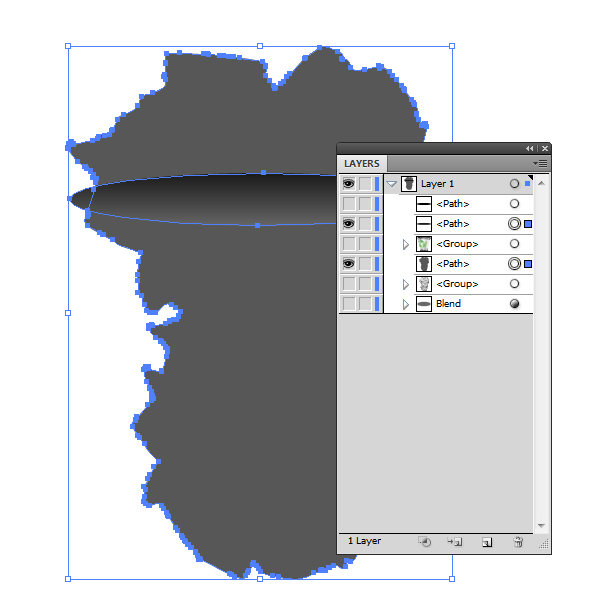
Take the Shape Builder Tool (Shift + M) and while holding down the Option key, click on the areas which are shown on the figure below.
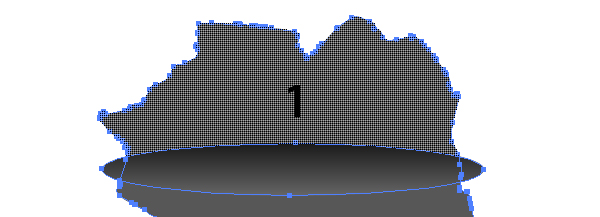
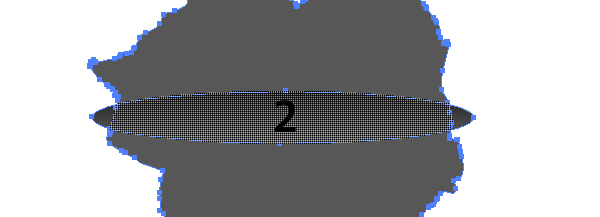
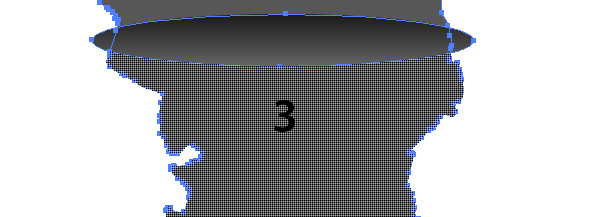
We’ve got two small objects as a result.
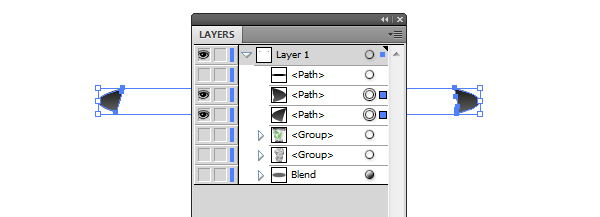
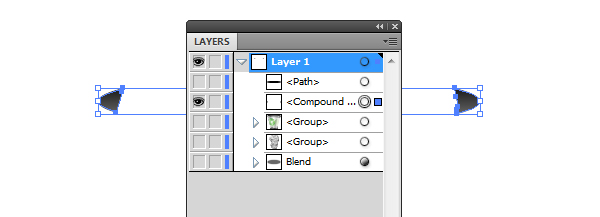
Select these objects and apply the shortcuts (Command + 8) while creating the Compound Path.
Step 24
Now we need to proceed to three ellipses which make the inside part of the trash bin; if they are not grouped, we should do it now. Place the Compound Path, created in the previous step, above this group.
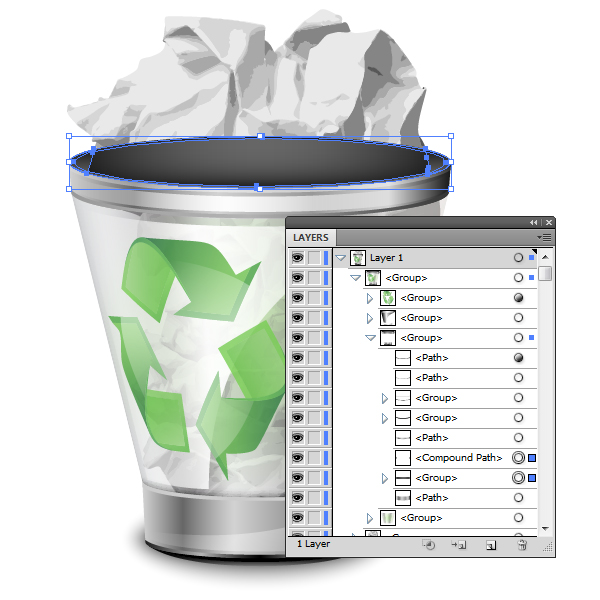
Select the group and the Compound Path, click on the shortcuts Command + 7 and our empty trash bin, which has been already created in the step 20, becomes full with the rumple paper.
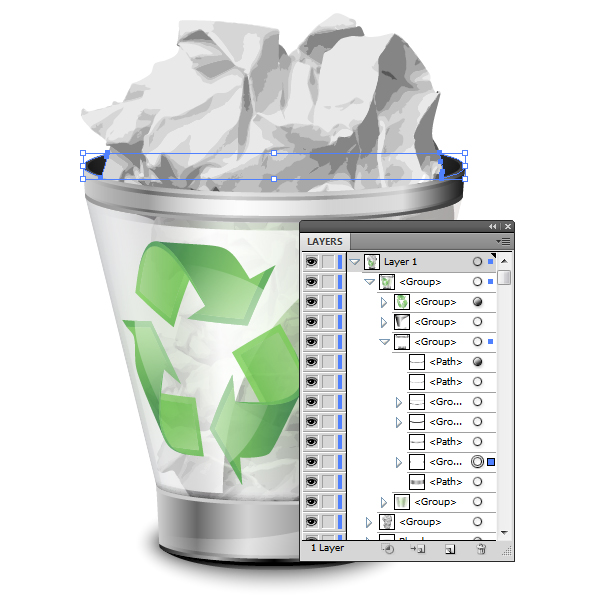
Conclusion
Now your work is done. Here is how it should look. I hope you’ve enjoyed this tut.
{excerpt}
Read More