In this tutorial we are going to use Ableton Live’s “Sampler” and some of its built-in audio effects to produce wide, organic, ambient textures and pads, originating from a single one-note instrument sample. It’s a great way to create MIDI-playable ambient pads with a warm and evolving character, and most of all to be able to use our own original and custom ambient sounds, without having to scroll through hundreds of synth presets to find the right one, which usually leads to losing patience and inspiration.
Download audio file (ambpad1_fin.mp3)
This is what we’re going for in this tutorial.
Step 1: Choosing the Sample
The most suitable samples for this simple technique are probably mallet-type or plucked string-type instruments, such as piano, vibes, music box, glockenspiel, classical/acoustic guitar, etc. The tail of the sound will be our main source, but their fast attack will be quite useful in creating nice transitions and reversed-string sounds. During this tutorial we will be using a one note sample of a Guzheng (traditional Chinese instrument), but more examples have been included in the Ableton Live project available for download below.
Keep in mind that our sample needs to be on C3, or at least needs to be transposed suitably if the original tonality is different, since we’re going to be playing whole chords and melodies with the final Sampler instrument.
Download audio file (ambpad2_Guhzeng_one_note.mp3)
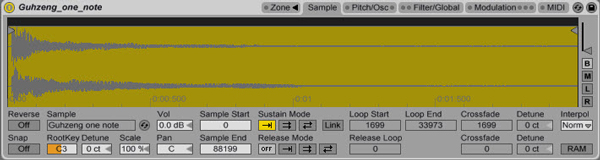
The original sample we chose, a sustained C3 note of a Guzheng instrument.
Step 2: Tweaking the Sample
Drag and drop the sample in the Sampler “Sample” section.
The sample is being dropped inside Sampler.
Enable the Reverse option, as well the Loop function on Sustain Mode. Edit the “Loop Start” and “Loop End” values suitably to avoid the silent parts of the sample, and focus on the tail of our sample. Remember, we have the Reverse function on, so the sample will start from where the Loop End value indicates. Increase the Crossfade value, to avoid clicks and pops while our sample loops. (It’s also needed for Step 5.).
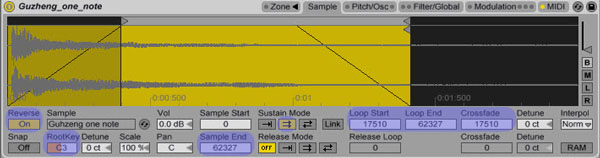
Reversed and Looped sample.
Finally, let’s smoothen the attack a bit. Go over to “Filter/Global” and increase the Attack’s microseconds.
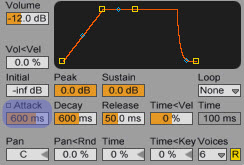
Smoothening the Attack.
It still doesn’t sound that interesting, but we’re getting closer.
Download audio file (ambpad3.mp3)
Step 3: Adding FX
As with most ambient sounds, we’ll obviously use some delay and reverb FX. Let’s begin by adding a PingPongDelay and a subtle Filter Delay. Try not to overdo it with the delays, or else your sound will probably end up a bit muddy.
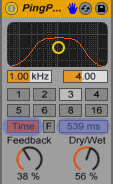
PingPong Delay.
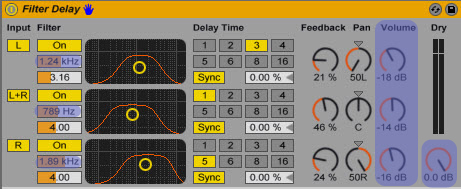
Notice the quite lowered values on the delayed signals.
What can also be handy is a GrainDelay, with heavy “Spray” and a +12.0 “Pitch” Value, keeping the Dry/Wet signal low though. You’ll notice some higher frequencies being added on top of our sound, making it more spacy.

Grain Delay.
A compressor is quite needed to even out the levels, especially after completing Step 5.
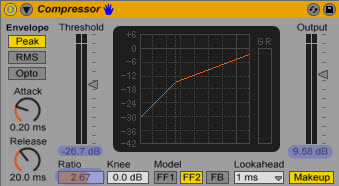
Compressor.
Last, but not least, the most obvious and probably most significant effect for this sound, a reverb with high Decay Time, and 60% Dry/Wet signal.
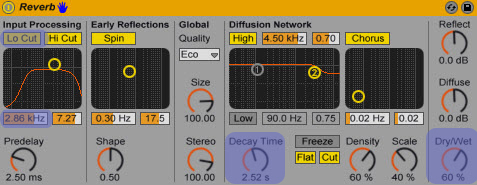
Reverb.
Download audio file (ambpad4.mp3)
Our sample, after the above effects have been applied.
Step 4: Return Channels
If we want more depth and ambience to our sound, we could use a return channel with some additional Reverb, 100% Wet, and a Utility plug-in to widen the sound a little.
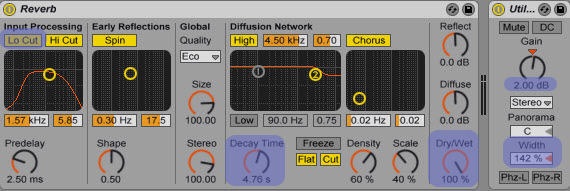
Increase the “A Send” knob all the way. You can try more FX of course, multiple return channels, etc.
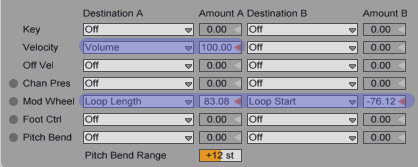
Step 5: Controlling Parameters Via MIDI
Different volume, panning, and sample offset values can keep a sound quite more interesting. What’s really handy in our situation is controlling the fast attacking “string” sound of the sample via modwheel or velocity. Live’s Sampler gives us that option. Click on the “MIDI” tab, and notice the several parameters that can be changed via different levels of velocity, mod wheel, pitch bend, and more. This makes our sound more alive, and more suitable to be played with a MIDI keyboard. In the following preview, to make the effect more obvious, the modwheel is being triggered during the second note.
Download audio file (ambpad5.mp3)
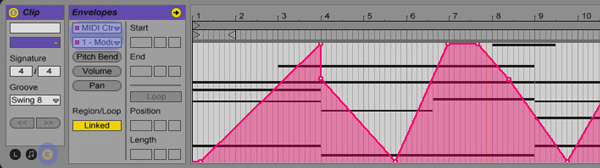
Even if you don’t have a keyboard and mod-wheel, you can just draw the automation in the MIDI clip.
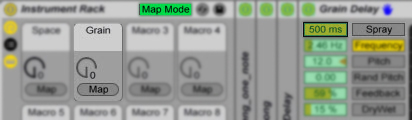
Step 6: Controlling Parameters with Macro Controls
We can further control elements of the sound, such as space (reverb, delay) via Macro Controls. I grouped everything on the track together as an instrument rack (Shift-Click all the racks on the channel, then Ctrl-G), and connected some MapControls to the reverb’s Decay Time, the GrainDelay’s Frequency value and the Dry/Wet signal value.
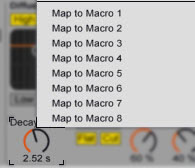
You can map as many knobs you like to one Macro.
Another way to do that.

My final very simple Macro set-up.
Step 7: Trying Out More Samples
Here’s the same technique applied to different instruments’ one-note samples.
Download audio file (ambpad6_piano.mp3)
Piano.
Download audio file (ambpad6_vibes.mp3)
Vibes.
Download audio file (ambpad6_marimba.mp3)
Marimba.
Download audio file (ambpad6_mbox.mp3)
MusicBox.
Download audio file (ambpad6_acGuitar.mp3)
Acoustic Guitar.
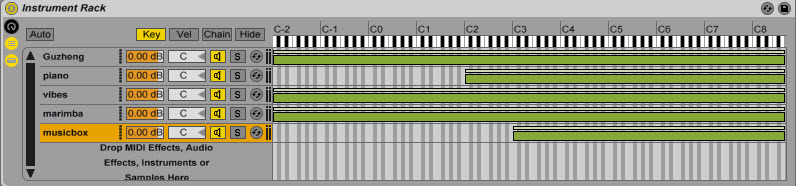
We can also experiment with stacking up different sampler-instruments we’ve made. For example, here’s an instance of some of the above sounds put together in a new instrument rack. Later we can map different Macro Controls again. Our options are truly limitless.
Download audio file (ambpad7.mp3)
Instrument Rack.
And here’s an example of those sounds used in the intro of a track.
Download audio file (ambpad8_snip.mp3)
Conclusion
So there you have it. A quite simple but entertaining technique. Keep experimenting with more one-note samples and have some fun with it! All the non-Ableton folks out there could try this out with Kontakt or EXS24 of course. For any questions or suggestions/requests, don’t be afraid to drop a line in the comment section. Thanks for reading!